-
First entry app: HelloWorld
1. How to run a project
Login account
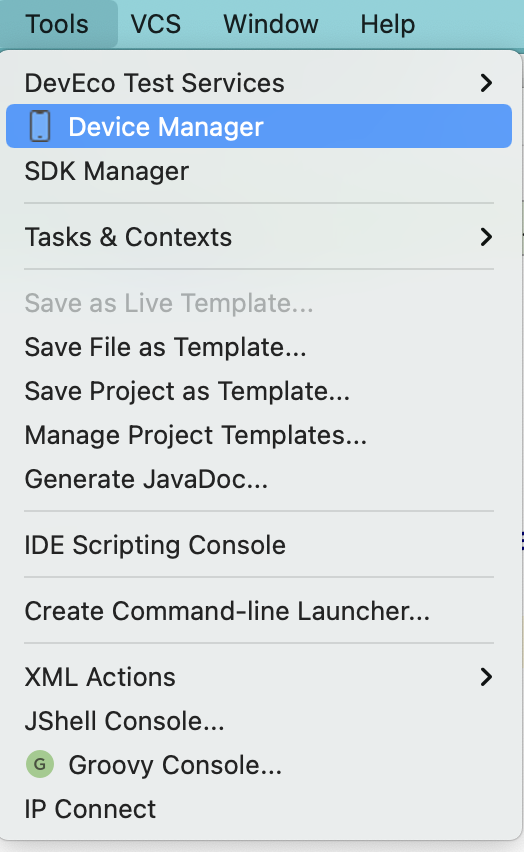

Turn on the simulator

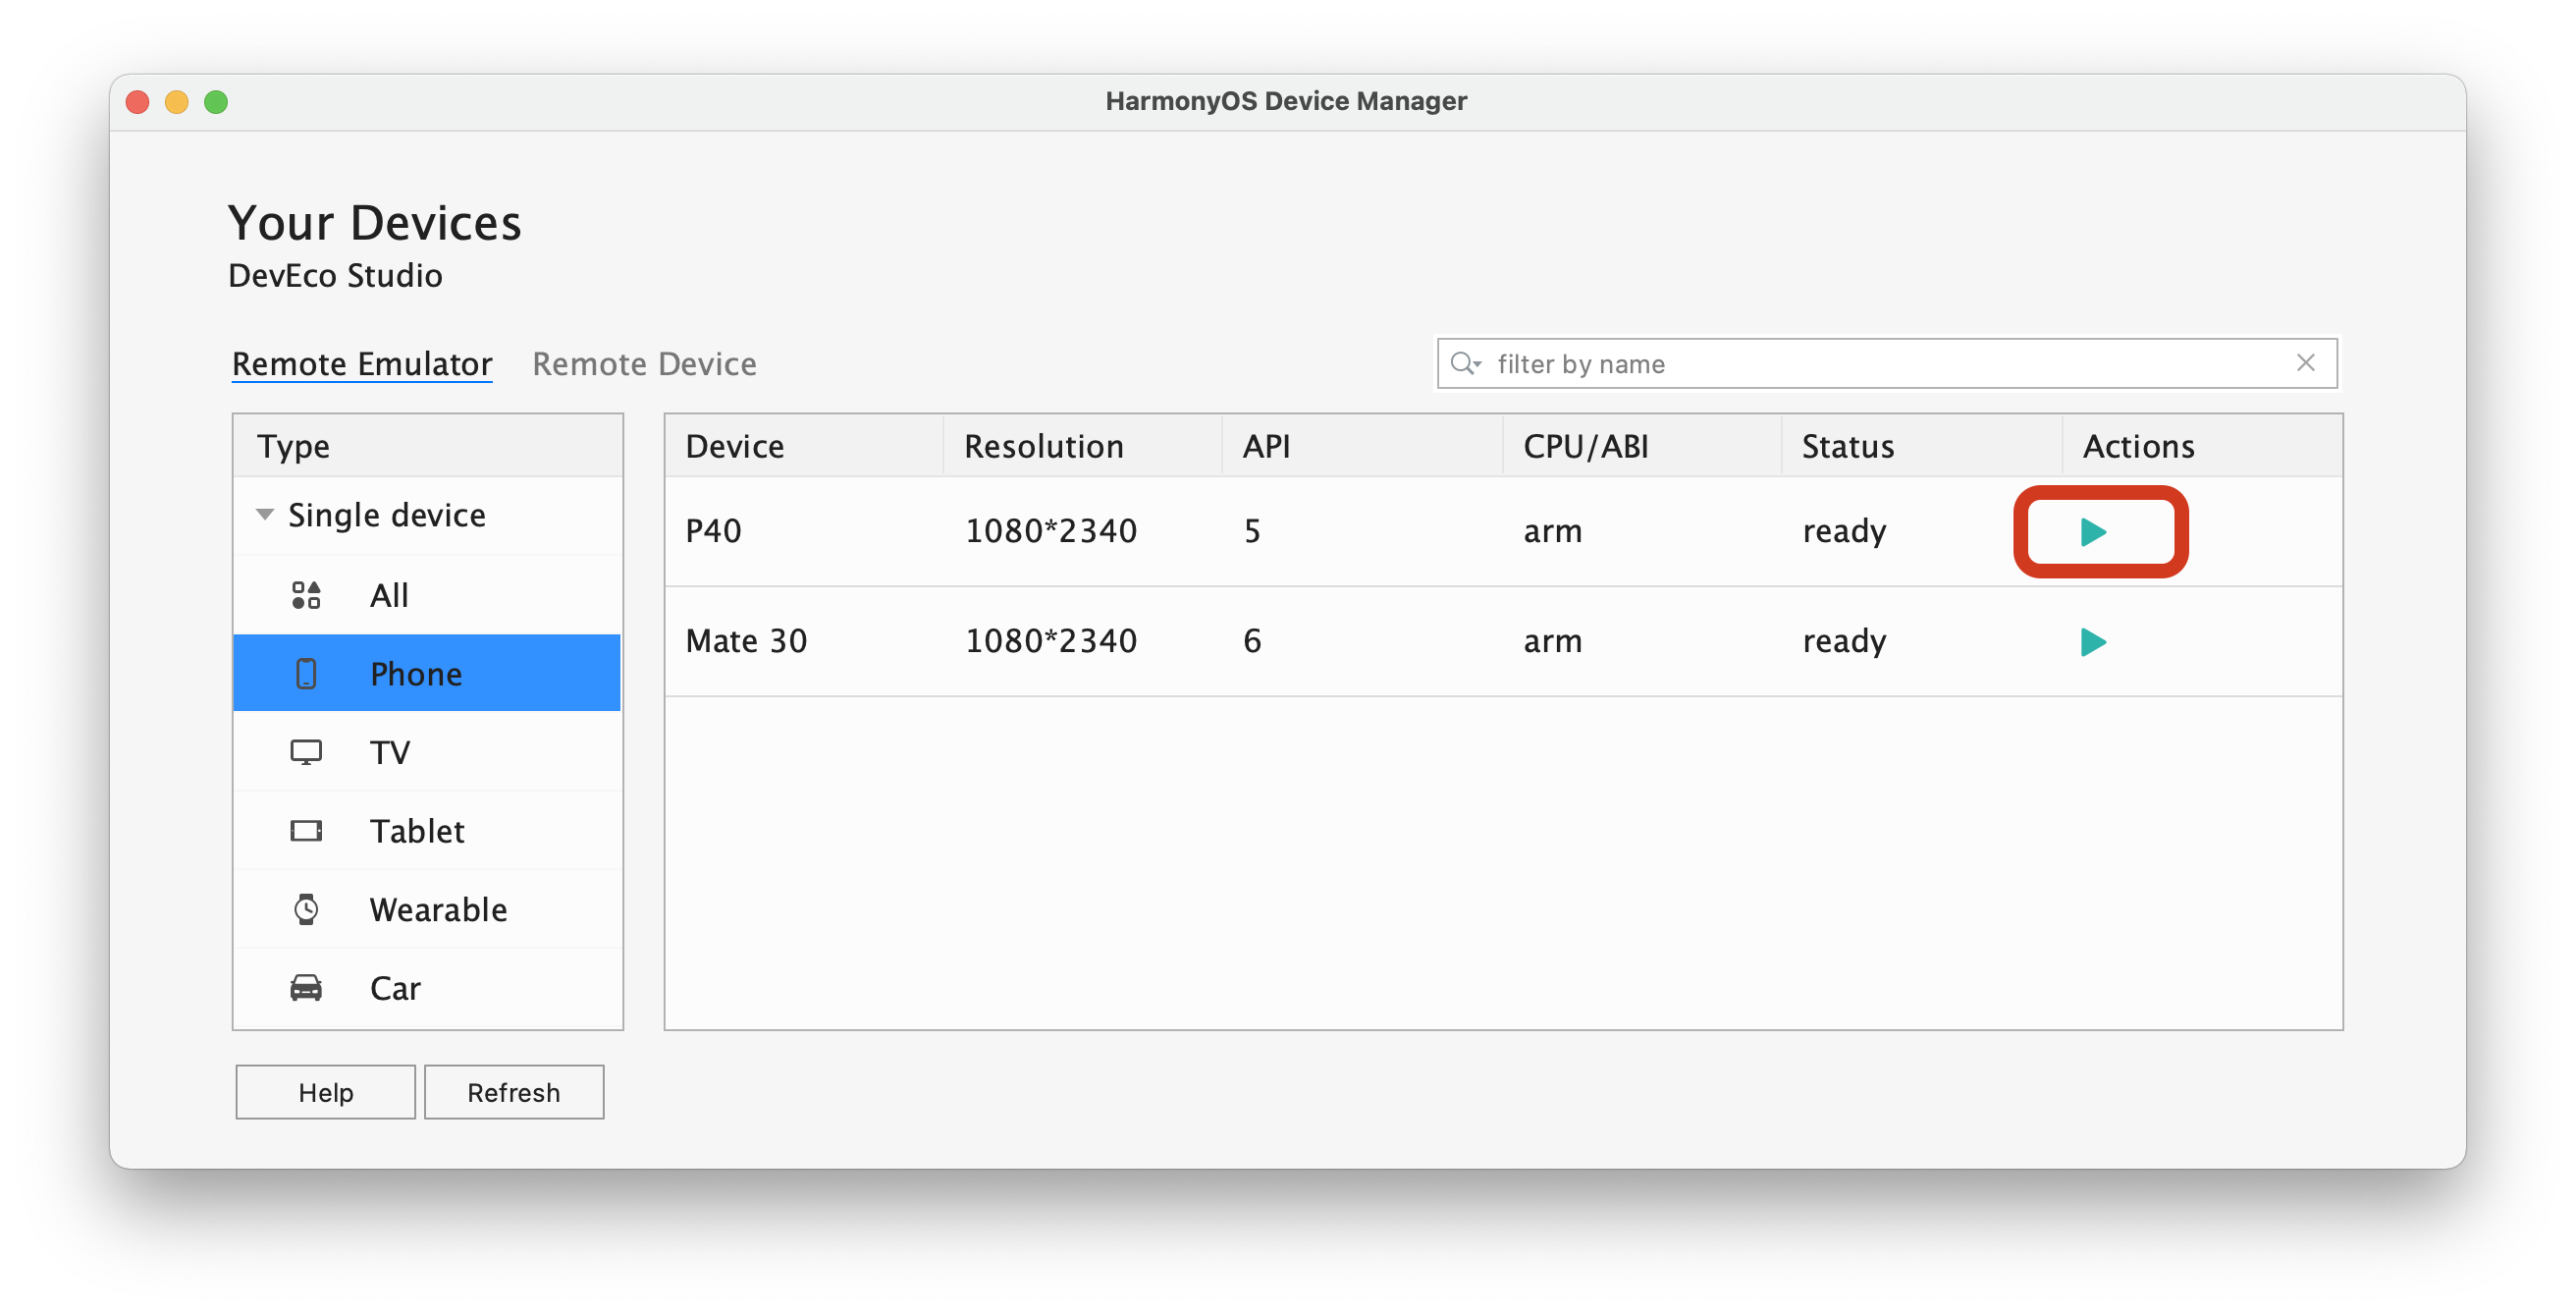
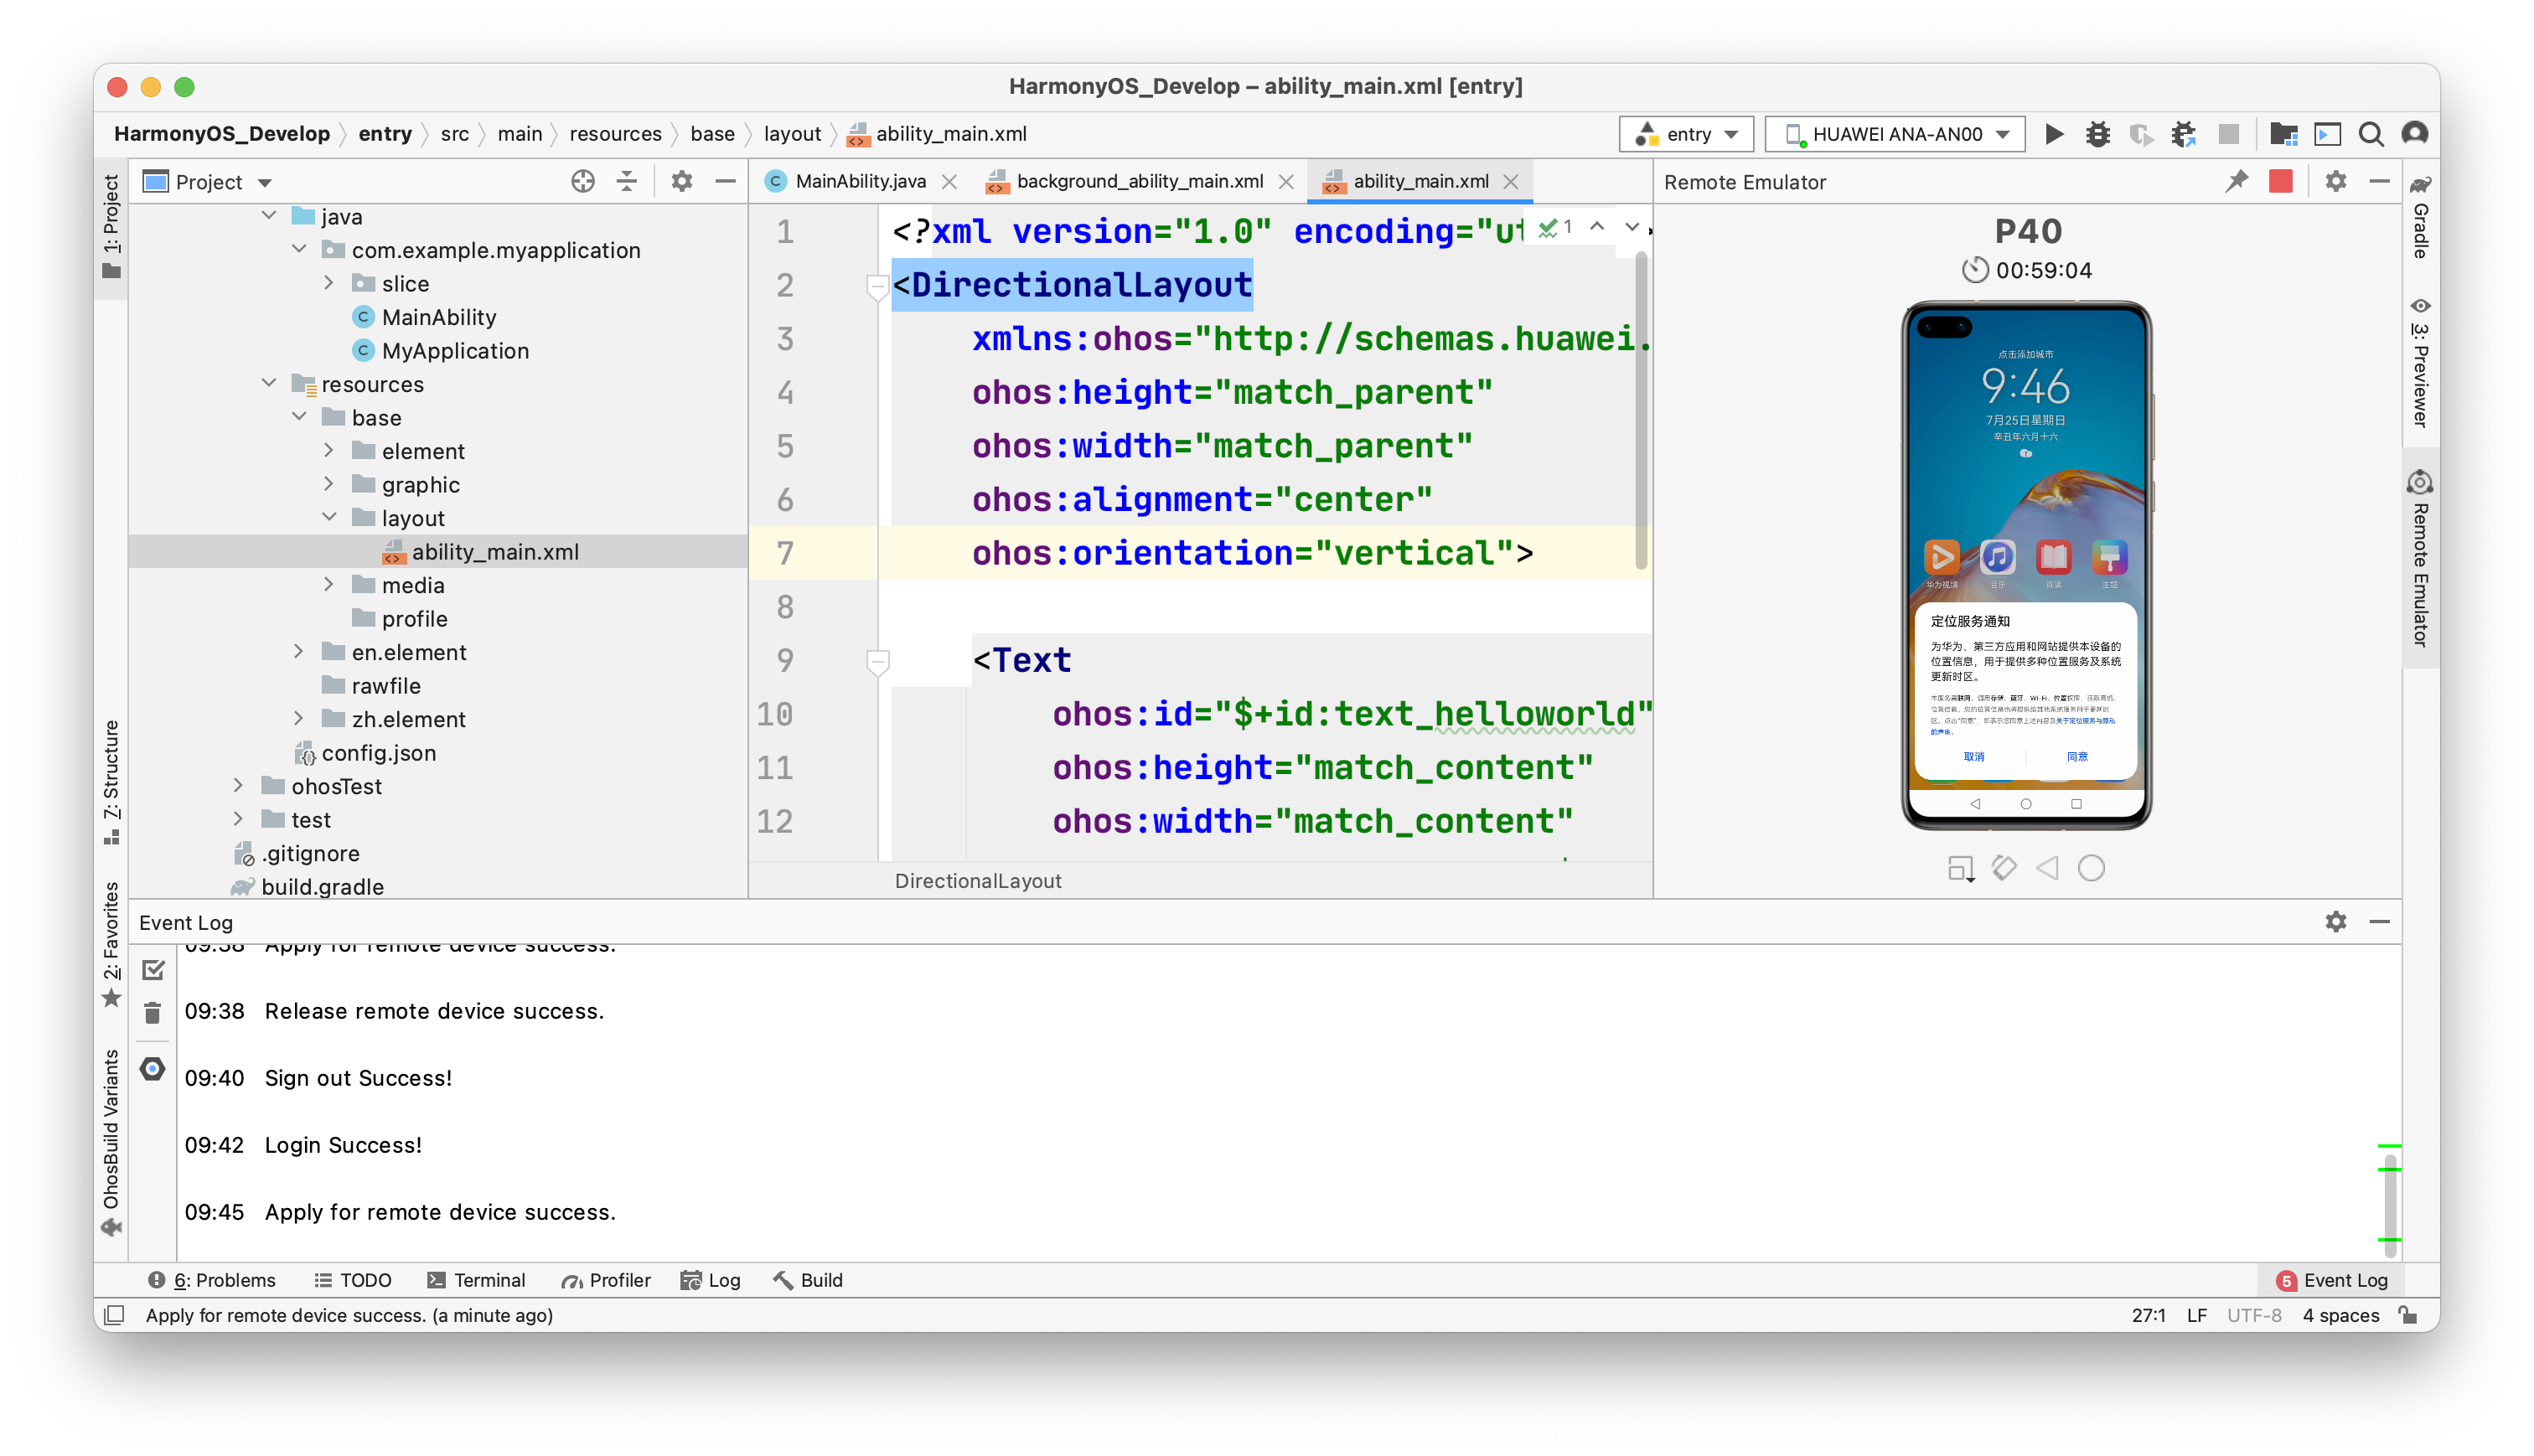
Note: this simulator is not a local simulator, but in the Huawei server. The advantage is that this simulator does not need to occupy local resources, but it cannot exceed 1 hour after startup. If it exceeds, it needs to restart the simulator. (the whole process must be networked)
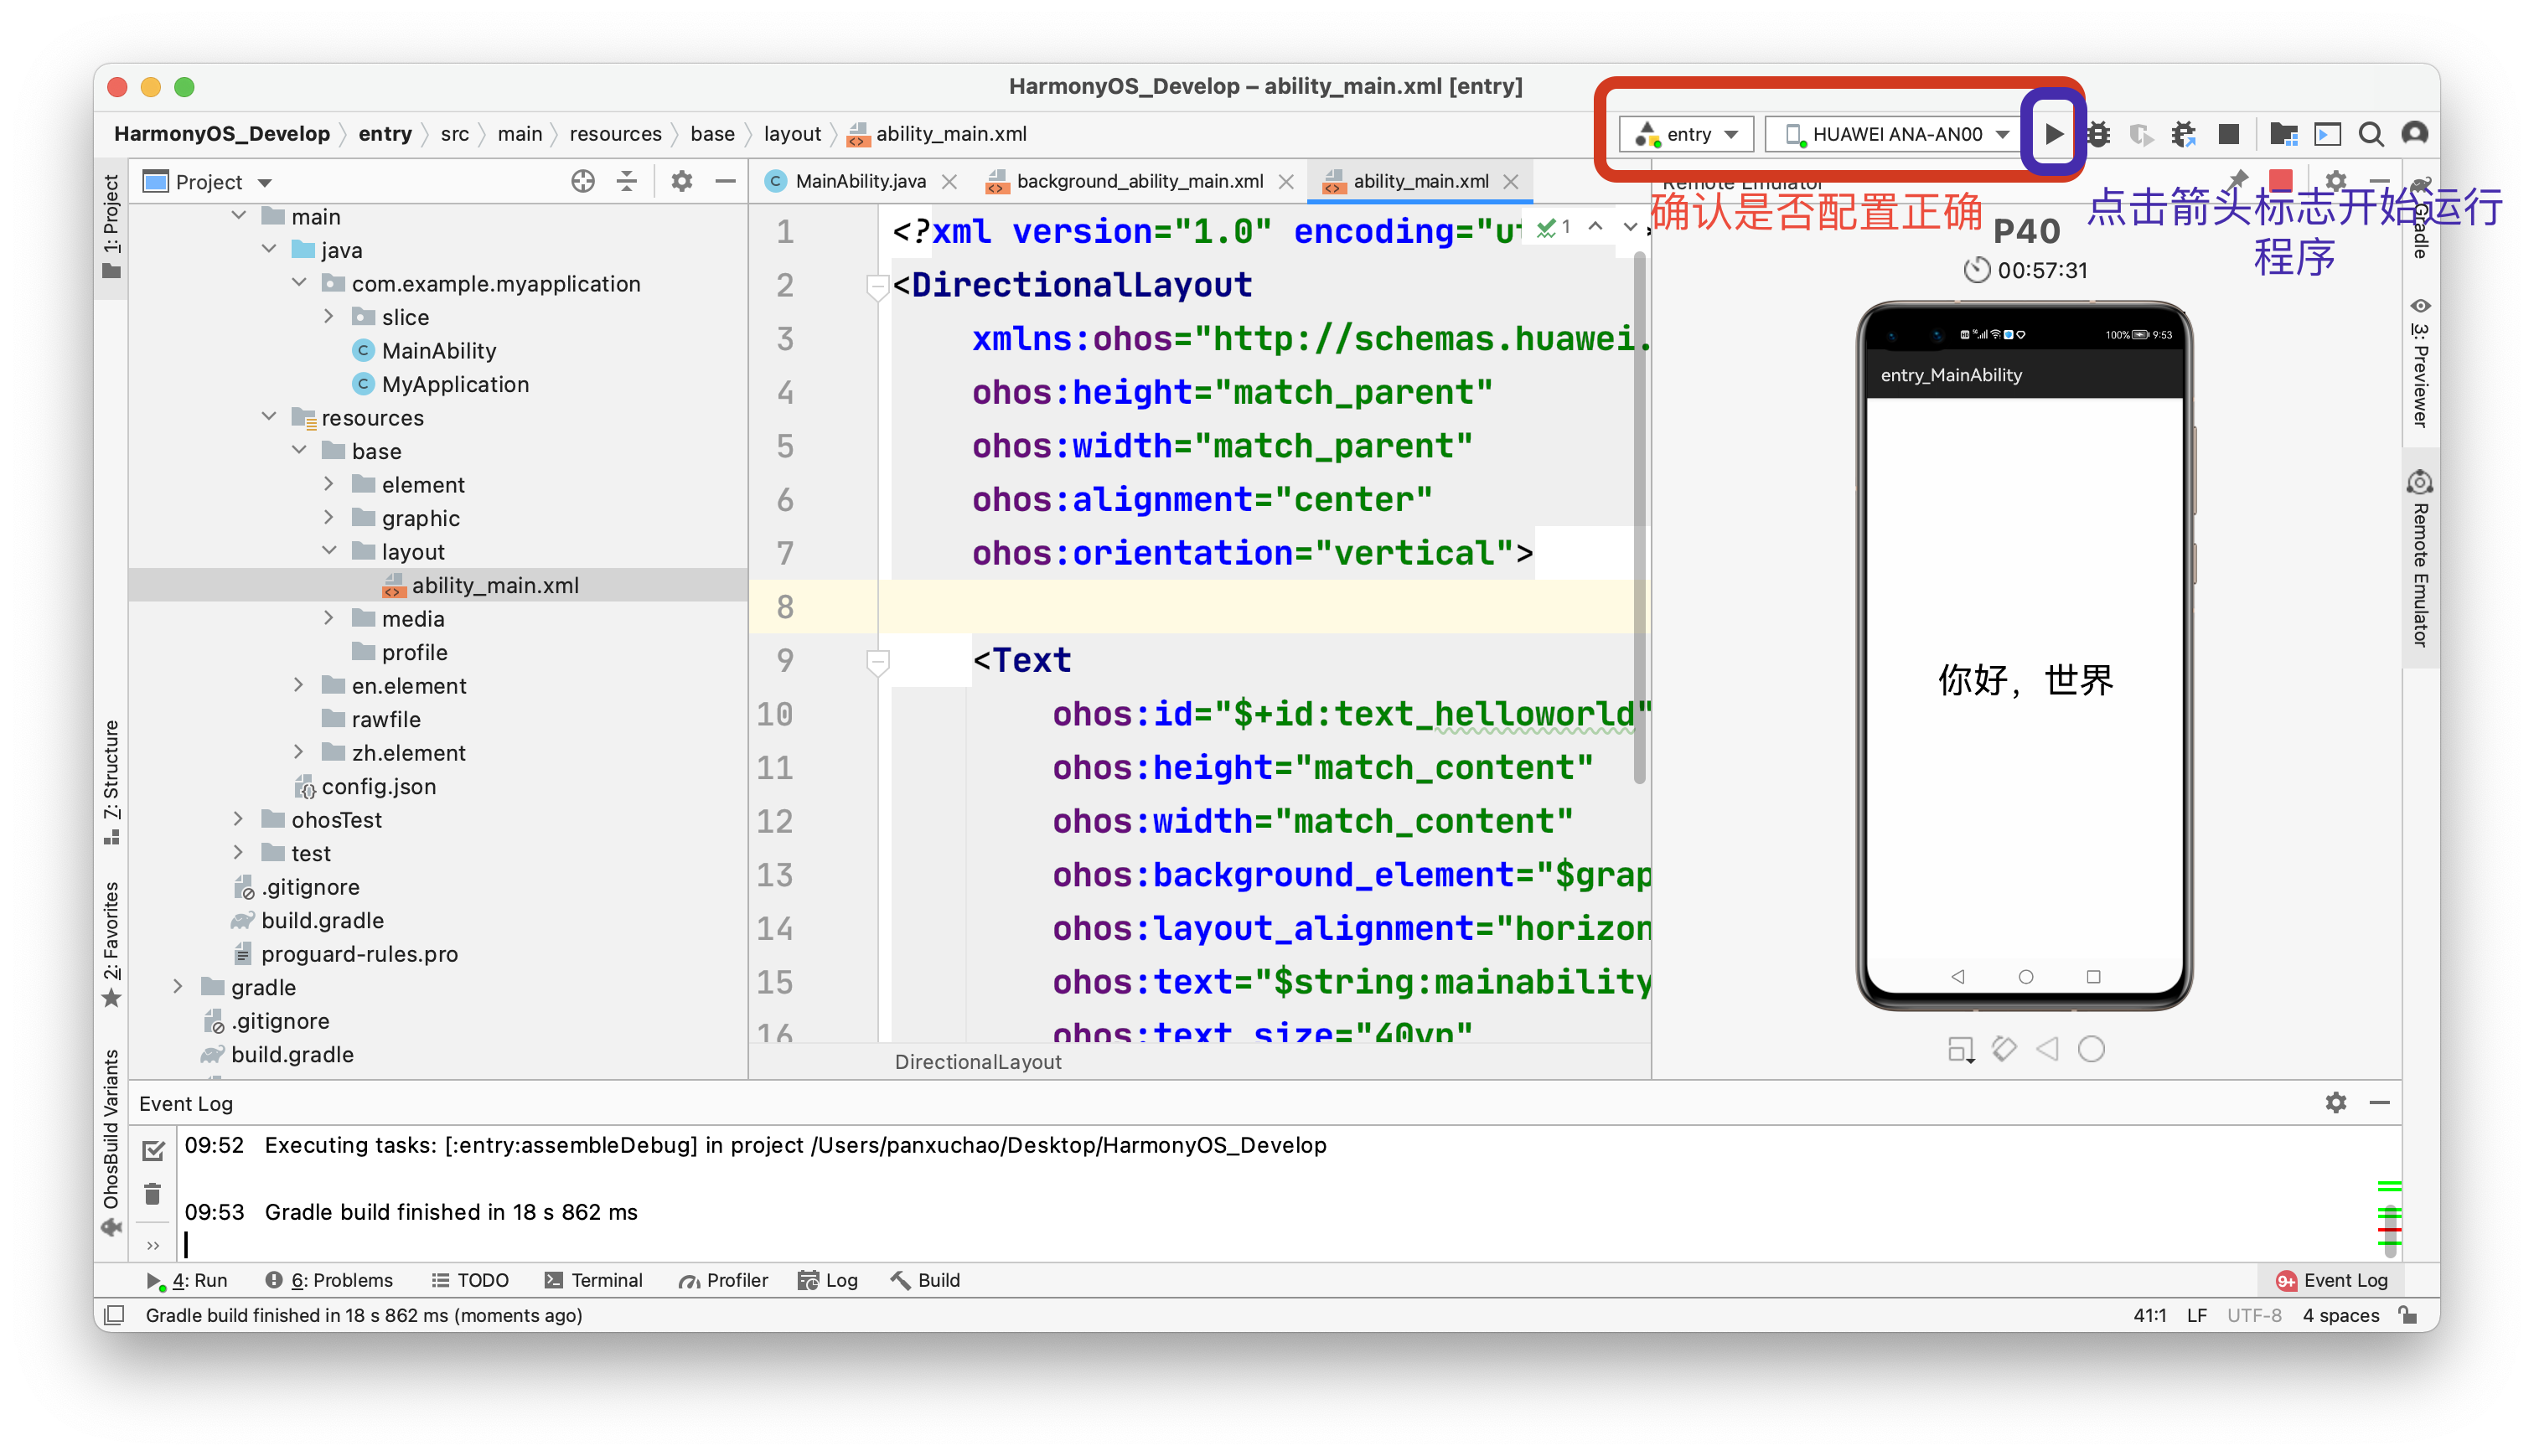
Run program
2. Inclusion relationships in pages
What is a page (the composition of a page)
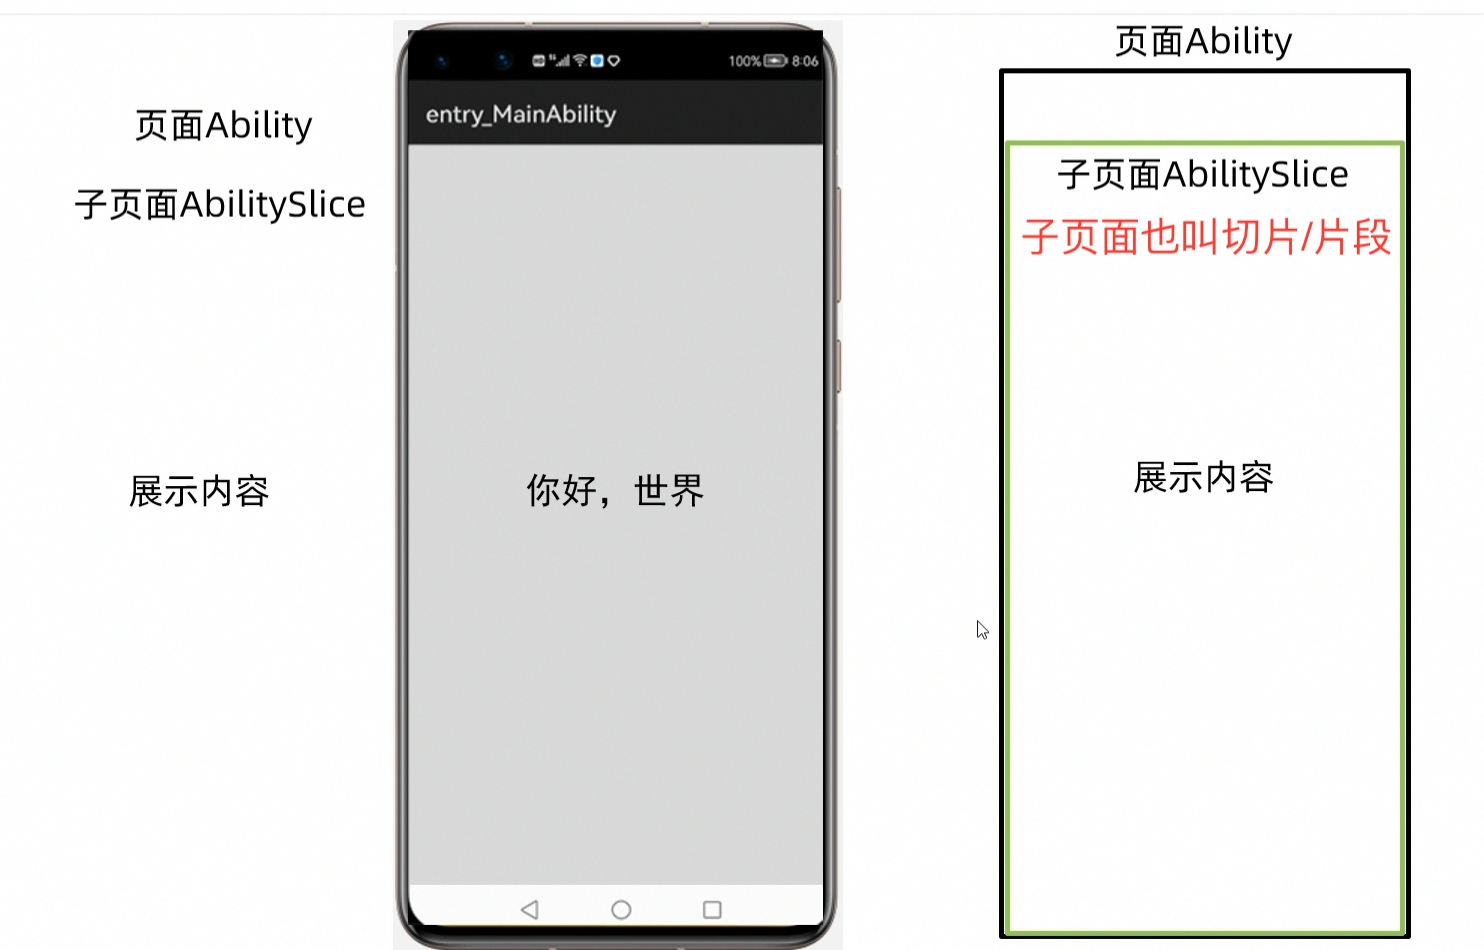
Include relationships:
The outermost is: Ability
Ability is one or more sub pages: AbilitySlice
There are contents to be displayed in the sub page: pictures, text and other information
Q: Why are there sub pages? Isn't it easier to add text information directly to the outermost page?
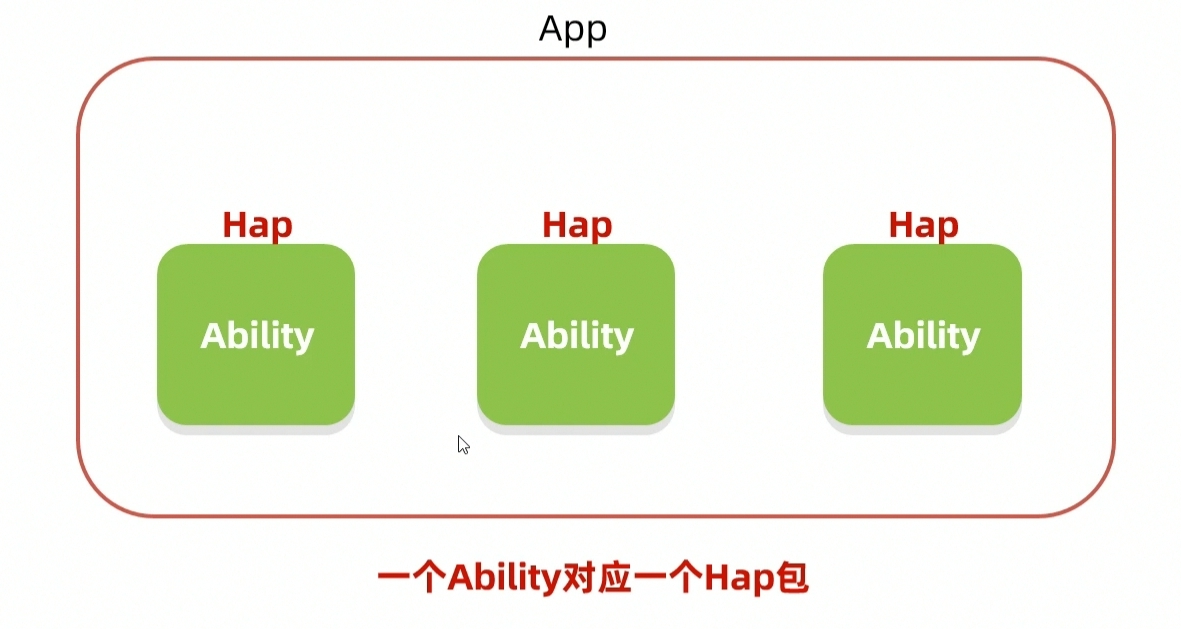
Conclusion: a single function corresponds to an Ability. If you need to switch in this capability, you can write multiple sub pages in Ability to switch.
Supplement: it is related to Hongmeng's design idea of "can be divided or combined". The picture shows a complete installation package structure of Hongmeng's APP. It will first package each Ability file into one Hap files (that is, an Ability corresponds to a Hap package), and then package all Hap packages into an overall APP. This is characterized by the design idea of "can be separated and combined". When users use what, they can download what. Each Hap package can be downloaded and installed separately.
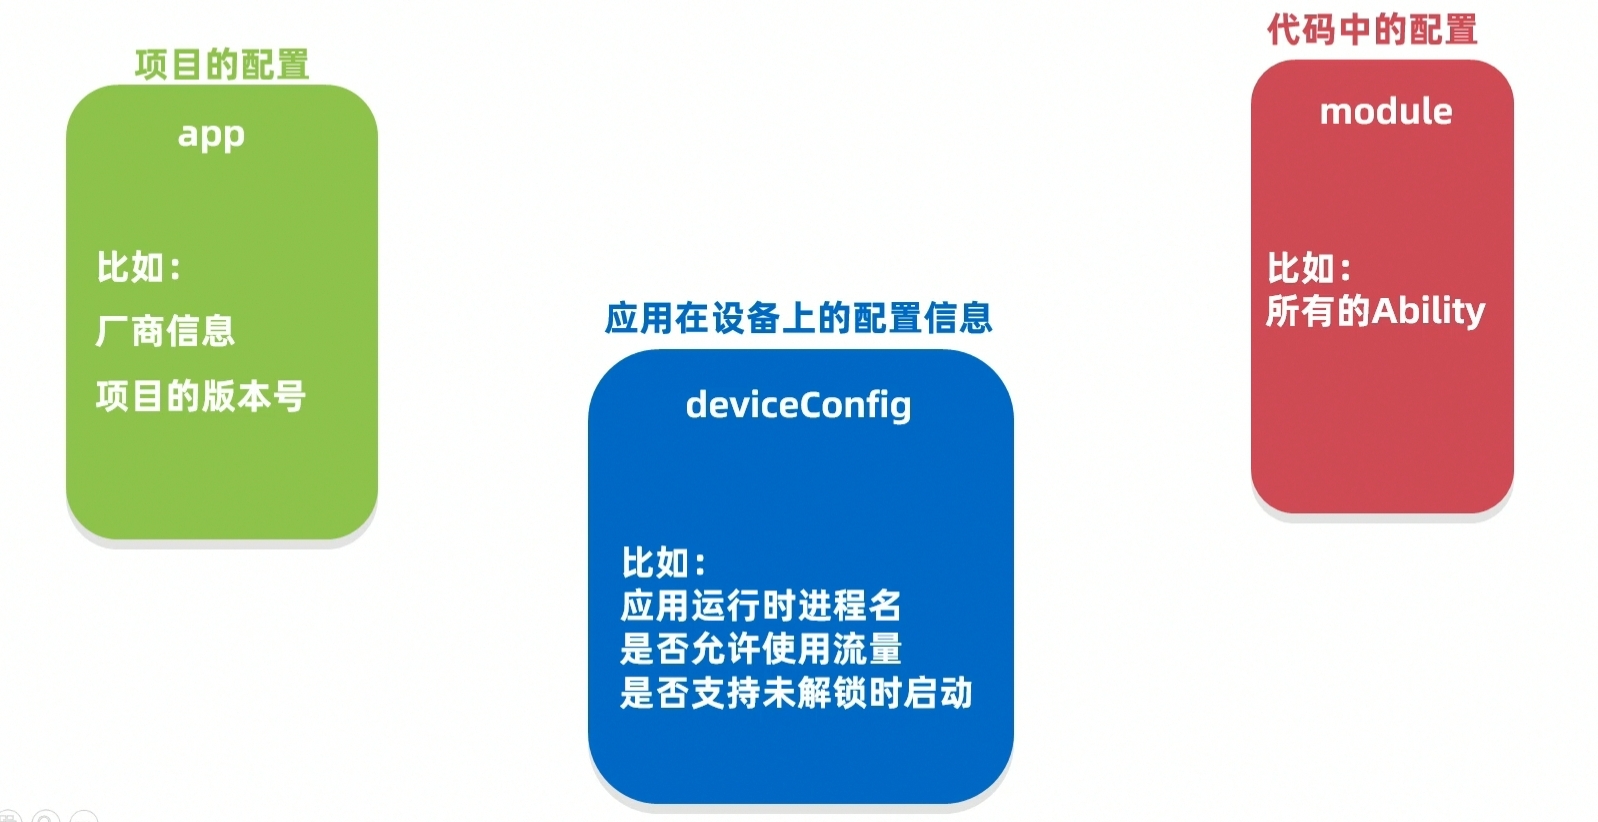
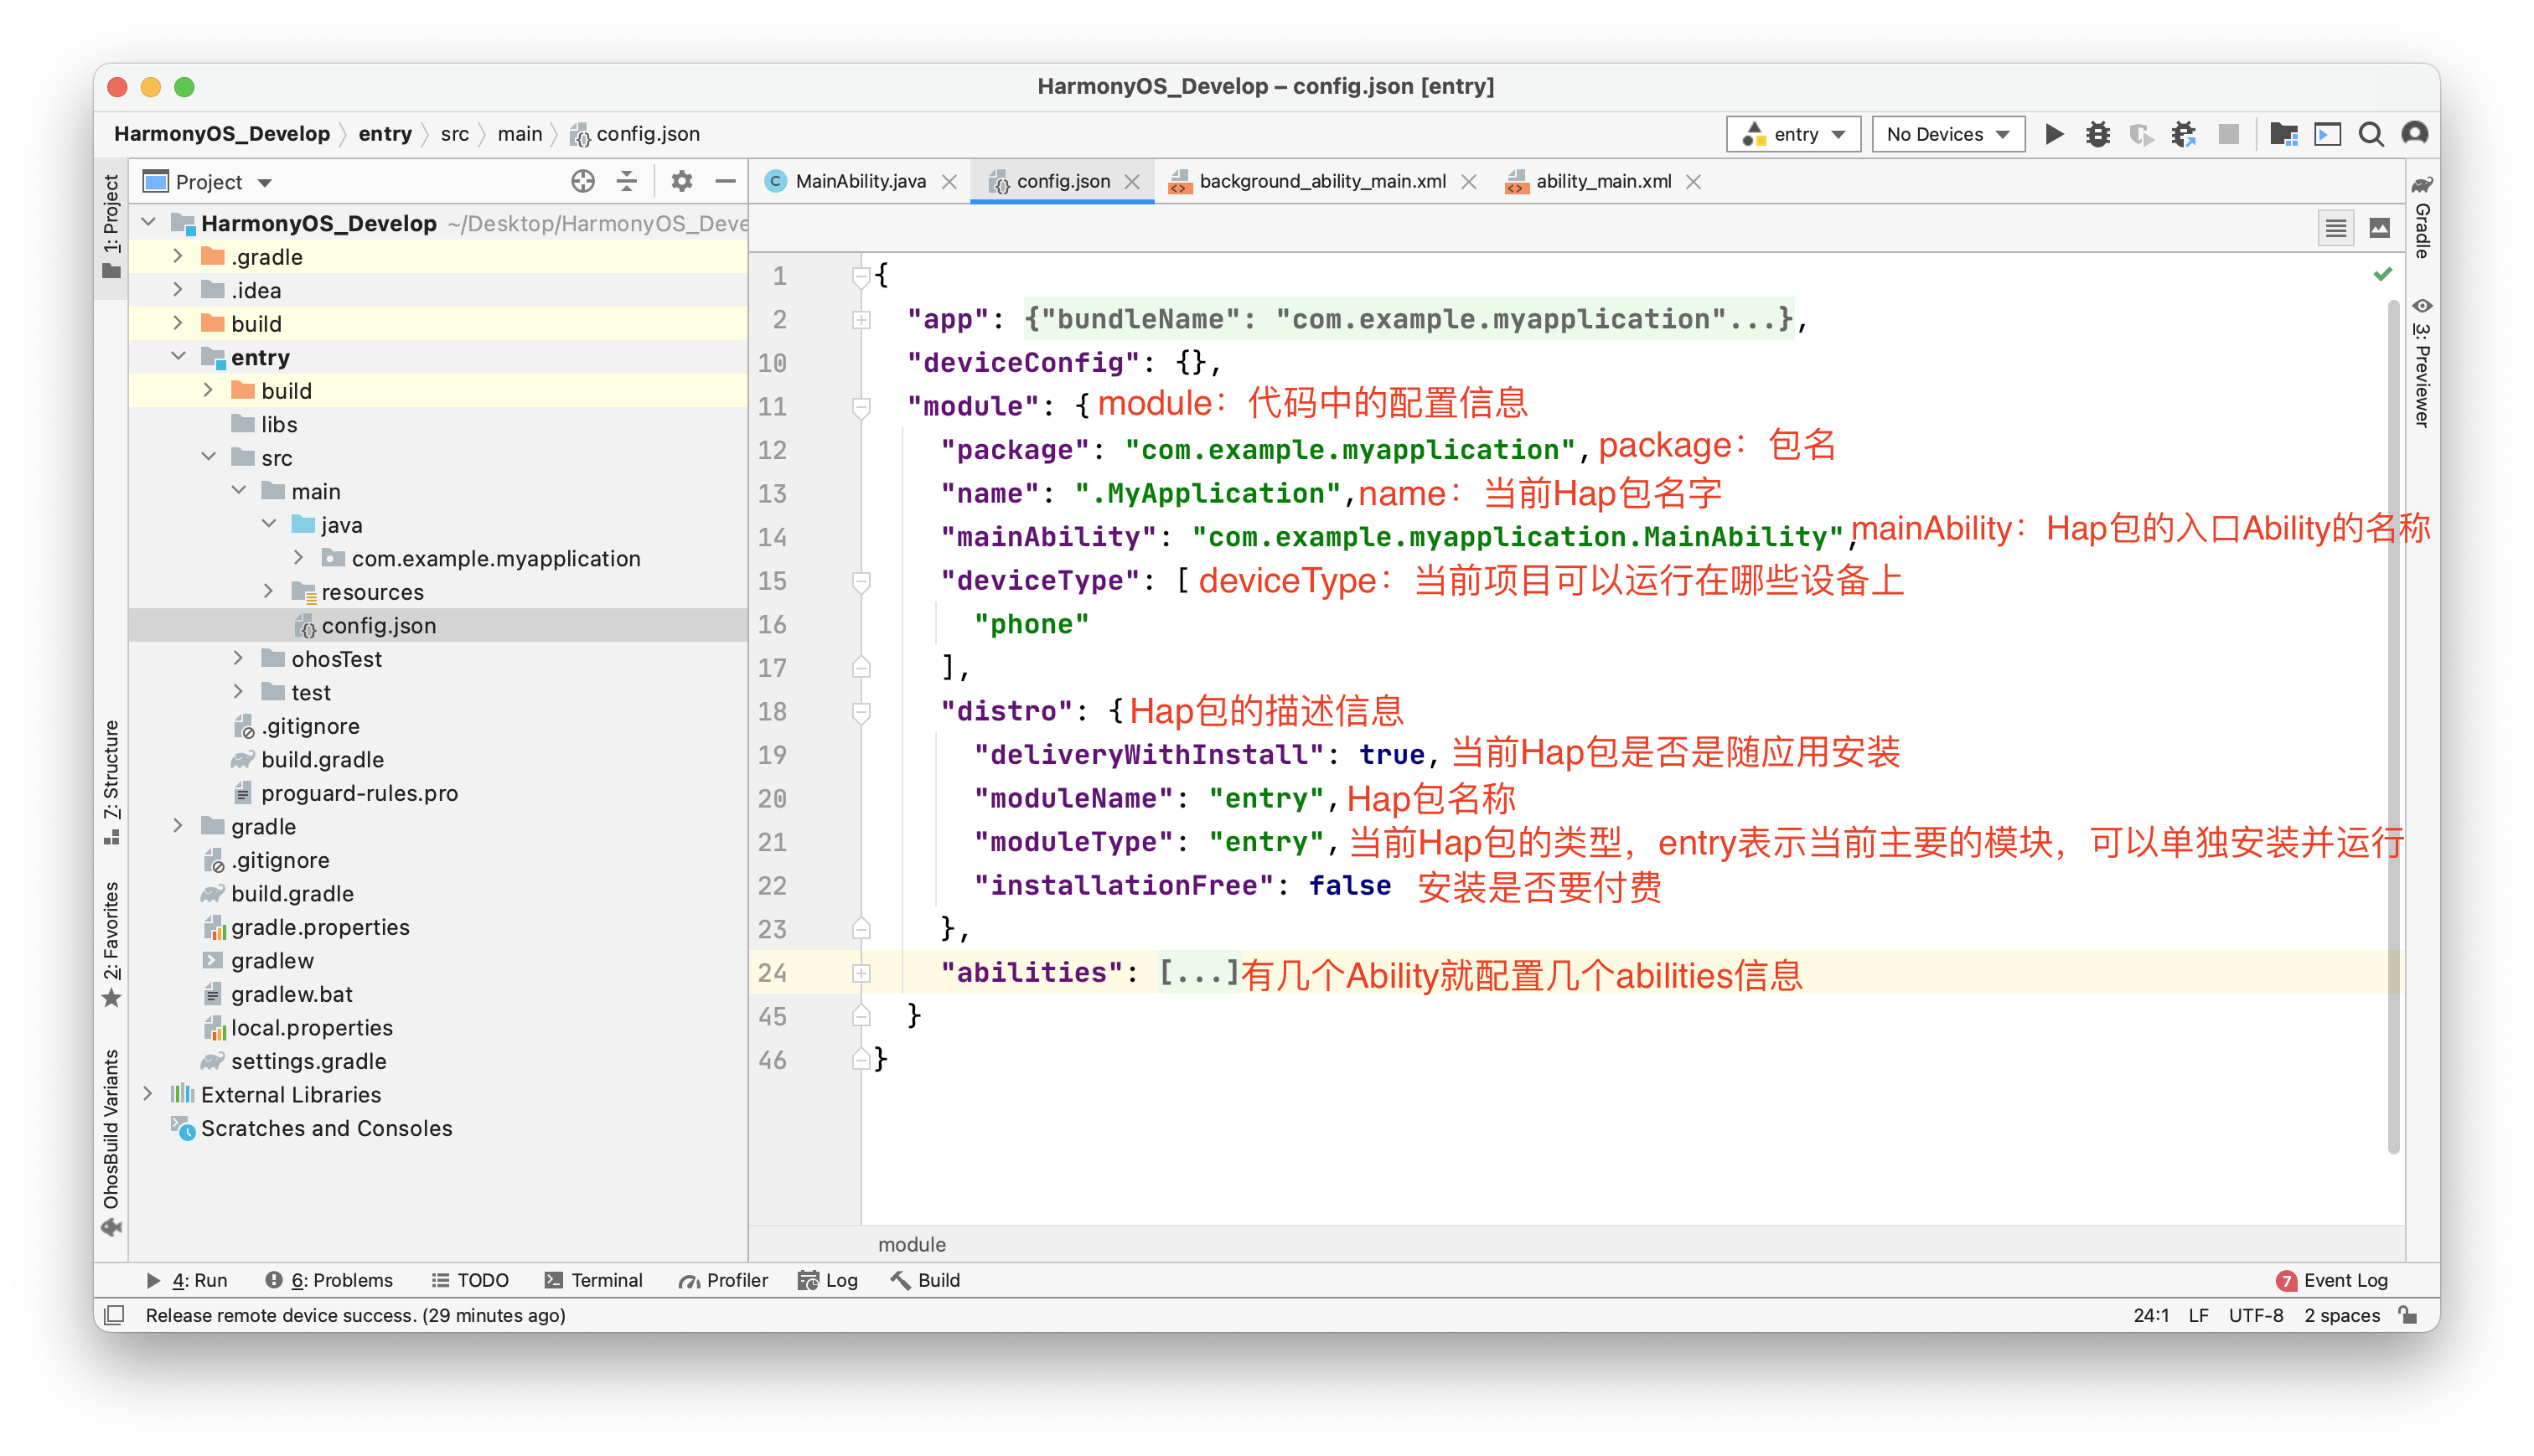
3. Configuration file of learning project: config json
Three parts of the configuration file
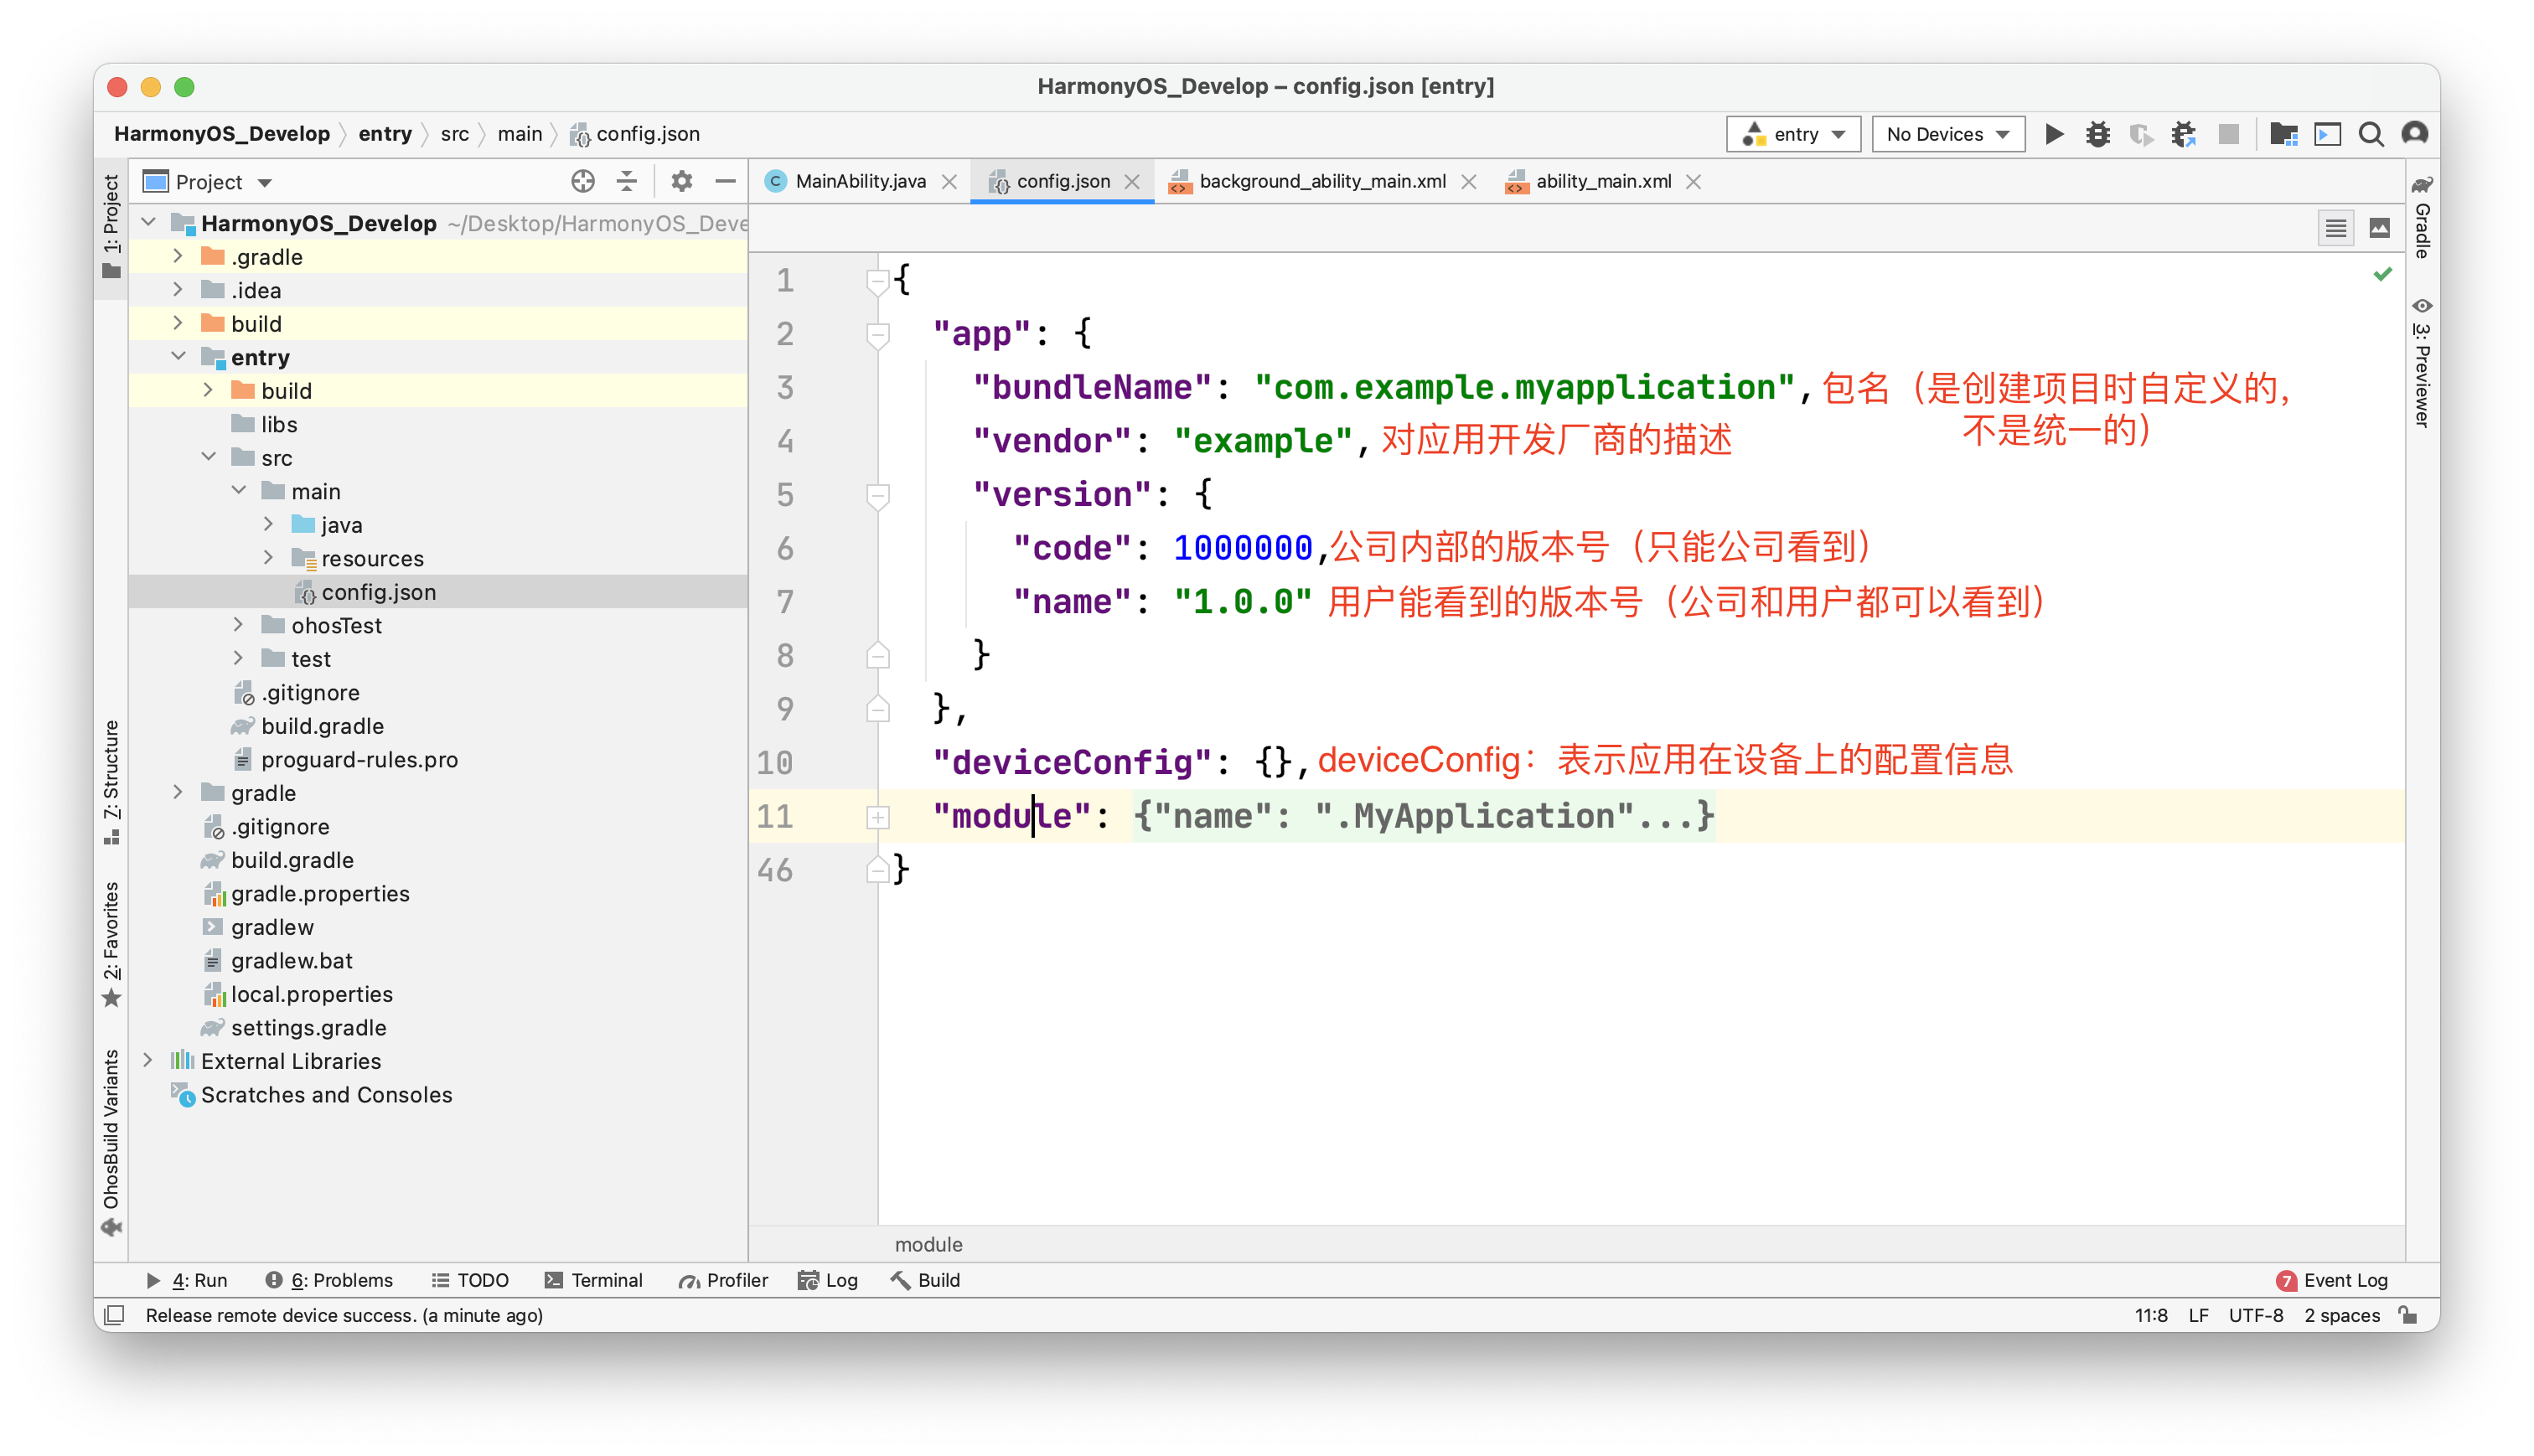
config.json file details
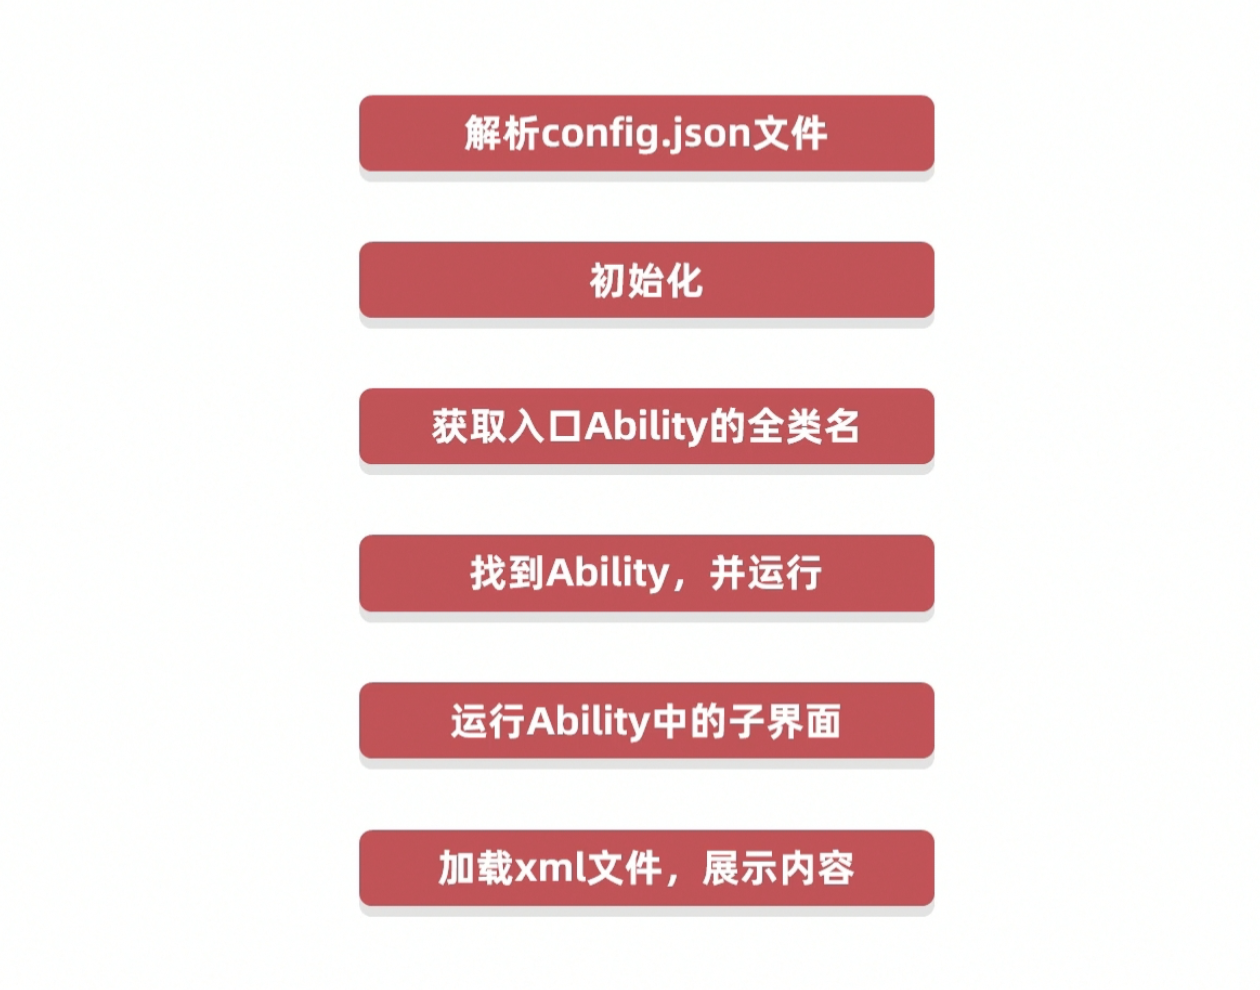
4. Understand the running process of the program
-
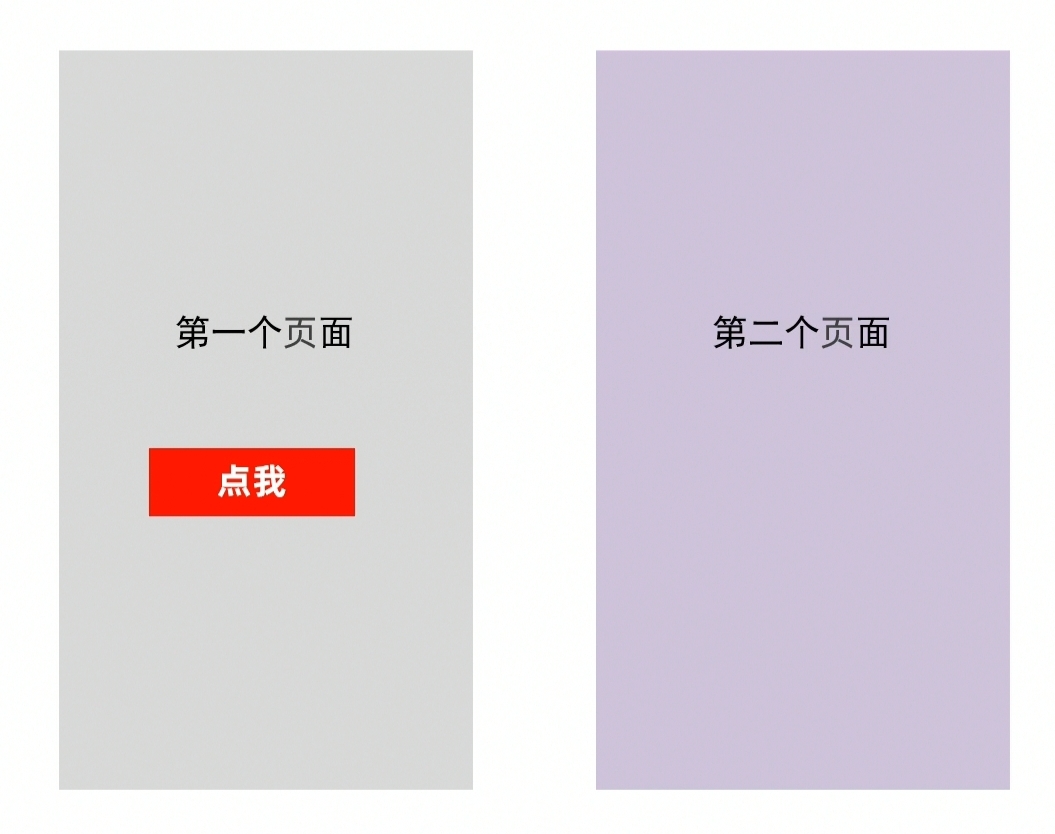
The second entry application: page Jump
Implementation steps
- Write the first page (text + button)
- Write second page (text)
- Add a jump to the button
There are two ways to write layouts
Hongmeng UI provides two ways to write layouts:
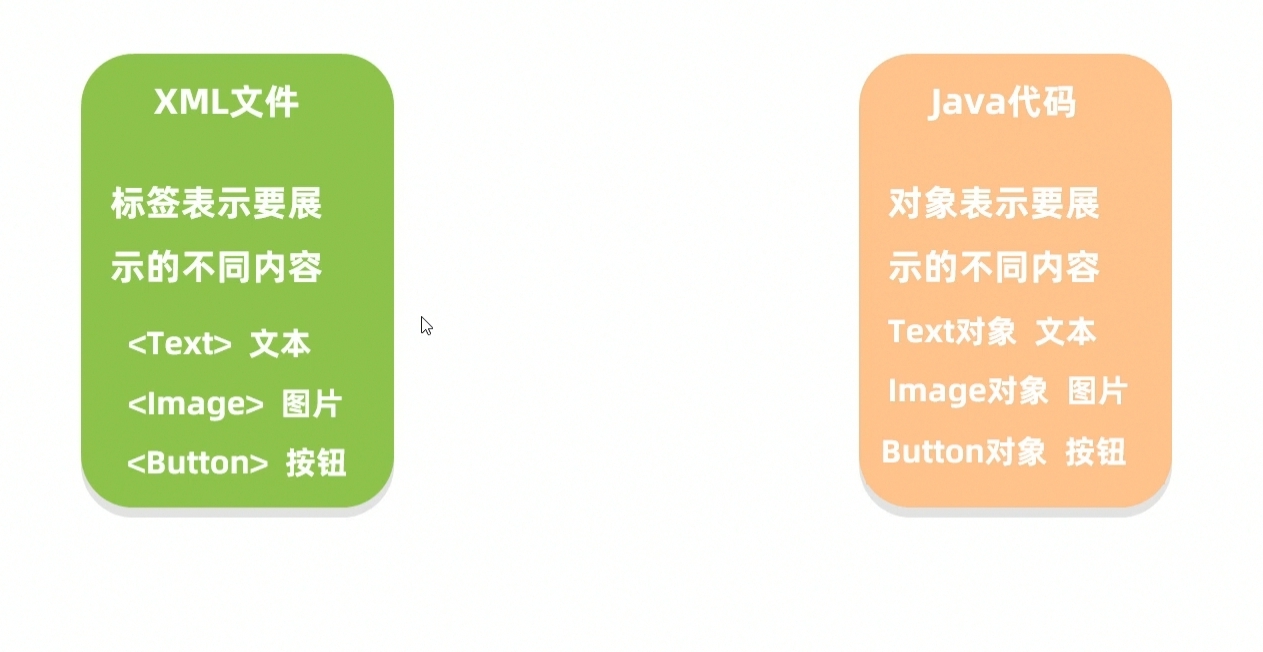
XML version
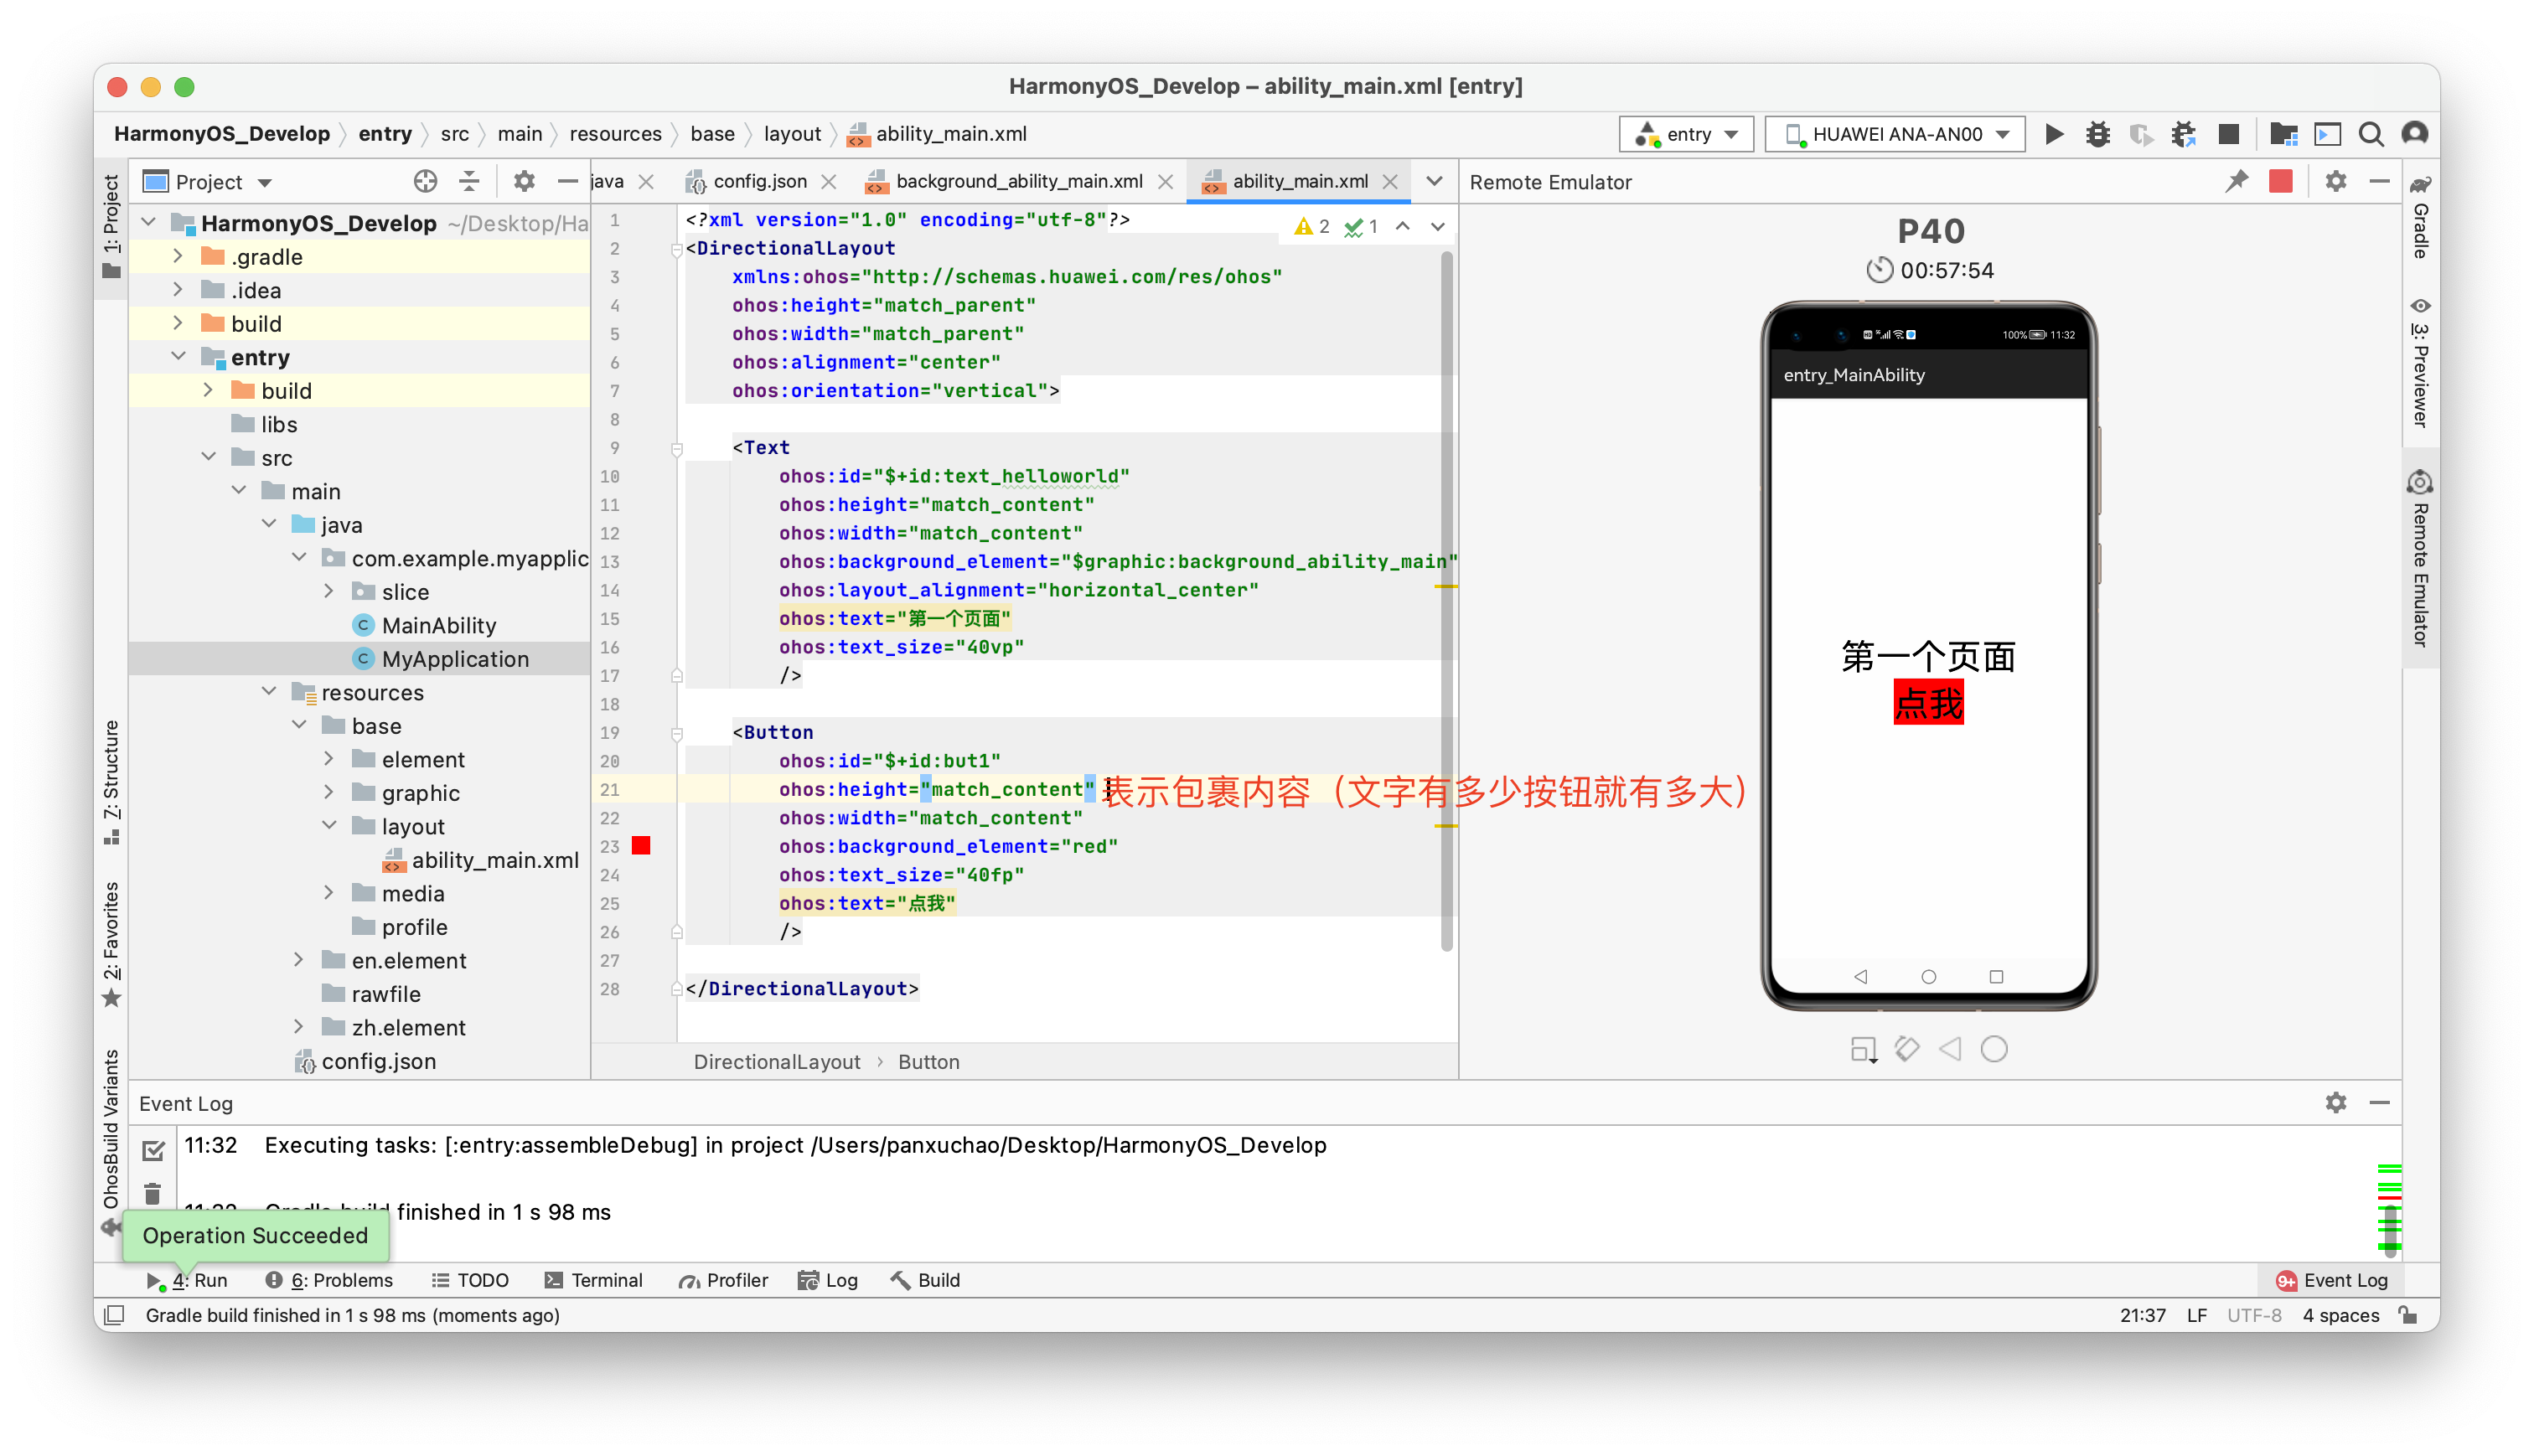
ability_ The main code is as follows:
<?xml version="1.0" encoding="utf-8"?>
<DirectionalLayout
    xmlns:ohos="http://schemas.huawei.com/res/ohos"
    ohos:height="match_parent"
    ohos:width="match_parent"
    ohos:alignment="center"
    ohos:orientation="vertical">

    <Text
        ohos:id="$+id:text_helloworld"
        ohos:height="match_content"
        ohos:width="match_content"
        ohos:background_element="$graphic:background_ability_main"
        ohos:layout_alignment="horizontal_center"
        ohos:text="First page"
        ohos:text_size="40vp"
        />

    <Button
        ohos:id="$+id:but1"
        ohos:height="match_content"
        ohos:width="match_content"
        ohos:background_element="red"
        ohos:text_size="40fp"
        ohos:text="Point me"
        />

</DirectionalLayout>
JAVA version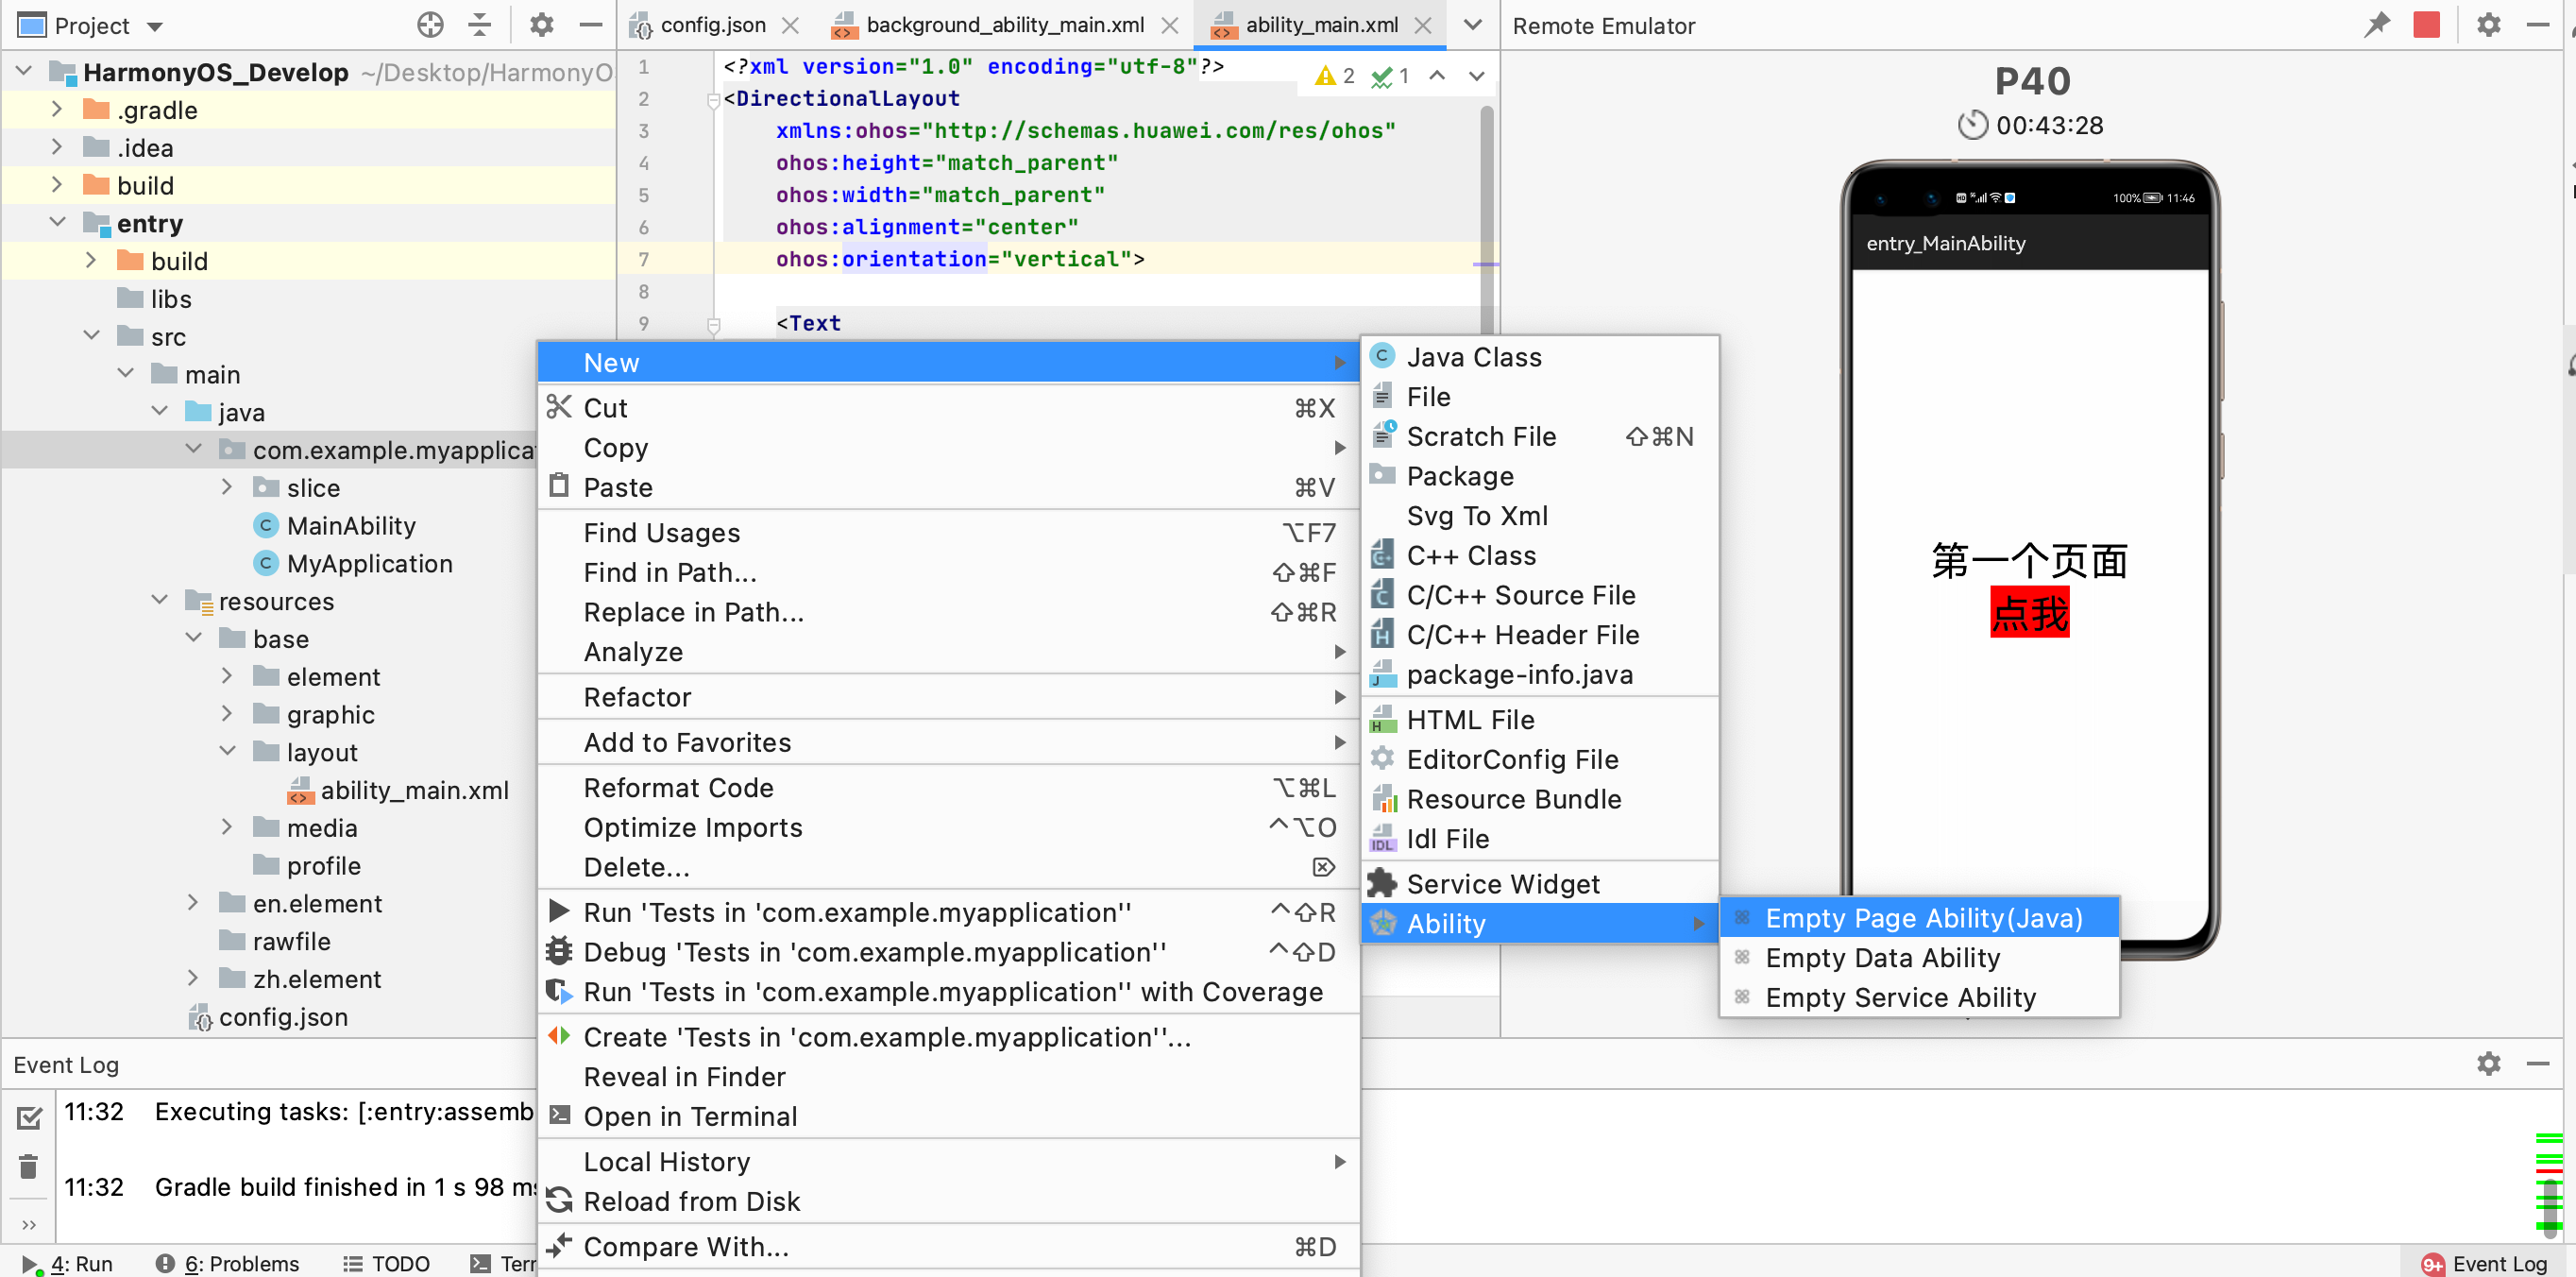
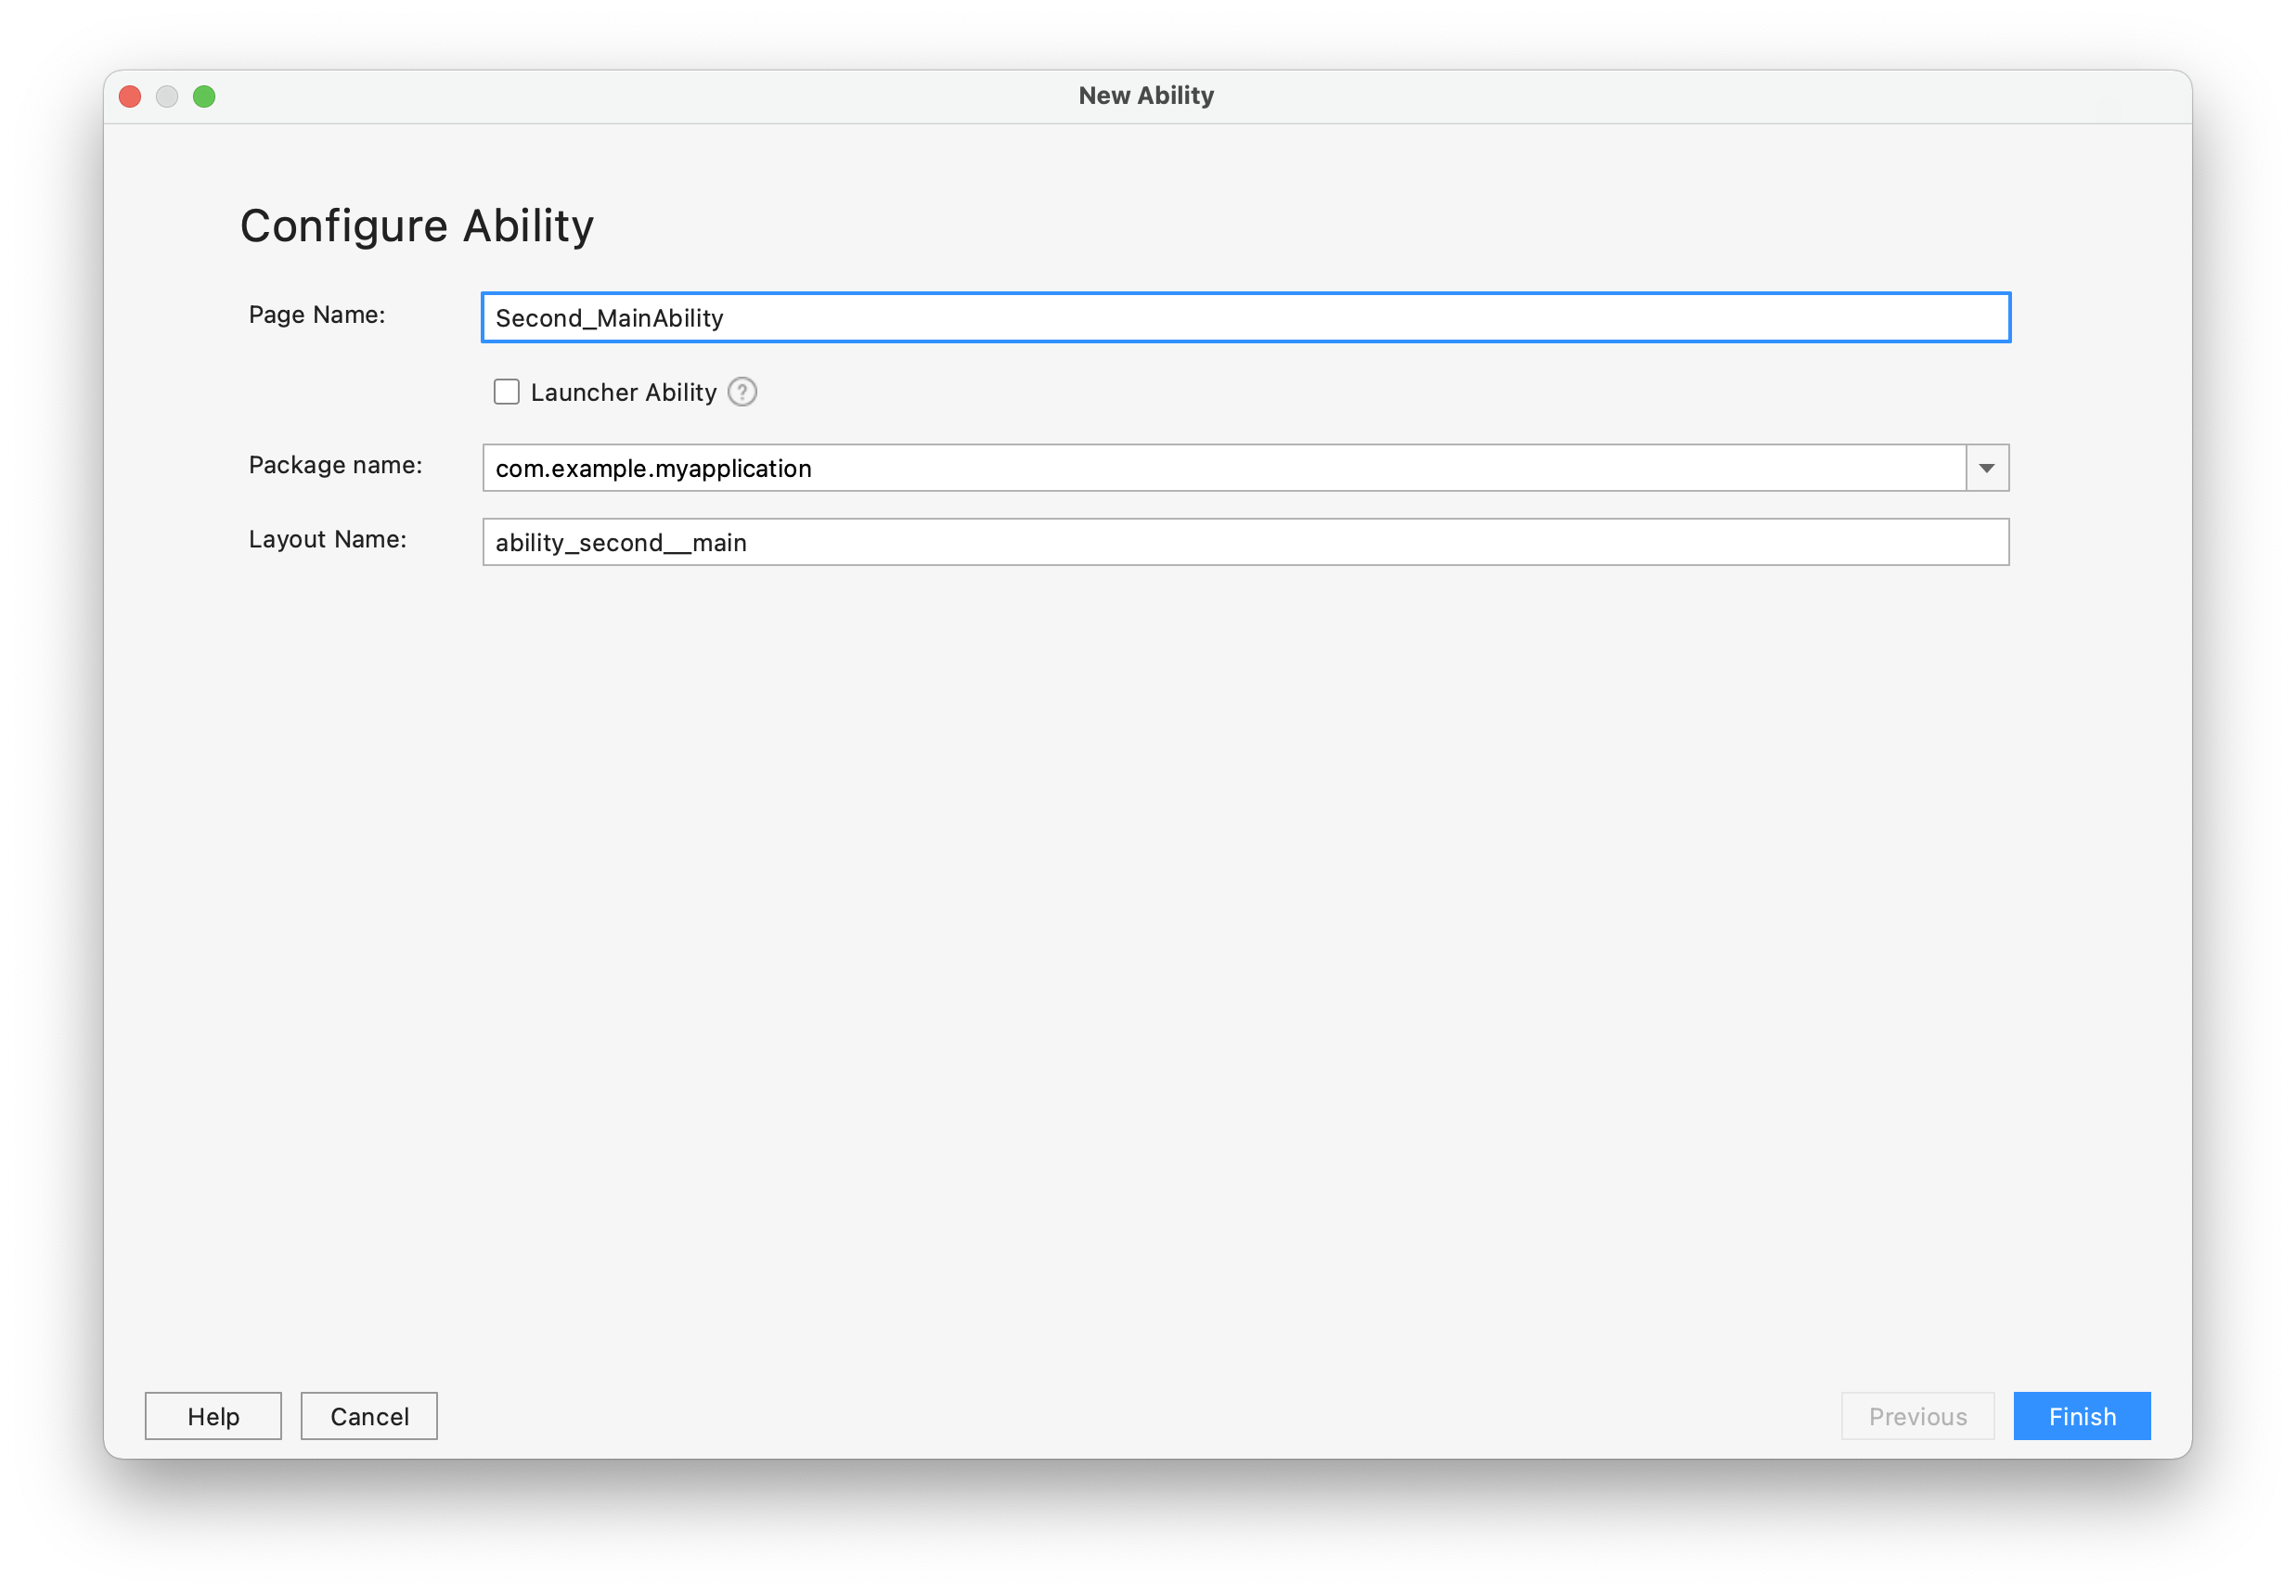
Delete ability in layout_ second__ main2. XML file and in second_ MainAbility2Slice. Add comments in Java. The diagram is as follows:
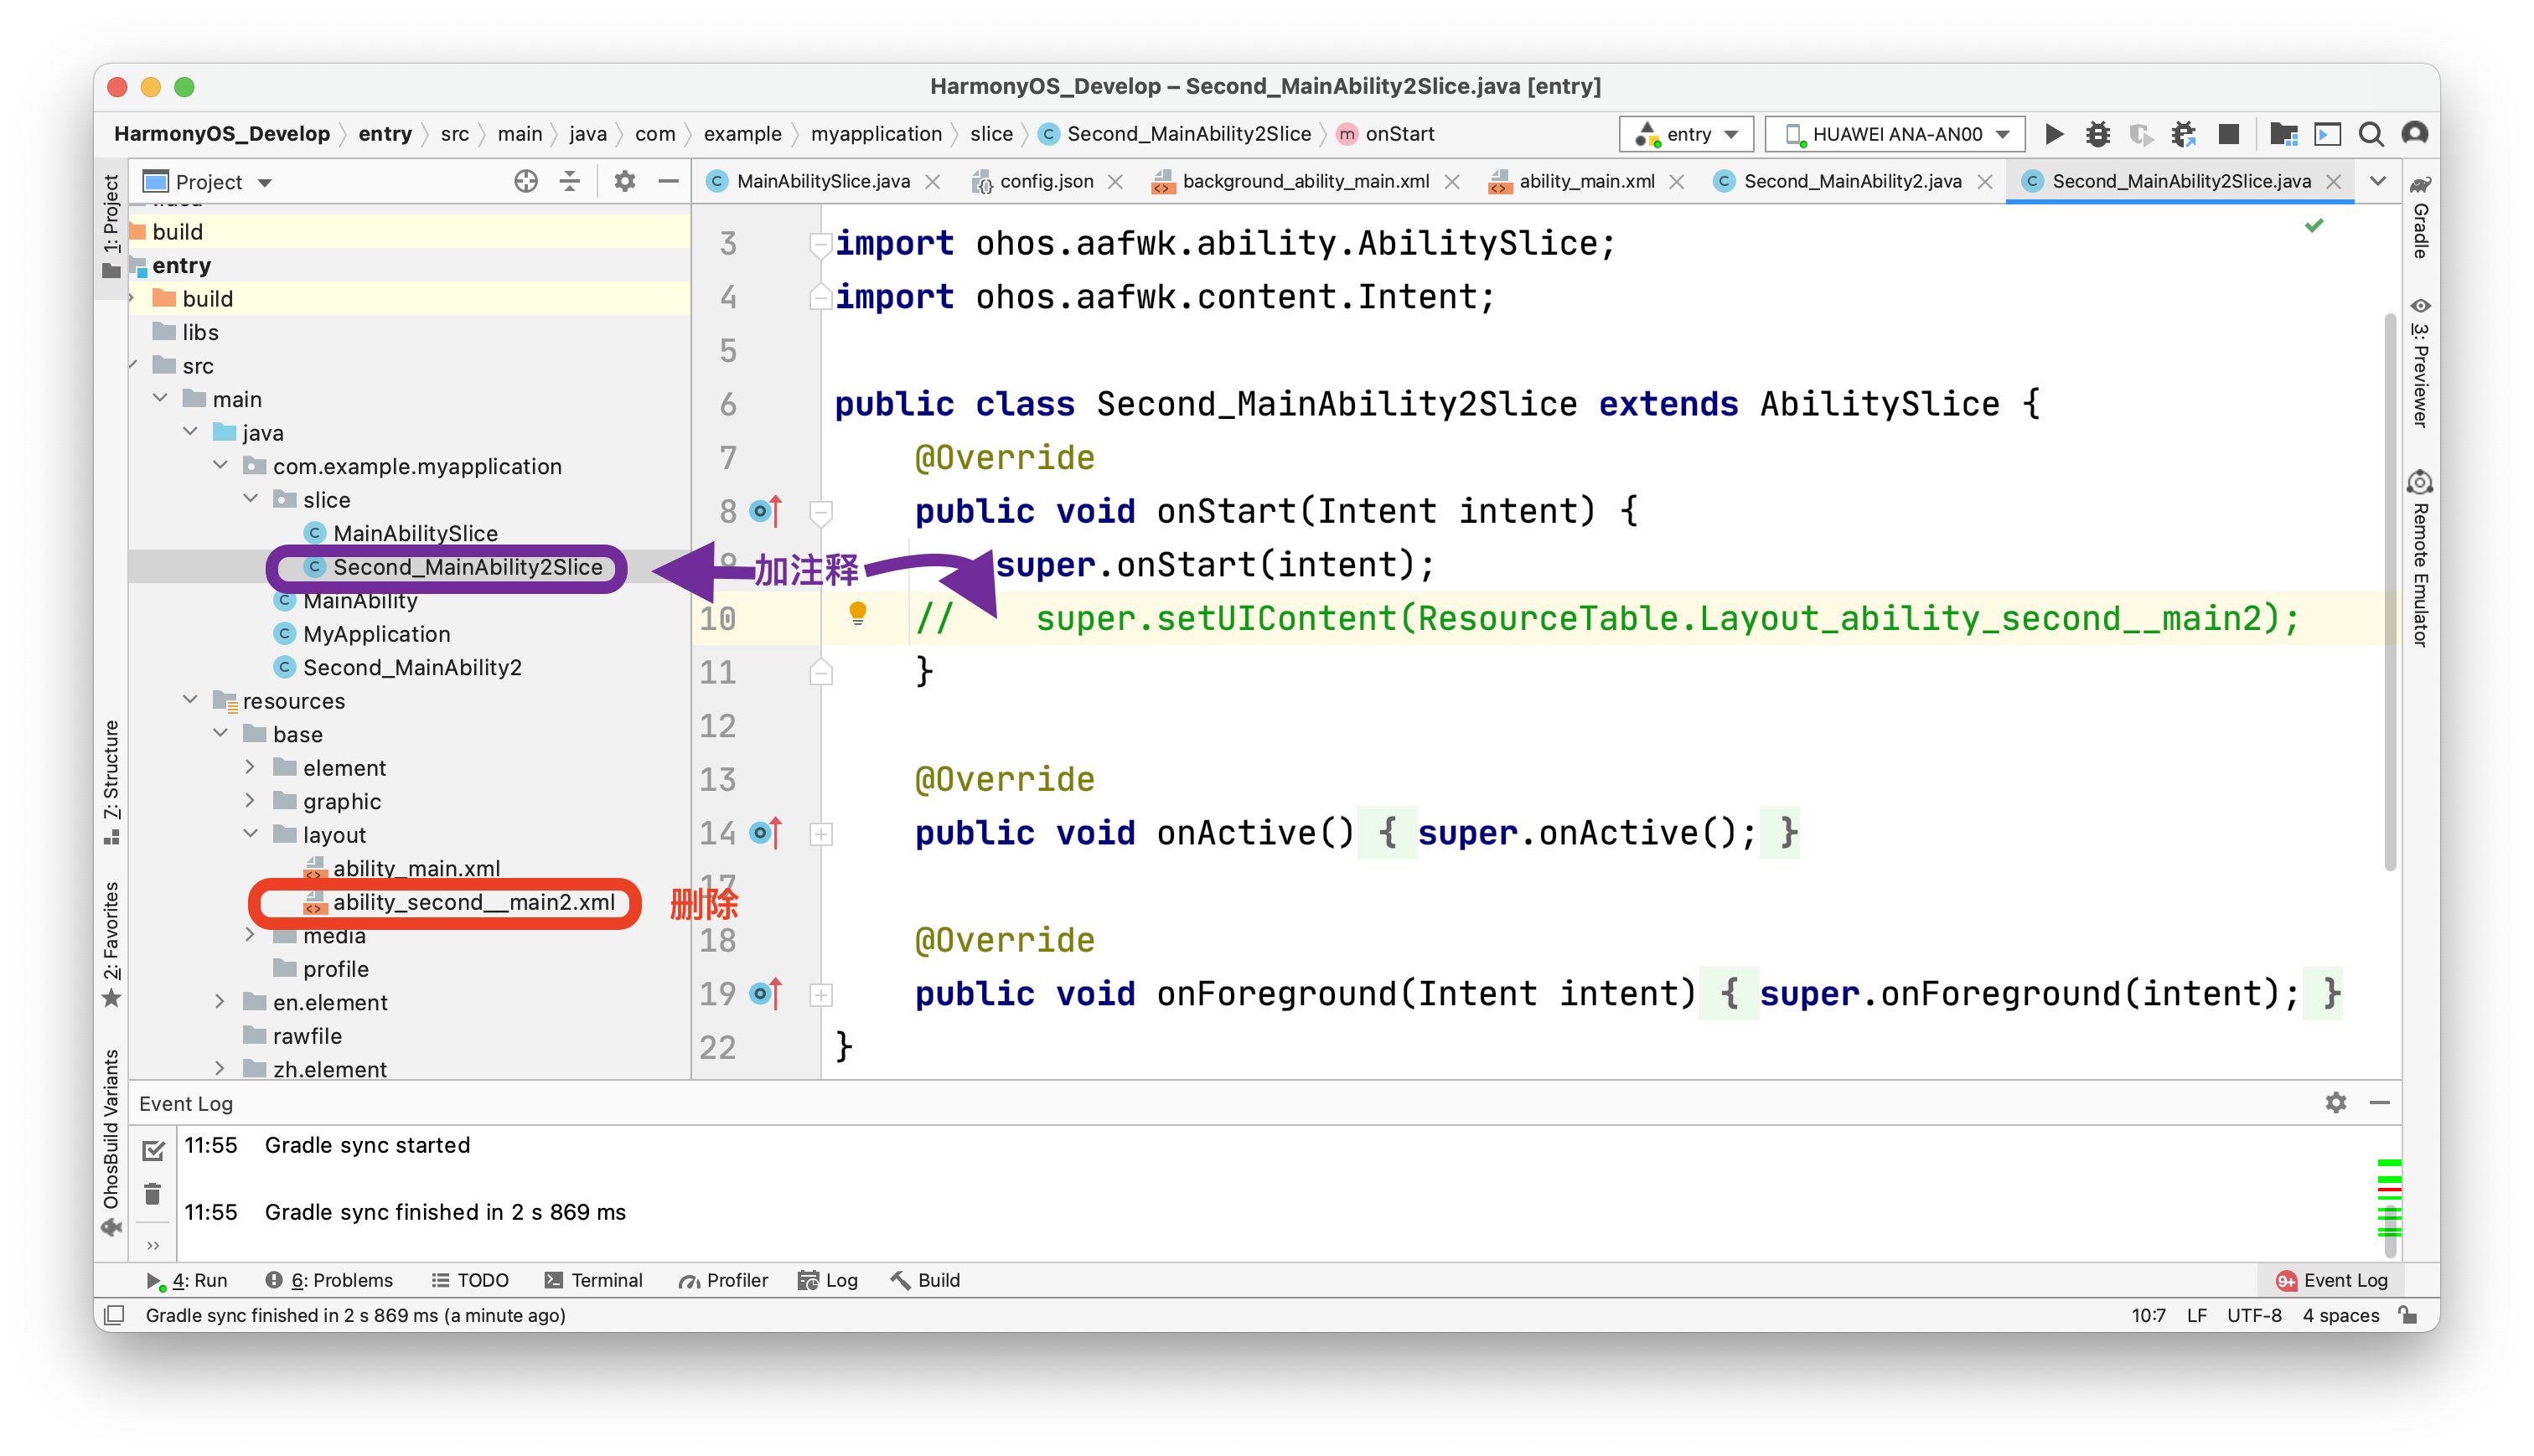
Second_ MainAbility2Slice. The code in Java is as follows:
package com.example.myapplication.slice;

import com.example.myapplication.ResourceTable;
import ohos.aafwk.ability.AbilitySlice;
import ohos.aafwk.content.Intent;
import ohos.agp.components.DirectionalLayout;
import ohos.agp.components.Text;
import ohos.agp.utils.Color;

public class SecondMainAbilitySlice extends AbilitySlice {
    @Override
    public void onStart(Intent intent) {
        super.onStart(intent);
        //super.setUIContent(ResourceTable.Layout_ability_second_main);

        //1. Create layout objects
        DirectionalLayout dl = new DirectionalLayout(this);

        //2. Create a text object
        Text t = new Text(this);
        //Set content
        t.setText("Second page");
        //Set text size
        t.setTextSize(55);
        //Set text color
        t.setTextColor(Color.BLUE);

        //3. Add the text object to the layout
        dl.addComponent(t);

        //4. Add layout to sub interface
        super.setUIContent(dl);
    }
    @Override
    public void onActive() { super.onActive(); }

    @Override
    public void onForeground(Intent intent) { super.onForeground(intent); }
}
MainAbilitySlice. The code in Java is as follows:
package com.example.myapplication.slice;

import com.example.myapplication.ResourceTable;
import ohos.aafwk.ability.AbilitySlice;
import ohos.aafwk.content.Intent;
import ohos.aafwk.content.Operation;
import ohos.agp.components.Button;
import ohos.agp.components.Component;

public class MainAbilitySlice extends AbilitySlice implements Component.ClickedListener {
    Button btu;
    @Override
    public void onStart(Intent intent) {
        super.onStart(intent);
        super.setUIContent(ResourceTable.Layout_ability_main);

        //1. Find the button
        btu = (Button) findComponentById(ResourceTable.Id_but1);

        //2. Add a click event to the button
        //If no click event is added, there is no response after clicking the button with the mouse
        //If a click event is added, the corresponding code can be executed after clicking the button with the mouse
        btu.setClickedListener(this);
        //Understanding method:
        //Added click event to btu this button
        //After clicking btu this button, you can execute the onClick method in the button
    }

    @Override
    public void onActive() {
        super.onActive();
    }

    @Override
    public void onForeground(Intent intent) {
        super.onForeground(intent);
    }

    @Override
    public void onClick(Component component) {
        //After clicking the button, execute the code to be executed
        //Jump to the second page
        if (component == btu)
        {
            //Only after clicking btu this button can you jump

            //Jump to that page (intention)
            Intent i =new Intent();
            //Contains the page information to jump to
            Operation operation =  new Intent.OperationBuilder()
                    .withDeviceId("") //On which device do you want to jump to? If you pass a string without content, it means to jump to the local machine
                    .withBundleName("com.example.myapplication") //To which application to jump to, the package name can be written in parentheses
                    .withAbilityName("com.example.myapplication.SecondMainAbility")//Page to jump to
                    .build();//Indicates that the above three information are packaged
            //Set the packaged operation object into the intent
            i.setOperation(operation);
            //Jump page
            startAbility(i);
        }
    }
}