In the last post, we integrated Amaze ui and adjusted a header and footer file at the bottom. It's easy to do. Just follow the steps, and there's no problem.Today, let's readjust the list page and the content page to make our background management system more elegant.
Make left menu
A background management system, roughly divided into north, south, East and west, while the West (that is, left) is generally our menu.Figure:
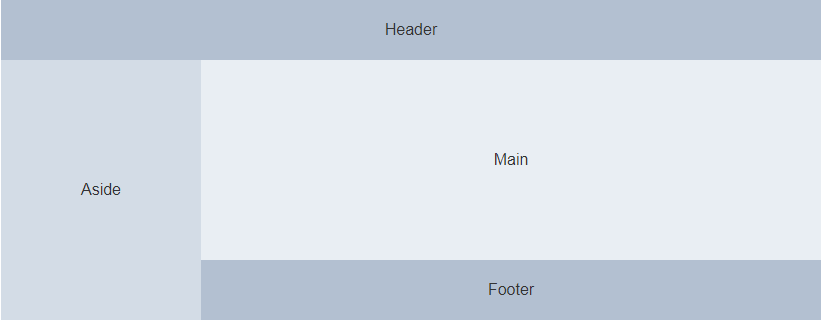
Let's finish our project today with the style shown above. First, let's make a menu on the left and create a new menu.vue under/src/components/The code is as follows:
<template>
<div class="admin-sidebar am-offcanvas" id="admin-offcanvas">
  <div class="am-offcanvas-bar admin-offcanvas-bar">
    <ul class="am-list admin-sidebar-list">
      <li class="admin-parent" v-for="menu in menus"><router-link :to="menu.href">{{menu.name}}</router-link>
        <ul class="am-list am-collapse admin-sidebar-sub am-in" id="collapse-nav">
           <li v-for="child in menu.childs" v-if="menu.childs"><router-link :to="child.href"><span class="am-icon-check"></span> {{child.name}}<span class="am-icon-star am-fr am-margin-right admin-icon-yellow"></span></router-link></li>
         </ul>
      </li>
    </ul>
  </div>
</div>
</template>
<script>
export default{
	name : "Menu",
	data(){
		return {
			menus:[{
				name:"home page",
				href:"/",
				childs:[]
			},{
				name:"Write letters",
				href:"/",
				childs:[]
			},{
				name:"Inbox",
				href:"/Inbox",
				childs:[]
			},{
				name:"Outbox",
				href:"/Outbox",
				childs:[]
			},{
				name:"Dustbin",
				href:"/",
				childs:[]
			},{
				name:"drafts",
				href:"/",
				childs:[]
			},{
				name:"Other Folders",
				href:"/",
				childs:[{
					name:"Sent Mail",
					href:"/"
				},{
					name:"Deleted message",
					href:"/"
				}]
			}]
		}
	}
}
</script>
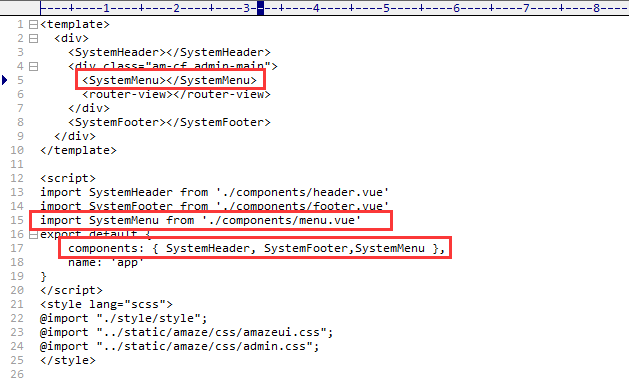
Now our menus are ready, just apply them to our project.Open/src/App.vue and modify the following location:
Adjust List Page
The open/src/pages/Index.vue code is as follows:
<template>
<div class="admin-content">
  <div class="admin-content-body">
    <div class="am-cf am-padding am-padding-bottom-0">
      <div class="am-fl am-cf"><strong class="am-text-primary am-text-lg">Inbox</strong> / <small>Inbox</small></div>
    </div>
    <hr>
    <div class="am-g">
      <div class="am-u-sm-12 am-u-md-6">
        <div class="am-btn-toolbar">
          <div class="am-btn-group am-btn-group-xs">
            <button type="button" class="am-btn am-btn-default" @click="toAdd"><span class="am-icon-plus"></span> Newly added</button>
            <button type="button" class="am-btn am-btn-default" @click="save"><span class="am-icon-save"></span> Preservation</button>
            <button type="button" class="am-btn am-btn-default" @click="verify"><span class="am-icon-archive"></span> To examine</button>
            <button type="button" class="am-btn am-btn-default" @click="remove"><span class="am-icon-trash-o"></span> delete</button>
          </div>
        </div>
      </div>
      <div class="am-u-sm-12 am-u-md-3">
        <div class="am-input-group am-input-group-sm">
          <input type="text" class="am-form-field">
        <span class="am-input-group-btn">
          <button class="am-btn am-btn-default" type="button">search</button>
        </span>
        </div>
      </div>
    </div>
    <!-- admin-content-body end -->
    <div class="am-g" style="margin-top:5px;">
      <div class="am-u-sm-12">
        <form class="am-form">
          <table class="am-table am-table-striped am-table-hover table-main am-table-bordered am-table-radius" >
            <thead>
            <tr>
              <th class="table-check"><input type="checkbox" /></th><th class="table-id">ID</th><th class="table-title">Title</th><th class="table-type">category</th><th class="table-author am-hide-sm-only">author</th><th class="table-date am-hide-sm-only">modification date</th><th class="table-set">operation</th>
            </tr>
            </thead>
            <tbody>
            <tr v-for="(item,index) in tableList">
              <td><input type="checkbox" /></td>
              <td>{{index + 1}}</td>
              <td><router-link :to="'/Content/' + item.id">{{item.title}}</router-link></td>
              <td>{{item.tab}}</td>
              <td class="am-hide-sm-only">{{item.author.loginname}}</td>
              <td class="am-hide-sm-only">{{item.create_at}}</td>
              <td>
                <div class="am-btn-toolbar">
                  <div class="am-btn-group am-btn-group-xs">
                    <button class="am-btn am-btn-default am-btn-xs am-text-secondary"><span class="am-icon-pencil-square-o"></span> edit</button>
                    <button class="am-btn am-btn-default am-btn-xs am-hide-sm-only"><span class="am-icon-copy"></span> copy</button>
                    <button class="am-btn am-btn-default am-btn-xs am-text-danger am-hide-sm-only"><span class="am-icon-trash-o"></span> delete</button>
                  </div>
                </div>
              </td>
            </tr>
            </tbody>
          </table>
          <div class="am-cf">
            //A total of 15 records
            <div class="am-fr">
              <ul class="am-pagination">
                <li class="am-disabled"><a href="#">«</a></li>
                <li class="am-active"><a href="#">1</a></li>
                <li><a href="#">2</a></li>
                <li><a href="#">3</a></li>
                <li><a href="#">4</a></li>
                <li><a href="#">5</a></li>
                <li><a href="#">»</a></li>
              </ul>
            </div>
          </div>
        </form>
      </div>
    </div>
    <!-- am-g end -->
  </div>
</div>
</template>
<script>
  export default{
    name : "Inbox",
    data () {
        return {
          tableList: []
        }
      },
      created () {
        this.initialization()
      },
      mounted () {
        $(".admin-content").css("height",(document.documentElement.clientHeight-36-50)+"px");
      },
      methods: {
        initialization () {
          this.$api.get('topics', {page:1,limit:10}, r => {
			console.log(r);
            if(r.success){
              this.tableList = r.data;
            }
          })
        },
		toAdd(){
			alert("Add to");
		},
		save(){
			alert("Preservation");
		},
		verify(){
			alert("To examine");
		},
		remove(){
			alert("delete");
		}
      }
  }
</script>
Note: Above we initiated a query for the data on the first page, and stipulated that 10 items per page should be displayed. We did not develop the paging function.Because the api of cnodejs.org did not return paging information to us, in the future if it is actually developed, the interface will normally return paging information, so we can render it more specifically then.
Adjust Content Page
Open/src/pages/Content.vue with the following code:
<template>
<div class="admin-content">
    <h2 v-text="article.title"></h2>
    <p>Author:{{article.author.loginname}}  Published in:{{article.create_at}}</p>
    <hr>
    <article v-html="article.content"></article>
    <h3>Netizen reply:</h3>
    <ul>
      <li v-for="i in article.replies">
        <p>Commentators:{{i.author.loginname}}  Comment on:{{i.create_at}}</p>
        <article v-html="i.content"></article>
      </li>
    </ul>
  </div>
</template>
<script>
  export default {
    name : "Content",
    data () {
      return {
        id: this.$route.params.id,
        article: {
          author: {
			loginname:""
		  }
        }
      }
    },
    created () {
      this.getData();
    },
    mounted () {
      $(".admin-content").css("height",(document.documentElement.clientHeight-36-50)+"px");
    },
    methods: {
      getData () {
        this.$api.get('topic/' + this.id, null, r => {
          console.log(r.data);
          this.article = r.data;
        })
      }
    }
  }
</script>
So far we've finished integrating the list page with the content page, showing that there are more mounted methods in the adjusted script, which is a hook function of vuejs. What I understand means is that elements have been created and data has been rendered.It's OK to set the height of admin-content, but I'm not sure if I have a problem with my writing or if it's the effect of the integration of Amaze ui and vuejs, which can only be solved at this time.
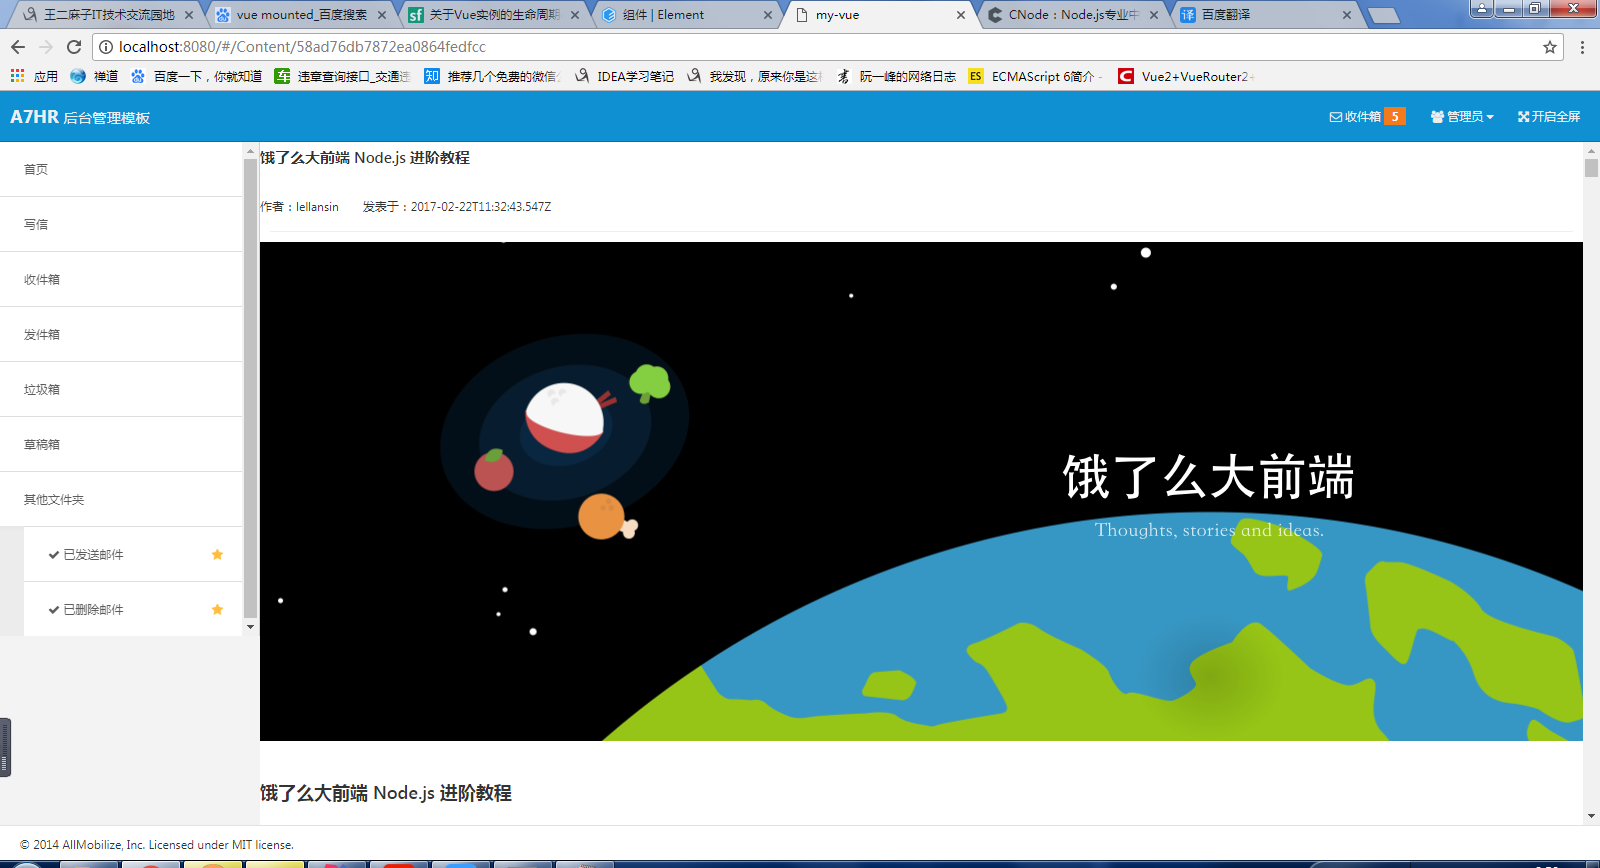
Final results
List page:

Content page: