1, Create template machine
1.1. Modify the IP settings in the configuration file
vim /etc/sysconfig/network-scripts/ifcfg-ens33
#Modification:
ONBOOT=yes
BOOTPROTO=static
IPADDR=192.168.150.211
NETMASK=255.255.255.0
GATEWAY=192.168.150.2
DNS1=192.168.150.2
1.2 modify the host name to hadoop01
vim /etc/hostname

1.3 restart network service
Enter "service network restart" to support the completion of IP settings. Next, you can use xshell to connect the node, which is more convenient to operate.
1.4. Connecting xshell
(1) New session: enter the name and the ip address of Hadoop 01

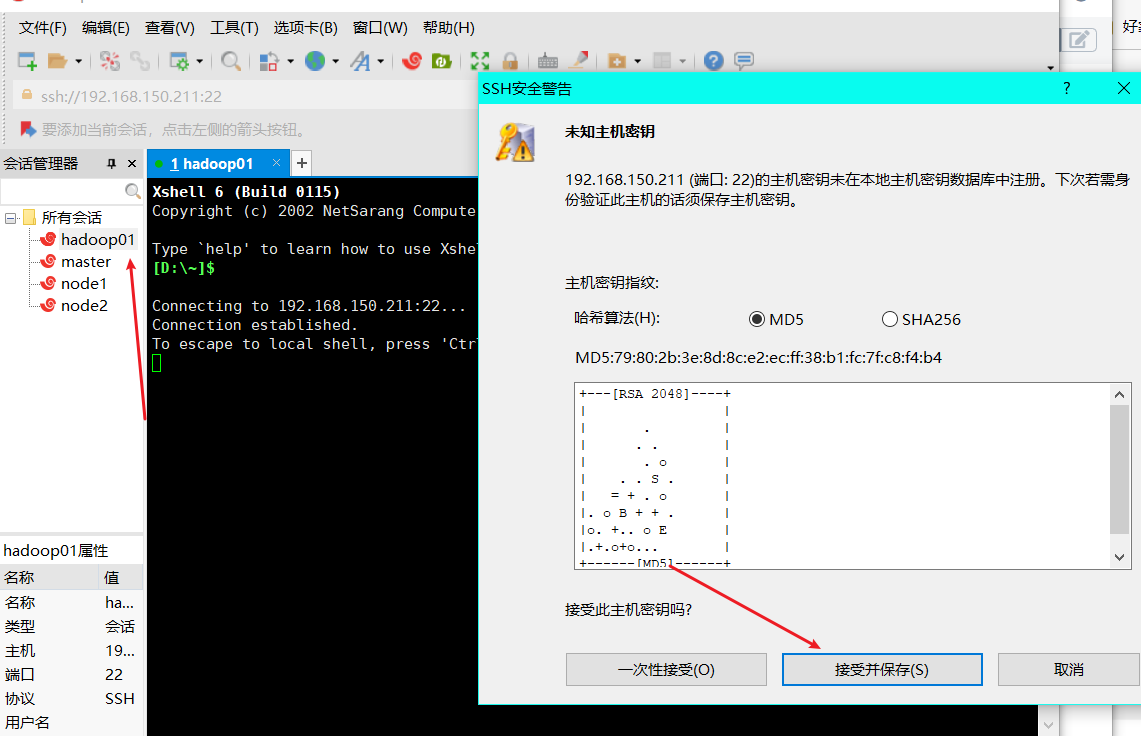
(2) Click OK, then double-click Hadoop 01 on the left, and click receive and save
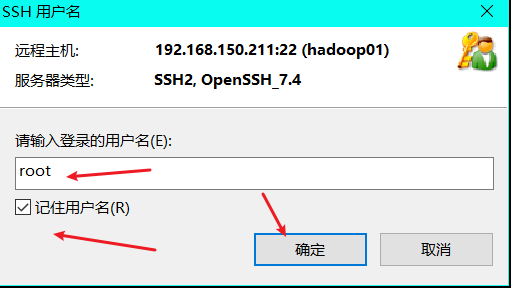
(3) Enter the user name and click to remember the user name
Note: I use the root user here, so I don't need to switch to root for configuration later
(4) Double click Hadoop 01 again, enter the password, click remember password, and then OK

(5) . the connection is successful, and subsequent configuration operations are carried out in xshell

1.5. Install relevant software
1.5. 1. ping Baidu to check whether the network is unblocked
ping www.baidu.com

Press Ctrl+C to end ping
1.5. 2. Install ssh connection software
yum -y install ntp openssh-clients openssh-server vim

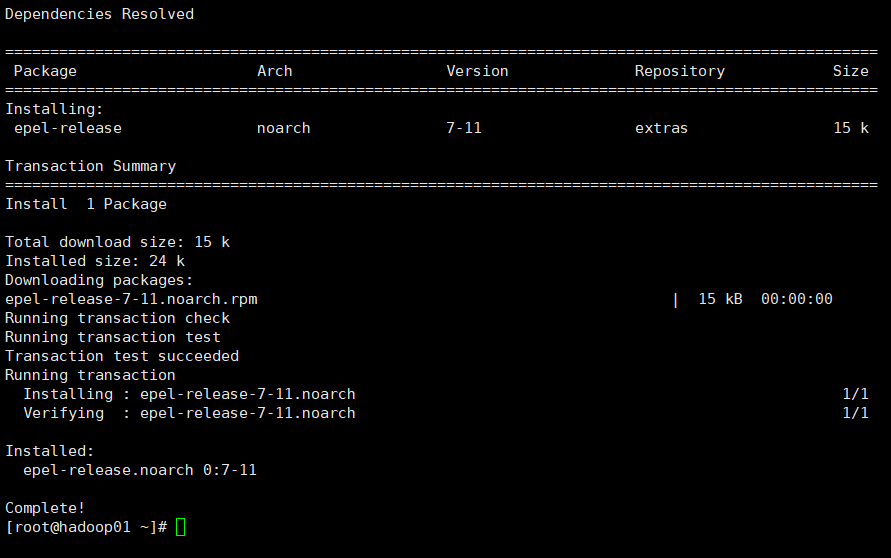
1.5. 3. Install EPEL release
Note: Extra Packages for Enterprise Linux is an additional software package for the "red hat" operating system, which is applicable to RHEL, CentOS and Scientific Linux. As a software warehouse, most rpm packages cannot be found in the official repository)
yum install -y epel-release
1.5. 4. Each node downloads rsync
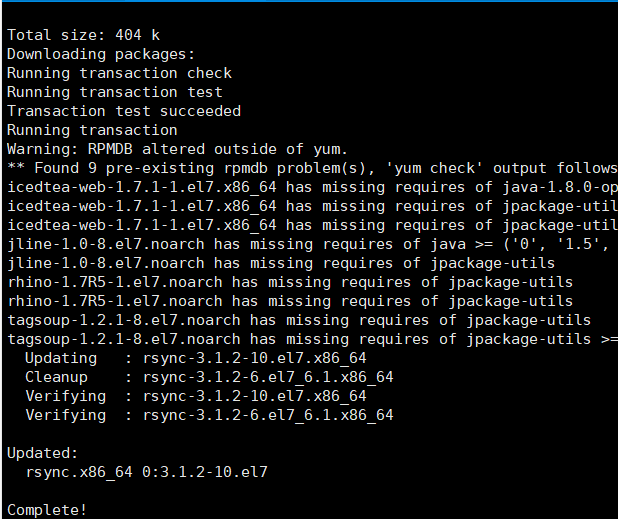
yum -y install rsync
1.5. 5. Note: if the minimum system version is installed on Linux, the following tools need to be installed; If you are installing Linux Desktop Standard Edition, you do not need to perform the following operations
Net tool: toolkit collection, including ifconfig and other commands
yum install -y net-tools
vim: Editor
yum install -y vim
1.6. Turn off the firewall and start the firewall automatically
systemctl stop firewalld
systemctl disable firewalld.service

Note: during enterprise development, the firewall of a single server is usually turned off. The company will set up a very secure firewall
1.7. Configure pcz user to have root permission, which is convenient for sudo to execute the command with root permission later
vim /etc/sudoers
Modify the / etc/sudoers file and add a line under the% wheel line as follows:
pcz ALL=(ALL) NOPASSWD:ALL

Note: the pcz line should not be placed directly under the root line, because all users belong to the wheel group. You first configured pcz to have the password free function, but when the program runs to the% wheel line, the function is overwritten and the password is required. So pcz should be placed under the line% wheel.
1.8. Create a folder in the / opt directory and modify the owner and group
mkdir /opt/module
mkdir /opt/software

1.9 the owner and group of the modified module and software folders are pcz users
(1) . create module and software folders in the / opt directory
mkdir /opt/module mkdir /opt/software

(2) The owner and group of the modified module and software folders are pcz users
chown pcz:pcz /opt/module
chown pcz:pcz /opt/software

(3) View the owner and group of the module and software folders
ll /opt

1.10. Uninstall the JDK of the virtual machine
Note: if your virtual machine is minimized, you do not need to perform this step.
rpm -qa | grep -i java | xargs -n1 rpm -e --nodeps
rpm -qa: query all RPM packages installed
grep -i: ignore case
xargs -n1: it means that only one parameter is passed at a time
rpm -e – nodeps: force software uninstallation

1.11 restart the virtual machine and the template machine is completed
reboot

2, Clone virtual machine
1. Using the template machine Hadoop 01, clone three virtual machines: Hadoop 02, Hadoop 03, Hadoop 04
Note: when cloning, close Hadoop 01 first
(1)
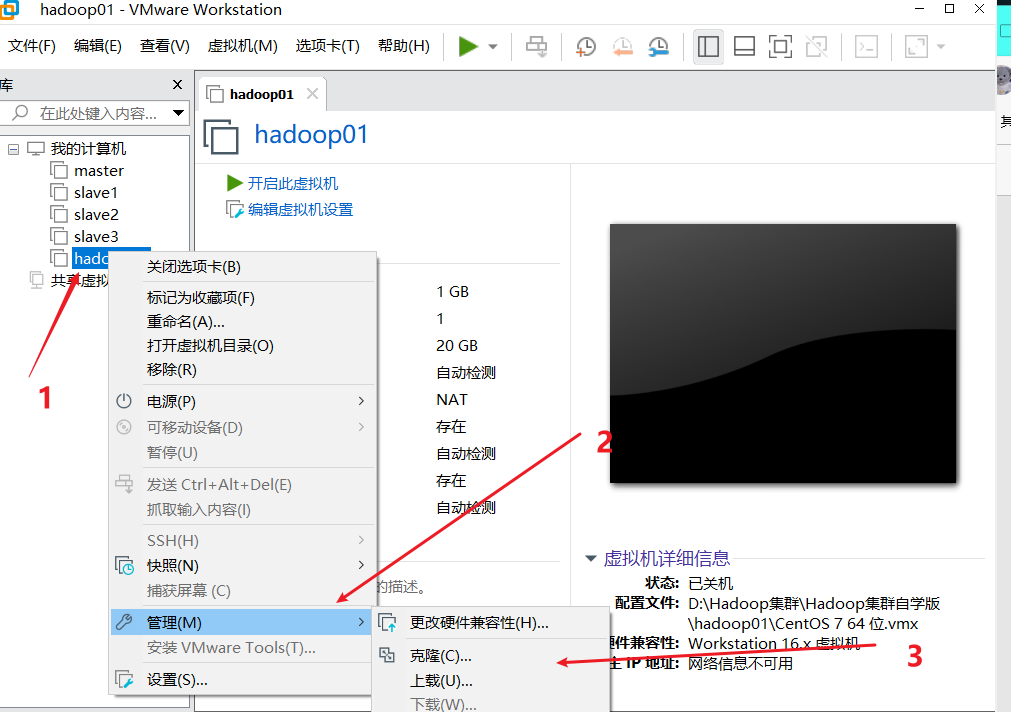
(2)

(3)

(4)

(5)
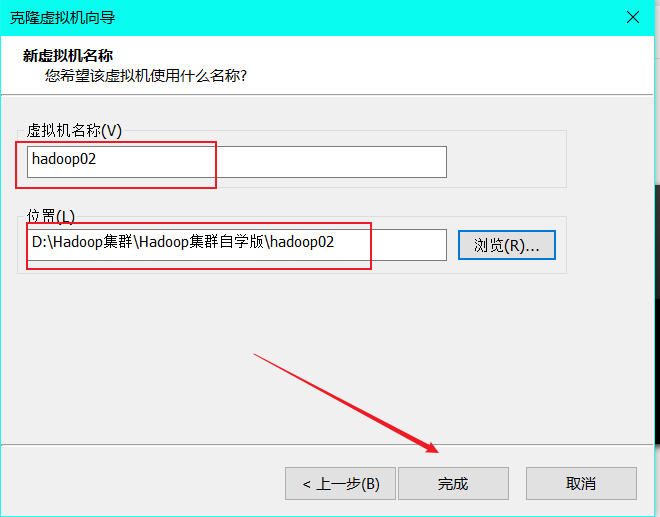
(6)
Wait until it is closed
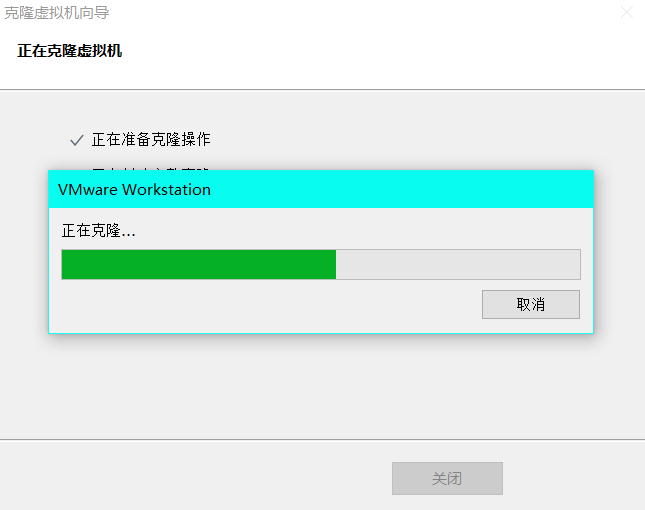
(7) Follow the above steps to complete Hadoop 03 and Hadoop 04 cloning
2. Modify the ip and host name of each child node. Here, take Hadoop 02 as an example
2.1. Modify ip
`[root@hadoop01 pcz]# vim /etc/sysconfig/netwo
rk-scripts/ifcfg-ens33`
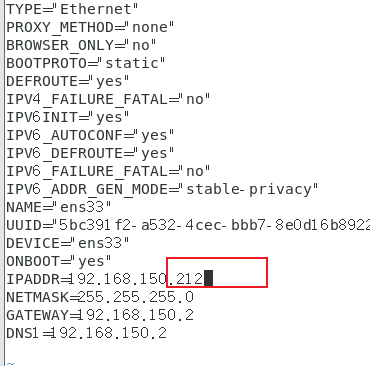
2.2. Modify host name
[root@hadoop01 pcz]# vim /etc/hostname

2.3. Configure the Linux clone host name mapping hosts file and open / etc/hosts
vim /etc/hosts
192.168.150.211 hadoop01
192.168.150.212 hadoop02
192.168.150.213 hadoop03
192.168.150.214 hadoop04
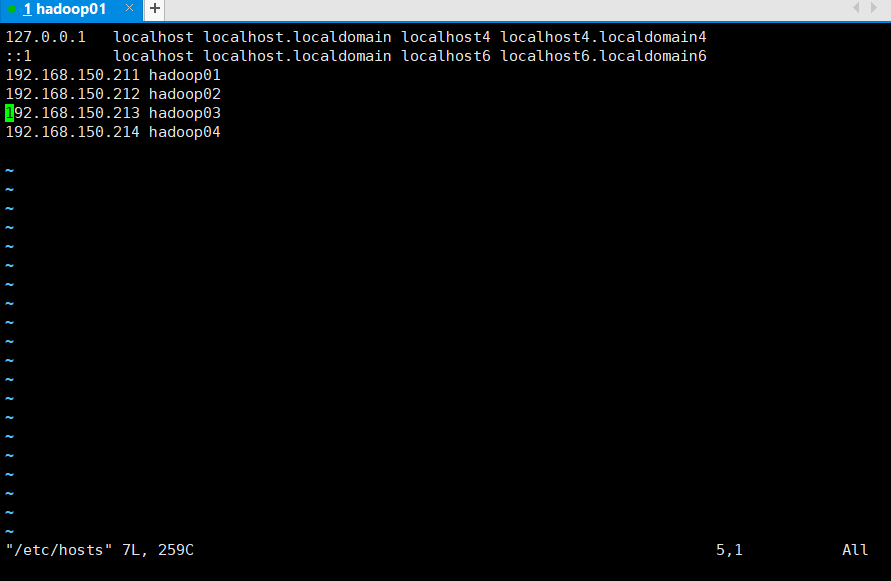
2.4 restart the virtual machine
2.5 modify Hadoop 03 and Hadoop 04 in the same way
2.6. Modify the host mapping file (hosts file) of windows
The operating system is windows 10. You can copy it, modify it, save it, and then overwrite it
Enter the C:\Windows\System32\drivers\etc path, open the hosts file as an administrator and add
192.168.150.211 hadoop01
192.168.150.212 hadoop02
192.168.150.213 hadoop03
192.168.150.214 hadoop04
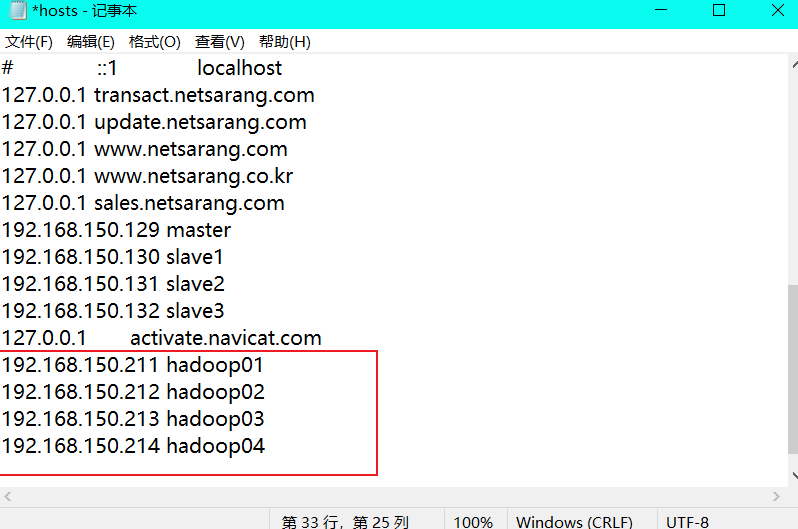
Note: save as follows:

3. Create a distribution script on the host, configure SSH password less login, and time synchronization
3.1. Create distribution script
(1) . enter the / bin directory where the configuration script can be run globally
cd /bin
(2) , create script
vim xsync
(3) Enter the script content, save and exit
#!/bin/bash
#1. Number of judgment parameters
if [ $# -lt 1 ]
then
          echo The number of parameters does not match
          exit;
fi
#2. Traverse all machines in the cluster
for host in hadoop01 hadoop02 hadoop03
do
         echo ========================$host========================
         #3. Traverse all directories and send them one by one
         for file in $@
         do
           #4. Judge whether the file exists
           if [ -e $file ]
             then
              #5. Get parent directory
              pdir=$(cd -P $(dirname $file); pwd)
              #6. Get the name of the current file fname=$(basename $file)
              ssh $host "mkdir -p $pdir"
              rsync -av $pdir/$fname $host:$pdir
                 else
                      echo $file non-existent!
                 fi
        done
done
(4) Modify the script xsync with execution permission
chmod +x xsync
3.2. Create ssh password free login
(1) . use SSH keygen to generate a public key and private key pair. Enter the command "SSH keygen - t RSA", and then press enter three times. After execution, the following output appears.
ssh-keygen -t rsa
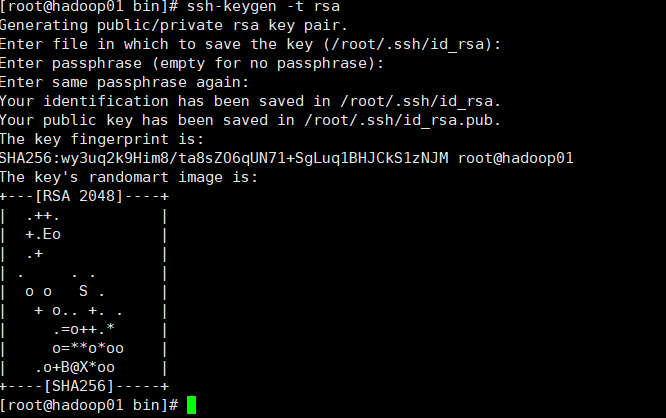
Generate private key id_rsa and public key id_rsa.pub two files. SSH keygen is used to generate and manage the key of RSA type. The parameter "- t" is used to specify that the type of SSH key to be created is RSA.
(2) . copy the public key to the remote machine with SSH copy ID
ssh-copy-id -i /root/.ssh/id_rsa.pub hadoop01//Enter yes,123456 (password of root user)
ssh-copy-id -i /root/.ssh/id_rsa.pub hadoop02
ssh-copy-id -i /root/.ssh/id_rsa.pub hadoop03
(3) Verify whether password free login is set
Input in sequence
ssh hadoop02
exit;
ssh hadoop03
exit;
(4) Explanation of file functions in the. ssh folder (~ /. ssh)
| name | meaning |
|---|---|
| known_hosts | Record the public key of the computer accessed by ssh |
| id_rsa | Generated private key |
| id_rsa.pub | Generated public key |
| authorized_keys | Store the authorized secret free login server public key |
3.3. Configure time synchronization service
(1) Install NTP service. At each node:
yum -y install ntp
(2) Modify settings
Assuming that the master node is the NTP service master node, its configuration is as follows. Open / etc/ntp.conf with the command "vim /etc/ntp.conf" Conf file, comment out the line beginning with server, and add:
restrict 192.168.150.2 mask 255.255.255.0 nomodify notrap
server 127.127.1.0
fudge 127.127.1.0 stratum 10
(3) Configure NTP in child nodes
Also modify / etc / NTP Conf file, comment out the line beginning with server, and add:
server hadoop01
(4) Turn off firewall
Execute the command "systemctl stop firewalld.service & systemctl disable firewalld. Service" to permanently close the firewall, and both the master node and the slave node should be closed.
(5) Start NTP service
① On the Hadoop 01 node, execute the command "service ntpd start & chkconfig ntpd on"
② Execute the command "ntpdate hadoop01" on the child node to synchronize the time
③ Execute "service ntpd start & chkconfig ntpd on" on the child node to start and
Permanently start the NTP service.
4. jdk is installed on each node and hadoop is installed on the master node
Here, take Hadoop 01 as an example
4.1 installation jdk
(1) Put the compressed packages of jdk and hadoop in the software directory
cd /opt/software
sz
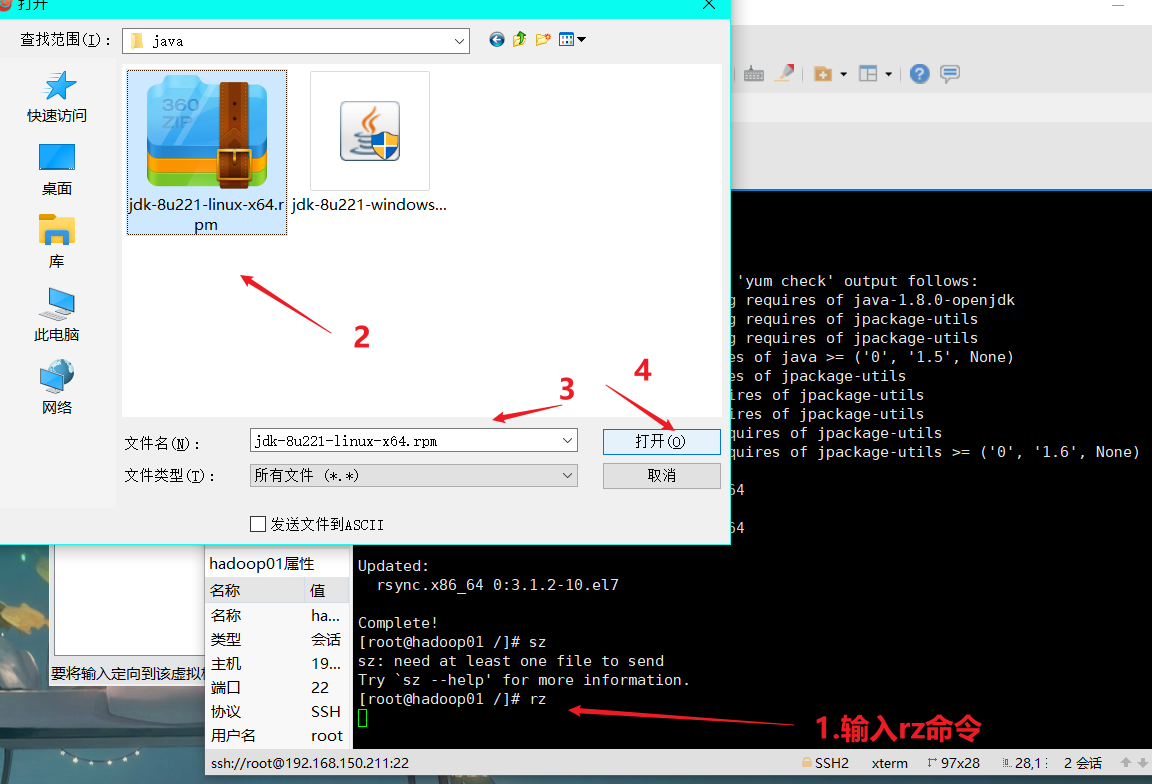
Wait for the upload to complete

Check whether the upload is successful

(2) Unzip the JDK to the / opt/module directory
rpm -i --badreloc --relocate /usr/java=/opt/module jdk-8u221-linux-x64.rpm

Verify that the jdk was successfully installed:
java -version

(3) Configure JDK environment variables
Create a new / etc / profile d/my_ env. SH file
vim /etc/profile.d/my_env.sh
Add the following
#JAVA_HOME
export JAVA_HOME=/opt/module/jdk1.8.0_221-amd64
export PATH=$PATH:$JAVA_HOME/bin
4.2. Installing hadoop
(1) Unzip the installation file under / opt/module
tar -zxvf hadoop-3.1.4.tar.gz -C /opt/module/
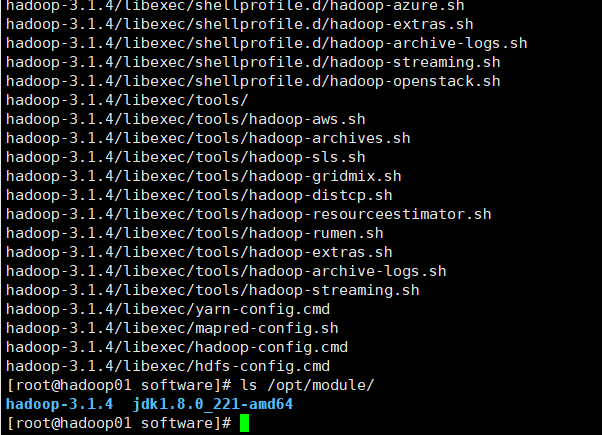
(2) Add Hadoop to environment variable
vim /etc/profile.d/my_env.sh
add to
#HADOOP_HOME
export HADOOP_HOME=/opt/module/hadoop-3.1.4
export PATH=$PATH:$HADOOP_HOME/bin
export PATH=$PATH:$HADOOP_HOME/sbin
(3) Test whether Hadoop is installed successfully
hadoop version

4.3 Hadoop directory structure
Location: / opt / module / hadoop-3.1 four
a) To view the hadoop Directory:
[root@hadoop01 hadoop-3.1.4]# ll
total 176
drwxr-xr-x. 2 1001 1002    183 Jul 21  2020 bin
drwxr-xr-x. 3 1001 1002     20 Jul 21  2020 etc
drwxr-xr-x. 2 1001 1002    106 Jul 21  2020 include
drwxr-xr-x. 3 1001 1002     20 Jul 21  2020 lib
drwxr-xr-x. 4 1001 1002    288 Jul 21  2020 libexec
-rw-rw-r--. 1 1001 1002 147145 Jul 20  2020 LICENSE.txt
-rw-rw-r--. 1 1001 1002  21867 Jul 20  2020 NOTICE.txt
-rw-rw-r--. 1 1001 1002   1366 Jul 20  2020 README.txt
drwxr-xr-x. 3 1001 1002   4096 Jul 21  2020 sbin
drwxr-xr-x. 4 1001 1002     31 Jul 21  2020 share
b) Important directory
(1) bin directory: stores scripts for operating Hadoop related services (hdfs, yarn, mapred)
(2) etc Directory: Hadoop configuration file directory, which stores Hadoop configuration files
(3) lib Directory: local library for storing Hadoop (function of compressing and decompressing data)
(4) sbin Directory: stores scripts for starting or stopping Hadoop related services
(5) share Directory: stores the dependent jar packages, documents, and official cases of Hadoop
3, Cluster configuration
3.1 cluster deployment planning
be careful:
Do not install NameNode and SecondaryNameNode on the same server
The resource manager also consumes a lot of memory and should not be configured on the same machine as NameNode and SecondaryNameNode.
| hadoop01 | hadoop02 | hadoop03 | |
|---|---|---|---|
| HDFS | NameNode DataNode | DataNode | SecondaryNameNode DataNode |
| YARN | NodeManager | ResourceManager NodeManager | NodeManager |
3.2. Description of configuration file
Hadoop configuration files are divided into two types: default configuration files and custom configuration files. Only users want to modify a default configuration file
When configuring values, you need to modify the custom configuration file and change the corresponding attribute values.
(1) Default profile:
Location: / opt / module / hadoop-3.1 4/share/hadoop
| Default file to get | The file is stored in the jar package of Hadoop |
|---|---|
| [core-default.xml] | hadoop-common-3.1.4.jar/core-default.xml |
| [hdfs-default.xml] | hadoop-hdfs-3.1.4.jar/hdfs-default.xml |
| [yarn-default.xml] | hadoop-yarn-common-3.1.4.jar/yarn-default.xml |
| [mapred-default.xml] | hadoop-mapreduce-client-core-3.1.4.jar/mapred-default.xml |
(2) Custom profile:
core-site.xml,hdfs-site.xml,yarn-site.xml,mapred-site.xml four configuration files are stored in $Hadoop_ On the path of home / etc / Hadoop, users can modify the configuration again according to the project requirements.
3.3. Configure cluster
Enter the configuration file directory:
cd $HADOOP_HOME/etc/hadoop or CD / opt / module / hadoop-3.1 4/etc/hadoop
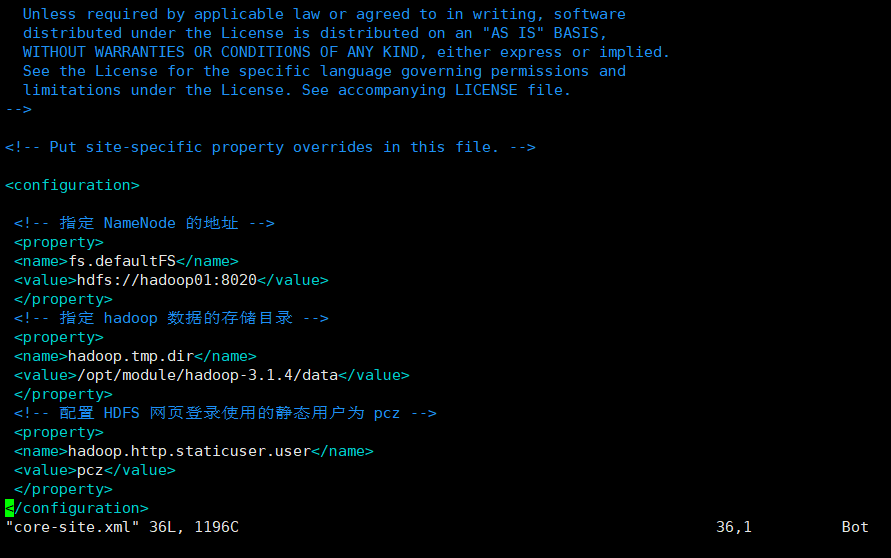
(1) Core profile
Configure core site xml
vim core-site.xml
<?xml version="1.0" encoding="UTF-8"?>
<?xml-stylesheet type="text/xsl" href="configuration.xsl"?>
<configuration>
 <!-- appoint NameNode Address of -->
 <property>
 <name>fs.defaultFS</name>
 <value>hdfs://hadoop01:8020</value>
 </property>
 <!-- appoint hadoop Storage directory of data -->
 <property>
 <name>hadoop.tmp.dir</name>
 <value>/opt/module/hadoop-3.1.4/data</value>
 </property>
 <!-- to configure HDFS The static user used for web page login is pcz -->
 <property>
 <name>hadoop.http.staticuser.user</name>
 <value>pcz</value>
 </property>
</configuration>
(2) HDFS profile
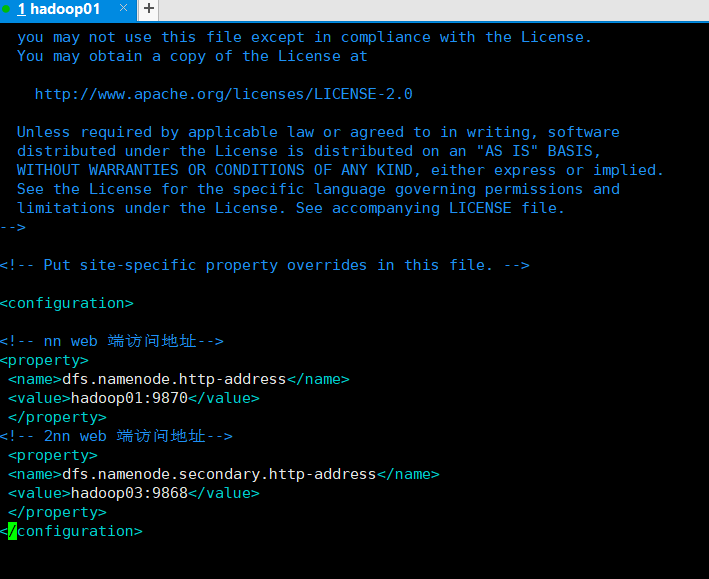
Configure HDFS site xml
[pcz@hadoop01 hadoop]$ vim hdfs-site.xml
<?xml version="1.0" encoding="UTF-8"?>
<?xml-stylesheet type="text/xsl" href="configuration.xsl"?>
<configuration>
<!-- nn web End access address-->
<property>
 <name>dfs.namenode.http-address</name>
 <value>hadoop01:9870</value>
 </property>
<!-- 2nn web End access address-->
 <property>
 <name>dfs.namenode.secondary.http-address</name>
 <value>hadoop03:9868</value>
 </property>
</configuration>
(3) YARN profile
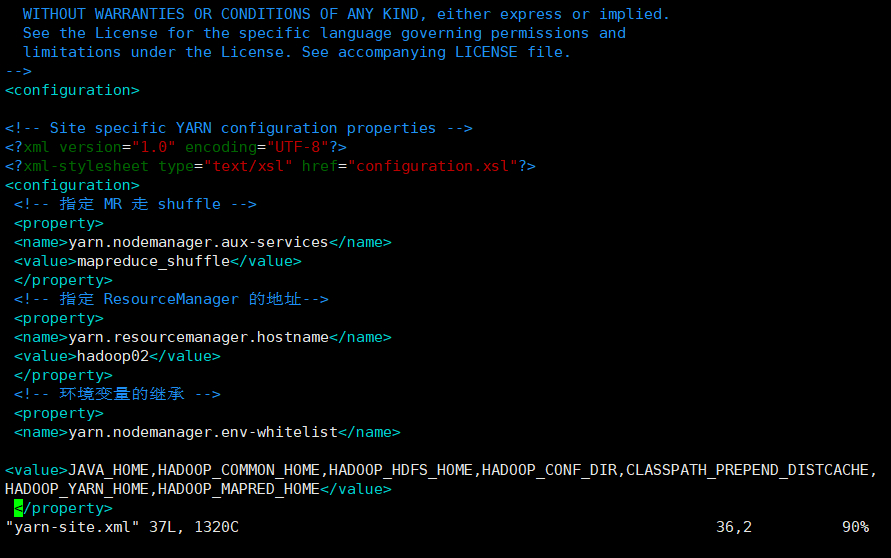
Configure yarn site xml
[pcz@hadoop01 hadoop]$ vim yarn-site.xml
<configuration>

<!-- appoint MR go shuffle -->
<property>
<name>yarn.nodemanager.aux-services</name>
<value>mapreduce_shuffle</value>
</property>

<!-- appoint ResourceManager Address of-->
<property>
<name>yarn.resourcemanager.hostname</name>
<value>hadoop02</value>
</property>

<!-- Inheritance of environment variables -->
<property>
<name>yarn.nodemanager.env-whitelist</name>

<value>JAVA_HOME,HADOOP_COMMON_HOME,HADOOP_HDFS_HOME,HADOOP_CONF_DIR,CLASSPATH_PREPEND_DISTCACHE,HADOOP_YARN_HOME,HADOOP_MAPRED_HOME</value>
</property>
<!-- Enable log aggregation -->
<property>
<name>yarn.log-aggregation-enable</name>
<value>true</value>
</property>
<!-- Set log aggregation server address -->
<property>
<name>yarn.log.server.url</name>
<value>http://hadoop1:19888/jobhistory/logs</value>
</property>
<!-- Set the log retention time to 7 days -->
<property>
<name>yarn.log-aggregation.retain-seconds</name>
<value>604800</value>
</property>
<!--Whether to start a thread to check the amount of virtual memory being used by each task. If the task exceeds the allocated value, it will be killed directly. The default is true-->
<property>
<name>yarn.nodemanager.vmem-check-enabled</name>
<value>false</value>
</property>
</configuration>
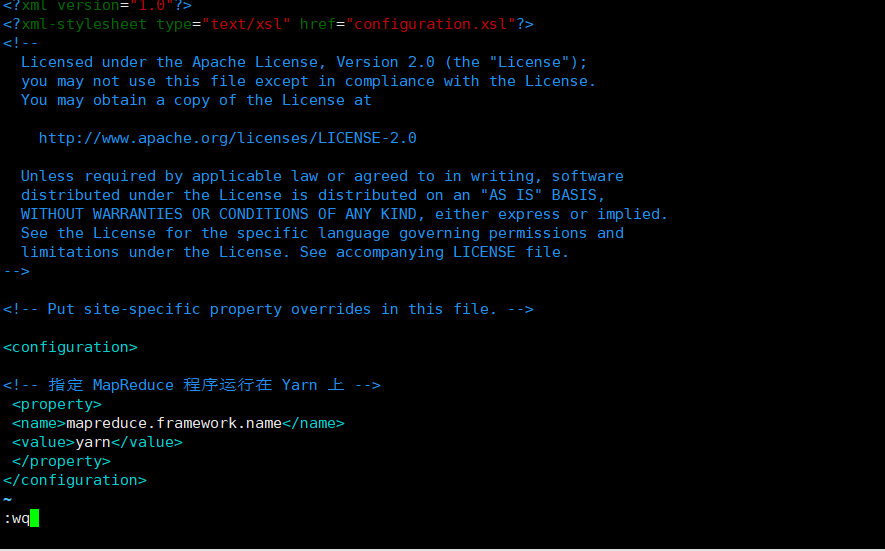
(4) MapReduce profile
Configure mapred site xml
[pcz@hadoop01 hadoop]$ vim mapred-site.xml
<?xml version="1.0" encoding="UTF-8"?>
<?xml-stylesheet type="text/xsl" href="configuration.xsl"?>
<configuration>
<!-- appoint MapReduce The program runs on Yarn upper -->
 <property>
 <name>mapreduce.framework.name</name>
 <value>yarn</value>
 </property>
</configuration>
3.4. Distribute the configured Hadoop configuration file on the cluster
[root@hadoop01 opt]# xsync /opt/module/hadoop-3.1.4/etc/hadoop/
3.5 cluster
1) . configure workers
[root@hadoop01 opt]# vim /opt/module/hadoop-3.1.4/etc/hadoop/workers

Note: no space is allowed at the end of the content added in the file, and no empty line is allowed in the file.
Synchronize all node profiles
[root@hadoop01 opt]# xsync /opt/module/hadoop-3.1.4/etc/

2) . start the cluster
(1) If the cluster is started for the first time, you need to format the NameNode on the Hadoop 01 node (Note: formatting NameNode will generate a new cluster id, resulting in inconsistent cluster IDS between NameNode and datanode, and the cluster cannot find past data. If the cluster reports an error during operation and needs to reformat NameNode, be sure to stop the NameNode and datanode process, delete the data and logs directories of all machines, and then format it (chemical.)
Format NameNode: hdfs namenode -format

(2) Start HDFS
/opt/module/hadoop-3.1.4
sbin/start-dfs.sh
(3) Start YARN on the node (Hadoop 02) where the resource manager is configured
sbin/start-yarn.sh
(4) View the NameNode of HDFS on the Web side
(a) Enter in the browser: http://hadoop01:9870
(b) View data information stored on HDFS
(5) View YARN's ResourceManager on the Web
(a) Enter in the browser: http://hadoop02:8088
(b) View Job information running on YARN
(6) View JobHistory
http://hadoop01:19888/jobhistory
3.6 summary of cluster start / stop modes
1) Each module starts / stops separately (ssh configuration is the premise)
(1) Overall start / stop HDFS
start-dfs.sh/stop-dfs.sh
(2) Overall start / stop of YARN
start-yarn.sh/stop-yarn.sh
2) Each service component starts / stops one by one
(1) Start / stop HDFS components separately
hdfs --daemon start/stop namenode/datanode/secondarynamenode
(2) Start / stop YARN
yarn --daemon start/stop resourcemanager/nodemanager
3.7. Write common hadoop scripts
1) Hadoop cluster startup and shutdown scripts (including HDFS, Yan, and Historyserver): pczhd
#!/bin/bash
if [ $# -lt 1 ]
then
 echo "The input parameters are incorrect!"
 exit ;
fi
case $1 in
"start")
 echo " =================== start-up hadoop colony ==================="
 echo "    ================     start-up hdfs     ================ "
 ssh hadoop01 "/opt/module/hadoop-3.1.4/sbin/start-dfs.sh"
 echo "    ================     start-up yarn     ================ "
 ssh hadoop02 "/opt/module/hadoop-3.1.4/sbin/start-yarn.sh"
 echo "    ================ start-up historyserver ================ "
 ssh hadoop01 "/opt/module/hadoop-3.1.4/bin/mapred --daemon start historyserver"
;;
"stop")
 echo " =================== close hadoop colony ==================="
 echo "    ================ close historyserver ================  "
 ssh hadoop01 "/opt/module/hadoop-3.1.4/bin/mapred --daemon stop historyserver"
 echo "    ================     close yarn     ================ "
 ssh hadoop02 "/opt/module/hadoop-3.1.4/sbin/stop-yarn.sh"
 echo "    ================     close hdfs     ================ "
 ssh hadoop01 "/opt/module/hadoop-3.1.4/sbin/stop-dfs.sh"
;;
*)
 echo "Incorrect input parameters!"
;;
esac