Reference to this document http://dblab.xmu.edu.cn/blog/2775-2/ The process of building a hadoop distributed cluster
Front
- A pseudo-distributed hadoop system has been configured on a virtual machine
- One virtual machine acts as master as namenode, and three virtual machines data1, 2, 3 (all with ubuntu system installed) acts as datanode
network configuration
-
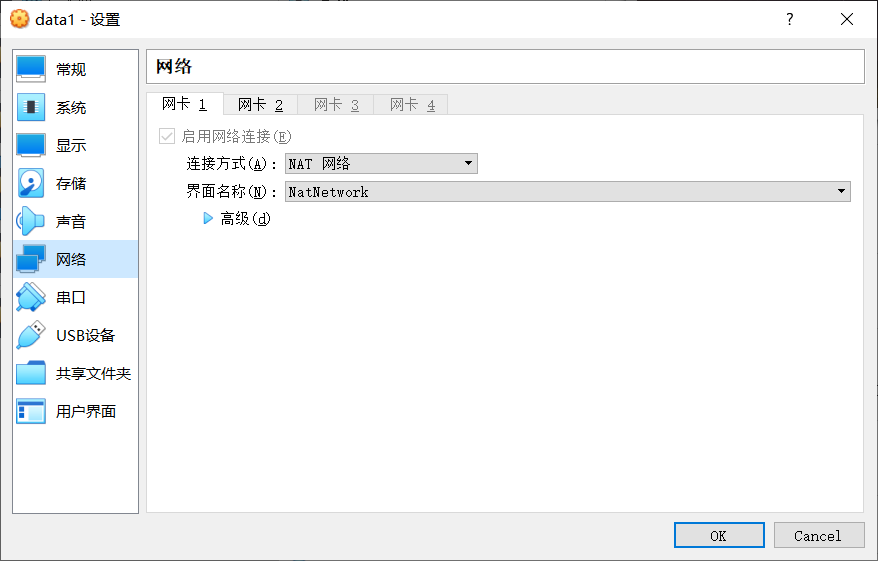
Network Card 1 is configured as a NAT network so that the virtual machine can normally access the external network
-
Network Card 2 is configured as host-only so that the data virtual machine can communicate with the master virtual machine
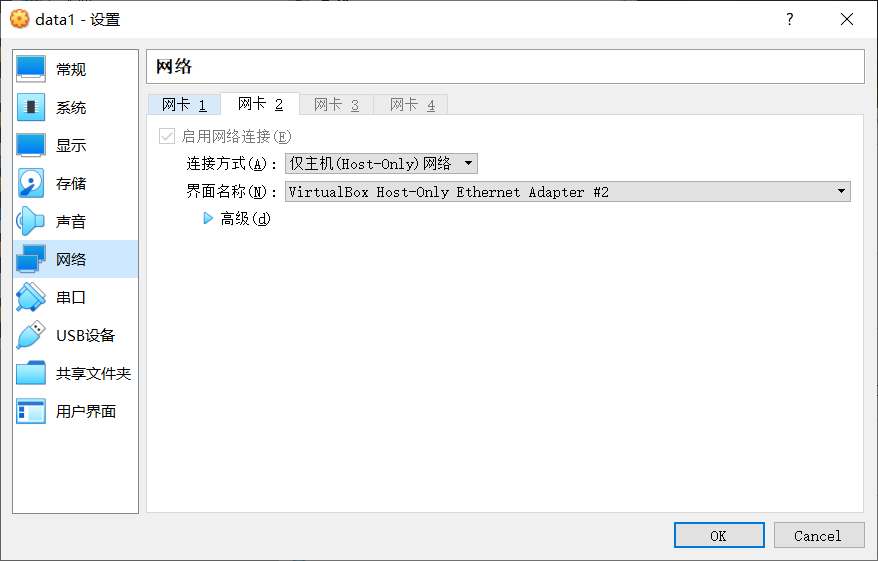
If the interface name display is not specified, you can specify the interface name by clicking Manage, Host Network Manager and Create in the upper left menu bar of virtualBox

-
Configure host name and network
sudo vim /etc/hostname
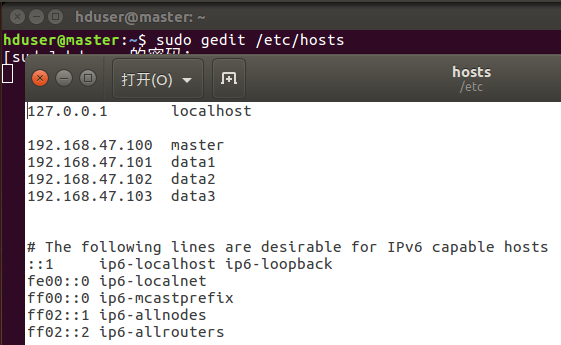
Ping data1-c 3 to test network connectivity

SSH Password-Free Login Node
-
Master nodes must be able to SSH passwordless login to each Slave node. First, generate the public key of the Master node. If the public key has been generated before, you must delete the original generated public key and regenerate it once again, because we have previously modified the host name. The specific commands are as follows
cd ~/.ssh              # If not, execute ssh localhost once
rm ./id_rsa*           # Delete previously generated public keys (if they already exist)
ssh-keygen -t rsa       # After executing the command, when prompted, press Enter all the time
-
In order for the Master node to be able to log in locally without a password SSH, the following commands need to be executed on the Master node:
cat ./id_rsa.pub >> ./authorized_keys -
Next, transfer the public key from the Master node to the Slave1 node (depending on the folder)
scp ~/.ssh/id_rsa.pub hadoop@Slave1:/home/hadoop/ -
On the data1 node, add the SSH key to the authorization:
mkdir ~/.ssh       # If the folder does not exist, create it first. If it does exist, ignore this command
cat ~/id_rsa.pub >> ~/.ssh/authorized_keys
rm ~/id_rsa.pub    # Can be deleted after use
-
Configure as if there are other nodes
Configure PATH variable
- In the previous pseudo-distributed installation, you have described how to configure the PATH variable. You can configure it the same way so that commands like hadoop, hdfs, and so on, can be used directly in any directory. If the PATH variable has not been configured, it needs to be configured on the Master node. First execute the command "vim /.bashrc", that is, use the VIM editor to open the "/.bashrc" file, and then add the following line at the top of the file:
export PATH=$PATH:/usr/local/hadoop/bin:/usr/local/hadoop/sbin
After saving, execute the command "source ~/.bashrc" for the configuration to take effect.
Configure Cluster/Distributed Environment
-
When configuring cluster/distributed mode, you need to modify the configuration file in the'/usr/local/hadoop/etc/hadoop'directory, where only the settings necessary for normal startup are set, including workers, core-site.xml, hdfs-site.xml, mapred-site.xml, yarn-site.xml, a total of five files. More settings are available for official instructions. File in/usr/local/hadoop/etc/hadoop
-
workers

-
core-site.xml
<configuration>
		<property>
				<name>fs.defaultFS</name>
				<value>hdfs://Master:9000</value>
		</property>
		<property>
				<name>hadoop.tmp.dir</name>
				<value>file:/usr/local/hadoop/tmp</value>
				<description>Abase for other temporary directories.</description>
		</property>
</configuration>
-
hdfs-site.xml
<configuration>
		<property>
				<name>dfs.namenode.secondary.http-address</name>
				<value>Master:50090</value>
		</property>
		<property>
				<name>dfs.replication</name>
				<value>1</value>
		</property>
		<property>
				<name>dfs.namenode.name.dir</name>
				<value>file:/usr/local/hadoop/tmp/dfs/name</value>
		</property>
		<property>
				<name>dfs.datanode.data.dir</name>
				<value>file:/usr/local/hadoop/tmp/dfs/data</value>
		</property>
</configuration>
-
mapred-site.xml
<configuration>
		<property>
				<name>mapreduce.framework.name</name>
				<value>yarn</value>
		</property>
		<property>
				<name>mapreduce.jobhistory.address</name>
				<value>Master:10020</value>
		</property>
		<property>
				<name>mapreduce.jobhistory.webapp.address</name>
				<value>Master:19888</value>
		</property>
		<property>
				<name>yarn.app.mapreduce.am.env</name>
				<value>HADOOP_MAPRED_HOME=/usr/local/hadoop</value>
		</property>
		<property>
				<name>mapreduce.map.env</name>
				<value>HADOOP_MAPRED_HOME=/usr/local/hadoop</value>
		</property>
		<property>
				<name>mapreduce.reduce.env</name>
				<value>HADOOP_MAPRED_HOME=/usr/local/hadoop</value>
		</property>
</configuration>
-
yarn-site.xml
<configuration>
		<property>
				<name>yarn.resourcemanager.hostname</name>
				<value>Master</value>
		</property>
		<property>
				<name>yarn.nodemanager.aux-services</name>
				<value>mapreduce_shuffle</value>
		</property>
</configuration>
-
When all five files are configured, the'/usr/local/hadoop'folder on the Master node needs to be copied to each node
On the master node:cd /usr/local sudo rm -r ./hadoop/tmp # Delete Hadoop Temporary Files sudo rm -r ./hadoop/logs/* # Delete Log File tar -zcf ~/hadoop.master.tar.gz ./hadoop # Compress before copying cd ~ scp ./hadoop.master.tar.gz Slave1:/home/hadoop
On the data1 node
sudo rm -r /usr/local/hadoop    # Delete old (if present)
sudo tar -zxf ~/hadoop.master.tar.gz -C /usr/local
sudo chown -R hadoop /usr/local/hadoop
start-up
-
For the first time, format the node on the master node:
hdfs namenode -format
-
start-up
start-dfs.sh
start-yarn.sh
mr-jobhistory-daemon.sh start historyserver
-
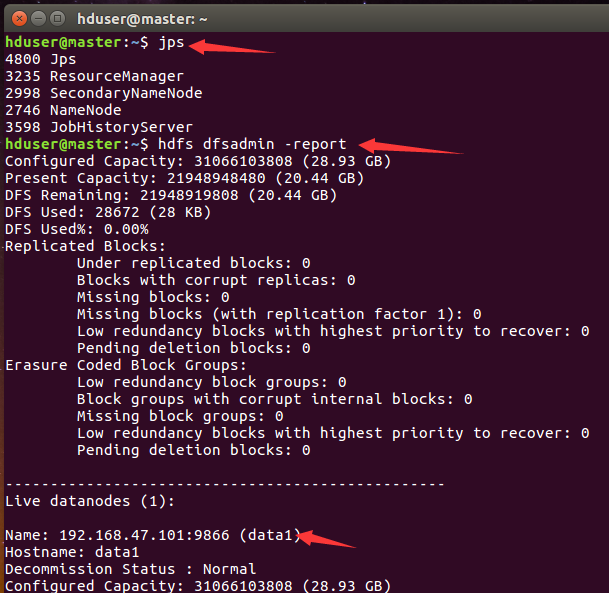
jps view on master
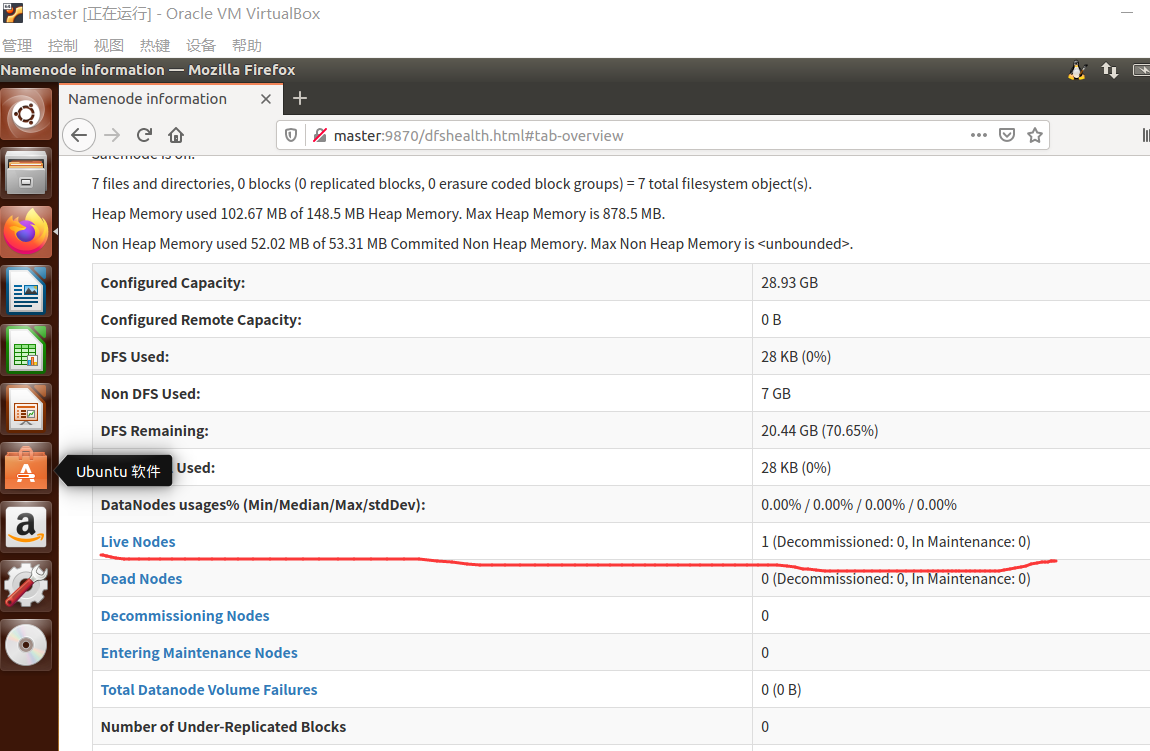
-
View on data1
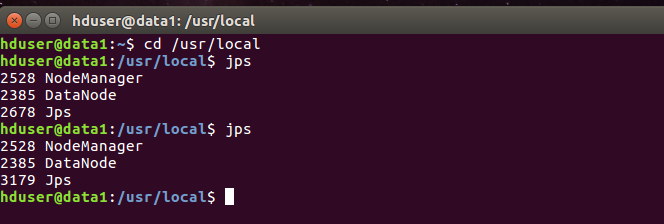
Close
- On master virtual machine
stop-yarn.sh
stop-dfs.sh
mr-jobhistory-daemon.sh stop historyserver