preface
I was here a few months ago DIY smart home from scratch - intelligent light sensor based on ESP32_ Inspired desktop blog - CSDN blog A pit was buried in the. Now I'm back to fill it! This time I'll finish the scene of remote light control (secretly tell you, I secretly dug a bigger hole). Now you can really turn on and off the lights automatically!
Hardware selection
First, the edge computer of Yihui Spirit 1 For edge computers, Spirit 1 is equivalent to a small server, and most of the operations are completed here.
Remote control light equipment, I chose the bull's Remote control switch But I found that the switch seemed to be lora's. I didn't adjust the 433MHz module, so I had to use the relay.
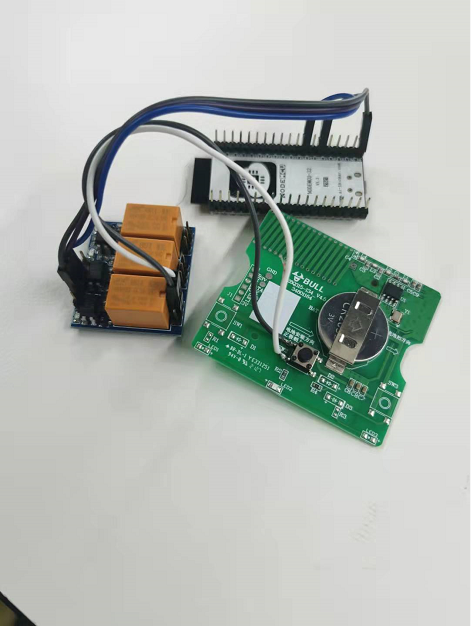
this relay It's very useful. It can be driven by 5V and triggered by 3.3V. It's not big. The board plus relay requires a total current of 0.13A.
In terms of wiring, the development board only needs a relay connection (VCC-5V, GND-GND,T1-P14).
Code parsing
Get code
In order to facilitate the explanation of logic, I will disrupt the order of the code and may cut it. If you want to run directly with the code, you can go directly The secret treasure house of inspiration desktop Get the code, or directly clone:
https://gitee.com/inspiration-desktop/DEV-lib-arduino.git
After downloading or clone code, the four folders are used this time:
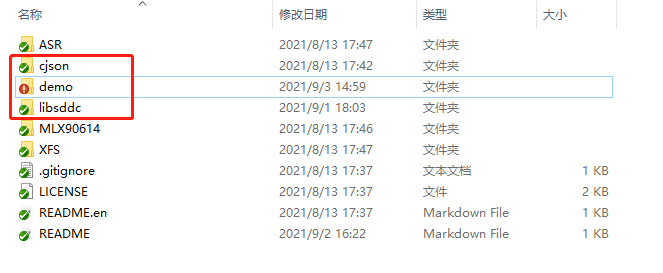
Cjson: the cjson library I transplanted is the standard cjson library. Put it in the libraries folder under the arduino installation directory and Baidu can use the cjson functions.
libsddc: I transplanted it from the official SDDC library and the SDK I wrote, and just put it in the libraries folder. Inside is the processing function of SDDC protocol. We don't care.
In the demo folder are the demo codes of our various sensors:
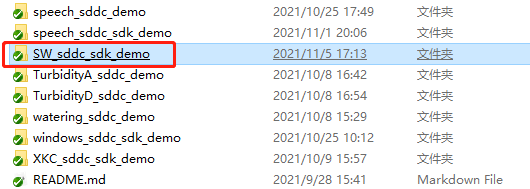
SW in red circle_ sddc_ sdk_ The demo folder contains our code. Click in to see SW_sddc_sdk_demo.ino file. Double clicking the file will automatically start Arduino ide to open the code. Select the corresponding COM port in tools - > port and click upload to burn the code into the board:

Equipment control command:
Through Spirit 1's application or debugging tool Sniffer Commands sent to sensor devices:
Trigger switch:
{
  "method": "set",
  "SW_ctrl": "button"
}
Device and protocol initialization process:
It is written based on the official demo and does not need to be modified. It is mainly about device initialization, pin configuration, and protocol initialization.
/*
 * Initialize sensor
 */
void sensor_init()
{
    pinMode(sign_pin, OUTPUT);
}

void setup() {
    byte mac[6];
    Serial.begin(115200);
    Serial.setDebugOutput(true);
    Serial.println();

    // Initialize sensor
    sensor_init();

    // Clear the state of the key state machine
    button.reset();

    // Create a key scanning thread, long press the IO0 key, and the ESP32 will enter the SmartConfig mode after releasing it
    sddc_printf("Press and hold the key to enter Smartconfig...\n");
    button.attachLongPressStop(esp_io0_key_task);
    xTaskCreate(esp_tick_task, "button_tick", ESP_TASK_STACK_SIZE, NULL, ESP_TASK_PRIO, NULL);

    // Start WiFi and connect to the network
    WiFi.begin(ssid, password);
    while (WiFi.status() != WL_CONNECTED)
    {
        delay(500);
        Serial.print(".");
    }

    // Get and print IP address
    Serial.println("");
    Serial.println("WiFi connected");
    Serial.print("'ip :");
    Serial.print(WiFi.localIP());
    Serial.println("' to connect");

    // sddc protocol initialization
    sddc_lib_main(&sys_cfg);

    // Obtain and print the mac address of the network card
    WiFi.macAddress(mac);
    sddc_printf("MAC addr: %02x:%02x:%02x:%02x:%02x:%02x\n",
              mac[5], mac[4], mac[3], mac[2], mac[1], mac[0]);
    // Use the network card mac address to set the device unique ID UID
    sddc_set_uid(G_sddc, mac);
}

void loop() {
    // Run SDDC protocol cycle
    while (1)
    {
        sddc_printf("SDDC running...\n");
        sddc_run(G_sddc);
        sddc_printf("SDDC quit!\n");
    }

    // Destroy SDDC protocol
    sddc_destroy(G_sddc);
}
Configure device information
This part of the code can configure the WiFi name and WiFi password, the pin to be used, and configure the information displayed by the device on Spirit 1:
#define SDDC_ CFG_ Port 680u / / port number used by SDDC protocol
#define PIN_ Input 0 / / select IO0 to control
#define ESP_TASK_STACK_SIZE       4096
#define ESP_TASK_PRIO             25

static const int sign_pin = 14;                   // Switch control pin

static const char* ssid = "EOS-Tenda";            // WiFi name
static const char* password = "1234567890";       // WiFi password

OneButton button(PIN_INPUT, true);

/*
 *  Information definition of the current device
 */
DEV_INFO    dev_info = {
            .name     = "Light remote control switch",
            .type     = "light.rc",
            .excl     = SDDC_FALSE,
            .desc     = "ESP-32S",
            .model    = "IDDGYK01B",
            .vendor   = "inspiration-desktop",
};

/*
 *   System registration object aggregation
 */
SDDC_CONFIG_INFO sys_cfg = {
        .token             = "1234567890",            // Device password
        .devinfo           = &dev_info,
        .io_dev_reg        = io_dev,
        .io_dev_reg_num    = ARRAY_SIZE(io_dev),
        .num_dev_reg       = num_dev,
        .num_dev_reg_num   = ARRAY_SIZE(num_dev),
        .state_get_reg     = dev_state_get_reg,
        .state_get_reg_num = ARRAY_SIZE(dev_state_get_reg),
        .dis_dev_reg       = dis_dev,
        .dis_dev_num       = ARRAY_SIZE(dis_dev),
};
Callback function registration
This is the location where the callback function is registered after receiving the command. Only the functions registered here can be called correctly by the SDK and perform correct actions.
For specific SDK analysis, please refer to The official series of coerced death! SDK framework based on sddc protocol_ sdk_ Lib parsing and The official series of coerced death! From DDC sniffer to SDDC_ sdk_ Data analysis of Lib
/*
 *  Registration of object function and processing method of digital quantity equipment
 */
NUM_DEV_REGINFO num_dev[] = {
//        {"set_num_demo", demo}, / / string is the input command, and demo is the command processing function
};

/*
 *  Display device object function and processing method registration
 */
DIS_DEV_REGINFO dis_dev[] = {
//        {"set_dis_demo", demo}, / / string is the input command, and demo is the command processing function
};

/*
 * IO Device object setting function and processing method registration
 */
IO_DEV_REGINFO io_dev[] = {
//        {"set_io_demo", demo}, / / string is the input command, and demo is the command processing function
          {"SW_ctrl", SW_ctrl},
};

/*
 *  System object status get registration
 */
DEV_STATE_GET  dev_state_get_reg[] = {
//        {"demo", dev_num_type, num_get_demo}, / / demo is the input command, and the string is the command processing function
//        {"demo", DEV_IO_TYPE, io_get_demo},
//        {"demo", DEV_DISPLAY_TYPE, dis_get_demo},
};
Data acquisition and reporting process
Here is the processing flow written by ourselves, which can be changed according to your needs. After receiving set or get, enter the corresponding processing function according to the previously registered function.
static void button_task(void *arg)
{
    Serial.println("trigger");
    delay(100);
    digitalWrite(sign_pin, HIGH);
    delay(100);
    digitalWrite(sign_pin, LOW);
    vTaskDelete(NULL);
}

/*
 *  Switch control function
 */
sddc_bool_t SW_ctrl(const char* value)
{
    printf("Enter switch control function\n");
    // Can not delay in the main loop, all open a thread separately to simulate the trigger of the key
    xTaskCreate(button_task, "button_task", ESP_TASK_STACK_SIZE, NULL, ESP_TASK_PRIO, NULL);
    return SDDC_TRUE;
}
summary
That's it? That's it? I said at the beginning that I was holding my breath. Of course not. It's just an appetizer. Please look forward to it!
This article is only for personal learning and use. If there are errors, please correct them ˙ ᗜ ˙ ) Thank you, boss!