The first thing to say is that this program is very weak. It's better to cut through the pictures. There is a transparent background, or even alignment is a problem.
Reference tutorial: https://www.shiyanlou.com/courses/370/learning/?id=1191
from PIL import Image
import argparse

parser = argparse.ArgumentParser()
parser.add_argument('file')
parser.add_argument('-o', '--output')
parser.add_argument('-w', '--width', type=int, default=80)
parser.add_argument('--height', type=int, default=80)

args = parser.parse_args()

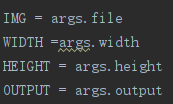
IMG = args.file
WIDTH =args.width
HEIGHT = args.height
OUTPUT = args.output

ascii_char = list("$@B%8&WM#*oahkbdpqwmZO0QLCJUYXzcvunxrjft/\|()1{}[]?-_+~<>i!lI;:,\"^`'. ")

def get_char(r, g, b, alpha = 256):
    if alpha == 0:
        return ' '
    length = len(ascii_char)
    grey = int(0.2126 * r + 0.7152 * g + 0.0722 * b)
    index = int((grey / 256) * length)
    return ascii_char[index]

if __name__ == '__main__':
    im = Image.open(IMG)
    im = im.resize((WIDTH, HEIGHT))

    txt = ""

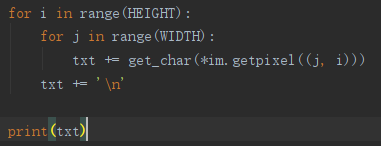
    for i in range(HEIGHT):
        for j in range(WIDTH):
            txt += get_char(*im.getpixel((j, i)))
        txt += '\n'

    print(txt)

    if OUTPUT:
        with open(OUTPUT, 'w') as f:
            f.write(txt)
    else:
        with open("output.txt", 'w') as f:
            f.write(txt)

The first line is abbreviation, and the second line is full name, but the corresponding saving variables are the same, and the necessary parameters do not need to be written.

The way to get the variable is to directly use the one after the horizontal bar as the member variable name
Learn how to use the argparse package:
import argparse

parser = argparse.ArgumentParser()
parser.add_argument('file')
parser.add_argument('-o', '--output')
parser.add_argument('-w', '--width', type=int, default=80)
parser.add_argument('--height', type=int, default=80)

args = parser.parse_args()

IMG = args.file
WIDTH =args.width
HEIGHT = args.height
OUTPUT = args.output
Another thing worth learning is:

getpixel starts with abscissa and then ordinate, and returns a tuple, * here is the solution group, and the four solved elements are used as the parameters of get_char.
Experimental results:
You can see that the provided layer is the cut layer:

