
sudo wget http://learning.happymmall.com/deploy/deploy.sh


echo "===========Get into git project happymmall Catalog============="
cd /developer/git-repository/mmall


echo "==========git Switch to mmall-v1.0==============="
git checkout mmall-v1.0

echo "==================git fetch======================"
git fetch

echo "==================git pull======================"
git pull


echo "===========Compile and skip unit tests===================="
mvn clean package -Dmaven.test.skip=true


echo "============Delete old ones ROOT.war==================="
rm /developer/apache-tomcat-7.0.73/webapps/ROOT.war


echo "======Copied and compiled war Package to tomcat lower-ROOT.war======="
cp /developer/git-repository/mmall/target/mmall.war  /developer/apache-tomcat-7.0.73/webapps/ROOT.war


echo "============delete tomcat Old ones ROOT Folder============="
rm -rf /developer/apache-tomcat-7.0.73/webapps/ROOT


echo "====================Close tomcat====================="
/developer/apache-tomcat-7.0.73/bin/shutdown.sh


echo "================sleep 10s========================="
for i in {1..10}
do
	echo $i"s"
	sleep 1s
done


echo "====================start-up tomcat====================="
/developer/apache-tomcat-7.0.73/bin/startup.sh
sudo vim deploy.sh
q exit
sudo mkdir git-repository
Enter git warehouse
cd git-repository/
Clone the project
sudo git clone git@git.oschina.net:imooccode/mmall_learning.git
The prompt does not have permissions ("You can't create a working tree directory"), which means that gleey has no permissions to create under the git-repository folder.

Now let's give geely permission to developer as a whole

sudo chown -R geely /developer/
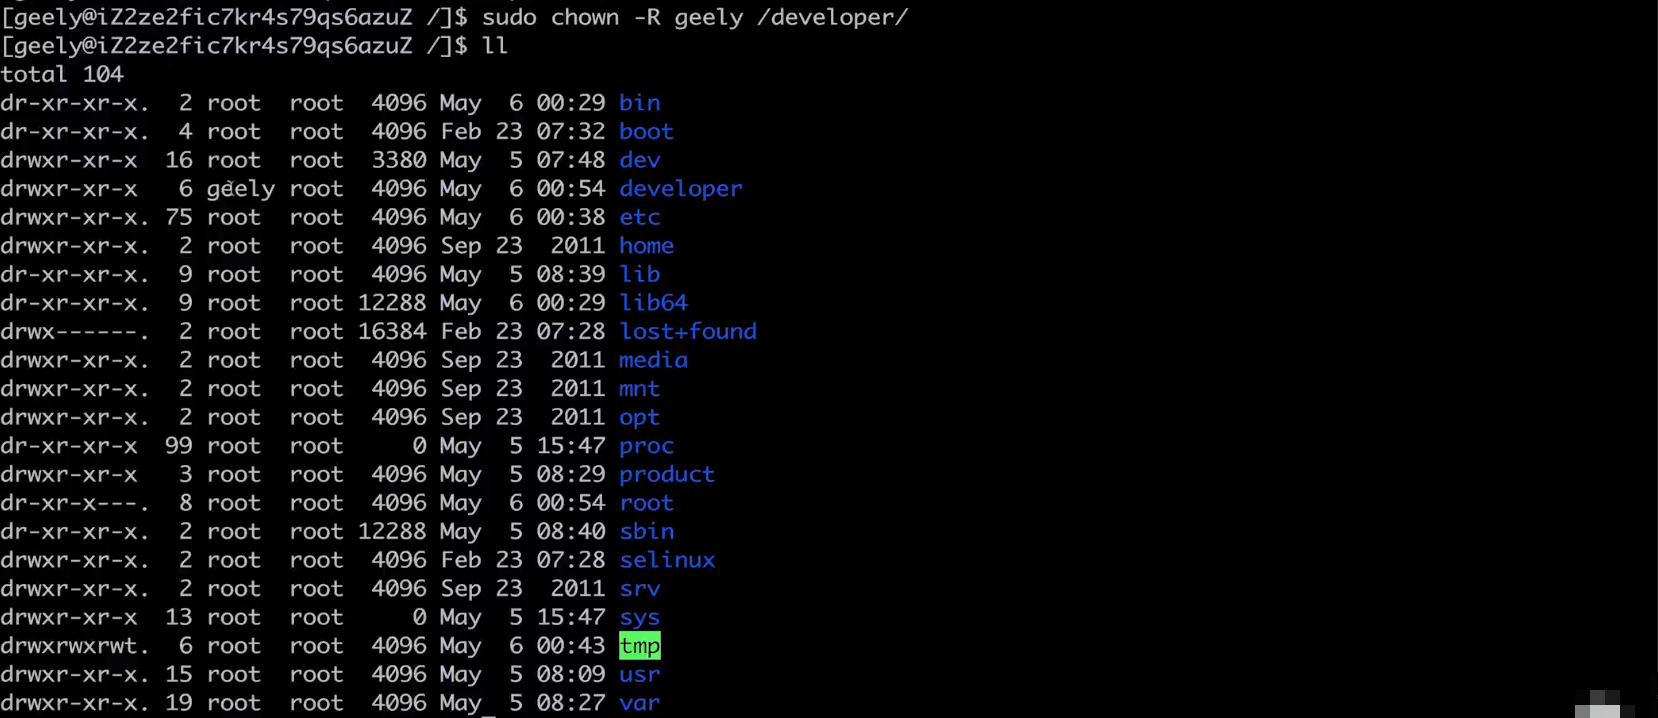
We can see that the developer user has changed to geely.
Then we give all the read, write, execute and permission of geely users to developer
sudo chmod u+w -R /developer/
sudo chmod u+r -R /developer/
sudo chmod u+x -R /developer/

Enter developer

Enter git warehouse
cd git-repository/
Then execute the cloning project command
git clone git@git.oschina.net:imooccode/mmall_learning.git

View directory


Go back to the developer directory and edit the automated publishing script
sudo vim deploy.sh

echo "===========Get into git project happymmall Catalog============="
cd /developer/git-repository/mmall_learning


echo "==========git Switch to mmall-v1.0==============="
git checkout mmall-v1.0

echo "==================git fetch======================"
git fetch

echo "==================git pull======================"
git pull


echo "===========Compile and skip unit tests===================="
mvn clean package -Dmaven.test.skip=true


echo "============Delete old ones ROOT.war==================="
rm /developer/apache-tomcat-7.0.73/webapps/ROOT.war


echo "======Copied and compiled war Package to tomcat lower-ROOT.war======="
cp /developer/git-repository/mmall_learning/target/mmall.war  /developer/apache-tomcat-7.0.73/webapps/ROOT.war


echo "============delete tomcat Old ones ROOT Folder============="
rm -rf /developer/apache-tomcat-7.0.73/webapps/ROOT


echo "====================Close tomcat====================="
/developer/apache-tomcat-7.0.73/bin/shutdown.sh


echo "================sleep 10s========================="
for i in {1..10}
do
	echo $i"s"
	sleep 1s
done


echo "====================start-up tomcat====================="
/developer/apache-tomcat-7.0.73/bin/startup.sh
wq save exit
Execution script
./deploy.sh


We saw a mistake, saying that the branch was not matched when switching, which should be the wrong name of our branch.
Let's look at the specific branches of the project.
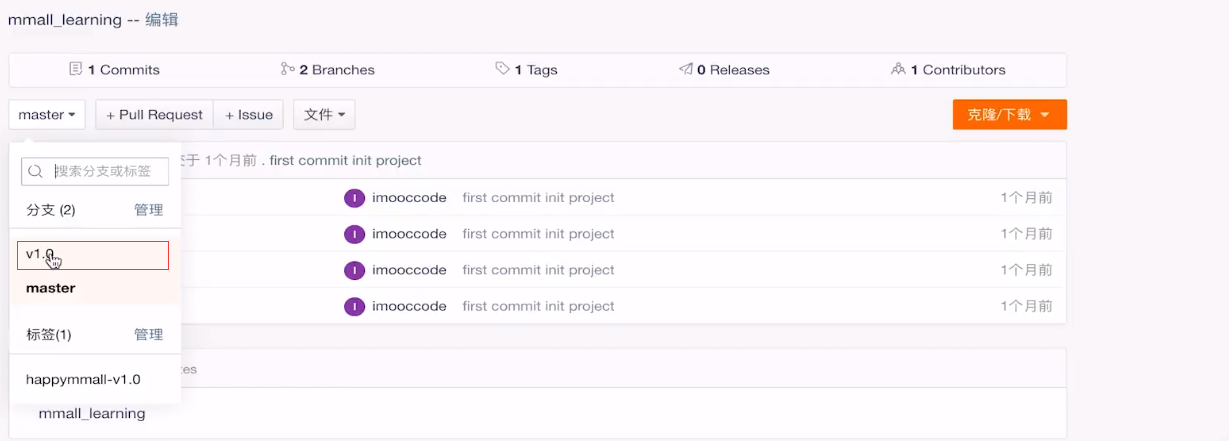
We see that its branch name is v1.0.
Then we change the name of the branch to find the switch branch, and switch to v1.0 branch.
echo "===========Get into git project happymmall Catalog============="
cd /developer/git-repository/mmall_learning


echo "==========git Switch to mmall-v1.0==============="
git checkout v1.0

echo "==================git fetch======================"
git fetch

echo "==================git pull======================"
git pull


echo "===========Compile and skip unit tests===================="
mvn clean package -Dmaven.test.skip=true


echo "============Delete old ones ROOT.war==================="
rm /developer/apache-tomcat-7.0.73/webapps/ROOT.war


echo "======Copied and compiled war Package to tomcat lower-ROOT.war======="
cp /developer/git-repository/mmall_learning/target/mmall.war  /developer/apache-tomcat-7.0.73/webapps/ROOT.war


echo "============delete tomcat Old ones ROOT Folder============="
rm -rf /developer/apache-tomcat-7.0.73/webapps/ROOT


echo "====================Close tomcat====================="
/developer/apache-tomcat-7.0.73/bin/shutdown.sh


echo "================sleep 10s========================="
for i in {1..10}
do
	echo $i"s"
	sleep 1s
done


echo "====================start-up tomcat====================="
/developer/apache-tomcat-7.0.73/bin/startup.sh
wq! Quit
Execute the script again
./deploy.sh
First, Maven downloads a lot of things, and it takes a little longer to wait.
We saw that "Delete the old Root.war" was unsuccessful because there was no old file in the first execution.

Let's go under tomcat
cd apache-tomcat-7.0.73


ll


cd webapps/


ll
See if the published ROOT is happy+mmall?
cd ROOT
ll

cat index.jsp
This index.jsp is our happy_mmall project.
Now I want to verify that the line is OK, so now switch the domain name to this machine.
Let's go into the Ali Cloud and copy the IP of the server.

Then click Parse

Let's verify that the home page is OK.
I click on the modification to put the cloud server IP in

Click Save to see the following image

Let's ping this website on the cloud server to see if its IP has changed. If it changes, it's OK.

We see that his IP has become the IP we just set up.
We're refreshing the website, 404 is normal, because our front-end resources have not been deployed yet.
What you can open is index.jsp

This is the same as what we used to be online. Let's add a difference.

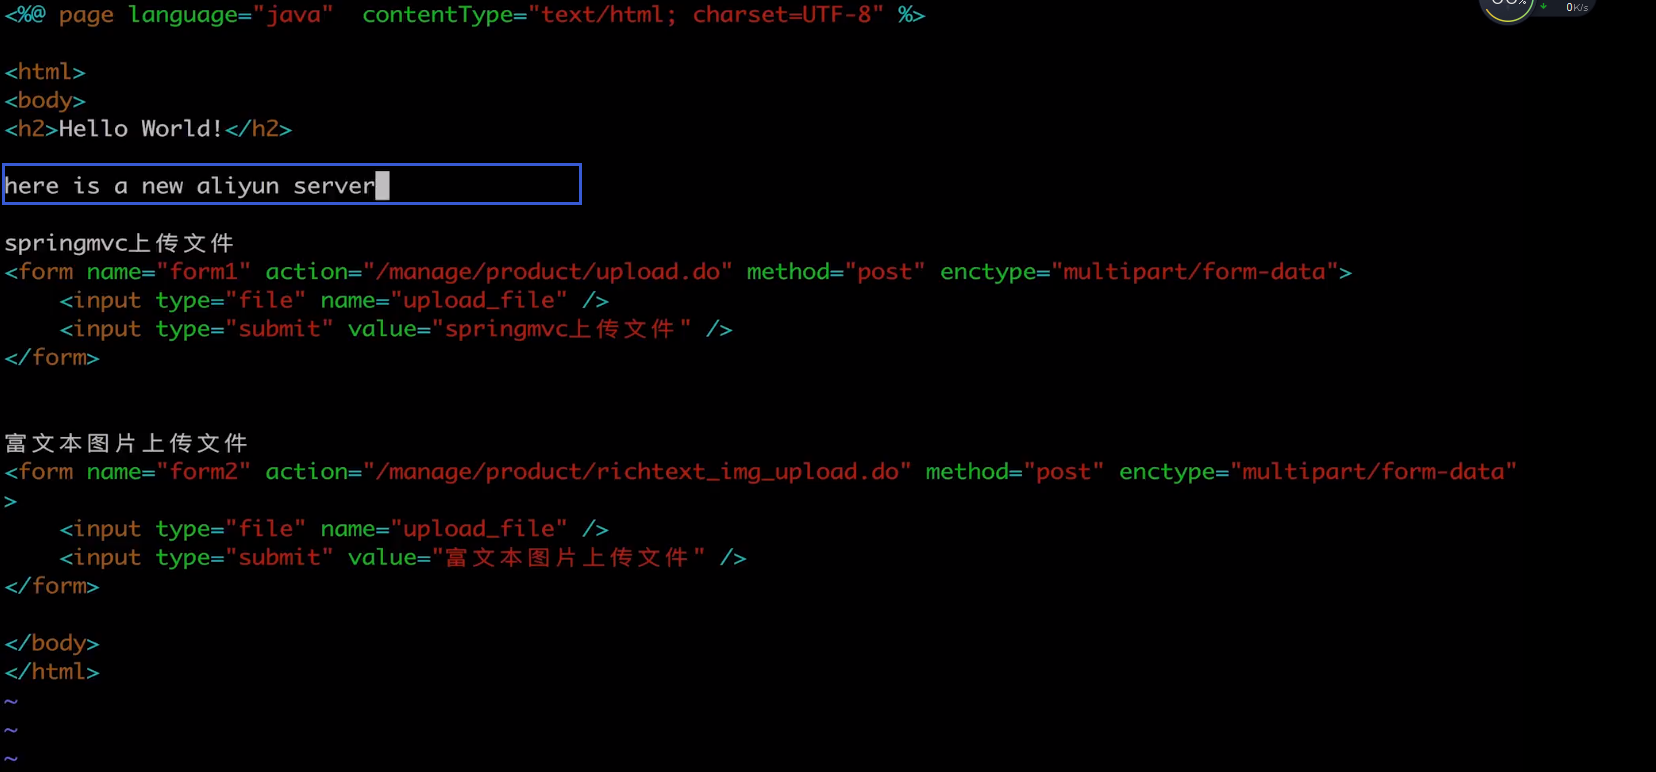
Wq save exit
It's not recommended. It's very dangerous for us to do this online.
At this time, we refresh this page and you can see that the text we just typed appears here.

Note here that after we deploy, his home page is 404, which is no problem, because our front-end resources are not deployed yet.
As long as index.jsp is accessible, our server has been successfully deployed.
Let's test login.
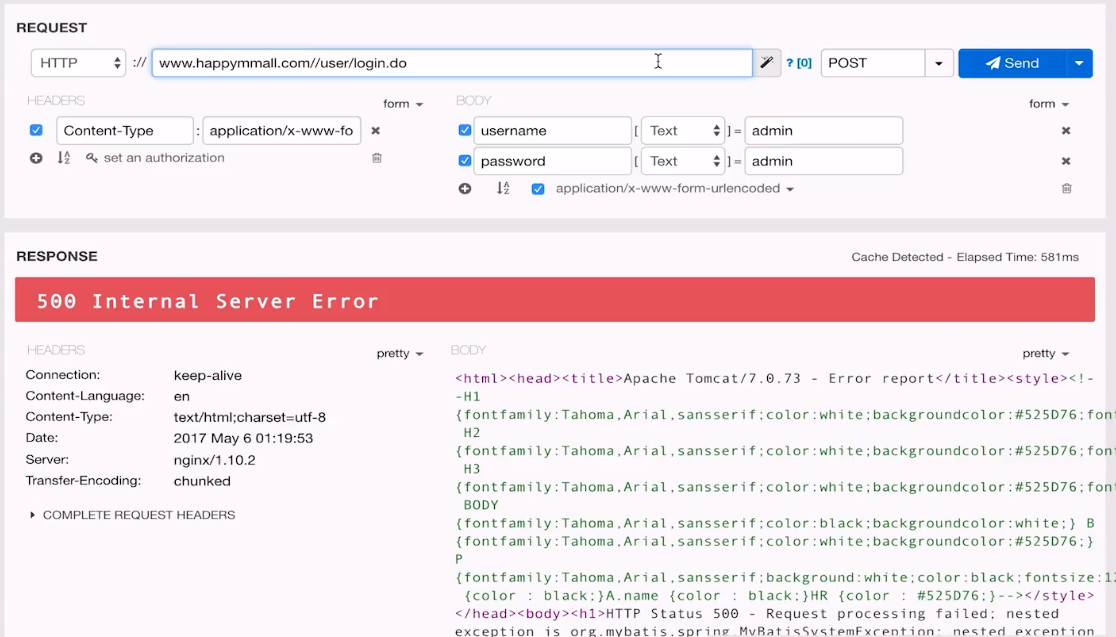
Let's take a look at the specific error reporting.
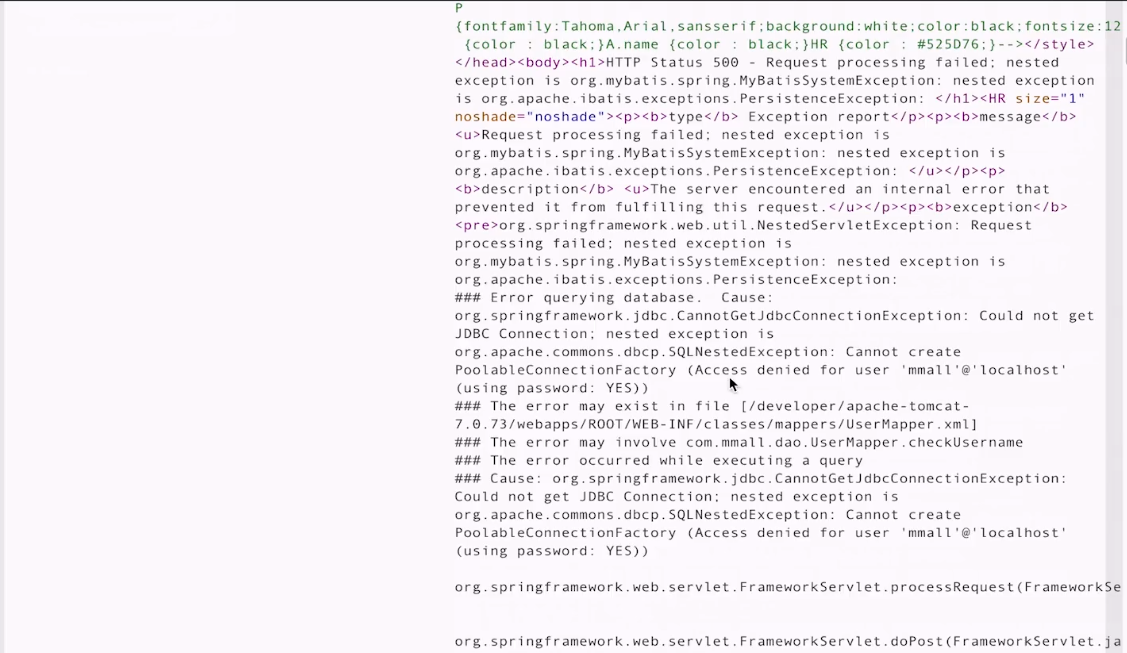
Because the password we set up in the project to connect to the database is not consistent with the password we just deployed in Ali Cloud, including the FTP password, we have to change it, and then redeploy it.


Modify ip pointing of secondary domain name img to cloud server ip

We submit this modified code to git
git branch

git add.

git commit -am 'aliyun deploy for password'

git push

Execute the deployment script again
./deploy.sh

Let's take a look at tomcat's log
cd apache-tomcat-7.0.73
tailf logs/catalina.out

Open our web page and request login again
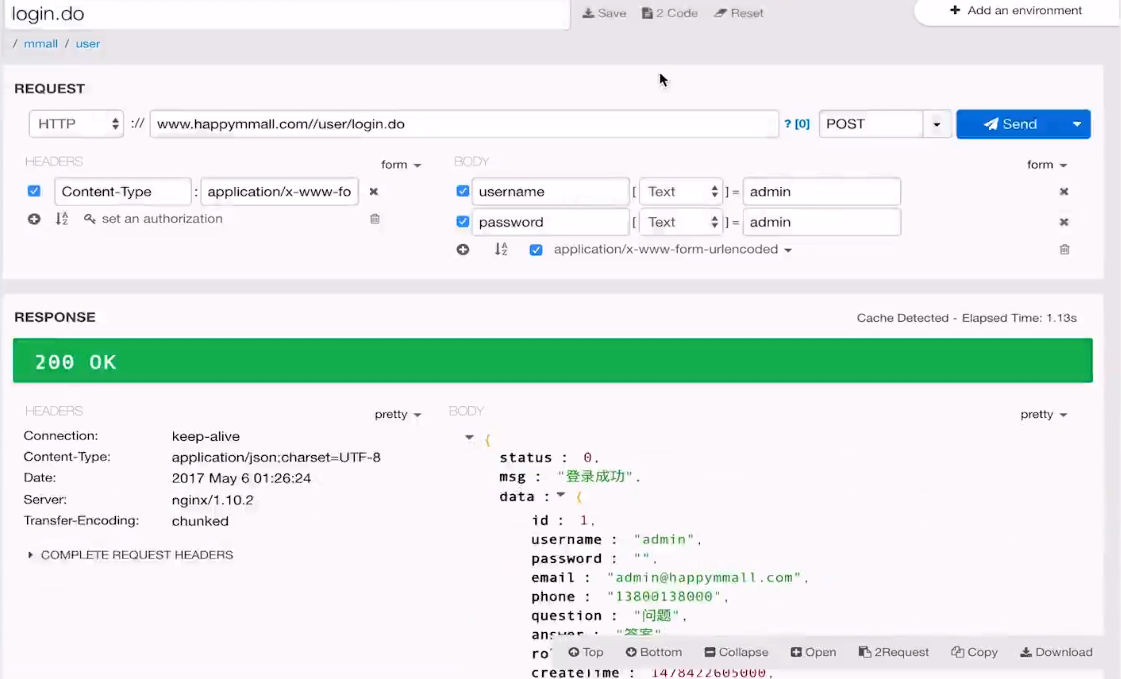
We can see the prompt for successful login.
Let's test the upload interface.

Click "Select Files" directly, select an image to upload, and click Upload.

We clicked on the link of the picture. 404 was not found.

First of all, we need to make sure that the domain name is pointed to the new one.
Let's ping it and see if it's the Aliyun server we just set up?

We can see that the ip has been set up.
So let's take a look at the anomaly reported above.

This means that the connection was rejected when uploading. This should be that our vsftpd did not start.
Let's start vsftpd
sudo service vsftpd start

At this point vsftpd starts
Let's try uploading a picture.

Let's take a look at the log before we validate it.
less logs/catalina.out

This log is wrong to see the location. First of all, we uploaded the result without adding the value.
I'm looking at the code. Our ftp.user is wrong. It's not mallftp, it's ftpuser.

The ftp user we just created,
Then we'll submit the changes.
git status


git add .


git commit -am 'commit for modify ftpuser'


git push

We're republishing it.
./deploy.sh

At present, our test is sure that nginx is not a problem, mysql is not a problem, because we have logged in successfully.
nginx because domain name testing is OK
FTP server because it has been uploading files not uploaded
Check the log
cd apache-tomcat-7.0.73


tailf logs/catalina.out

Now that it's started successfully, let's upload another picture.
Because it's restarted, we need to log in again.
Select Always Picture, Click Upload

Let's click on the picture link, or 404

We just checked the ftp problem, so now we need to see if this picture is uploaded or not.
Let's visit this ftp

We can see that this picture has actually been uploaded.
Let's click on it.

Find that the picture can be displayed, there is no problem, then what should be the problem?
Let's see where the domain name img.happymmall.com is resolved. Let's look at the configuration of mginx.
sudo vim /usr/local/nginx.conf/vhost/img.happymmall.com.conf

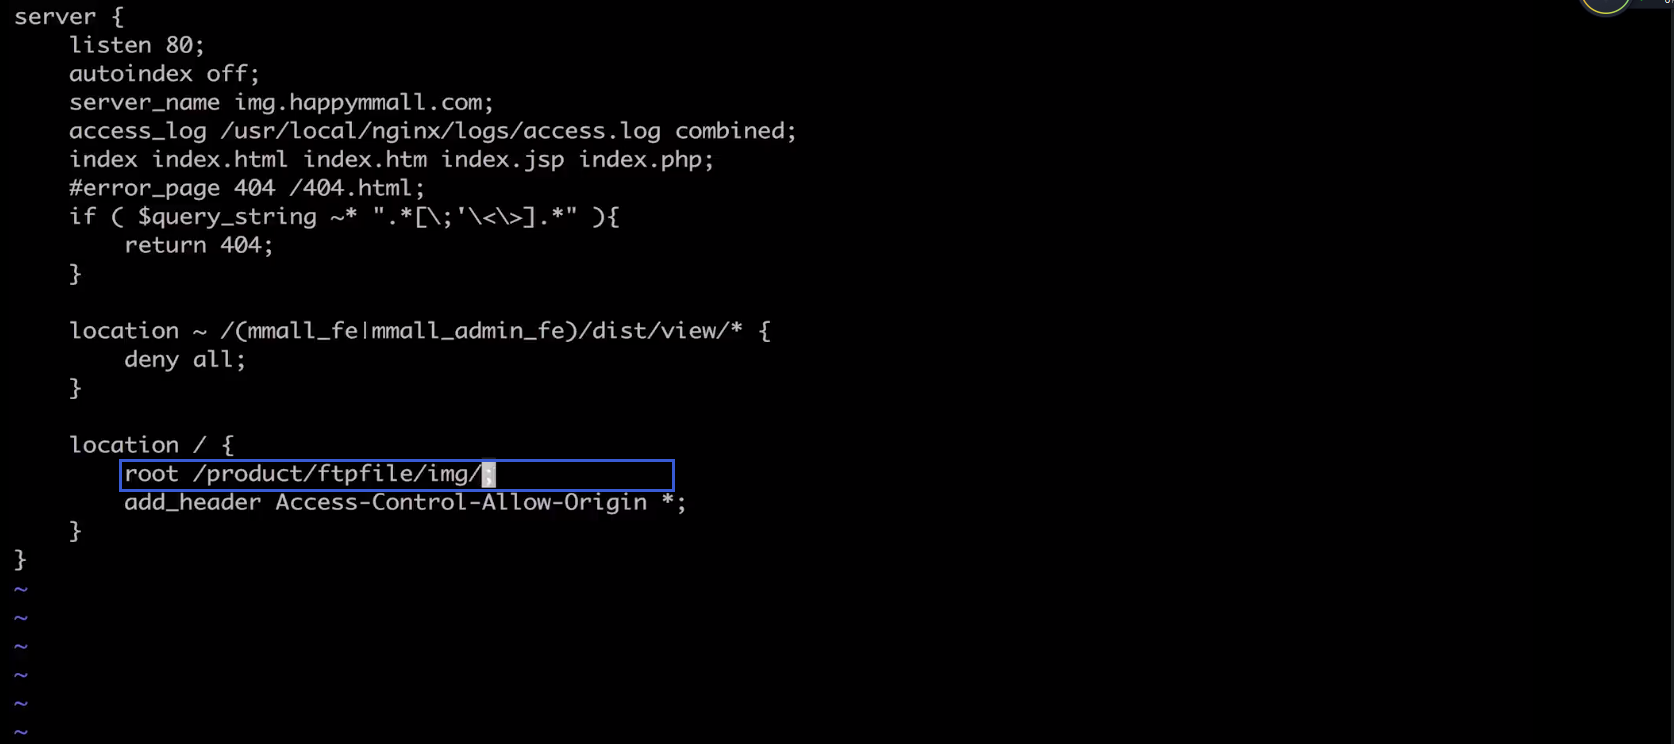
You can see that its root points to / product/ftpfile/img /; directory
:q!
So if we have this directory under this folder, let's check it.
cd /product/ftpfile/

We can see that the files are uploaded here, but there is no img directory.
Let's create an img directory
sudo mkdir img

Then move the picture in.

After moving in, let's visit the picture link again. You can see that it's OK.

That's a problem. This img folder doesn't exist, and we ftp users don't have permission to create this folder.

Simply, after we create this folder, we change all of its users and user groups to ftpuser, and we give the user groups write permission.
sudo chown ftpuser img/

Modify user groups

Let's see if the modification is successful.

We give the user group a write permission
sudo chmod g+w img/

We tested again and uploaded pictures all the time and found that it was successful.
So far, our online deployment is complete.
Domain Name Resolution Normal
MYSQL can see normal through our login
Nginx access through domain names, including ip authentication, is normal
It is normal for ftp server to verify through file upload, and the file server composed of ftp server and nginx is OK.
So my online Aliyun deployment is OK