Server host preparation
Jumpserver (management side) 192.168.1.25 docker-ce jumpserver/jms_all:1.4.8 mirror
backend-db (managed back-end service) 192.168.1.26 MariaDB mariadb-server redis
 backend (Managed backend Service) 192.168.1.27
1.jumpserver management configuration
1. Configure the yum source of dock
[root@localhost ~]# wget -O /etc/yum.repos.d/base.repo
https://mirrors.aliyun.com/docker-ce/linux/centos/docker-ce.repo
2) Check out the docker-ce version, the latest version in September 18
[root@localhost ~]# yum list *docker-ce*
Loaded plugins: fastestmirror
Loading mirror speeds from cached hostfile
 * base: mirrors.huaweicloud.com
 * extras: mirrors.huaweicloud.com
 * updates: mirrors.huaweicloud.com
Installed Packages
docker-ce.x86_64                                                                           3:18.09.7-3.el7                                                                    @docker-ce-stable
docker-ce-cli.x86_64                                                                       1:18.09.7-3.el7                                                                    @docker-ce-stable
Available Packages
docker-ce-selinux.noarch
3) Install docker-ce
yum install docker-ce -y
4) Start docker service
[root@localhost ~]# systemctl start docker
[root@localhost ~]# systemctl enable docker
5) directories and files generated by default after starting dockerf service
[root@localhost ~]# ll /etc/docker/
total 4
-rw------- 1 root root 244 Jul  2 13:16 key.json
6) Configure the mirror accelerator to transfer the download address of the mirror to Aliyun in China
[root@localhost ~]# vim /etc/docker/daemon.json
{
"registry-mirrors":["https://9916w1ow.mirror.aliyuncs.com"]
}
7) Save Configuration is Restarting Service
[root@localhost ~]# systemctl restart docker
8) View docker's mirror download address
[root@localhost ~]# docker info
9) Download mirror files
[root@localhost ~]# docker pull jumpserver/jms_all:1.4.8
......
Using default tag: latest
latest: Pulling from jumpserver/jms_all
8ba884070f61: Downloading[===>                                               ]5.389MB/75.4MB
6b54480a4844: Downloading [===>                                               ]  16.62MB/244.6MB
e6e1e1d12d27: Downloading [==>                                                ]    9.1MB/162.5MB
2aaff2cdbbad: Waiting
3cdd227b7107: Waiting
3e28c9c2ba8d: Waiting
10) See if the image file has been downloaded.
[root@localhost ~]# docker images
REPOSITORY           TAG                 IMAGE ID            CREATED             SIZE
jumpserver/jms_all   1.4.8               e9274ba449e8        3 months ago        1.31GB
2.backend-db installation of database and other configurations
1) Prepare the yum source and provide a new version of mariadb database to install the yum source
[root@backend-db ~]#yum install centos-release-openstack-rocky.noarch -y
2) View the version of mariadb
[root@backend-db ~]# yum list *mariadb*
Loaded plugins: fastestmirror
Loading mirror speeds from cached hostfile
 * base: mirror.jdcloud.com
 * centos-qemu-ev: mirrors.tuna.tsinghua.edu.cn
 * extras: mirrors.tuna.tsinghua.edu.cn
 * updates: mirrors.tuna.tsinghua.edu.cn
Installed Packages
mariadb.x86_64            3:10.1.20-2.el7            @centos-openstack-rocky
mariadb-common.x86_64             3:10.1.20-2.el7             @centos-openstack-rocky
mariadb-config.x86_64          3:10.1.20-2.el7         @centos-openstack-rocky
mariadb-errmsg.x86_64      3:10.1.20-2.el7    @centos-openstack-rocky
mariadb-libs.x86_64        3:10.1.20-2.el7      @centos-openstack-rocky
mariadb-server.x86_64      3:10.1.20-2.el7     @centos-openstack-rocky
Available Packages
mariadb-bench.x86_64    3:10.1.20-2.el7    centos-openstack-rocky
mariadb-connect-engine.x86_64      3:10.1.20-2.el7      centos-openstack-rocky
mariadb-devel.i686    1:5.5.60-1.el7_5         base
mariadb-devel.x86_64       3:10.1.20-2.el7     centos-openstack-rocky
mariadb-embedded.i686        1:5.5.60-1.el7_5       base
mariadb-embedded.x86_64     3:10.1.20-2.el7         centos-openstack-rocky
mariadb-embedded-devel.i686     1:5.5.60-1.el7_5      base
mariadb-embedded-devel.x86_64  3:10.1.20-2.el7          centos-openstack-rocky
mariadb-libs.i686        1:5.5.60-1.el7_5        base
mariadb-server-galera.x86_64      3:10.1.20-2.el7       centos-openstack-rocky
mariadb-test.x86_64
3) Install mariadb database
[root@backend-db ~]# yum install mariadb-server -y
4) Start mysql database and add jumpserver database and authorized user
[root@backend-db ~]# systemctl enable mariadb
[root@backend-db ~]# systemctl start mariadb
 create database jumpserver default charset 'utf8';
grant all on jumpserver.* to 'jumpserver'@'%' identified by 'centos123';
5) install redis database
[root@backend-db ~]# yum install redis -y
6) Configure redis configuration file
[root@backend-db ~]# vim /etc/redis.conf
......
bind 192.168.1.26 #Monitor local ip address
......
requirepass centos123 #Modify redis connection password
......
7) Start redis service
[root@backend-db ~]# systemctl enable redis
[root@backend-db ~]# systemctl start redis
3. Start the jumpserver service on the jumpserver management side
1) Create a mapping file directory
[root@localhost ~]# mkdir /opt/mysql -pv
[root@localhost ~]# mkdir /opt/jumpserver -pv
2) Generating container random key
 [root@localhost ~]#if [ "$SECRET_KEY" = "" ]; then SECRET_KEY=`cat /dev/urandom | tr -dc A-Za-z0-9 | head -c 50`; echo "SECRET_KEY=$SECRET_KEY"
 >> ~/.bashrc; echo $SECRET_KEY; else echo $SECRET_KEY; fi
[root@localhost ~]# if [ "$BOOTSTRAP_TOKEN" = "" ]; then BOOTSTRAP_TOKEN=`cat /dev/urandom | tr -dc A-Za-z0-9 | head -c 16`;
echo "BOOTSTRAP_TOKEN=$BOOTSTRAP_TOKEN" >> ~/.bashrc; echo $BOOTSTRAP_TOKEN; else echo $BOOTSTRAP_TOKEN; fi
3) Fill in some connection parameters of jumpserver service and start the service
[root@localhost ~]#docker run --name usa -d \  #The name of the container is usa
        -v /opt/mysql:/var/lib/mysql \   #Mapping host / opt/mysql path to container / var/lib/mysql path
        -v /opt/jumpserver:/opt/jumpserver/data/media \ #Map the host host / opt/jumpserver path to the container / opt/jumpserver/data/media path
        -p 80:80 \   #- p is the port mapping option, which is mapped to port 80 of the container when accessing port 80 of the local machine.
        -p 2222:2222 \
        -e SECRET_KEY=S5ROTQj9vckA31G8BGBnQEQ2wxcyRQ0MYE40OE7njpJdK1yeap \ #Passing key parameters
        -e BOOTSTRAP_TOKEN=EL8qi4sLXCTIiVH9 \ #Pass boot start password parameters
        -e DB_HOST=192.168.1.26 \  #Transfer connection to mysql database host
        -e DB_PORT=3306 \  #mysql database port
        -e DB_USER=jumpserver \    #Authorized users in mysql database
        -e DB_PASSWORD=centos123 \  #User password in mysql database
        -e DB_NAME=jumpserver \   #Database name created in mysql database
        -e REDIS_HOST=192.168.1.26 \  #Specify the host to connect to redis database
        -e REDIS_PORT=6379 \  #redis-enabled ports
        -e REDIS_PASSWORD=centos123 \  #Password for redis database login
        jumpserver/jms_all:1.4.8   #Version of jumpserver service
4) Check whether the container service started properly
[root@localhost ~]# docker ps
CONTAINER ID        IMAGE                      COMMAND             CREATED             STATUS              PORTS                                        NAMES
0eec322a30b3        jumpserver/jms_all:1.4.8   "entrypoint.sh"     4 hours ago         Up About an hour    0.0.0.0:80->80/tcp, 0.0.0.0:2222->2222/tcp   usa
5) Check whether the container log file is wrong
[root@localhost ~]# docker logs -f 0eec322a30b3
//If access to Connection RefusedError:... http//127.0.0.1:8080... refused... ... Reporting errors
//The server.xml configuration file of tomcat in the docker container needs to be modified
[root@localhost conf]# vim /var/lib/docker/devicemapper/mnt/84d4fd5a5ee81f77b948c8919a2f12c1577d5161a668d2dcbad4425c3d8287d9
/rootfs/config/tomcat8/conf/server.xm
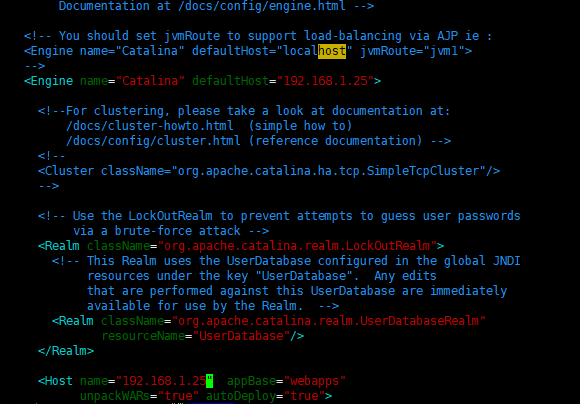
Change defaultHost="localhost" to defaultHost="192.168.1.25"
Change the name in < Host name = localhost appBase = "webapps" to name=192.168.1.25
6) Check the container log file again for error
[root@localhost ~]# docker logs -f 0eec322a30b3
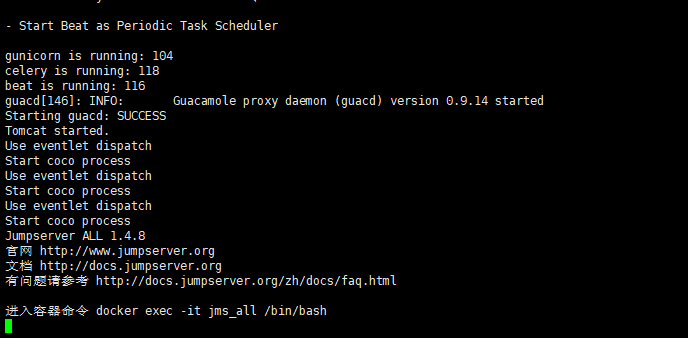
7) Log can be accessed through browser without error

4. Log on to jumpserver service web for virtual machine management
1) login admin management interface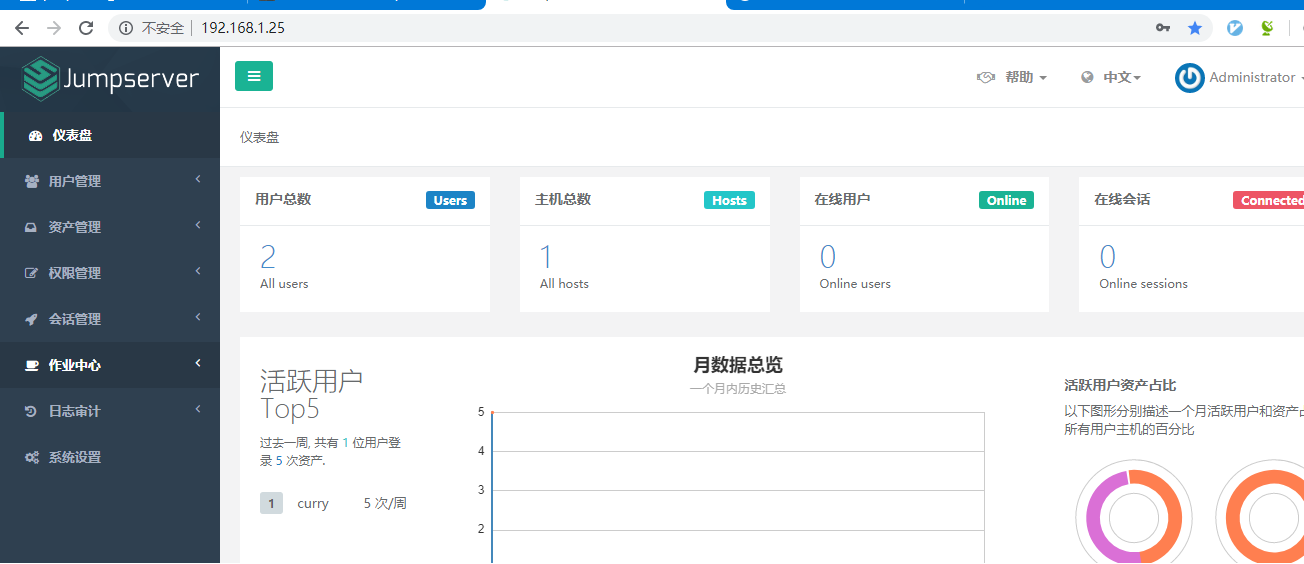
2) Create a develop ment group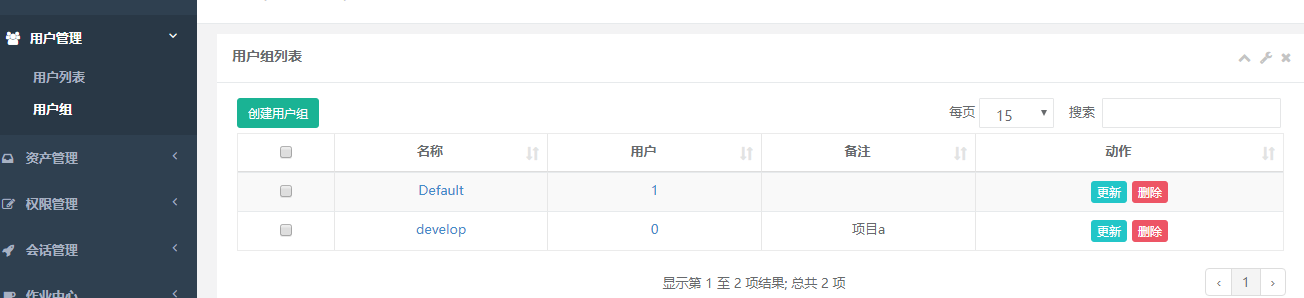
3) Create a user curry, add curry to the develop ment group, role for ordinary users, and then submit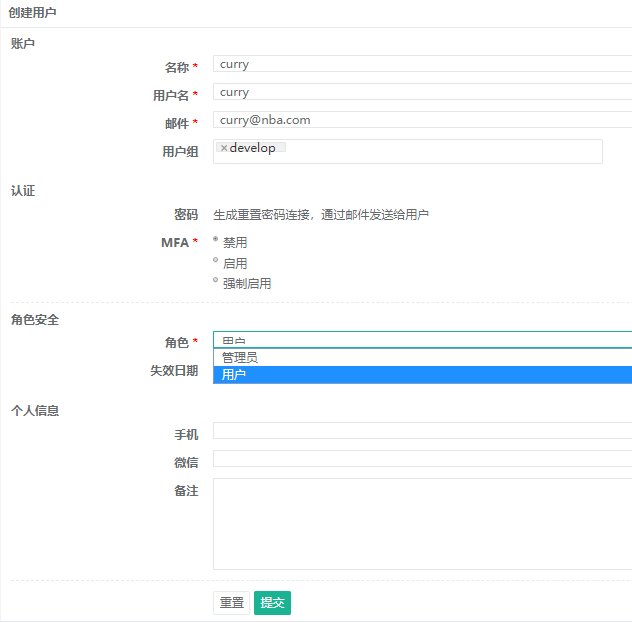
4) Click on the update to add a login password to curry users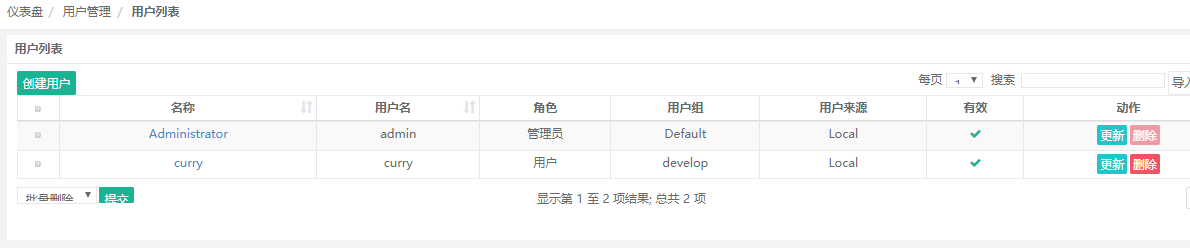
Fill in curry user password and submit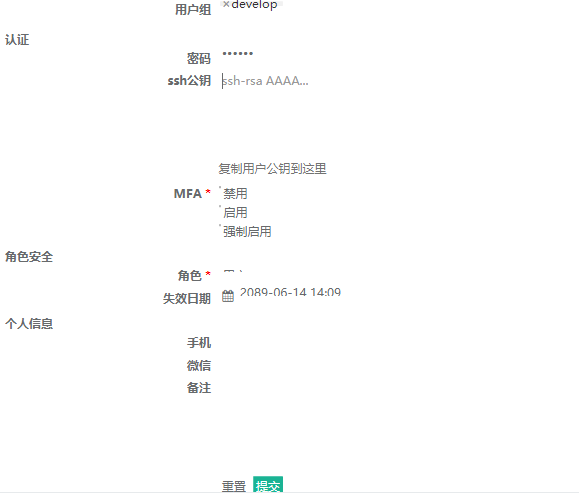
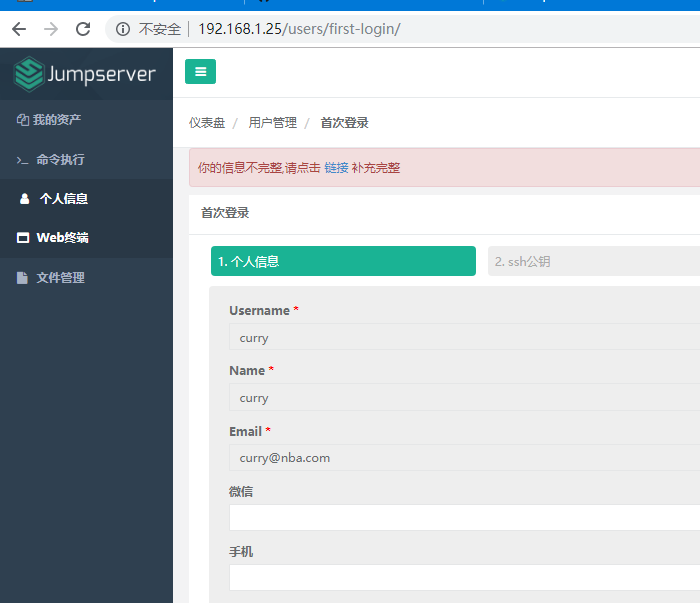
5) Log in with curry account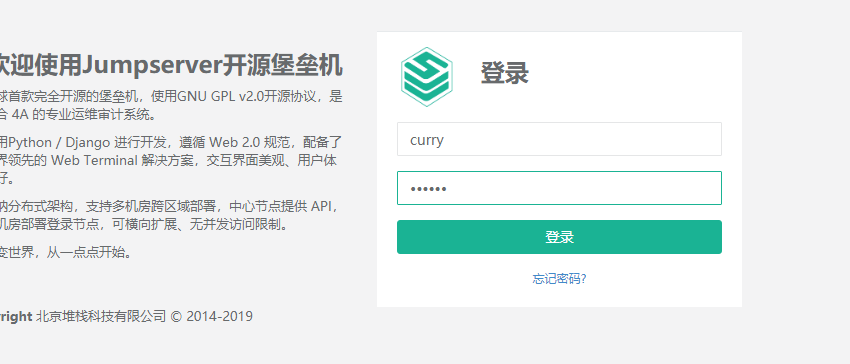
Enter curry user interface
6) Create a management user (to manage the user, who must have the root identity of the asset virtual host with the password of ssh login to the virtual host)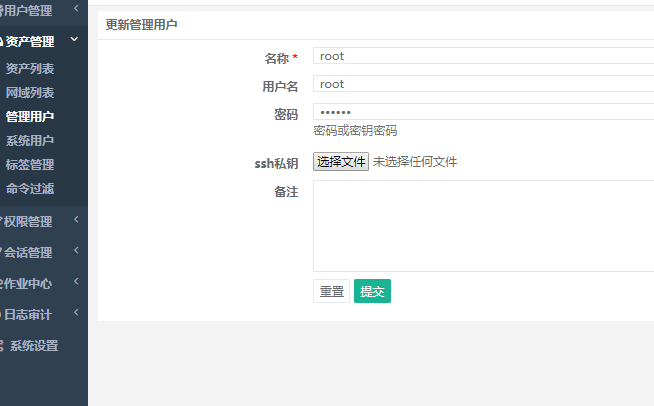
7) Create assets (referring to managed virtual hosts)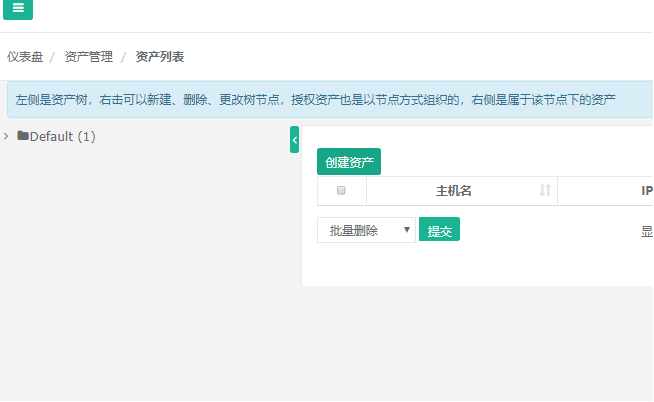
Fill in Virtual Host Name, ip Address and Manage User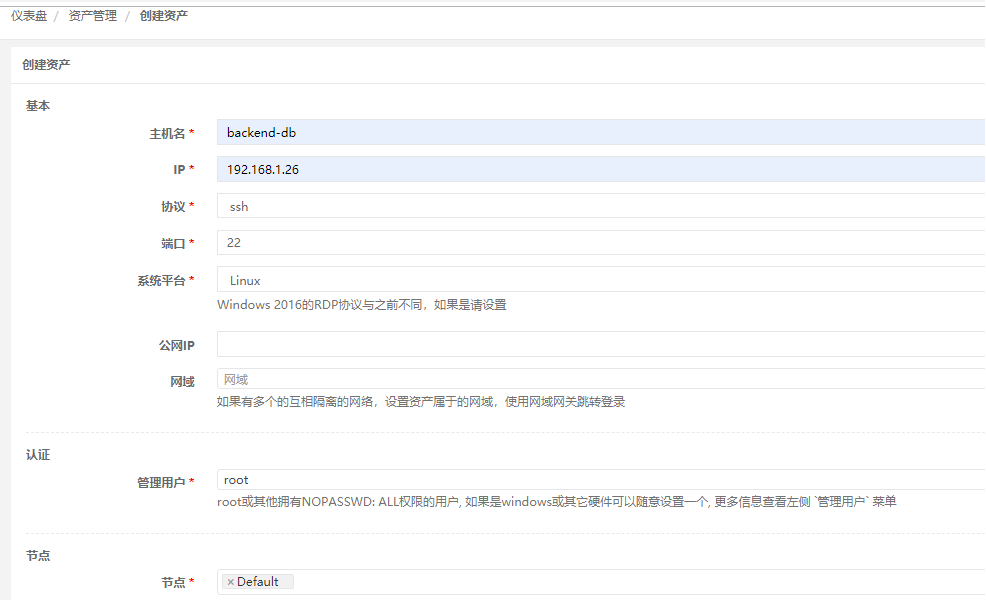
Click on the hostname to enter the asset details page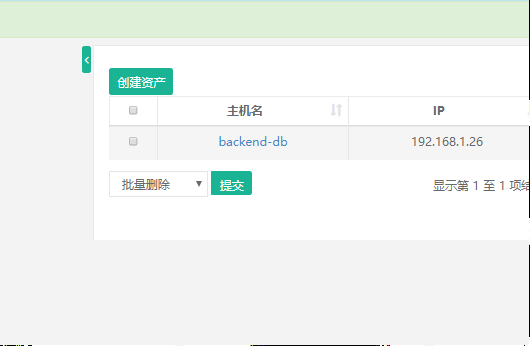
Click on the test to check whether the managed virtual host can ping. The results show that the test is successful.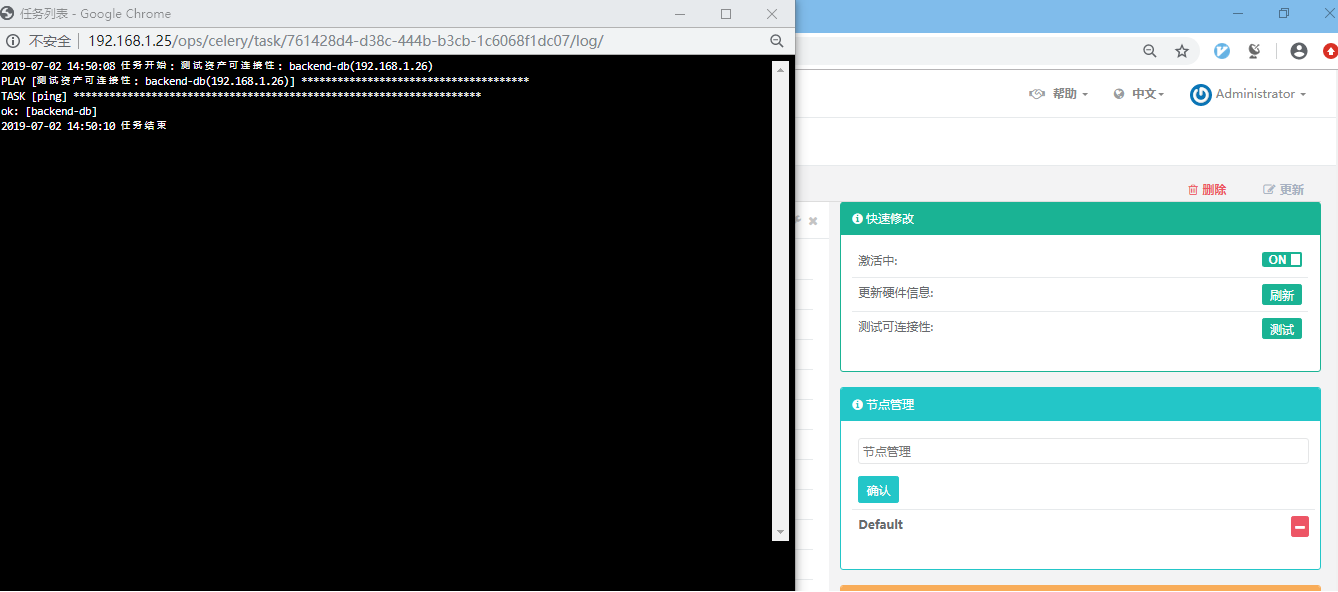
8) Create a filter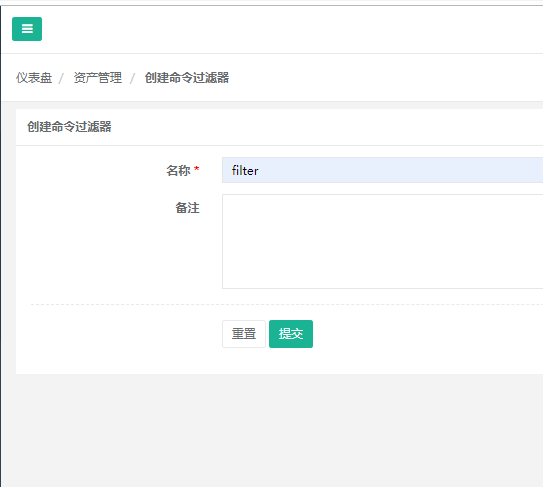
9) Create a system user (this username will be created automatically after login to the virtual host, default normal user for login to the virtual host, non-administrator user, with less privileges)

10) Create authorization rules to add assets to the develop ment group, where users can access the asset virtual host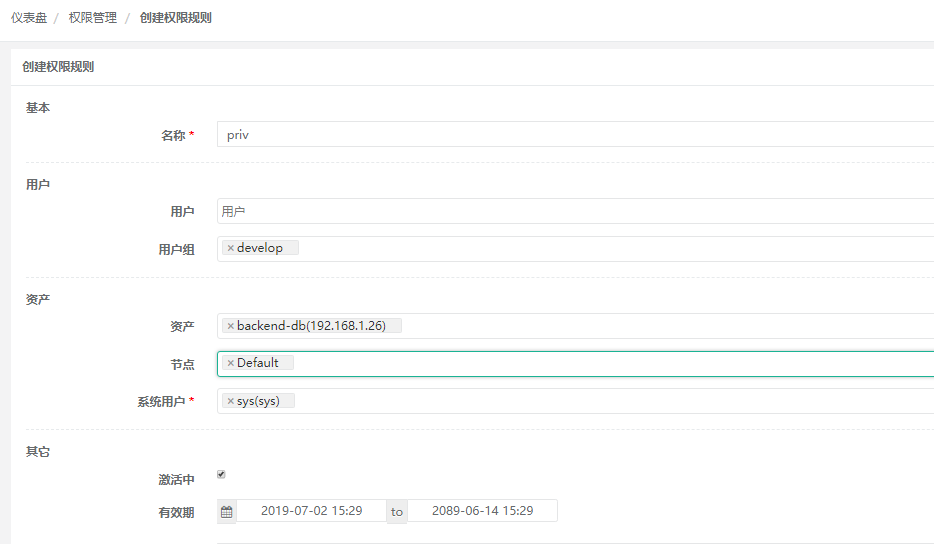
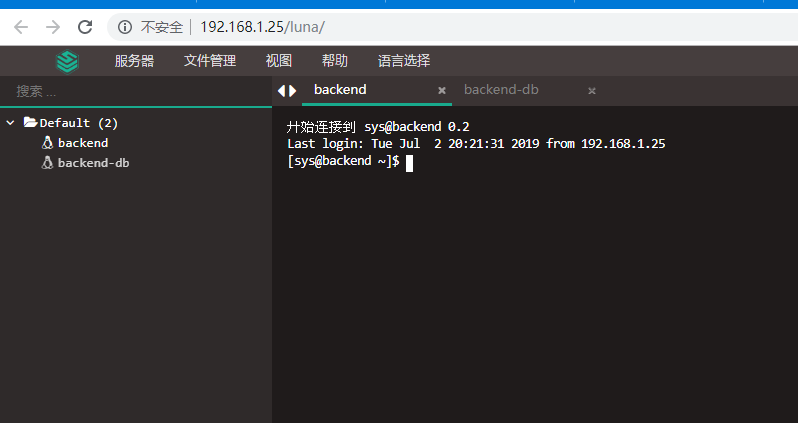
11) Log in to the curry user interface and click on the web terminal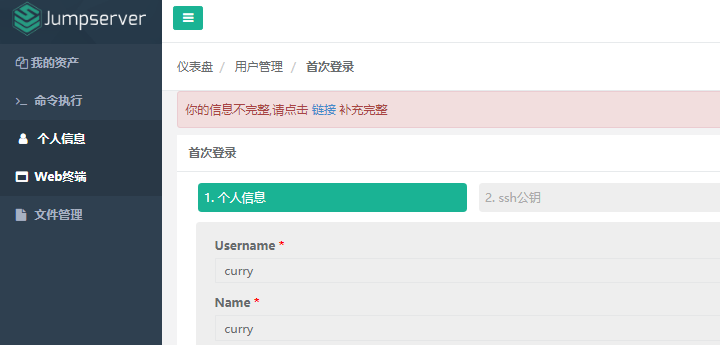
You can see the authorized terminal virtual machine. Click on the virtual terminal to operate the terminal in the command window.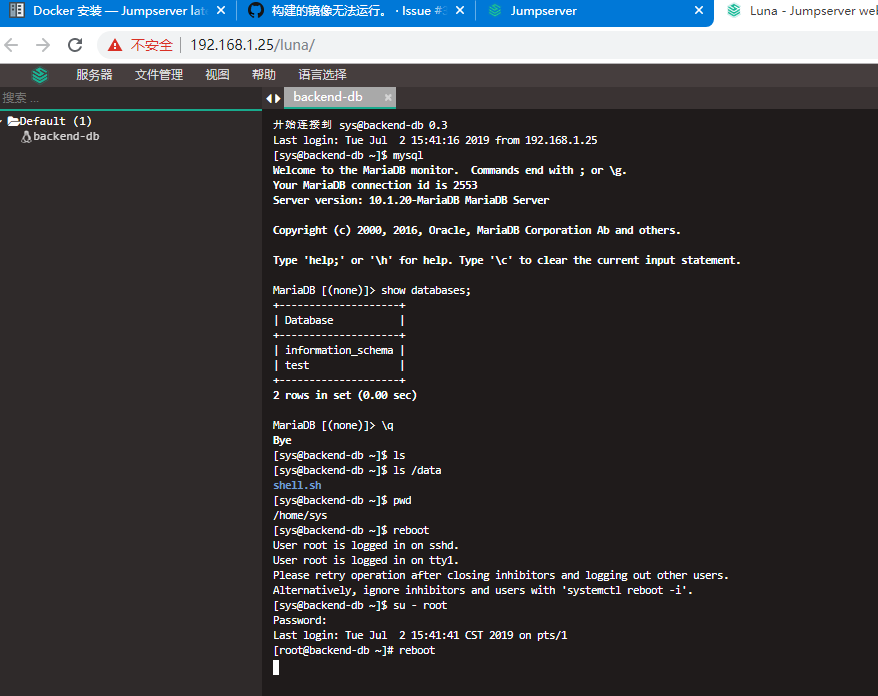
12) Reset the filter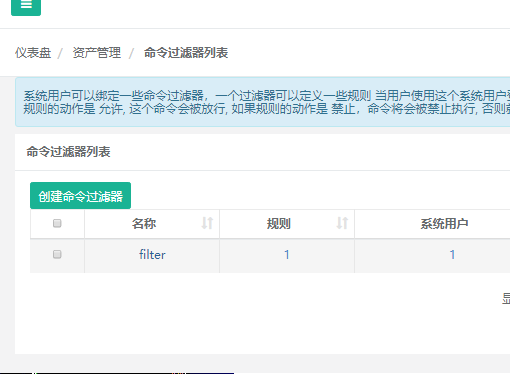
Click Rules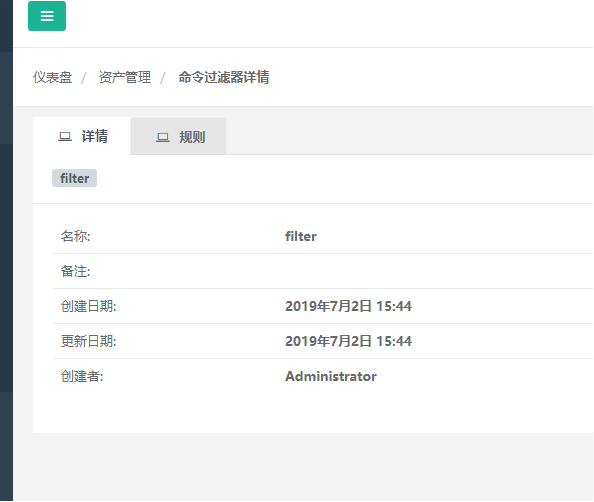
Setting command filtering prohibition rules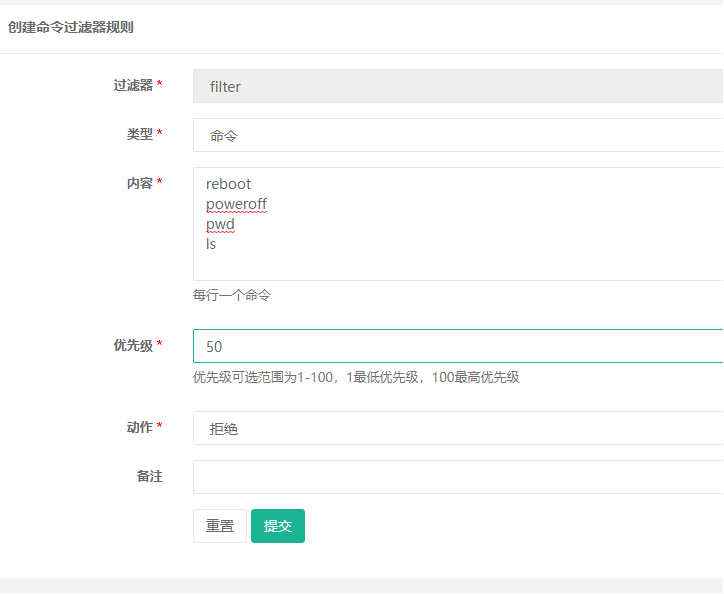
13) When you log in to the curry page again to log in to the virtual host, executing these commands will be prohibited, as shown below.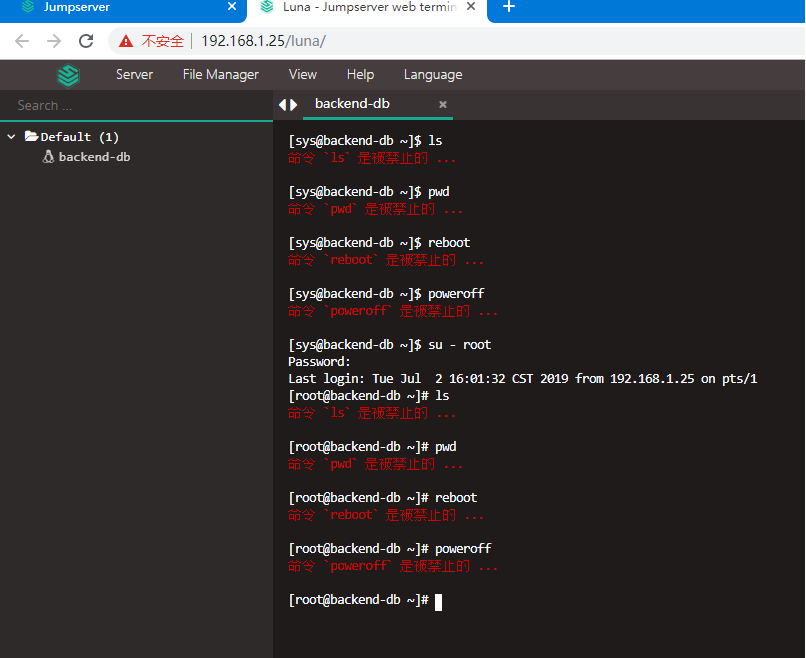
14) Back to admin's web side, a session-managed historical session can open a video playback list to record all the operations of the virtual host.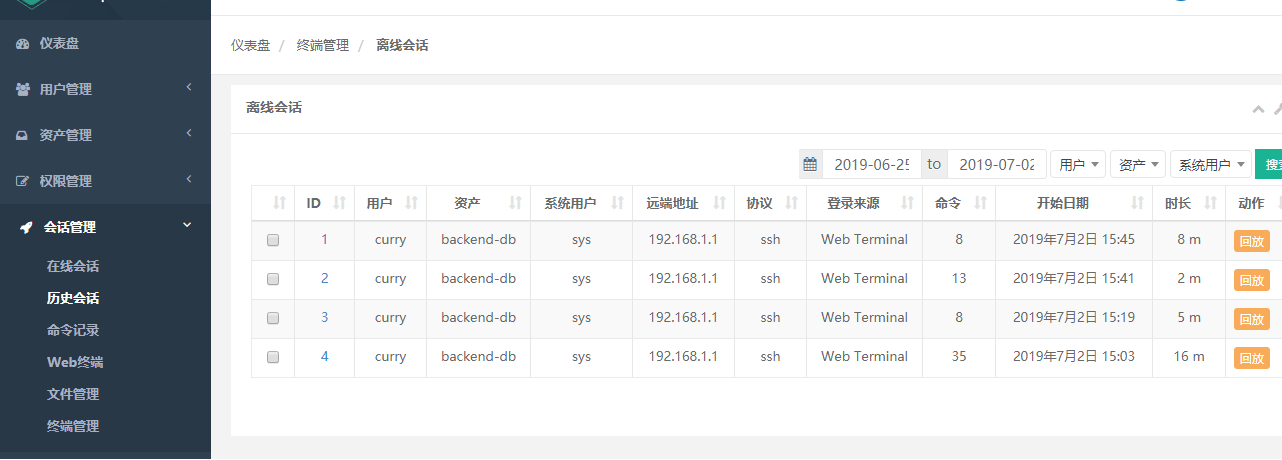
15) Video playback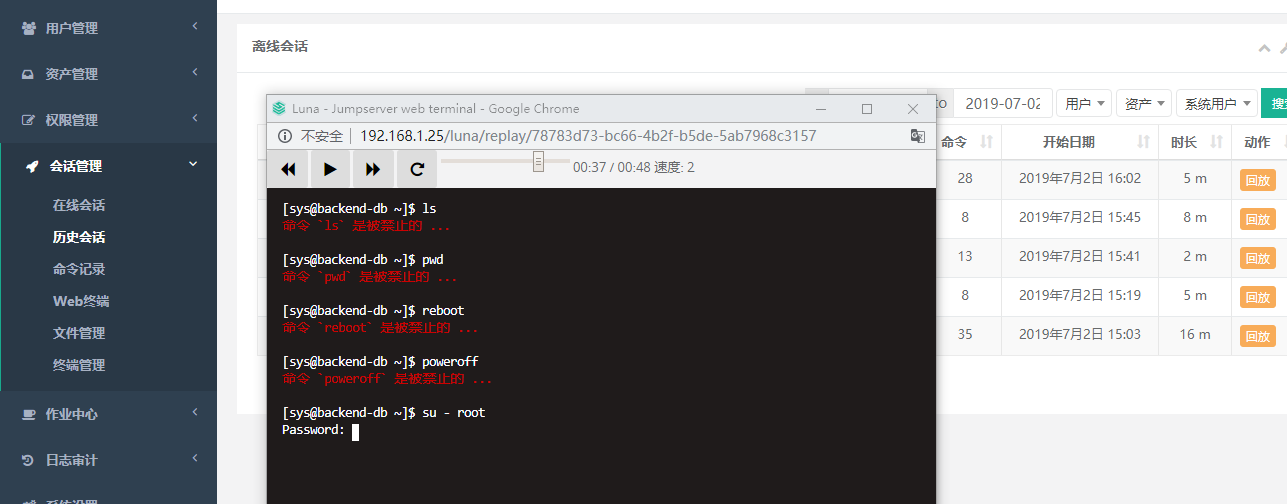
16) Create another asset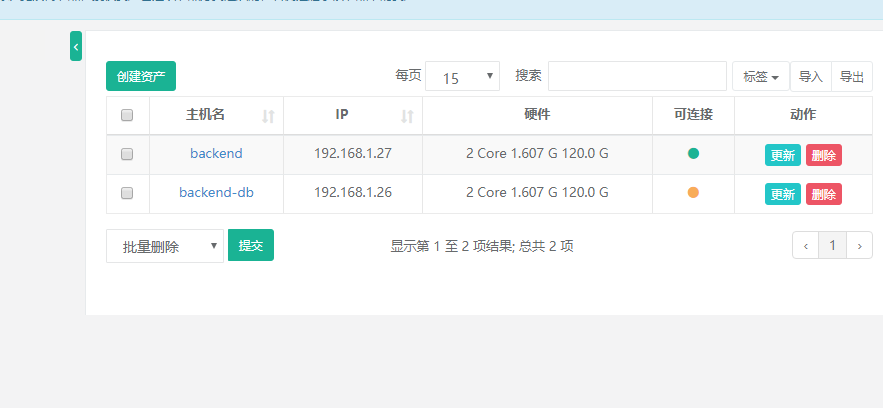
17) Add this asset to the develop ment group in the asset authorization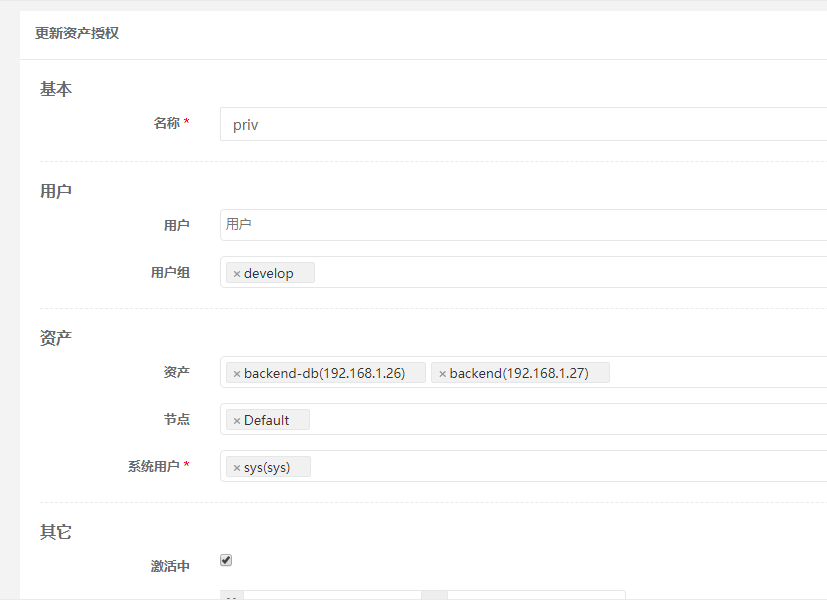
18) Log in to the curry interface and open the web terminal to see how to operate two virtual hosts