In the previous chapter, we have built a very simple framework. In this chapter, we continue to refine, focusing on achieving some dynamic effects through signal and slot functions.
1. Login window
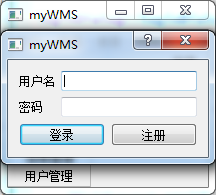
Because our software has the function of login and registration. So we have to build a separate login window. When the user clicks the login button in the main window, this sub-window will pop up for the user to enter the account password for login.
Here we can use a QDialog type control to create the login window. The prototype design is as follows:
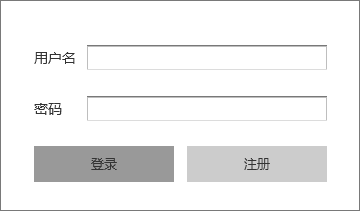
QDidalog is a dialog control. We implement this login window by inheriting this class.
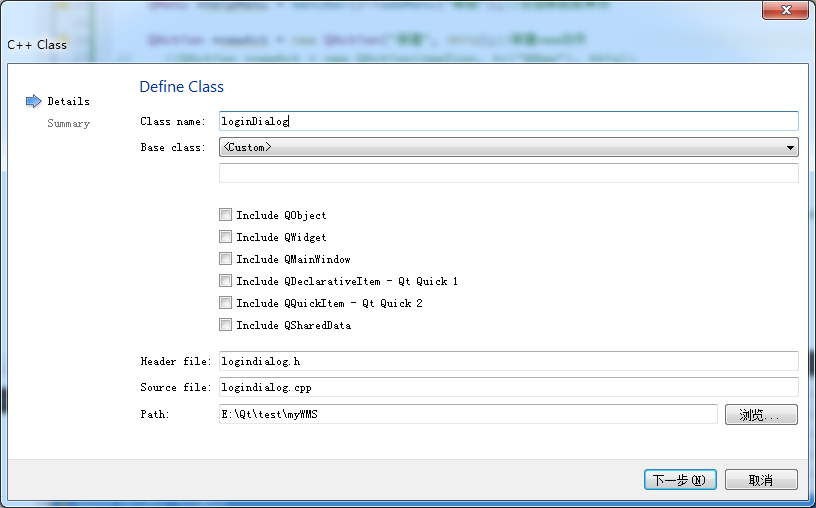
Click on the file of Qt Creator - > New File or Project - > File and Class - > C++ Class. The class is named loginDialog, and the basic class is selected < Custom >, which is customized.
After the new building is completed, click on the logindialog.h header file to edit the following:
#ifndef LOGINDIALOG_H
#define LOGINDIALOG_H

#include <QDialog>


class loginDialog : public QDialog
{
    Q_OBJECT

public:
    loginDialog(QWidget *parent = nullptr);
    ~loginDialog();
};


#endif // LOGINDIALOG_H
We have created a new custom class inherited from QDialog, which has not been added yet.
Edit the constructor and destructor in the logindialog.cpp source file.
#include "logindialog.h"

loginDialog::loginDialog(QWidget *parent)
    : QDialog(parent)
{

}
loginDialog::~loginDialog()
{

}
Next, we click on the main window header file and add a loginDialog member to MainWindow, which, of course, precedes the logindialog.h header file.
#ifndef MAINWINDOW_H
#define MAINWINDOW_H

#include <QMainWindow>
#include <QStackedWidget>
#include <QDialog>
#include "logindialog.h"


class MainWindow : public QMainWindow
{
    Q_OBJECT

public:
    MainWindow(QWidget *parent = nullptr);
    ~MainWindow();
private:
    void creatMenu();
    void creatTool();
    void creatNaviBar();
    void creatStackWidget();

    QStackedWidget *stackWidget;
    loginDialog *myLoginDialog;

private slots:

};
#endif // MAINWINDOW_H
Then we add the following to the creatTool() of mainwindow.cpp:
myLoginDialog = new loginDialog(this);
connect(loginAct,&QAction::triggered,myLoginDialog,&QDialog::show);
A new example of login window is built here, and the trigger signal of loginAct action button is connected with the display slot function of login window through the connect function. That is to say, as long as the login button is clicked, the login window will be displayed.
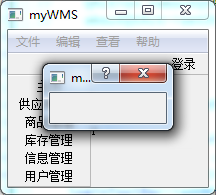
Run again and find that clicking login will pop up a blank dialog window.
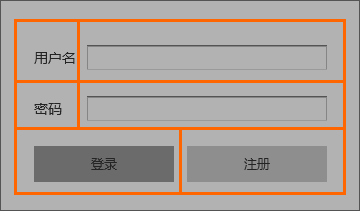
Next, we will complete the login dialog. According to the prototype design, this dialog contains two labels, two text input boxes, two buttons, and the overall layout is also very regular, but the column width of the last row and the column width of the first two rows are inconsistent, so we can not simply use the table layout to complete, we can use QG. RidLayout, QHbox Layout and QVbox Layout are integrated for layout.
The whole page can be divided into 2*4 tables, as follows:
Declare all child controls in logindialog.h, including two labels, two text boxes, and two buttons. The code is as follows:
#ifndef LOGINDIALOG_H
#define LOGINDIALOG_H

#include <QDialog>
#include <QLabel>
#include <QLineEdit>
#include <QPushButton>

class loginDialog : public QDialog
{
    Q_OBJECT

public:
    loginDialog(QWidget *parent = nullptr);
    ~loginDialog();

    QLabel *nameLabel;
    QLabel *passwordLabel;
    QLineEdit *nameEdit;
    QLineEdit *passwordEdit;
    QPushButton *loginButton;
    QPushButton *registButton;
};

#endif // LOGINDIALOG_H
In the constructor of logindialog.cpp, add the following:
loginDialog::loginDialog(QWidget *parent)
    : QDialog(parent)
{
    nameLabel = new QLabel("User name");
    passwordLabel = new QLabel("Password");
    nameEdit = new QLineEdit;
    passwordEdit = new QLineEdit;
    loginButton = new QPushButton("Sign in");
    registButton = new QPushButton("register");

    QGridLayout *gridLayout = new QGridLayout;
    gridLayout->addWidget(nameLabel,0,0);
    gridLayout->addWidget(nameEdit,0,1);
    gridLayout->addWidget(passwordLabel,1,0);
    gridLayout->addWidget(passwordEdit,1,1);
    QHBoxLayout *hLayout = new QHBoxLayout;
    hLayout->addWidget(loginButton);
    hLayout->addWidget(registButton);
    QVBoxLayout *vLayout = new QVBoxLayout;
    vLayout->addLayout(gridLayout);
    vLayout->addLayout(hLayout);

    setLayout(vLayout);

}
Run it and click on the login button. You can see that the login interface is basically in shape now.
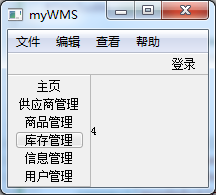
2. Page switching
In the previous chapter, we have added six pages through QStacked Widget. Next, we associate the six action buttons of the navigation bar on the left with the six pages and click on different buttons to display different pages.
We turn the six temporary action buttons in the creatNaviBar() function into the global variables of mainwindow and declare them in the header file.
class MainWindow : public QMainWindow
{
    Q_OBJECT

public:
    MainWindow(QWidget *parent = nullptr);
    ~MainWindow();
private:
    void creatMenu();
    void creatTool();
    void creatNaviBar();
    void creatStackWidget();

    QStackedWidget *stackWidget;
    loginDialog *myLoginDialog;

    QAction *homeAction;
    QAction *supplierAction;
    QAction *goodsAction;
    QAction *stockAction;
    QAction *infoAction;
    QAction *userAction;

};
Modify creatNaviBar() to read:
void MainWindow::creatNaviBar()
{
    QToolBar *naviBar = new QToolBar("Navigation",this);
    addToolBar(Qt::LeftToolBarArea,naviBar);
    homeAction = new QAction("homepage",this);
    naviBar->addAction(homeAction);
    supplierAction = new QAction("Supplier Management",this);
    naviBar->addAction(supplierAction);
    goodsAction = new QAction("Commodity management",this);
    naviBar->addAction(goodsAction);
    stockAction = new QAction("Inventory management",this);
    naviBar->addAction(stockAction);
    infoAction = new QAction("information management",this);
    naviBar->addAction(infoAction);
    userAction = new QAction("user management",this);
    naviBar->addAction(userAction);
    naviBar->setMovable(false);
}
Next, we can call these action buttons anywhere else.
We add a slot function void switchPages() to the main window and edit the following in the body of the function:
void MainWindow::switchPages()
{
    QAction *action = qobject_cast<QAction *>(sender());
    if(action->text() == "homepage")
        stackWidget->setCurrentIndex(0);
    if(action->text() == "Supplier Management")
        stackWidget->setCurrentIndex(1);
    if(action->text() == "Commodity management")
        stackWidget->setCurrentIndex(2);
    if(action->text() == "Inventory management")
        stackWidget->setCurrentIndex(3);
    if(action->text() == "information management")
        stackWidget->setCurrentIndex(4);
    if(action->text() == "user management")
        stackWidget->setCurrentIndex(5);
}
This function means that I first look at who is the signal transmitter triggering the slot function. I convert the transmitter into an action button. If the name of the button matches the text of the navigation bar button, the stack container displays the page corresponding to the corresponding button. Note that the index of the stack container starts at 0.
In the main window constructor, we connect the six buttons in the navigation bar to the slot function:
MainWindow::MainWindow(QWidget *parent)
: QMainWindow(parent)
{
creatMenu();
creatTool();
creatNaviBar();
creatStackWidget();
connect(homeAction,&QAction::triggered,this,&MainWindow::switchPages);
connect(supplierAction,&QAction::triggered,this,&MainWindow::switchPages);
connect(goodsAction,&QAction::triggered,this,&MainWindow::switchPages);
connect(stockAction,&QAction::triggered,this,&MainWindow::switchPages);
connect(infoAction,&QAction::triggered,this,&MainWindow::switchPages);
connect(userAction,&QAction::triggered,this,&MainWindow::switchPages);
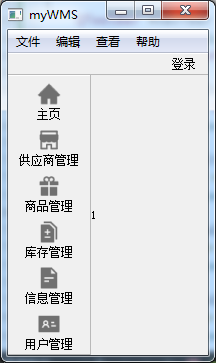
}If you run it, you can see that different pages can be displayed by clicking different buttons.
3. Button Add icon
The navigation bar is still relatively simple. For beauty, we add icon s to every button in the navigation bar.
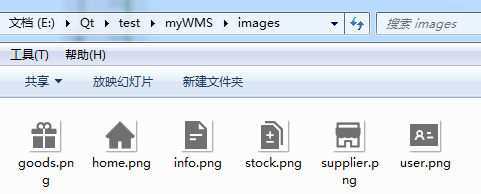
First, we use Photoshop or sketch to cut out the PNG format file of icon, because PNG can support transparent background. The cut icon is named after the content represented by icons, such as the icon of the home button. I named it home.png. I try to name the icon as standard as possible. It will be more convenient to call it later in the code.
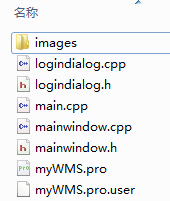
We put the cut icon into a folder in the project file directory. The folder is named images, and the cut file is ready.
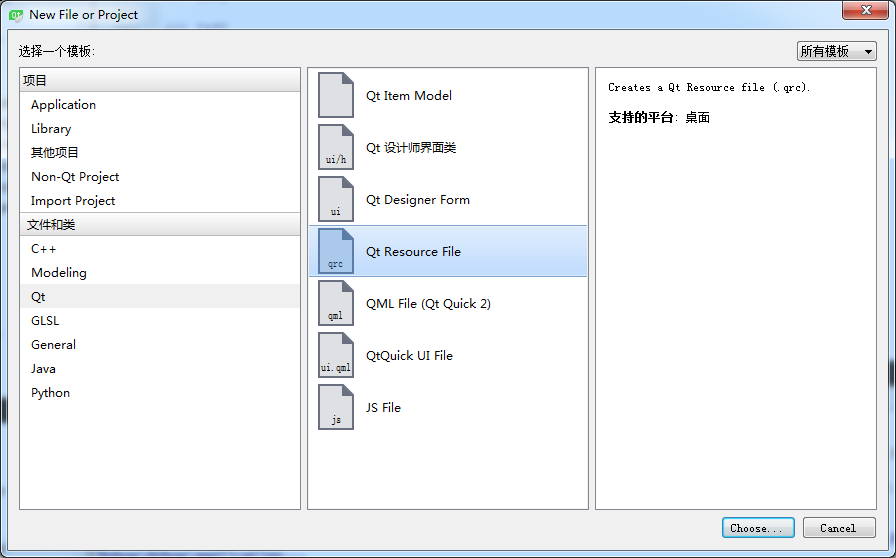
Next, we need to add resource files for the project, click on file - > new file or project - > file and class - > Qt - > Qt Resource File.
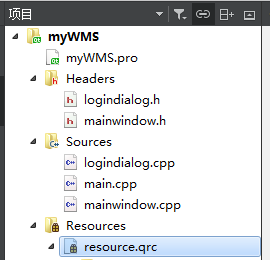
My name is resource. When the new project is successful, you can see that a resource.qrc file has been added to the project in the project file window.
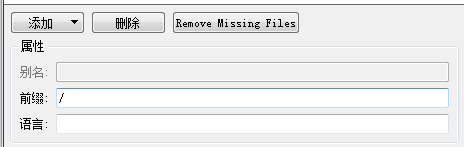
We click Add - > Add Prefix and edit the input box of Prefix as "/"
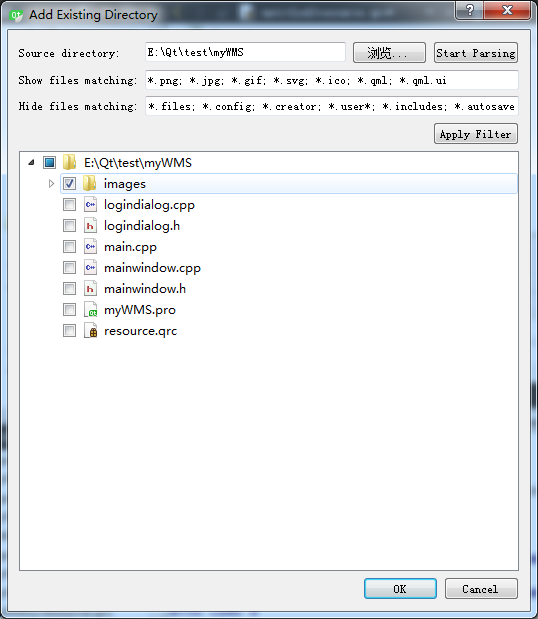
Then select resource.qrc in the project window, right-click to add the existing directory, and in the pop-up window, check the image directory we just approved, other project files do not check.
Then, you can see that the qrc file in the project window can be expanded, including the icon file we just prepared, and then we can use these icons directly in the project.
In creatNaviBar(), modify the code as follows:
void MainWindow::creatNaviBar()
{
    QToolBar *naviBar = new QToolBar("Navigation",this);
    naviBar->setToolButtonStyle(Qt::ToolButtonTextUnderIcon);
    addToolBar(Qt::LeftToolBarArea,naviBar);

    const QIcon homeIcon = QIcon::fromTheme("home", QIcon(":/images/home.png"));
    homeAction = new QAction(homeIcon,"homepage",this);
    naviBar->addAction(homeAction);

    const QIcon supplierIcon = QIcon::fromTheme("supplier", QIcon(":/images/supplier.png"));
    supplierAction = new QAction(supplierIcon,"Supplier Management",this);
    naviBar->addAction(supplierAction);

    const QIcon goodsIcon = QIcon::fromTheme("goods", QIcon(":/images/goods.png"));
    goodsAction = new QAction(goodsIcon,"Commodity management",this);
    naviBar->addAction(goodsAction);

    const QIcon stockIcon = QIcon::fromTheme("stock", QIcon(":/images/stock.png"));
    stockAction = new QAction(stockIcon,"Inventory management",this);
    naviBar->addAction(stockAction);

    const QIcon infoIcon = QIcon::fromTheme("info", QIcon(":/images/info.png"));
    infoAction = new QAction(infoIcon,"information management",this);
    naviBar->addAction(infoAction);

    const QIcon userIcon = QIcon::fromTheme("user", QIcon(":/images/user.png"));
    userAction = new QAction(userIcon,"user management",this);
    naviBar->addAction(userAction);

    naviBar->setMovable(false);
}
We use the QIcon control to place the icon file, and then add QIcon to each action button. Remember to start by setting the button style of the QToolBar to text under the icon.
If you run it, you can see that the navigation bar button has added icons.
Well, here, we have basically completed the rough UI framework of this software. Although it is still ugly, we will open a chapter to beautify the page in the future. At this stage, the main function is to achieve.