--------------------------------------- Basic Overview - -----------------------------------------------------------------------------------------------------
PXE is a network boot technology developed by Inter Corporation. It works in Client/Server mode. It allows clients to download boot images from remote servers through the network and load installation files or the entire operating system.
The services needed for installing PXE in batches
DHCP+TFTP+DHTP
The files needed to install PXE
Bootstrapper pxelinux.0
Compressed kernel vmlinuz
System initialization file initrd.img
Start menu default
·
DHCP: Automatically assign IP addresses and locate boot files.
TFTP: Store the boot files of the installation system, and load them fast (because the boot files are small and need efficient operation)
FTP: Store system files, large capacity (TCP protocol, system files need safe and stable transmission)
System environment
CentOS7 serves as a server: running DHCP services to assign addresses, locate bootstraps, run TFTP servers, and provide bootstrap Downloads
CentOS7 as a client: network card supports PXE protocol, motherboard supports network startup
Actual operation
1. Deploy the PXE server first. We need to know that PXE is used in the LAN environment, but because we need to install the software package needed by the service (or create a private YUM repository), we need to add another network card to set up the host-only mode, so that we can install the required software package and re-Bureau it. Guidance Services in the Area Network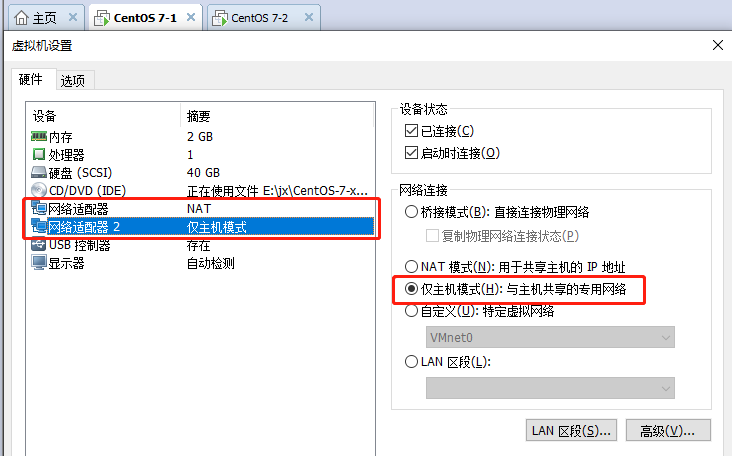
·
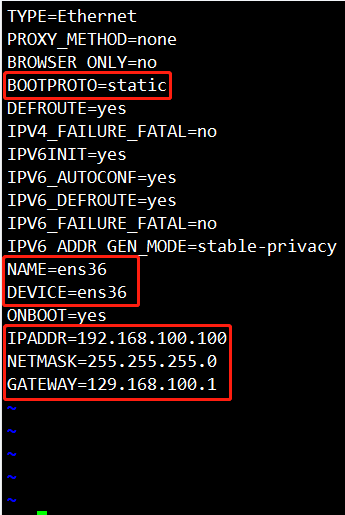
1,First, we configure the newly added network card, which will ens33 Copy a network profile template to ens36 In, and then enter"vim ifcfg-ens36",Get into ens36 In the network configuration file, the ens36 Configuration is static IP,Press"/"input dhcp,Knock back and press"dw"Delete to"static",All of the"ens33"Change to"ens36",Press"dd"delete UUID=c9fb678c-82b2-44b7-93ee-ab6d56e066cb,Reconfiguration of gateway address 192.168.100.1,Press"wq"Save exit, so ens36 The network is configured and restarted after configuration to make it work.
[root@localhost ~]# cd /etc/sysconfig/network-scripts/
[root@localhost network-scripts]# cp -p ifcfg-ens33 ifcfg-ens36
[root@localhost network-scripts]# vim ifcfg-ens36
[root@localhost network-scripts]# service network restart


·
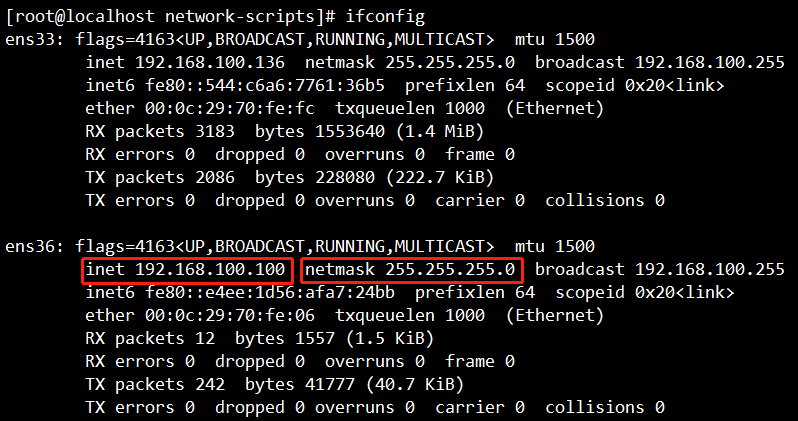
2,Use"ifconfig"Command View Modified ens36IP Address, MAC Does the address take effect?
[root@localhost network-scripts]# ifconfig
·
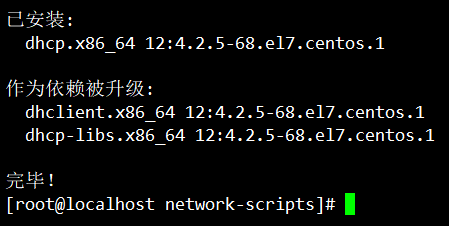
3,After the dual network card configuration is finished, we will start to install the service. First, install the service. DHCP Service, input"yum intsall dhpd -y"Start installation DHCP service
[root@localhost network-scripts]# yum install dhcp -y
·
4,The next thing is configuration. DHCP Process, input"cp -p /usr/share/doc/dhcp-4.2.5/dhcpd.conf.example /etc/dhcp/dhcpd.conf"Copy a template to DHCP In the configuration file, enter"yes"Confirm coverage
[root@localhost network-scripts]# cp -p /usr/share/doc/dhcp-4.2.5/dhcpd.conf.example /etc/dhcp/dhcpd.conf

·
5,After the template has been copied, it enters DHCP Modify the configuration file
Detailed steps[root@localhost network-scripts]# vim /etc/dhcp/dhcpd.conf
subnet 192.168.100.0 netmask 255.255.255.0 {
        range 192.168.100.20 192.168.100.30;
        option routers 192.168.100.100;
        option domain-name-servers 10.10.10.10;
        filename "pxelinux.0";
}
Subnet 192.168.100.0 netmask 255.255.255.0 (set segment 192.168.100.0, MAC address unchanged)
range 192.168.100.20 192.168.100.30; (Configure the address range of DHCP services assigned to clients)
option routers 192.168.100.100; (gateway set to point to local)
option domain-name-servers 10.10.10.10; (assign DNS address)
net-server 192.168.100.100; (point to TFTP server)
filename "pxelinux.0"; (point to boot file location)
·
6,End of configuration DHCP After the configuration file, you can install the bootstrapper file
[root@localhost network-scripts]# yum install syslinux -y

·
7. After installation, you can enter "[root@localhost network-scripts] rpm-ql syslinux | grep pxelinux.0" to see the path location of the file, but we should put it in TFTP, because we pointed to the TFTP path "pxelinux.0" in the configuration file just now.
·
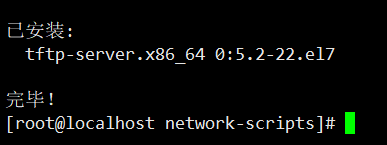
8,Install what we need to use tftp Service, input[root@localhost network-scripts]# yum install tftp-server -y"
[root@localhost network-scripts]# yum install tftp-server -y
·
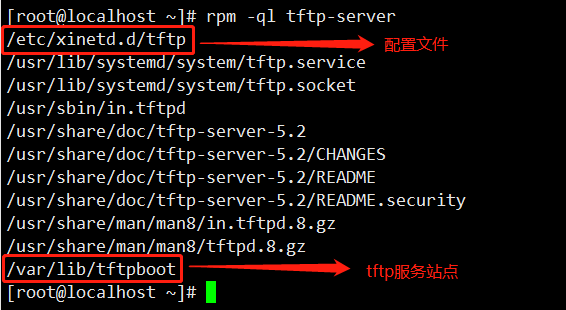
9. After the security of TFTP service is over, we need to know its configuration file and site. Enter "[root@localhost~] # rpm-ql tftp-server", where "/etc/xinetd.d/tftp" is the configuration file of TFTP service, and "/var/lib/tftpboot" is the site of TFTP service.
[root@localhost ~]# rpm -ql tftp-server
·
10,Now let's boot the program."pxelinux.0"Put in tftp In the Service Site
[root@localhost ~]# cp /usr/share/syslinux/pxelinux.0 /var/lib/tftpboot/

·
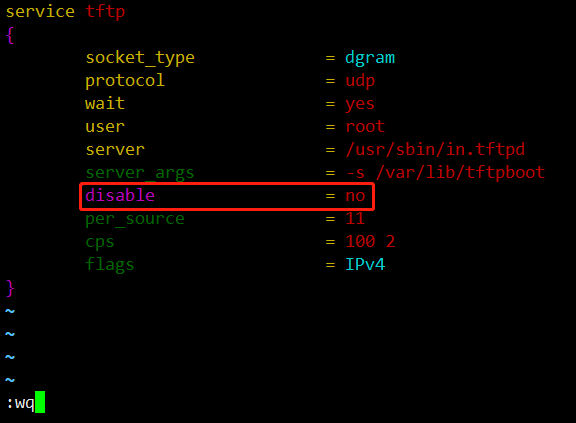
11,Enter configuration file modification enable start-up tftp Service, input"vim /etc/xinetd.d/tftp",Will configure file"enable"In a row"yes"Change to"no"that will do
[root@localhost ~]# vim /etc/xinetd.d/tftp
·
12,install ftp The service uses the mirror file inside, and enters"yum install vsftpd -y"
[root@localhost ~]# yum install vsftpd -y

·
13. Enter the ftp site and remove the creation folder "centos7" as the mount directory. You can choose to copy it to "centos7" or mount it directly. Here, you need to connect the mirror files in the virtual machine to mount it.
[root@localhost ~]# cd /var/ftp/
[root@localhost ftp]# mkdir centos7
[root@localhost ftp]# mount /dev/sr0 /var/ftp/centos7
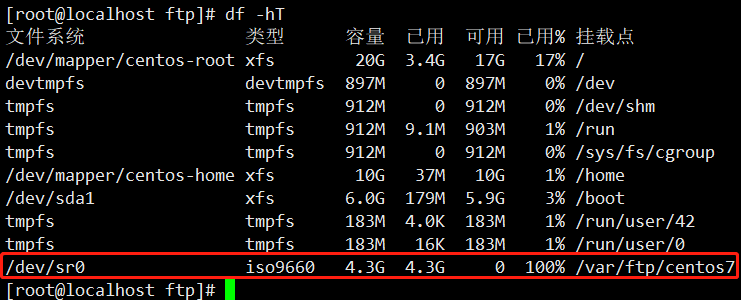
·
14,Place initialization files and compressed kernel files"/var/libtftpboot/(tftp Service Station Site),
[root@localhost pxeboot]# cp initrd.img vmlinuz /var/lib/tftpboot/
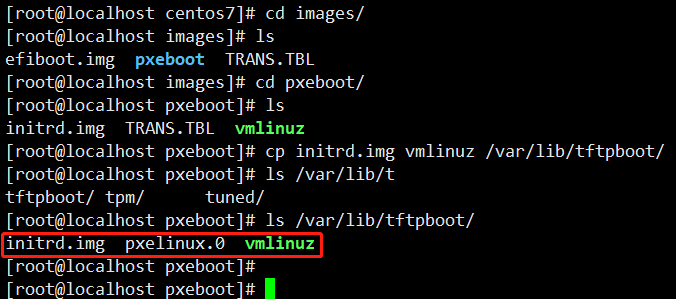
·
15,You can see by looking at it tftp In the service site, the Startup menu is just configured. Next, the Startup menu is configured and entered."tftpboot"Create in"pxelinux.cfg"Catalog(This directory name must not be wrong)
[root@localhost tftpboot]# mkdir pxelinux.cfg

·
16. Enter pxelinux.cfg, manually edit the Startup menu "default", save "wq" and exit after editing.
Detailed configuration
default auto
prompt 1

label auto
        kernel vmlinuz
        append initrd=initrd.img method=ftp://192.168.100.100/centos7

label linux text
        kernel vmlinuz
        append text initrd=initrd.img method=ftp://192.168.100.100/centos7

label linux rescue
        kernel vmlinuz
        append rescue initrd=initrd.img method=ftp://192.168.100.100/centos7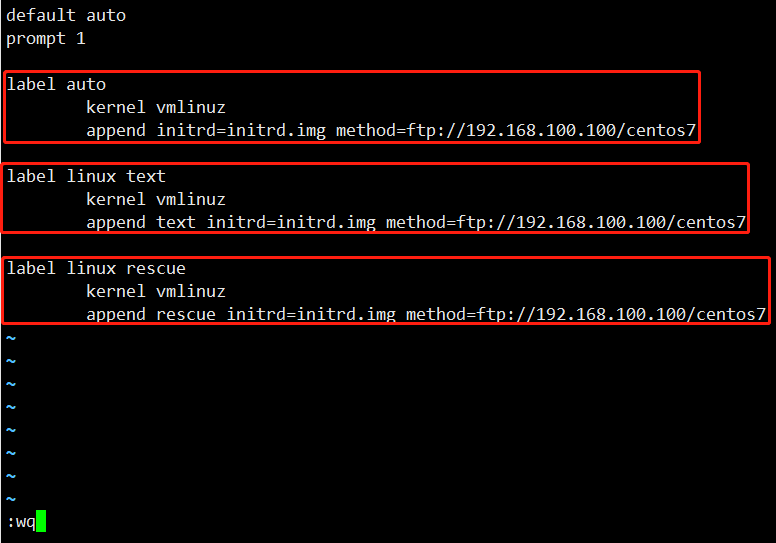
·
17,After all the files are configured, the last step is to shut down the firewall, enhance security, and then start all the services.
[root@localhost pxelinux.cfg]# System CTL stop firewalld. service
[root@localhost pxelinux.cfg]# Setenforce 0 (turn off enhanced security)
[root@localhost pxelinux.cfg]# System CTL start dhcpd (start dhcp service)
[root@localhost pxelinux.cfg]# System CTL start tftp (start tftp service)
[root@localhost pxelinux.cfg]# System CTL start vsftpd (start ftp service)

----------------------------------------------------------------------------------------------------------------------------------------------
1. In order to achieve the installation process without manual, we need to install kickstart here.
[root@localhost ~]# yum install system-config-kickstart -y

·
2. After installation, we enter the virtual machine. Click on the application to see "Kiskstart" in the system tools, and use it to create template files.
·
3. Start configuring the Kiskstart program by clicking on Entry
Basic configuration
Default Language: Chinese (Simplified)
Keyboard: U.S.English
Time zone: Asia/Shanghai
Root password:
Check Installation and Restart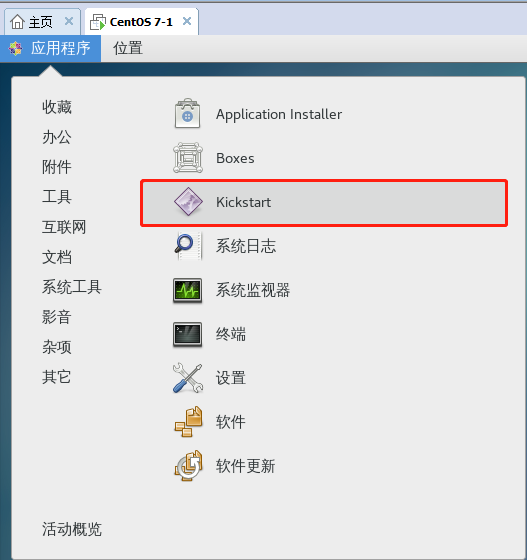
Installation method
Installation Method: Perform a New Installation
Installation method: FTP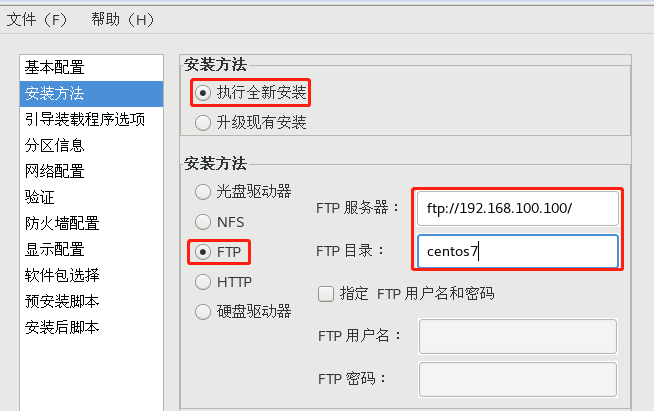
Zoning information
Click Add
/boot:500M
/home:4096M
swap:4096M
/ Use all unallocated space on disk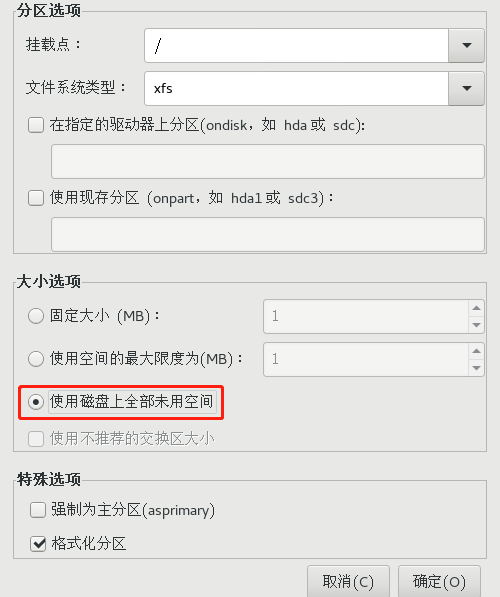
Network settings
Click Add Network Device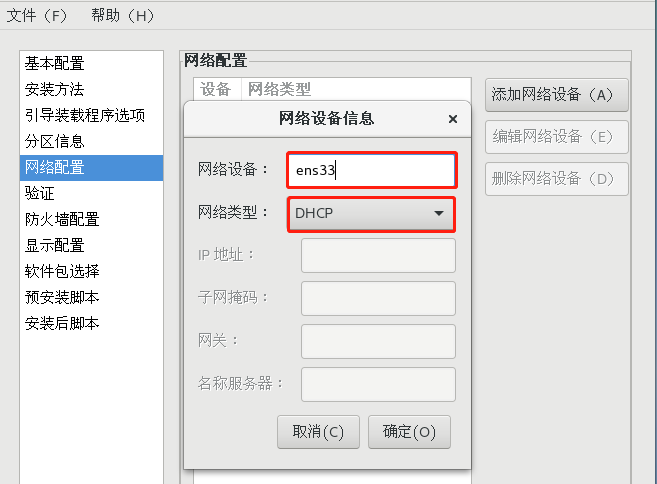
Firewall settings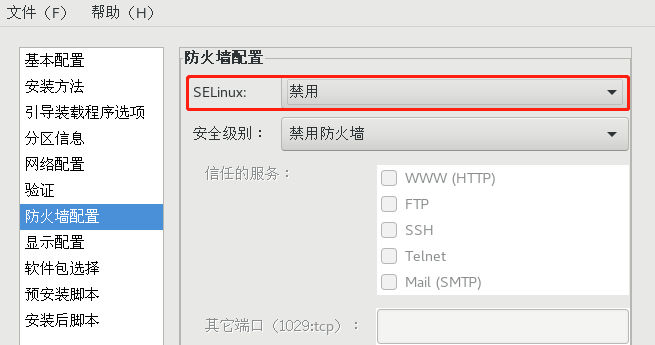
Post-installation script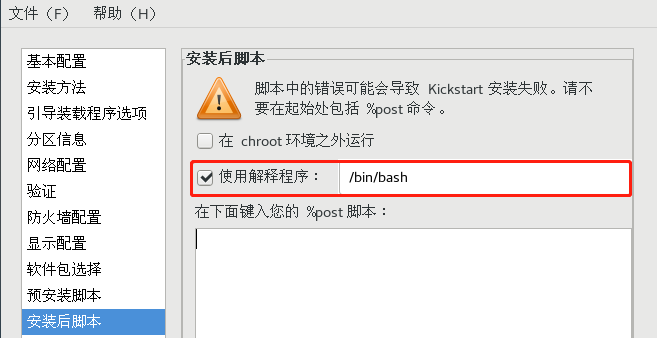
The basic configuration is satisfied. Click on File Save in the upper left corner to save the file in the file system "/var/ftp"/
·
4,"Kiskstart"After configuring, we need to"root"Directory"anaconda-ks.cfg"The host installation package is copied as a template to the"ks.cfg"If it is not replicated, the component selection will fail at installation
[root@localhost ftp]# vim anaconda-ks.cfg
[root@localhost ftp]# vim ks.cfg
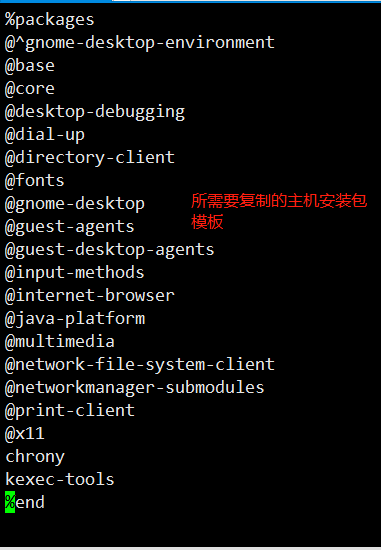
5. Go first to'/ var/lib/tftpboot / and then to'/ pxelinux.cfg'. You can see'default', edit'default'and add the path of kickstart configuration file in automatic mode.
[root@localhost ~]# cd /var/lib/tftpboot/
[root@localhost tftpboot]# cd pxelinux.cfg/
[root@localhost pxelinux.cfg]# vim default

6. Finally, we build a new virtual machine. When installing, we choose to install the operating system later. Then we choose the host mode only. Click on the running virtual machine to see the automatic installation of CentOS 7.
