brief introduction
This tutorial is written in the thinking mode of WHAT-what-HOW Golden Circle. The Golden Circle principle emphasizes learning from WHY to WHAT to learn and HOW to learn. From fuzzy to clear learning mode. Everyone's time is very precious. Before we do something, we should first think about WHY we should do it and WHAT kind of goal we can achieve after learning. Then we should think about HOW to achieve this goal and HOW to achieve it.
It's better to try something and learn from it after failure than to do nothing. - Mark Zuckerberg
Why study?
It is a headache for developers to debug API interfaces and generate API documents. In our busy schedule, we have to write interface documents for front-end developers to describe the parameters and return states of N interfaces in the system, and then test the correctness of the API with the help of third-party tools such as PostMan. After the birth of Swagger, this manual work has been greatly improved. We can not only automatically build beautiful interactive API documentation, but also directly debug the correctness of API interface. The latest version of Swagger has perfectly supported Open Api specification and JWT Token authorized access.
What can be learned?
- Using Swagger to generate elegant API documents
- Using Swagger to debug JWT authorization interface
- Using Swagger to generate descriptions of view models in various class libraries
How do you do it?
Open source address of Swagger project: https://github.com/domaindrivendev/Swashbuckle.AspNetCore
Create a. NET Core project
First of all, create a new. NET Core 3.0 Web Api project, open Nuget installation manager, check the display preview distribution package in the lower left corner, search Swashbuckle.AspNetCore, and select 5.0.0-rc4 to add the version. Note that since. NET Core 3.0 has just come out, many of the currently supported libraries are preview versions. Here I choose 5.0.0-beta to report an error, and select 5.0.0-rc4 to use normally.


Set generate XML description information
Wait patiently for a few seconds after adding, we will select the Api project just created on the left, right-click > attribute (called option in Mac), and check generate XML document, which is the description information used to generate Swagger.

Start configuration of Swagger
Then we open the Startup.cs file to configure the Swagger configuration. In the ConfigureServices method, we add the Swagger configuration as follows:
services.AddSwaggerGen(c =>
{
    c.SwaggerDoc("v1", new OpenApiInfo
    {
        Version = "v1",
        Title = "Crypto Exchange",
        Description = "Be based on.NET Core 3.0 Blockchain digital currency exchange",
        Contact = new OpenApiContact
        {
            Name = "Microfisher",
            Email = "276679490@qq.com",
            Url = new Uri("http://cnblogs.com/microfisher"),
        },
    });

    // Load the xml description document for the assembly
    var baseDirectory = System.AppDomain.CurrentDomain.BaseDirectory;
    var xmlFile = System.AppDomain.CurrentDomain.FriendlyName+ ".xml";
    var xmlPath = Path.Combine(baseDirectory, xmlFile);
    c.IncludeXmlComments(xmlPath);
})
Parameters are very simple, that is, some information displayed on the Swagger interface. Note that you must be used to using Path.Combine to splice paths. Many students like to use double slashes to splice paths. There will be problems under Mac and Linux. Since you have embraced open source technology, try to use MAC or Linux to develop. NET Core. Then we add the following code to the Configure method:
app.UseSwagger();
app.UseSwaggerUI(c =>
{
    c.SwaggerEndpoint("/swagger/v1/swagger.json", "Crypto Exchange");
    // Routing suffix to access Swagger
    c.RoutePrefix = "swagger";
});
Preview the small results
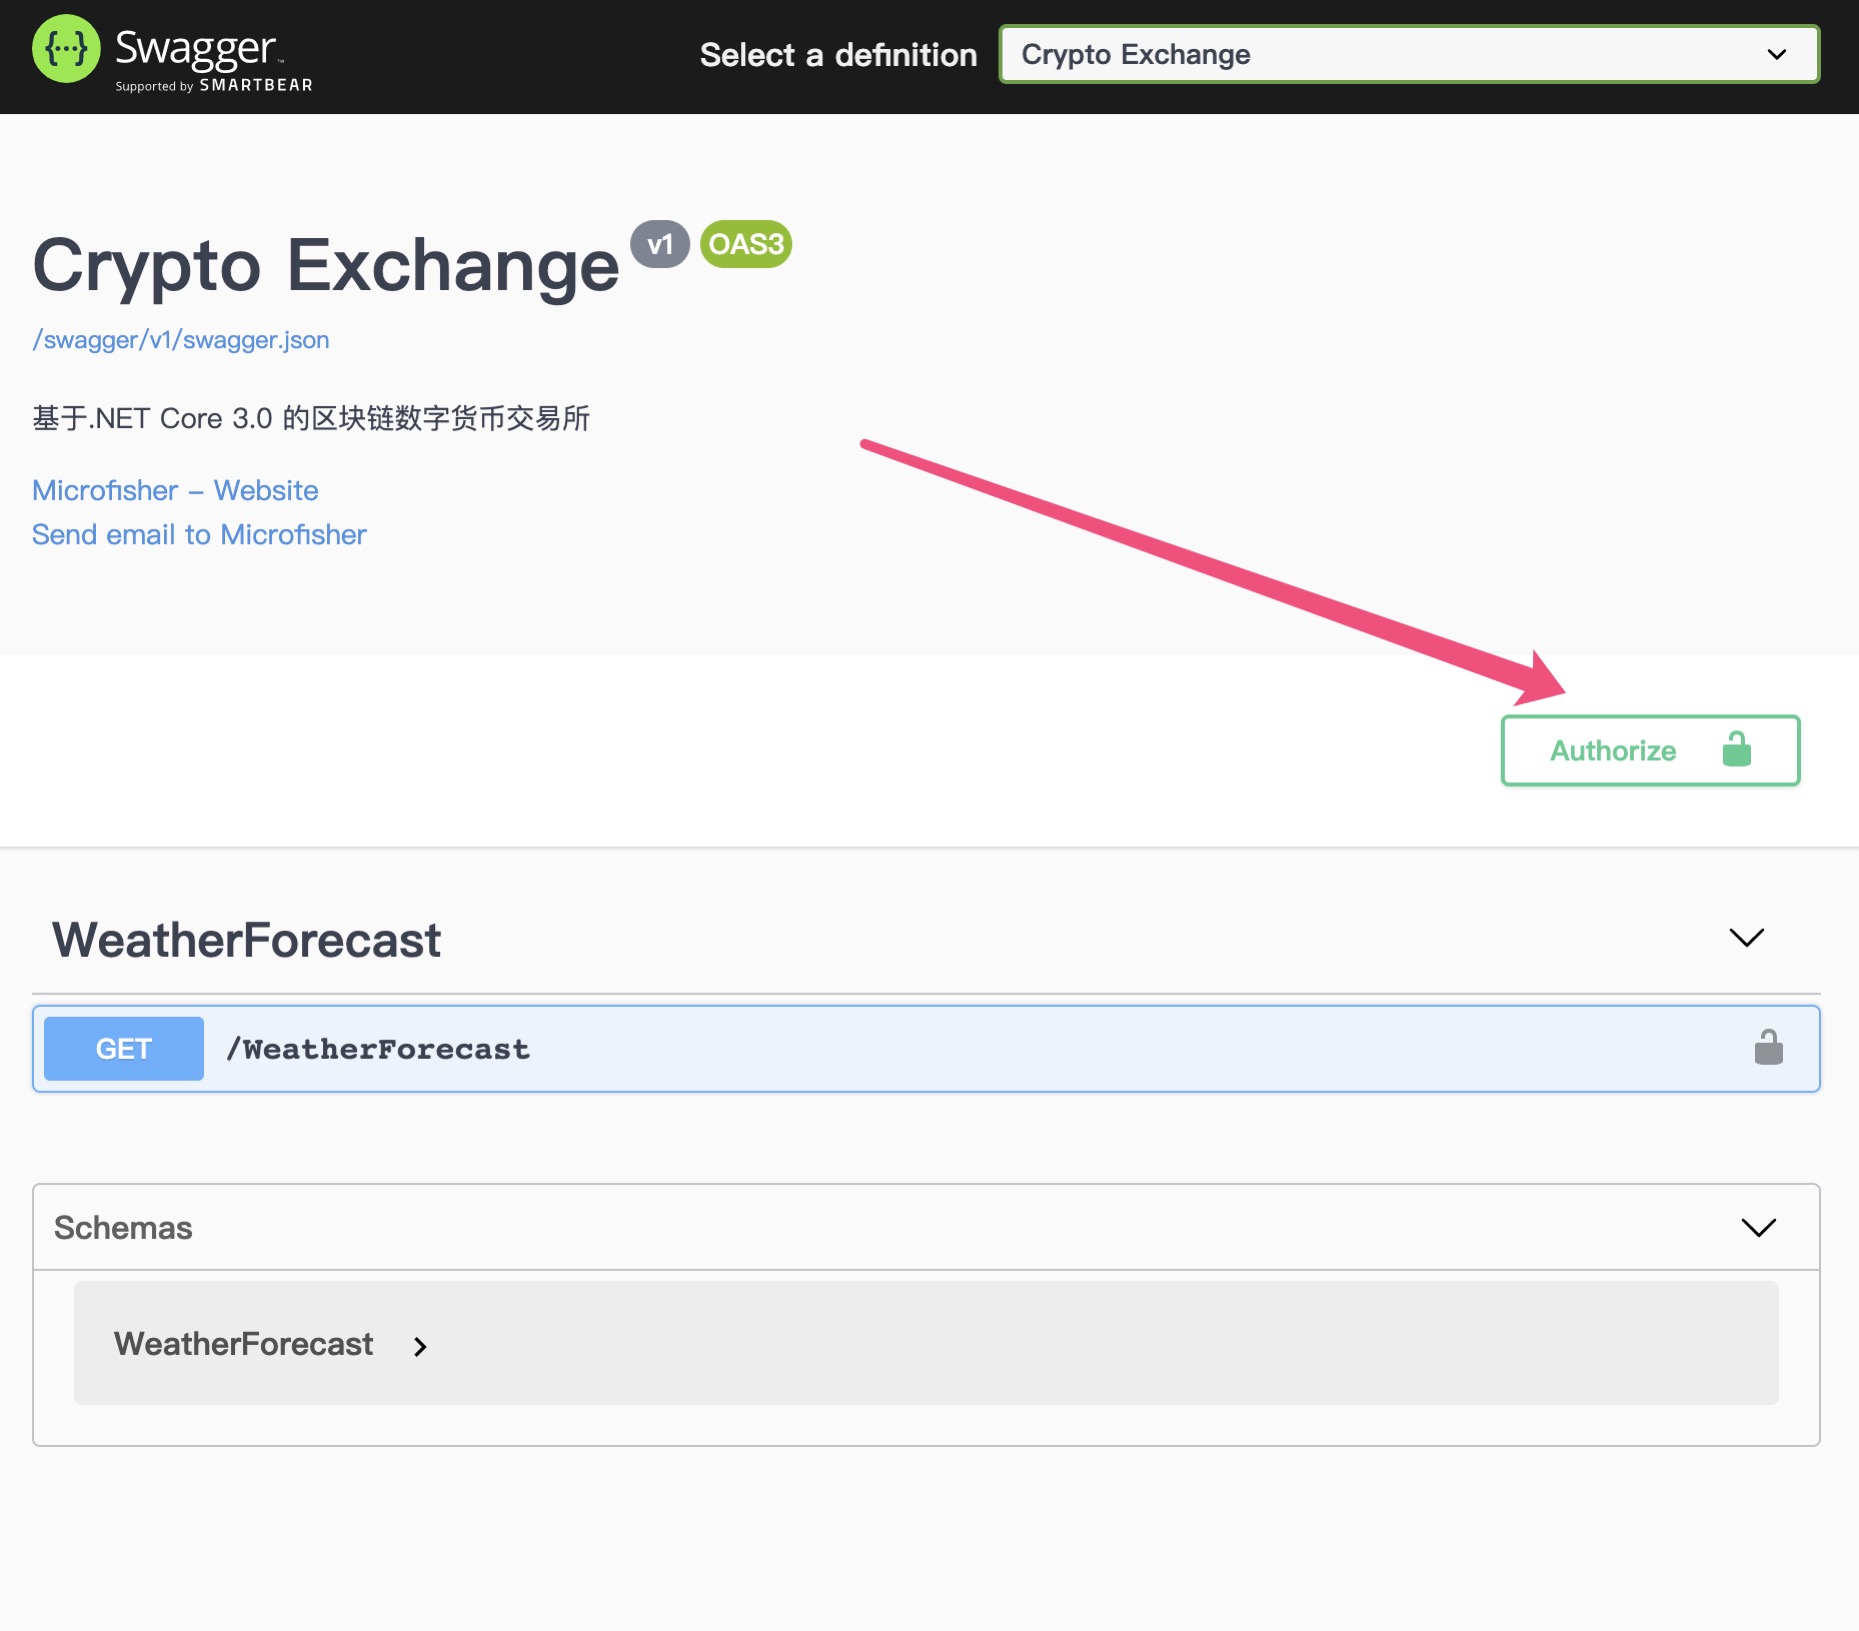
So far, our basic configuration of swagger has been completed. RoutePrefix is the route to access swagger. If it is set to null, you do not need to enter the / swagger suffix to access. Now let's take a look at the F5 startup project. My local website is https://localhost:5000, so go directly to: https://localhost:5000/swagger, as shown in the figure below. It's too ugly for me to go to this interface. What's the beauty? Don't worry, let's tune slowly:

Enable JWT authorization for API documents
At present, many websites use JWT (JSON WEB TOKEN) as the authentication and authorization of account system. JWT has become a popular authentication method for websites because of its simple, efficient and distributed advantages. We will not introduce too much here. If you are interested, I can write another long article to introduce the advantages and use methods of JWT. We will continue to add JWT authorization authentication for Swagger, open the Startup.cs file, and modify the code in the ConfigureServices method above:
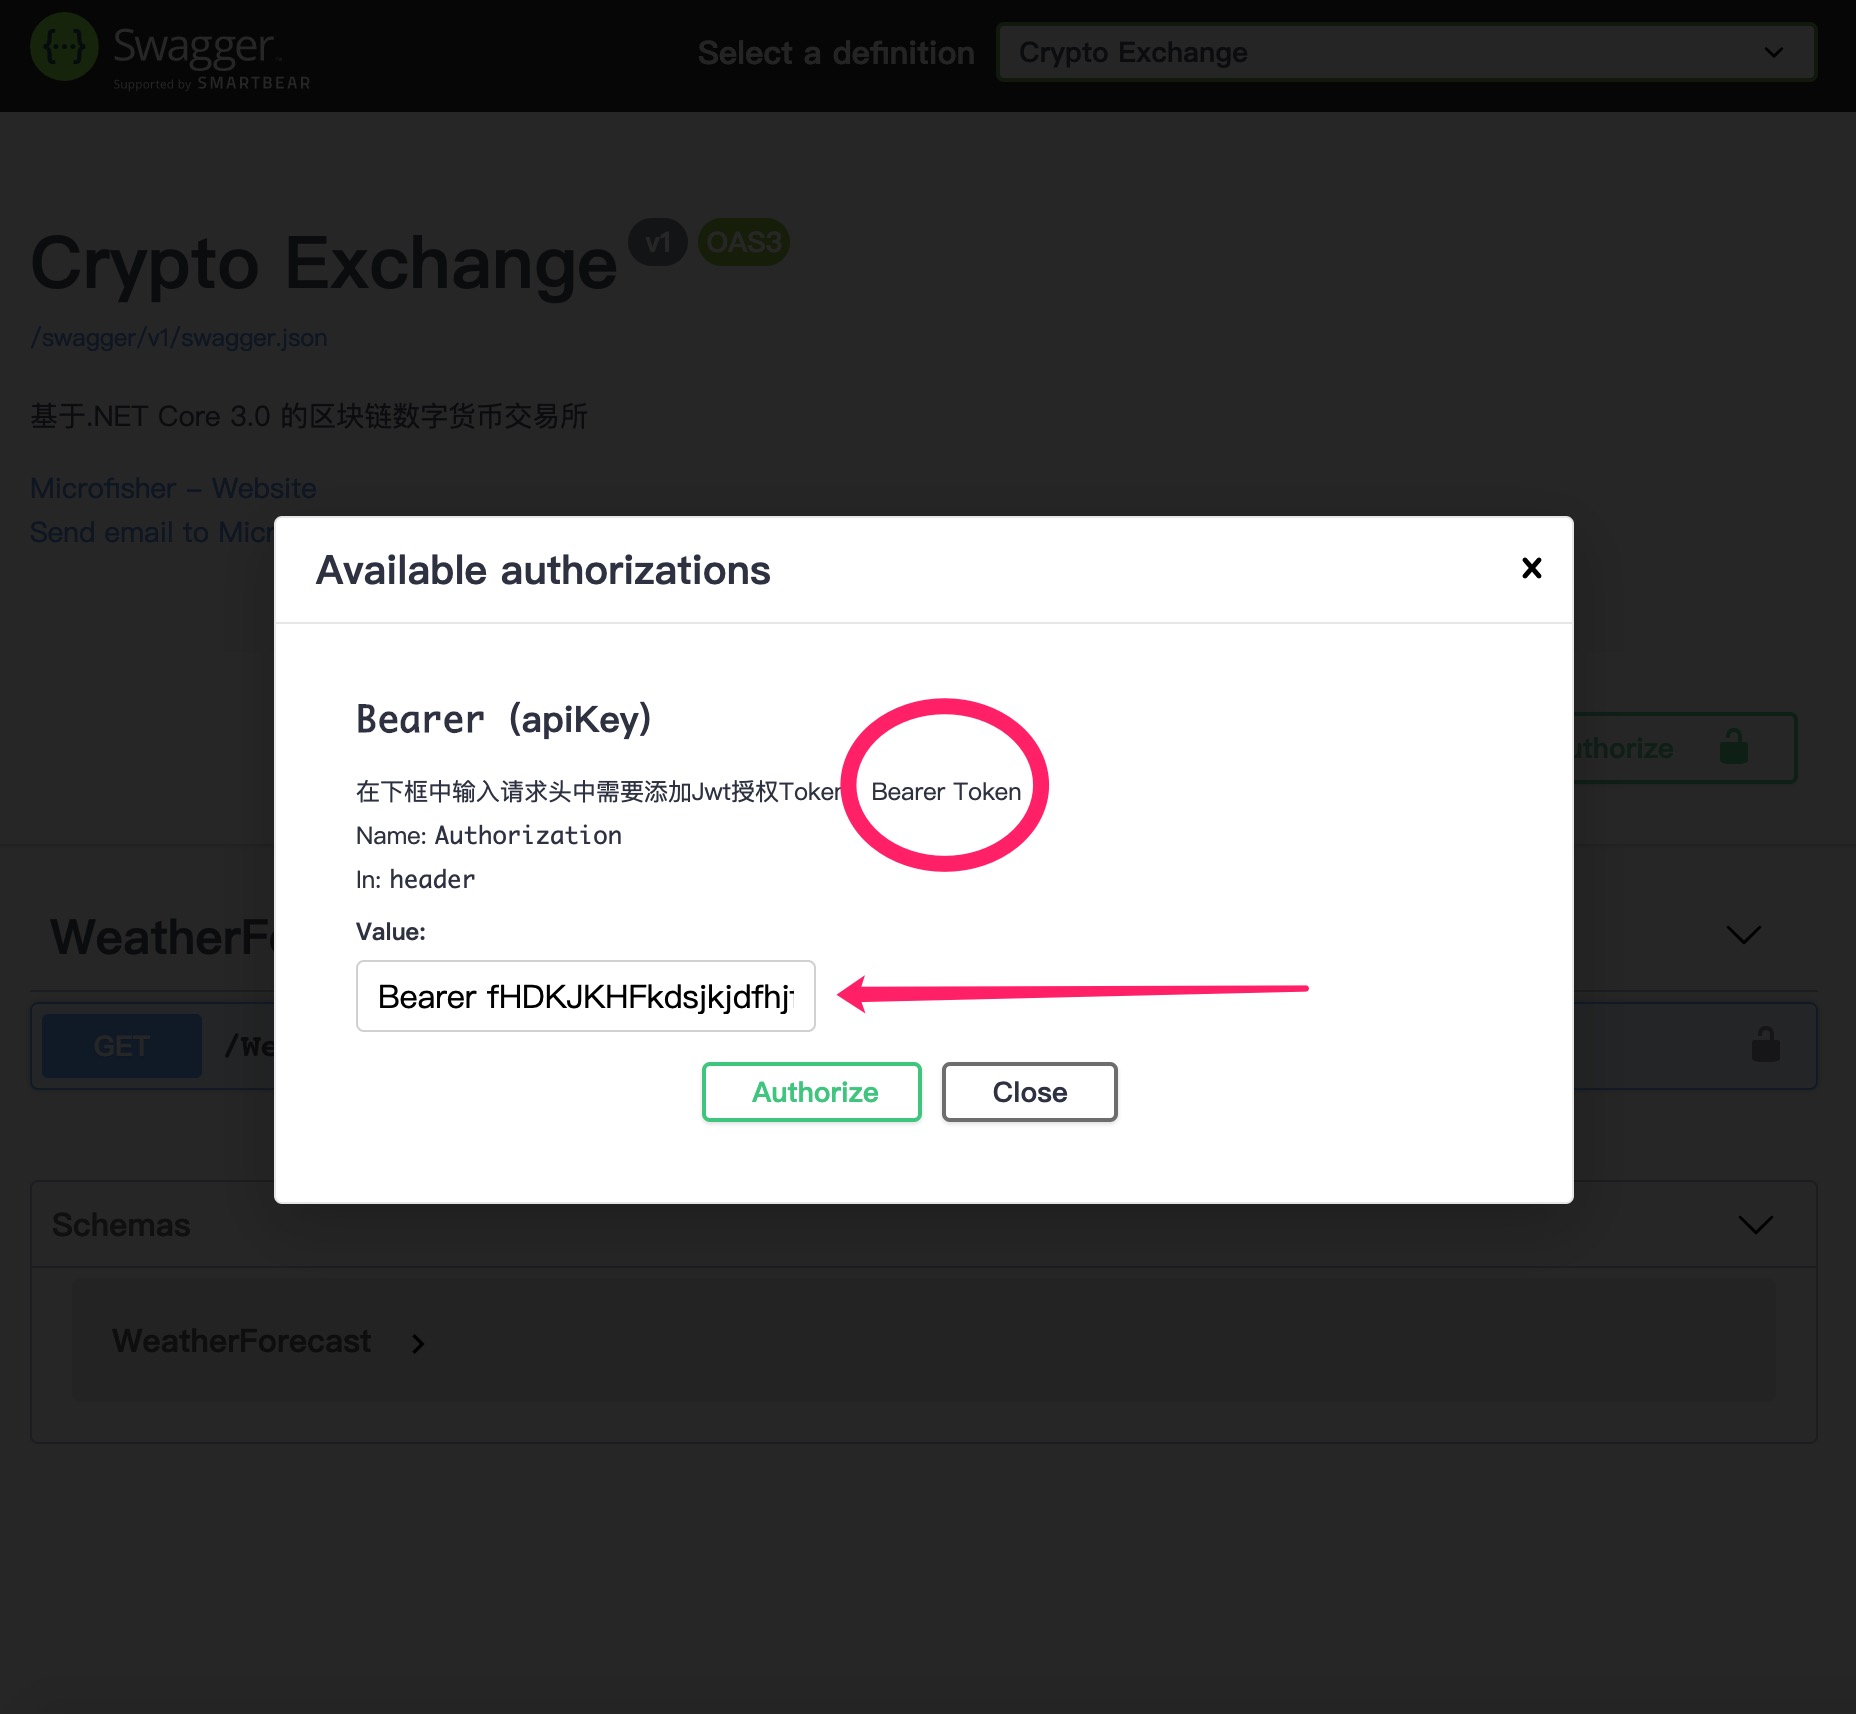
services.AddSwaggerGen(c =>
{
    c.SwaggerDoc("v1", new OpenApiInfo
    {
        Version = "v1",
        Title = "Crypto Exchange",
        Description = "Be based on.NET Core 3.0 Blockchain digital currency exchange",
        Contact = new OpenApiContact
        {
            Name = "Microfisher",
            Email = "276679490@qq.com",
            Url = new Uri("http://cnblogs.com/microfisher"),
        },
    });

    c.AddSecurityDefinition("Bearer", new OpenApiSecurityScheme()
    {
        Description = "Enter the request header in the following box to add Jwt To grant authorization Token: Bearer Token",
        Name = "Authorization",
        In = ParameterLocation.Header,
        Type = SecuritySchemeType.ApiKey,
        BearerFormat = "JWT",
        Scheme = "Bearer"
    });

    c.AddSecurityRequirement(new OpenApiSecurityRequirement
    {
        {
            new OpenApiSecurityScheme
            {
                Reference = new OpenApiReference {
                    Type = ReferenceType.SecurityScheme,
                    Id = "Bearer"
                }
            },
            new string[] { }
        }
    });

    var baseDirectory = System.AppDomain.CurrentDomain.BaseDirectory;
    var xmlFile = System.AppDomain.CurrentDomain.FriendlyName + ".xml";
    var xmlPath = Path.Combine(baseDirectory, xmlFile);
    c.IncludeXmlComments(xmlPath);
});
Preview the authorization settings
Then start the project again. You will find that there is an Authorize green button with lock on the right. After clicking this button, you can set our JWT Token information. The format is: Bearer your Token string. Note that there is a space between Bearer and Token. After setting the Token, when you request any API interface, Swagger will automatically attach the Token to the request Header.
Create a RESTFUL interface
Above we have implemented various configurations of Swagger. Now let's delete the default controller WeatherForecastController and view model WeatherForecast, create an account controller and several view models, and let Swagger return the interface documents with descriptions.
//[Authorize]
[Produces("application/json")]
[Route("v1/[controller]")]
[ApiController]
public class AccountController : ControllerBase
{
    /// <summary>
    ///Create information
    /// </summary>
    ///< param name = "createviewmodel" > parameters < / param >
    ///< returns > status < / returns >
    [HttpPost]
    public StatusViewModel Post([FromBody]CreateViewModel createViewModel)
    {
        return new StatusViewModel { };
    }

    /// <summary>
    ///Delete information
    /// </summary>
    ///< param name = "deleteviewmodel" > parameters < / param >
    /// <returns></returns>
    [HttpDelete]
    public StatusViewModel Delete([FromQuery]DeleteViewModel deleteViewModel)
    {
        return new StatusViewModel { };
    }

    /// <summary>
    ///Query information
    /// </summary>
    ///< param name = "queryviewmodel" > parameters < / param >
    /// <returns></returns>
    [HttpGet]
    public StatusViewModel Get([FromQuery]QueryViewModel queryViewModel)
    {
        return new StatusViewModel { };
    }

    /// <summary>
    ///Modify information
    /// </summary>
    ///< param name = "updateviewmodel" > parameters < / param >
    /// <returns></returns>
    [HttpPut]
    public StatusViewModel Put([FromQuery]UpdateViewModel updateViewModel)
    {
        return new StatusViewModel { };
    }
}
Create several view models
Create several new view models according to your favorite style, and add a summary for each field with / / / as follows:
public class UpdateViewModel
{
    /// <summary>
    /// ID
    /// </summary>
    public long Id { get; set; }

    /// <summary>
    /// account number
    /// </summary>
    public long Account { get; set; }

    /// <summary>
    //Password
    /// </summary>
    public long Password { get; set; }
}
Test final results
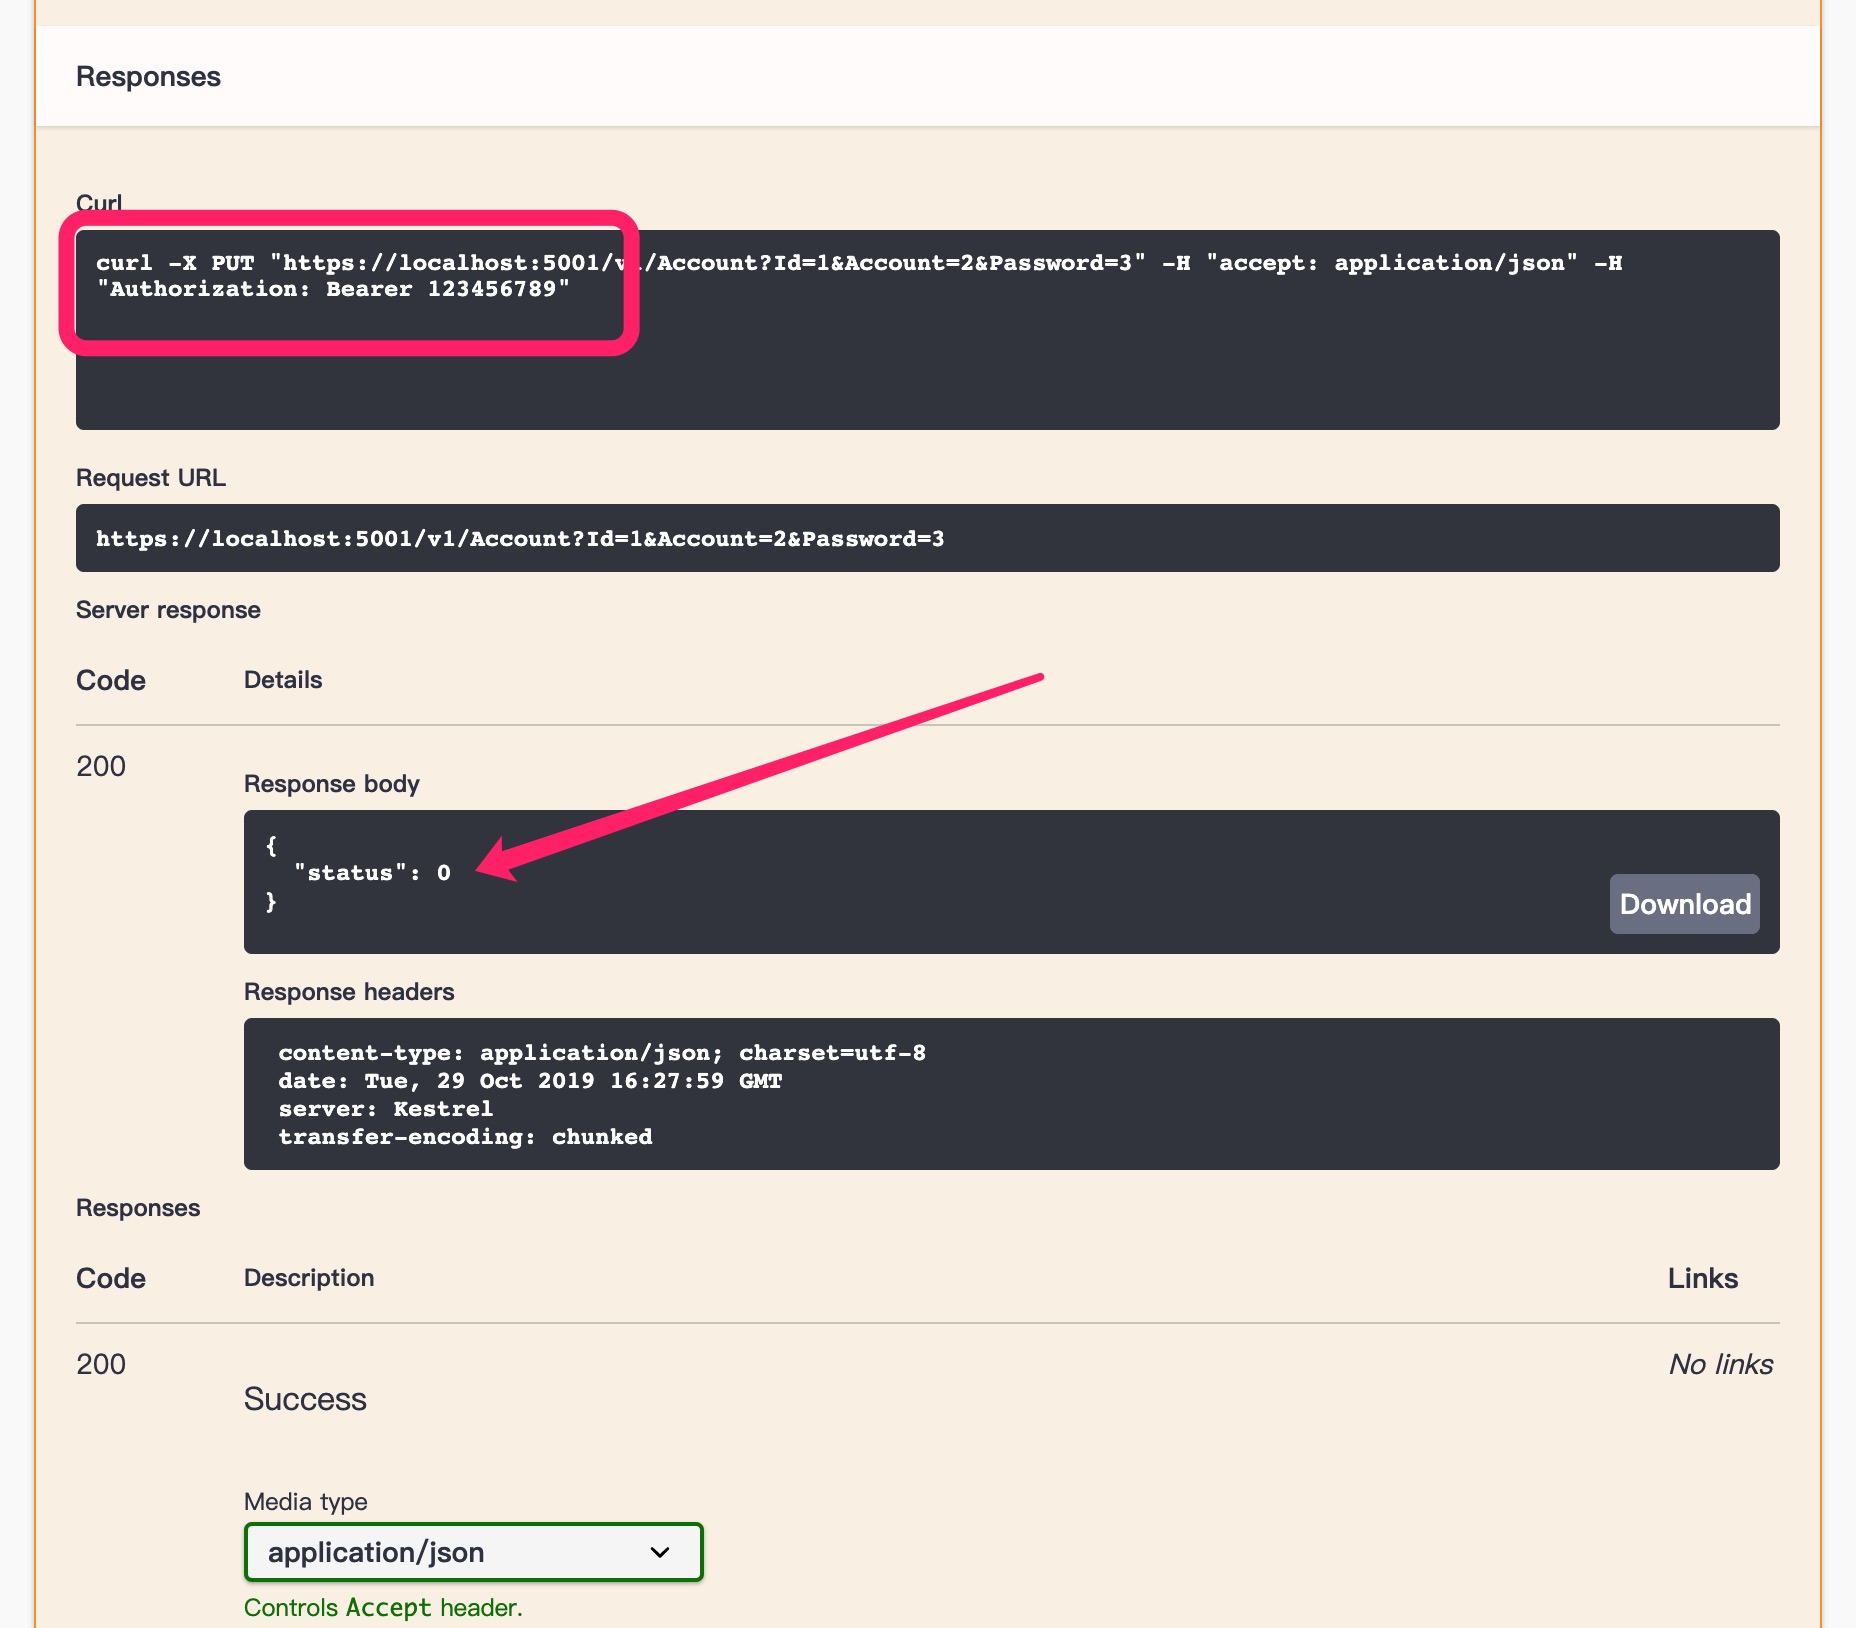
Finally, let's take a look at the effect. Expand an API interface casually, and you can see that the comments we wrote to the view model have been displayed on Swagger. The front-end developers can understand it as soon as they read it, input some interface parameters, and click execute to see the return value:

Let's see that our request Header already contains the JWT authorization information (Bearer 123456789). I set it at will, and let you change your Token when debugging the front end.