opencv basic operation
# -*- coding: utf-8 -*-
# Author:    xurongzhong#126.com wechat:pythontesting qq:37391319
# Technical support nail group: 21745728 (pythontesting invitation can be added)
# qq group: 144081101 591302926 567351477
# CreateDate: 2018-11-17

import imutils
import cv2

# Read picture information
image = cv2.imread("jp.png")
(h, w, d) = image.shape
print("width={}, height={}, depth={}".format(w, h, d))

# display picture
cv2.imshow("Image", image)
cv2.waitKey(0)

# Access pixels
(B, G, R) = image[100, 50]
print("R={}, G={}, B={}".format(R, G, B))

# Select region of interest
roi = image[60:160, 320:420]
cv2.imshow("ROI", roi)
cv2.waitKey(0)

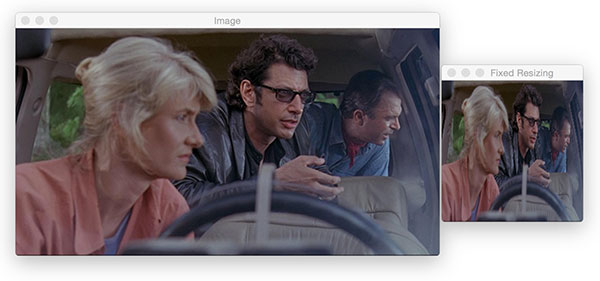
# zoom
resized = cv2.resize(image, (200, 200))
cv2.imshow("Fixed Resizing", resized)
cv2.waitKey(0)

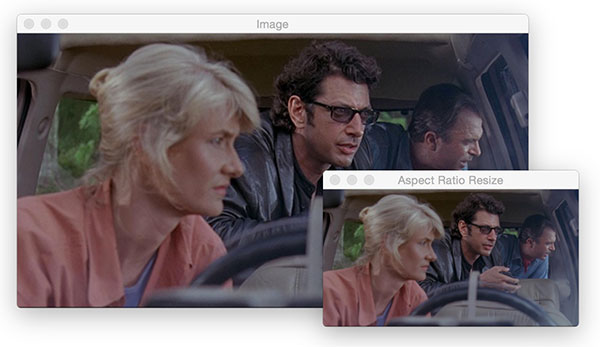
# Scale to scale
r = 300.0 / w
dim = (300, int(h * r))
resized = cv2.resize(image, dim)
cv2.imshow("Aspect Ratio Resize", resized)
cv2.waitKey(0)

# Scale with imutils
resized = imutils.resize(image, width=300)
cv2.imshow("Imutils Resize", resized)
cv2.waitKey(0)

# 45 degrees clockwise
center = (w // 2, h // 2)
M = cv2.getRotationMatrix2D(center, -45, 1.0)
rotated = cv2.warpAffine(image, M, (w, h))
cv2.imshow("OpenCV Rotation", rotated)
cv2.waitKey(0)

# Rotate with imutils
rotated = imutils.rotate(image, -45)
cv2.imshow("Imutils Rotation", rotated)
cv2.waitKey(0)


# Lossless rotation with imutils
rotated = imutils.rotate_bound(image, 45)
cv2.imshow("Imutils Bound Rotation", rotated)
cv2.waitKey(0)

# apply a Gaussian blur with a 11x11 kernel to the image to smooth it,
# useful when reducing high frequency noise
# https://www.pyimagesearch.com/2016/07/25/convolutions-with-opencv-and-python/
blurred = cv2.GaussianBlur(image, (11, 11), 0)
cv2.imshow("Blurred", blurred)
cv2.waitKey(0)

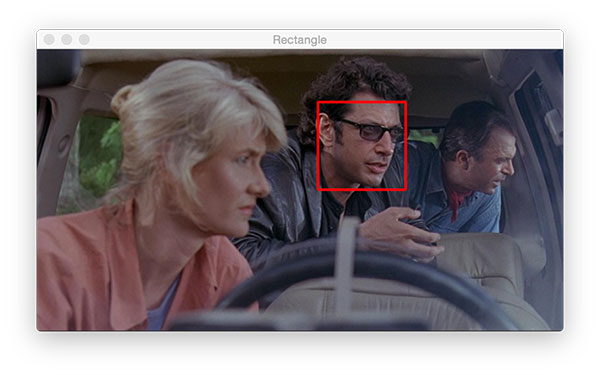
# Picture frame
output = image.copy()
cv2.rectangle(output, (320, 60), (420, 160), (0, 0, 255), 2)
cv2.imshow("Rectangle", output)
cv2.waitKey(0)

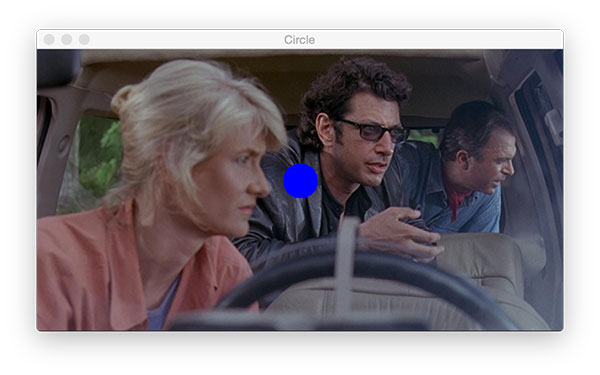
# Circle drawing
output = image.copy()
cv2.circle(output, (300, 150), 20, (255, 0, 0), -1)
cv2.imshow("Circle", output)
cv2.waitKey(0)

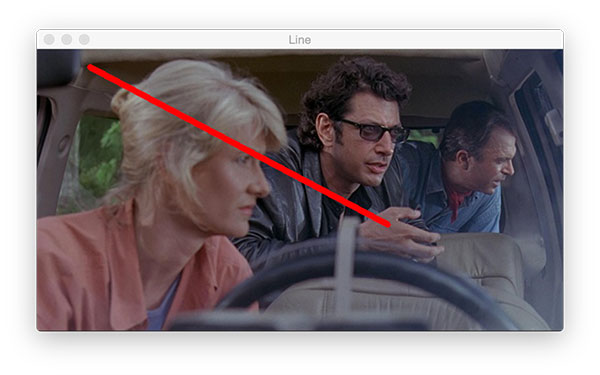
# Scribing
output = image.copy()
cv2.line(output, (60, 20), (400, 200), (0, 0, 255), 5)
cv2.imshow("Line", output)
cv2.waitKey(0)

# Output text
output = image.copy()
cv2.putText(output, "https://china-testing.github.io", (10, 25),
    cv2.FONT_HERSHEY_SIMPLEX, 0.7, (0, 255, 0), 2)
cv2.imshow("Text", output)
cv2.waitKey(0)
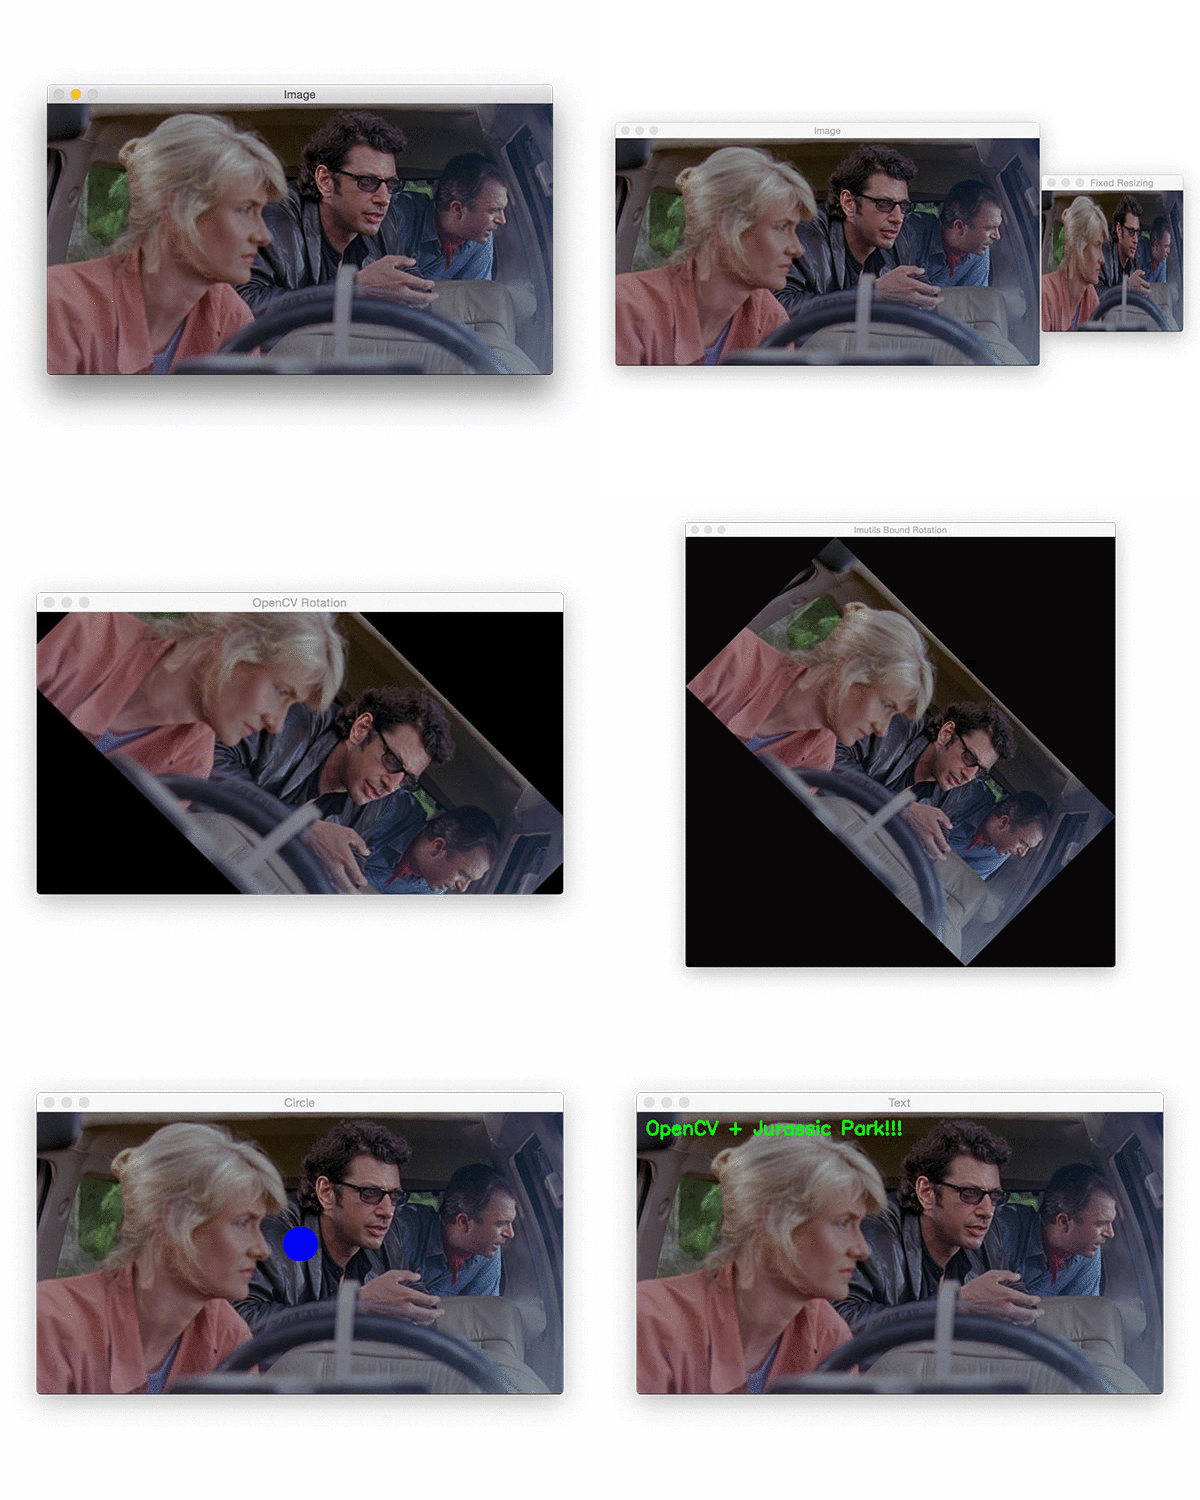
Original image:
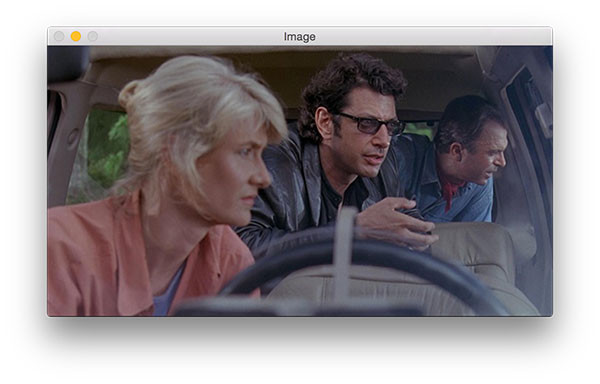
Select region of interest

zoom
Scale to scale
rotate

Lossless rotation with imutils

Gauss fuzzy

Picture frame
Circle drawing
Scribing
Output text

Output at execution time
$ python opencv_tutorial_01.py
width=600, height=322, depth=3
R=41, G=49, B=37
Download the English original code of this section
As for the rotation part, in fact, pilot does better. For example, turn it 90 degrees counter clockwise.
Implementation of opencv:
import imutils
import cv2

image = cv2.imread("jp.png")
rotated = imutils.rotate(image, 90)
cv2.imshow("Imutils Rotation", rotated)
cv2.waitKey(0)

Implementation of pilot:
from PIL import Image

im = Image.open("jp.png")
im2 = im.rotate(90, expand=True)
im2.show()
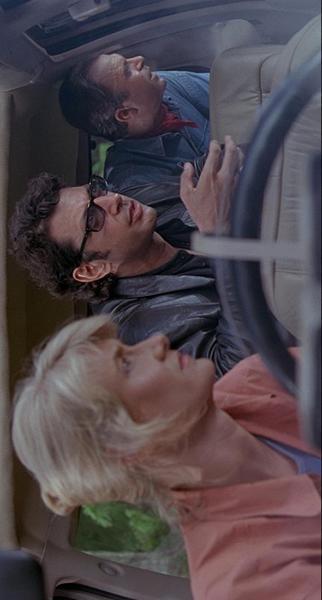
Further reference: Introduction to python Library - Chinese document of image processing tool pilot - Manual (may 2018 *)
Reference material
- Technical support qq group 144081101 (code and model storage)
- Address of the latest version of this article
- python test development library involved in this article Thanks a lot!
- This article related massive books Download
- 2018 best artificial intelligence machine learning tool book and download (continuous update)
- Code download: https://itbooks.pipipan.com/fs/18113597-320636142
- Code github address: https://github.com/china-testing/python-api-tesing/tree/master/opencv_crash_deep_learning
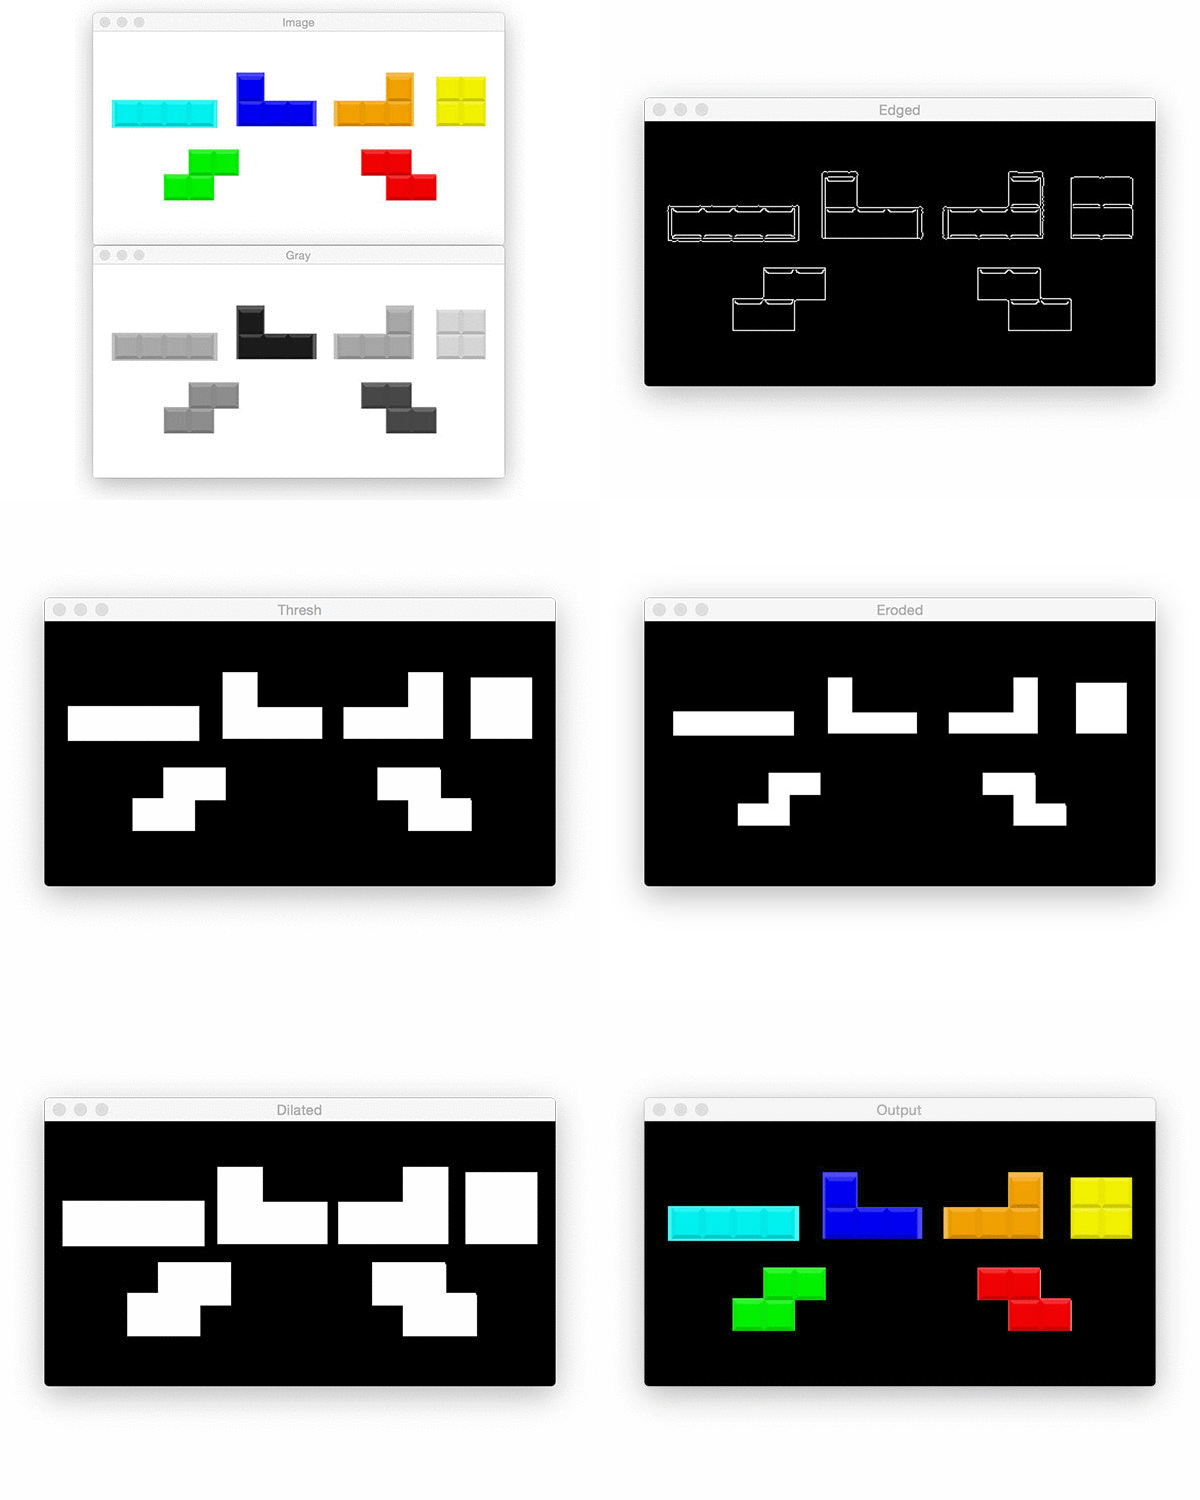
Identify Tetris
# -*- coding: utf-8 -*-
# Author:    xurongzhong#126.com wechat:pythontesting qq:37391319
# Technical support nail group: 21745728 (pythontesting invitation can be added)
# qq group: 144081101 591302926 567351477
# CreateDate: 2018-11-19
# python opencv_tutorial_02.py --image tetris_blocks.png

import argparse
import imutils
import cv2

ap = argparse.ArgumentParser()
ap.add_argument("-i", "--image", required=True,
    help="path to input image")
args = vars(ap.parse_args())

image = cv2.imread(args["image"])
cv2.imshow("Image", image)
cv2.waitKey(0)

# Convert to grayscale
gray = cv2.cvtColor(image, cv2.COLOR_BGR2GRAY)
cv2.imshow("Gray", gray)
cv2.waitKey(0)

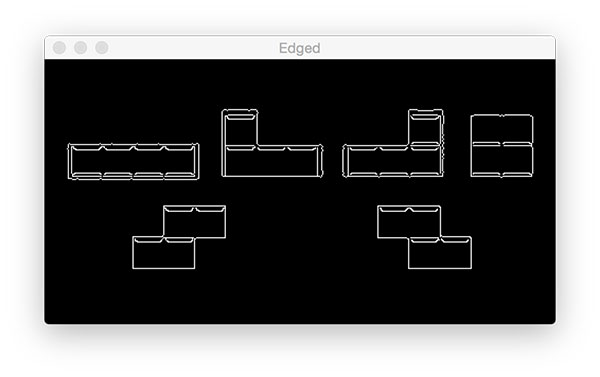
# edge detection
edged = cv2.Canny(gray, 30, 150)
cv2.imshow("Edged", edged)
cv2.waitKey(0)

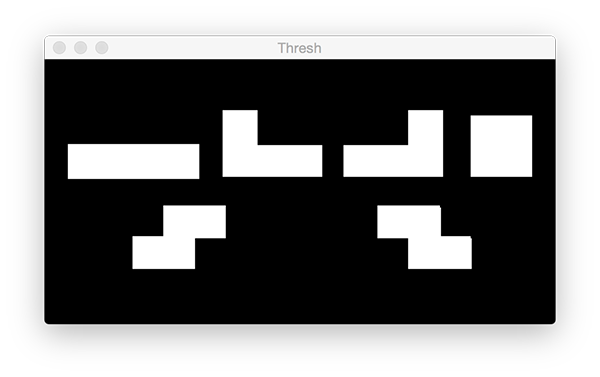
# threshold
thresh = cv2.threshold(gray, 225, 255, cv2.THRESH_BINARY_INV)[1]
cv2.imshow("Thresh", thresh)
cv2.waitKey(0)

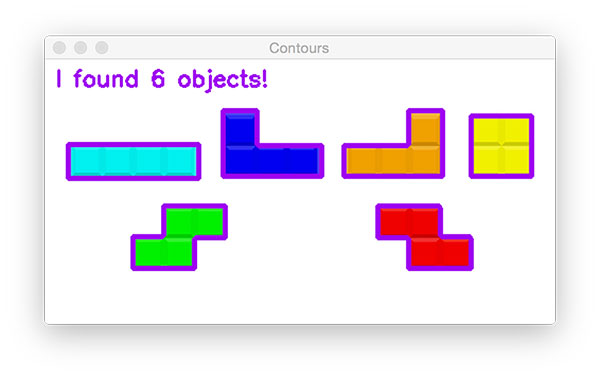
# Find edge
cnts = cv2.findContours(thresh.copy(), cv2.RETR_EXTERNAL,
    cv2.CHAIN_APPROX_SIMPLE)
cnts = cnts[0] if imutils.is_cv2() else cnts[1]
output = image.copy()

# loop over the contours
for c in cnts:
    # draw each contour on the output image with a 3px thick purple
    # outline, then display the output contours one at a time
    cv2.drawContours(output, [c], -1, (240, 0, 159), 3)
    cv2.imshow("Contours", output)
    cv2.waitKey(0)

# draw the total number of contours found in purple
text = "I found {} objects!".format(len(cnts))
cv2.putText(output, text, (10, 25),  cv2.FONT_HERSHEY_SIMPLEX, 0.7,
    (240, 0, 159), 2)
cv2.imshow("Contours", output)
cv2.waitKey(0)

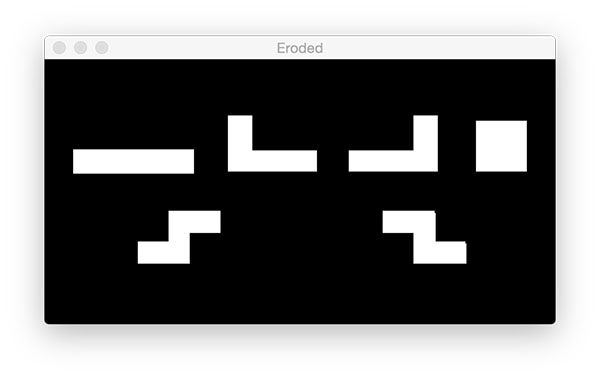
# we apply erosions to reduce the size of foreground objects
mask = thresh.copy()
mask = cv2.erode(mask, None, iterations=5)
cv2.imshow("Eroded", mask)
cv2.waitKey(0)

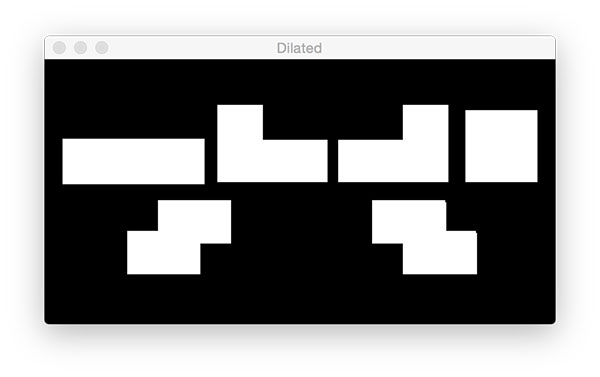
# Expand
mask = thresh.copy()
mask = cv2.dilate(mask, None, iterations=5)
cv2.imshow("Dilated", mask)
cv2.waitKey(0)

# a typical operation we may want to apply is to take our mask and
# apply a bitwise AND to our input image, keeping only the masked
# regions
mask = thresh.copy()
output = cv2.bitwise_and(image, image, mask=mask)
cv2.imshow("Output", output)
cv2.waitKey(0)
Original and grayscale:

edge detection
threshold
outline

Finding results
Corrosion and expansion
Shielding and bit operation

String together
$ python opencv_tutorial_02.py --image tetris_blocks.png
