Preface
Last time When it comes to learning ROS, it's mainly because we are doing many UAV cooperative control projects. It's said that ROS can be used to control Pixhawk UAV with raspberry pie. In this way, the source code of flight control can not be modified, and raspberry pie can be used for image processing. So began a mighty journey to the west, but how just over a few mountains, and over several rivers, ghosts and ghosts how so many. However, a summary is to go to the official website more often, and the blog is mixed, and many times the version is not suitable for use.
After a long time of struggling, I finally completed the environment construction, and the later test was successful, so I want to record it.
Note: when learning external control, do not hang up the propeller, otherwise it is very dangerous!!!
1, System environment
| Name of software and hardware | Edition | Remarks |
|---|---|---|
| Raspberry pie | Raspberry Pi 3B | nothing |
| Raspberry pie operating system | Ubuntu 16.04 MATE | nothing |
| Raspberry pie installation Library | ROS (Kinetic) and MAVROS | Moledic seems to only support Ubuntu 18.04 and above |
| Flight control | Pixhawk 2.4.8 | nothing |
| Flight control firmware version | PX4 v1.8.2 (stable) | nothing |
| Notebook operating system | Ubuntu 16.04 | If you do not do source compilation and simulation, Windows can also |
| Notebook key software | QGroundControl v3.5.6 | For downloading firmware |
| Notebook key software | putty | For remote login to raspberry pie |
| Other hardware | USB to TTL | nothing |
Assuming that you have completed the above software and hardware installation, note that the latest PX4 firmware used by QGC is v1.10.1, and the following sys'u company parameter cannot be found. For some reason, it just can't be found. The program card is in the first while() loop written by yourself. As for how to download the version you want, I will talk about it next time
2, Flight control board settings
2.1 download firmware v1.10.1 (stable)
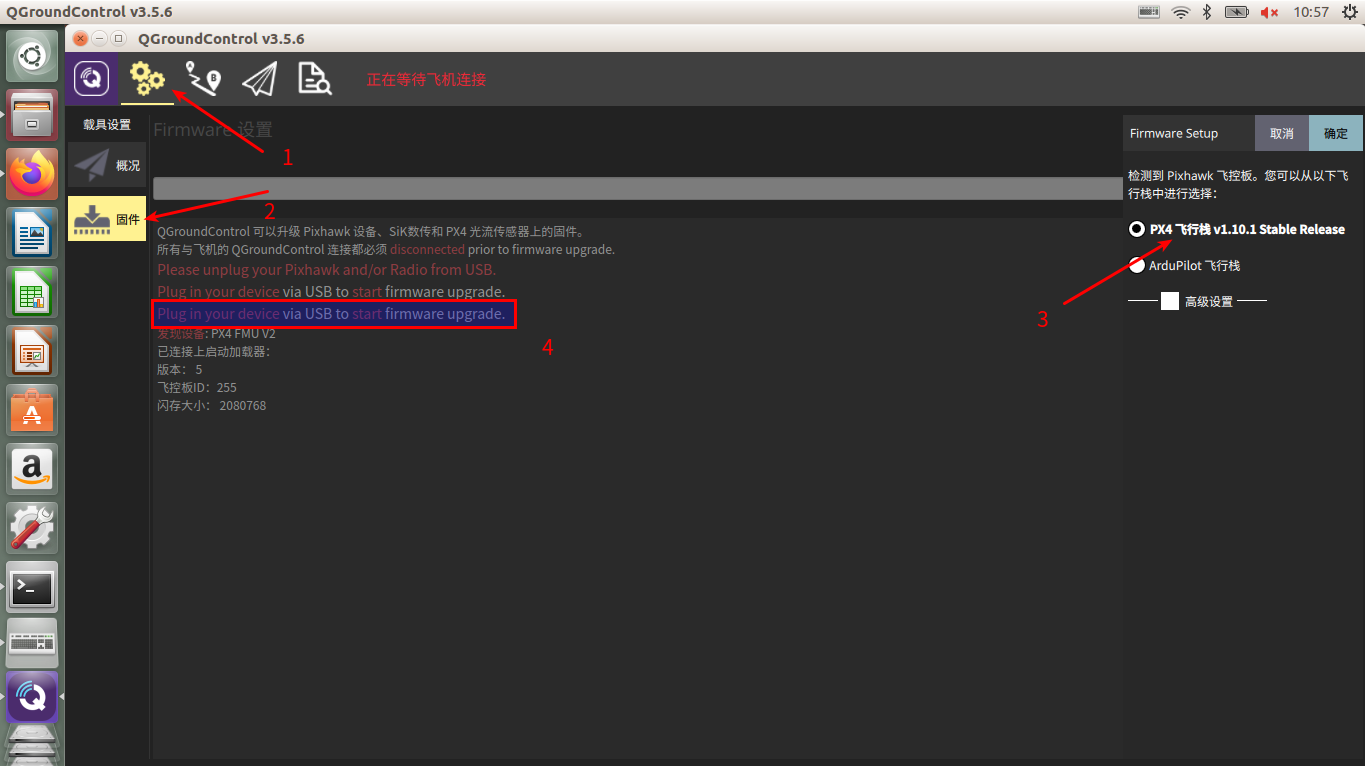
Open QGC - > click settings (Gear Icon) -- > Click firmware - > insert flight control - > click OK.
Note: you may need to plug in the flight control version again. The operation is as follows: After the upgrade, reseat to make the firmware valid.
2.2 use of external controls
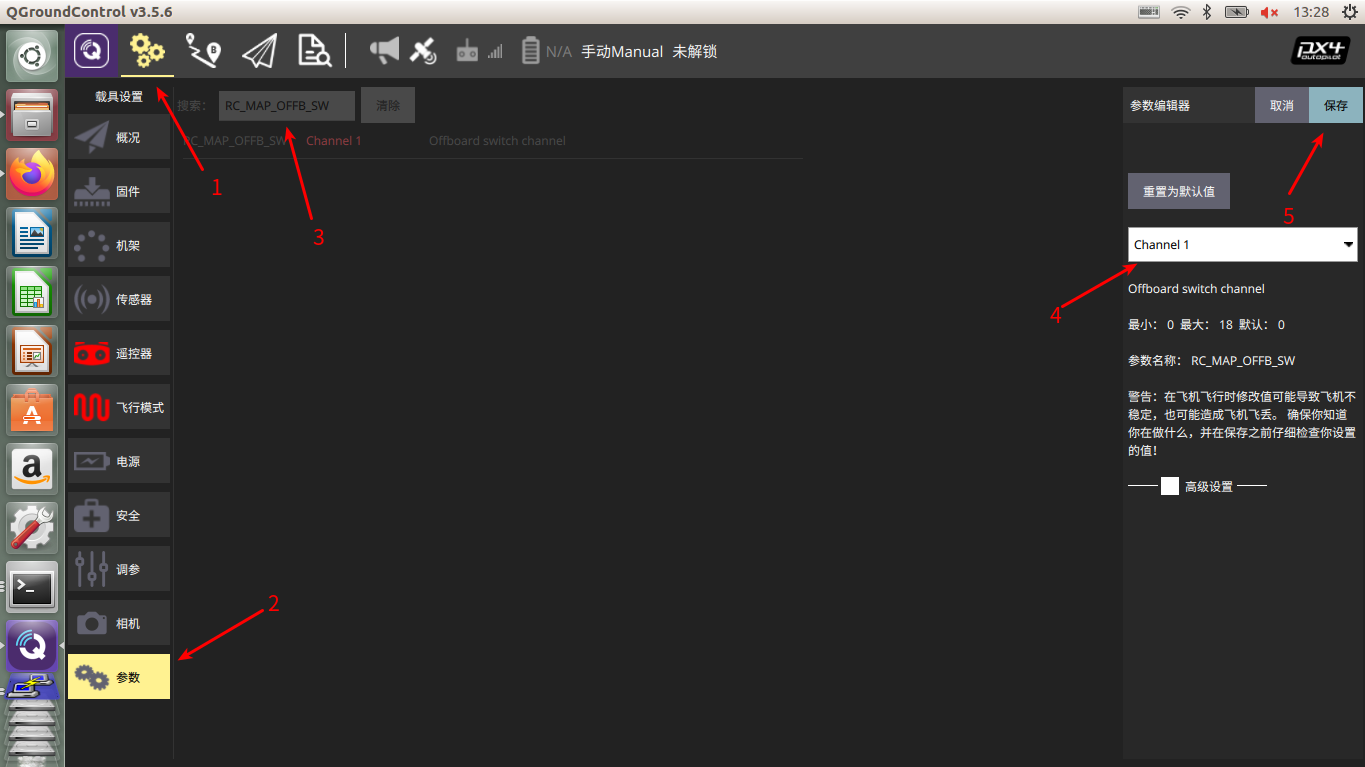
Search parameter RC map offb SW, set to Channel1

In the same way, set sys company to 57600
Then unplug again to make the settings valid.
3, Raspberry pie program
On raspberry pie, you need to add an ROS package, and then add your own reading program to this package. This step is related to ROS learning notes (2) - file system, creation and compilation of packages The steps of creating ROS package in 2.2 of are basically the same, as follows:
3.1 create package
cd ~/catkin_ws/src
catkin_create_pkg pi_offboard_px4 geometry_msgs mavros roscpp
#Package name PI ﹣ offboard ﹣ Px4, dependent packages geometry ﹣ msgs, mavros and roscpp
3.2 add. cpp file and necessary modification
cd pi_offboard_px4/src
touch offboard_pi_node.cpp
vim offboard_pi_node.cpp
Add the following from MAVROS control routine of PX4 official tutorial:
  /**
 * @file offb_node.cpp
 * @brief offboard example node, written with mavros version 0.14.2, px4 flight
 * stack and tested in Gazebo SITL
 */

#include <ros/ros.h>
#include <geometry_msgs/PoseStamped.h>
#include <mavros_msgs/CommandBool.h>
#include <mavros_msgs/SetMode.h>
#include <mavros_msgs/State.h>

mavros_msgs::State current_state;
void state_cb(const mavros_msgs::State::ConstPtr& msg){
    current_state = *msg;
}

int main(int argc, char **argv)
{
    ros::init(argc, argv, "offboard_pi_node");
    ros::NodeHandle nh;

    ros::Subscriber state_sub = nh.subscribe<mavros_msgs::State>
            ("mavros/state", 10, state_cb);
    ros::Publisher local_pos_pub = nh.advertise<geometry_msgs::PoseStamped>
            ("mavros/setpoint_position/local", 10);
    ros::ServiceClient arming_client = nh.serviceClient<mavros_msgs::CommandBool>
            ("mavros/cmd/arming");
    ros::ServiceClient set_mode_client = nh.serviceClient<mavros_msgs::SetMode>
            ("mavros/set_mode");

    //the setpoint publishing rate MUST be faster than 2Hz
    ros::Rate rate(20.0);

   ROS_INFO("Pass 1");    //The original routine is not available. Add convenient debug

    // wait for FCU connection
    while(ros::ok() && current_state.connected){
        ros::spinOnce();
        rate.sleep();
    }
    geometry_msgs::PoseStamped pose;
    pose.pose.position.x = 0;
    pose.pose.position.y = 0;
    pose.pose.position.z = 2;

    //send a few setpoints before starting
    for(int i = 100; ros::ok() && i > 0; --i){
        local_pos_pub.publish(pose);
        ros::spinOnce();
        rate.sleep();
    }

    mavros_msgs::SetMode offb_set_mode;
    offb_set_mode.request.custom_mode = "OFFBOARD";

    mavros_msgs::CommandBool arm_cmd;
    arm_cmd.request.value = true;

    ros::Time last_request = ros::Time::now();

	ROS_INFO("Pass 2");    //The original routine is not available. Add convenient debug

    while(ros::ok()){
        if( current_state.mode != "OFFBOARD" &&
            (ros::Time::now() - last_request > ros::Duration(5.0))){
            if( set_mode_client.call(offb_set_mode) &&
                offb_set_mode.response.mode_sent){
                ROS_INFO("Offboard enabled");
            }
            last_request = ros::Time::now();
        } else {
            if( !current_state.armed &&
                (ros::Time::now() - last_request > ros::Duration(5.0))){
                if( arming_client.call(arm_cmd) &&
                    arm_cmd.response.success){
                    ROS_INFO("Vehicle armed");
                }
                last_request = ros::Time::now();
            }
        }
        local_pos_pub.publish(pose);
        ros::spinOnce();
        rate.sleep();
    }
    return 0;
}
Note: if the above content is handwritten, it is likely to make an error. If the compiling results in invoking "make-j4-l4" failed, please check the error multiple times.
Next, modify CMakeLists.txt for compilation.
cd ~/catkin_ws/src/pi_offboard_px4/
vim CMakeLists.txt
Uncomment / modify the text to get the following two sentences:
add_executable(offboard_pi_node src/px4_pi_node.cpp)
target_link_libraries(offboard_pi_node
	${catkin_LIBRARIES}
)
3.3 compilation
catkin_make 				#Compile
catkin_make install
source devel/setup.bash     #Configure catkin workspace
4, Connection test
4.1 connection
Use USB to TTL to connect raspberry pie with the TELEM 2 port of Pixhawk. The input voltage of TELEM 2 is 5V. Use 5V for USB to TTL.
If the word TELEM2 of the flight control board is positive, then the six interfaces from left to right are:
5V TX RX useless GND
The physical connection diagram is as follows. The real connection of the line from Pixhawk to raspberry pie is: red purple, white gray, black green, yellow blue.
4.2 test
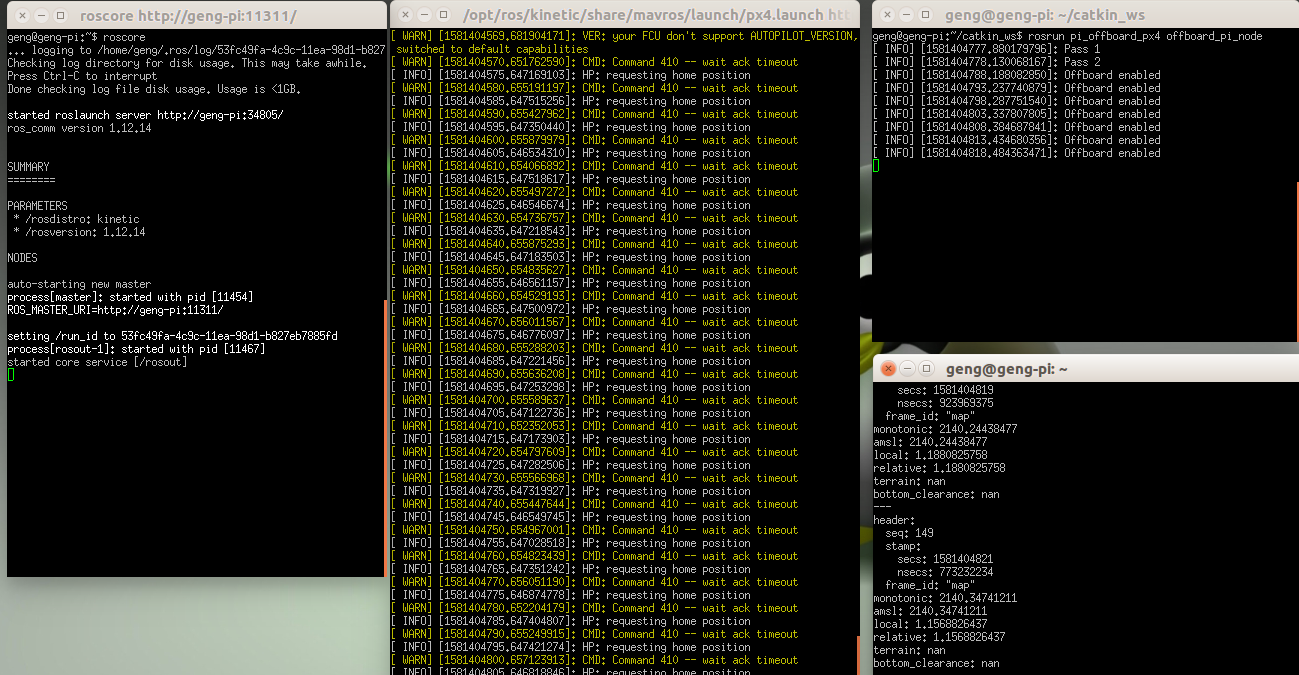
This process requires raspberry pie to open several terminals and log in several putty implementations.
Run roscore in a terminal and start ROS.
roscore
Run in another terminal
ls /dev/tty*        # The following two sentences can only be run in one sentence (according to ttyUSB0 or ttyACM0)
roslaunch mavros px4.launch fcu_url:=/dev/ttyUSB0:57600  #There are ttyUSB0
roslaunch mavros px4.launch fcu_url:=/dev/ttyACM0:57600  #There are ttyACM0
Run at another terminal
rosrun pi_offboad_px4 offboard_pi_node
At this time, another terminal can run
rostopic list
rostopic echo /mavros/altitude
Check the local altitude
The operation effect is as follows

Reference connection: PX4 UAV MAVROS external control tutorial

