
What is the route? Why use routing? What is the function of routing? Can I write the source code of route jump?
After finishing the routing part, the four company strike made me think deeply. Let's learn vue router's wings~
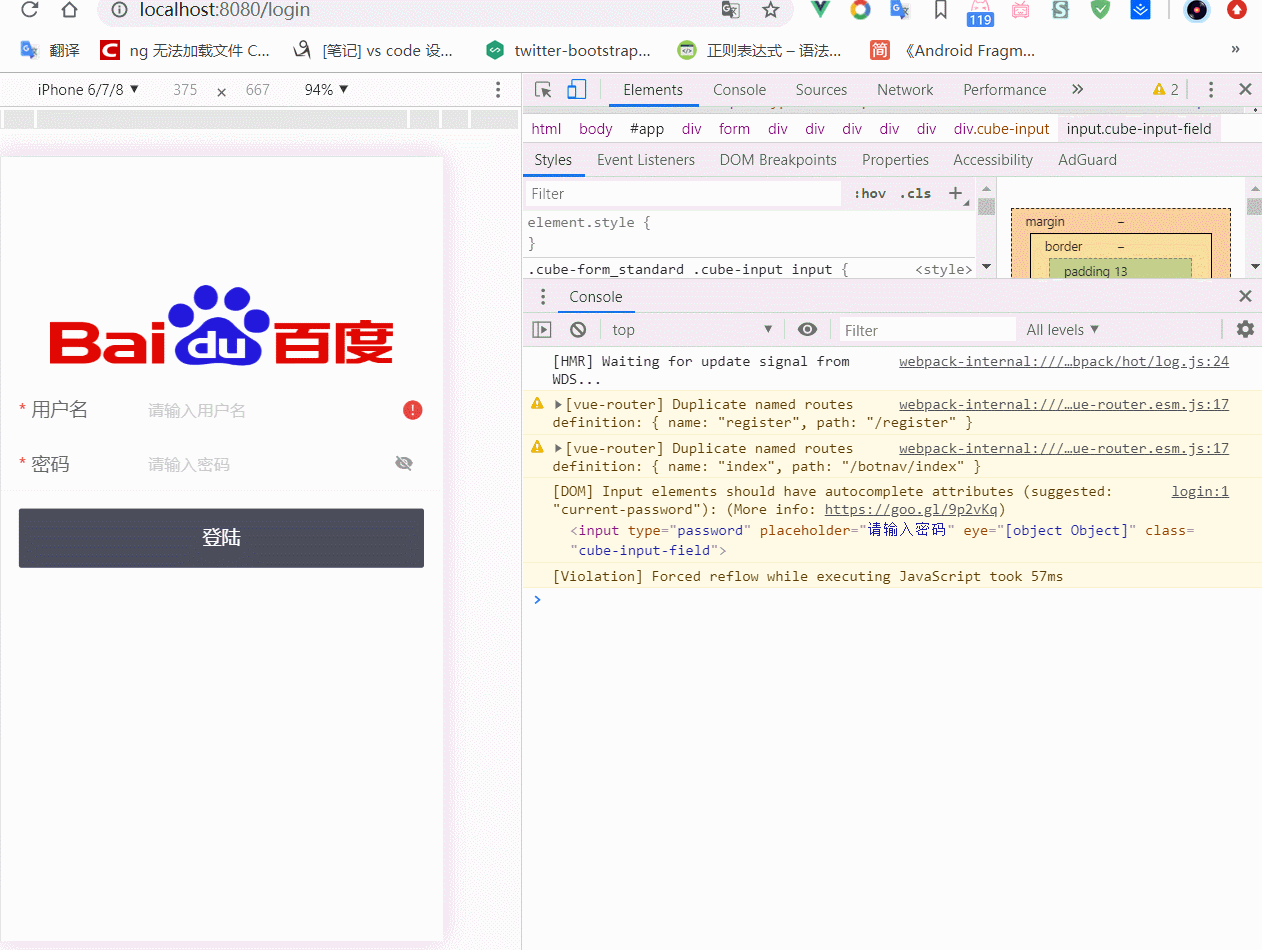
This is an e-commerce project demo based on vue & Axios & mock & token & stylus & cube UI. It is for beginners of vue. Although the scene is simple, it has five internal organs. It covers a lot of basic operations of vues and related technologies. There are detailed comments to help you get started quickly.
Github address
- Vue Jingdong (don't grudge your little star)
- Don't talk much about the renderings
Body part
As a beginner of VUE, there are home page and about page Jump in the demo after creating a project. When I was writing this little project, I didn't think too much about it. When I finish the routing part, I have many questions in my mind. What is the route? Why use routing? What is the function of routing? Can I write the source code of route jump?
With these problems, I have looked up a lot of materials and articles, and found that they are relatively scattered, often only about a small point. If you have the same problem, follow me to break it one by one~
What is the route?
- Routing: the corresponding rule between hash value (hash) and template in browser.
In the principle of computer network, routing refers to querying the routing table and forwarding it to another interface according to the IP address in the packet of the previous interface. It determines an end-to-end network path. So routing is used to resolve URL s and call corresponding controllers.
- The route in Vue is the corresponding relationship between hash and component. Vue routing is Vue router. In web development, "router" refers to the corresponding handler assigned according to the url.
Generally speaking, in web development, routing is a set of mapping rules (one-to-one corresponding rules), which are made by developers.
When the hash value in the URL changes, the route will display the corresponding view content according to the established rules.
Why use routing?
In the traditional web development, every request address will request the server to process, but some operations of the user do not need to request the server, and the purpose can be achieved by directly modifying the logic at the page end. In this way, the best way is to use the route, because when using the route, the URL will change, and the user can directly copy or collect the current page when browsing a web page The URL to others, this way for search engines and users are friendly.
In Web app, a page is used to show and manage the functions of the whole application.
SPA (single page application) is often an application with complex functions. In order to manage all view contents effectively, front-end routing arises at the historic moment!
What is the function of routing?
I understand this problem through the Vue Router developer's documentation, but after reading it, I was a bit confused and didn't particularly understand it. After that, I got a deeper understanding of the routing function by consulting some articles. Let's follow the author to take a look at it in combination with the project~
Basic use
Install: NPM I - s vue router or select router when creating vue project
<!-- app.vue -->
<template>
  <div id="app">
  <!-- 5 Route entry specifies to jump to fixed entry only -->
    <div id="nav">
      <router-link to="/login">Land</router-link> |
      <router-link to="/register">register</router-link>
    </div>
    <!-- 7 Route exit: used to show matching route view content -->
    <router-view/>
  </div>
</template>

// 3. The author will not write code to create two components. The demo at the beginning of the vue project has been created.

//index.js in router
import Register from '../views/Register.vue'
import Login from '../views/Login.vue'

Vue.use(VueRouter)

// 4 create routing object
const routes = [
  {
    path: '/',
    name: 'login',
    redirect: '/login'
  },
   // One to one correspondence between path and component
  {
    path: '/register',
    name: 'register',
    component: Register
  },
  {
    path: '/login',
    name: 'login',
    // route level code-splitting
    // this generates a separate chunk (about.[hash].js) for this route
    // which is lazy-loaded when the route is visited.
    //Project route lazy load, seconds on
    component: () => import(/* webpackChunkName: "about" */ '../views/Login.vue')
    },
]

<!-- main.js -->
// 1 import vue.js
import Vue from 'vue'
import './cube-ui'
import App from './App.vue'
// 2 import route file
import router from './router'
import store from './store'
import axios from 'axios'
import 'amfe-flexible'
import steaxios from './setaxios'

steaxios();
Vue.config.productionTip = false
Vue.prototype.$http=axios//Mount axios
new Vue({
  router,
  store,
  // 6 mount the route instance to the vue instance
  render: h => h(App)
}).$mount('#app')
Through the steps in code annotation, the basic function of routing is realized!
redirect
In this small project, I directly use redirection to make the page Jump to the landing page at the beginning of the root path.
 {
    //  Redirect path to redirect
    path: '/',
    name: 'login',
    redirect: '/login'
  },
There are two ways to redirect
- The target of redirection can be a named route:
{ path: '/', redirect: { name: 'login' }}
- The target of redirection can be a method that dynamically returns the redirection target:
{ path: '/', redirect: to => {
      // Method receives the destination route as a parameter
      // return redirected string path / path object
    }}
Note: navigation guard is not applied to jump route, but only to its target.
Lazy load (delayed load)
- Definition: lazy loading is also called delayed loading, that is, loading when needed and loading when used.
- Function: lazy route loading can help us not to load excessive resources when entering the first screen, thus reducing the loading speed of the first screen. That is, load on demand. Using the third-party component library depends too much, which will bring a lot of pressure to the first screen loading. The general solution is to introduce components as required. If the component that references the component also jumps to the corresponding route, and then loads the component that needs to be used, the performance can be improved.
- There are three ways to implement lazy loading:
First, Vue Asynchronous component technology:
	{
		path: '/home',
		name: 'Home',
		component: resolve => reqire(['path Route'], resolve)
	}
//2, es6 proposal import()
	const Home = () => import('path Route')
	//How to use this project
   {
    path: '/login',
    name: 'login',
    component: () => import(/* webpackChunkName: "about" */ '../views/Login.vue')
    },
//3, require.ensure() provided by webpack
	{
		path: '/home',
		name: 'Home',
		component: r => require.ensure([],() =>  r(require('path Route')), 'demo')
	}
//Summary from:
//Author: Xiaomeng
//Link: https://juejin.im/post/5e4c0b856fb9a07ccb7e8eca
//Source: Nuggets
Can I write lazy source code?
I also want to think about this problem. To implement lazy loading, you must directly operate DOM. As a front-end Xiaobai, my ability is limited and I can't complete it temporarily, but I found an article for your reference.
Disadvantages of lazy loading
Everything is a double-edged sword, which has both advantages and disadvantages. It can only be used on demand. It must not be overused.
Lazy loading of routes in large projects is not suitable for the development environment (it will take a long time of 20s to update the code when saving the code)
Solution
Add 2 folders to router / folder:
_import_development.js
module.exports = file => require('@/' + file + '.vue').default
_import_production.js
module.exports = file => resolve => require(['@/' + file + '.vue'], resolve)
index.js
const IMPORT = require('./_import_' + process.env.NODE_ENV + '.js');
Write on component import:
component: IMPORT('pages/mainPage') // assembly
Nested sub route
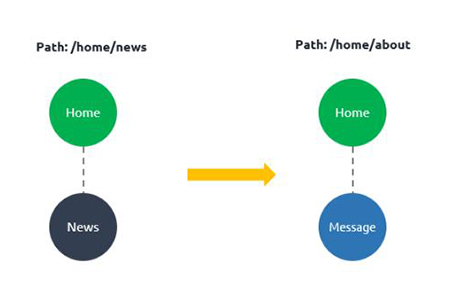
Nested routing is also used in my small project. As the name implies, nested routes contain sub routes. For example:
/botnav/index                         /botnav/list
+------------------+                  +-----------------+
| botnav           |                  | botnav          |
| +--------------+ |                  | +-------------+ |
| | index        | |  +------------>  | | list        | |
| |              | |                  | |             | |
| +--------------+ |                  | +-------------+ |
+------------------+                  +-----------------+
When you want to switch multiple pages such as index and list in the botnav page, nested routing is useful. Its writing rules are as follows:
Note: do not add '\' to the child routing path. When writing code, you are used to writing the routing path. It is easy to make this small error
{
    path: '/botnav',
    name: 'botnav',
    component: () => import('../views/Botnav.vue'),
 children:[
      {
        path: 'index',
        name: 'index',
        component: () => import('../views/index.vue')
      },
      {
        path: 'list',
        name: 'list',
        component: () => import('../views/List.vue')
      },
      {
        path: 'search',
        name: 'search',
        component: () => import('../views/Search.vue')
      },
      {
        path: 'cart',
        name: 'cart',
        component: () => import('../views/Cart.vue')
      },
      {
        path: 'mine',
        name: 'mine',
        component: () => import('../views/Mine.vue')
      },
    ]
}
Effect:

These botsnavs can switch on the same page.
Transient dynamic effect
When writing a project, in order to increase the user experience and the transition effect during route switching, it is necessary to see the effect of the transition effect

It is a basic dynamic component, so we can use the component to add some transition effects to it:
<template>
    <div>
      <transition :name="transitionName">
        <router-view class="Router"></router-view>
      </transition>
        <cube-tab-bar
            v-model="selectedLabelDefault"
            :data="tabs"
            @click="clickHandler"
            @change="changeHandler"
            class="botnav">
        </cube-tab-bar>
  </div>
</template>
<script>
export default {
  data () {
    return {
      transitionName:'slide-right',
      selectedLabelDefault: 'home page',
      tabs: [{
        label: 'home page',
        icon: 'cubeic-home'
      }, {
        label: 'classification',
        icon: 'cubeic-tag'
      }, {
        label: 'search',
        icon: 'cubeic-search'
      }, {
        label: 'Shopping Cart',
        icon: 'cubeic-mall'
      }, {
        label: 'My',
        icon: 'cubeic-person'
      }]
    }
  },
  methods: {
    clickHandler (label) {
      // if you clicked home tab, then print 'Home'
      console.log(label)
    },
    //Click on other navigation different from your own
    changeHandler (label) {
      // if you clicked different tab, this methods can be emitted
      switch(label){
          case 'home page':
          this.$router.push('/botnav/index');
          break;
          case 'classification':
          this.$router.push({path:'/botnav/list'});
          break;
          case 'search':
          this.$router.push({path:'/botnav/search'});
          break;
          case 'Shopping Cart':
          this.$router.push({path:'/botnav/cart'});
          break;
          case 'My':
          this.$router.push({path:'/botnav/mine'});
          break;
      }
    }
  }
}
</script>

<style lang="stylus" scoped>
    .cube-tab-bar.botnav
        position  fixed
        bottom  0
        left 0
        z-index 1000
        width 100%
        background #fff
        font-size  25px
        .cube-tab div
            font-size  16px
            padding-top  3px
        i
            font-size 20px
            <!--The following code achieves the transition effect-->
      .Router
        position absolute
        width 100%
        transition all 0.8s ease
      .silde-left-ender,.slide-right-leave-active
        opacity 0
        -webkit-transform translate(100%,0)
        transform translate(100%,0)
      .slide-left-leave-active,.silde-right-enter
        opacity 0
        -webkit-transform translate(-100%,0)
        transform translate(-100%,0)
</style>
The above code establishes a botnav, uses the package, and gives the transition a name, uses the leave and enter in css to complete the page switching, and writes the effect to be realized in it. Here I refer to a picture in VUE.js to give an intuitive explanation: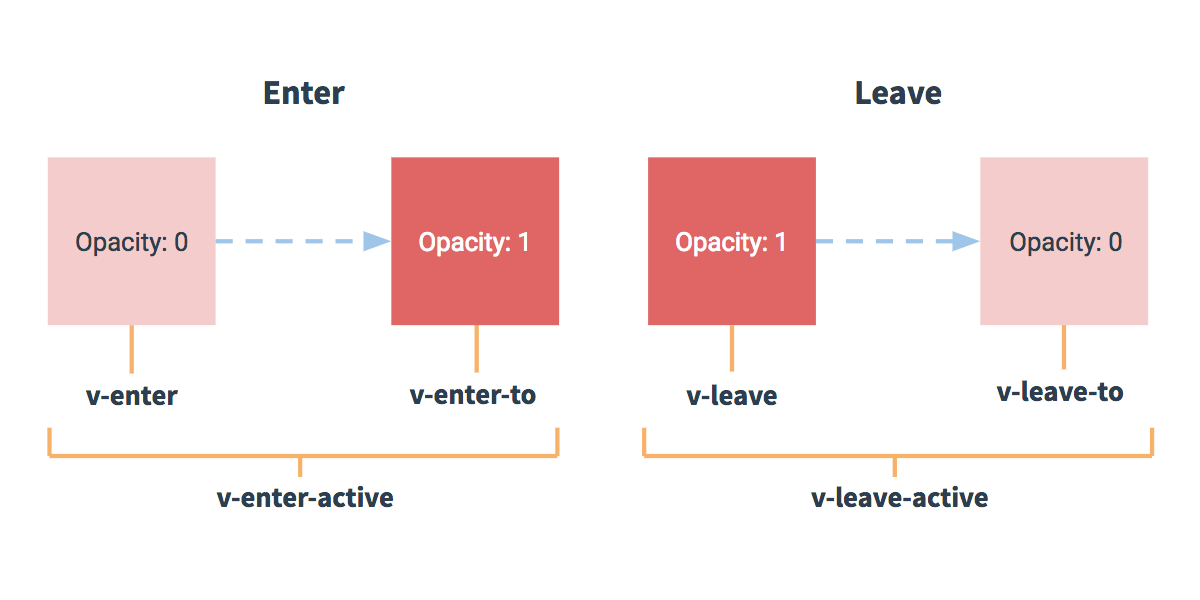
v - is replaced by silde right in this project.
There are many other functions of routing. I will not introduce them one by one. If you are interested, you can go to the official documents. Let's answer the last question,? Can I write the source code of route jump?
Can I write the source code of route jump?
Want to know the source code of the route? Be sure to know how the routing is implemented. My simple understanding is that for the hush mode of routing, we switch a page to show a view. You need to display this view. You must get the huas value of this page, register this view, and then display it. In this way, you can use routing to switch pages successfully. I don't know if my understanding is correct, I hope the big guy points out. Next, I write the source code for my ideas, first put on the renderings.
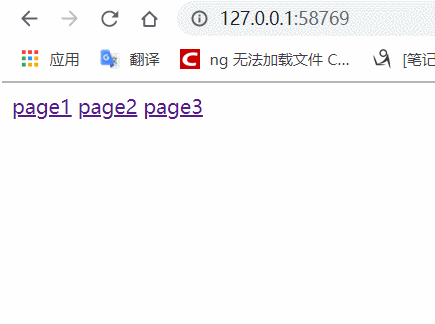
Let's start with three links:
 <div id="nav">
    <a href="#/page1">page1</a>
    <a href="#/page2">page2</a>
    <a href="#/page3">page3</a>
  </div>
  <div id="container"></div>
Then we define a hashRouter method, and the implementation returns null when entering the home page.
class HashRouter {
//Execute on initialization
    registerIndex(cb = () => {}) {
      this.routers.index = cb;
    }
  }
Next, we get the hash and register the page view:
 class HashRouter {
    constructor() {
      this.routers = {}; //Configuration is the key point of design routes
      //Hash key Val component for storing route configuration
      window.addEventListener('hashchange', () => {
        let hash = window.location.hash.slice(1),//Get page hash
          handler;
        if(!hash) {
          handler = this.routers.index;
        } else {
          handler = this.routers[hash];
        }
        handler.call(this);//Throw out the hash
      })
    }
    // Which function will be executed after hahschange
    // vue component functional component callback
    register(hash, callback){
      this.routers[hash] = callback;//Register view
    }
    //Execute on initialization
    registerIndex(cb = () => {}) {
      this.routers.index = cb;
    }
  }
Finally, we insert the registered view into id = "container" to display the page
let router = new HashRouter(); //Routing object, type hash
  let container =
   document.getElementById('container'); // Root components
  router.registerIndex(() => container.innerHTML = 'home page')
  router.register('/page1', function ()
  {
    console.log(this.routers);
    container.innerHTML = '/page1';
  }) // Route corresponding execution / /. vue template part
  router.register('/page2', () => container.innerHTML = '/page2');
  router.register('/page3', () => container.innerHTML = '/page3');
The simple implementation of routing is finished. If there is any error, please point out.
Written in the back
Quoting the words of little goldfish, of course, the paper has been shallow since school, and I never know that I should do it. After learning the theory, we need to practice it. After reading it, we must operate it by ourselves. Otherwise, we will forget it the next day. The author encloses the address of GitHub again Vue Jingdong (don't grudge your little star) . This is a series of articles, to be continued, looking forward to learning with you. If it's helpful to you, you may as well send your star, roses and fragrance. Thank you!

