
catalogue
Write in front
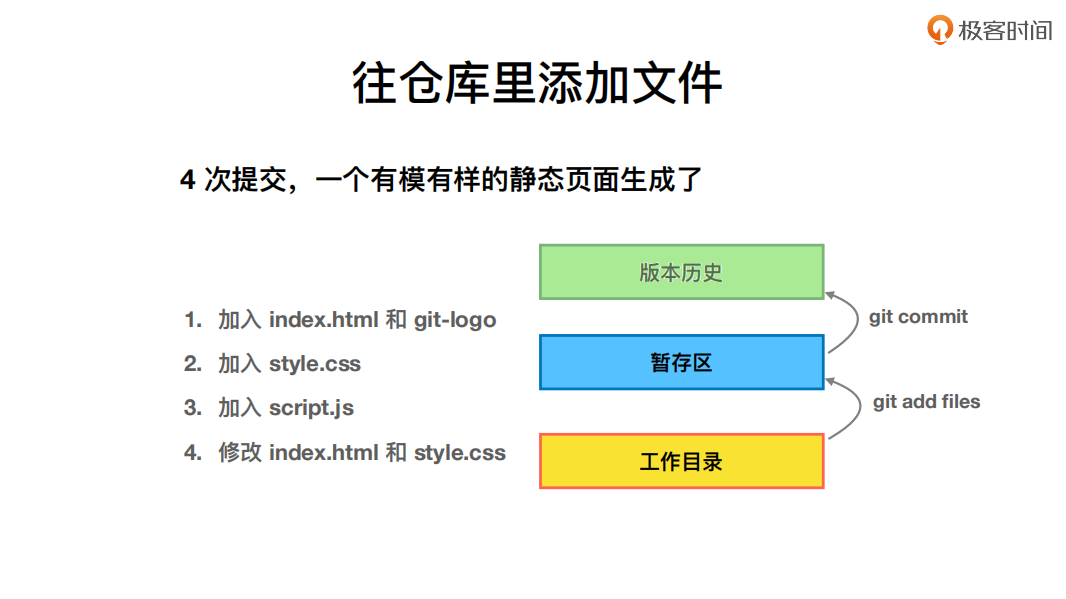
In this article, I will show you how to understand the workspace and staging area through several commit s.
Theme of my blog: I hope everyone can make experiments with my blog, first do the experiments, and then understand the technical points in a deeper level in combination with theoretical knowledge, so as to have fun and motivation in learning. Moreover, the content steps of my blog are very complete. I also share the source code and the software used in the experiment. I hope I can make progress with you!
If you have any questions during the actual operation, you can contact me at any time to help you solve the problem for free:
-
Personal wechat QR Code: x2675263825 (shede), qq: 2675263825.

-
Personal blog address: www.onlyonexl.cn

-
Personal WeChat official account: cloud native architect real battle

-
Personal csdn
https://blog.csdn.net/weixin_39246554?spm=1010.2135.3001.5421

Introduction to basic knowledge
-
Front end Basics
html page: the most basic web page file
css: Beautify html pages
js: animation effect
Experimental environment
Experimental environment:
1,win10;
2,$ git version
   git version 2.17.0.windows.1
Experimental software
Link: https://pan.baidu.com/s/1Gt6n5nrF4_mKyhwij-O0Rw
Extraction code: nkjv
1. Prepare the software required for this experiment
Related css, html, js and other files:

2. Prepare your own test directory environment
/d/git_repository/git_learning

3. First submission (add basic html file)
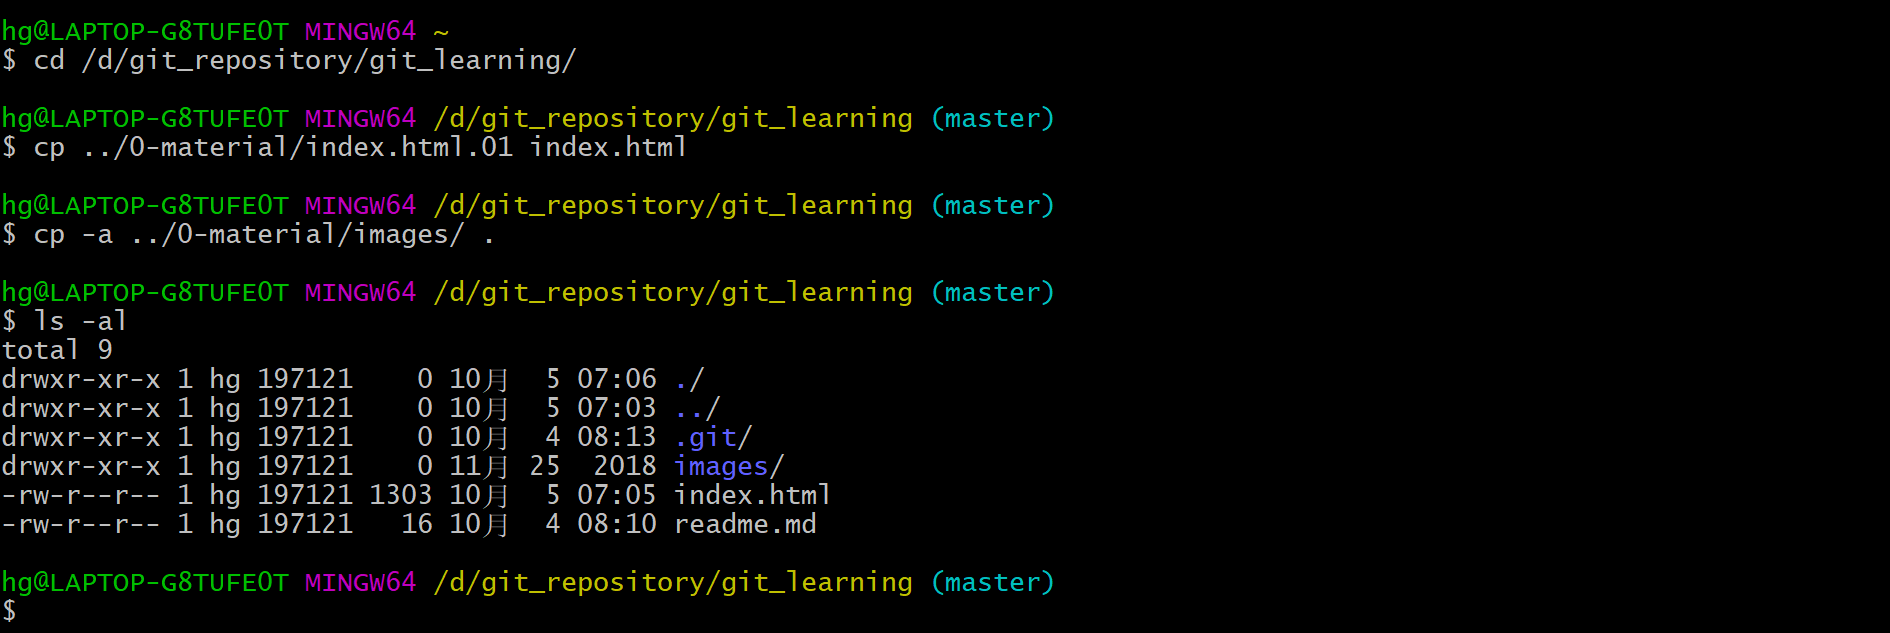
- Copy the relevant documents to the project warehouse

$ cd /d/git_repository/git_learning/
$ cp ../0-material/index.html.01 index.html
$ cp -a ../0-material/images/ .
- View the current status of git and execute the git add command
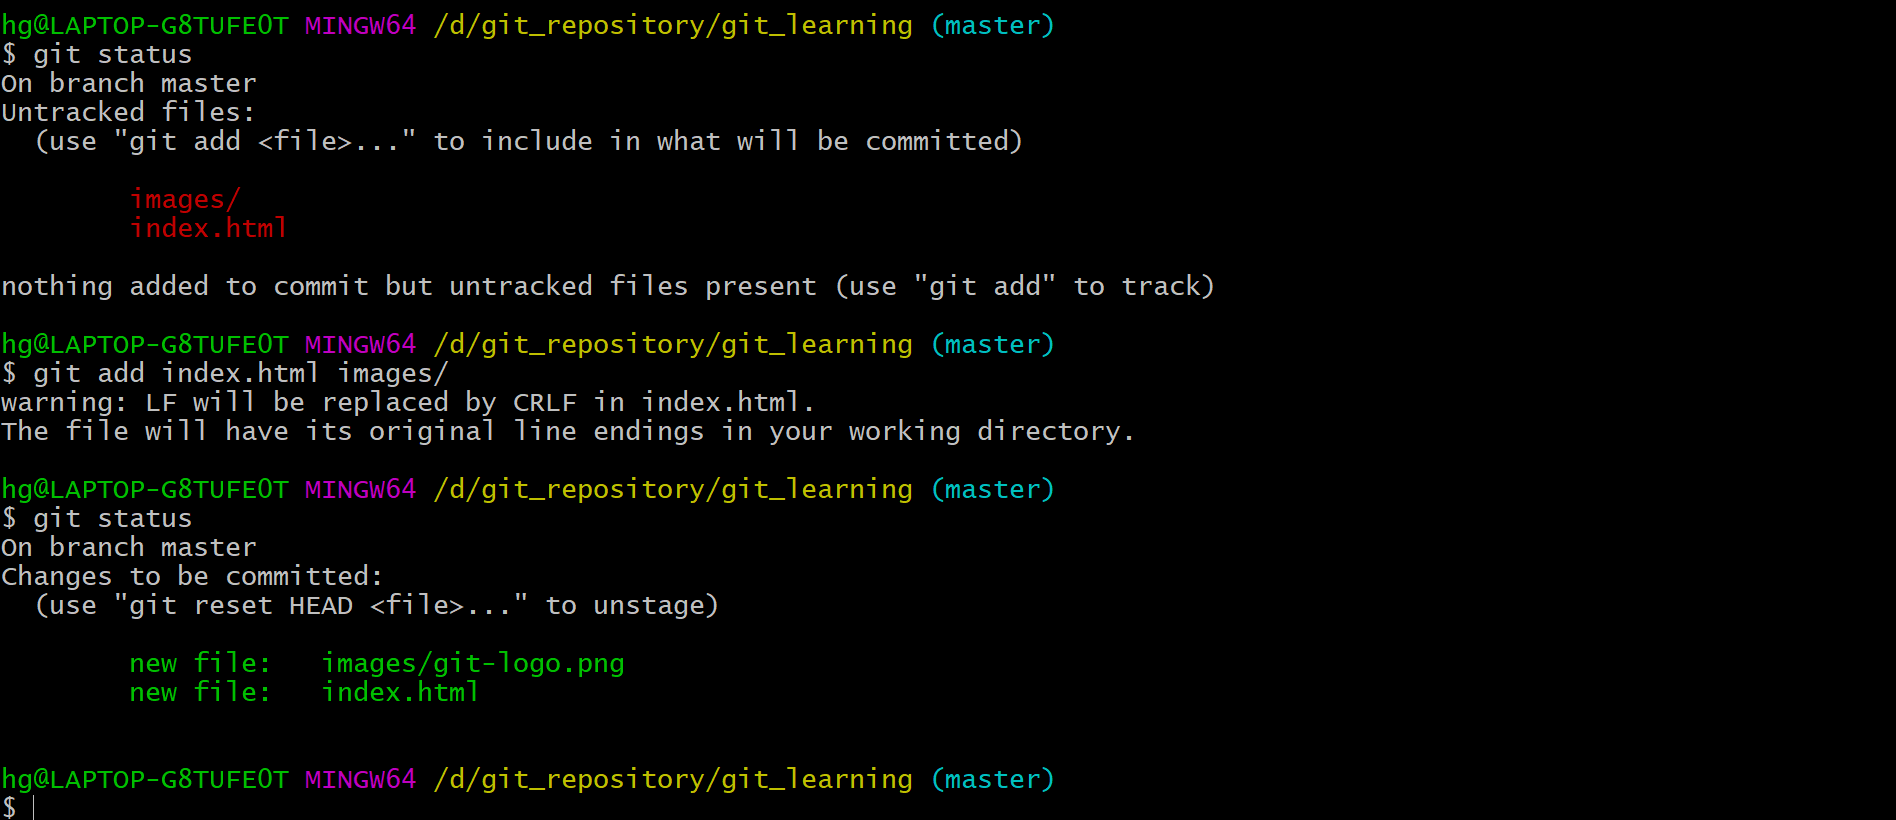
$ git status
$ git add index.html images/
$ git status
- Test and verify the index.html file
Double click the html file to observe the effect:


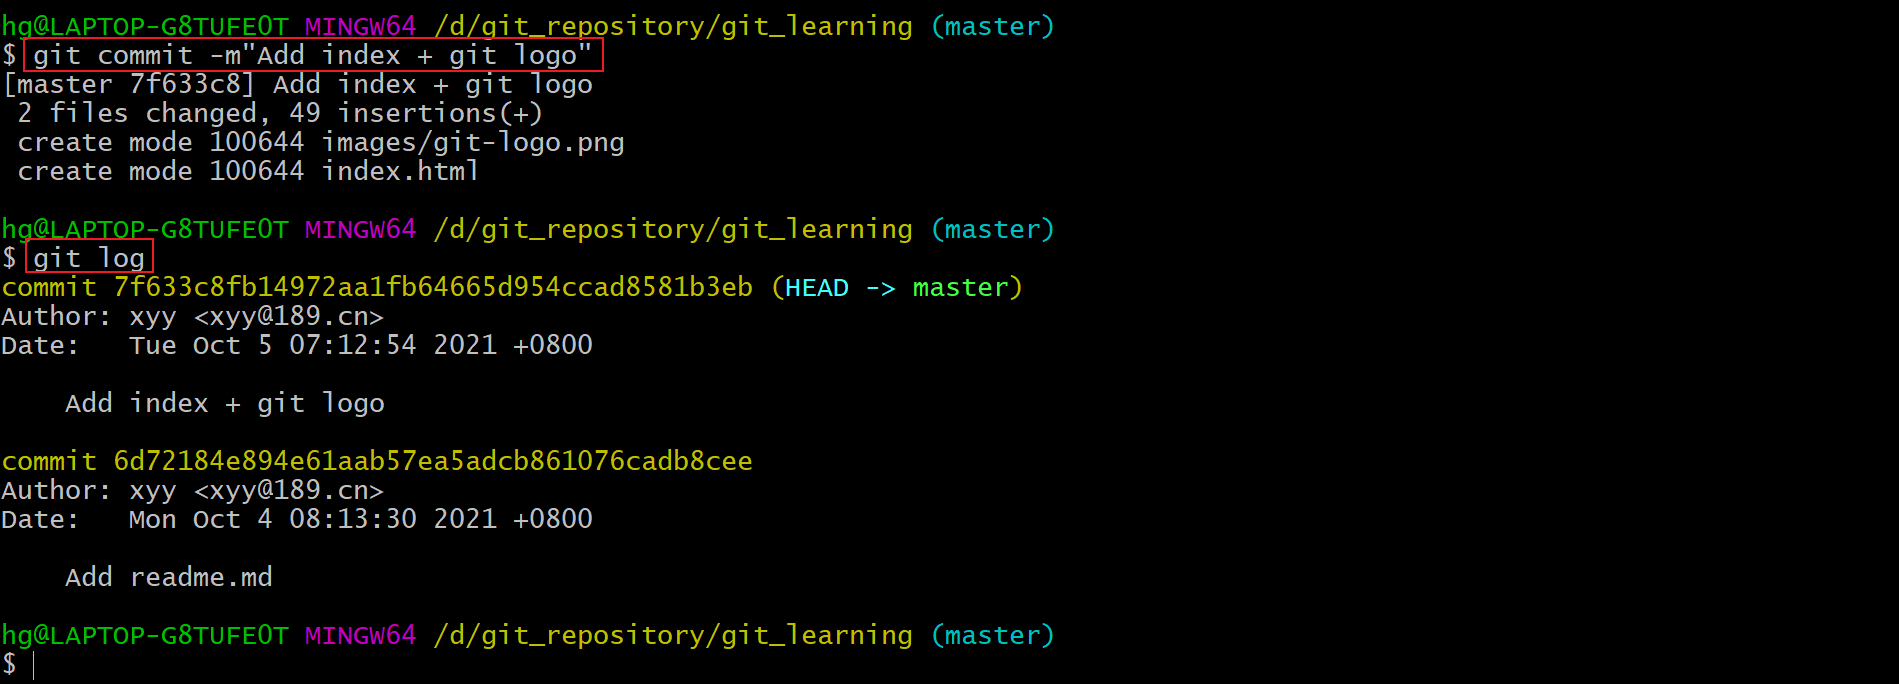
- At this point, let's commit the content just now
$ git commit -m"Add index + git logo"
$ git log
4. Second submission (add css beautification page)
- Considering that the index.html page is low, let's introduce css now
$ mkdir styles
$ cp -a ../0-material/styles/style.css.01 style/style.css

Let's first look at the content of css:
$ vim styles/style.css

- At this point, let's refresh the page just now to see the effect

- After adding css, we find that the page looks better. At this time, we submit the changed information again
$ git add styles/
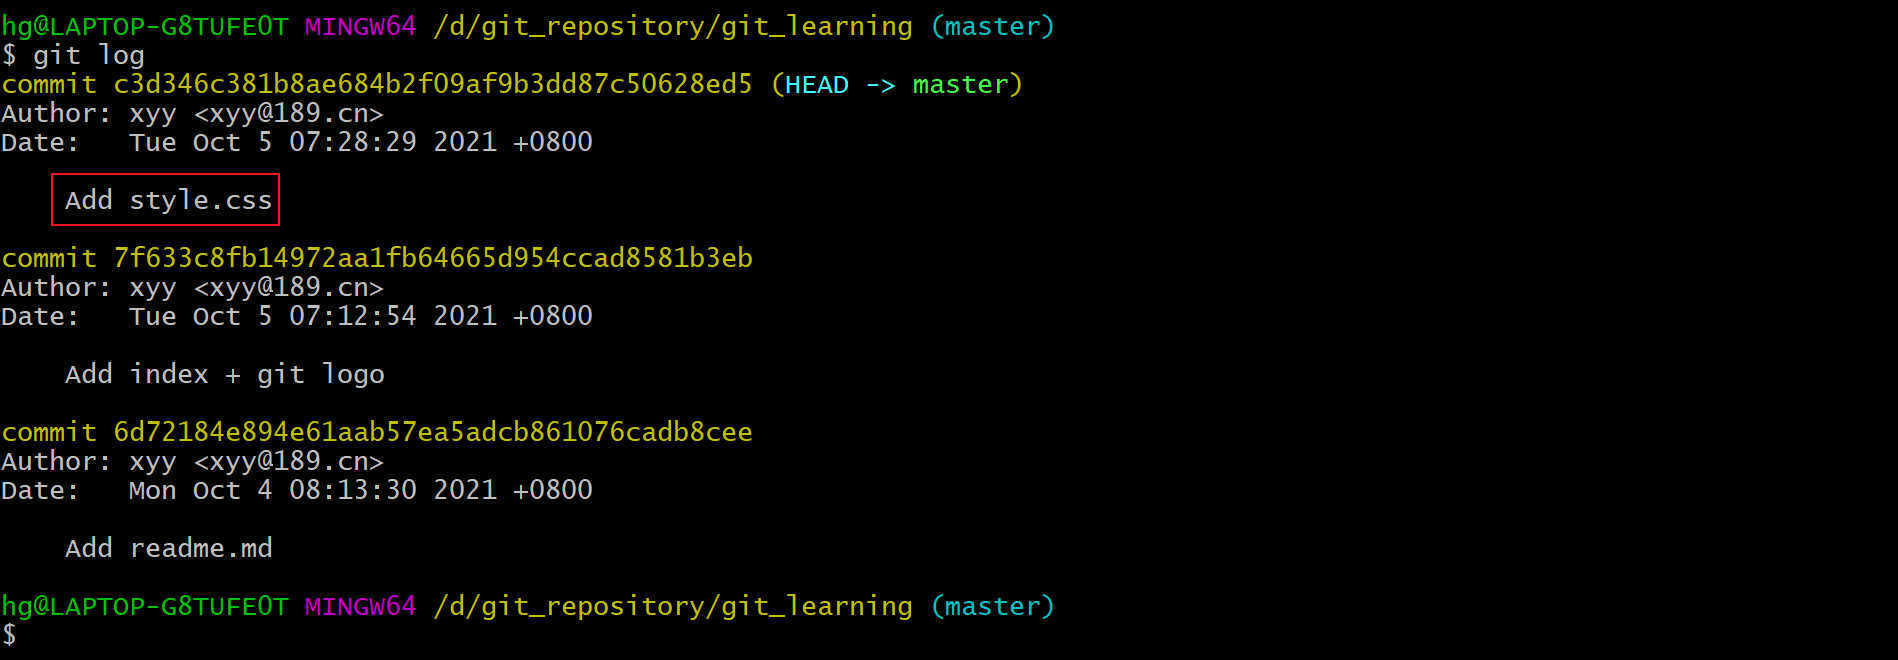
$ git commit -m"Add style.css"

- Let's look at the git log information again
$ git log
5. Third submission (add js animation effect)
- At this time, the html page still has some problems. We want to add content by clicking, so we need to add js effect
$ cp -a ../0-material/js/ .
$ cat js/script.js #The function of this js is: when we click on an element, different effects will appear!
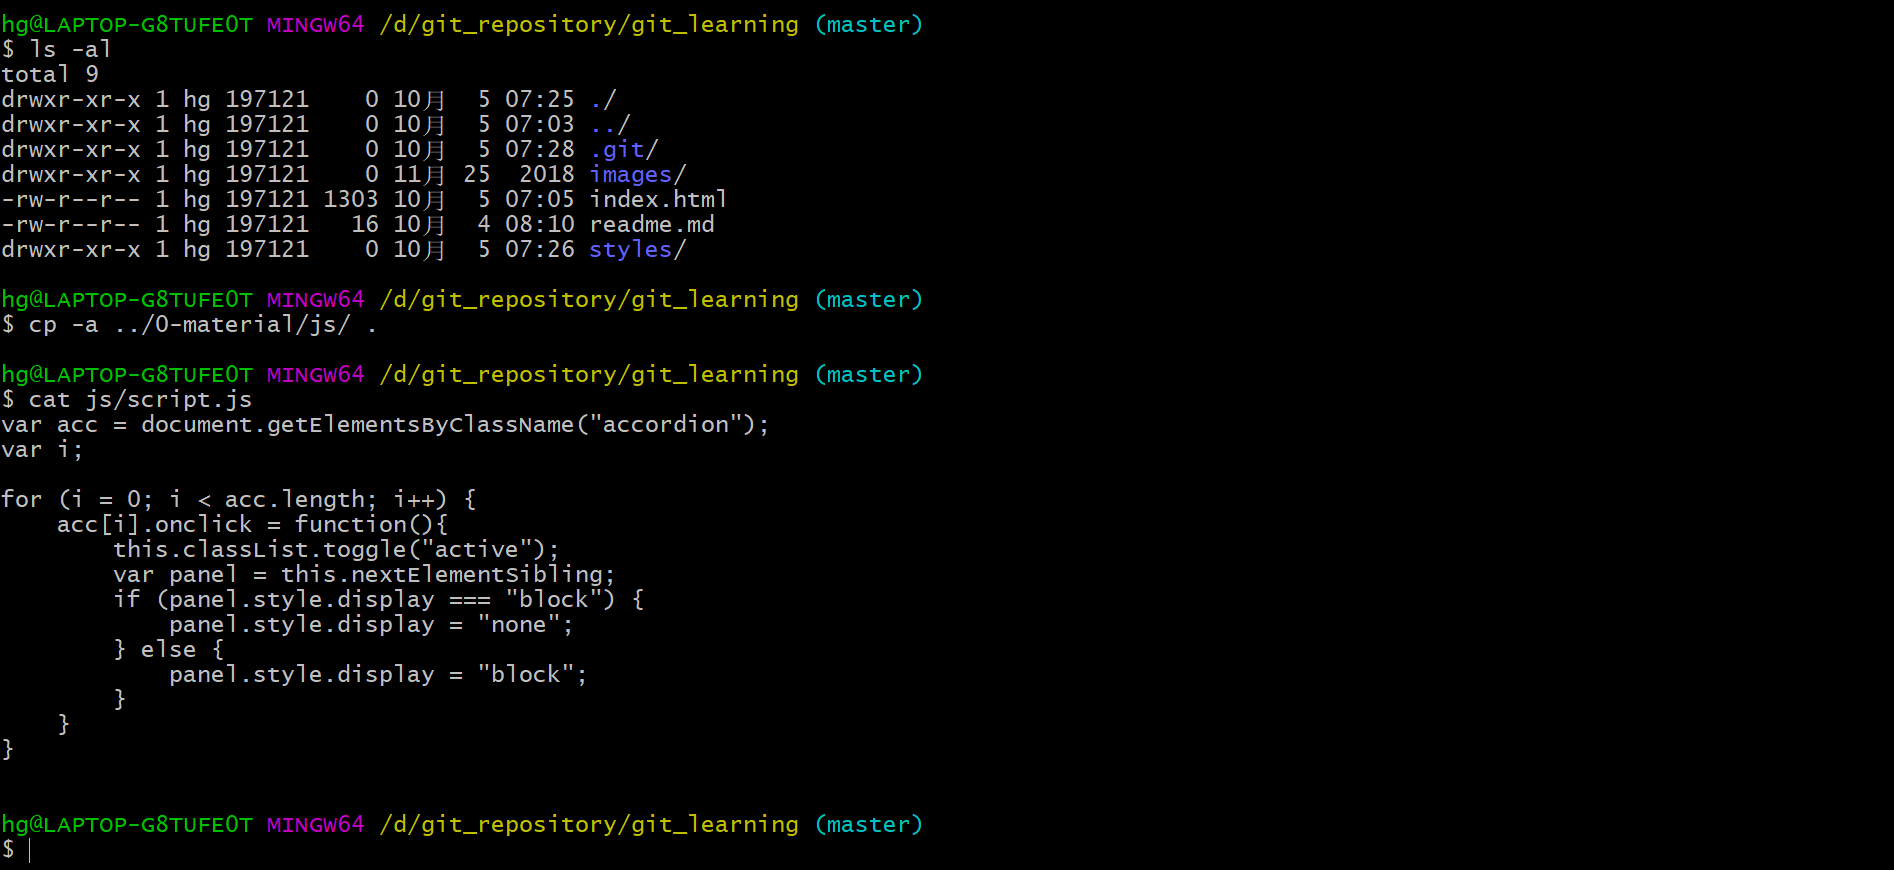
- After the js file is added, let's look at the effect and refresh the browser: = > as expected.

- The effect of this html is acceptable, so we submit the code here
$ git add js/
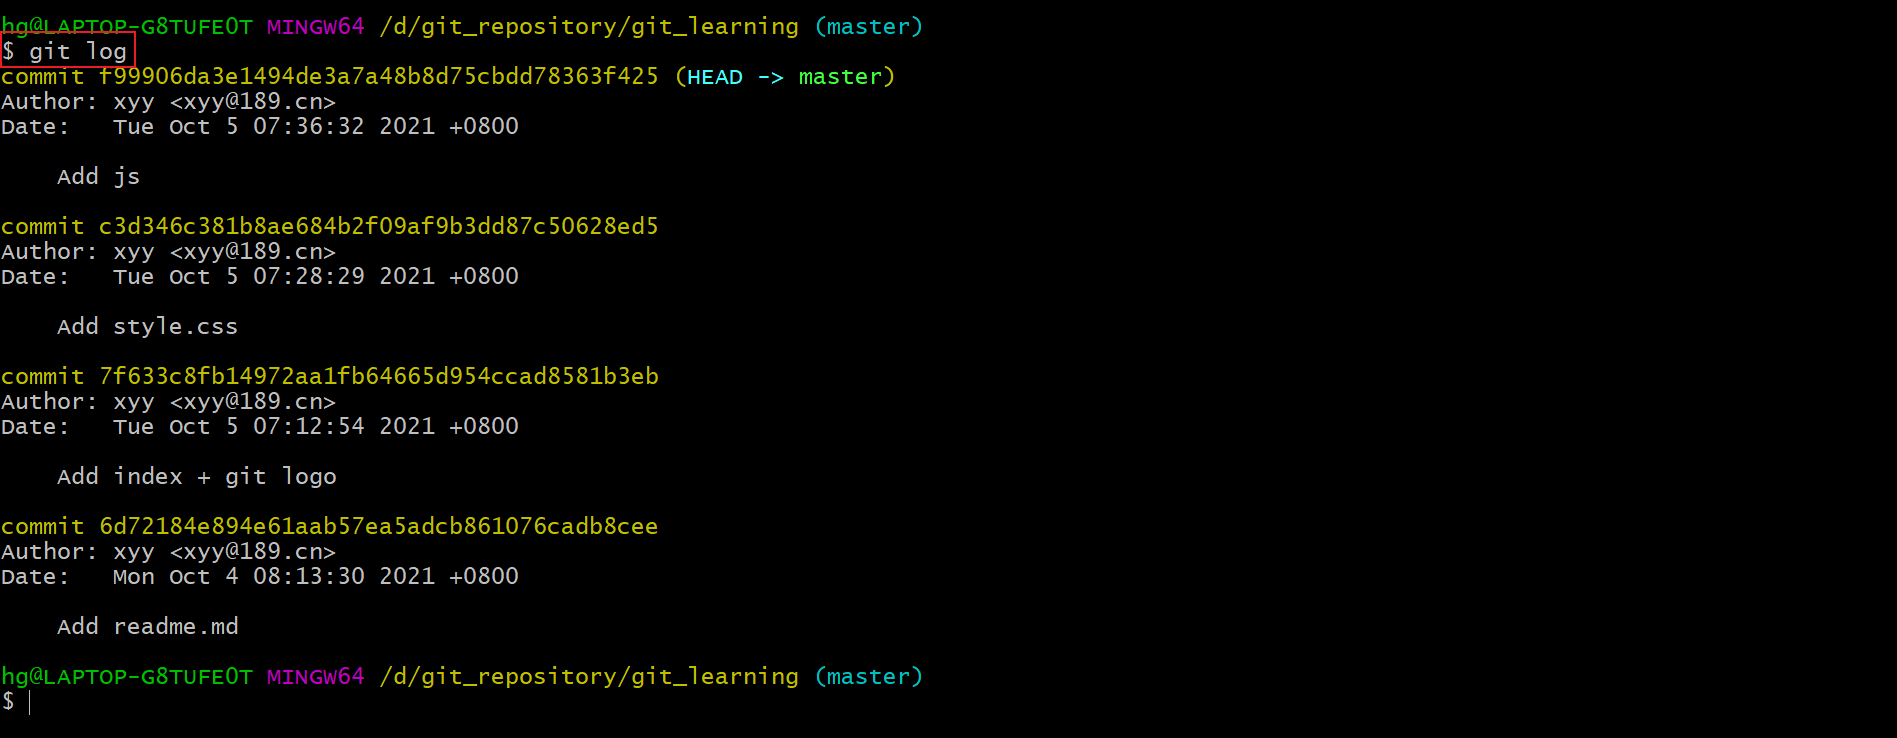
$ git commit -m"Add js"

- After submitting, let's check the git log
$ git log
6. Fourth submission (add reference project information)
Finally, our project is referenced from github, so I need to add the reference project information after the html page:
For convenience, two modified files, index.html.02 and style.css.02, are directly provided here. You can paste the corresponding contents into the relevant files of the project or directly replace the corresponding files. I edit them on the basis of the original file this time:
$vim... / 0-material/index.html.02 # view the contents of the reference file
<footer>
    <p>
        <a href="https://Github.com/ttn-js/unforgittable "> reference item 01</a>
    </p>
</footer>

Edit this index.html file:
hg@LAPTOP-G8TUFE0T MINGW64 /d/git_repository/git_learning (master)
$ vim index.html

- Refresh the page to see the effect

- I want it to be on the right, so I need to modify the style.css file
$ vim ../0-material/styles/style.css.02
footer{
  right: 0;
  bottom: 0;
  position: relative;
  padding: 10px 1rem 10px 0;
  margin-top: 50px;
  font-size: 0.7em;
  text-align: right;
}

footer p{
  margin-bottom:0;
}

- Edit the style.css content of this item
$ vim styles/style.css
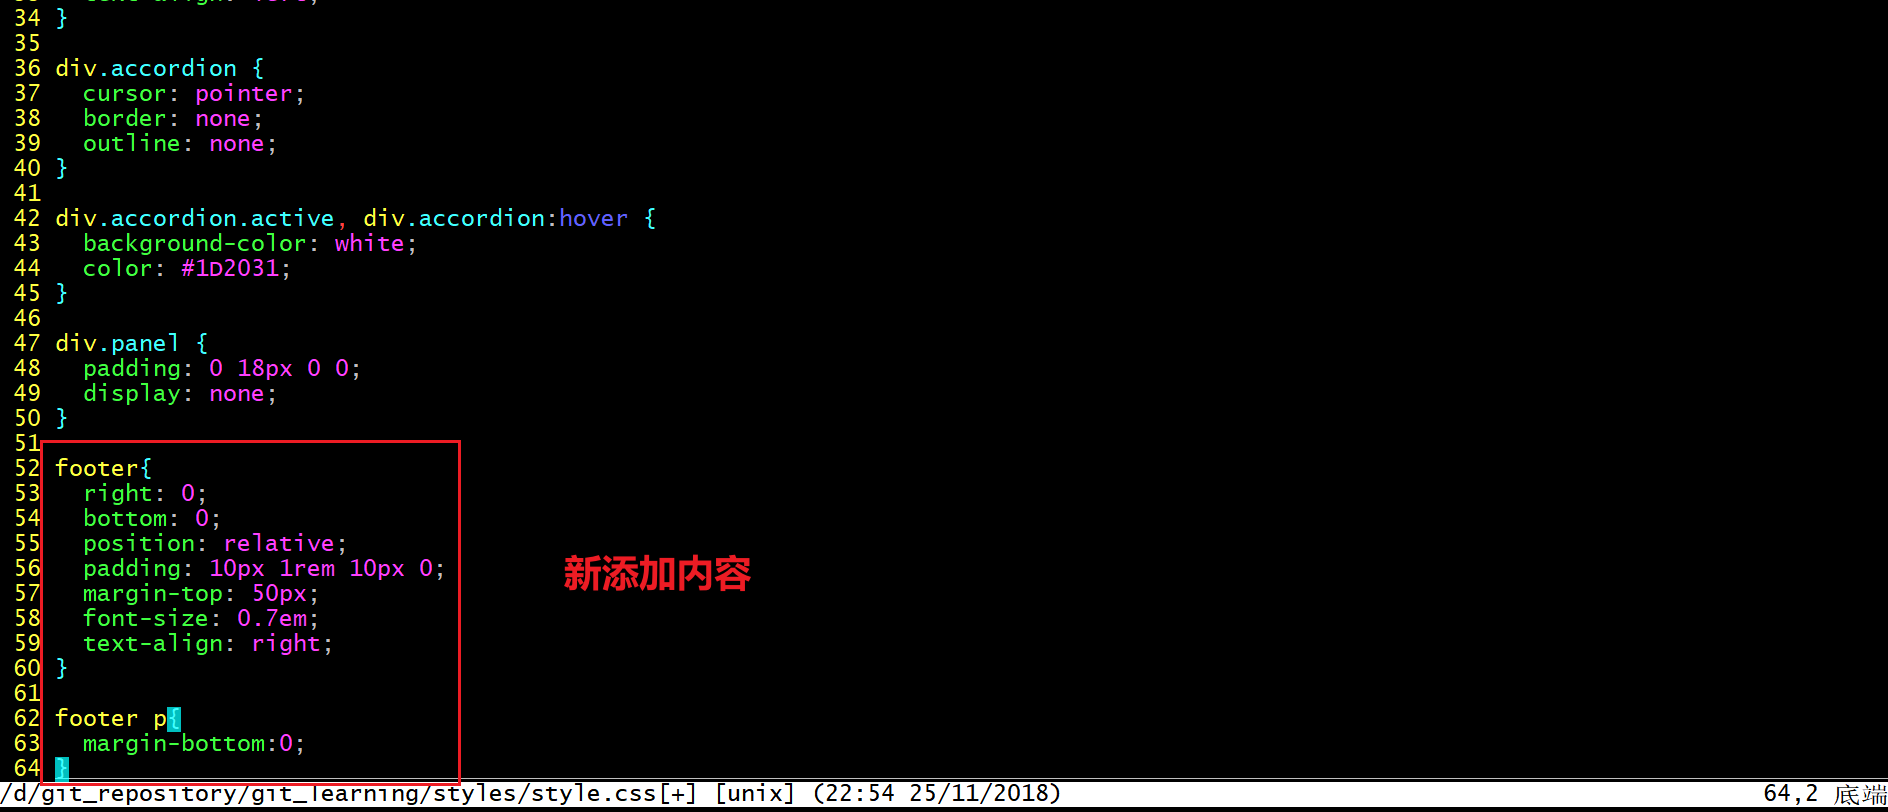
- Check the effect after refreshing the web page: it meets the expectation

- At this point, a complete project has been completed. We will submit the all asking price under the project directory
$ git add -u #Note that if the all file in the current directory has been controlled by git, but the file has been modified, I think git add -u can be used to add the content of the workspace to the temporary storage area without writing the file name!!!
$ git commit -m"Add refering project"

- View the git log information under the current project
$ git log

At this point, the experiment is over! Perfect
summary
Well, that's all for the experiment of getting to know the work area and temporary storage area through several commit s. Thank you for reading. Finally, stick my US dollar photo. I wish you a happy life and a meaningful life every day. See you next time!
