In this article, we are still based on e-commerce management system.
This time, we analyze the overall layout of the interface and apply the layout container and sidebar components of ElementUI,
catalogue
Overall layout of interface (Container component is adopted)
Overall layout of interface (Container component is adopted)
The overall layout of the interface adopts the Container layout Container of ElementUI component library

The code is as follows:
<el-container>
  <el-header>Header</el-header>
  <el-container>
    <el-aside width="200px">Aside</el-aside>
    <el-main>Main</el-main>
  </el-container>
</el-container>
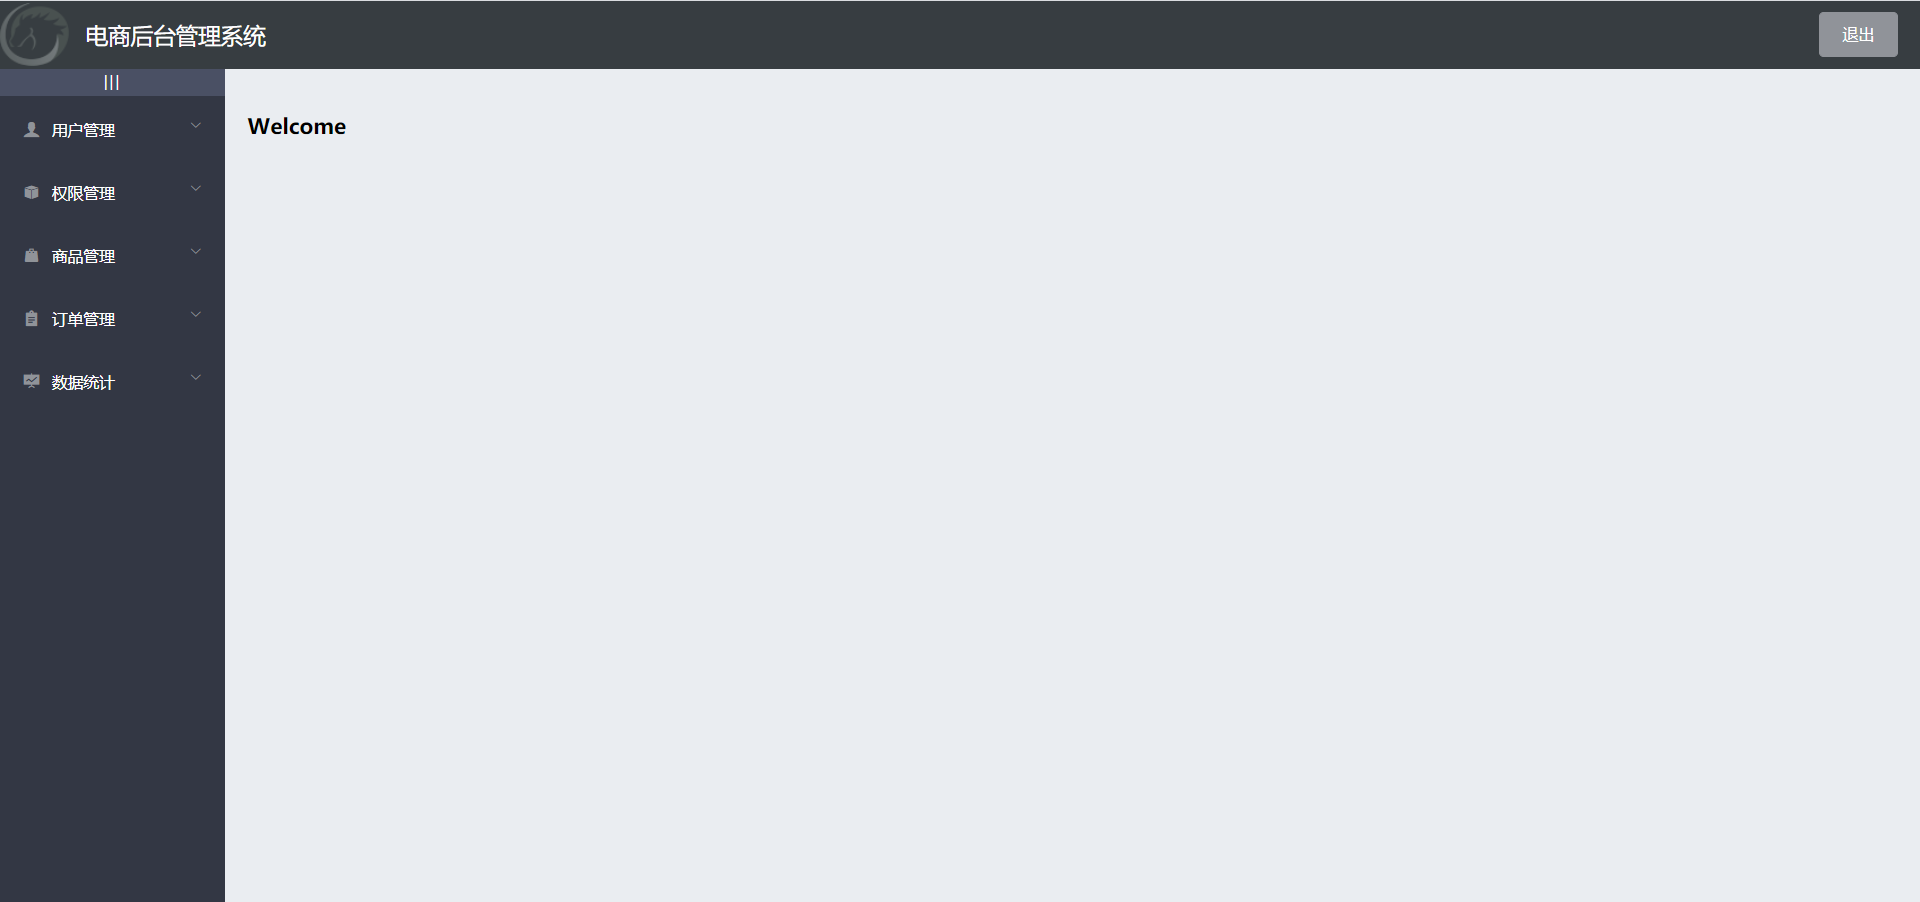
The implementation page is as follows:
 The header area is the system name and exit button;
The side area adopts Menu component;
The main area uses < router View > to match components in the form of sub routes.
The routing configuration is as follows:
    {
        path: '/home',
        component: Home,
        redirect: '/welcome',
        children: [
            { path: '/welcome', component: Welcome },
            { path: '/users', component: Users },
            { path: '/rights', component: Rights },
            { path: '/roles', component: Roles }
        ]
    }
Menu component
In the second part of the article, we mainly analyze the application of Menu component in the sidebar.
In the front page, the menu component is a very common component, which can be arranged in the side bar or the top bar. This only needs to set the mode attribute in the El menu component, which defaults to the vertical mode, and the mode="horizontal" can be changed to the horizontal mode. The code of the side bar is as follows:
            <el-aside :width="isCollapse ? '64px' : '200px'">
                <div class="toggle-button"
                    @click="toggleCollapse">|||</div>
                <!-- Sidebar menu area -->
                <el-menu :uniqueOpened="true"
                    background-color="#333744"
                    text-color="#fff"
                    active-text-color="#409FFF"
                    :unique-opened="false"
                    :collapse="isCollapse"
                    :collapse-transition="false"
                    router
                    :default-active="activePath">
                    <!-- First level menu -->
                    <el-submenu :index="item.id+''"
                        v-for="item in menuList"
                        :key="item.id">
                        <!-- Template area of the first level menu -->
                        <template #title>
                            <!-- Icon -->
                            <i :class="iconsObj[item.id]"></i>
                            <!-- text -->
                            <span>{{item.authName}}</span>
                        </template>
                        <!-- Secondary menu -->
                        <el-menu-item :index="'/' + subItem.path"
                            v-for="subItem in item.children"
                            :key="subItem.id"
                            @click="saveNavState('/' + subItem.path)">
                            <template #title>
                                <!-- Icon -->
                                <i class="el-icon-menu"></i>
                                <!-- text -->
                                <span>{{subItem.authName}}</span>
                            </template>
                        </el-menu-item>
                    </el-submenu>

                </el-menu>
            </el-aside>
We set the primary menu through El submenu and the secondary menu through El menu item.
The Menu component provides background color to set the background color, text color to set the text color of the Menu, and active text color to set the text color of the current active Menu. Unique opened is dynamically bound to false here, which means that only one sub Menu is not limited to open (multiple menus can be opened at the same time), and collapse indicates whether to horizontally collapse and collapse the Menu (available only when the mode is vertical), collapse transition is set to false here, which means that the collapse animation is not turned on,
Router indicates that the Vue router mode is enabled. Enabling this mode will jump the route with index as the path when the navigation is activated,
Default active dynamically binds the index of the current active menu and sets the value to dynamic activePath
We need to get the menu list in the created lifecycle function and store it in menuList
        created() {
            this.getMenuList();
            this.activePath = window.sessionStorage.getItem('activePath');
        },
            // Get all menus
            async getMenuList() {
                const { data: res } = await this.$axios.get('menus');
                if (res.meta.status !== 200) return this.$message.error('res.meta.msg');
                this.menuList = res.data;
                console.log(res);
            },
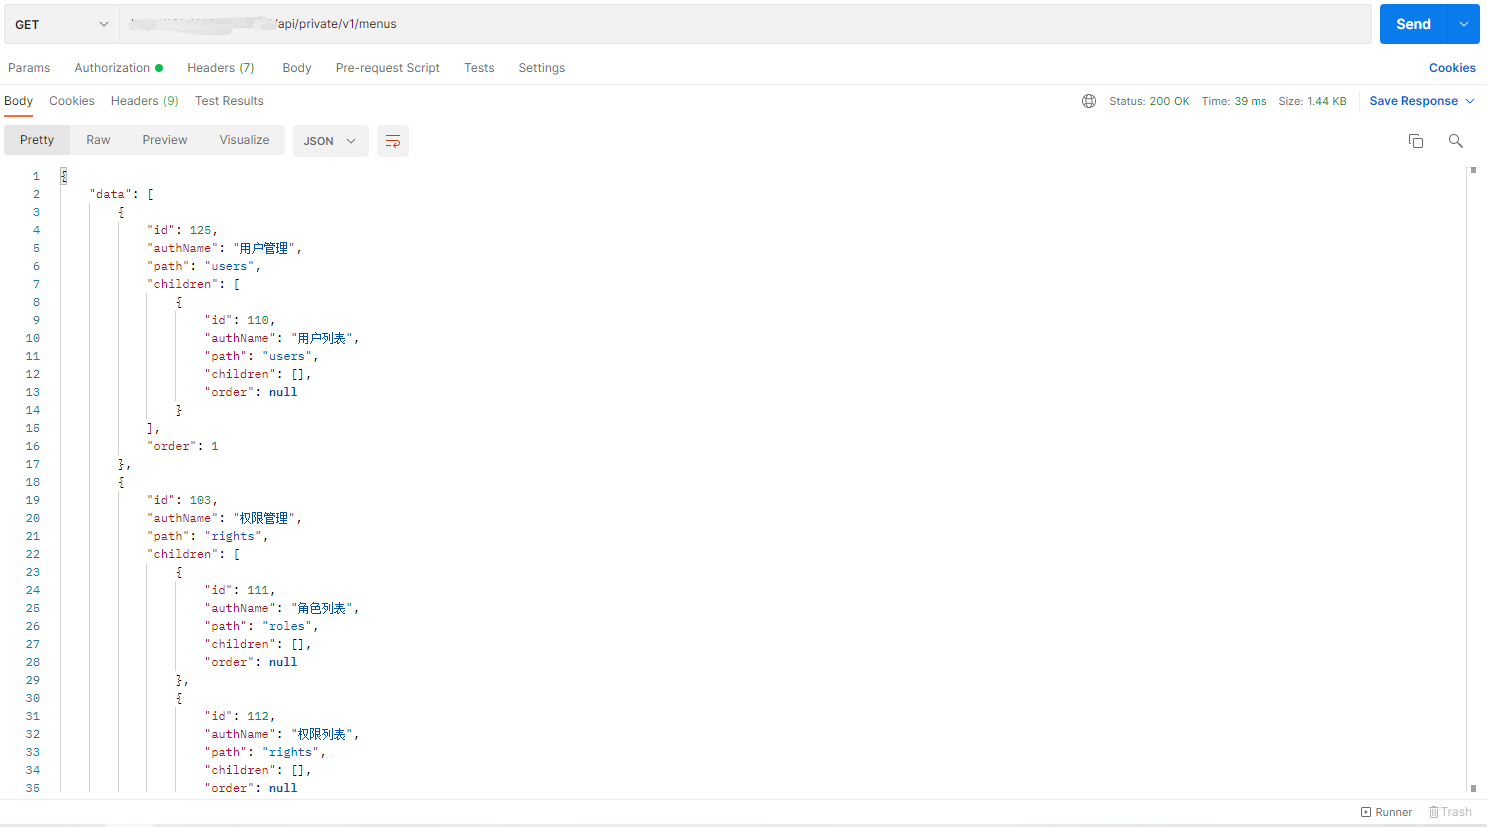
The menu data returned from the interface is as follows:

There are two levels of menus. For each level, we need to use the for loop to get it.
First level menu
For the first level menu, the code is as follows:
                    <!-- First level menu -->
                    <el-submenu :index="item.id+''"
                        v-for="item in menuList"
                        :key="item.id">
                        <!-- Template area of the first level menu -->
                        <template #title>
                            <!-- Icon -->
                            <i :class="iconsObj[item.id]"></i>
                            <!-- text -->
                            <span>{{item.authName}}</span>
                        </template>
index dynamically binds the ID as a unique identifier
Each item in menulist is obtained through the v-for instruction
Place icons and text in the template area. The icons are dynamically bound by class, and the icons refer to strings
Secondary menu
For the secondary menu, the code is as follows:
                        <!-- Secondary menu -->
                        <el-menu-item :index="'/' + subItem.path"
                            v-for="subItem in item.children"
                            :key="subItem.id"
                            @click="saveNavState('/' + subItem.path)">
                            <template #title>
                                <!-- Icon -->
                                <i class="el-icon-menu"></i>
                                <!-- text -->
                                <span>{{subItem.authName}}</span>
                            </template>
                        </el-menu-item>
The path when the index binding activates navigation
The v-for instruction loops through the children list of the current item item
click event is saveNavState('/' + subItem.path)
The code is as follows:
            // Save the activation status of the link
            saveNavState(activePath) {
                window.sessionStorage.setItem('activePath', activePath);
                this.activePath = activePath;
            }
First save the Item item activePath in sessionStorage
The default active property of the Menu component is dynamically bound to the activePath of the currently active Menu and set as the incoming path value
Then place icons and text in the secondary menu template area