The previous blogs have studied the principles and practical tips of SpringBoot. The next few blogs, I would like to call it the integration of all layers of SpringBoot to deal with the complete development task, nothing more than the integration of database and persistence layer and the customized integration of Spring MVC. Today's Blog will integrate and configure data sources, Including the framework of each persistence layer. For the data access layer, whether SQL (relational database) or NOSQL (non relational database), Spring Boot adopts the method of integrating Spring Data (Spring Data is also a well-known project in Spring as well as Spring Boot and Spring Cloud) for unified processing by default, and simplifies our operation on the data access layer through a large number of automatic configurations, We only need to make simple settings to access the data layer. Here we mention the concept of a data source. In fact, the data source can be understood as an agent. For the specific implementation of the JDBC protocol, see this article for details: Differences between database and data source
Spring boot integrates JDBC
We use JDBC consolidation configuration as follows:
1. Import JDBC scenario launcher
Spring Boot extracts various scenarios in daily enterprise application R & D and makes them into one scenario Starter. The scenario Starter integrates various possible dependencies in the scenario, so that users can get rid of the trouble of dealing with various dependencies and configurations. If you want to use JDBC for data access in Spring Boot, the first step is to import the JDBC scenario initiator: Spring Boot Starter data JDBC in pom.xml. The code is as follows
<!--Import JDBC Scene launcher for-->
<dependency>
    <groupId>org.springframework.boot</groupId>
    <artifactId>spring-boot-starter-data-jdbc</artifactId>
</dependency>
2. Import database driver
The JDBC scenario launcher does not import database drivers. We need to import the required database drivers according to our own needs. For example, when accessing a MySQL database, you need to import the MySQL database driver: MySQL connector Java. The example code is as follows
<!--Import database driver-->
<dependency>
    <groupId>mysql</groupId>
    <artifactId>mysql-connector-java</artifactId>
    <scope>runtime</scope>
</dependency>
3 configuring data sources
After importing the JDBC scenario initiator and database driver, we can configure the data source in the configuration file (application.properties/yml). The example code (application.yml) is as follows
#Data source connection information
spring:
  datasource:
    username: root
    password: root
    url: jdbc:mysql://localhost:3306/test?userSSL=true&useUnicode=true&characterEncoding=UTF-8&serverTimezone=UTC
    driver-class-name: com.mysql.cj.jdbc.Driver
4. Jdbctemplate request test
Spring Boot provides a lightweight data access tool called JdbcTemplate, which encapsulates JDBC. Spring Boot provides default automatic configuration for JdbcTemplate. We can directly inject it into bean s using @ Autowired or constructor
package com.example.springboot;

import org.junit.jupiter.api.Test;
import org.springframework.boot.test.context.SpringBootTest;
import org.springframework.jdbc.core.JdbcTemplate;

import javax.annotation.Resource;
import javax.sql.DataSource;
import java.sql.SQLException;

@SpringBootTest
class SpringbootApplicationTests {
    //Data source component
    @Resource
    DataSource dataSource;
    //Components for accessing the database
    @Resource
    JdbcTemplate jdbcTemplate;

    @Test
    void contextLoads() throws SQLException {
        System.out.println("The default data source is:" + dataSource.getClass());
        System.out.println("Database connection instance:" + dataSource.getConnection());
        //Access database
        Integer i = jdbcTemplate.queryForObject("SELECT count(*) from `person`", Integer.class);
        System.out.println("user Total in table" + i + "Data.");
    }

}
The data sheet is as follows:

The returned result is:

From the above operation results, it can be seen that Spring Boot uses HikariCP as its data source by default to access the database. HikariDataSource is known as the fastest data source of Java WEB, which is better than traditional connection pools such as C3P0, DBCP and Tomcat jdbc
Spring Boot data source configuration principle
In the process of database access, "data source" is undoubtedly one of the most important concepts. It can not only encapsulate and uniformly manage various parameters related to database access, but also manage database connection pool and improve database connection performance. At present, there are many excellent open source data sources on the market, such as DBCP, C3P0, Druid, HikariCP, etc. In Spring Boot 2.x, HikariCP with the best performance at present is used as its default data source. Next, let's introduce the default data source configuration and principle of Spring Boot
DataSourceAutoConfiguration
We know that almost all default configurations in Spring Boot are configured through the configuration class XxxAutoConfiguration, and the Spring Boot data source is no exception. Its automatic configuration class is DataSourceAutoConfiguration.
DataSourceAutoConfiguration includes the following five internal static classes:
- EmbeddedDatabaseCondition
- PooledDataSourceAvailableCondition
- PooledDataSourceCondition
- PooledDataSourceConfiguration (pooled data source auto configuration class)
- EmbeddedDatabaseConfiguration (embedded data source autoconfiguration class)
PooledDataSourceConfiguration and EmbeddedDatabaseConfiguration are automatic Configuration classes with @ Configuration annotation, and the other three are constraint classes.
EmbeddedDatabaseConfiguration class
EmbeddedDatabaseConfiguration is an automatic configuration class with embedded data sources. There is no method to implement it. Its main functions are implemented by introducing EmbeddedDataSourceConfiguration class through @ Import annotation
  @Configuration(
        proxyBeanMethods = false
    )
    @Conditional({DataSourceAutoConfiguration.EmbeddedDatabaseCondition.class})
    @ConditionalOnMissingBean({DataSource.class, XADataSource.class})
    @Import({EmbeddedDataSourceConfiguration.class})
    protected static class EmbeddedDatabaseConfiguration {
        protected EmbeddedDatabaseConfiguration() {
        }
    }
EmbeddedDataSourceConfiguration adds a Spring Boot embedded data source to the container. The data source supports HSQL, H2 and DERBY databases. Part of the code is as follows
@Configuration(
    proxyBeanMethods = false
)
@EnableConfigurationProperties({DataSourceProperties.class})
public class EmbeddedDataSourceConfiguration implements BeanClassLoaderAware {
    private ClassLoader classLoader;
    public EmbeddedDataSourceConfiguration() {
    }
    public void setBeanClassLoader(ClassLoader classLoader) {
        this.classLoader = classLoader;
    }
    //Add a Spring Boot embedded data source to the container
    @Bean(
        destroyMethod = "shutdown"
    )
    public EmbeddedDatabase dataSource(DataSourceProperties properties) {
        return (new EmbeddedDatabaseBuilder()).setType(EmbeddedDatabaseConnection.get(this.classLoader).getType()).setName(properties.determineDatabaseName()).build();
    }
}
Through the above analysis, we know that the function of the automatic configuration class EmbeddedDatabaseConfiguration is to add an embedded data source to the container
EmbeddedDatabaseCondition condition class
Adding an embedded data source to a container is Conditional. An @ Conditional annotation is also used on the EmbeddedDatabaseConfiguration class, which uses the internal restriction class EmbeddedDatabaseCondition of DataSourceAutoConfiguration to judge the condition
    static class EmbeddedDatabaseCondition extends SpringBootCondition {
        private static final String DATASOURCE_URL_PROPERTY = "spring.datasource.url";
        private final SpringBootCondition pooledCondition = new DataSourceAutoConfiguration.PooledDataSourceCondition();

        EmbeddedDatabaseCondition() {
        }

        public ConditionOutcome getMatchOutcome(ConditionContext context, AnnotatedTypeMetadata metadata) {
            Builder message = ConditionMessage.forCondition("EmbeddedDataSource", new Object[0]);
            if (this.hasDataSourceUrlProperty(context)) {
                return ConditionOutcome.noMatch(message.because("spring.datasource.url is set"));
            } else if (this.anyMatches(context, metadata, new Condition[]{this.pooledCondition})) {
                return ConditionOutcome.noMatch(message.foundExactly("supported pooled data source"));
            } else {
                EmbeddedDatabaseType type = EmbeddedDatabaseConnection.get(context.getClassLoader()).getType();
                return type == null ? ConditionOutcome.noMatch(message.didNotFind("embedded database").atAll()) : ConditionOutcome.match(message.found("embedded database").items(new Object[]{type}));
            }
        }

        private boolean hasDataSourceUrlProperty(ConditionContext context) {
            Environment environment = context.getEnvironment();
            if (environment.containsProperty("spring.datasource.url")) {
                try {
                    return StringUtils.hasText(environment.getProperty("spring.datasource.url"));
                } catch (IllegalArgumentException var4) {
                }
            }

            return false;
        }
    }
Embedded database condition is mainly used to detect whether pooled data source already exists in the container. If there is a pooled data source in the container, the EmbeddedDatabaseConfiguration cannot be instantiated. Only when there is no pooled data source in the container can the EmbeddedDatabaseConfiguration be instantiated and the embedded data source be added to the container
PooledDataSourceConfiguration class
PooledDataSourceConfiguration is an automatic configuration class for pooled data sources. A @ Conditional annotation is used on this class, which uses PooledDataSourceCondition, an internal restriction class of DataSourceAutoConfiguration, to judge conditions.
  @Configuration(
        proxyBeanMethods = false
    )
    @Conditional({DataSourceAutoConfiguration.PooledDataSourceCondition.class})
    @ConditionalOnMissingBean({DataSource.class, XADataSource.class})
    @Import({Hikari.class, Tomcat.class, Dbcp2.class, OracleUcp.class, Generic.class, DataSourceJmxConfiguration.class})
    protected static class PooledDataSourceConfiguration {
        protected PooledDataSourceConfiguration() {
        }
    }
Like EmbeddedDatabaseConfiguration, PooledDataSourceConfiguration class does not have any method implementation. All its functions are implemented by introducing other classes through the @ Import annotation. PooledDataSourceConfiguration introduces five data source configuration classes Hikari, Tomcat, Dbcp2, OracleUcp and Generic through the @ Import annotation. They are all internal classes of DataSourceConfiguration and have similar functions. They all add specified data sources to the container. Let's take Hikari as an example. The source code of Hikari is as follows
@Configuration(
    proxyBeanMethods = false   //@Configuration: indicates that the current class is a configuration class
)
@ConditionalOnClass({HikariDataSource.class}) //Indicates that Hikari can only be instantiated if the HikariDataSource class must exist in the classpath. The HikariDataSource class is introduced by spring boot starter JDBC by default. Therefore, as long as we introduce the starter in pom.xml, Hikari will be instantiated (which is why Spring Boot 2.x uses HikariCP as its data source by default)
@ConditionalOnMissingBean({DataSource.class})  //Indicates that the configuration class will be instantiated only when there is no user-defined data source in the container
@ConditionalOnProperty(
    name = {"spring.datasource.type"},
    havingValue = "com.zaxxer.hikari.HikariDataSource",
    matchIfMissing = true
) //It means that Hikari will be instantiated only when spring.datasource.type = com.zaxxer.hikari.HikariDataSource (explicitly specifying the use of Hikari data source) or spring.datasource.type (that is, the default) is configured in the Spring Boot configuration file
static class Hikari {
    Hikari() {
    }
    @Bean
    @ConfigurationProperties(
        prefix = "spring.datasource.hikari"
    )
    HikariDataSource dataSource(DataSourceProperties properties) {
        HikariDataSource dataSource = (HikariDataSource)DataSourceConfiguration.createDataSource(properties, HikariDataSource.class);
        if (StringUtils.hasText(properties.getName())) {
            dataSource.setPoolName(properties.getName());
        }
        return dataSource;
    }
}
The Hikari class adds the HikariDataSource component to the container through the @ Bean annotation. The instance object of the component is obtained by calling the createDataSource() method of DataSourceConfiguration. The code is as follows
@Bean
@ConfigurationProperties(
    prefix = "spring.datasource.hikari"
)
HikariDataSource dataSource(DataSourceProperties properties) {
    HikariDataSource dataSource = (HikariDataSource)DataSourceConfiguration.createDataSource(properties, HikariDataSource.class);
    if (StringUtils.hasText(properties.getName())) {
        dataSource.setPoolName(properties.getName());
    }
    return dataSource;
}
In the createDataSource() method, call the initializeDataSourceBuilder() of DataSourceProperties to initialize DataSourceBuilder. The source code is as follows
protected static <T> T createDataSource(DataSourceProperties properties, Class<? extends DataSource> type) {
    return properties.initializeDataSourceBuilder().type(type).build();
}
initializeDataSourceBuilder() method creates a DataSourceBuilder object by calling the create() method of DataSourceBuilder, and sets the data source type, driver class name, connection url, user name, password and other information according to the configuration in the Spring Boot configuration file (application.properties/yml)
public DataSourceBuilder<?> initializeDataSourceBuilder() {
    return DataSourceBuilder.create(this.getClassLoader()).type(this.getType()).
          driverClassName(this.determineDriverClassName()).url(this.determineUrl()).username(this.determineUsername()).password(this.determinePassword());
}
PooledDataSourceCondition condition class
PooledDataSourceConfiguration is an automatic configuration class of pooled data sources. This class uses a @ Conditional annotation, which uses the internal restriction class PooledDataSourceCondition of DataSourceAutoConfiguration to judge conditions
static class PooledDataSourceCondition extends AnyNestedCondition {
        PooledDataSourceCondition() {
            super(ConfigurationPhase.PARSE_CONFIGURATION);
        }

        @Conditional({DataSourceAutoConfiguration.PooledDataSourceAvailableCondition.class})
        static class PooledDataSourceAvailable {
            PooledDataSourceAvailable() {
            }
        }

        @ConditionalOnProperty(
            prefix = "spring.datasource",
            name = {"type"}
        )
        static class ExplicitType {
            ExplicitType() {
            }
        }
    }
PooledDataSourceCondition, like EmbeddedDatabaseCondition, is also used to detect whether pooled data sources already exist in the container. However, the difference is that PooledDataSourceConfiguration can be instantiated only when pooled data sources exist in the container, so as to add pooled data sources to the container
PooledDataSourceAvailableCondition condition class
PooledDataSourceCondition called PooledDataSourceAvailableCondition class
static class PooledDataSourceAvailableCondition extends SpringBootCondition {
        PooledDataSourceAvailableCondition() {
        }

        public ConditionOutcome getMatchOutcome(ConditionContext context, AnnotatedTypeMetadata metadata) {
            Builder message = ConditionMessage.forCondition("PooledDataSource", new Object[0]);
            return DataSourceBuilder.findType(context.getClassLoader()) != null ? ConditionOutcome.match(message.foundExactly("supported DataSource")) : ConditionOutcome.noMatch(message.didNotFind("supported DataSource").atAll());
        }
    }
Summary of data source automatic configuration principle
Through the analysis of the automatic configuration principle of Spring Boot data source, it can be seen that:
- When the user does not configure the data source, if the HikariDataSource class exists in the container, Spring Boot will automatically instantiate Hikari and use it as its data source.
- Spring Boot JDBC scene initiator (Spring Boot starter data JDBC) introduces HikariCP data source (including HikariDataSource class) by default through Spring Boot starter JDBC, so Spring Boot uses HikariCP as its data source by default
Spring boot integrates Druid
Spring Boot 2.x uses HikariCP as the data source by default. As long as we import the JDBC scenario initiator of Spring Boot in the project, we can use HikariCP data source to obtain database connection, add, delete, modify and query the database. HikariCP is the best data source product on the market, but in the actual development process, enterprises often use another data source product: Druid, which is the most widely used data source product in China. Druid is an open source high-performance data source product launched by Alibaba. Druid supports all JDBC compatible databases, including Oracle, MySQL, SQL Server and H2. Druid not only combines the advantages of data source products such as C3P0, DBCP and PROXOOL, but also adds powerful monitoring functions. Through Druid's monitoring function, you can observe the operation of database connection pool and SQL in real time, and help users find out the problems in the system in time. Druid is not a technology provided internally by Spring Boot. It belongs to a third-party technology. We can integrate Druid through the starter provided by Ali
1. Introduce Druid spring boot starter scenario launcher
Add the following dependencies in pom.xml of Spring Boot project and introduce the latest version of Druid Spring Boot Starter
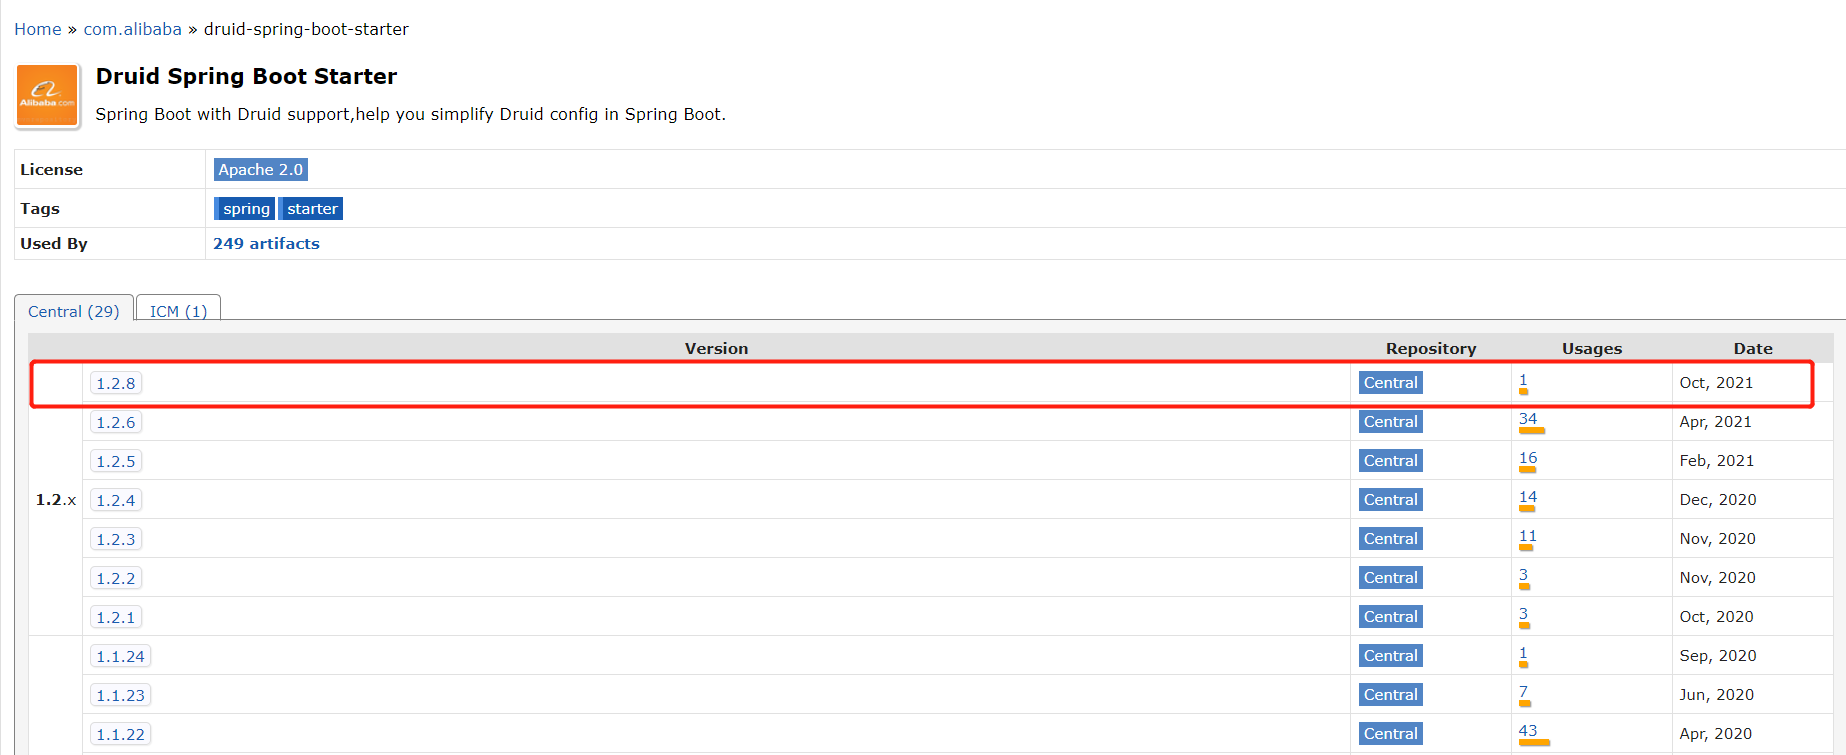
  <!--add to druid of starter-->
        <dependency>
            <groupId>com.alibaba</groupId>
            <artifactId>druid-spring-boot-starter</artifactId>
            <version>1.2.8</version>
        </dependency>
2 Druid related configuration properties
Druid Spring Boot Starter has configured all modules in the Druid data source by default. We can also modify the configuration of each Druid module through the Spring Boot configuration file (application.properties/yml). Otherwise, the default configuration will be used. Configure the following in the Spring Boot configuration file:
- JDBC common configuration
- Druid data source connection pool configuration
- Druid monitoring configuration
- Druid built-in Filter configuration
The above automatic configuration contents are integrated by starter, so we don't need to write automatic configuration classes
1. JDBC general configuration
We can configure JDBC in the configuration file of Spring Boot, such as database user name, database password, database URL and database driver. The example code is as follows
#Data source connection information
spring:
  datasource:
    username: root
    password: root
    url: jdbc:mysql://localhost:3306/test?userSSL=true&useUnicode=true&characterEncoding=UTF-8&serverTimezone=UTC
    driver-class-name: com.mysql.cj.jdbc.Driver
We again request the test:
package com.example.springboot;

import org.junit.jupiter.api.Test;
import org.springframework.boot.test.context.SpringBootTest;
import org.springframework.jdbc.core.JdbcTemplate;

import javax.annotation.Resource;
import javax.sql.DataSource;
import java.sql.SQLException;

@SpringBootTest
class SpringbootApplicationTests {
    //Data source component
    @Resource
    DataSource dataSource;
    //Components for accessing the database
    @Resource
    JdbcTemplate jdbcTemplate;

    @Test
    void contextLoads() throws SQLException {
        System.out.println("The default data source is:" + dataSource.getClass());
        System.out.println("Database connection instance:" + dataSource.getConnection());
        //Access database
        Integer i = jdbcTemplate.queryForObject("SELECT count(*) from `person`", Integer.class);
        System.out.println("user Total in table" + i + "Data.");
    }

}
Because when there is no DataSource (data source class) in the container, Spring Boot will use HikariCP as its default data source. That is, if we add an object of Druid data source class (DruidDataSource, inherited from DataSource) to the container, Spring Boot will use Druid as its data source instead of HikariCP, so the print results are as follows:

2 Druid data source connection pool configuration
We can also configure the Druid data source connection pool in the Spring Boot configuration file. The example code is as follows
 ################################################## Druid Configuration of connection pool ##########################################
spring:
  datasource:
    druid:
      initial-size: 5                                                                 #Initialize connection size
      min-idle: 5                                                                     #Minimum number of connection pools
      max-active: 20                                                                  #Maximum number of connection pools
      max-wait: 60000                                                                 #Maximum wait time to get a connection, in milliseconds
      time-between-eviction-runs-millis: 60000                                        #Configure how often to detect idle connections that need to be closed. The unit is milliseconds
      min-evictable-idle-time-millis: 300000                                          #Configure the minimum lifetime of a connection in the pool, in milliseconds
      validation-query: SELECT 1 FROM DUAL                                            #Test connection
      test-while-idle: true                                                           #It is detected when applying for connection. It is recommended to configure it to true, which will not affect performance and ensure security
      test-on-borrow: false                                                           #The detection is performed when obtaining the connection. It is recommended to close it, which will affect the performance
      test-on-return: false                                                           #Perform detection when returning the connection. It is recommended to close it, which will affect the performance
      pool-prepared-statements: false                                                 #Whether to enable PSCache. PSCache greatly improves the performance of databases supporting cursors. It is recommended to enable it in oracle and close it in mysql
      max-pool-prepared-statement-per-connection-size: 20                             #It takes effect after poolPreparedStatements is enabled
      filters: stat,wall                                                              #Configure extension plug-ins. Common plug-ins are = > stat: monitoring statistics wall: defending sql injection
      connection-properties: 'druid.stat.mergeSql=true;druid.stat.slowSqlMillis=5000' #Open the mergeSql function through the connectProperties property; Slow SQL record
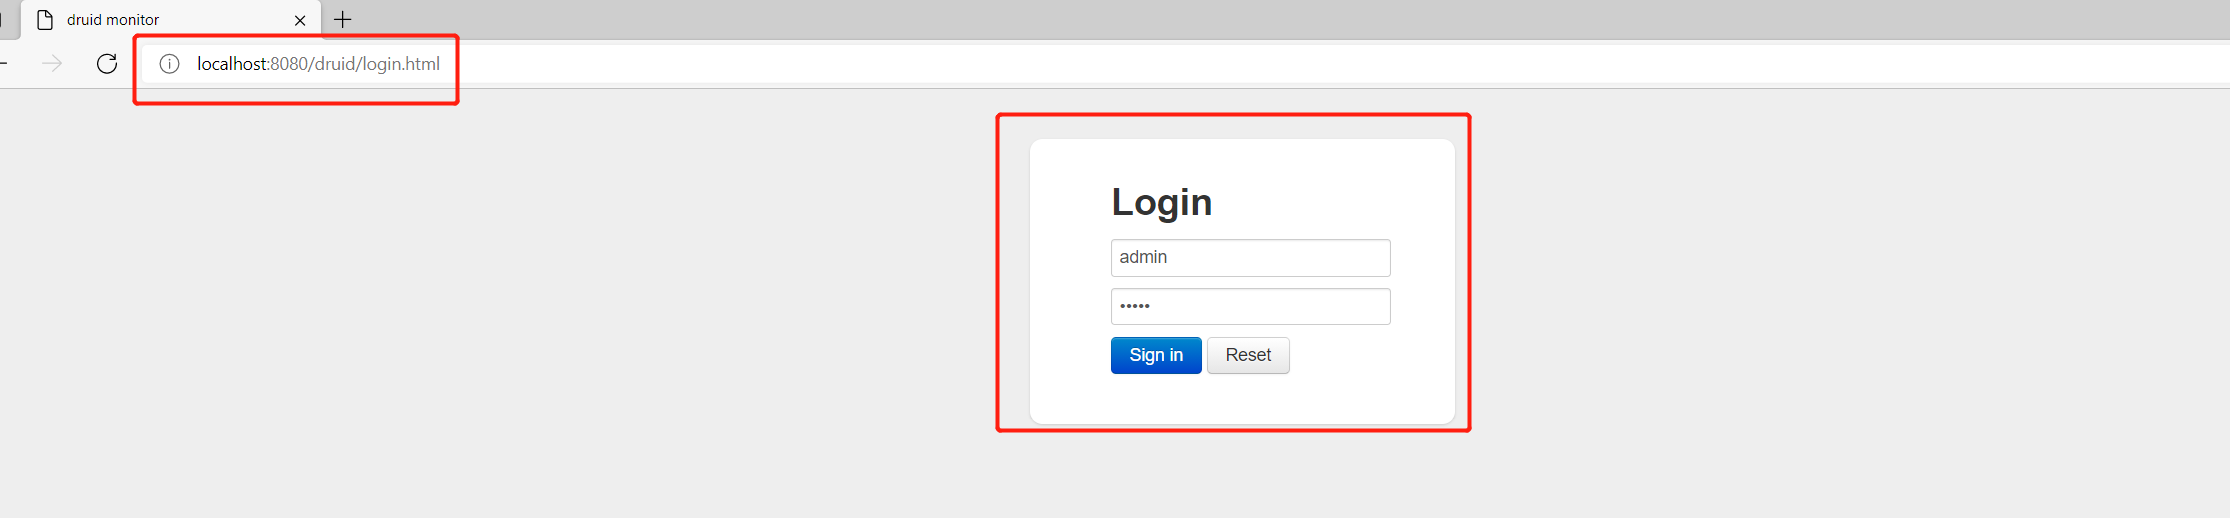
3 Druid monitoring configuration
We can also configure functions such as Druid built-in monitoring page, web JDBC Association monitoring and Spring monitoring in the configuration file of Spring Boot. The example code is as follows
###################################################### Druid Monitoring configuration information  ##########################################
spring:
  datasource:
    druid:
      # For StatViewServlet configuration, please refer to Druid Wiki configuration_ StatViewServlet configuration
      stat-view-servlet:
        enabled: true                                                                 #Whether to open the built-in monitoring page. The default value is false
        url-pattern: '/druid/*'                                                       #The mapping path of StatViewServlet, that is, the access address of the built-in monitoring page
        reset-enable: true                                                            #Enable reset button
        login-username: admin                                                         #Login page username of the built-in monitoring page username
        login-password: admin                                                         #Login page password of built-in monitoring page
      # For the configuration of WebStatFilter, please refer to the Druid Wiki_ Configure WebStatFilter
      web-stat-filter:
        enabled: true                                                                 #Whether to enable Web JDBC associated monitoring data in built-in monitoring
        url-pattern: '/*'                                                             #Matching path
        exclusions: '*.js,*.gif,*.jpg,*.png,*.css,*.ico,/druid/*'                     #Exclude path
        session-stat-enable: true                                                     #Monitor session
      # For Spring monitoring configuration, please refer to Druid Github Wiki configuration_ Druid and Spring are associated with monitoring configuration
      aop-patterns: com.example.*                                               #Spring monitors AOP pointcuts, such as x.y.z.abc. *, and configures multiple English comma separated pointcuts
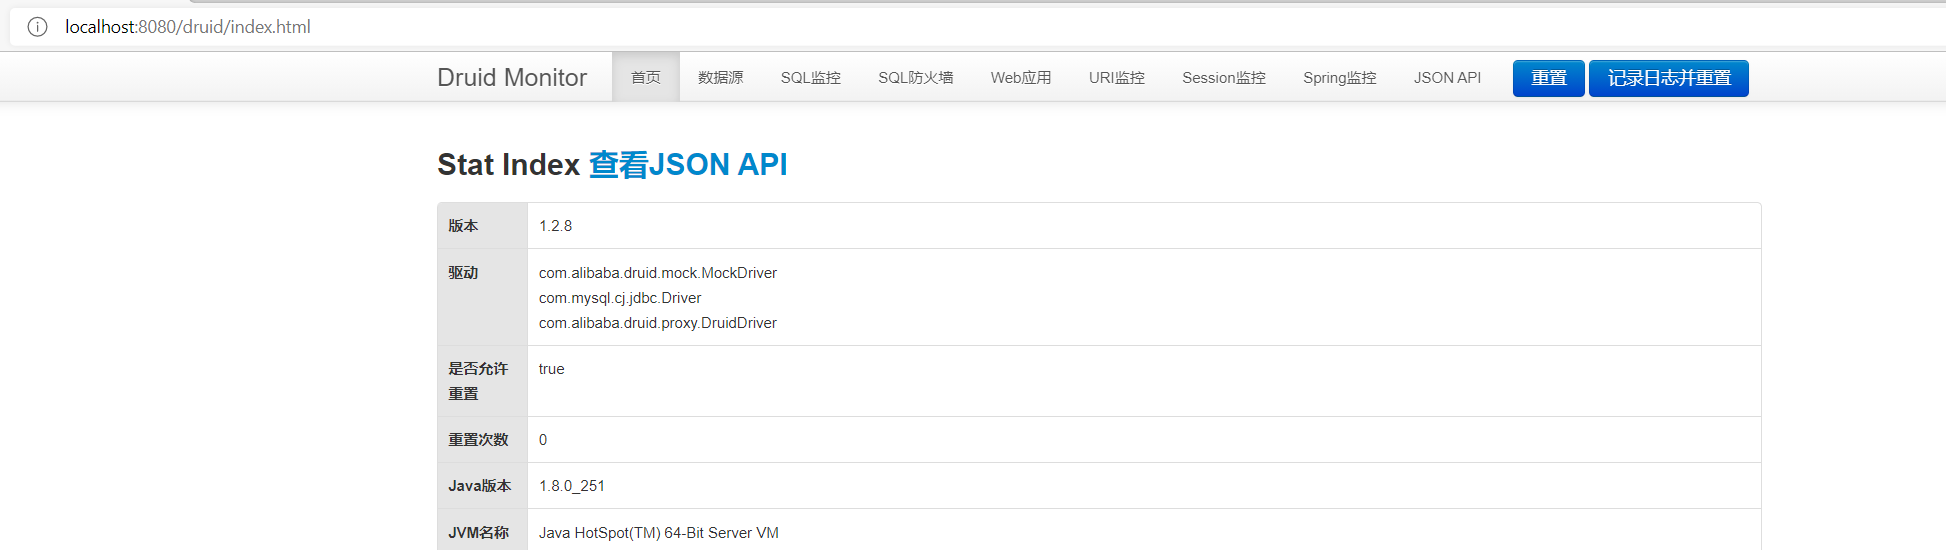
After configuring the built-in monitoring, we access http://localhost:8080/druid , enter the configured user name and password:
You can enter the monitoring page:
Of course, SQL monitoring is enabled here, so add a Controller to test:
package com.example.springboot.controller;
import org.springframework.jdbc.core.JdbcTemplate;
import org.springframework.stereotype.Controller;
import org.springframework.web.bind.annotation.GetMapping;
import org.springframework.web.bind.annotation.ResponseBody;

import javax.annotation.Resource;

@Controller
public class IndexController {
    //Auto assemble JDBC template
    @Resource
    JdbcTemplate jdbcTemplate;
    /**
     * Access "/ testSql" to access the database
     * @return
     */
    @ResponseBody
    @GetMapping("/getPersonCount")
    public String testSql() {
        String SQL = "SELECT count(*) from `person`";
        Integer integer = jdbcTemplate.queryForObject(SQL, Integer.class);
        return integer.toString();
    }
}
Please:

Then observe the monitoring changes and find that the SQL statements are monitored

At the same time, URI address monitoring also monitors the request information:

4 Druid built-in Filter configuration
Druid Spring Boot Starter provides default configurations for the following Druid built-in filters: StatFilter, WallFilter, ConfigFilter, encodeconvertfilter, Slf4jLogFilter, Log4jFilter, Log4j2Filter, CommonsLogFilter:
- You can enable the corresponding built-in Filter by spring.datasource.druid.filters=stat,wall
- If the default configuration cannot meet our requirements, we can also configure these filters in the configuration file using spring.datasource.druid.filter. *
The example code is as follows
#  ####################################################### Druid Monitoring configuration information  ##########################################
spring:
  datasource:
    druid:
     # Configure the enabled filters, namely stat(sql monitoring) wall (firewall)
      filter:
        #Configure StatFilter (SQL monitoring configuration)
        stat:
          enabled: true                                                               #Enable SQL monitoring
          slow-sql-millis: 1000                                                       #Slow query
          log-slow-sql: true                                                          #Record slow query SQL
        #Configure WallFilter (firewall configuration)
        wall:
          enabled: true                                                               #Turn on the firewall
          config:
            update-allow: true                                                        #Allow update operation
            drop-table-allow: false                                                   #Table deletion is prohibited
            insert-allow:  true                                                       #Allow insert operation
            delete-allow: true                                                        #Delete data operation
When configuring the Druid built-in Filter, you need to first set the enabled of the corresponding Filter to true, otherwise the configuration of the built-in Filter will not take effect
SpringBoot integrates MyBatis
We learned how to integrate MyBatis through Spring in SSM framework integration. Since SpringBoot needs to be simplified, it also needs to integrate MyBatis. MyBatis has also developed a starter based on Spring Boot mode: MyBatis Spring Boot starter
1. Introduce the mybatis spring boot starter scenario launcher
The first step for Spring Boot to integrate MyBatis is to introduce the dependency of MyBatis Spring Boot starter into the project's pom.xml
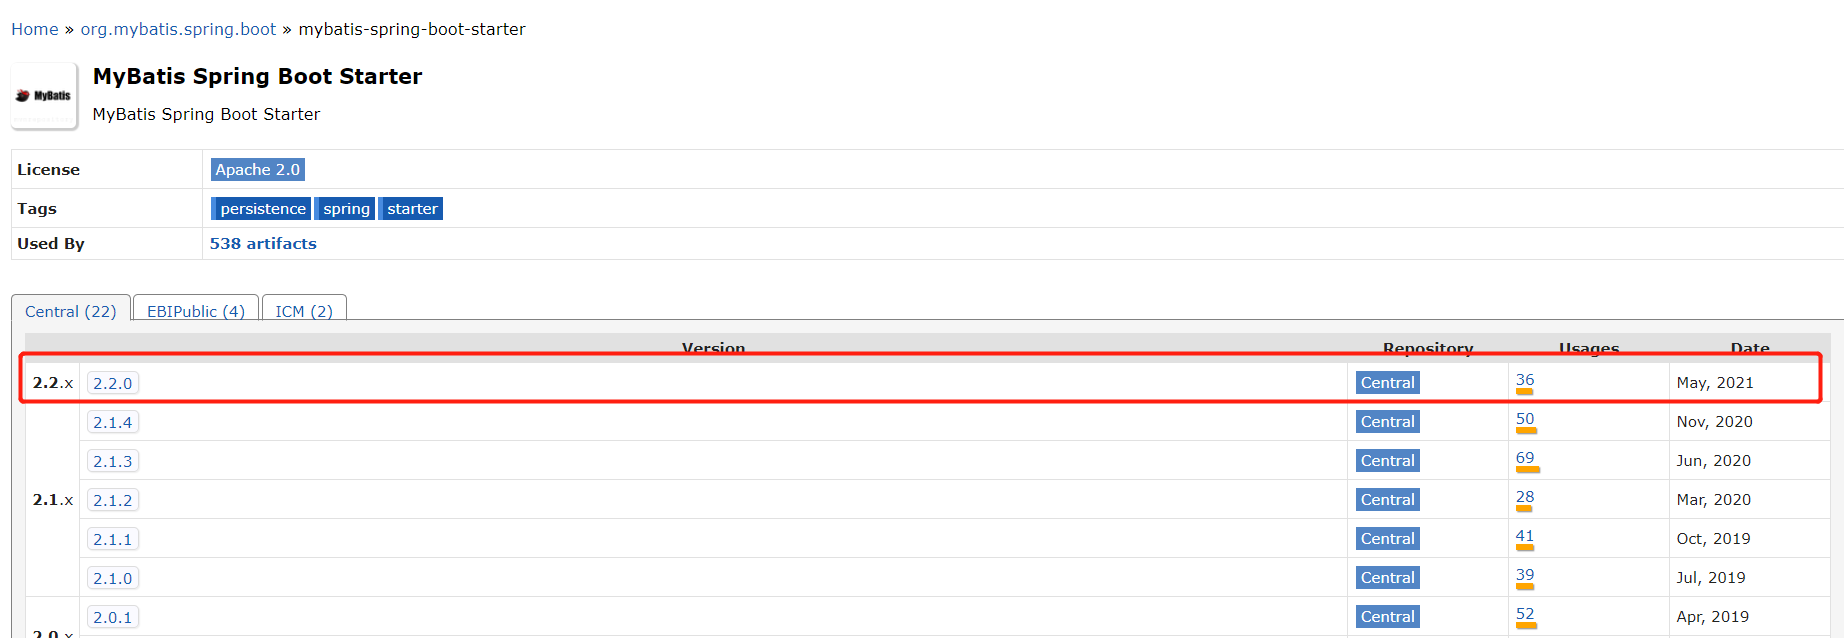
Use the latest version:
<!--introduce mybatis-spring-boot-starter Dependence of-->
<dependency>
    <groupId>org.mybatis.spring.boot</groupId>
    <artifactId>mybatis-spring-boot-starter</artifactId>
    <version>2.2.0</version>
</dependency>
2. Configure MyBatis
Configure MyBatis in the Spring Boot configuration file (application.properties/yml), such as specifying the location of mapper.xml, the location of entity class, whether to turn on hump naming, etc
###################################### MyBatis to configure######################################
mybatis:
  # Specify the location of mapper.xml
  mapper-locations: classpath:mapper/*.xml
  #The location of the scanned entity class. Indicate the package of the scanned entity class here. You can not write the full pathname of the entity class in mapper.xml
  type-aliases-package: com.example.model
  configuration:
    #The hump naming method is enabled by default, and you can not set this attribute
    map-underscore-to-camel-case: true
When using MyBatis, you must configure data source information, such as database URL, database user type, database password, database driver, etc., that is, the related configuration of database driver:
#Data source connection information
spring:
  datasource:
    username: root
    password: root
    url: jdbc:mysql://localhost:3306/test?userSSL=true&useUnicode=true&characterEncoding=UTF-8&serverTimezone=UTC
    driver-class-name: com.mysql.cj.jdbc.Driver
3 Create entity class
We create the entity class Person under the model package to map the data table, that is, to create PO
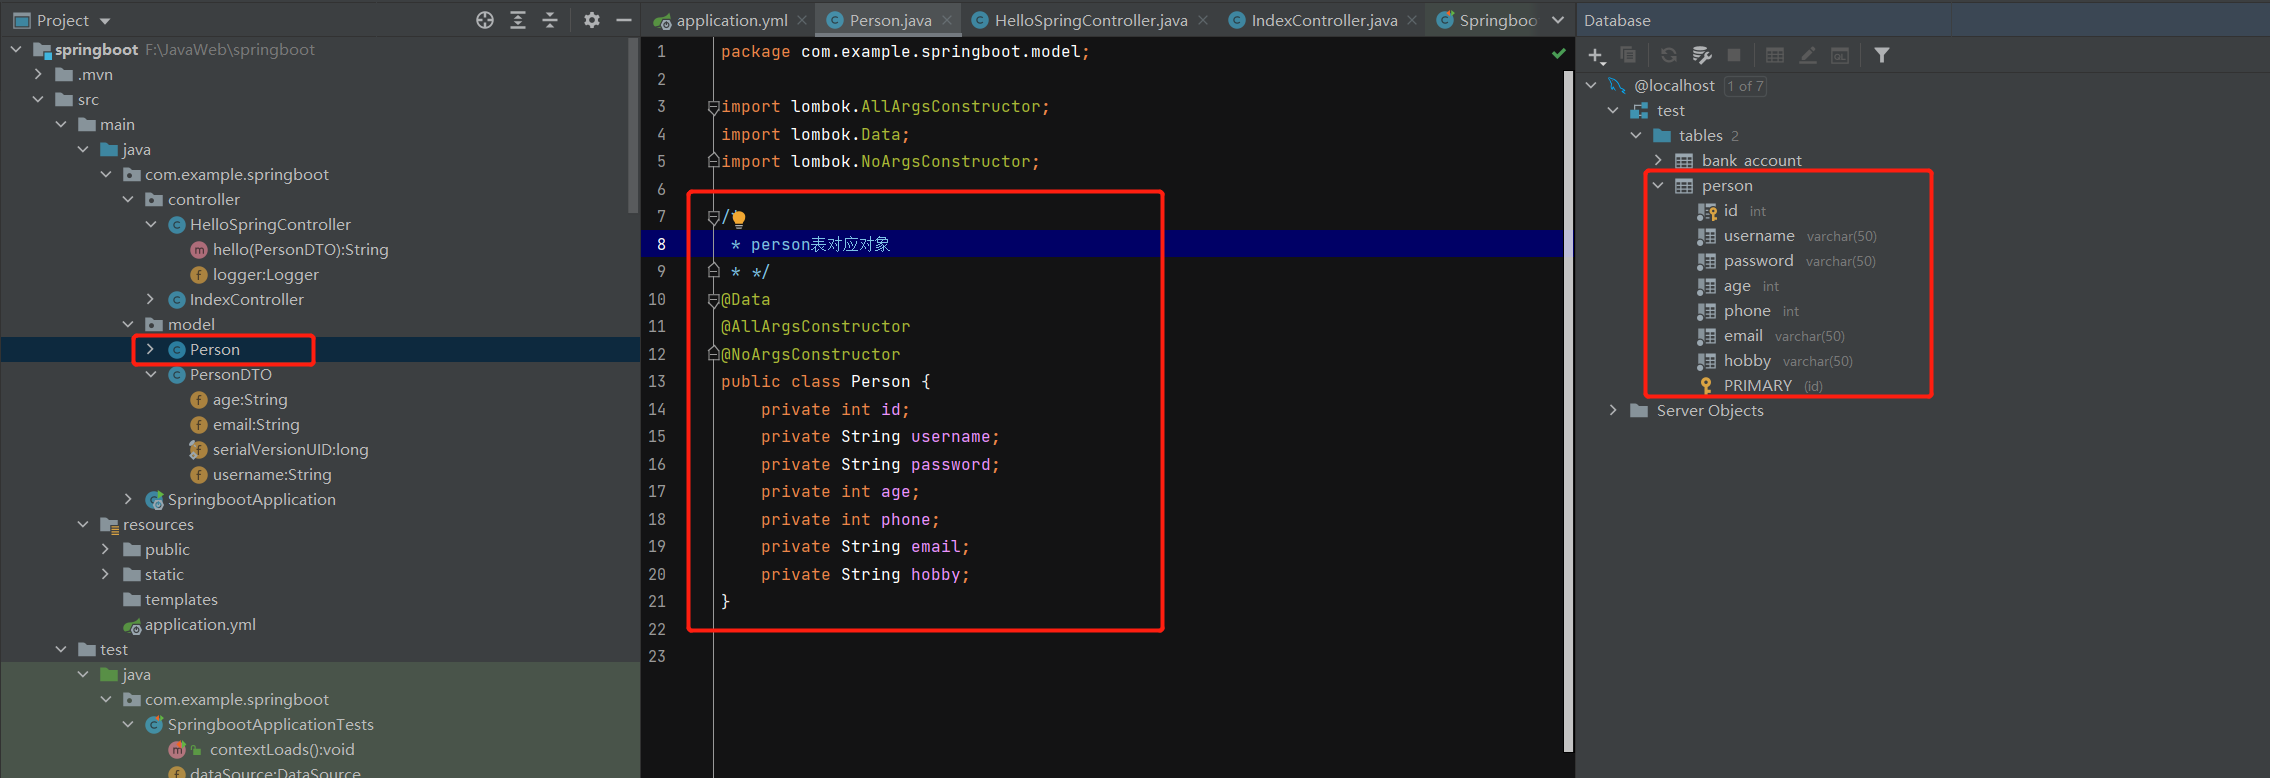
The code is as follows:
package com.example.springboot.model;

import lombok.AllArgsConstructor;
import lombok.Data;
import lombok.NoArgsConstructor;

/*
 * person Table corresponding object
 * */
@Data
@AllArgsConstructor
@NoArgsConstructor
public class Person {
    private int id;
    private String username;
    private String password;
    private int age;
    private int phone;
    private String email;
    private String hobby;
}
4. Creation of persondao interface
Create a PersonDao interface under the dao package to write interface methods:
package com.example.springboot.dao;

import com.example.springboot.model.Person;
import org.apache.ibatis.annotations.Mapper;
import org.springframework.stereotype.Repository;

import java.util.List;

@Mapper
@Repository
public interface PersonDao {
    List<Person> getPersonList();
}
5. Preparation of personmapper.xml mapping file
Add the personMapper.xml mapping file in the mapper folder under the resource path
<?xml version="1.0" encoding="UTF-8" ?>
<!DOCTYPE mapper
        PUBLIC "-//mybatis.org//DTD Mapper 3.0//EN"
        "http://mybatis.org/dtd/mybatis-3-mapper.dtd">

<!--namespace=Bind a specified Dao/Mapper Interface-->
<mapper namespace="com.example.springboot.dao.PersonDao">
    <select id="getPersonList" resultType="com.example.springboot.model.Person">
        select * from person
    </select>
</mapper>
6 test access database
Let's write a unit test to access the following database:
package com.example.springboot;

import com.example.springboot.dao.PersonDao;
import com.example.springboot.model.Person;
import org.junit.jupiter.api.Test;
import org.springframework.boot.test.context.SpringBootTest;

import javax.annotation.Resource;
import javax.sql.DataSource;
import java.sql.SQLException;
import java.util.List;

@SpringBootTest
class SpringbootApplicationTests {
    //Data source component
    @Resource
    DataSource dataSource;
    @Resource
    PersonDao personDao;


    @Test
    void testMyBatis() throws SQLException {
        System.out.println("The default data source is:" + dataSource.getClass());
        System.out.println("Database connection instance:" + dataSource.getConnection());
        //Access database
        List<Person> personList=personDao.getPersonList();
        System.out.println(personList);
    }

}
The printing results are as follows:

Remember that there are two important configurations in the previous SSM integration, which do not appear here. One is the core configuration file of MyBatis
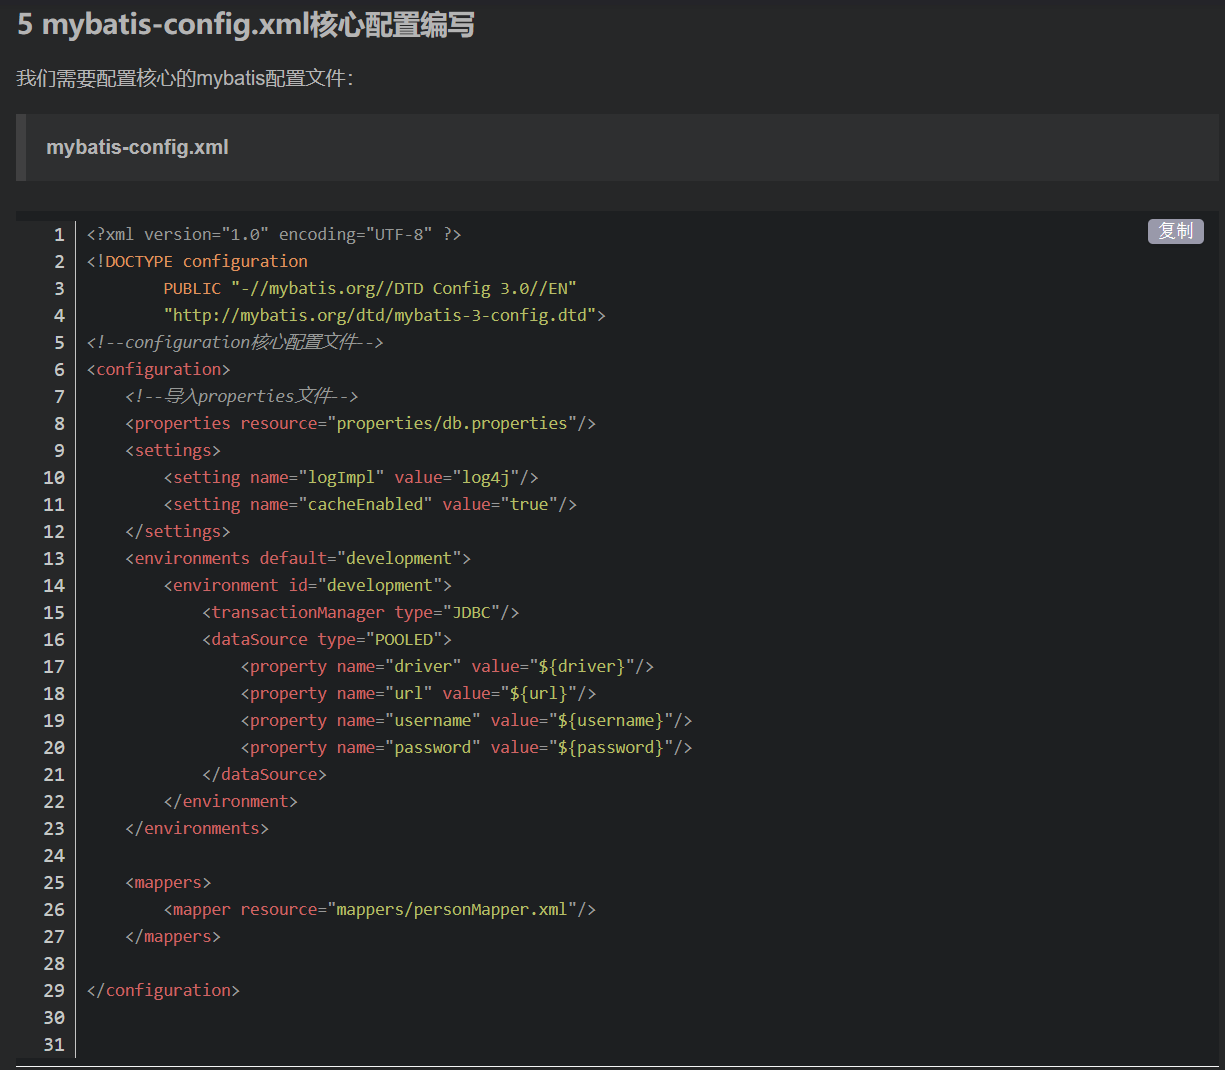
The other is that Spring integrates MyBatis configuration files
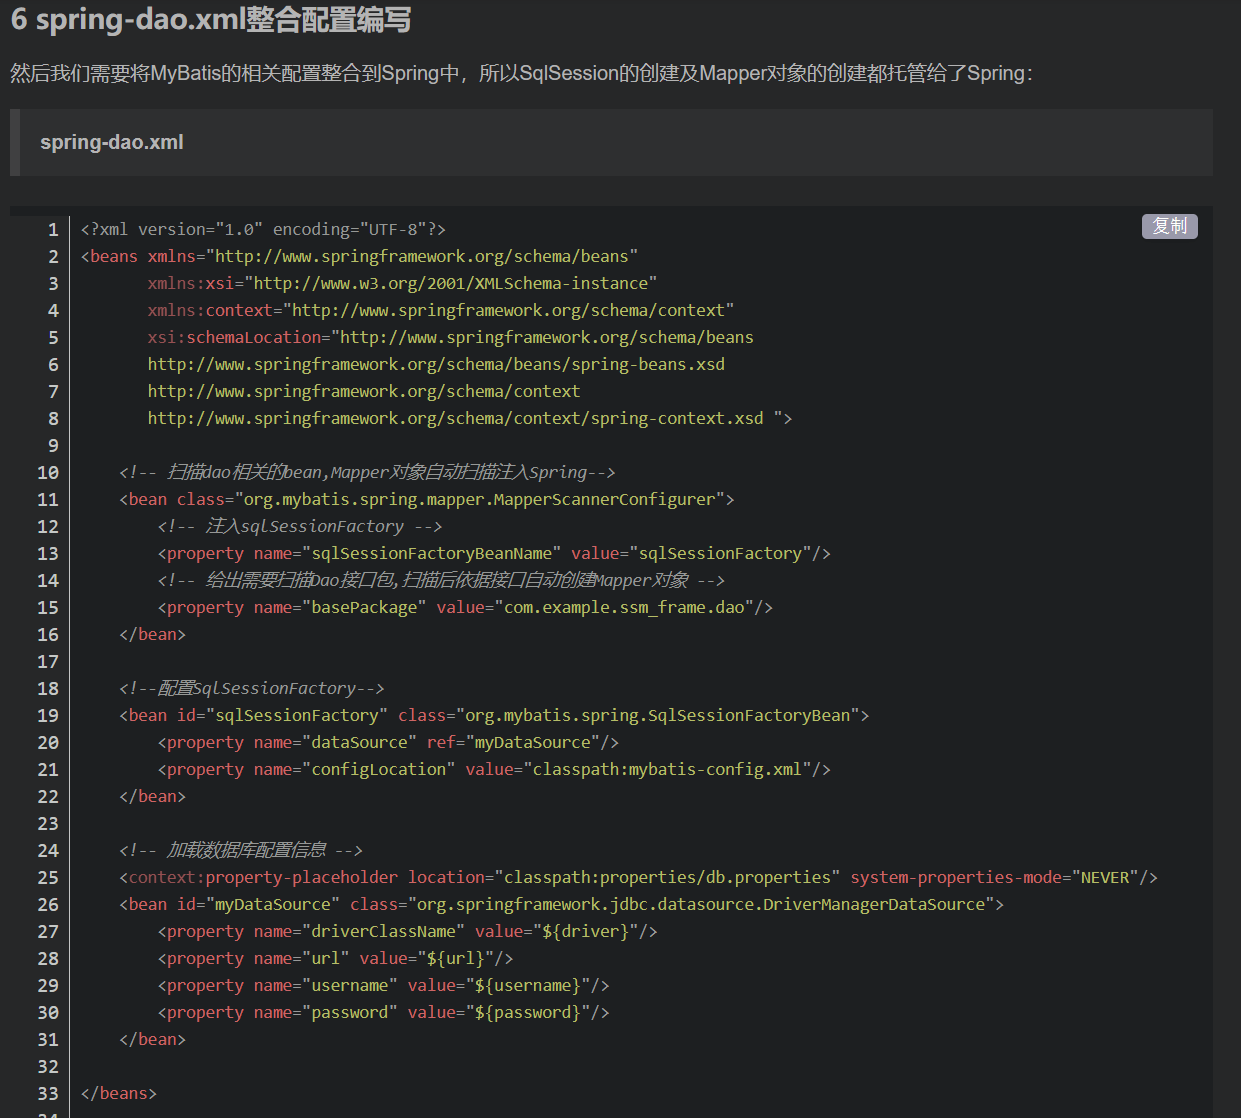
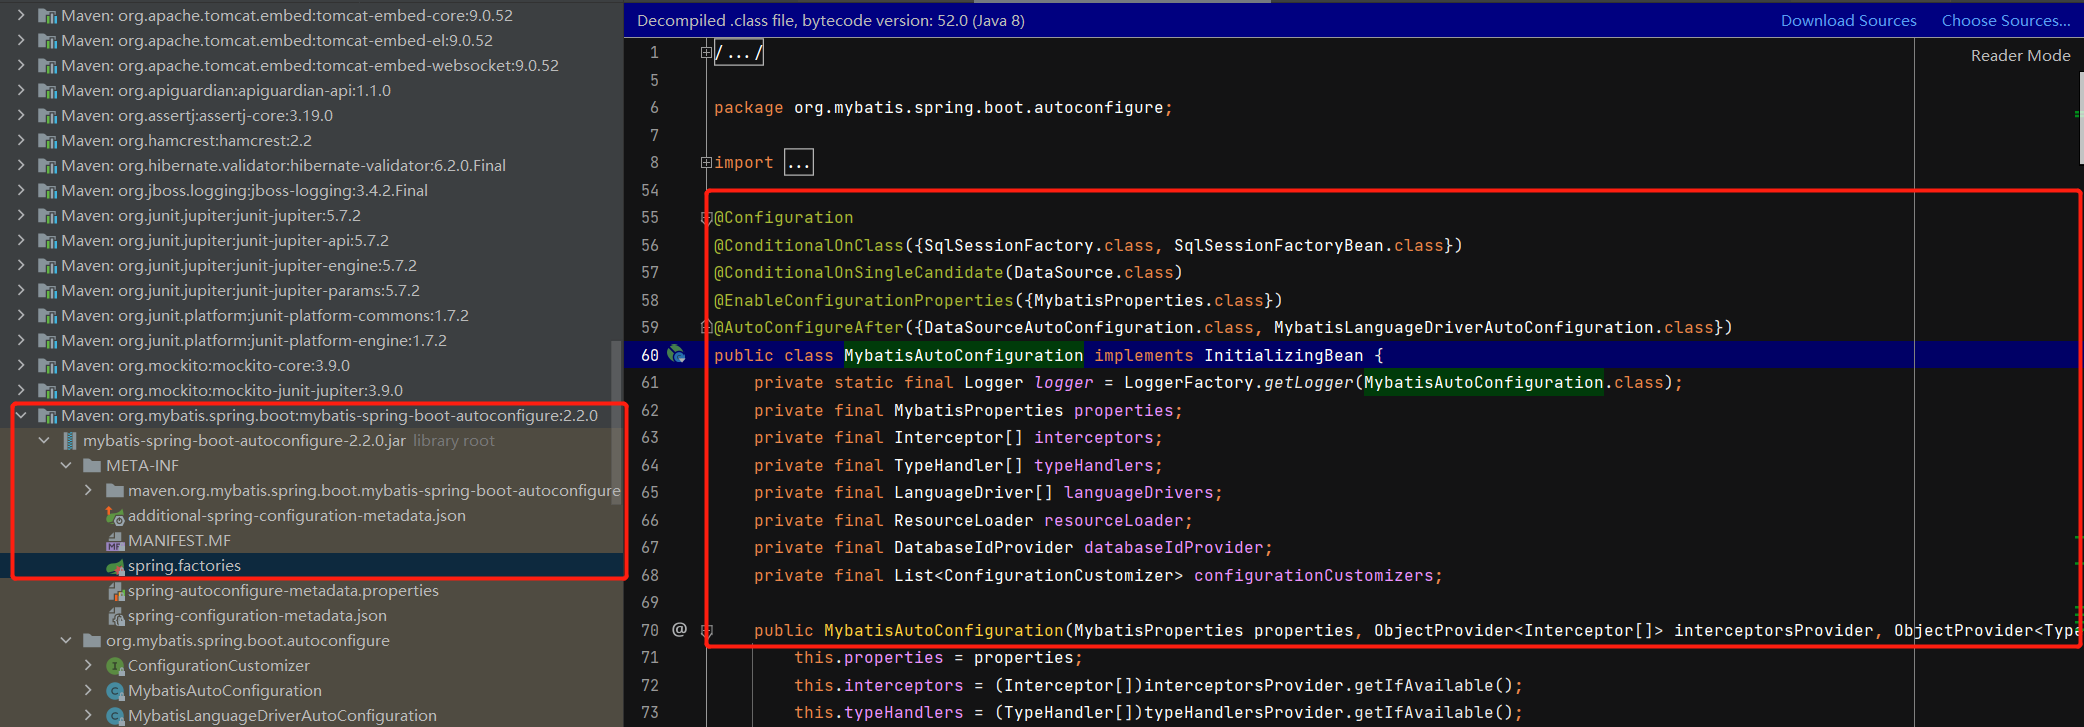
In fact, it can be seen that SpringBoot has made a great unification. What is the data source connection pool? Which database driver information to choose? Both can be selected. In the yml configuration file, due to the automatic configuration and the separation of configuration and container injection, our configuration perspective is more simple. We only focus on the configuration information. Other starter s help us do a good job. Take a brief look at the code below:
Overall yml file configuration list
We have integrated JDBC, Druid and MyBatis into SpringBoot step by step. Let's go back to see all our yml configurations:
#Data source connection information
spring:
  datasource:
    username: root
    password: root
    url: jdbc:mysql://localhost:3306/test?userSSL=true&useUnicode=true&characterEncoding=UTF-8&serverTimezone=UTC
    driver-class-name: com.mysql.cj.jdbc.Driver
    ################################################## Druid Configuration of connection pool ##########################################
    druid:
      initial-size: 5                                                                 #Initialize connection size
      min-idle: 5                                                                     #Minimum number of connection pools
      max-active: 20                                                                  #Maximum number of connection pools
      max-wait: 60000                                                                 #Maximum wait time to get a connection, in milliseconds
      time-between-eviction-runs-millis: 60000                                        #Configure how often to detect idle connections that need to be closed. The unit is milliseconds
      min-evictable-idle-time-millis: 300000                                          #Configure the minimum lifetime of a connection in the pool, in milliseconds
      validation-query: SELECT 1 FROM DUAL                                            #Test connection
      test-while-idle: true                                                           #It is detected when applying for connection. It is recommended to configure it to true, which will not affect performance and ensure security
      test-on-borrow: false                                                           #The detection is performed when obtaining the connection. It is recommended to close it, which will affect the performance
      test-on-return: false                                                           #Perform detection when returning the connection. It is recommended to close it, which will affect the performance
      pool-prepared-statements: false                                                 #Whether to enable PSCache. PSCache greatly improves the performance of databases supporting cursors. It is recommended to enable it in oracle and close it in mysql
      max-pool-prepared-statement-per-connection-size: 20                             #It takes effect after poolPreparedStatements is enabled
      filters: stat,wall                                                              #Configure extension plug-ins. Common plug-ins are = > stat: monitoring statistics wall: defending sql injection
      connection-properties: 'druid.stat.mergeSql=true;druid.stat.slowSqlMillis=5000' #Open the mergeSql function through the connectProperties property; Slow SQL record
  ###################################################### Druid Monitoring configuration information  ##########################################
      # For StatViewServlet configuration, please refer to Druid Wiki configuration_ StatViewServlet configuration
      stat-view-servlet:
        enabled: true                                                                 #Whether to open the built-in monitoring page. The default value is false
        url-pattern: '/druid/*'                                                       #The mapping path of StatViewServlet, that is, the access address of the built-in monitoring page
        reset-enable: true                                                            #Enable reset button
        login-username: admin                                                         #Login page username of the built-in monitoring page username
        login-password: admin                                                         #Login page password of built-in monitoring page
      # For the configuration of WebStatFilter, please refer to the Druid Wiki_ Configure WebStatFilter
      web-stat-filter:
        enabled: true                                                                 #Whether to enable Web JDBC associated monitoring data in built-in monitoring
        url-pattern: '/*'                                                             #Matching path
        exclusions: '*.js,*.gif,*.jpg,*.png,*.css,*.ico,/druid/*'                     #Exclude path
        session-stat-enable: true                                                     #Monitor session
      # For Spring monitoring configuration, please refer to Druid Github Wiki configuration_ Druid and Spring are associated with monitoring configuration
      aop-patterns: net.biancheng.www.*                                               #Spring monitors AOP pointcuts, such as x.y.z.abc. *, and configures multiple English comma separated pointcuts
######################################################## Druid Monitoring configuration information  ##########################################
      # Configure the enabled filters, namely stat(sql monitoring) wall (firewall)
      filter:
        #Configure StatFilter (SQL monitoring configuration)
        stat:
          enabled: true                                                               #Enable SQL monitoring
          slow-sql-millis: 1000                                                       #Slow query
          log-slow-sql: true                                                          #Record slow query SQL
        #Configure WallFilter (firewall configuration)
        wall:
          enabled: true                                                               #Turn on the firewall
          config:
            update-allow: true                                                        #Allow update operation
            drop-table-allow: false                                                   #Table deletion is prohibited
            insert-allow:  true                                                       #Allow insert operation
            delete-allow: true                                                        #Delete data operation
###################################### MyBatis to configure######################################
mybatis:
  # Specify the location of mapper.xml
  mapper-locations: classpath:mapper/*.xml
  #The location of the scanned entity class. Indicate the package of the scanned entity class here. You can not write the full pathname of the entity class in mapper.xml
  type-aliases-package: com.example.springboot.model
  configuration:
    #The hump naming method is enabled by default, and you can not set this attribute
    map-underscore-to-camel-case: true
To sum up
In fact, this Blog involves three data related integration: JDBC+Druid+MyBatis. What's the difference between these three? How do we usually use it together?
- JDBC: in fact, it is a set of standards and specifications. It is the most original database operation mode. It is responsible for: loading database drivers, creating connections, writing native statements, executing and closing connections
- Druid: JDBC alone is too simple. We need connection pool to solve the performance problems in high concurrency scenarios. At this time, we need some data source tools, such as Druid, which is a simple encapsulation of JDBC. The most important thing is the addition of connection pool. Druid can create many database connections in the connection pool for MyBatis
- MyBatis: MyBatis is the encapsulation of JDBC. It is a semi-automatic ORM framework. I mentioned it in detail in my previous Blog. To put it bluntly, it is a framework convenient for us to use. MyBatis can flexibly drive the connection provided by Druid to operate on the basis of making JDBC better.
So how do these three work together?
- When the project starts, Druid has created a pile of connections using JDBC for later use
- When the mapper (Dao) is requested, the MyBatis framework creates a temporary class and replaces and rewrites the dynamic sql into the original native sql
- MyBatis gets a connection from Druid, sends the sql to the database for execution through the connection, obtains the execution results, and finally maps the results and returns data
That is, MyBatis selects the data source (Druid) for us, and actually calls the JDBC native method to perform data operations.