It took 2 days to study the cloud service and pagoda panel, and finally uploaded it successfully. Now make a detailed record to facilitate the majority of netizens to view it. Without much nonsense, start directly
Tencent ECS purchases and installs pagoda panels
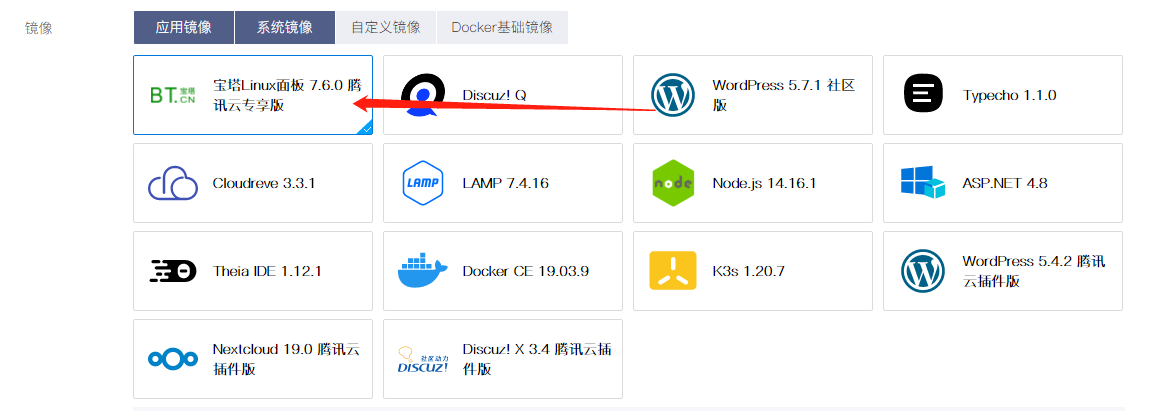
Purchase ECs and install pagoda panels. You can choose to install pagoda panels at the time of purchase
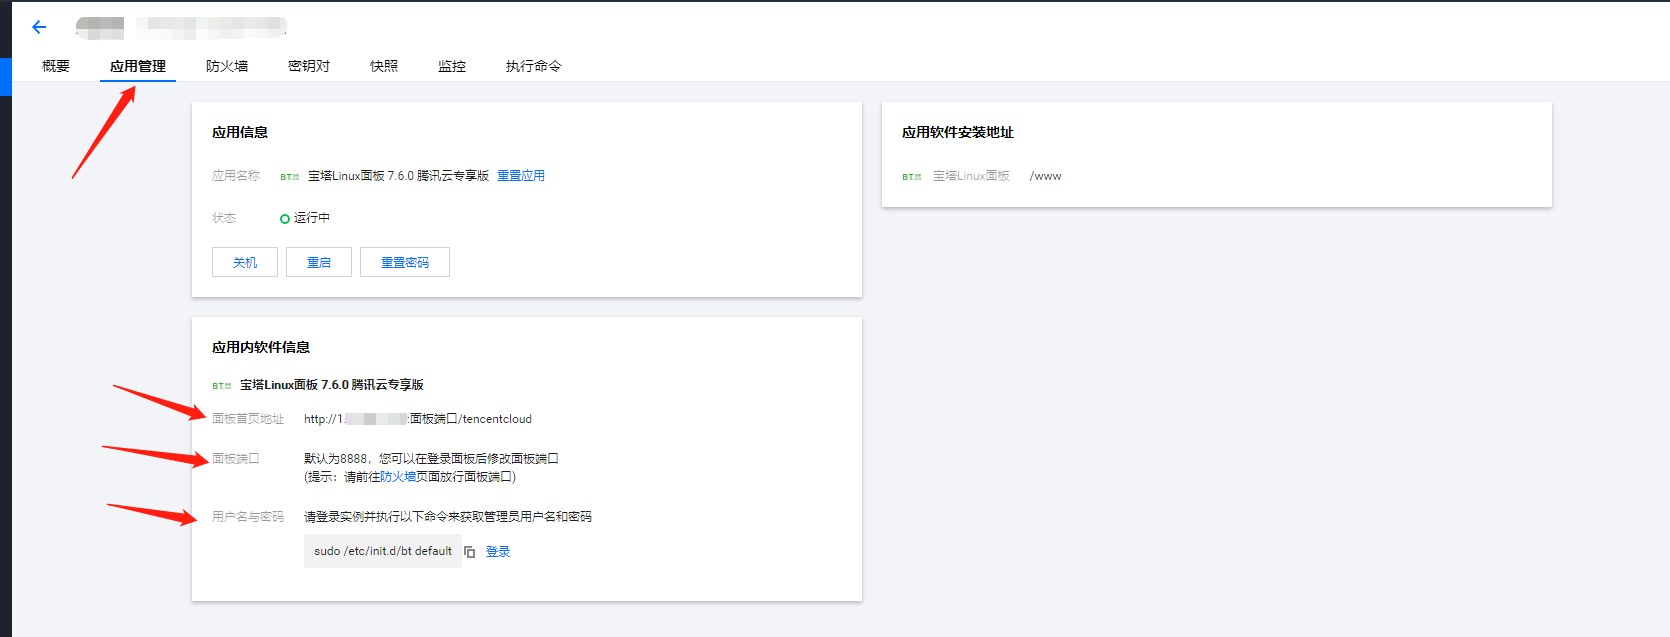
Then find the application management, obtain the user name and password of the panel, and then log in using public IP + port + Tencent cloud
Configure pagoda panel
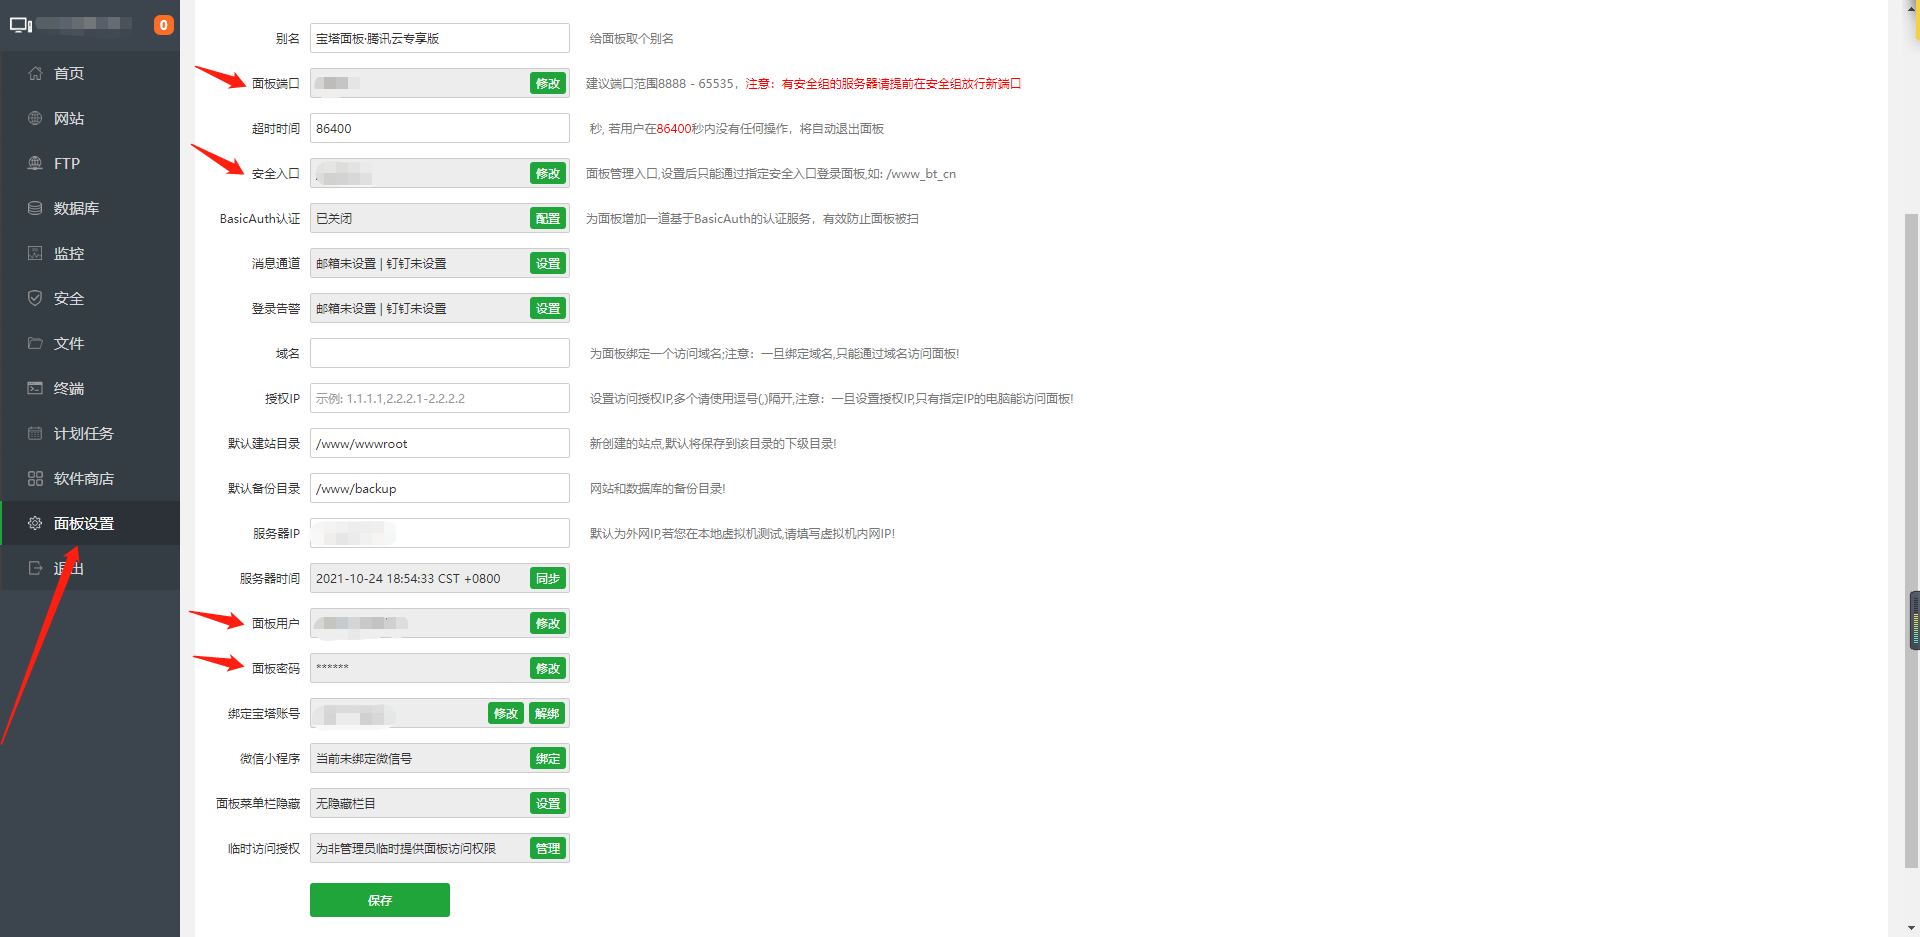
After logging in, you can choose Nginx or Apache. I install Nginx here. First, we need to modify the user name, password and port number to make the server more secure. If our port is changed to 45678, the security entry is changed to / xiaopang, and the user name and password are admin, 123, then the next login address is http://1.1.1.1:45678/xiaopang The account and password are admin and 123, Please remember your account and password
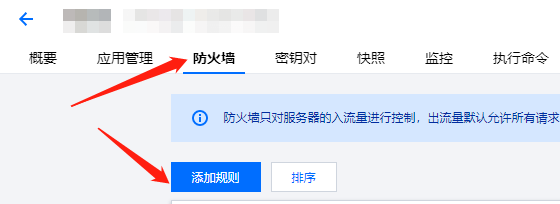
You need to release the port first. If there is no release port, you will not be able to open the login address. If there is no release port, you can change the account and password to log in. You can manage the release port on the server

Then we add the website. We need to create FTP and database, bind the domain name and IP address, and the domain name and IP are the entrance to the website
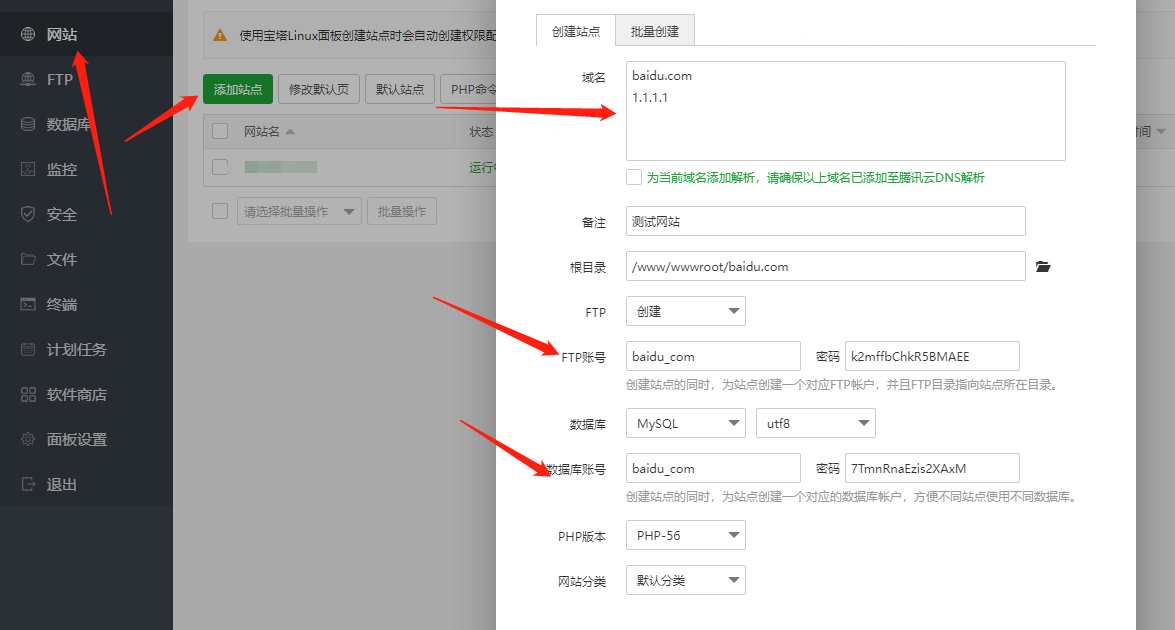
Then use the FTP tool to log in to FTP. Then we need to upload the project. First release port 21 and port 39000-40000. Port 21 is the default FTP port and port 39000-40000 is the range of FTP passive mode ports. The connection can be successful only after release. (I use 8utf, which is good and free)

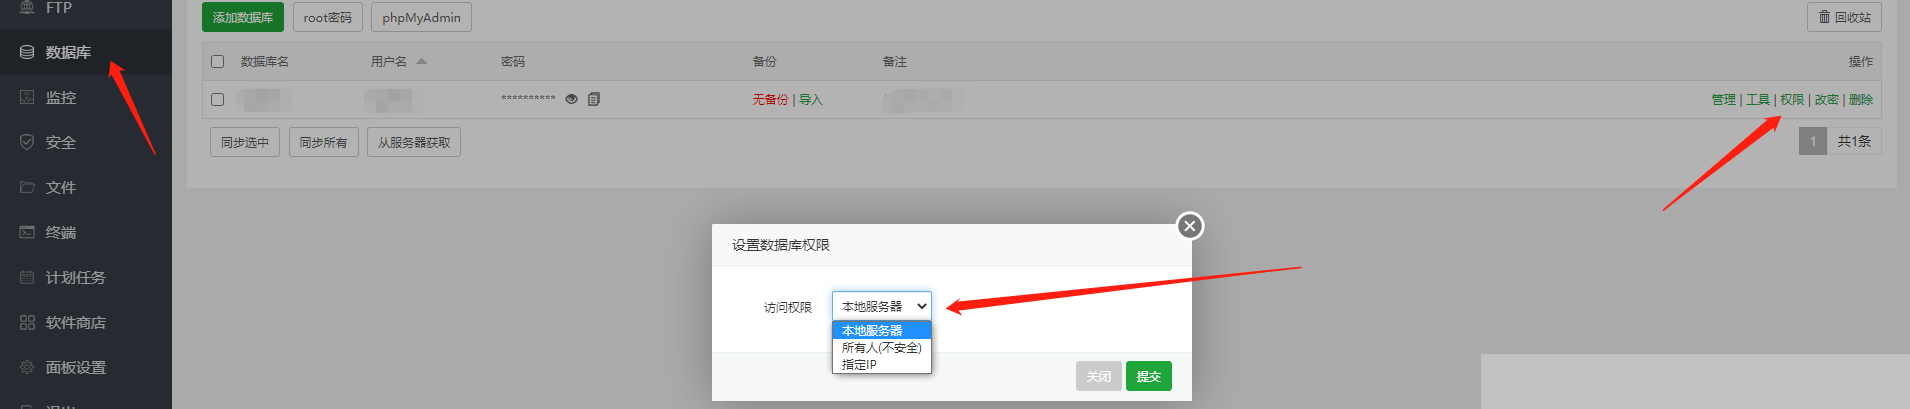
After the connection is successful, we can test the database. First release the 3306 MySQL default port, and then connect with Navicat. We also need to set the permission to access the database and set the specified IP, otherwise we will not be able to connect

Just temporarily configure FTP and MySQL. The rest will be discussed later
vue+node to upload files
The action is none, which is the submission address of the component. The upload path needs to be customized, so select none and set auto upload to false. Because the upload component is uploaded automatically, we don't need to
<el-upload class="upload-demo" :action="'none'" :file-list="fileraw" :auto-upload="false" drag ref='upload' :before-remove="onRemove" :on-change="onChange" multiple>
	<i class="el-icon-upload"></i>
	<div class="el-upload__text">Drag the file here, or<em>Click upload</em></div>
	<div class="el-upload__tip" slot="tip">Only upload less than 50 M Picture file or video file</div>
</el-upload>
Here's the point. In onChange, put the raw in the received file into this.fileraw. The raw in the file is the real file object. I set the format and size of the uploaded file here. If there are other needs, you can change the format. It is recommended to set the size. The server should be larger and cheaper, otherwise it will take a long time to upload. Path is the upload file address. The local path is different from that of the server. It is recommended to modify the path after the local test, and then package the code and upload it to the server
data() {
	return {
		fileraw:[],
	};
},
methods: {
	onRemove(file,filelist){//File list removal
		this.fileraw.splice(this.fileraw.indexOf(file.raw),1)
	},
	onChange(file,filelist){//File upload
		if(file.raw.type == "video/mp4" || file.raw.type == "image/jpeg" || file.raw.type == "image/png" || file.raw.type == "video/quicktime"){
			if(file.raw.size /1024 /1024 > 50){
				this.$message.error("Please upload less than 50 M Videos or pictures!")
			}else{this.fileraw.push(file.raw)}
		}else{
			this.$message.error("Please upload pictures or videos!")
		}
	},
	submitData(){//submit document
		if(this.fileraw == ''){
			this.$message.error("Please upload the file!")
		}else{
			let formData = new FormData();
			this.fileraw = Array.from(this.fileraw)
			this.fileraw.forEach(file => {
				formData.append('file', file);
			})
			var path = this.$route.query.name01 + '\\' + this.$route.query.name02 + '\\';//Local upload file path
			//var path = this.$route.query.name01 + '/' + this.$route.query.name02 + '/';// Server specification
			formData.append('path',path)
			this.$axios({
				method:"POST",
				url:this.baseUrl + "/uploadFile",
				data:formData,
			}).then((res)=>{
				console.log(res)
				if(res.data.status == 200){
					his.$message({message:res.data.data,type: 'success'});
				}else{
					this.$message.error(res.data.data)
				}
			}).catch((err)=>{
				console.log(err)
			})
		}
	},
},
Tell me about the difference between Vue and local server
In config - > dev.env.js is the development mode, while config - > food.env.js is the online mode, so we can switch the development and online interface addresses at any time by setting a global variable. Add this sentence to main.js
import axios from 'axios'
Vue.prototype.$axios = axios
Vue.prototype.baseUrl = process.env.NODE_ENV==="production"?"http://1.1.1.1:3030":"/api"
Then write this.baseUrl + "/ interface name" in the URL of the interface
Again, why do we need to request * / api / interface name *, we need to cross domain to request the back-end interface, so we need to set cross domain
Just set proxyTable in config - > index.js
proxyTable: {
		"/api":{
			target:"http://localhost:3030 "
			changeOrigin:true,//Allow cross domain
			pathRewrite:{
				"^/api":"/"
			},
		}
	},
After configuring the code in mian.js and config - > index.js, the interface address we requested is http://localhost:3030/login , the address of online mode is http://1.1.1.1:3030/login
Next is the node backend file code
First, install fs and multiparty module. Multiparty is to obtain file data, and fs is to rename and save to the specified path
router.post('/uploadFile',async(req, res) => {//Upload file
	let form = new multiparty.Form()
	form.keepExtensions = true; //Retain suffix
	form.parse(req, function(err, fields, files) { //fields represents the form data object you submitted, and files represents the file object you submitted
		let save_path = "C:\\file\\"
		if (err) {
			res.send({"status":201,"message":err});
		} else {
			let file_list = []
			if (!files.file) res.send({"status":201,"message":err,"data":"Upload failed!"});
			else {
				files.file.forEach(file => {
					//Original path of file.path file
					//save_path specifies the disk
					//fields.path dynamic path
					//file.originalFilename file name
					fs.rename(file.path,save_path + fields.path + file.originalFilename, function(err) {
						if (err) {
							res.send({"status":201,"message":err,"data":"Upload failed!"});
						} else {
							res.send({"status":200,"data":"Upload succeeded!"});
						}
					});
				})
			}
		}
	})
});
Deploy the node+vue project and run successfully
It's the most critical step. I'm still a little excited. I'm finally going to finish writing. I'm so tired. I don't talk much nonsense. Let's start!
First, install PM2 in the pagoda. This is a plug-in for running node, which can run node files 24 hours a day
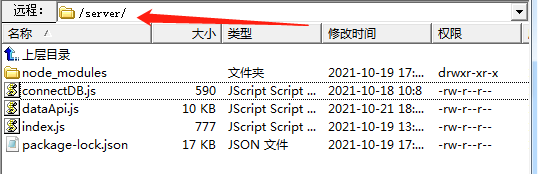
Then use the FTP tool to upload the node file to the FTP space (I use the 8utf tool), and then configure the path and port
I put the node file under the server folder
Install it first, then add it to the home page, and then open it directly on the home page

Add the project, select the running file, and then submit it
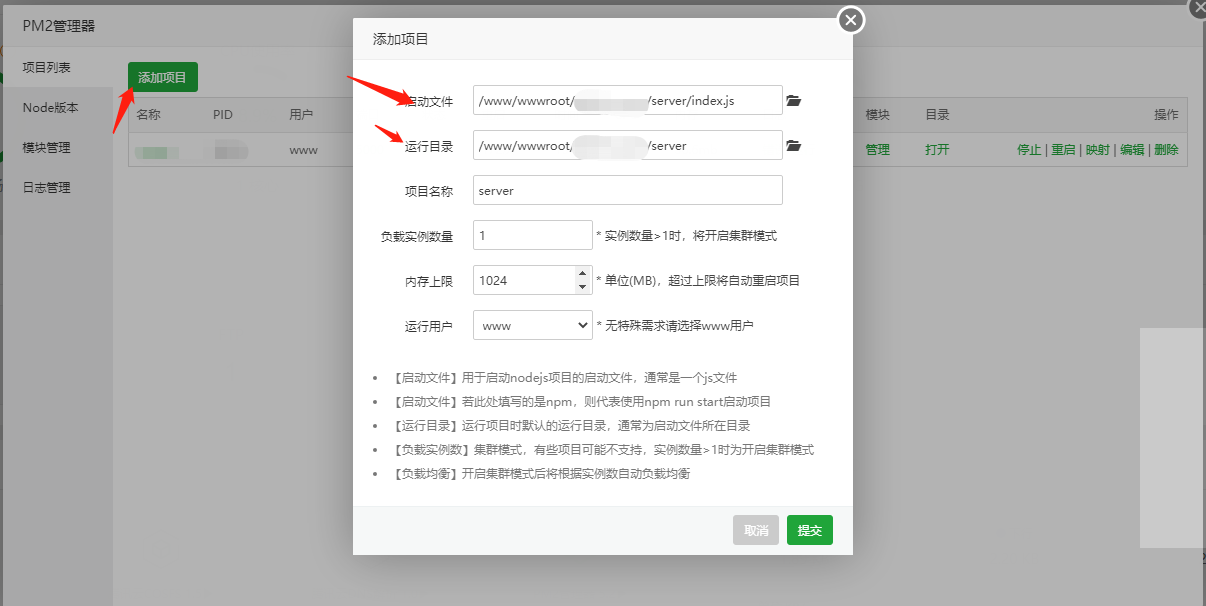
Then install various modules and include mysql, multiparty and other modules. Otherwise, you will report an error. Then release the port and modify the listening port

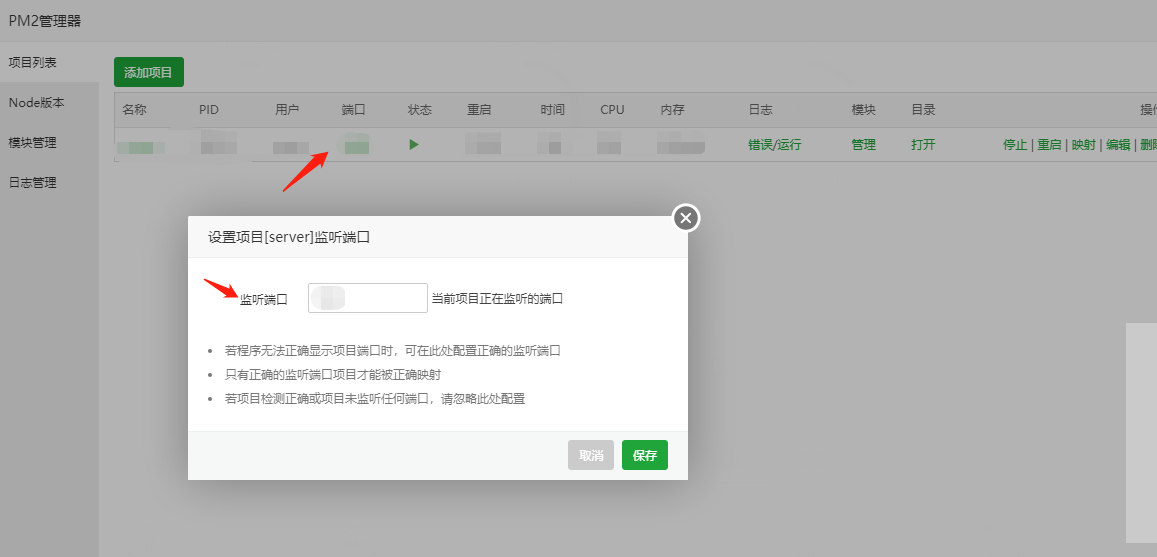
Then start it. If there is no problem, the node will be deployed. Next, deploy the Vue project
First, fix the interface as I said before, set a global variable in main.js, correspond the interface address to the public IP, and then add the port set by yourself. Then run npm run build to generate a dist folder, and then upload it with FTP tool. If you encounter any problems in project deployment, you can leave a message or send a private letter to me. Thank you! !
Finally, say: work!!!!