This is the second study note based on SpringBoot. Due to space reasons, this note may be divided into several articles.
Automatic configuration principle
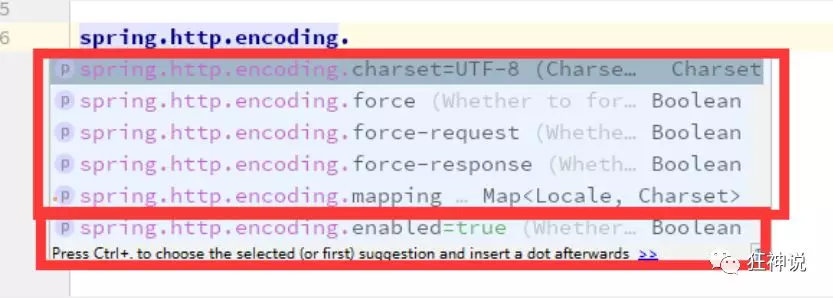
We take Http encoding autoconfiguration (Http encoding autoconfiguration) as an example to explain the principle of autoconfiguration
//Indicates that this is a configuration class. Like the previously written configuration file, you can also add components to the container;
@Configuration

//Start the ConfigurationProperties function of the specified class;
  //Enter the HttpProperties view and bind the corresponding values in the configuration file with HttpProperties;
  //And add HttpProperties to the ioc container
@EnableConfigurationProperties({HttpProperties.class})

//Spring underlying @ Conditional annotation
  //According to different conditions, if the specified conditions are met, the configuration in the whole configuration class will take effect;
  //This means to judge whether the current application is a web application. If so, the current configuration class will take effect
@ConditionalOnWebApplication(
    type = Type.SERVLET
)

//Judge whether the current project has this class CharacterEncodingFilter; Filter for garbled code resolution in spring MVC;
@ConditionalOnClass({CharacterEncodingFilter.class})

//Judge whether there is a configuration in the configuration file: spring.http.encoding.enabled;
  //If it does not exist, the judgment is also valid
  //Even if pring.http.encoding.enabled=true is not configured in our configuration file, it will take effect by default;
@ConditionalOnProperty(
    prefix = "spring.http.encoding",
    value = {"enabled"},
    matchIfMissing = true
)

public class HttpEncodingAutoConfiguration {
    //He has mapped to the SpringBoot configuration file
    private final Encoding properties;
    //When there is only one constructor with parameters, the value of the parameter will be taken from the container
    public HttpEncodingAutoConfiguration(HttpProperties properties) {
        this.properties = properties.getEncoding();
    }

    //Add a component to the container. Some values of this component need to be obtained from properties
    @Bean
    @ConditionalOnMissingBean //Determine that the container does not have this component?
    public CharacterEncodingFilter characterEncodingFilter() {
        CharacterEncodingFilter filter = new OrderedCharacterEncodingFilter();
        filter.setEncoding(this.properties.getCharset().name());
        filter.setForceRequestEncoding(this.properties.shouldForce(org.springframework.boot.autoconfigure.http.HttpProperties.Encoding.Type.REQUEST));
        filter.setForceResponseEncoding(this.properties.shouldForce(org.springframework.boot.autoconfigure.http.HttpProperties.Encoding.Type.RESPONSE));
        return filter;
    }
    //. . . . . . .
}
Once the configuration class takes effect; This configuration class will add various components to the container;
The properties of these components are obtained from the corresponding properties classes, and each property in these classes is bound to the configuration file;
All properties that can be configured in the configuration file are encapsulated in the xxproperties class;
The attribute class corresponding to a function can be referenced for what can be configured in the configuration file
//Get the specified value from the configuration file and bind it with the properties of the bean
@ConfigurationProperties(prefix = "spring.http")
public class HttpProperties {
    // .....
}
The above is the principle of automatic assembly.
summary
1. SpringBoot boot will load a large number of auto configuration classes
2. Let's see if the functions we need are in the auto configuration class written by SpringBoot by default;
3. Let's look at which components are configured in this automatic configuration class; (as long as the component we want to use exists in it, we don't need to configure it manually)
4. When adding components to the automatic configuration class in the container, some properties will be obtained from the properties class. We only need to specify the values of these attributes in the configuration file;
Xxxautoconfiguration: automatic configuration class; Add components to container
Xxxproperties: encapsulates related properties in the configuration file;
@Conditional
After understanding the principle of automatic assembly, let's pay attention to a detail. The automatic configuration class must take effect under certain conditions;
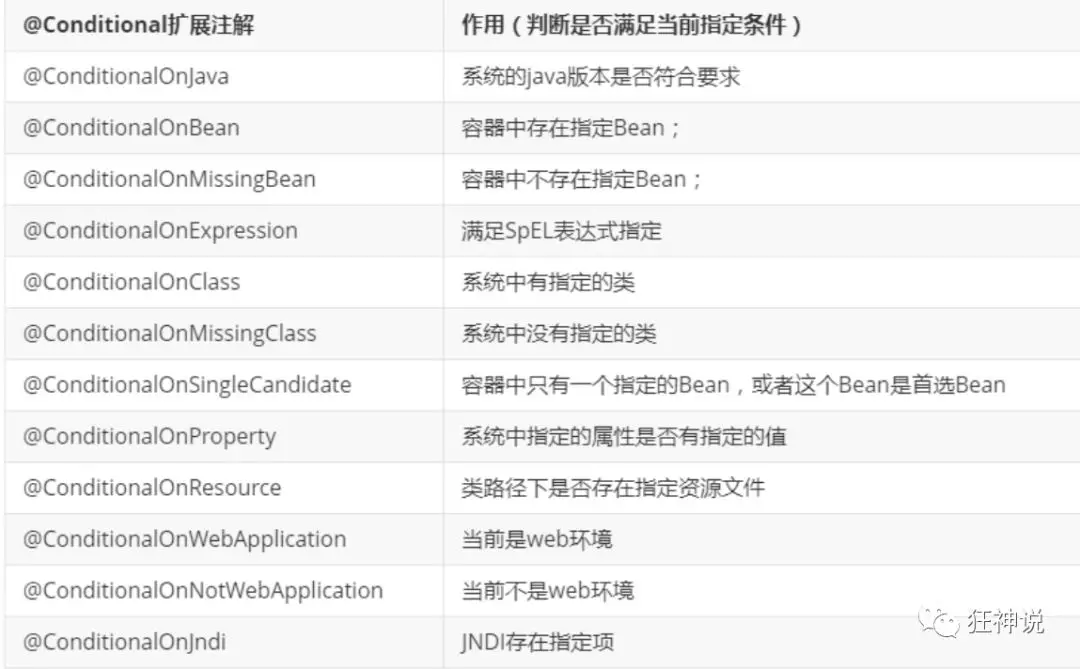
@Conditional derived annotation (the native @ conditional function of Spring annotation version)
Function: only when the conditions specified by @ Conditional are met can components be added to the container and all contents in the configuration configuration take effect;
#Open the debugging class of springboot
debug=true
If you enable this, you can know which automatic configuration classes have taken effect.
Positive matches: (auto configuration class enabled: positive matches)
Negative matches: (no startup, no matching successful automatic configuration class: negative matching)
Unconditional classes: (unconditional classes)
[Demo: view the output log]
Customize SpringBoot Starter
Naming reduction:
Official name:
Prefix: spring boot starter XXX
For example: spring boot starter Web
Custom naming:
xxx-spring-boot-starter
For example: mybatis spring boot starter
Write initiator
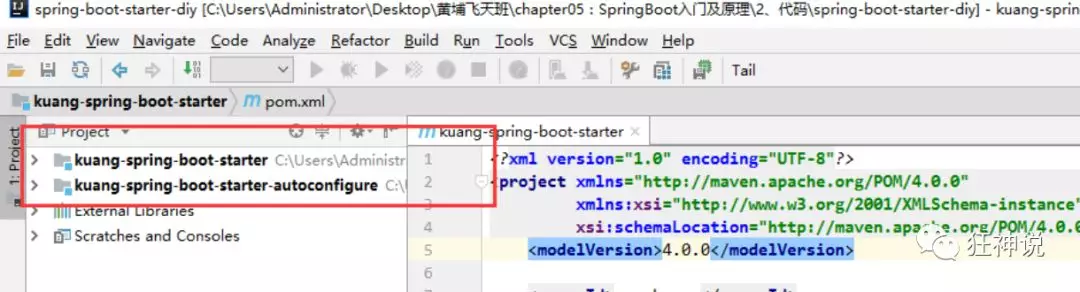
1. Create an empty project spring boot starter DIY in the IDEA
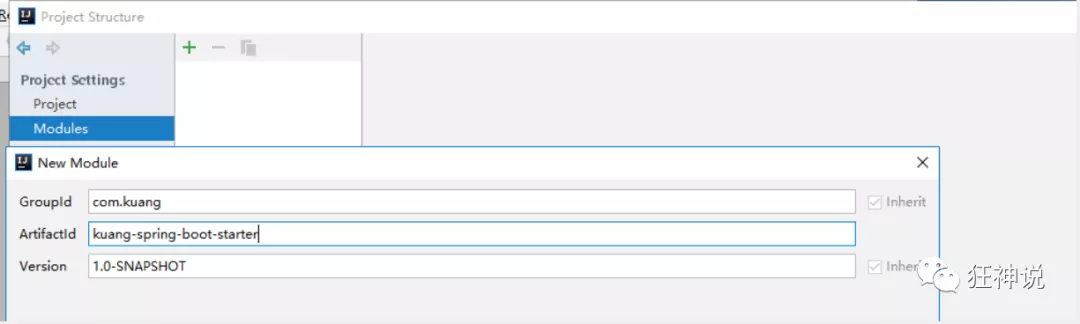
2. Create a new normal Maven module: Kuang spring boot starter
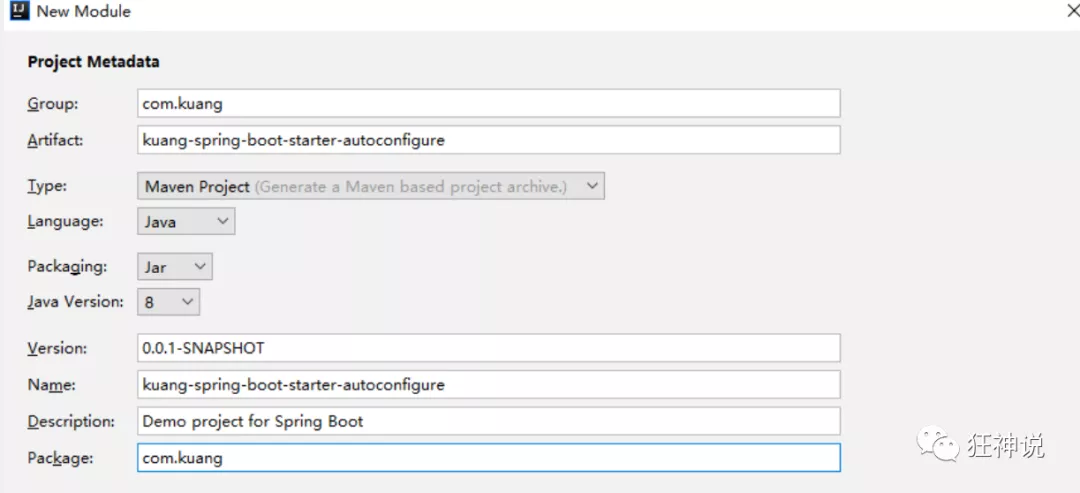
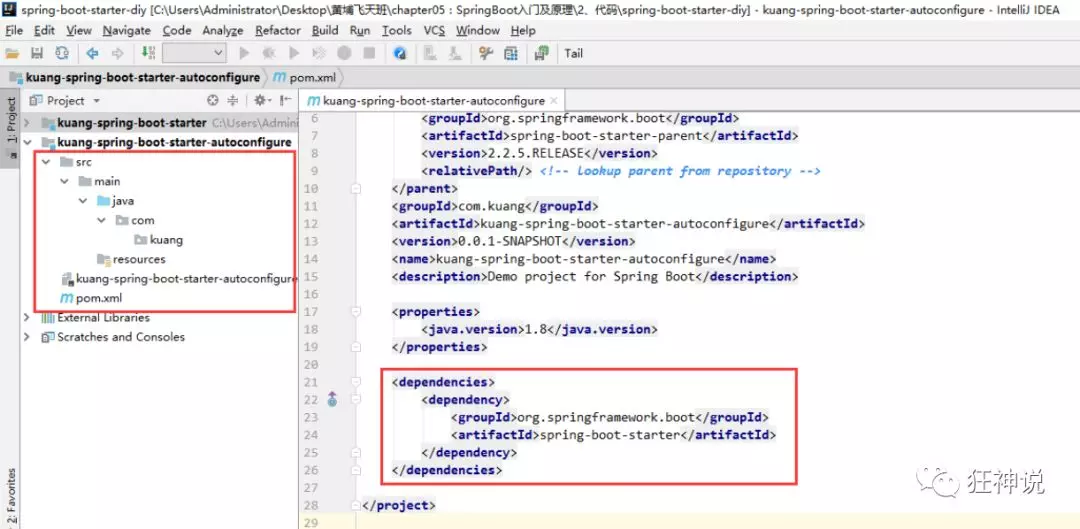
3. Create a new Springboot module: Kuang spring boot starter autoconfigure
4. Click apply to the basic structure
5. Import autoconfigure dependencies in our starter!
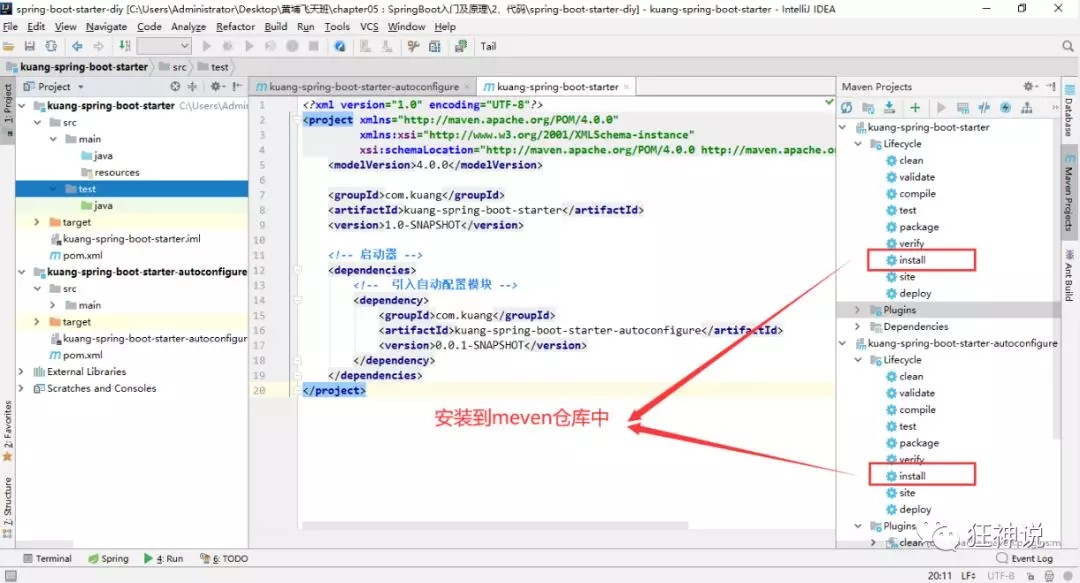
<!-- starter -->
<dependencies>
    <!--  Introduction of automatic configuration module -->
    <dependency>
        <groupId>com.kuang</groupId>
        <artifactId>kuang-spring-boot-starter-autoconfigure</artifactId>
        <version>0.0.1-SNAPSHOT</version>
    </dependency>
</dependencies>
6. Delete all redundant files under the autoconfigure project, leaving only one starter in Pom, which is the basic configuration of all initiators!
7. We write our own service
package com.kuang;

public class HelloService {

    HelloProperties helloProperties;

    public HelloProperties getHelloProperties() {
        return helloProperties;
    }

    public void setHelloProperties(HelloProperties helloProperties) {
        this.helloProperties = helloProperties;
    }

    public String sayHello(String name){
        return helloProperties.getPrefix() + name + helloProperties.getSuffix();
    }

}
8. Write the HelloProperties configuration class
package com.kuang;

import org.springframework.boot.context.properties.ConfigurationProperties;

// Prefix kuang.hello
@ConfigurationProperties(prefix = "kuang.hello")
public class HelloProperties {

    private String prefix;
    private String suffix;

    public String getPrefix() {
        return prefix;
    }

    public void setPrefix(String prefix) {
        this.prefix = prefix;
    }

    public String getSuffix() {
        return suffix;
    }

    public void setSuffix(String suffix) {
        this.suffix = suffix;
    }
}
9. Write our auto configuration class and inject bean s to test!
package com.kuang;

import org.springframework.beans.factory.annotation.Autowired;
import org.springframework.boot.autoconfigure.condition.ConditionalOnWebApplication;
import org.springframework.boot.context.properties.EnableConfigurationProperties;
import org.springframework.context.annotation.Bean;
import org.springframework.context.annotation.Configuration;

@Configuration
@ConditionalOnWebApplication //web application validation
@EnableConfigurationProperties(HelloProperties.class)
public class HelloServiceAutoConfiguration {

    @Autowired
    HelloProperties helloProperties;

    @Bean
    public HelloService helloService(){
        HelloService service = new HelloService();
        service.setHelloProperties(helloProperties);
        return service;
    }

}
10. Write your own META-INF\spring.factories in resources
# Auto Configure
org.springframework.boot.autoconfigure.EnableAutoConfiguration=\
com.kuang.HelloServiceAutoConfiguration
11. After writing, you can install it into maven warehouse!
test
1. Create a new SpringBoot project
2. Import our own starter
<dependency>
    <groupId>com.kuang</groupId>
    <artifactId>kuang-spring-boot-starter</artifactId>
    <version>1.0-SNAPSHOT</version>
</dependency>
3. Write a HelloController to test our own interface!
package com.kuang.controller;

@RestController
public class HelloController {

    @Autowired
    HelloService helloService;

    @RequestMapping("/hello")
    public String hello(){
        return helloService.sayHello("zxc");
    }

}
4. Write the configuration file application.properties
kuang.hello.prefix="ppp"
kuang.hello.suffix="sss"
5. Start the project for test, and the result is successful!
Web development static resource processing
First, we need to know the steps of using SpringBoot:
1. Create a SpringBoot application, select the modules we need, and SpringBoot will automatically configure the modules we need by default
2. Manually configure some configuration items in the configuration file to run
3. Focus on writing business code without considering a lot of configurations like before.
Why?
If we are a web application, there will be a webapp under our main. We used to import all pages here, right! But our current pom is packaged as jar. Can SpringBoot write pages for us in this way? Of course, it is possible, but SpringBoot has regulations on the location of static resources!
Principle:
In spring boot, the web configuration of spring MVC is in the configuration class webmvcoautoconfiguration;
We can see that there are many configuration methods in webmvca autoconfigurationadapter;
There is one method: addResourceHandlers add resource handlers
@Override
public void addResourceHandlers(ResourceHandlerRegistry registry) {
    if (!this.resourceProperties.isAddMappings()) {
        // Default resource handling is disabled
        logger.debug("Default resource handling disabled");
        return;
    }
    // Cache control
    Duration cachePeriod = this.resourceProperties.getCache().getPeriod();
    CacheControl cacheControl = this.resourceProperties.getCache().getCachecontrol().toHttpCacheControl();
    // webjars configuration
    if (!registry.hasMappingForPattern("/webjars/**")) {
        customizeResourceHandlerRegistration(registry.addResourceHandler("/webjars/**")
                                             .addResourceLocations("classpath:/META-INF/resources/webjars/")
                                             .setCachePeriod(getSeconds(cachePeriod)).setCacheControl(cacheControl));
    }
    // Static resource allocation
    String staticPathPattern = this.mvcProperties.getStaticPathPattern();
    if (!registry.hasMappingForPattern(staticPathPattern)) {
        customizeResourceHandlerRegistration(registry.addResourceHandler(staticPathPattern)
                                             .addResourceLocations(getResourceLocations(this.resourceProperties.getStaticLocations()))
                                             .setCachePeriod(getSeconds(cachePeriod)).setCacheControl(cacheControl));
    }
}
Read the source code: for example, all / webjars / * *, you need to go to classpath:/META-INF/resources/webjars / to find the corresponding resources;
What is webjars?
The essence of Webjars is to introduce our static resources in the form of jar package. We used to import a static resource file directly.
Webjars is required to use SpringBoot. We can search:
Website: https://www.webjars.org
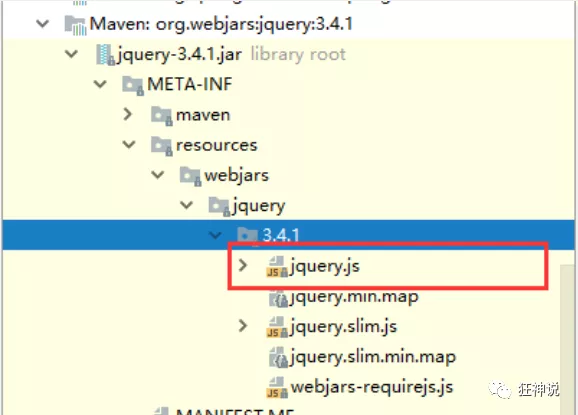
To use jQuery, we just need to introduce the pom dependency of the corresponding version of jQuery!
<dependency>
    <groupId>org.webjars</groupId>
    <artifactId>jquery</artifactId>
    <version>3.4.1</version>
</dependency>
After importing, view the webjars directory structure and access the Jquery.js file!
Access: as long as it is a static resource, SpringBoot will go to the corresponding path to find the resource. We visit here: http://localhost:8080/webjars/jquery/3.4.1/jquery.js
How can we import our own static resources in our project? Let's look at the next line of code;
We go to staticPathPattern and find the second mapping rule: / * *. When accessing any resources of the current project, it will find the class resourceProperties. We can click to see the analysis:
// Entry method
public String[] getStaticLocations() {
    return this.staticLocations;
}
// Find the corresponding value
private String[] staticLocations = CLASSPATH_RESOURCE_LOCATIONS;
// Find path
private static final String[] CLASSPATH_RESOURCE_LOCATIONS = {
    "classpath:/META-INF/resources/",
  	"classpath:/resources/",
    "classpath:/static/",
    "classpath:/public/"
};
ResourceProperties can set parameters related to our static resources; This points to the folder where it will look for resources, that is, the contents of the above array.
Therefore, it is concluded that the static resources stored in the following four directories can be identified by us:
"classpath:/META-INF/resources/"
"classpath:/resources/"
"classpath:/static/"
"classpath:/public/"
We can create a new folder under the root directory of resources to store our static files;
For example, we visit http://localhost:8080/1.js , he will go to these folders to find the corresponding static resource files;
Custom static resource path
We can also specify which folders we need to put static resource files through the configuration file, and configure them in application.properties;
spring.resources.static-locations=classpath:/coding/,classpath:/kuang/
Once you define the path of the static folder, the original automatic configuration will become invalid!
Home page processing
After the static resource folder is finished, we continue to look down at the source code! You can see a map of the welcome page, which is our home page!
@Bean
public WelcomePageHandlerMapping welcomePageHandlerMapping(ApplicationContext applicationContext,
                                                           FormattingConversionService mvcConversionService,
                                                           ResourceUrlProvider mvcResourceUrlProvider) {
    WelcomePageHandlerMapping welcomePageHandlerMapping = new WelcomePageHandlerMapping(
        new TemplateAvailabilityProviders(applicationContext), applicationContext, getWelcomePage(), // Getwelcome page to get the welcome page
        this.mvcProperties.getStaticPathPattern());
    welcomePageHandlerMapping.setInterceptors(getInterceptors(mvcConversionService, mvcResourceUrlProvider));
    return welcomePageHandlerMapping;
}
Click in and keep looking
private Optional<Resource> getWelcomePage() {
    String[] locations = getResourceLocations(this.resourceProperties.getStaticLocations());
    // : is a new operator introduced in java8
    // When Class::function, function belongs to Class and should be a static method.
    // The fund of this::function belongs to this object.
    // In short, it is just a kind of grammatical sugar, which is a kind of abbreviation
    return Arrays.stream(locations).map(this::getIndexHtml).filter(this::isReadable).findFirst();
}
// The welcome page is just index.html under a location
private Resource getIndexHtml(String location) {
    return this.resourceLoader.getResource(location + "index.html");
}
Welcome page, all index.html pages under the static resource folder; Mapped by / * * map.
Like my visit http://localhost:8080/ , you will find index.html under the static resource folder
Create a new index.html in any of the above three directories; Then access the test http://localhost:8080/ Look at the results!
Description of website Icon:
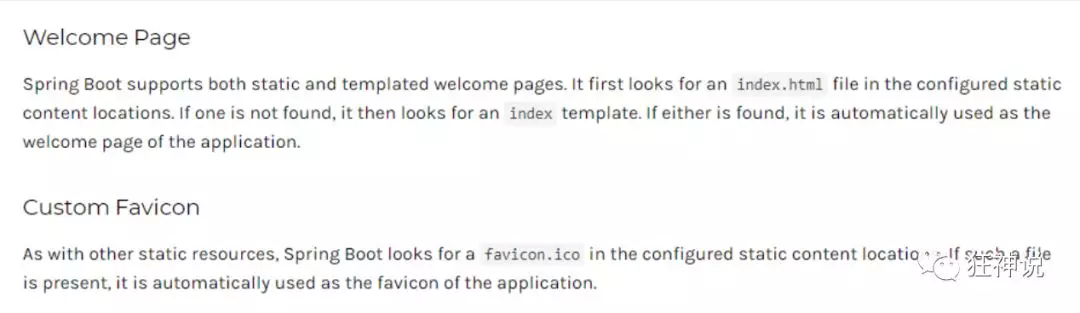
Like other static resources, Spring Boot looks for favicon.ico in the configured static content location. If such a file exists, it will automatically be used as the favicon for the application.
1. Turn off the SpringBoot default icon
#Turn off default icon
spring.mvc.favicon.enabled=false
2. Put an icon in the static resource directory, and I put it in the public directory
3. Clear browser cache! Refresh the web page and find that the icon has become your own!
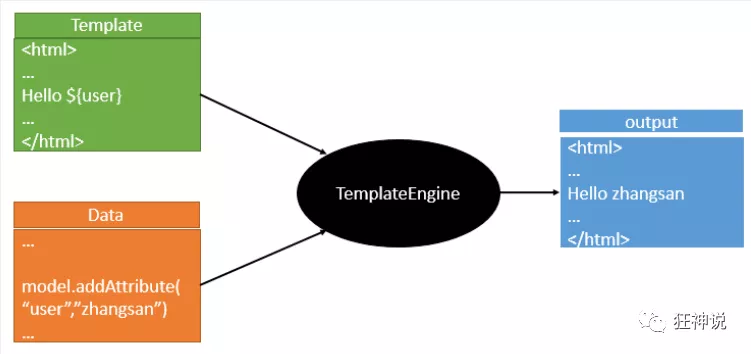
template engine
Function to render html files according to the returned data and html pages
Introduction of Thymeleaf
How to introduce it? For springboot, everything is a start. Let's introduce it into the project. Here are three websites:
Thymeleaf official website: https://www.thymeleaf.org/
Thymeleaf's home page at Github: https://github.com/thymeleaf/thymeleaf
Spring official documentation: find our corresponding version
https://docs.spring.io/spring-boot/docs/2.2.5.RELEASE/reference/htmlsingle/#using-boot-starter
Find the corresponding pom dependency: you can click the source code to see the original package!
<!--thymeleaf-->
<dependency>
    <groupId>org.springframework.boot</groupId>
    <artifactId>spring-boot-starter-thymeleaf</artifactId>
</dependency>
Maven will automatically download the jar package. We can go and have a look at the downloaded things;

Thymeleaf analysis
Previously, we have introduced Thymeleaf. How can we use this?
First, we have to take a look at the automatic configuration rule of Thymeleaf according to the automatic configuration principle of SpringBoot. According to that rule, we use it.
Let's look for Thymeleaf's auto configuration class: ThymeleafProperties
@ConfigurationProperties(
    prefix = "spring.thymeleaf"
)
public class ThymeleafProperties {
    private static final Charset DEFAULT_ENCODING;
    public static final String DEFAULT_PREFIX = "classpath:/templates/";
    public static final String DEFAULT_SUFFIX = ".html";
    private boolean checkTemplate = true;
    private boolean checkTemplateLocation = true;
    private String prefix = "classpath:/templates/";
    private String suffix = ".html";
    private String mode = "HTML";
    private Charset encoding;
}
We can see the default prefix and suffix in it!
We just need to put our html page under the templates under the classpath, and thymeleaf can help us render automatically.
There is no need to configure anything to use thymeleaf, just put it in the specified folder!
test
1. Write a TestController
@Controller
public class TestController {

    @RequestMapping("/t1")
    public String test1(){
        //classpath:/templates/test.html
        return "test";
    }

}
2. Write a test page test.html and put it in the templates directory
<!DOCTYPE html>
<html lang="en">
<head>
    <meta charset="UTF-8">
    <title>Title</title>
</head>
<body>
<h1>Test page</h1>

</body>
</html>
3. Start project request test
Thymeleaf grammar learning
To learn grammar, it is most accurate to refer to the official website documents. Let's find the corresponding version and have a look;
Thymeleaf official website: https://www.thymeleaf.org/ , take a brief look at the official website! Let's download the official documents of thymeleaf!
Let's do the simplest exercise: we need to find some data and display it on the page
1. Modify the test request and add data transmission;
@RequestMapping("/t1")
public String test1(Model model){
    //Store data
    model.addAttribute("msg","Hello,Thymeleaf");
    //classpath:/templates/test.html
    return "test";
}
2. To use thymeleaf, we need to import namespace constraints in html files to facilitate prompt.
We can take a look at the namespace in #3 the official document and bring it here:
xmlns:th="http://www.thymeleaf.org"
3. Let's write the front page
<!DOCTYPE html>
<html lang="en" xmlns:th="http://www.thymeleaf.org">
<head>
    <meta charset="UTF-8">
    <title>Madness theory</title>
</head>
<body>
<h1>Test page</h1>

<!--th:text Is to div The content in is set to the value it specifies, and the previous learning Vue equally-->
<div th:text="${msg}"></div>
</body>
</html>
4. Start the test!
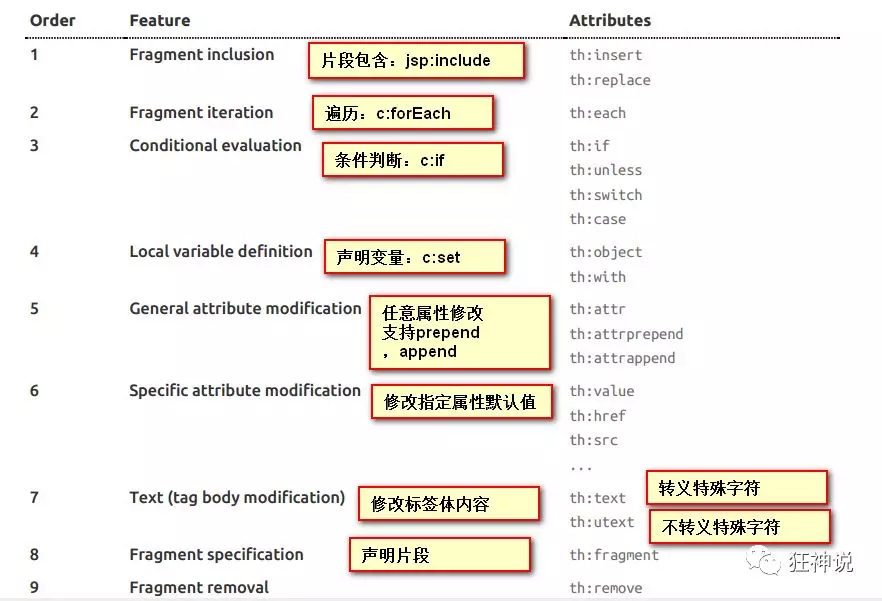
Advanced
1. We can use any th:attr to replace the value of the native attribute in Html!
2. What expressions can we write?
Simple expressions:(Expression syntax)
Variable Expressions: ${...}: Obtain variable value; OGNL;
    1),Get the properties and call methods of the object
    2),Use built-in base objects:#18
         #ctx : the context object.
         #vars: the context variables.
         #locale : the context locale.
         #request : (only in Web Contexts) the HttpServletRequest object.
         #response : (only in Web Contexts) the HttpServletResponse object.
         #session : (only in Web Contexts) the HttpSession object.
         #servletContext : (only in Web Contexts) the ServletContext object.

    3),Some built-in tool objects:
      #execInfo : information about the template being processed.
      #uris : methods for escaping parts of URLs/URIs
      #conversions : methods for executing the configured conversion service (if any).
      #dates : methods for java.util.Date objects: formatting, component extraction, etc.
      #calendars : analogous to #dates , but for java.util.Calendar objects.
      #numbers : methods for formatting numeric objects.
      #strings : methods for String objects: contains, startsWith, prepending/appending, etc.
      #objects : methods for objects in general.
      #bools : methods for boolean evaluation.
      #arrays : methods for arrays.
      #lists : methods for lists.
      #sets : methods for sets.
      #maps : methods for maps.
      #aggregates : methods for creating aggregates on arrays or collections.
==================================================================================

  Selection Variable Expressions: *{...}: Select expressions: and ${}It is the same in function;
  Message Expressions: #{...}: get internationalized content
  Link URL Expressions: @{...}: definition URL;
  Fragment Expressions: ~{...}: Fragment reference expression

Literals((literal)
      Text literals: 'one text' , 'Another one!' ,...
      Number literals: 0 , 34 , 3.0 , 12.3 ,...
      Boolean literals: true , false
      Null literal: null
      Literal tokens: one , sometext , main ,...

Text operations:((text operation)
    String concatenation: +
    Literal substitutions: |The name is ${name}|

Arithmetic operations:(Mathematical operation)
    Binary operators: + , - , * , / , %
    Minus sign (unary operator): -

Boolean operations:(Boolean operation)
    Binary operators: and , or
    Boolean negation (unary operator): ! , not

Comparisons and equality:(Comparison operation)
    Comparators: > , < , >= , <= ( gt , lt , ge , le )
    Equality operators: == , != ( eq , ne )

Conditional operators:Conditional operation (ternary operator)
    If-then: (if) ? (then)
    If-then-else: (if) ? (then) : (else)
    Default: (value) ?: (defaultvalue)

Special tokens:
    No-Operation: _
Practice test:
1. We write a Controller and put some data
@RequestMapping("/t2")
public String test2(Map<String,Object> map){
    //Store data
    map.put("msg","<h1>Hello</h1>");
    map.put("users", Arrays.asList("qinjiang","kuangshen"));
    //classpath:/templates/test.html
    return "test";
}
2. Test page fetch data
<!DOCTYPE html>
<html lang="en" xmlns:th="http://www.thymeleaf.org">
<head>
    <meta charset="UTF-8">
    <title>Madness theory</title>
</head>
<body>
<h1>Test page</h1>

<div th:text="${msg}"></div>
<!--No escape-->
<div th:utext="${msg}"></div>

<!--Traversal data-->
<!--th:each Each traversal will generate the current tag: official website#9-->
<h4 th:each="user :${users}" th:text="${user}"></h4>

<h4>
    <!--In line writing: Official Website#12-->
    <span th:each="user:${users}">[[${user}]]</span>
</h4>

</body>
</html>
3. Start project test!
MVC automatic configuration principle
Official documents: https://docs.spring.io/spring-boot/docs/2.2.5.RELEASE/reference/htmlsingle/#boot-features-spring-mvc-auto-configuration
ContentNegotiatingViewResolver content negotiation view resolver
The ViewResolver is automatically configured, which is the view parser of spring MVC we learned earlier;
That is, the View object is obtained according to the return value of the method, and then the View object determines how to render (forward, redirect).
Let's take a look at the source code here: we find webmvca autoconfiguration and search for content negotiatingviewresolver. Find the following method!
@Bean
@ConditionalOnBean(ViewResolver.class)
@ConditionalOnMissingBean(name = "viewResolver", value = ContentNegotiatingViewResolver.class)
public ContentNegotiatingViewResolver viewResolver(BeanFactory beanFactory) {
    ContentNegotiatingViewResolver resolver = new ContentNegotiatingViewResolver();
    resolver.setContentNegotiationManager(beanFactory.getBean(ContentNegotiationManager.class));
    // Content negotiatingviewresolver uses all other view parsers to locate views, so it should have higher priority
    resolver.setOrder(Ordered.HIGHEST_PRECEDENCE);
    return resolver;
}
We can click into this class to see! Find the code of the corresponding parsing view;
@Nullable // Note: @ Nullable means that the parameter can be null
public View resolveViewName(String viewName, Locale locale) throws Exception {
    RequestAttributes attrs = RequestContextHolder.getRequestAttributes();
    Assert.state(attrs instanceof ServletRequestAttributes, "No current ServletRequestAttributes");
    List<MediaType> requestedMediaTypes = this.getMediaTypes(((ServletRequestAttributes)attrs).getRequest());
    if (requestedMediaTypes != null) {
        // Get candidate view objects
        List<View> candidateViews = this.getCandidateViews(viewName, locale, requestedMediaTypes);
        // Select the most appropriate view object, and then return this object
        View bestView = this.getBestView(candidateViews, requestedMediaTypes, attrs);
        if (bestView != null) {
            return bestView;
        }
    }
    // .....
}
Let's continue to click in and see how he gets the candidate view?
In getCandidateViews, you can see that it brings all view parsers, performs a while loop, and parses them one by one!
Iterator var5 = this.viewResolvers.iterator();
Therefore, it is concluded that the view parser content negotiation view resolver is used to combine all view parsers
Let's study his combinatorial logic and see that there is an attribute viewResolvers to see where it is assigned!
protected void initServletContext(ServletContext servletContext) {
    // Here it is the parser that gets all the views in the container from the beanFactory tool
    // ViewRescolver.class combines all view parsers
    Collection<ViewResolver> matchingBeans = BeanFactoryUtils.beansOfTypeIncludingAncestors(this.obtainApplicationContext(), ViewResolver.class).values();
    ViewResolver viewResolver;
    if (this.viewResolvers == null) {
        this.viewResolvers = new ArrayList(matchingBeans.size());
    }
    // ...............
}
Find it in the container and look for the view parser.
Therefore, we can customize a view parser
Custom view parser
1. Let's try to write a view parser in our main program;
@Bean //Put in bean
public ViewResolver myViewResolver(){
    return new MyViewResolver();
}

//When we write a static inner class, the view parser needs to implement the ViewResolver interface
private static class MyViewResolver implements ViewResolver{
    @Override
    public View resolveViewName(String s, Locale locale) throws Exception {
        return null;
    }
}
2. What do you think about whether the view parser we wrote ourselves works?
We add a breakpoint to the doDispatch method in the dispatcher servlet for debugging, because all requests will go to this method

3. We start our project, then visit a random page to see the Debug information;
Find this
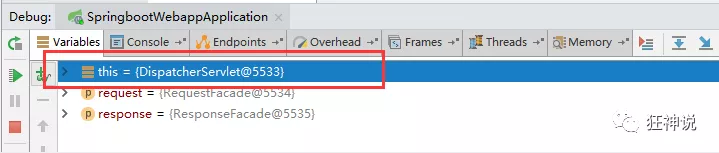
Find the view parser, and we see that our own definition is here;
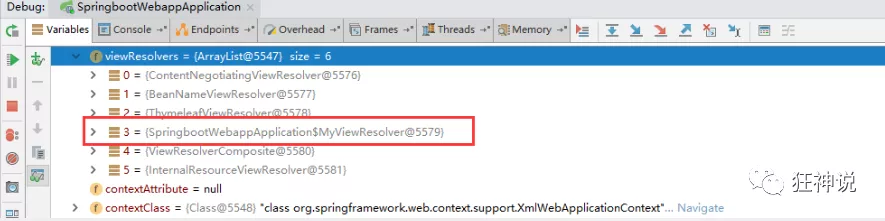
Therefore, if we want to use our own customized things, we just need to add this component to the container! SpringBoot will do the rest for us!
Converter and formatter
Format converter found:
@Bean
@Override
public FormattingConversionService mvcConversionService() {
    // Get the formatting rules in the configuration file
    WebConversionService conversionService =
        new WebConversionService(this.mvcProperties.getDateFormat());
    addFormatters(conversionService);
    return conversionService;
}
Click to:
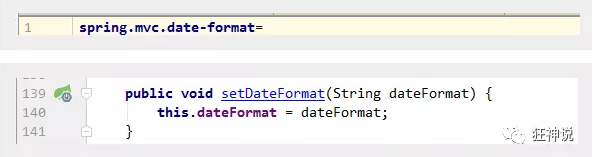
public String getDateFormat() {
    return this.dateFormat;
}

/**
* Date format to use. For instance, `dd/MM/yyyy`. default
 */
private String dateFormat;
You can see that in our Properties file, we can automatically configure it!
If you configure your own formatting method, it will be registered in the Bean and take effect. We can configure the date formatting rules in the configuration file:
Modify the default configuration of SpringBoot
Extension using spring MVC
All we need to do is write a @ Configuration annotation class, and the type should be WebMvcConfigurer, and the @ EnableWebMvc annotation cannot be marked; Let's write one by ourselves; We create a new package called config and write a class MyMvcConfig;
//The expected type requires WebMvcConfigurer, so we implement its interface
//You can use custom classes to extend the functionality of MVC
@Configuration
public class MyMvcConfig implements WebMvcConfigurer {

    @Override
    public void addViewControllers(ViewControllerRegistry registry) {
        // When the browser sends / test, it will jump to the test page;
        registry.addViewController("/test").setViewName("test");
    }
}
Browser access:

Principle:
1. Webmvcoautoconfiguration is the automatic configuration class of spring MVC, which has a class webmvcoautoconfigurationadapter
2. There is an annotation on this class, which will be imported during other automatic configuration: @ Import(EnableWebMvcConfiguration.class)
3. Let's click EnableWebMvcConfiguration to see that it inherits a parent class: delegatingwebmvccconfiguration
There is such a piece of code in this parent class:
public class DelegatingWebMvcConfiguration extends WebMvcConfigurationSupport {
    private final WebMvcConfigurerComposite configurers = new WebMvcConfigurerComposite();

  // Get all webmvcconfigurers from the container
    @Autowired(required = false)
    public void setConfigurers(List<WebMvcConfigurer> configurers) {
        if (!CollectionUtils.isEmpty(configurers)) {
            this.configurers.addWebMvcConfigurers(configurers);
        }
    }
}
4. We can find a viewController we just set in this class as a reference and find that it calls a
protected void addViewControllers(ViewControllerRegistry registry) {
    this.configurers.addViewControllers(registry);
}
5. Let's go in and have a look
public void addViewControllers(ViewControllerRegistry registry) {
    Iterator var2 = this.delegates.iterator();

    while(var2.hasNext()) {
        // Call all WebMvcConfigurer related configurations together! Including those configured by ourselves and those configured by Spring
        WebMvcConfigurer delegate = (WebMvcConfigurer)var2.next();
        delegate.addViewControllers(registry);
    }

}
Therefore, it is concluded that all WebMvcConfiguration will be used, not only Spring's own configuration class, but also our own configuration class will be called;
Fully take over spring MVC
Official documents:
If you want to take complete control of Spring MVC
you can add your own @Configuration annotated with @EnableWebMvc.
Full takeover: spring boot does not need to automatically configure spring MVC. We configure everything ourselves!
Just add a @ EnableWebMvc in our configuration class.
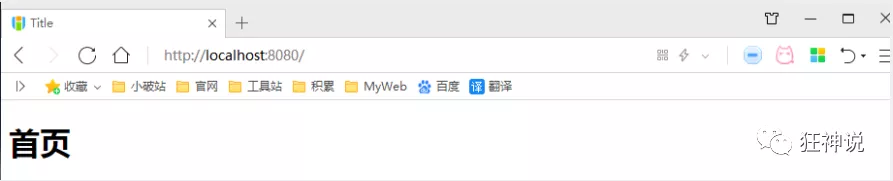
Let's take a look. If we take over spring MVC, the static resource mapping configured by SpringBoot will be invalid. We can test it;
Go to the home page without comments:
Annotate the configuration class: @ EnableWebMvc
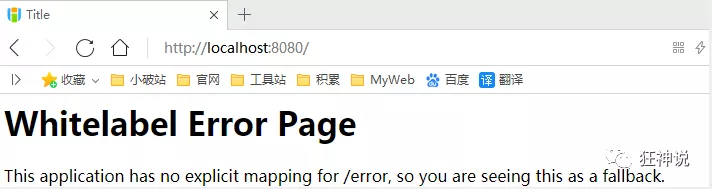
We found that all spring MVC auto configuration failed! Return to the original appearance;
Of course, it is not recommended to use spring MVC in our development
Thinking? Why is the automatic configuration invalid when an annotation is added! Let's look at the source code:
1. It is found that it imports a class. We can continue to look at it
@Import({DelegatingWebMvcConfiguration.class})
public @interface EnableWebMvc {
}
2. It inherits a parent class WebMvcConfigurationSupport
public class DelegatingWebMvcConfiguration extends WebMvcConfigurationSupport {
  // ......
}
3. Let's review the Webmvc autoconfiguration class
@Configuration(proxyBeanMethods = false)
@ConditionalOnWebApplication(type = Type.SERVLET)
@ConditionalOnClass({ Servlet.class, DispatcherServlet.class, WebMvcConfigurer.class })
// This annotation means that the autoconfiguration class takes effect only when there is no component in the container
@ConditionalOnMissingBean(WebMvcConfigurationSupport.class)
@AutoConfigureOrder(Ordered.HIGHEST_PRECEDENCE + 10)
@AutoConfigureAfter({ DispatcherServletAutoConfiguration.class, TaskExecutionAutoConfiguration.class,
    ValidationAutoConfiguration.class })
public class WebMvcAutoConfiguration {

}
To sum up: @ EnableWebMvc has imported the WebMvcConfigurationSupport component
The imported WebMvcConfigurationSupport is only the most basic function of spring MVC!