preface
It is recommended that the server 2-core 2G and above take a look at this tutorial. The 1-core 2G runs very hard.
After loading, there is a QQ robot query function. Let's see the last picture
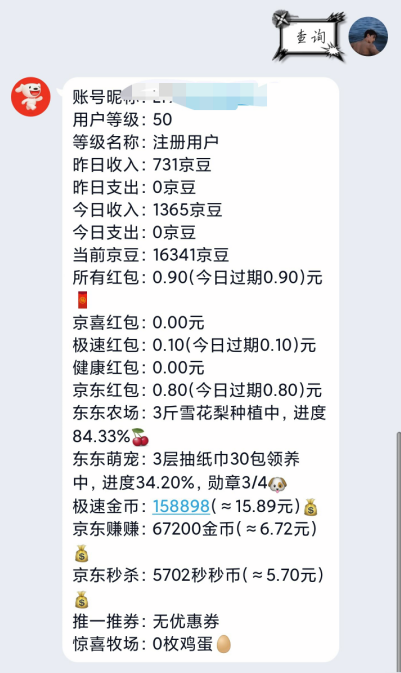 That's almost the effect.
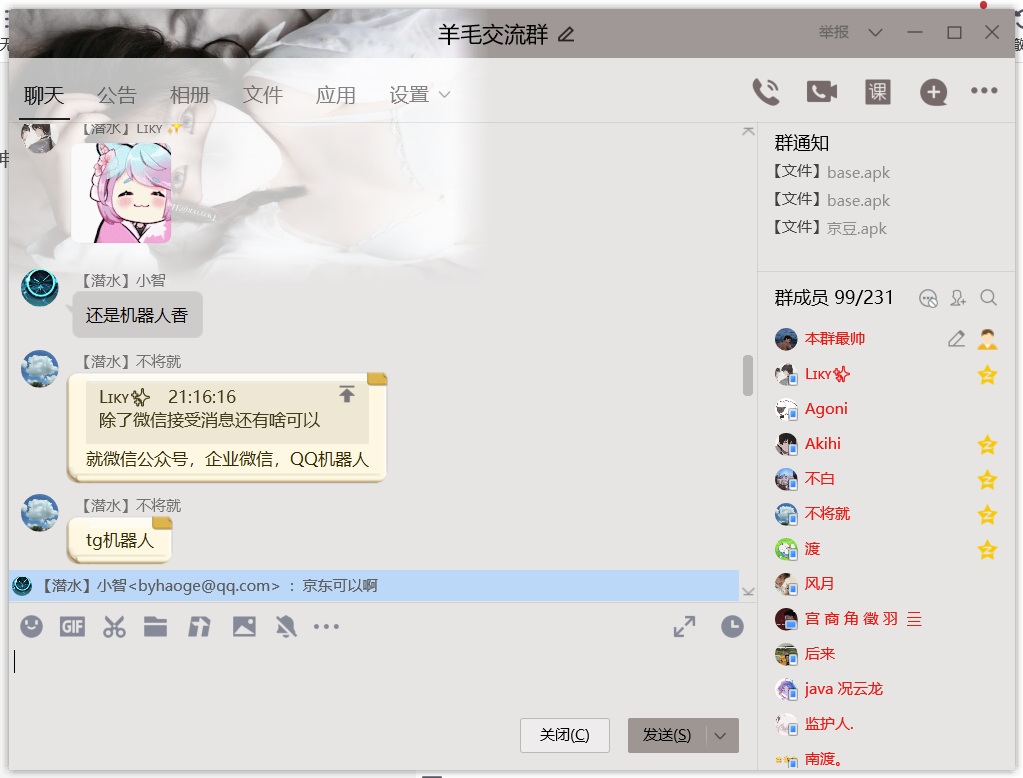
Join the communication group 334996635, and all great gods will answer for you, as shown in the figure above!
The first step is to install the pagoda
Both Tencent cloud and Alibaba cloud lightweight models should be the system image of the pagoda panel, as shown in the figure. If so, ignore this step directly.

If not, install the pagoda yourself.
Install the FinalShell tool for ssh connection. If you don't know, take a look at another article and learn how to use it.
Jingdong Jingdou nerd, Qinglong panel + Ninja dependence all-round tutorial [latest and complete in the whole network]
After establishing the connection, enter the following command to install the pagoda
yum install -y wget && wget -O install.sh http://download.bt.cn/install/install_6.0.sh && sh install.sh
Wait for completion.
Step 2 pull the Qinglong panel
After the installation is completed, connect ssh and enter bt. the background address, user name and password of the pagoda will be displayed (the default address of the pagoda is ip:8888)
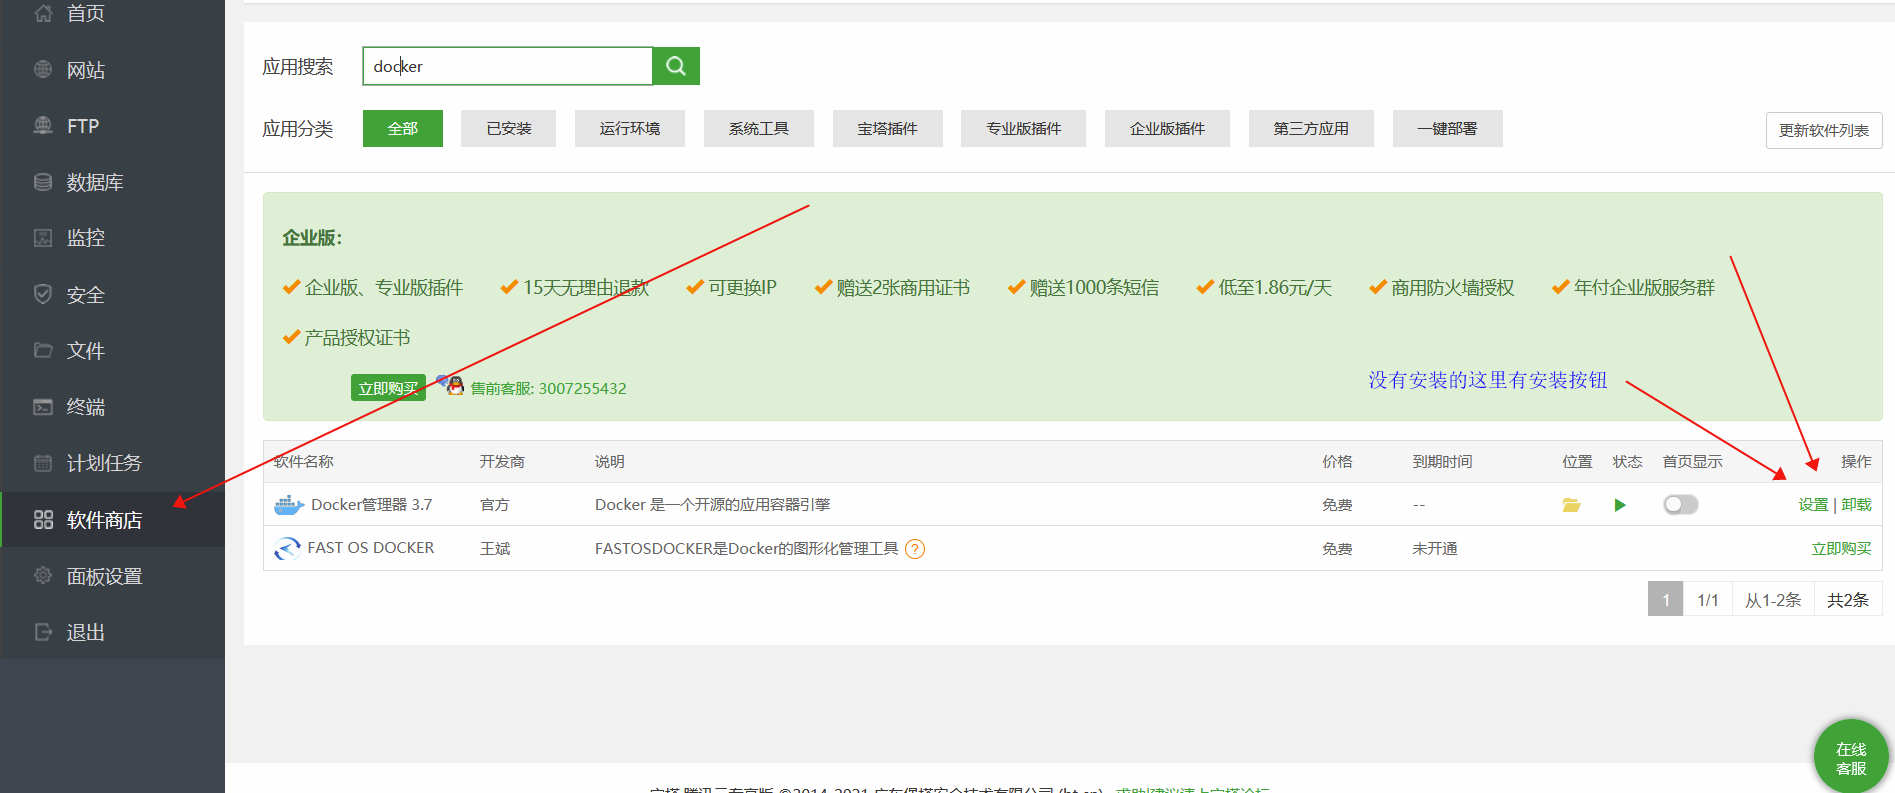
Open login and install Docker (wait patiently)
 Next, return to the ssh connection and enter the following command to pull the green dragon panel
docker pull whyour/qinglong:latest
Create container (line by line carriage return execution)
docker run -dit \
  --name ql \
  --hostname ql \
  --restart always \
  -p 5700:5700 \
  -v $PWD/ql/config:/ql/config \
  -v $PWD/ql/log:/ql/log \
  -v $PWD/ql/db:/ql/db \
  -v $PWD/ql/scripts:/ql/scripts \
  -v $PWD/ql/jbot:/ql/jbot \
  whyour/qinglong:latest
Then enter your ip:5700 in the browser, enter the Qinglong panel, complete the setting and log in according to the guidance (the selection notification method in the setting process can be skipped directly first)
Open the Qinglong panel and complete the steps shown in the figure
 The following two values will be used later

Next, add scheduled tasks to the scheduled tasks on the green dragon panel (pull library. It is recommended to pull Faker and frog at the same time. By default, you are both domestic servers)
Faker Library
Name Faker
command
ql repo https://ghproxy.com/https://github.com/shufflewzc/faker2.git "jd_|jx_|gua_|jddj_|getJDCookie" "activity|backUp" "^jd[^_]|USER|ZooFaker_Necklace.js|JDJRValidator_Pure|sign_graphics_validate"
Timing rule 0 / 10 1 * * **
Frog Library
Name frog
command
ql repo https://github.com/smiek2121/scripts.git "jd_|gua_" "" "^MovementFaker|^JDJRValidator|^ZooFaker|^sign"
Timing rule 0 / 20 1 * * **
Just run these two when you're done.
Step 3 install XDD plus
preparation
GCC and git required for installation (the following commands are executed line by line)
yum -y install gcc

yum -y install gcc-c++

wget http://dl.fedoraproject.org/pub/epel/epel-release-latest-7.noarch.rpm

rpm -ivh epel-release-latest-7.noarch.rpm

yum install -y git
Download the go installation package. Here we install it in the usr/local directory
cd /usr/local && wget https://golang.google.cn/dl/go1.16.7.linux-amd64.tar.gz -O go1.16.7.linux-amd64.tar.gz
Unzip the installation package
tar -xvzf go1.16.7.linux-amd64.tar.gz
After the above command is executed, open the pagoda background file profile
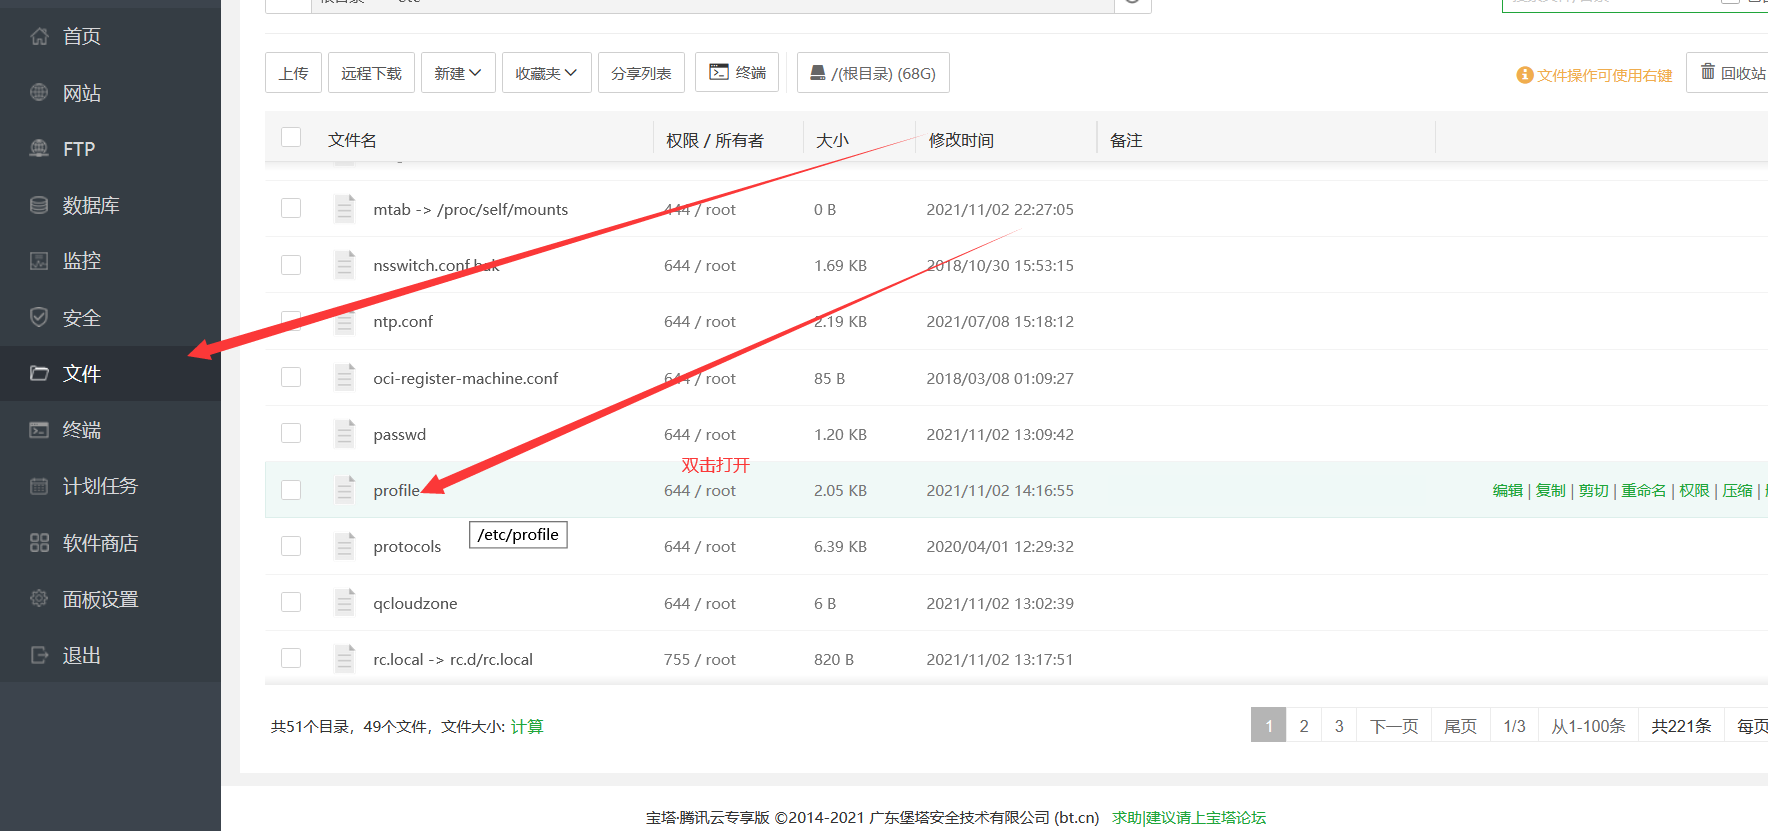
The following is a full copy, which is placed at the end of the profile file (see the figure below) to save and exit.
export GO111MODULE=on
export GOPROXY=https://goproxy.cn
export GOROOT=/usr/local/go
export GOPATH=/usr/local/go/path
export PATH=$PATH:$GOROOT/bin:$GOPATH/bin
 Then connect back to ssh and execute the following command
source /etc/profile ##Read and execute the commands in the profile in the current bash environment.
go env
Download XDD plus
Execute the following command
cd ~ && git clone https://github.com/FBI888888/xdd-plus.git
Compile - give permission - execute (step by step)
cd xdd-plus && go build
chmod 777 xdd
./xdd
When the page does not move, ctrl+c exits
Open the file / root / XDD plus / conf / config.yaml
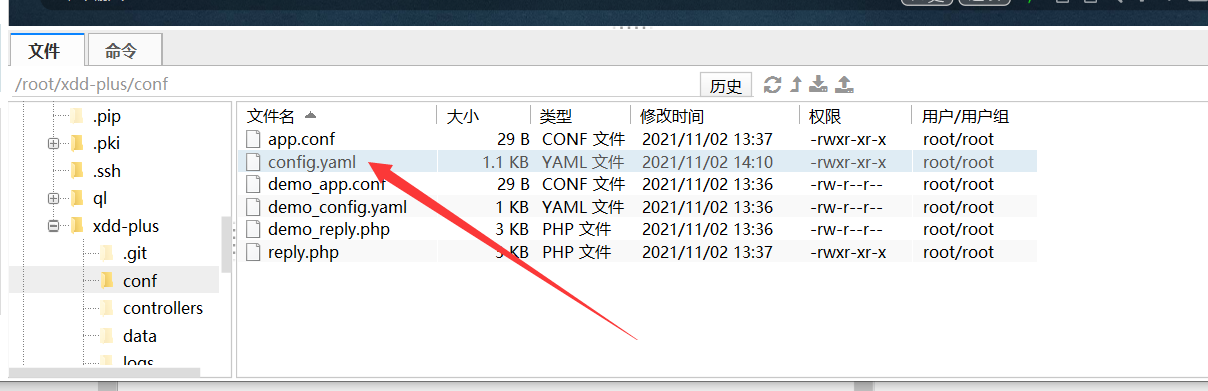
Refer to the notes below and fill in. cid and secret are the two values of the system application created in the previous Qinglong panel.
mode: balance #Mode balance (balance mode, select this), parallel (parallel mode)
containers: #Container, multiple can be configured
  - address: http://ip:5700
    username: admin #user name
    password: admin #password
    cid: xxx #cid of Qinglong application, visible when creating application
    secret: xxxx #The secret of Qinglong application, which is visible when the application is created
    weigth: 10 #In the weight balance mode, the higher the weight, the more ck you get. The default value is 1
    mode: #Set the mode of the container separately
    limit: 50 #Limit the number of containers
  #- address: http://ip:5800
    #username: admin #user name
    #password: admin #password
    #cid: xxx #cid of Qinglong application, visible when creating application
    #secret: xxxx #The secret of Qinglong application, which is visible when the application is created
    #weigth: 9 #In the weight balance mode, the higher the weight, the more ck you get. The default value is 1
    #mode: #Set the mode of the container separately
    #limit: 50 #Limit the number of containers
theme: /root/xdd-plus/theme/admin.html #Add uses admin.html to customize the theme and supports local and network paths
static: ./static #Static files are convenient for importing css, js and other files when customizing QR code pages
master: ABC123 #Write the password for the plus version here and delete this note
database: /root/xdd-plus/.xdd.db
qywx_key:  #Enterprise wechat push key
daily_push: #Timed task
resident: jd_xxxxx #In the balanced mode, all containers share the same account pin, and multiple are spliced with '&'. It is not recommended to fill in, and the specified account assistance function will be realized later.
#Custom ua
user_agent:
telegram_bot_token:
telegram_user_id:
qquid: 123456789 #QQ number to receive notification, QQ number of administrator
qqgid: 12345678 #Monitored group
default_priority: #Default priority for new users
no_ghproxy: false #Whether the update resource does not use the proxy default is false
qbot_public_mode: true  #qq robot group chat mode, default private chat mode
#Don't blame me for the failure caused by the non configuration of the new AtTime parameter
AtTime:  #Fill in the number between 1 and 12. If it is wrong, the default value is 10. Peak timeout is easy to occur at 10 o'clock.
daily_asset_push_cron: 0 8 * * * #Automatic asset push at 8:00
repos:
  - git: https://github.com/shufflewzc/faker2.git
  - path: https://raw.githubusercontent.com/shufflewzc/faker2/main/jd_all_bean_change.js
After filling in and saving, execute the following command to issue the QR code, and bind it with the qq robot number (no QR code will be issued if the filling is wrong)
cd xdd-plus && ./xdd
After that, ctrl+c exits, runs it again and lets it hang up in the background again
./xdd
./xdd -d
Basically completed, send your own ck to the robot for automatic binding.
Step 4 install configuration files and dependencies
No nonsense, every tutorial will have dependencies. Just execute it line by line, regardless of the errors.
Normal users are node.js
For IOS software users, please use https://raw.githubusercontent.com/NobyDa/Script/master/JD-DailyBonus/JD_DailyBonus.js
download
cd /usr/local  && wget https://nodejs.org/dist/v14.17.5/node-v14.17.5-linux-x64.tar.xz

decompression
xz -dk node-v14.17.5-linux-x64.tar.xz  && tar -xvf node-v14.17.5-linux-x64.tar

Copy below profile File (see previous steps)

export NODE_HOME=/usr/local/node-v14.17.5-linux-x64
export PATH=$PATH:$NODE_HOME/bin
export NODE_PATH=$NODE_HOME/lib/node_modules

take effect
source /etc/profile
Must pretend to rely on (don't be lazy)
1, Installation got
cd xdd-plus  &&  npm install got

2, Installation tough-cookie
cd scripts && npm install png-js crypto-js download got http-server request tough-cookie tunnel ws

3, Installation crypto-js
npm install crypto-js

4, Graphics verification depends on the requirements of pet Wang graphics check-in
docker exec -it ql bash -c "cd scripts && npm i -S png-js"

5, Partial script dependency
docker exec -it ql bash -c "apk add --no-cache build-base g++ cairo-dev pango-dev giflib-dev && cd scripts && npm install canvas --build-from-source"

6, Check in and pet Wang Wang exchange must be loaded with dependent documents
cd ql/scripts && wget  https://cdn.jsdelivr.net/gh/mzljjkj/mzkj@master/20210819/66ed73000262d5876ea6464d5b6280a5/66ed73000262d5876ea6464d5b6280a5.zip && unzip 66ed73000262d5876ea6464d5b6280a5.zip

7, All dependent
docker exec -it ql bash -c "npm install -g typescript"
docker exec -it ql bash -c "npm install axios date-fns"

docker exec -it ql bash -c "npm install png-js"
docker exec -it ql bash -c "npm install -g npm"
docker exec -it ql bash -c "pnpm i png-js"
docker exec -it ql bash -c "pip3 install requests"
docker exec -it ql bash -c "apk add --no-cache build-base g++ cairo-dev pango-dev giflib-dev && cd scripts && npm install canvas --build-from-source"
docker exec -it ql bash -c "apk add python3 zlib-dev gcc jpeg-dev python3-dev musl-dev freetype-dev"
docker exec -it ql bash -c "cd /ql/scripts/ && apk add --no-cache build-base g++ cairo-dev pango-dev giflib-dev && npm i && npm i -S ts-node typescript @types/node date-fns axios png-js canvas --build-from-source"
ending
Most of the above resources come from the Internet. Please refer to them. Tribute to the authors.
Join the exchange group 334996635 and all great gods will answer for you.