(1) Introduction
-
zap is a log repository for comparing fire in go. It provides different levels of logs and is fast
-
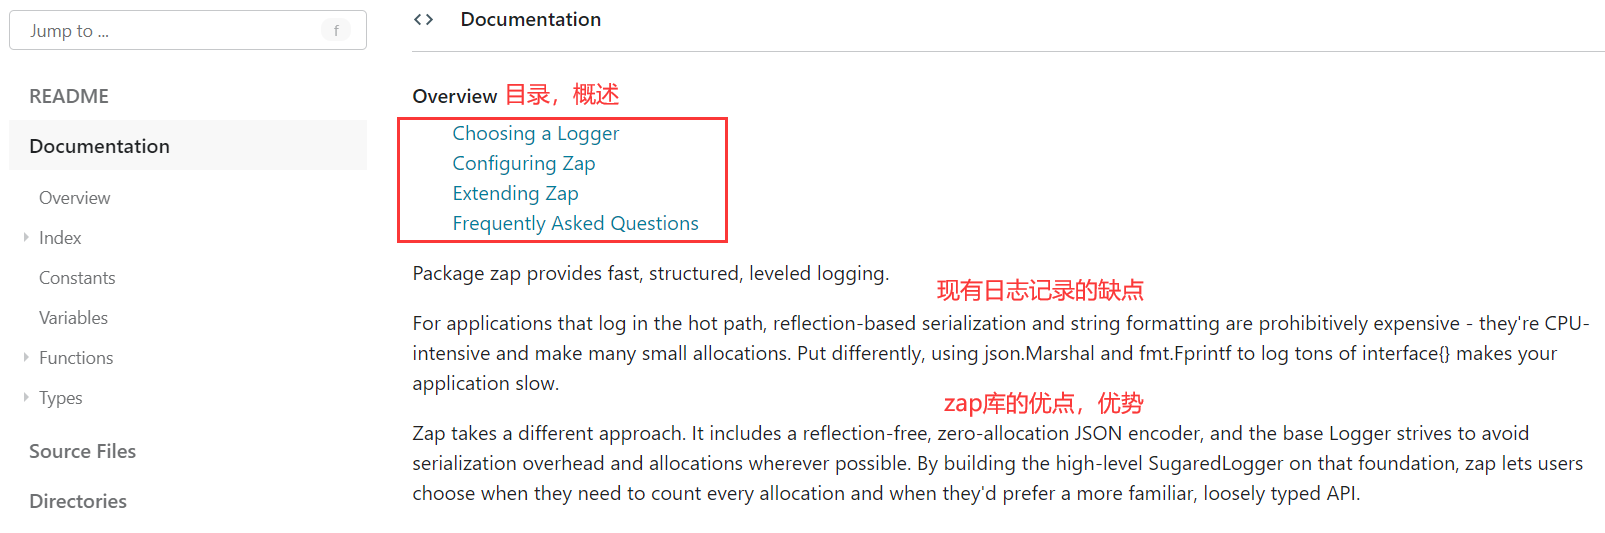
Official documents: https://pkg.go.dev/go.uber.org/zap#section-readme You can also use github to search zap directly. The document has a comprehensive introduction. We encourage you to watch the documents. You can have video materials for relevant guidance, but you must see the official documents when learning. In particular, the documentation is also suitable for getting started. First, look at the Quick Start section. Generally, there are introduction examples and the overall framework.
-
The official documents are very clear, with relevant data comparison, and generally have an example folder to provide relevant programming examples.
-
Quick Start: zap provides two types of loggers:
- (1) Sugarlogger: (sugar Logger)
-
Official documentation: use sugarlogger in environments with good performance but not critical. It is 4-10 times faster than other structured log packages and contains structured and printf style APIs.
// Create a logger
logger, _ := zap.NewProduction()
defer logger.Sync() // flushes buffer, if any
sugar := logger.Sugar()
sugar.Infow("failed to fetch URL",
  // The structured context is a loosely typed key value pair.
  "url", url,
  "attempt", 3,
  "backoff", time.Second,
)
sugar.Infof("Failed to fetch URL: %s", url)
-
- (2)Logger
-
Use Logger when performance and type safety are critical. It's even faster than sugarlogger and allocates much less, but it only supports structured logging.
logger, _ := zap.NewProduction()
defer logger.Sync()
logger.Info("failed to fetch URL",
  // A structured context as a strongly typed field value
  zap.String("url", url),
  zap.Int("attempt", 3),
  zap.Duration("backoff", time.Second),
)
-
- For more information, see the document choose a logger
-
Choosing between Logger and sugarlogger does not require application wide decisions: switching between the two is simple and cheap. As can be seen from the above, there is little difference between the creation and use of the two.
logger := zap.NewExample()
defer logger.Sync()
sugar := logger.Sugar()
plain := sugar.Desugar()
-
- (1) Sugarlogger: (sugar Logger)
(2) Explain zap
1. Log level
- Under the const document, the definition of log level is introduced
const (
	// DebugLevel logs are typically voluminous, and are usually disabled in
	// production.
	DebugLevel = zapcore.DebugLevel
	// InfoLevel is the default logging priority.
	InfoLevel = zapcore.InfoLevel
	// WarnLevel logs are more important than Info, but don't need individual
	// human review.
	WarnLevel = zapcore.WarnLevel
	// ErrorLevel logs are high-priority. If an application is running smoothly,
	// it shouldn't generate any error-level logs.
	ErrorLevel = zapcore.ErrorLevel
	// DPanicLevel logs are particularly important errors. In development the
	// logger panics after writing the message.
	DPanicLevel = zapcore.DPanicLevel
	// PanicLevel logs a message, then panics.
	PanicLevel = zapcore.PanicLevel
	// FatalLevel logs a message, then calls os.Exit(1).
	FatalLevel = zapcore.FatalLevel
)
2. Build looger
- At the end of the document Configuring Zap Medium:
The easiest way to build a Logger is to use zap's inherent presets: new example, new production, and new development. These presets build a Logger with a function call. - The loggers created by the three are different. We can find the introduction of the three functions under the type logger in the official document, corresponding to different scenarios.
- func NewExample(options ...Option) *Logger
- NewExample builds a Logger specifically designed for zap's testable example. It writes the logs of DebugLevel and above as JSON to the standard output, but omits the timestamp and call function to keep the sample output short and deterministic
- func NewProduction(options ...Option) (*Logger, error)
- NewProduction builds a reasonable production logger that writes logs of infolevel and above to standard errors in JSON.
- It is a shortcut to NewProductionConfig(). build(... Option).
- func NewDevelopment(options ...Option) (*Logger, error)
- NewDevelopment builds a development logger that writes debug level and above logs to standard errors in a human friendly format.
- This is a shortcut to NewDevelopmentConfig().Build(... Option)
- It's like going to the store to sell goods. At the beginning, it comes with several configured models. Generate the corresponding logger through configuration. We can also customize the configuration and generate our own customized logger.
- func NewExample(options ...Option) *Logger
3. Method use
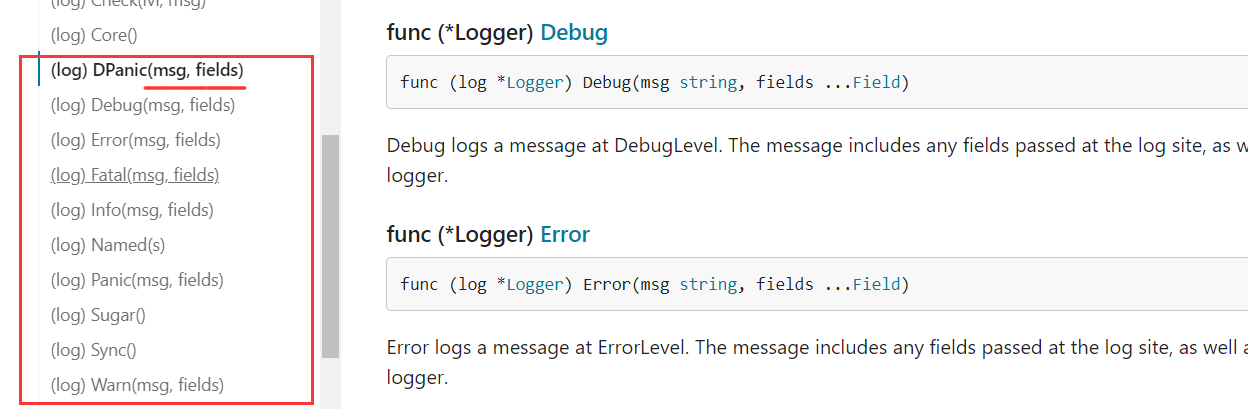
- In the types/logger and types/SaguredLogger of the document, the usage methods of the relevant looger record messages are recorded.
-
Take logger as an example:
-
Both accept an msg String followed by optional fields. Field type, you can view many types of documents.
-
Write a Get request to access the corresponding web address and record the log information
package main import ( "net/http" "time" "go.uber.org/zap" ) func main() { // To create a logger, you can select other presets, which will have different output effects logger, _ := zap.NewProduction() defer logger.Sync() // flushes buffer, if any // Define url url := "http://www.baidu.com" resp, err := http.Get(url) // Direct error log if err != nil { logger.Error("Access failed", zap.String("url", url), // Keep up with error messages zap.Error(err), ) }else { // Print log information at info level logger.Info("Successfully accessed!", // A structured context as a strongly typed field value zap.String("url", url), zap.String("status", resp.Status), zap.Duration("backoff", time.Second), ) resp.Body.Close() } }- The results are:
{"level":"info","ts":1637632861.812557, "caller":"zap Log Library Learning/main.go:25", "msg":"Successfully accessed!", "url":"http://www.baidu.com", "status":"200 OK","backoff":1} {"level":"error", "ts":1637633063.4520404, "caller":"zap Log Library Learning/main.go:18", "msg":"Access failed", "url":"http://www.xxx.com", "error":"Get \"http://www.xxx.com\": dial tcp 69.171.228.20:80: connectex: A connection attempt failed because the connected party did not properly respond after a p eriod of time, or established connection failed because connected host has failed to respond.","stacktrace":"main.main\n\tD:/gofiles/go-learning -notes/go-learning/zap Log Library Learning/main.go:18\nruntime.main\n\tD:/software/go/go1.15/src/runtime/proc.go:204"}- You can see the confidence related to the terminal prompt after executing the program. msg is set by yourself, time, url, etc. There is also a caller information indicating the number of rows where the problem occurred.
-
The generation log created by NewDevelopment() is like this: separated by spaces. Missing caller
2021-11-23T10:08:26.171+0800 INFO zap Log Library Learning/main.go:25 Successfully accessed! {"url": "http://www.baidu.com", "status": "200 OK", "backoff": "1s"} -
NewExample()
{"level":"info","msg":"Successfully accessed!","url":"http://www.baidu.com","status":"200 OK","backoff":"1s"}
-
4. Customized logger
-
You can see from the source code of NewProduction that the actual bottom layer is: NewProductionConfig().Build(options...)
-
The NewProductionConfig() method was called, created internally, and returned a Config object.
-
Build. Internally, through the configuration of Config object, use the New method to generate the corresponding logger object and return.
-
In other words, this is the NewProduction () and other methods preset by the zap library. Internally, the corresponding logger log object is generated according to the specified configuration. We can also call our own internal related methods, imitate the related processes of NewProductionConfig().Build(options...), and create and customize the logger object ourselves.
-
Observe what the New method needs to generate a logger. In the Build function:
// To return a Core object, three parameters are required
func NewCore(enc Encoder, ws WriteSyncer, enab LevelEnabler) Core
func New(core zapcore.Core, options ...Option) *Logger

log := New(
		zapcore.NewCore(enc, sink, cfg.Level),
		cfg.buildOptions(errSink)...,
	)
-
Official introduction to Core: you need to open the corresponding package and view the document
Core is a minimal and fast recorder interface. It is designed for library authors to encapsulate a more friendly API.
-
-
The NewProductionConfig() function returns the corresponding Config object. The Build function generates a logger object according to this configuration.
-
Of course, we can customize this to generate our own logger. Let's take a look at its source code
// NewProductionConfig is a reasonable production log configuration.
//Enable logging at infolevel and above.
//It uses a JSON encoder, writes standard errors, and enables sampling.
// stacktrace will be automatically included in the logs of ErrorLevel and above.
func NewProductionConfig() Config {
	return Config{
		// log level
		Level:       NewAtomicLevelAt(InfoLevel),
		Development: false,
		Sampling: &SamplingConfig{
			Initial:    100,
			Thereafter: 100,
		},
		// Coding mode
		Encoding:         "json",
		// EncoderCofig to configure the default configuration of the encoder editor.
		EncoderConfig:    NewProductionEncoderConfig(),
		// Open the file and write the log information here.
		OutputPaths:      []string{"stderr"},
		ErrorOutputPaths: []string{"stderr"},
	}
}
(1) How to write log files
-
According to the custom logger above, three parameters are required to create a Core core, including the control of writing files.
-
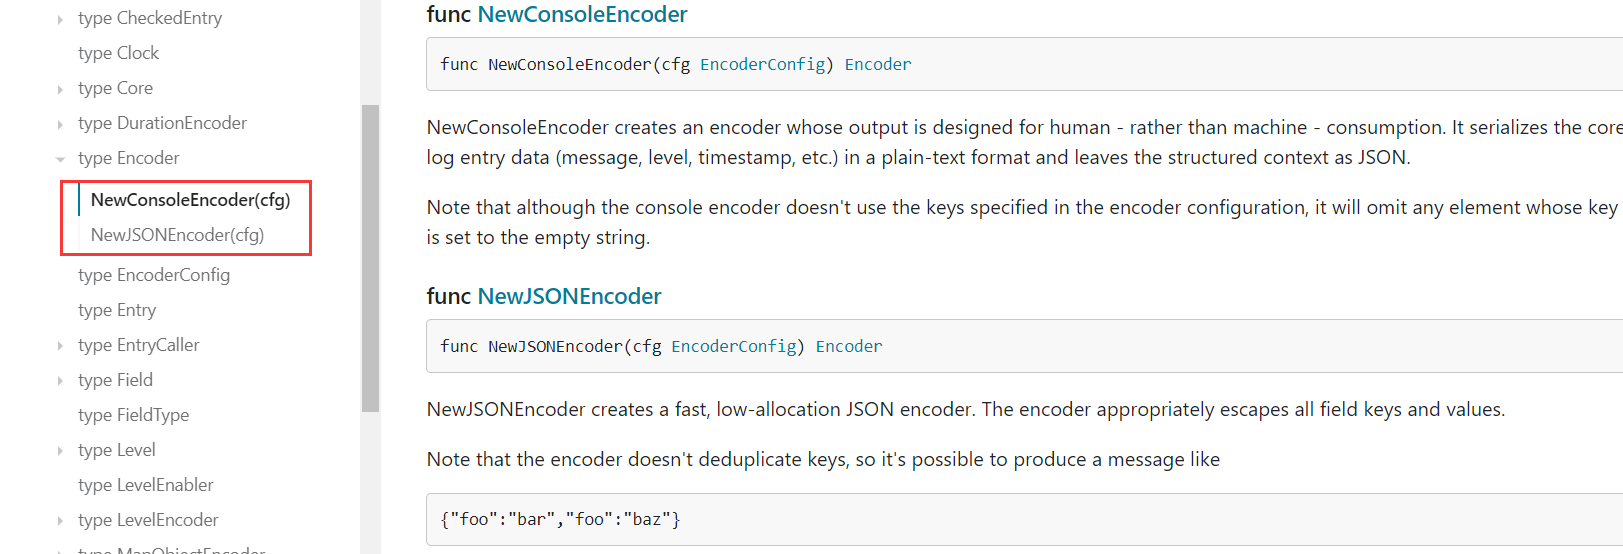
Encoder: editor. Provides two ways to edit information.
- Parameters to be passed can be passed in using the default EncoderConfig: NewProductionEncoderConfig().
- A text style, a json style information input.
-
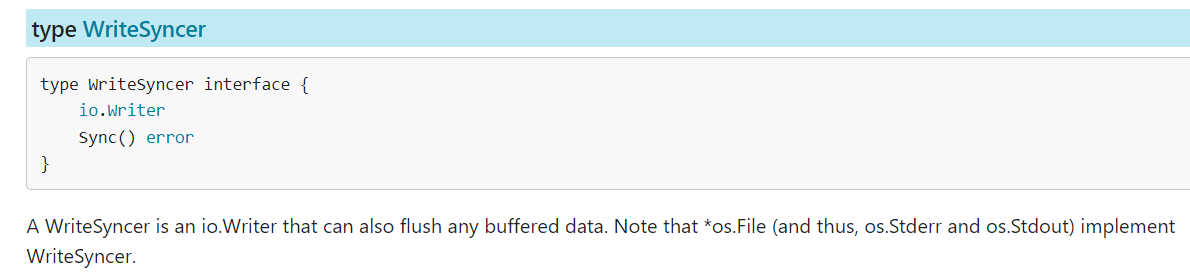
Writesynchronizer: specifies where the log is written. You can define your own specified file path
-
Return a through the func addsync (W io. Writer) writesynchronizer method.
AddSync is used to convert io. Writer to WriteSyncer. It tries to be intelligent: if a specific type of Io. Writer implements WriteSyncer. We will use the existing Sync method. If not, we will add a no action synchronization.// Create file object file, _ := os.Create("./getLog.log") // Or use the OpenFile function to add on the original basis. // file, _ := os.OpenFile("./getLog.log", os.O_APPEND | os.O_RDWR, 0744) // Generate WriteSyncer wSy := zapcore.AddSync(file)
-
-
LevelEnabler: sets which level of logs will be written
- Corresponding to the log level described above; For example:
zapcore.DebugLevel
- Corresponding to the log level described above; For example:
-
To create a custom logger:
-
According to the understanding of the above three parameters, you can specify the establishment of the file
// There is still one configuration information left, but it is OK
// By default, we call the NewProduction () method without passing any configuration.
log := New(
		zapcore.NewCore(Transfer editor (two), Custom file output, cfg.Level(Level)),
		)
- After the establishment, it can be used to print the log to the specified file.
-
In addition, the preset method of generating loggers in zap is to generate relevant configurations through NewProductionConfig(). It can also be done without so much trouble. I think it's OK to directly customize a NewProductionConfig(), and then follow the corresponding steps. The Build method is to generate a logger through the configured Config object.
-
Here is a series of tutorial articles: https://blog.csdn.net/weixin_39620252/article/details/111136566
-
Like me: to rewrite the method, just add a file name
func myNewProduction(options ...zap.Option) (*zap.Logger, error) {
	return myNewProductionConfig().Build(options...)
}

func myNewProductionConfig() zap.Config {
	config := zap.NewProductionConfig()
	// The configuration output path is. / test.log. Everything else remains the same. The internal default is json coding. Just json and console. You can see the introduction of the Encoding field.
	config.OutputPaths = []string{"./test.log"}
	return config
}

// Create logger object
logger, _ := myNewProduction()
-
(2) Change the time code and add details of the caller
Time format (or encoding) changes
-
In the time display section, we can see the configuration of the Encoder message editor object in the field created in the default NewProductionConfig() function
Its description can also be found in the document: https://pkg.go.dev/go.uber.org/zap@v1.19.1/zapcore#EncoderConfigfunc NewProductionEncoderConfig() zapcore.EncoderConfig { return zapcore.EncoderConfig{ // All key s are defined output field names. TimeKey: "ts", LevelKey: "level", NameKey: "logger", CallerKey: "caller", FunctionKey: zapcore.OmitKey, MessageKey: "msg", StacktraceKey: "stacktrace", LineEnding: zapcore.DefaultLineEnding, EncodeLevel: zapcore.LowercaseLevelEncoder, EncodeTime: zapcore.EpochTimeEncoder, EncodeDuration: zapcore.SecondsDurationEncoder, EncodeCaller: zapcore.ShortCallerEncoder, } -
Let's go along the document or directly click EncodeTime: zapcore.EpochTimeEncoder. EncodeTime, as its name implies: time code. It is controlled here. After clicking in, there are several functions for setting time code below the function, which can also be found in the document.
-
Then we can directly modify the corresponding configuration to meet our user-defined requirements.
-
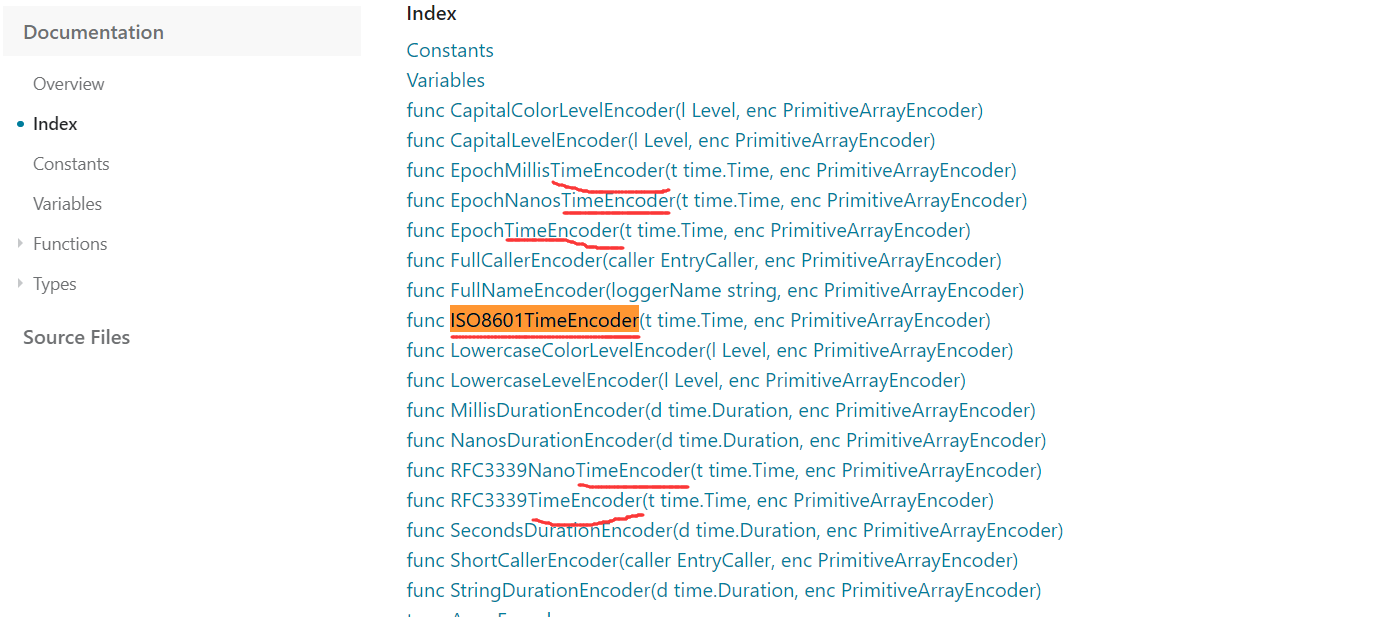
Select the format of ISO8601TimeEncoder: "2006-01-02T15:04:05.000Z0700" which is easy to understand.
-
Follow the above method to modify the imported file:
func myNewProductionConfig() zap.Config { config := zap.NewProductionConfig() // Modify import file path config.OutputPaths = []string{"./test.log"} // Modify time format: config.EncoderConfig.EncodeTime = zapcore.ISO8601TimeEncoder return config }- Run again and the time code will change
{"level":"info","ts":"2021-11-23T17:13:39.430+0800","caller":"zap Log Library Learning/main.go:43","msg":"Successfully accessed!","url":"http://www.baidu.com","status":"200 OK","backoff":1} -
The way we write here is to constantly modify the configuration preset for us by NewProductionConfig(). If you want to make major changes and create your own Core step by step, then redefine your own NewProductionEncoderConfig().
-
Displays the details of the added caller.
-
According to the understanding of time, it is easy to think of here: the EncodeCaller in the configuration item can also specify relevant functions to print the caller's information.
-
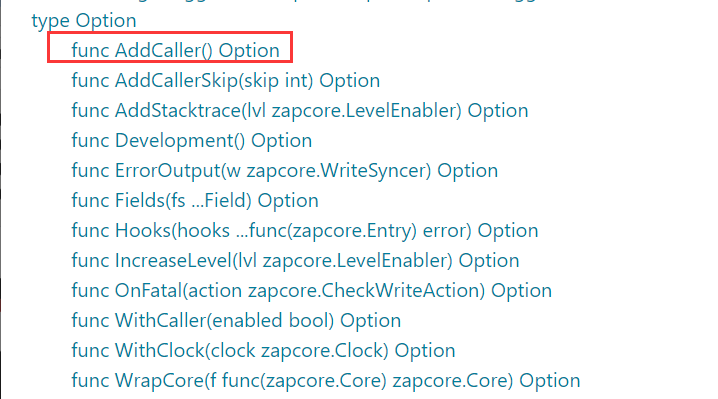
Another way is: we create a Core, zap.New() creates a logger, and analyzes the Options type of the second parameter. Relevant methods can be found in the document, including adding debugging methods to display caller information.
func New(core zapcore.Core, options ...Option) *Logger
log := zap.New(
		zapcore.NewCore(enc, sink, cfg.Level),
		zap.AddCaller(),
	)
5. Lumberjack cuts and archives log files
-
This part is more difficult. I don't understand it without actual operation. Refer to articles or relevant videos, and use the two together.
-
If there are too many logs, the log file will become larger and larger. If there are several G's, it will be too troublesome to open and operate! Then it is necessary to split and archive the log file.
-
Third party libraries need to be installed: Lumberjack: go get -u github.com/natefinch/lumberjack
-
When using, the file is still open. For use with zap, you need to create a new zapcore.WriteSyncer.
-
lumberjack.Logger implements the io.writer interface and can be used as a parameter.
func getLogWriter() zapcore.WriteSyncer { lumberJackLogger := &lumberjack.Logger{ Filename: "./test.log", // Import file name MaxSize: 10, // Size M megabytes MaxBackups: 5, // Maximum number of backups MaxAge: 30, // Maximum backup days Compress: false, // Compress } return zapcore.AddSync(lumberJackLogger) } -
Test:
// Create a new logger object encoder := zapcore.NewJSONEncoder(zap.NewProductionEncoderConfig()) writeSyncer := getLogWriter() // Create core newCore := zapcore.NewCore(encoder, writeSyncer, zapcore.InfoLevel) // Create logger logger := zap.New(newCore) // Insert log for i := 0; i < 10000; i++ { logger.Info("Successfully accessed!", // A structured context as a strongly typed field value zap.String("url", "Test archiving"), zap.String("status", "Add data"), zap.Duration("backoff", time.Second), ) } defer logger.Sync() // flushes buffer, if any- Effect display: create a new file with the current timestamp

- There are more than 80000 data in the archive

- There are only more than 3000 entries in test.log

- Effect display: create a new file with the current timestamp
6. Configure zap logging in the gin framework
- In the previous article: Explain in detail the source code analysis record, thinking process and understanding of go web framework for gin framework
- Explained the creation engine of gin.Default. By default, two middleware are added. One is logger log and the other is recover recovery. The logger provided by gin works here.
- Then we also need to encapsulate zap as a logger middleware (handler func).
- The specific implementation can be modified by referring to the implementation of the two logger recover middleware.
- The computer is too laggy to create a global logger object, and then it can be invoked in the project. It can also be added to middleware.
- Explained the creation engine of gin.Default. By default, two middleware are added. One is logger log and the other is recover recovery. The logger provided by gin works here.