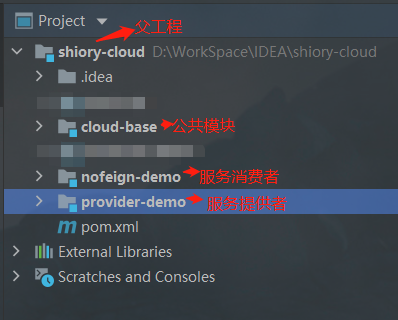
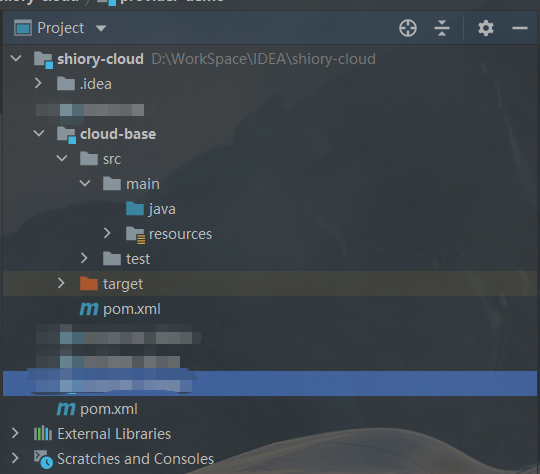
0. Final project structure
1. Build parent project
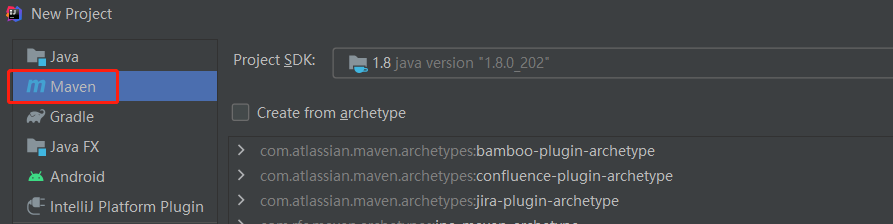
1. Construction project
In the last article( Version selection )In version selection, the version has been determined and a maven project is created

After creating the parent project, delete the src directory to the final structure
2. Change pom.xml file
Lock the versions of SpringBoot, SpringCloud and SpringCloud Alibaba in the pom.xml file and add the following contents. The dependency management tag is a locked version and is not a real dependency.
    <!-- SpringBoot-->
    <parent>
        <groupId>org.springframework.boot</groupId>
        <artifactId>spring-boot-starter-parent</artifactId>
        <version>2.3.2.RELEASE</version>
        <relativePath/>
    </parent>

    <properties>
        <!--JDK edition-->
        <java.version>1.8</java.version>
        <!--Character set encoding-->
        <project.build.sourceEncoding>UTF-8</project.build.sourceEncoding>
        <project.reporting.outputEncoding>UTF-8</project.reporting.outputEncoding>
        <!--spring-cloud edition-->
        <spring.cloud-version>Hoxton.SR9</spring.cloud-version>
        <!--spring-cloud-alibaba edition-->
        <spring.cloud.alibaba-version>2.2.6.RELEASE</spring.cloud.alibaba-version>
    </properties>

    <dependencyManagement>
        <dependencies>
            <!--spring-cloud-->
            <dependency>
                <groupId>org.springframework.cloud</groupId>
                <artifactId>spring-cloud-dependencies</artifactId>
                <version>${spring.cloud-version}</version>
                <type>pom</type>
                <scope>import</scope>
            </dependency>
            <!--spring-cloud-alibaba-->
            <dependency>
                <groupId>com.alibaba.cloud</groupId>
                <artifactId>spring-cloud-alibaba-dependencies</artifactId>
                <version>${spring.cloud.alibaba-version}</version>
                <type>pom</type>
                <scope>import</scope>
            </dependency>
        </dependencies>
    </dependencyManagement>

    <repositories>
        <repository>
            <id>aliyun</id>
            <name>aliyun Repository</name>
            <url>http://maven.aliyun.com/nexus/content/groups/public</url>
            <snapshots>
                <enabled>false</enabled>
            </snapshots>
        </repository>
    </repositories>
If the SpringBoot version reports an error, add the following content to the pom file
    <repositories>
        <repository>
            <id>spring-snapshots</id>
            <url>http://repo.spring.io/libs-snapshot</url>
        </repository>
    </repositories>

    <pluginRepositories>
        <pluginRepository>
            <id>spring-snapshots</id>
            <url>http://repo.spring.io/libs-snapshot</url>
        </pluginRepository>
    </pluginRepositories>
2. Extract common module
Because there are many services in the microservice project, the common part is extracted to build a Module
1. Build Module
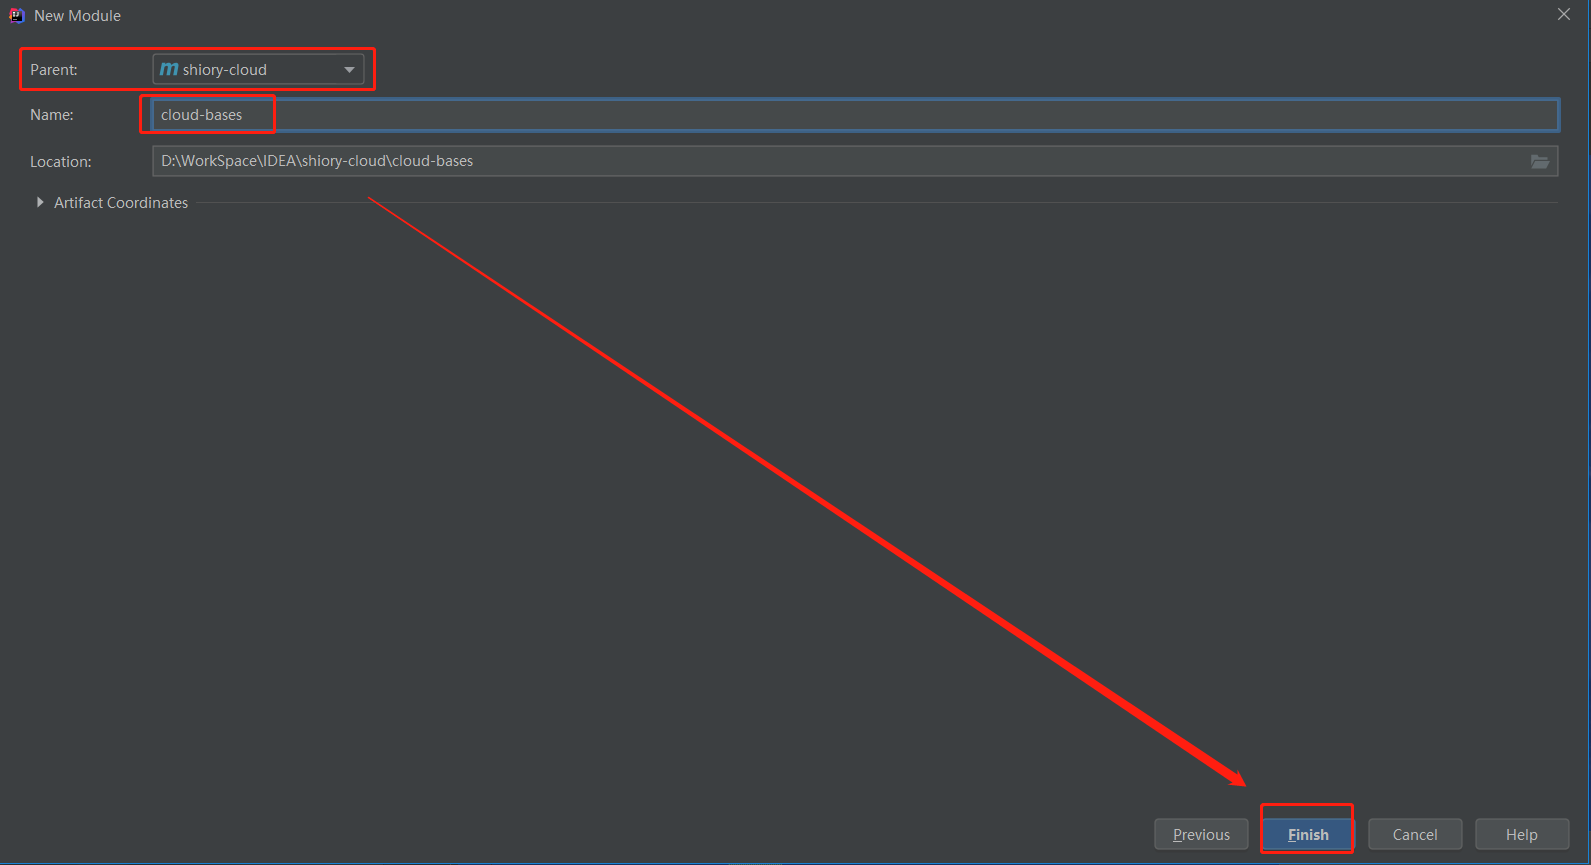
Right click the project -- New--Module, select Maven project, and click Next

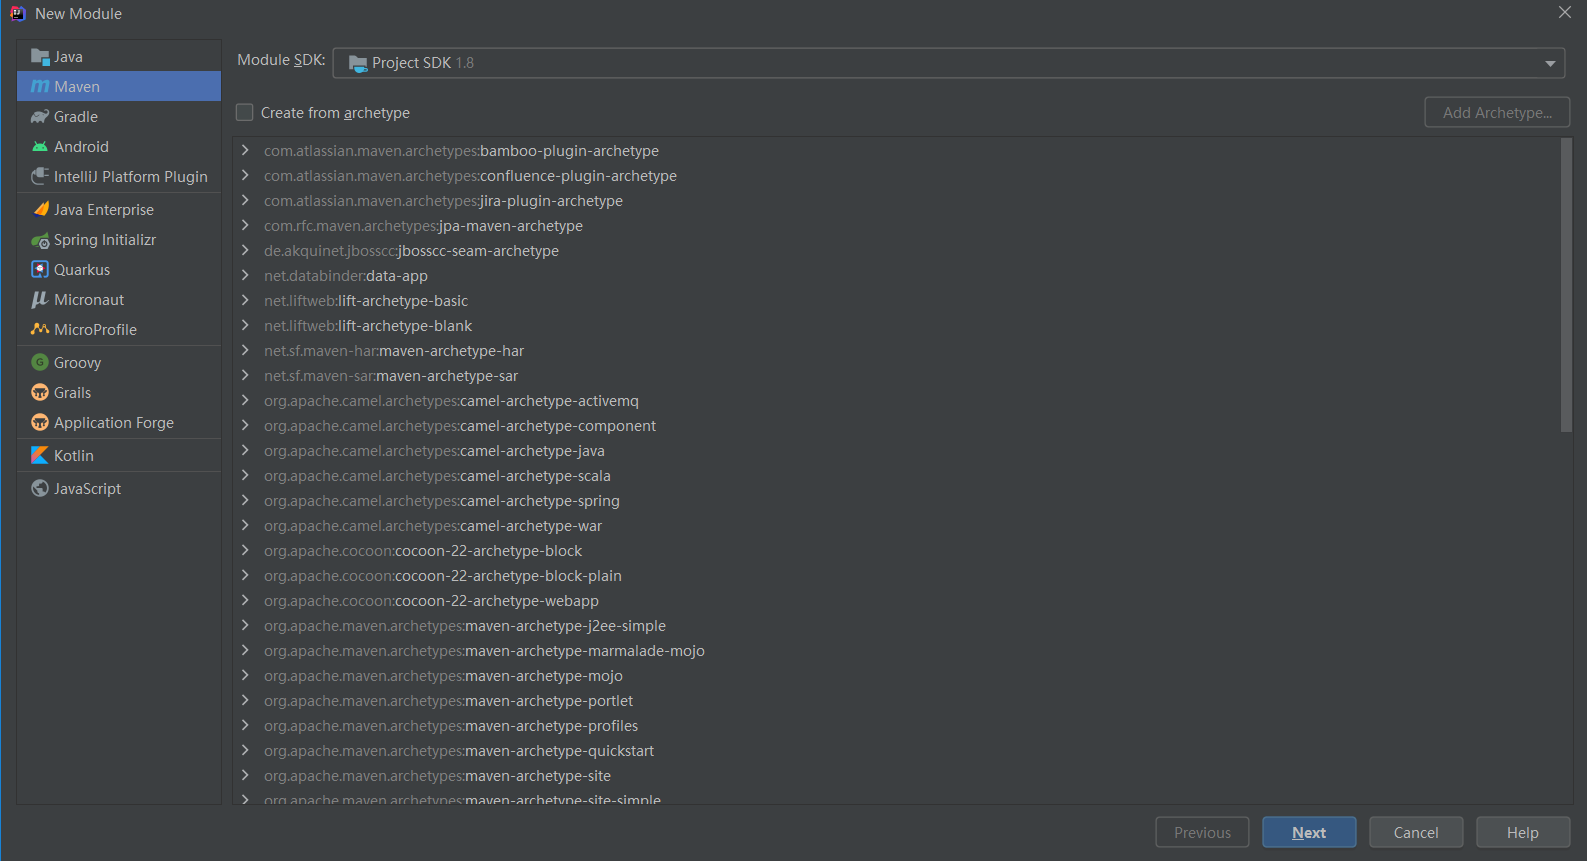
Select the parent project, enter the module name, and click Finish
2. Modify pom.xml file
The Nacos scenario dependency is temporarily used for service registration and discovery. There is no need to write the version here because the version has been locked in the parent project
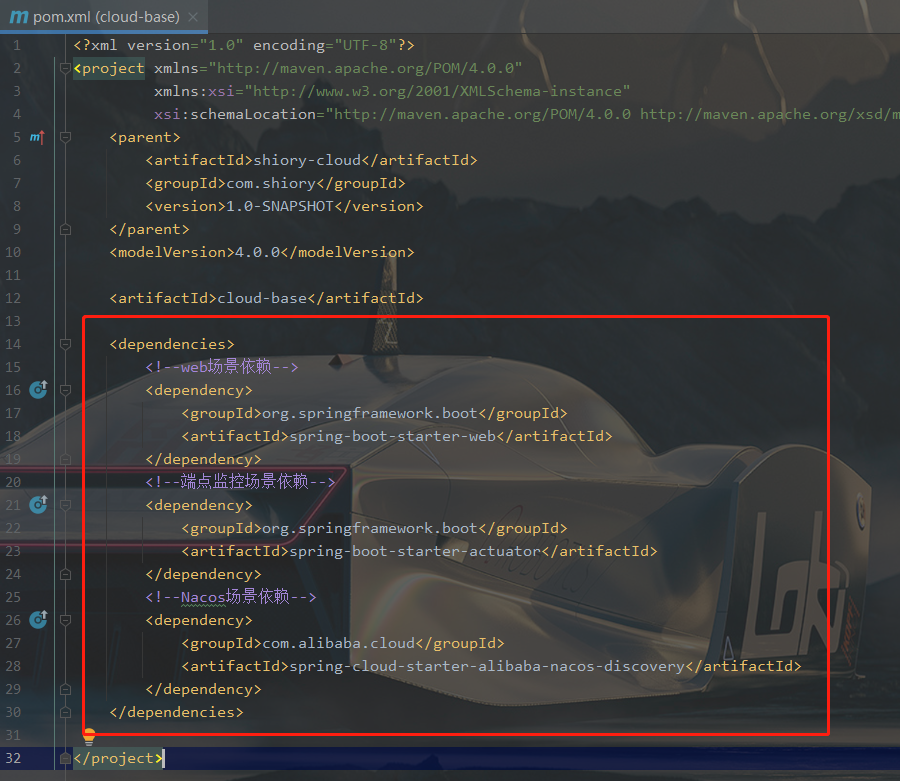
    <dependencies>
        <!--web Scenario dependency-->
        <dependency>
            <groupId>org.springframework.boot</groupId>
            <artifactId>spring-boot-starter-web</artifactId>
        </dependency>
        <!--Endpoint monitoring scenario dependency-->
        <dependency>
            <groupId>org.springframework.boot</groupId>
            <artifactId>spring-boot-starter-actuator</artifactId>
        </dependency>
        <!--Nacos Scenario dependency-->
        <dependency>
            <groupId>com.alibaba.cloud</groupId>
            <artifactId>spring-cloud-starter-alibaba-nacos-discovery</artifactId>
        </dependency>
    </dependencies>
3. Project structure
3. Build service provider
1. Build Module
Right click the project -- New--Module, select Maven project, click Next, select the parent project, enter the module name, and click Finish
2. Change pom.xml file
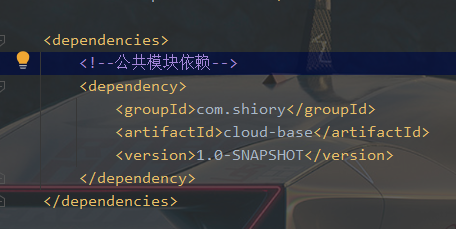
Add the dependency of common module in pom.xml
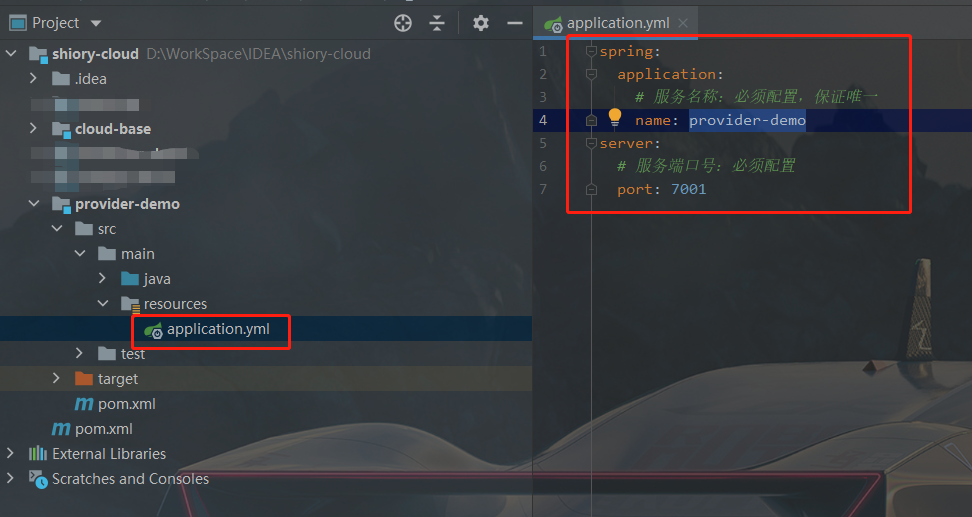
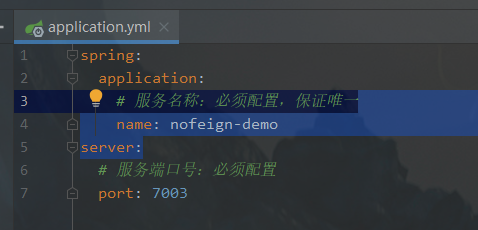
3. Create a new application.yml file
Create a new application.yml file in the resources directory, and add the service name and port. The service name and port of each module must be unique
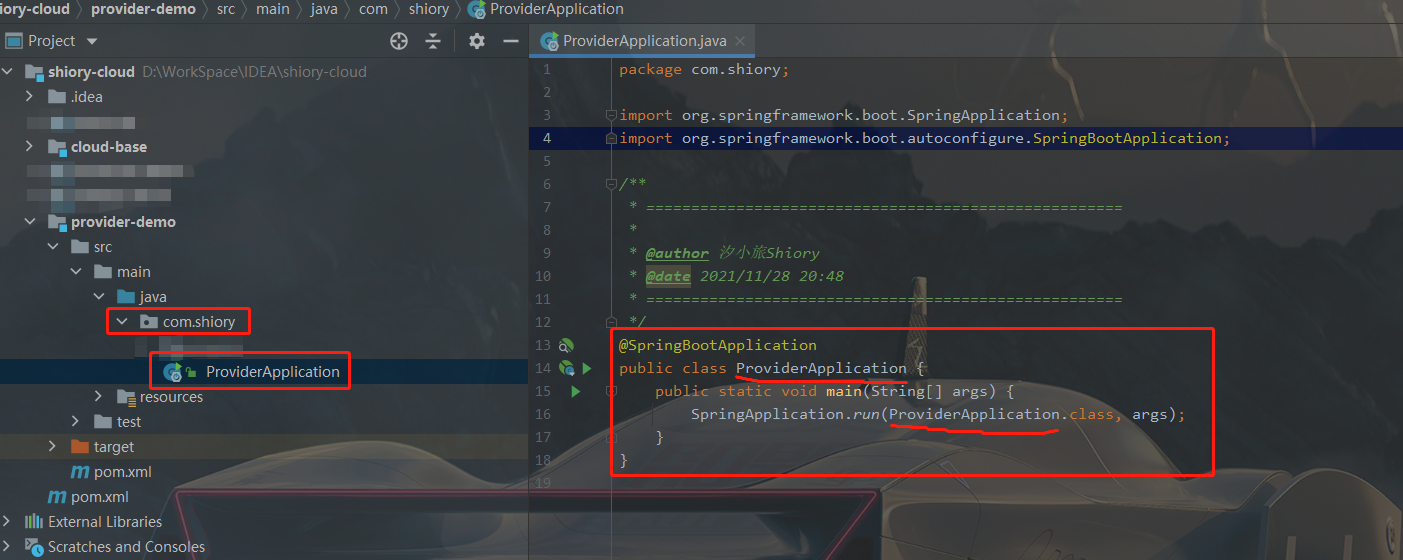
4. New main startup class
Create a new startup class in src/main/java
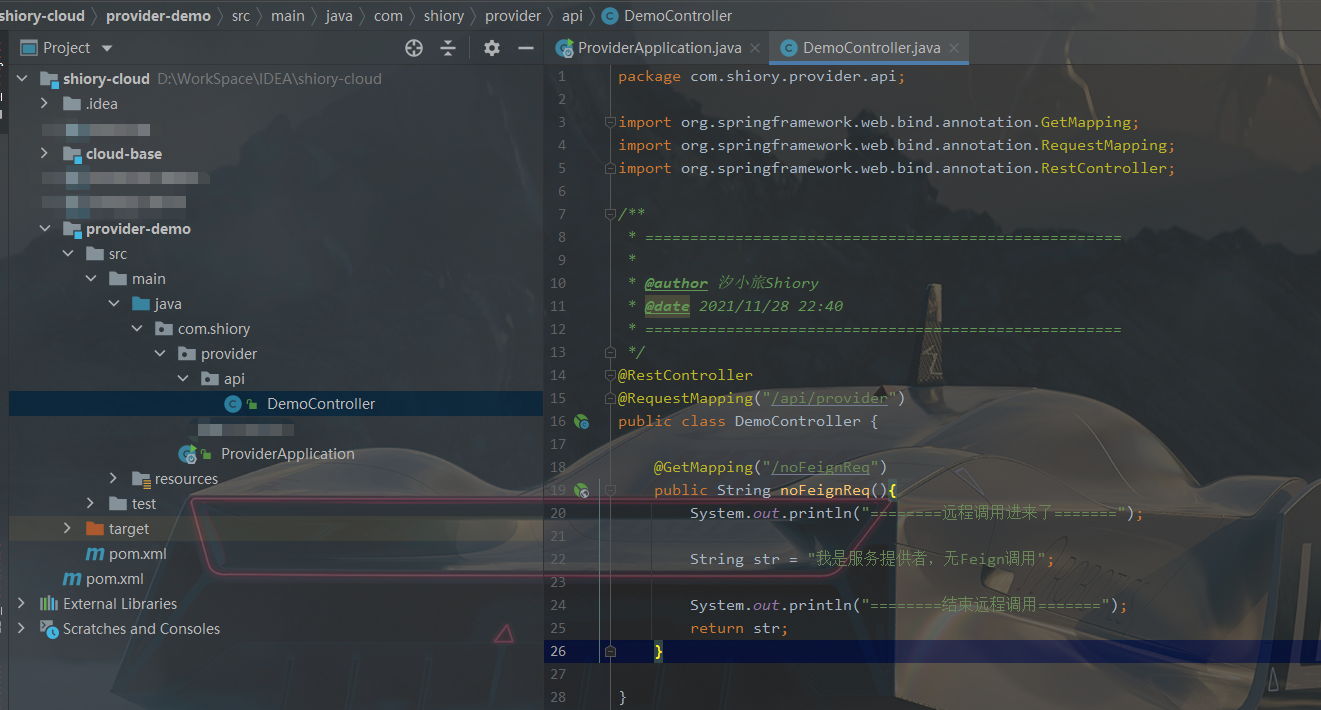
5. New business class
Create a new Controller and expose an interface. (here is a simple new Controller. The real business classes include Entity, Dao, Service and Controller)
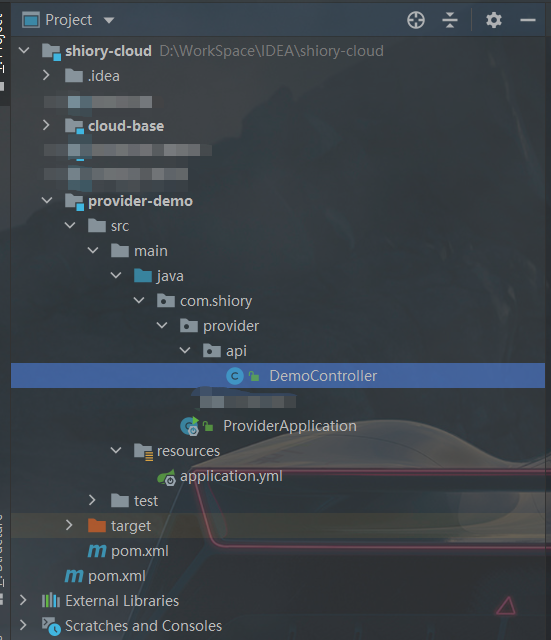
6. Module structure
4. Build service consumers
1. Build Module
Similarly, build a service provider
2. Change pom.xml file
Similarly, build a service provider
3. Create a new application.yml file
Similarly, to build a service provider, you need to modify the service name and port
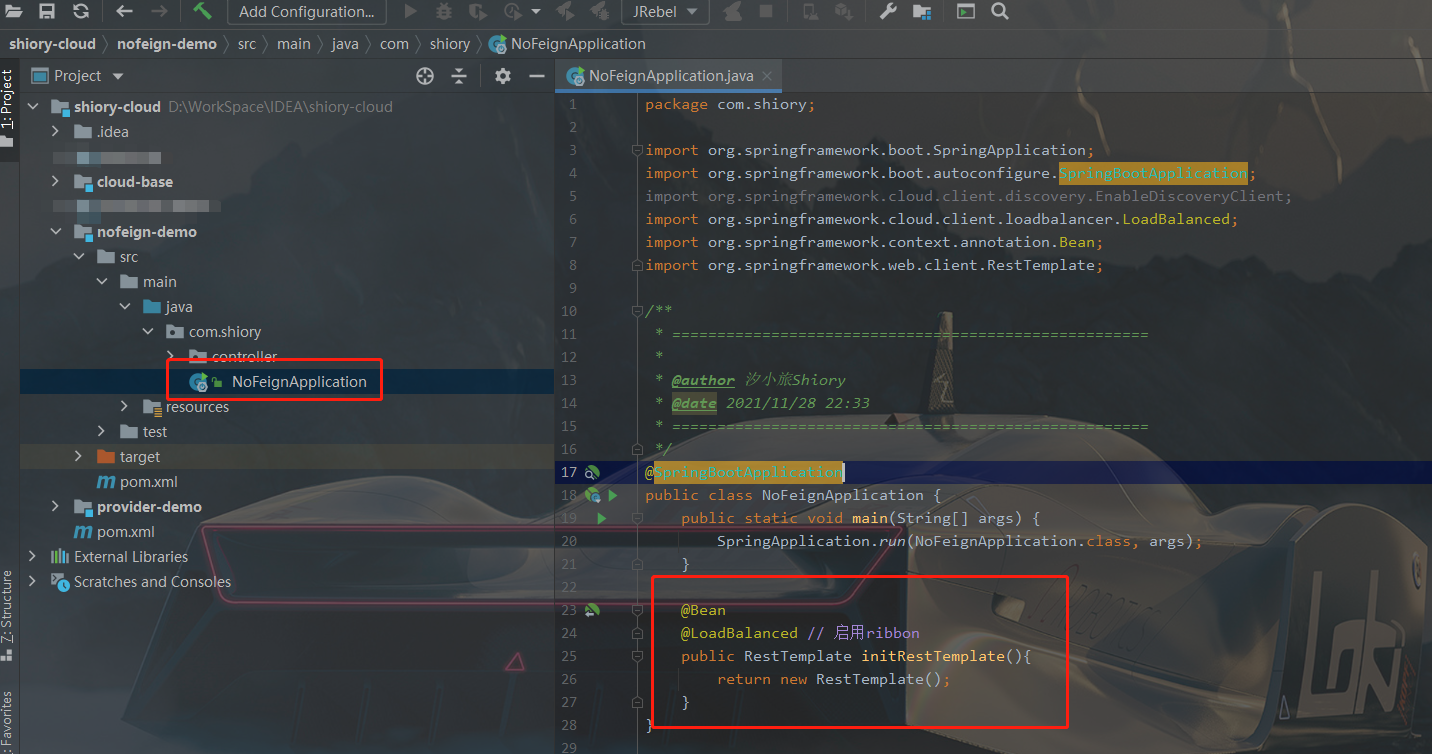
4. New main startup class
Similarly, build a service provider, but you need to inject RestTemplate into the startup class and turn on the ribbon (@ LoadBalanced annotation)
Inject RestTemplate: implement remote call
Enable ribbon: when calling with the service name of the service provider, resolve the name of the service provider to the real IP and port
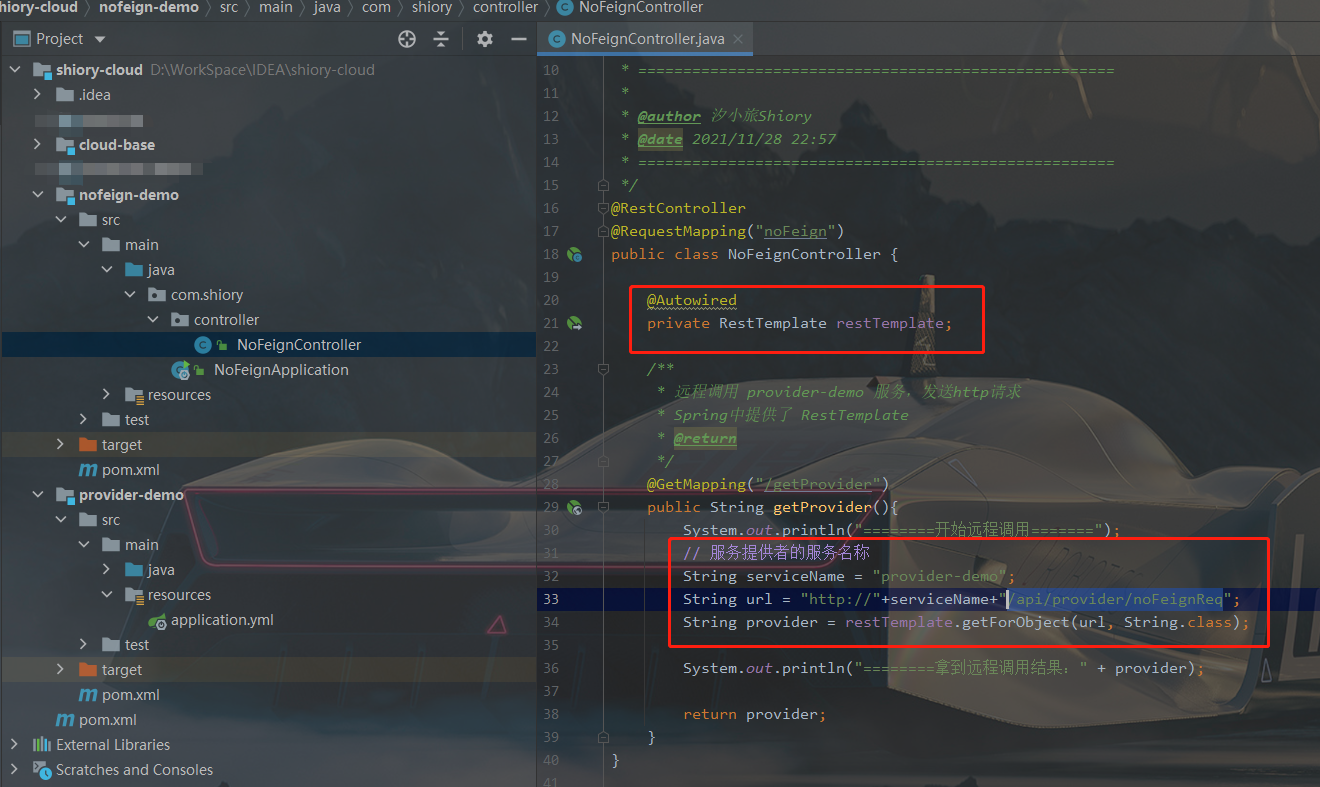
5. New business class
Similarly, build a service provider, but this is the interface exposed by the calling service provider
When building a service provider, you can get the following information about the service provider
Service Name: provider demo
Interface exposed by service: / api/provider/noFeignReq
Response return value type: String
6. Module structure
