This series of articles is to explain Python OpenCV image processing knowledge. In the early stage, it mainly explains the introduction of image and the basic usage of OpenCV. In the middle stage, it explains various algorithms of image processing, including image sharpening operator, image enhancement technology and image segmentation. In the later stage, it studies the application of image recognition, image classification and target detection combined with in-depth learning.
The previous article introduced Python calling OpenCV to realize image fusion, image addition and subtraction, image logical operation and type conversion. This article will explain image scaling, image rotation, image flipping and image translation in detail. I hope the article is helpful to you. If there are deficiencies, please forgive me~
- 1, Image scaling
- 2, Image rotation
- 3, Image flip
- 4, Image translation
All source code of this series in github:
- https://github.com/eastmountyxz/ ImageProcessing-Python
1, Image scaling
Image scaling is mainly realized by calling the resize() function, as follows:
- result = cv2.resize(src, dsize[, result[. fx[, fy[, interpolation]]]])
src represents the original image, dsize represents the zoom size, and fx and fy can also represent the zoom size multiple. Set one of them (dsize or fx\fy) to achieve image zoom. For example:
- result = cv2.resize(src, (160,160))
- result = cv2.resize(src, None, fx=0.5, fy=0.5)
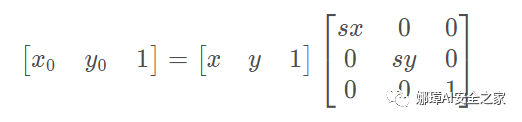
Image scaling: if (x0, y0) is the coordinates after scaling, (x, y) is the coordinates before scaling, and sx and sy are the scaling factors, the formula is as follows:
The code example is as follows:
#encoding:utf-8
import cv2
import numpy as np

#Read picture
src = cv2.imread('test.jpg')

#Image scaling
result = cv2.resize(src, (200,100))
print(result.shape)

#Display image
cv2.imshow("src", src)
cv2.imshow("result", result)

#Wait for display
cv2.waitKey(0)
cv2.destroyAllWindows()
The output result is shown in the figure below, and the image is reduced to (200100) pixels.
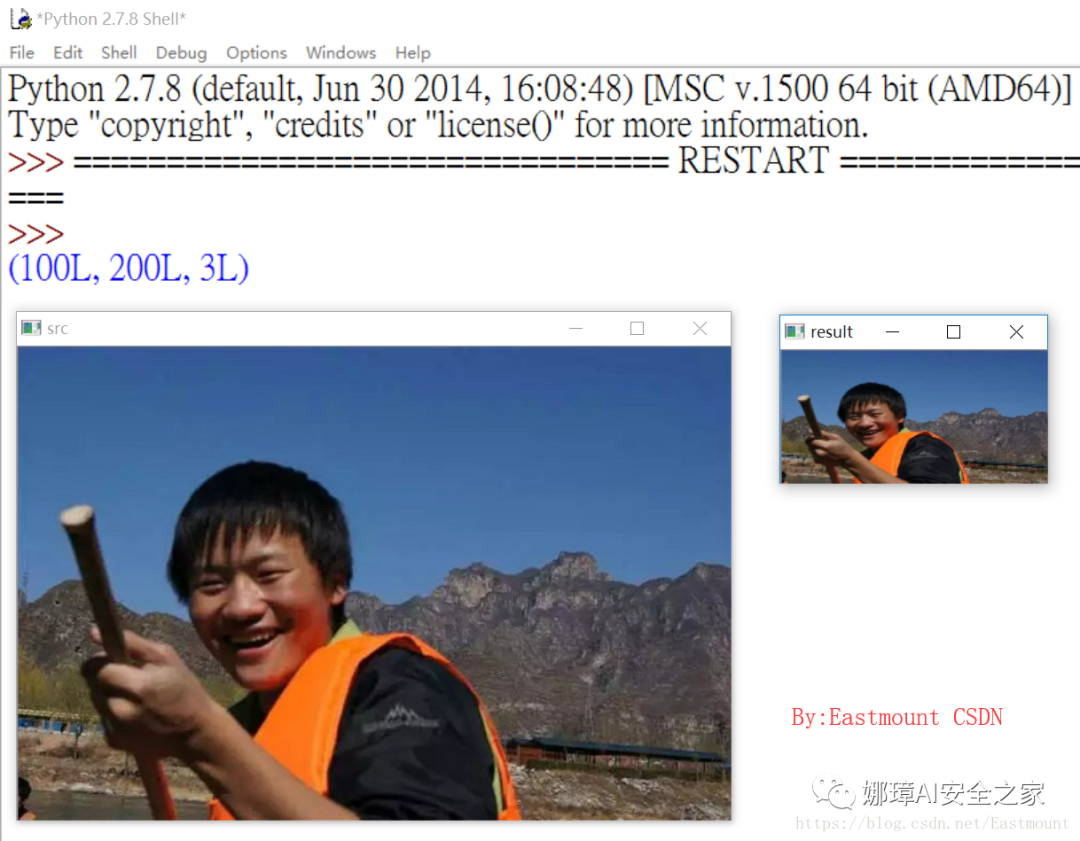
It should be noted that the dsize set by CV2. Resize (SRC, (200100)) in the code is 200 columns and 100 rows.
Similarly, the original image pixels can be obtained and multiplied by the scaling coefficient for image transformation. The code is as follows.
#encoding:utf-8
import cv2
import numpy as np
#Read picture
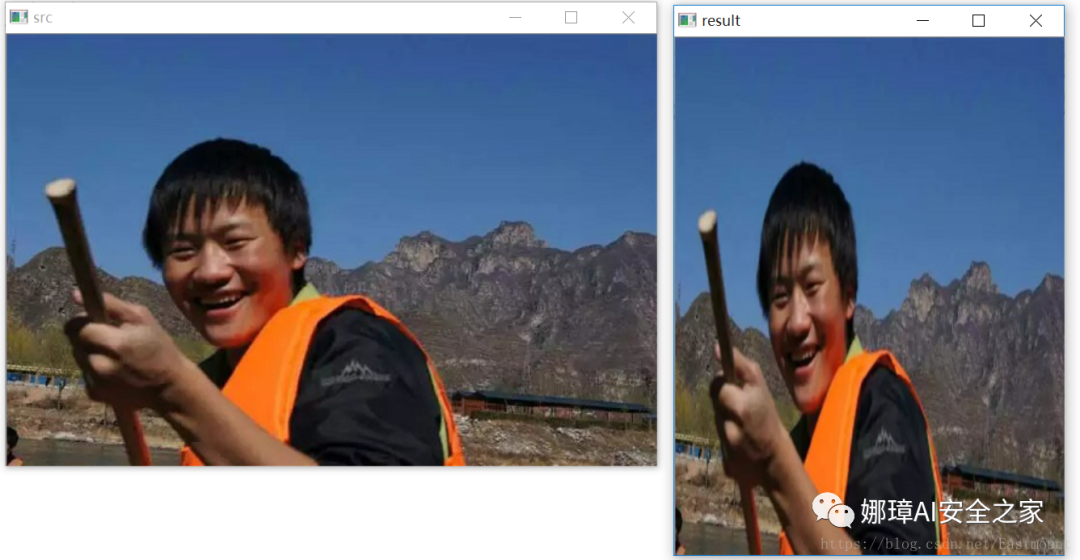
src = cv2.imread('test.jpg')
rows, cols = src.shape[:2]
print(rows, cols)
#Image scaling dsize (column, row)
result = cv2.resize(src, (int(cols*0.6), int(rows*1.2)))
#Display image
cv2.imshow("src", src)
cv2.imshow("result", result)
#Wait for display
cv2.waitKey(0)
cv2.destroyAllWindows()
The output results are shown in the figure below:
Finally, the method of (fx,fy) zoom factor is explained to enlarge or reduce the image.
#encoding:utf-8
import cv2
import numpy as np
#Read picture
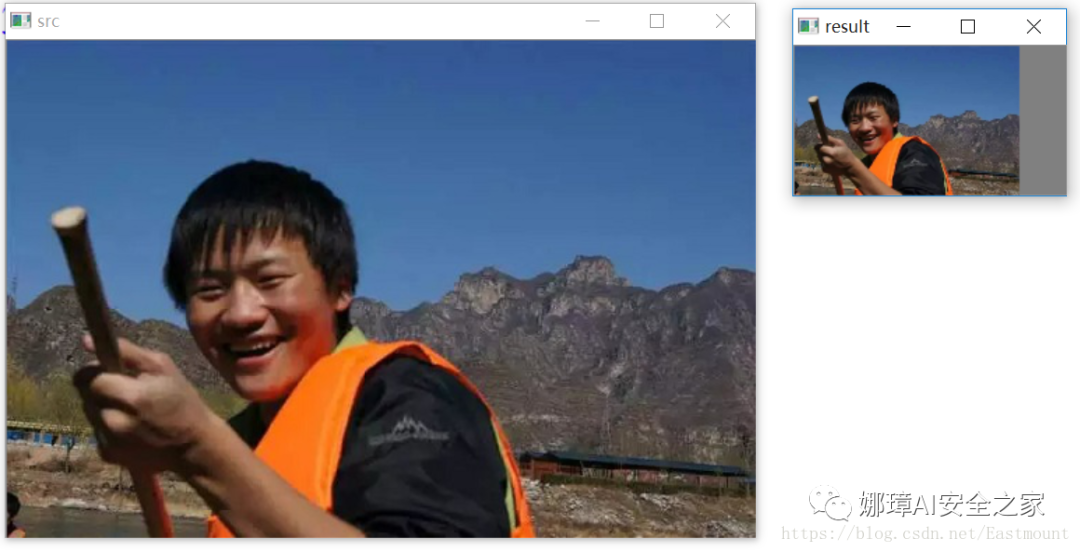
src = cv2.imread('test.jpg')
rows, cols = src.shape[:2]
print(rows, cols)
#Image scaling
result = cv2.resize(src, None, fx=0.3, fy=0.3)
#Display image
cv2.imshow("src", src)
cv2.imshow("result", result)
#Wait for display
cv2.waitKey(0)
cv2.destroyAllWindows()
The final output result is shown in the figure below, which is smaller than 0.3 * 0.3 as an example.
2, Image rotation
Image rotation is mainly realized by calling getRotationMatrix2D() function and warpAffine() function to rotate around the center of the image, as follows:
- M = cv2.getRotationMatrix2D( (cols/2, rows/2), 30, 1) The parameters are: rotation center, rotation degree and scale
- rotated = cv2.warpAffine( src, M, (cols, rows)) The parameters are: original image, rotation parameter and original image width and height
Image rotation: if (x0, y0) is the coordinates after rotation, (x, y) is the coordinates before rotation, (m,n) is the rotation center, a is the rotation angle, and (left,top) is the coordinates of the upper left corner of the image after rotation, the formula is as follows:

The code is as follows:
#encoding:utf-8
import cv2
import numpy as np

#Read picture
src = cv2.imread('test.jpg')

#Height, width and number of channels of the original drawing
rows, cols, channel = src.shape

#Rotate around the center of the image
#Parameter: rotation center rotation degree scale
M = cv2.getRotationMatrix2D((cols/2, rows/2), 30, 1)
#Parameters: original image rotation parameter element image width and height
rotated = cv2.warpAffine(src, M, (cols, rows))

#Display image
cv2.imshow("src", src)
cv2.imshow("rotated", rotated)

#Wait for display
cv2.waitKey(0)
cv2.destroyAllWindows()
The output results are shown in the figure below:
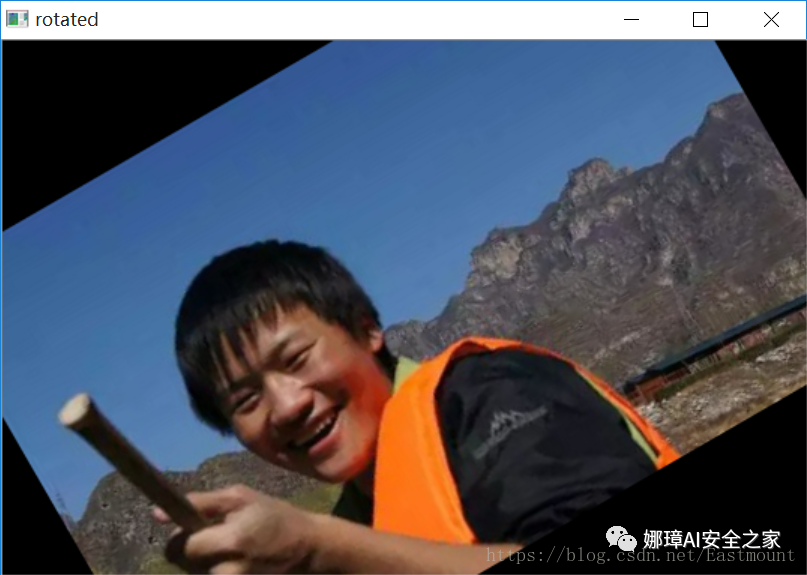
If - 90 degrees is set, the core code and image are as follows.
- M = cv2.getRotationMatrix2D( (cols/2, rows/2), -90, 1)
- rotated = cv2.warpAffine( src, M, (cols, rows))

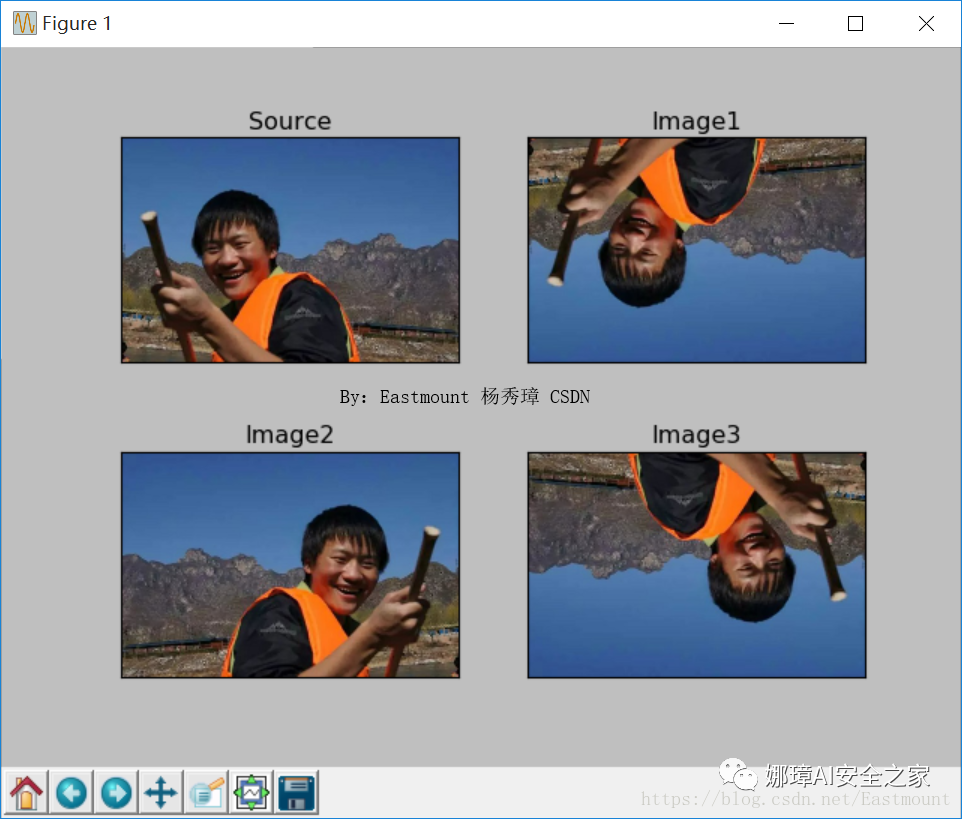
3, Image flip
The image flip is implemented in OpenCV by calling function flip(). The prototype is as follows:
- dst = cv2.flip(src, flipCode)
Where src represents the original image, and flipCode represents the flip direction. If flipCode is 0, it will flip with the X axis as the symmetry axis, if flipCode > 0, it will flip with the Y axis as the symmetry axis, and if flipCode < 0, it will flip at the X axis and Y axis at the same time.
The code is as follows:
#encoding:utf-8
import cv2
import numpy as np
import matplotlib.pyplot as plt

#Read picture
img = cv2.imread('test.jpg')
src = cv2.cvtColor(img,cv2.COLOR_BGR2RGB)

#Image flip
#0 flip with X axis as symmetry axis > 0 flip with y axis as symmetry axis < 0 flip with X axis and Y axis
img1 = cv2.flip(src, 0)
img2 = cv2.flip(src, 1)
img3 = cv2.flip(src, -1)

#display graphics
titles = ['Source', 'Image1', 'Image2', 'Image3']
images = [src, img1, img2, img3]
for i in range(4):
   plt.subplot(2,2,i+1), plt.imshow(images[i], 'gray')
   plt.title(titles[i])
   plt.xticks([]),plt.yticks([])
plt.show()
The output results are shown in the figure below:
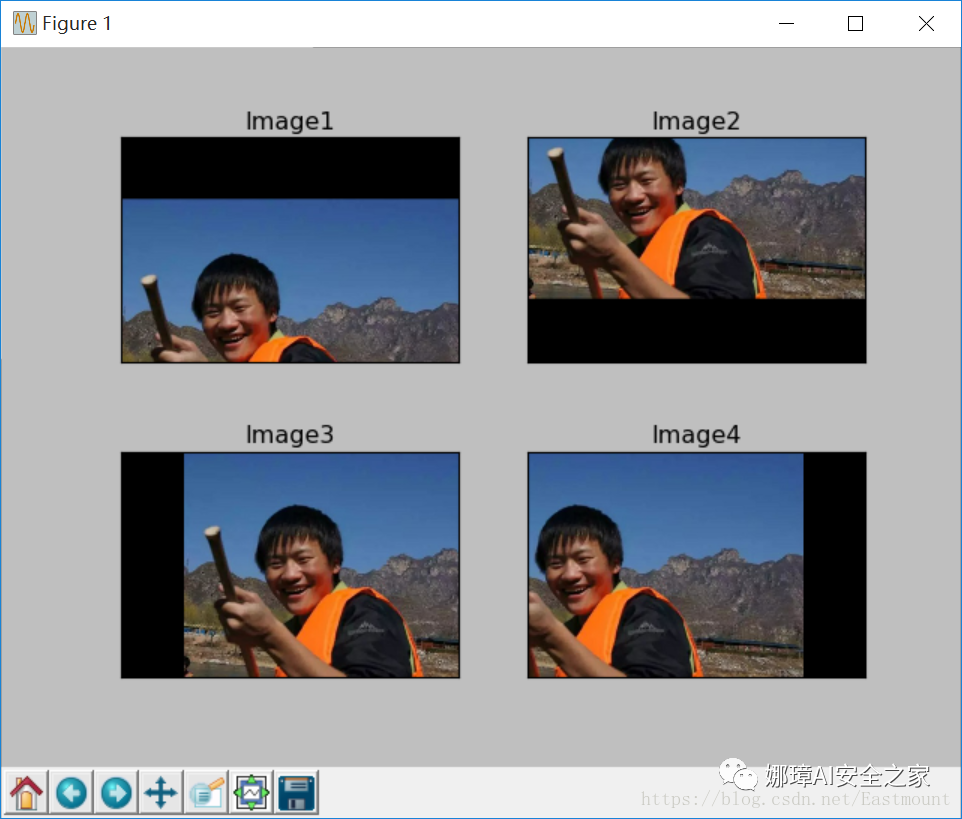
4, Image translation
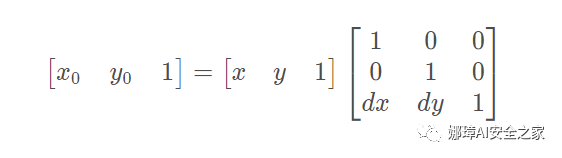
Image translation: if (x0, y0) is the coordinate after scaling, (x, y) is the coordinate before scaling, and dx and dy are the offset, the formula is as follows:
For image translation, first define the translation matrix M, and then call the warpAffine() function to realize the translation. The core functions are as follows:
- M = np.float32([[1, 0, x], [0, 1, y]])
- shifted = cv2.warpAffine(image, M, (image.shape[1], image.shape[0]))
The complete code is as follows:
#encoding:utf-8
import cv2
import numpy as np
import matplotlib.pyplot as plt

#Read picture
img = cv2.imread('test.jpg')
image = cv2.cvtColor(img,cv2.COLOR_BGR2RGB)

#Image pan down, up, right, left
M = np.float32([[1, 0, 0], [0, 1, 100]])
img1 = cv2.warpAffine(image, M, (image.shape[1], image.shape[0]))

M = np.float32([[1, 0, 0], [0, 1, -100]])
img2 = cv2.warpAffine(image, M, (image.shape[1], image.shape[0]))

M = np.float32([[1, 0, 100], [0, 1, 0]])
img3 = cv2.warpAffine(image, M, (image.shape[1], image.shape[0]))

M = np.float32([[1, 0, -100], [0, 1, 0]])
img4 = cv2.warpAffine(image, M, (image.shape[1], image.shape[0]))

#display graphics
titles = [ 'Image1', 'Image2', 'Image3', 'Image4']
images = [img1, img2, img3, img4]
for i in range(4):
   plt.subplot(2,2,i+1), plt.imshow(images[i], 'gray')
   plt.title(titles[i])
   plt.xticks([]),plt.yticks([])
plt.show()
The output results are shown in the figure below:
5, Summary
This article mainly explains the basic image processing of Python and OpenCV, including:
- 1, Image scaling
- 2, Image rotation
- 3, Image flip
- 4, Image translation
Source code download address, remember to help star and pay attention!
- https://github.com/eastmountyxz/ ImageProcessing-Python
References, I would like to thank these leaders for their encouragement!
- [1] Gonzalez. Digital image processing (3rd Edition) [M]. Electronic Industry Press, 2013
- [2] Mao Xingyun, Leng Xuefei. Introduction to OpenCV3 programming [M]. Electronic Industry Press, 2015
- [3] https://blog.csdn.net/Eastmount