The sample code and files of this article have been uploaded to my Github repository https://github.com/CNFeffery/DataScienceStudyNotes
1 Introduction
In daily work, it is often necessary to connect to multiple remote servers through SSH to complete various tasks. When there are many servers to operate and many tasks to be executed involve commands, if the cumbersome process of SSH connection and command execution can be simulated in an automatic way, the improvement of work efficiency is very considerable.
In this article, I will take you to learn how to use a very powerful fabric Library in Python to automate common remote server connection management operations 😋:

2 using fabric to play with remote server management
Based on the powerful paramiko, invoke and other libraries, fabric constructs a set of simple and easy-to-use API s, so that we can deal with various common remote server operations with simple statements, and complete the installation with pip install fabric. The corresponding version demonstrated in this paper is 2.6.
2.1 connect to the remote server and execute the terminal command
To establish and maintain a connection to the remote server, we need to instantiate fabric.Connection(). Its basic parameters are:
-
Host: str type, such as' user name @ host: port ', in which the' port 'part can be omitted, and the default port is 22
-
connect_kwargs: dict type, which is used to pass in parameters required by other connections. Commonly used are:
- Password: str type. It is used to pass in the password corresponding to the host parameter when connecting in password mode
- pkey: str type, which is used to set the corresponding key when connected by private key
- Timeout: float type, used to set the timeout duration of TCP connection (unit: seconds)
Other available Parameters you can go to https://docs.paramiko.org/en/latest/api/client.html#paramiko.client.SSHClient.connect Learn more about Parameters
-
Config: fabric.Config type, used to set more complex function parameters, see https://docs.fabfile.org/en/2.6/api/config.html
Let's take a look at the most basic example:
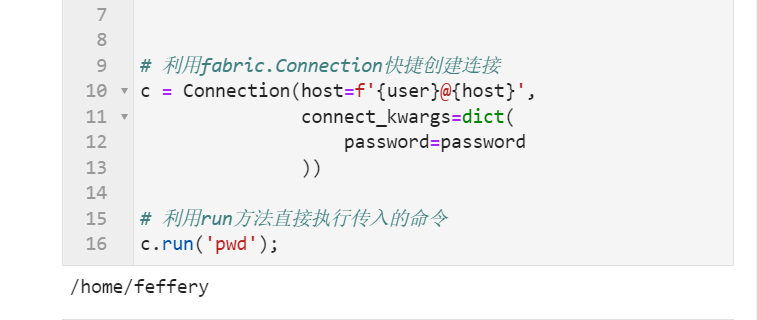
from fabric import Connection

# It is recommended to variable the parameters required for ssh connections
user = 'user name'
host = 'host address'
password = 'password'


# Create a quick connection with fabric.Connection
c = Connection(host=f'{user}@{host}',
               connect_kwargs=dict(
                   password=password
               ))

# Execute the incoming command directly using the run method
c.run('pwd');
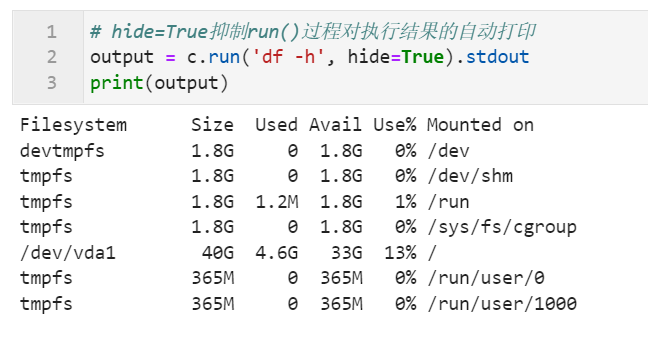
You can see that the process of connecting to the server and executing the specified command is very simple, and the printed results of the command executed by the run() method can be saved through the stdout attribute:
# hide=True suppresses the automatic printing of execution results by run() process
output = c.run('df -h', hide=True).stdout
print(output)
After learning about the basic use of fabric, let's learn some advanced contents:
2.2 configure sudo command password to be automatically pre filled
We all know that for non root users, sudo prefix needs to be added when executing some commands with high permissions, and the password of the current user needs to be manually entered during the initial execution of the session. In fabric, there are two ways to automate this step:
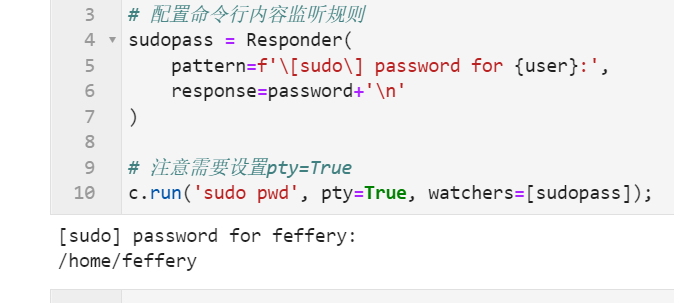
2.2.1 mode 1: cooperate with invoke.Responder
We can cooperate with invoke.Responder to automatically enter and execute the specified command when the command line returns the password input prompt:
from invoke import Responder

# Configure command line content listening rules
sudopass = Responder(
    pattern=f'\[sudo\] password for {user}:',
    response=password+'\n'
)

# Note that pty=True should be set
c.run('sudo pwd', pty=True, watchers=[sudopass]);
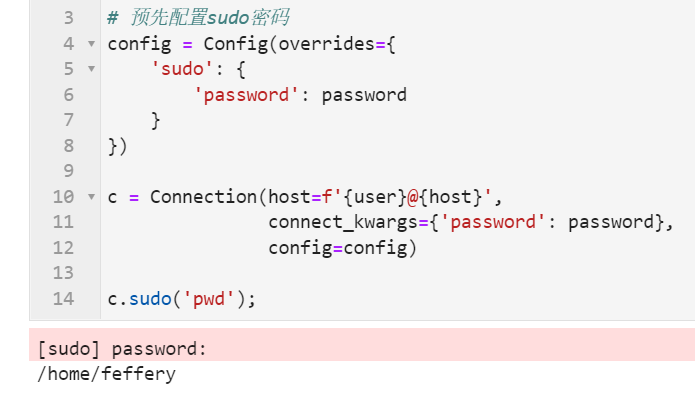
2.2.2 method 2: use fabric.Config to set sudo password
In addition to the above method, we can also use fabric.Config to configure sudo password in advance at one time when creating a connection. Then, when sudo command needs to be executed, sudo() method can be used instead of run() method:
from fabric import Config

# Preconfigured sudo password
config = Config(overrides={
    'sudo': {
        'password': password
    }
})

c = Connection(host=f'{user}@{host}',
               connect_kwargs={'password': password},
               config=config)

c.sudo('pwd');
2.3 remote file transfer
Many friends know that you can use pscp, xshell and other tools to manually transfer files between the server and the local. These tasks can also be automated in fabric:
2.3.1 upload files from local to server
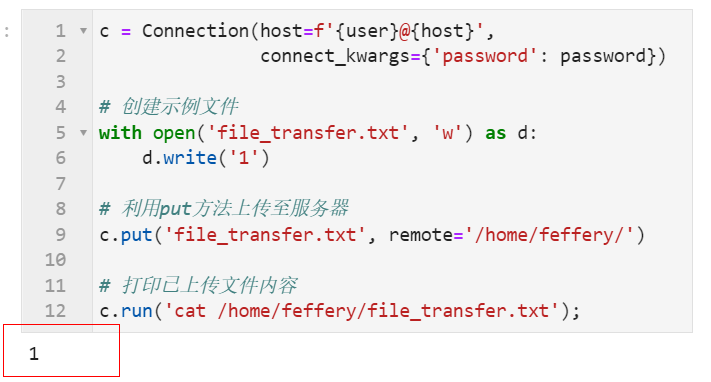
Use the put() method to upload the specified local file to the specified location of the server. The remote parameter corresponds to the target storage location of the server:
c = Connection(host=f'{user}@{host}',
               connect_kwargs={'password': password})

# Create sample file
with open('file_transfer.txt', 'w') as d:
    d.write('1')

# Upload to the server using the put method
c.put('file_transfer.txt', remote='/home/feffery/')

# Print uploaded file content
c.run('cat /home/feffery/file_transfer.txt');
2.3.2 download the specified file from the server to the local
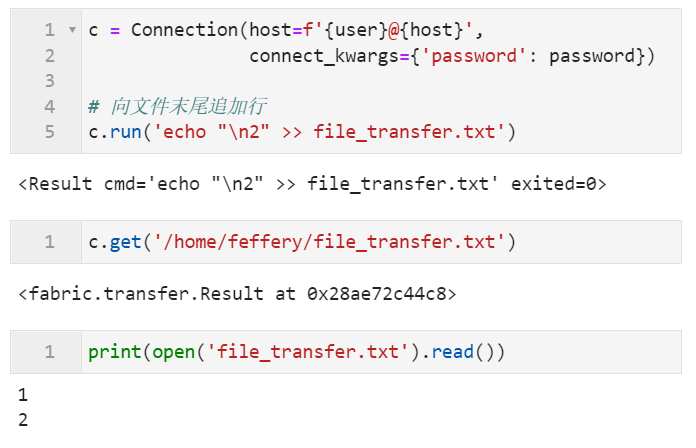
On the contrary, when we need to retrieve the specified file from the server to the local, we can use the get() method:
c = Connection(host=f'{user}@{host}',
               connect_kwargs={'password': password})

# Add a line to the end of the file
c.run('echo "\n2" >> file_transfer.txt')

c.get('/home/feffery/file_transfer.txt')

print(open('file_transfer.txt').read())
The above is the whole content of this article. Welcome to discuss with me in the comment area~