Python Flask (I)
- 1, Build virtual environment
- 2, Setting up a virtual environment in a development tool
- 3, The first flash program
The following operations are carried out in the windows environment. The Python version I use is 3.7.1
1, Build virtual environment
1.1 building a virtual environment using pipenv
Of course, you can also use virtualenv, but this virtual environment is often not installed. Here is another installation method of virtual environment. I use the cmd command to perform the following operations
- Install pipenv: pip install pipenv
- Create the directory where the project runs: mkdir app
- Enter the directory: cd app
- Installation environment dependency: pipenv install
- Entering the virtual environment: pipenv shell
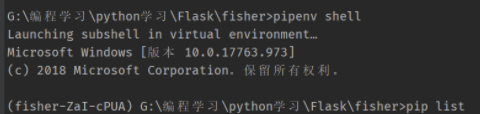
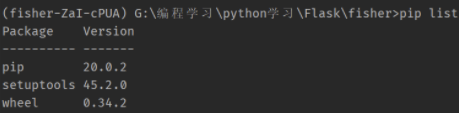
6. View the current python package: pip list
1.2 install other packages for the virtual environment
We want to use flash, so we can use the following command: pipenv install flash. If there are other needs, such as installing requests, pumysql and so on, the commands are the same as above
1.3 list of pipenv commands
command | function |
|---|---|
pipenv install | Initialize virtual environment |
pipennv | Enter virtual environment |
pipenv install xxx (uninstall xxx) | Install (remove) packages for virtual environments |
exit | Exit virtual environment |
pipenv graph | View dependencies between packages |
2, Setting up a virtual environment in a development tool
The development tool I use is pychar Community Edition
2.1 find the path of the virtual environment
- Here, we need to enter this command to view the path of pipenv: pipenv --venv. Mine is installed in the following location

2.2 configuring virtual environment in development tools
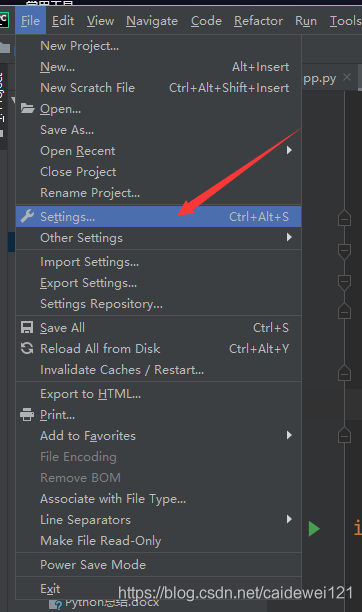
- Then open pycharm settings and find setting
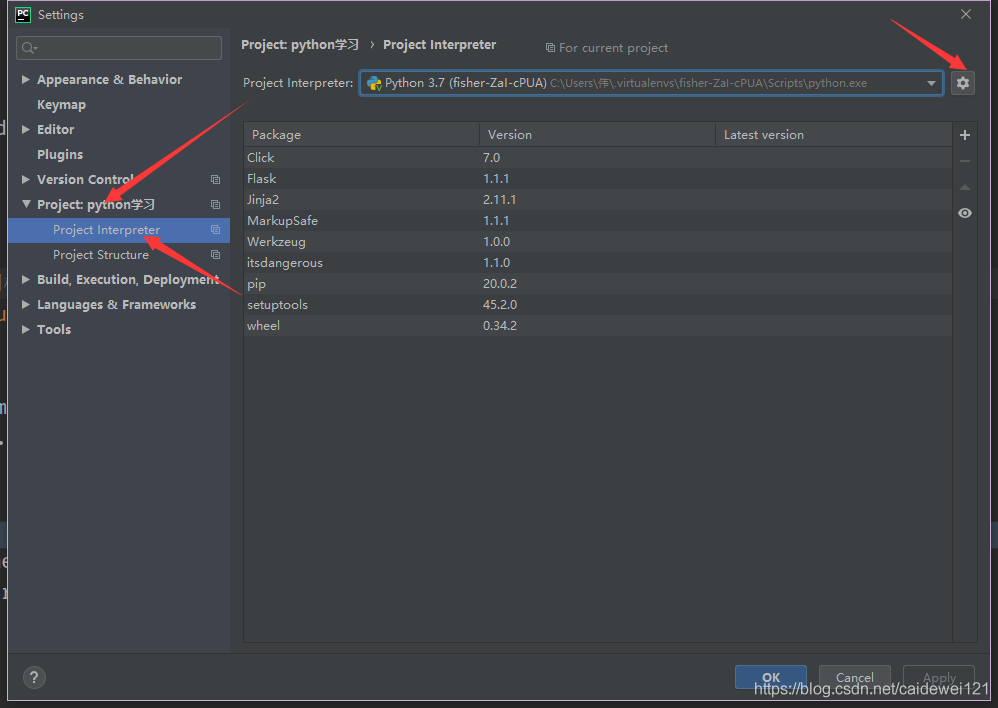
- Then find the Python interpreter, add the virtual environment, find the path we just found, and add it
3, The first flash program
3.1 running the first flash application
We only need three sentences to implement the simplest flash application
#!/usr/bin/python
# -*- coding: utf-8 -*-
#file: app.py
#@author: Gorit
#@contact: gorit@qq.com
#@time: 2020/2/26 9:08
from flask import Flask
app = Flask(__name__) # Instantiate flash__ name__ Will be used as an identifier of the app core, which can be any string
@app.route('/hello') # Using the route, define a route for the hello function, and then the viewer obtains the corresponding data through the http request
def hello(): # hello is the view function and the controller in mvc
return "Hello World"
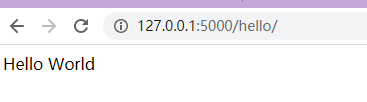
app.run()Then we can enter python app.py in the virtual environment http://127.0.0.1:5000 We started our flash application in, but found nothing after opening it. This is because we set up a route in the program, so we need to change the path to http://127.0.0.1:5000/hello Then you can find the hello world string on the web page
3.2 routing redirection mechanism in flash
- Or reuse the above code, let's make a small change
from flask import Flask
app = Flask(__name__)
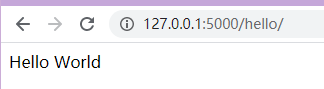
@app.route('/hello/') # Let's add an extra slash here
def hello():
return "Hello World"
app.run()- Then we run normally
- Let's change the path: 127.0.0.1:5000/hello, and then enter
- We found that the page jumped and became a normal state
- We open the F12 developer tool and find the network option. We find that there are two network requests
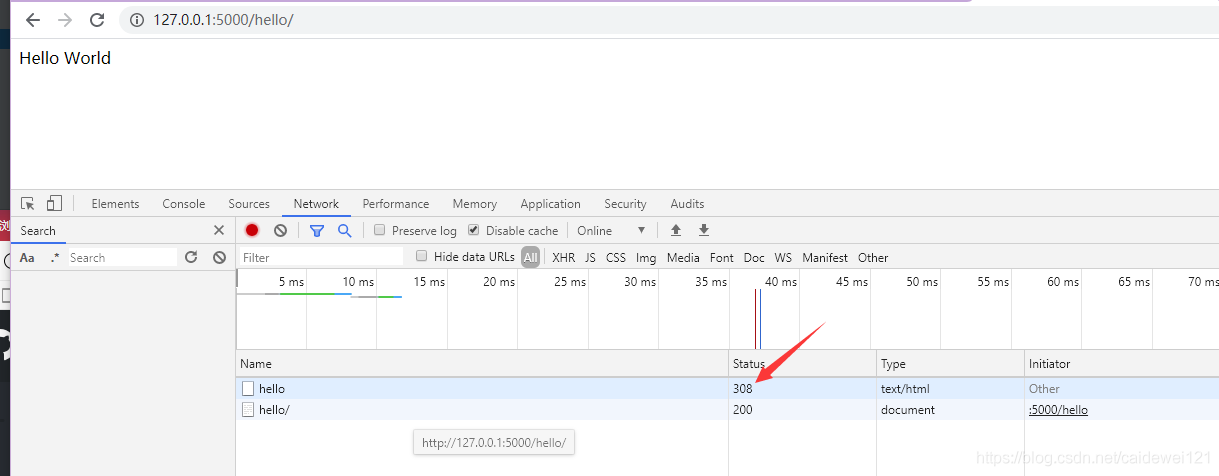
- After consulting the data, that is to say, the input of / hello will be permanently redirected by Python flash
3.3 another route registration method
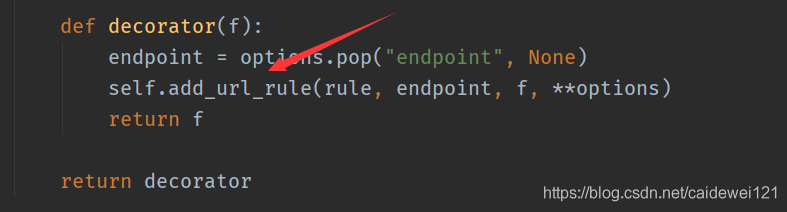
- We use app.route("/hello") as the access interface, but we use ctrl + left mouse button to click route to view its source code. Route is used as a decorator
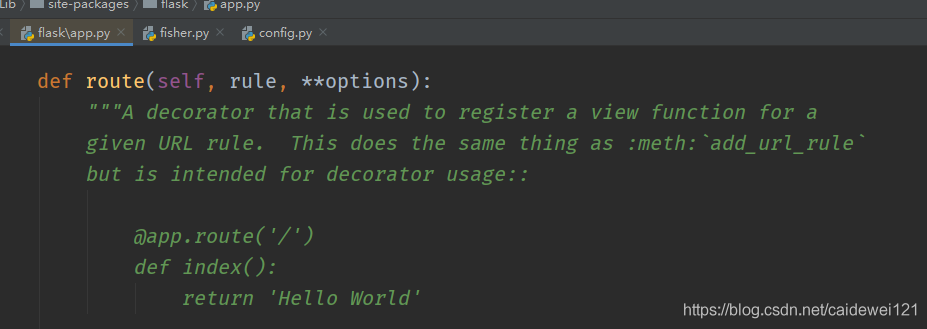
- The focus is on the following implementation. The core of routing is actually by setting add_url_rule(..) implementation of routing rules
- Therefore, we can also use another method to set the route, which is easy to use. The first parameter is to set the path, the second parameter is to specify the view function, that is, hello()
from flask import Flask
app = Flask(__name__)

# @app.route('/hello/')
def hello():
    return "Hello World"

app.add_url_rule('/hello',view_func=hello)

if __name__ == '__main__':
app.run()- The second use case is generally used more in the class based view, that is, we use the object-oriented method to write flash applications
3.4 change the operation mode of flash
There are three parameters in app.run(), which we change together
- Enable the debug mode (in this way, flash will restart the server automatically, and we don't need to restart the server manually)
- Specify the startup port (the default port is 5000. We can modify the port manually)
- Change the host (the default is 127.0.0.1. If you want to hang it on the server, you can change the host to 0.0.0.0, and then close the firewall so that the external network can see it)
from flask import Flask
app = Flask(__name__)

@app.route('/hello')
def hello():
    return "Hello World"

if __name__ == '__main__':
    app.run(host="localhost", debug=True,port=9999)
Then run http://localhost:9999/hello
Then you can see the content
3.5 what should we do if we want to see html tags?
Let's try to change the returned content in the hello view function into html tags to see if it works?
from flask import Flask
app = Flask(__name__)

@app.route('/hello/')
def hello():
    return ""

if __name__ == '__main__':
    app.run()
In fact, it won't show anything. Why? It's a question of request headers.
The contents of the Flask request header include
- status code
- content-type http headers
Because the content type value in the request header has been specified, the html tag cannot be displayed as a string. At this time, we need to change the information in the request header. We can do this
from flask import Flask,make_response
app = Flask(__name__)

@app.route('/hello')
def hello():
    # Manually create a response
    headers = {
        "content-type": "text/html",  # Plain is regarded as an ordinary string. After plain is changed, the content of html tag can be displayed normally
    }
    return 'Hello, world', 200, headers

if __name__ == '__main__':
    app.run()
ok, so we can display the contents of our html tags normally, but the font is wrong. This is the problem of coding format

Other types
- Content type: "text/plain" treats the returned data as a string
- "Content type": "application/json" uses api to specify the returned data in json format
3.6 clever use of redirection
We can add the location parameter to the headers, which can automatically jump to other pages when the user loads a specified path
from flask import Flask,make_response
app = Flask(__name__)
app.config.from_object('config')

@app.route('/hello')
def hello():
    headers = {
        "content-type": "text/plain",  # plain as an ordinary string
        # "Content type": "application / json" uses api to specify the returned data in json format
        "location": "https://www.bing.com"
    }
    # Also realize the jump effect and control the response status code
    return '', 301, headers

if __name__ == '__main__':
    app.run()