preface
in the last blog, I finished viewing the news details data and registering the user. In this article, I will add and modify the user's information. It will use file reading and writing, camera permissions, custom Dialog, album selection and camera photography.

text
next, we will upgrade the database first, because we want to change the user's Avatar. Therefore, first, we need a avatar field in the user table. Before upgrading the database, we directly added a table, so this time we will add a field to the table.
1, Database upgrade
generally speaking, some factors should be considered when redesigning the database. Such as adding table fields usually occurs when the business requirements are changed. Therefore, when designing the table, we can figure out whether it is possible to expand and how it will be expanded. Next, we will add an avatar field to the data table User to represent the avatar.
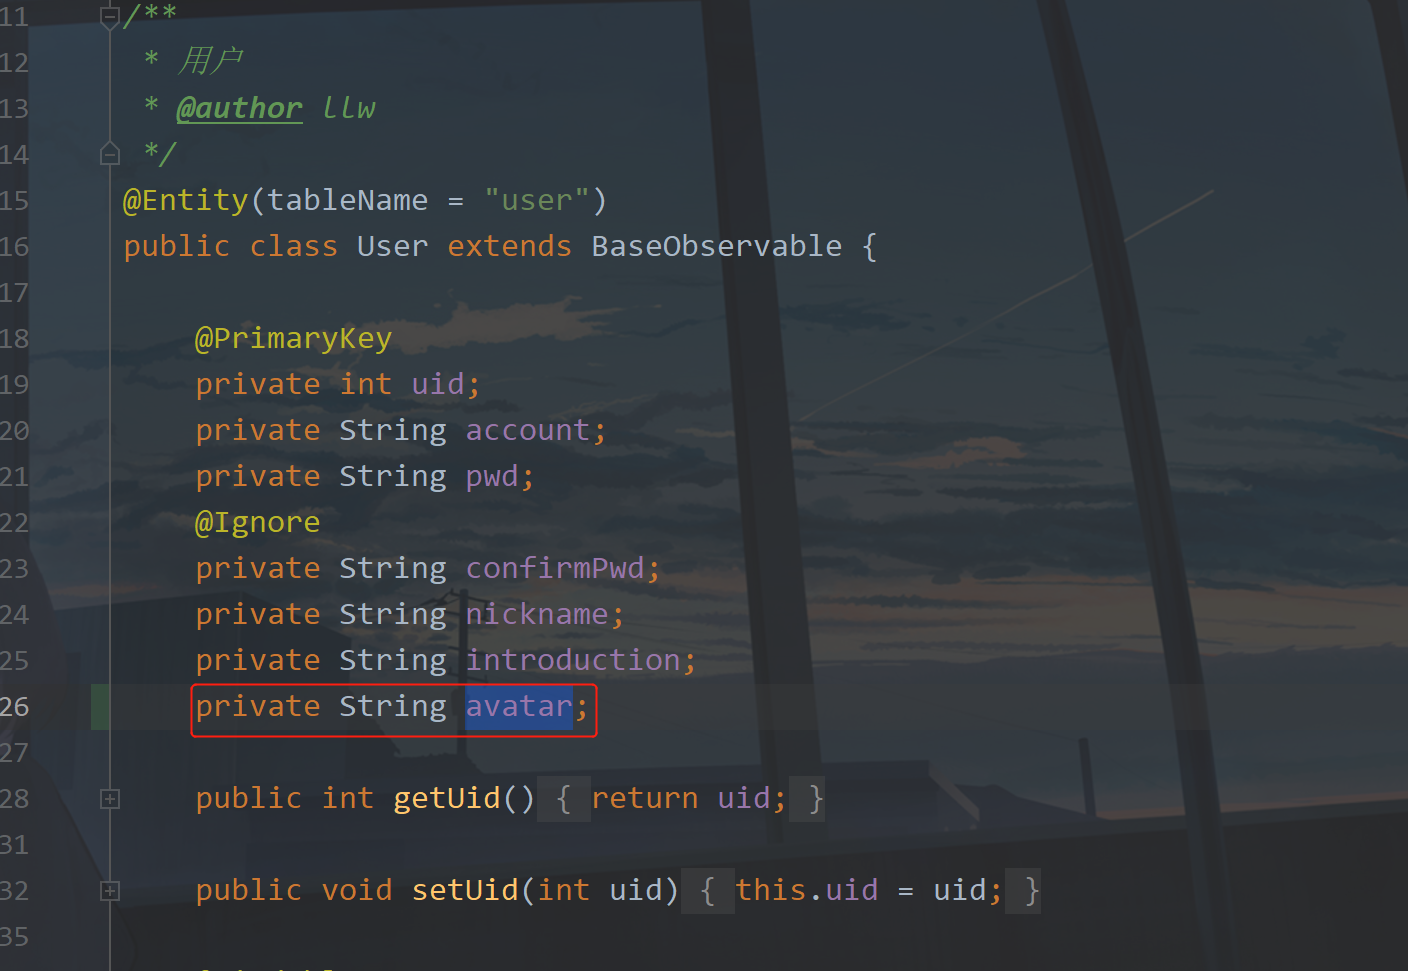
At the same time, add get and set methods.
	public String getAvatar() {
        return avatar;
    }

    public void setAvatar(String avatar) {
        this.avatar = avatar;
    }
Then upgrade the database, open AppDatabase and add the following code:
	/**
     * Upgrade the version and migrate to 5. Add an avatar field in the user table
     */
    static final Migration MIGRATION_4_5 = new Migration(4, 5) {
        @Override
        public void migrate(@NonNull @NotNull SupportSQLiteDatabase database) {
            //Add avatar field in User table
            database.execSQL("ALTER TABLE `user` ADD COLUMN avatar TEXT");
        }
    };
This means that I add an avatar field to the User table, and then we add the migration
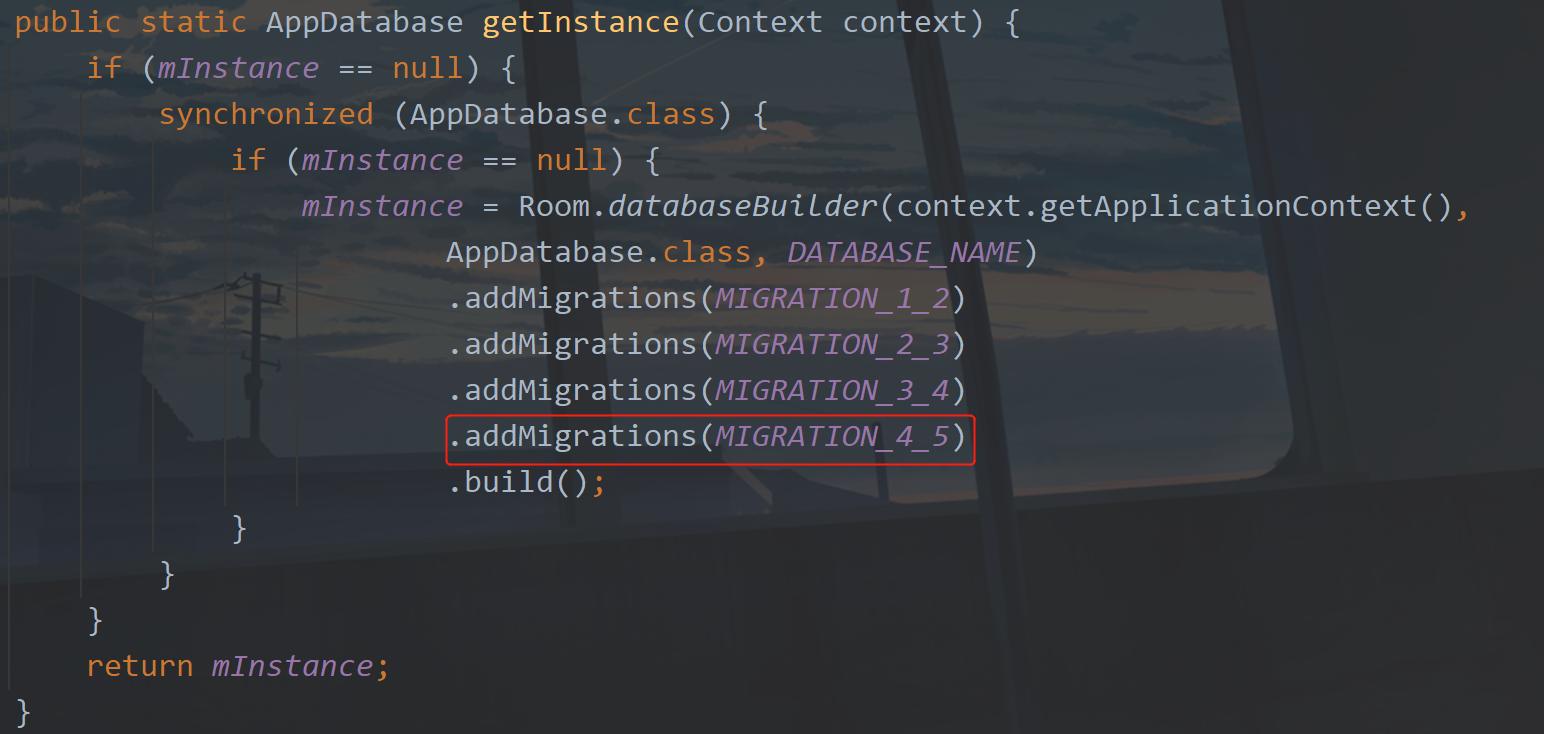
Then change the database version to 5.

In this way, the database upgrade and migration are completed.
2, Data operation
The code in UserRepository also needs to be updated. Add the following code:
	private static volatile UserRepository mInstance;

    public static UserRepository getInstance() {
        if (mInstance == null) {
            synchronized (UserRepository.class) {
                if (mInstance == null) {
                    mInstance = new UserRepository();
                }
            }
        }
        return mInstance;
    }
This article will cover the page data interaction in HomeActivity. Therefore, we need a HomeViewModel and create it under the viewmodels package. The code is as follows:
public class HomeViewModel extends BaseViewModel {

    public LiveData<User> user;

    public String defaultName = "beginner-Study";
    public String defaultIntroduction = "Android | Java";

    public void getUser() {
        user = UserRepository.getInstance().getUser();
    }

    public void updateUser(User user) {
        UserRepository.getInstance().updateUser(user);
        failed = UserRepository.getInstance().failed;
        getUser();
    }
}
I have set two default values here, because the nickname and profile can be left blank during registration, so this default value will be displayed if it is not filled in. If it is Kotlin, the default value will be used directly. These two default values will be used in xml. At the same time, the HomeViewModel has a method to obtain and modify user information. When we log in to the HomeActivity successfully, it is obtained, and when we modify user information, it is updated, which is very easy to understand. After this step is made clear, we will do a new operation.
2, Custom Dialog
The following is to define a dialog for use in the App. Create a new dialog package under the view package and a new DialogViewHelper class under the package. The code is as follows:
① DialogViewHelper
public class DialogViewHelper {

    private View mContentView;
    private SparseArray<WeakReference<View>> mViews;

    public DialogViewHelper(Context context, int layoutResId) {
        this();
        mContentView = LayoutInflater.from(context).inflate(layoutResId, null);
    }

    public DialogViewHelper() {
        mViews = new SparseArray<>();
    }

    public <T extends View> void setText(int viewId, CharSequence text) {
        TextView tv = getView(viewId);
        if (tv != null) {
            tv.setText(text);
        }
    }

    public <T extends View> T getView(int viewId) {
        WeakReference<View> weakReference = mViews.get(viewId);
        View view = null;

        if (weakReference != null) {
            view = weakReference.get();
        }

        if (view == null) {
            view = mContentView.findViewById(viewId);
            if (view != null) {
                mViews.put(viewId, new WeakReference<>(view));
            }
        }
        return (T) view;
    }

    public void setOnClickListener(int viewId, View.OnClickListener onClickListener) {
        View view = getView(viewId);
        if (view != null) {
            view.setOnClickListener(onClickListener);
        }
    }

    public void setIcon(int viewId, int resId) {
        ImageView iv = getView(viewId);
        if (iv != null) {
            iv.setImageResource(resId);
        }
    }

    public void setContentView(View contentView) {
        mContentView = contentView;
    }

    public View getContentView() {
        return mContentView;
    }
}
② AlertController
Similarly, create a new AlertController class under the dialog package. The code is as follows:
public class AlertController {
    private AlertDialog mAlertDialog;
    private Window mWindow;
    private DialogViewHelper mViewHelper;

    public AlertController(AlertDialog alertDialog, Window window) {
        mAlertDialog = alertDialog;
        mWindow = window;
    }

    public void setDialogViewHelper(DialogViewHelper dialogViewHelper) {
        mViewHelper = dialogViewHelper;
    }

    public void setText(int viewId, CharSequence text) {
        mViewHelper.setText(viewId, text);
    }

    public void setIcon(int viewId, int resId) {
        mViewHelper.setIcon(viewId, resId);
    }

    public <T extends View> T getView(int viewId) {
        return mViewHelper.getView(viewId);
    }


    public void setOnClickListener(int viewId, View.OnClickListener onClickListener) {
        mViewHelper.setOnClickListener(viewId, onClickListener);
    }

    public AlertDialog getDialog() {
        return mAlertDialog;
    }

    public Window getWindow() {
        return mWindow;
    }

//-------------------------------------------------------------------------------------------------


    public static class AlertParams {

        public Context mContext;
        //Dialog topic background
        public int mThemeResId;

        public boolean mCancelable;

        public DialogInterface.OnCancelListener mOnCancelListener;

        public DialogInterface.OnDismissListener mOnDismissListener;

        public DialogInterface.OnKeyListener mOnKeyListener;
        //text color
        public SparseArray<Integer> mTextColorArray = new SparseArray<>();

        //Save changes to text
        public SparseArray<CharSequence> mTextArray = new SparseArray<>();
        //Save click events
        public SparseArray<View.OnClickListener> mClickArray = new SparseArray<>();
        //Store long press click events
        public SparseArray<View.OnLongClickListener> mLondClickArray = new SparseArray<>();
        //Save dialog Icon
        public SparseArray<Integer> mIconArray = new SparseArray<>();
        //Save dialog picture
        public SparseArray<Bitmap> mBitmapArray = new SparseArray<>();
        //Dialog layout resource id
        public int mLayoutResId;
        //view of dialog box
        public View mView;
        //Dialog width
        public int mWidth;
        //Dialog height
        public int mHeight;
        //Dialog box vertical outer margin
        public int mHeightMargin;
        //Dialog box horizontal outer margin
        public int mWidthMargin;
        //animation
        public int mAnimation;
        //Dialog box display location
        public int mGravity = Gravity.CENTER;


        public AlertParams(Context context, int themeResId) {
            mContext = context;
            mThemeResId = themeResId;
        }

        public void apply(AlertController alert) {
            //Setup dialog layout
            DialogViewHelper dialogViewHelper = null;
            if (mLayoutResId != 0) {
                dialogViewHelper = new DialogViewHelper(mContext, mLayoutResId);
            }
            if (mView != null) {
                dialogViewHelper = new DialogViewHelper();
                dialogViewHelper.setContentView(mView);
            }
            if (dialogViewHelper == null) {
                throw new IllegalArgumentException("please set layout");
            }
            //Set dialog layout to dialog

            alert.getDialog().setContentView(dialogViewHelper.getContentView());

            //Set DialogViewHelper helper helper class
            alert.setDialogViewHelper(dialogViewHelper);
            //Set text
            for (int i = 0; i < mTextArray.size(); i++) {
                alert.setText(mTextArray.keyAt(i), mTextArray.valueAt(i));
            }
            //Settings Icon
            for (int i = 0; i < mIconArray.size(); i++) {
                alert.setIcon(mIconArray.keyAt(i), mIconArray.valueAt(i));
            }
            //Set Click
            for (int i = 0; i < mClickArray.size(); i++) {
                alert.setOnClickListener(mClickArray.keyAt(i), mClickArray.valueAt(i));
            }
            //Configure custom effects, bottom pop-up, width and height, animation, full screen
            Window window = alert.getWindow();
            window.setGravity(mGravity);//Display location

            if (mAnimation != 0) {
                window.setWindowAnimations(mAnimation);//Animate
            }
            //Set width and height
            WindowManager.LayoutParams params = window.getAttributes();
            params.width = mWidth;
            params.height = mHeight;
            params.verticalMargin = mHeightMargin;
            params.horizontalMargin = mWidthMargin;
            window.setAttributes(params);
        }
    }
}
Next, customize the Dialog
③ AlertDialog
Create a new AlertDialog under the dialog package. The code inside is as follows:
public class AlertDialog extends Dialog {

    private AlertController mAlert;

    public AlertDialog(@NonNull Context context, @StyleRes int themeResId) {
        super(context, themeResId);
        mAlert = new AlertController(this, getWindow());
    }

    public void setText(int viewId, CharSequence text) {
        mAlert.setText(viewId, text);
    }

    public <T extends View> T getView(int viewId) {
        return mAlert.getView(viewId);
    }

    public void setOnClickListener(int viewId, View.OnClickListener onClickListener) {
        mAlert.setOnClickListener(viewId, onClickListener);
    }


//----------------------------------------------------------------------------------------------

    public static class Builder {
        private final AlertController.AlertParams P;

        public Builder(Context context) {
            this(context, R.style.dialog);
        }


        public Builder(Context context, int themeResId) {
            P = new AlertController.AlertParams(context, themeResId);
        }

        /**
         * Setup dialog layout
         *
         * @param view
         * @return
         */
        public Builder setContentView(View view) {
            P.mView = view;
            P.mLayoutResId = 0;
            return this;
        }

        /**
         * @param layoutId
         * @return
         */
        public Builder setContentView(int layoutId) {
            P.mView = null;
            P.mLayoutResId = layoutId;
            return this;
        }

        /**
         * Set text
         *
         * @param viewId
         * @param text
         * @return
         */
        public Builder setText(int viewId, CharSequence text) {
            P.mTextArray.put(viewId, text);
            return this;
        }

        /**
         * Set text color
         *
         * @param viewId
         * @param color
         * @return
         */
        public Builder setTextColor(int viewId, int color) {
            P.mTextColorArray.put(viewId, color);
            return this;
        }

        /**
         * Settings Icon
         *
         * @param iconId
         * @return
         */
        public Builder setIcon(int iconId, int resId) {
            P.mIconArray.put(iconId, resId);
            return this;
        }

        /**
         * Set picture
         *
         * @param viewId
         * @return
         */
        public Builder setBitmap(int viewId, Bitmap bitmap) {
            P.mBitmapArray.put(viewId, bitmap);
            return this;
        }

        /**
         * Set the dialog width to fill the screen
         *
         * @return
         */
        public Builder fullWidth() {
            P.mWidth = ViewGroup.LayoutParams.MATCH_PARENT;
            return this;
        }

        /**
         * Pop up at the bottom of the dialog box
         *
         * @param isAnimation
         * @return
         */
        public Builder fromBottom(boolean isAnimation) {
            if (isAnimation) {
                P.mAnimation = R.style.dialog_from_bottom_anim;
            }
            P.mGravity = Gravity.BOTTOM;
            return this;
        }

        /**
         * The dialog box pops up on the right
         *
         * @param isAnimation
         * @return
         */
        public Builder fromRight(boolean isAnimation) {
            if (isAnimation) {
                P.mAnimation = R.style.dialog_scale_anim;
            }
            P.mGravity = Gravity.RIGHT;
            return this;
        }


        /**
         * Set dialog width and height
         *
         * @param width
         * @param heigth
         * @return
         */
        public Builder setWidthAndHeight(int width, int heigth) {
            P.mWidth = width;
            P.mHeight = heigth;
            return this;
        }

        /**
         * Set dialog width and height
         *
         * @param width
         * @param heigth
         * @return
         */
        public Builder setWidthAndHeightMargin(int width, int heigth, int heightMargin, int widthMargin) {
            P.mWidth = width;
            P.mHeight = heigth;
            P.mHeightMargin = heightMargin;
            P.mWidthMargin = widthMargin;
            return this;
        }

        /**
         * Add default animation
         *
         * @return
         */
        public Builder addDefaultAnimation() {
            P.mAnimation = R.style.dialog_scale_anim;
            return this;
        }

        /**
         * Animate
         *
         * @param styleAnimation
         * @return
         */
        public Builder setAnimation(int styleAnimation) {
            P.mAnimation = styleAnimation;
            return this;
        }

        /**
         * Set click event
         *
         * @param viewId
         * @param onClickListener
         * @return
         */
        public Builder setOnClickListener(int viewId, View.OnClickListener onClickListener) {
            P.mClickArray.put(viewId, onClickListener);
            return this;
        }

        public Builder setOnLongClickListener(int viewId, View.OnLongClickListener onLongClickListener) {
            P.mLondClickArray.put(viewId, onLongClickListener);
            return this;
        }

        /**
         * Sets whether the dialog is cancelable or not.  Default is true.
         *
         * @return This Builder object to allow for chaining of calls to set methods
         */
        public Builder setCancelable(boolean cancelable) {
            P.mCancelable = cancelable;
            return this;
        }


        public Builder setOnCancelListener(OnCancelListener onCancelListener) {
            P.mOnCancelListener = onCancelListener;
            return this;
        }


        public Builder setOnDismissListener(OnDismissListener onDismissListener) {
            P.mOnDismissListener = onDismissListener;
            return this;
        }


        public Builder setOnKeyListener(OnKeyListener onKeyListener) {
            P.mOnKeyListener = onKeyListener;
            return this;
        }

        public AlertDialog create() {
            // Context has already been wrapped with the appropriate theme.
            final AlertDialog dialog = new AlertDialog(P.mContext, P.mThemeResId);
            P.apply(dialog.mAlert);
            dialog.setCancelable(P.mCancelable);
            if (P.mCancelable) {
                dialog.setCanceledOnTouchOutside(true);
            }
            dialog.setOnCancelListener(P.mOnCancelListener);
            dialog.setOnDismissListener(P.mOnDismissListener);
            if (P.mOnKeyListener != null) {
                dialog.setOnKeyListener(P.mOnKeyListener);
            }
            return dialog;
        }

        public AlertDialog show() {
            final AlertDialog dialog = create();
            dialog.show();
            return dialog;
        }
    }
}
④ Style
set the style of pop-up window and the way pop-up window appears in themes Add the following code under XML:
	<style name="loading_dialog" parent="android:style/Theme.Dialog">
        <item name="android:windowFrame">@null</item>
        <item name="android:windowNoTitle">true</item>
        <item name="android:windowBackground">@drawable/shape_bg_white_radius_6</item>
        <item name="android:windowIsFloating">true</item>
        <item name="android:windowContentOverlay">@null</item>
    </style>

	<!--Custom Dialog -->
    <style name="dialog" parent="@android:style/Theme.Dialog">
        <item name="android:windowFrame">@null</item>
        <item name="android:windowIsFloating">true</item>
        <item name="android:windowIsTranslucent">true</item>
        <item name="android:windowBackground">@android:color/transparent</item>
        <item name="android:backgroundDimEnabled">true</item>
        <item name="android:windowNoTitle">true</item>
    </style>

    <!--Dialog box pop-up and disappear animation-->
    <style name="dialog_from_bottom_anim">
        <item name="android:windowEnterAnimation">@anim/dialog_from_bottom_anim_in</item>
        <item name="android:windowExitAnimation">@anim/dialog_from_bottom_anim_out</item>
    </style>

    <style name="dialog_from_top_anim">
        <item name="android:windowEnterAnimation">@anim/dialog_from_top_anim_in</item>
        <item name="android:windowExitAnimation">@anim/dialog_from_top_anim_out</item>
    </style>

    <style name="dialog_scale_anim">
        <item name="android:windowEnterAnimation">@anim/dialog_scale_anim_in</item>
        <item name="android:windowExitAnimation">@anim/dialog_scale_anim_out</item>
    </style>
The animation style file is also used here. Create an anim folder under the res folder, which defines seven xml files, as shown below:
New dialog_from_bottom_anim_in.xml, the code is as follows:
<?xml version="1.0" encoding="utf-8"?>
<set xmlns:android="http://schemas.android.com/apk/res/android">
    <translate
        android:duration="400"
        android:fromXDelta="0"
        android:fromYDelta="1000"
        android:toXDelta="0"
        android:toYDelta="0" />
</set>
dialog_from_bottom_anim_out.xml, the code is as follows:
<?xml version="1.0" encoding="utf-8"?>
<set xmlns:android="http://schemas.android.com/apk/res/android">
    <translate
        android:duration="400"
        android:fromXDelta="0"
        android:fromYDelta="0"
        android:toXDelta="0"
        android:toYDelta="1000" />
</set>
dialog_from_top_anim_in.xml, the code is as follows:
<?xml version="1.0" encoding="utf-8"?>
<set xmlns:android="http://schemas.android.com/apk/res/android">
    <translate
        android:duration="1000"
        android:fromYDelta="-100%"
        android:toYDelta="0" />
</set>
dialog_from_top_anim_out.xml, the code is as follows:
<?xml version="1.0" encoding="utf-8"?>
<set xmlns:android="http://schemas.android.com/apk/res/android">
    <translate
        android:duration="1000"
        android:fromYDelta="0"
        android:toYDelta="-100%" />
</set>
dialog_scale_anim_in.xml, the code is as follows:
<?xml version="1.0" encoding="utf-8"?>
<set xmlns:android="http://schemas.android.com/apk/res/android" >

    <scale
        android:duration="135"
        android:fromXScale="0.8"
        android:fromYScale="0.8"
        android:pivotX="50%"
        android:pivotY="50%"
        android:toXScale="1.05"
        android:toYScale="1.05" />

    <scale
        android:duration="105"
        android:fromXScale="1.05"
        android:fromYScale="1.05"
        android:pivotX="50%"
        android:pivotY="50%"
        android:startOffset="135"
        android:toXScale="0.95"
        android:toYScale="0.95" />

    <scale
        android:duration="60"
        android:fromXScale="0.95"
        android:fromYScale="0.95"
        android:pivotX="50%"
        android:pivotY="50%"
        android:startOffset="240"
        android:toXScale="1.0"
        android:toYScale="1.0" />

    <alpha
        android:duration="90"
        android:fromAlpha="0.0"
        android:interpolator="@android:anim/accelerate_interpolator"
        android:toAlpha="1.0" />

</set>
dialog_scale_anim_out.xml, the code is as follows:
<?xml version="1.0" encoding="utf-8"?>
<set xmlns:android="http://schemas.android.com/apk/res/android" >

    <scale
        android:duration="150"
        android:fromXScale="1.0"
        android:fromYScale="1.0"
        android:pivotX="50%"
        android:pivotY="50%"
        android:toXScale="0.6"
        android:toYScale="0.6" />

    <alpha
        android:duration="150"
        android:fromAlpha="1.0"
        android:interpolator="@android:anim/accelerate_interpolator"
        android:toAlpha="0.0" />

</set>
loading_animation.xml, the code is as follows:
<?xml version="1.0" encoding="utf-8"?>
<set android:shareInterpolator="false" xmlns:android="http://schemas.android.com/apk/res/android">
    <rotate
        android:interpolator="@android:anim/linear_interpolator"
        android:pivotX="50%"
        android:pivotY="50%"
        android:fromDegrees="0"
        android:toDegrees="+360"
        android:duration="1500"
        android:startOffset="-1"
        android:repeatMode="restart"
        android:repeatCount="-1"/>
</set>
There is also a shape_bg_white_radius_6.xml style, created in drawable, with the following code:
<?xml version="1.0" encoding="utf-8"?>
<shape xmlns:android="http://schemas.android.com/apk/res/android">
    <corners android:radius="24dp"/>
    <solid android:color="@color/white"/>
</shape>
Also create another shape_bg_white_radius_12.xml, the code is as follows:
<?xml version="1.0" encoding="utf-8"?>
<shape xmlns:android="http://schemas.android.com/apk/res/android">
    <corners android:radius="12dp"/>
    <solid android:color="@color/white"/>
</shape>
There is also a shape_bg_white_radius_24.xml, the code is as follows:
<?xml version="1.0" encoding="utf-8"?>
<shape xmlns:android="http://schemas.android.com/apk/res/android">
    <corners android:radius="24dp"/>
    <solid android:color="@color/white"/>
</shape>
⑤ Layout
In this article, three pop-up layouts will be created, one for loading status, one for modifying user information, and the last for entering information.
Create a new dialog under layout_ edit. XML, the code is as follows:
<?xml version="1.0" encoding="utf-8"?>
<layout xmlns:android="http://schemas.android.com/apk/res/android">

    <RelativeLayout
        android:layout_width="300dp"
        android:layout_height="wrap_content"
        android:background="@drawable/shape_bg_white_radius_12">

        <TextView
            android:id="@+id/tv_title"
            android:layout_width="match_parent"
            android:layout_height="wrap_content"
            android:gravity="center"
            android:padding="12dp"
            android:text="title"
            android:textSize="16sp" />

        <androidx.appcompat.widget.AppCompatEditText
            android:id="@+id/et_content"
            android:layout_width="match_parent"
            android:layout_height="wrap_content"
            android:layout_below="@+id/tv_title"
            android:layout_margin="12dp"
            android:maxLength="18"
            android:singleLine="true"
            android:textSize="@dimen/sp_14" />

        <View
            android:id="@+id/v_line"
            android:layout_width="match_parent"
            android:layout_height="1dp"
            android:layout_below="@+id/et_content"
            android:background="@color/line" />

        <TextView
            android:id="@+id/tv_cancel"
            android:layout_width="150dp"
            android:layout_height="50dp"
            android:textSize="@dimen/sp_14"
            android:layout_below="@+id/v_line"
            android:foreground="?attr/selectableItemBackground"
            android:gravity="center"
            android:text="cancel" />

        <View
            android:layout_width="1dp"
            android:layout_height="50dp"
            android:layout_below="@+id/v_line"
            android:layout_centerHorizontal="true"
            android:background="@color/line" />

        <TextView
            android:id="@+id/tv_sure"
            android:layout_width="150dp"
            android:layout_height="50dp"
            android:textColor="@color/purple_500"
            android:layout_below="@+id/v_line"
            android:textSize="@dimen/sp_14"
            android:layout_toEndOf="@+id/tv_cancel"
            android:foreground="?attr/selectableItemBackground"
            android:gravity="center"
            android:text="determine" />
    </RelativeLayout>
</layout>
Create a new dialog under layout_ loading. XML, the code is as follows:
<?xml version="1.0" encoding="utf-8"?>
<LinearLayout xmlns:android="http://schemas.android.com/apk/res/android"
    android:id="@+id/dialog_view"
    android:orientation="vertical"
    android:layout_width="120dp"
    android:layout_height="120dp"
    android:gravity="center"
    android:padding="10dp">

    <ImageView
        android:id="@+id/iv_loading"
        android:layout_width="40dp"
        android:layout_height="40dp"
        android:src="@mipmap/ic_loading" />

    <TextView
        android:id="@+id/tv_loading_tx"
        android:layout_width="wrap_content"
        android:layout_height="wrap_content"
        android:layout_marginTop="10dp"
        android:maxLines="1"
        android:text="Loading..."
        android:textColor="@color/purple_500"
        android:textSize="14sp" />
</LinearLayout>
Here is an icon

Under mipmap.
Finally, create a new dialog under layout_ modify_ user_ info. XML, the code is as follows:
<?xml version="1.0" encoding="utf-8"?>
<layout xmlns:android="http://schemas.android.com/apk/res/android">

    <LinearLayout
        android:layout_width="330dp"
        android:layout_height="wrap_content"
        android:background="@drawable/shape_bg_white_radius_24"
        android:orientation="vertical">

        <TextView
            android:layout_width="match_parent"
            android:layout_height="wrap_content"
            android:gravity="center"
            android:padding="12dp"
            android:text="Modify user information"
            android:textColor="@color/purple_500"
            android:textSize="16sp" />

        <View
            android:layout_width="match_parent"
            android:layout_height="1dp"
            android:background="@color/line" />

        <TextView
            android:id="@+id/tv_modify_avatar"
            android:layout_width="match_parent"
            android:layout_height="wrap_content"
            android:foreground="?selectableItemBackground"
            android:gravity="center"
            android:padding="12dp"
            android:text="Modify Avatar"
            android:textColor="@color/black"
            android:textSize="16sp" />

        <LinearLayout
            android:id="@+id/lay_modify_avatar"
            android:layout_width="match_parent"
            android:layout_height="wrap_content"
            android:orientation="vertical"
            android:visibility="gone">

            <TextView
                android:id="@+id/tv_album_selection"
                android:layout_width="match_parent"
                android:layout_height="wrap_content"
                android:background="@color/line"
                android:foreground="?selectableItemBackground"
                android:gravity="center"
                android:padding="12dp"
                android:text="Album selection"
                android:textColor="@color/black"
                android:textSize="16sp" />

            <TextView
                android:id="@+id/tv_camera_photo"
                android:layout_width="match_parent"
                android:layout_height="wrap_content"
                android:background="@color/line"
                android:foreground="?selectableItemBackground"
                android:gravity="center"
                android:padding="12dp"
                android:text="Camera photography"
                android:textColor="@color/black"
                android:textSize="16sp" />
        </LinearLayout>

        <View
            android:layout_width="match_parent"
            android:layout_height="0.5dp"
            android:background="@color/line" />

        <TextView
            android:id="@+id/tv_modify_nickname"
            android:layout_width="match_parent"
            android:layout_height="wrap_content"
            android:foreground="?selectableItemBackground"
            android:gravity="center"
            android:padding="12dp"
            android:text="Modify nickname"
            android:textColor="@color/black"
            android:textSize="16sp" />

        <View
            android:layout_width="match_parent"
            android:layout_height="0.5dp"
            android:background="@color/line" />

        <TextView
            android:id="@+id/tv_modify_Introduction"
            android:layout_width="match_parent"
            android:layout_height="wrap_content"
            android:foreground="?selectableItemBackground"
            android:gravity="center"
            android:padding="12dp"
            android:text="Modification introduction"
            android:textColor="@color/black"
            android:textSize="16sp" />

        <View
            android:layout_width="match_parent"
            android:layout_height="0.5dp"
            android:background="@color/line" />

        <TextView
            android:id="@+id/tv_close"
            android:layout_width="match_parent"
            android:layout_height="wrap_content"
            android:gravity="center"
            android:padding="12dp"
            android:text="close"
            android:textColor="@color/purple_500"
            android:textSize="16sp" />
    </LinearLayout>
</layout>
The preparations here are all done, which will be used later. Don't worry, and then add a loading pop-up window in BaseActivity,
	private LoadingDialog loadingDialog;

	/**
     * Show load pop-up
     */
    protected void showLoading() {
        loadingDialog = new LoadingDialog(this);
        loadingDialog.show();
    }

    /**
     * Show load pop-up
     *
     * @param isClose true Click the pop-up window in other areas to close, false does not close.
     */
    protected void showLoading(boolean isClose) {
        loadingDialog = new LoadingDialog(this, isClose);
    }

    /**
     * Hide load Popup
     */
    protected void dismissLoading() {
        if (loadingDialog != null) {
            loadingDialog.dismiss();
        }
    }
In this way, it can be used directly in the Activity to display the loading pop-up window and hide the loading pop-up window.
3, Permission request
Permission is a troublesome but necessary thing on Android, if you are still Android 6 Mobile phones below 0 can ignore these, but unfortunately they are now Android 10 and 11, so we still need to be compatible.
① Permission configuration
Because you need to read and write files and cameras, you need to use Android manifest Add the following code to XML:
	<!-- Camera permissions -->
    <uses-permission android:name="android.permission.CAMERA" />
    <!-- file reservation-->
    <uses-permission android:name="android.permission.READ_EXTERNAL_STORAGE" />
    <uses-permission
        android:name="android.permission.WRITE_EXTERNAL_STORAGE"
        tools:ignore="ScopedStorage" />
    <!-- Manage external storage permissions, Android11 need-->
    <uses-permission
        android:name="android.permission.MANAGE_EXTERNAL_STORAGE"
        tools:ignore="ScopedStorage" />
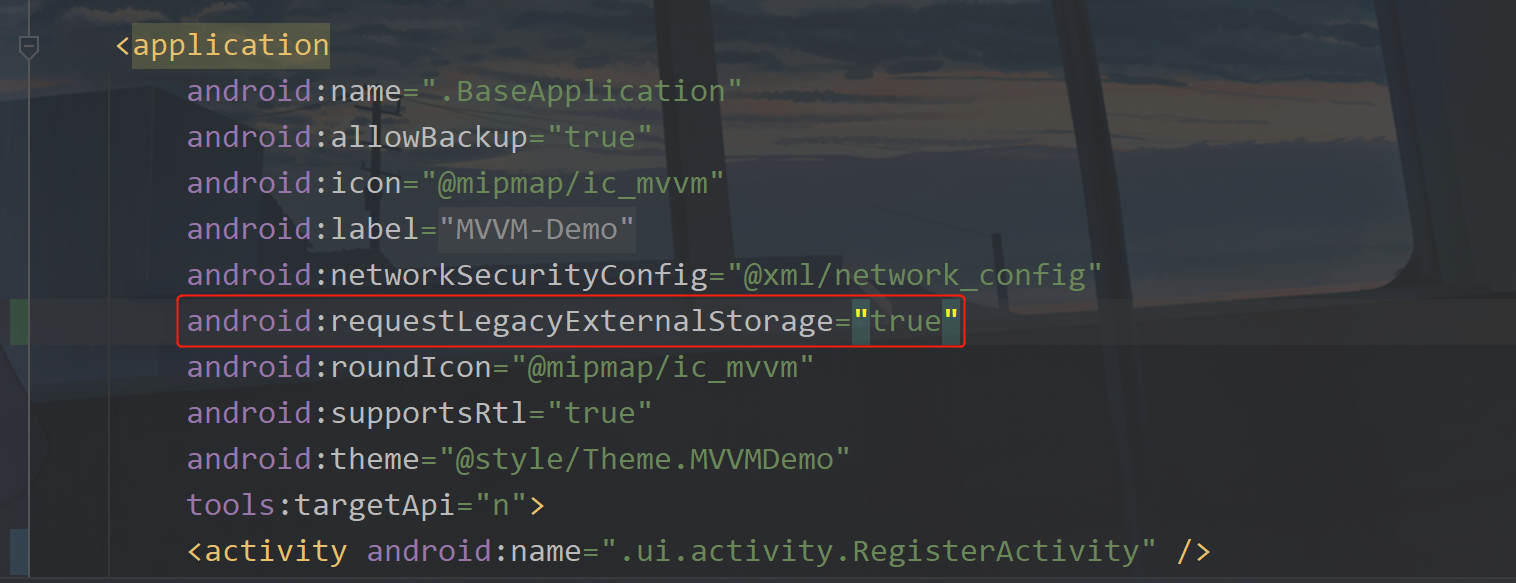
It's not over yet, on Android 10 To access the file on 0, you need to add it in the application
android:requestLegacyExternalStorage="true"
As shown in the figure below:
Colleagues, we also need to be compatible with Android 7 0, create a new file under the xml folder_ paths. xml, the code is as follows:
<?xml version="1.0" encoding="utf-8"?>
<resources>
    <paths>
        <!-- This is the path to save photos,Must be configured. -->
        <external-files-path
            name="images"
            path="Pictures" />
    </paths>
</resources>
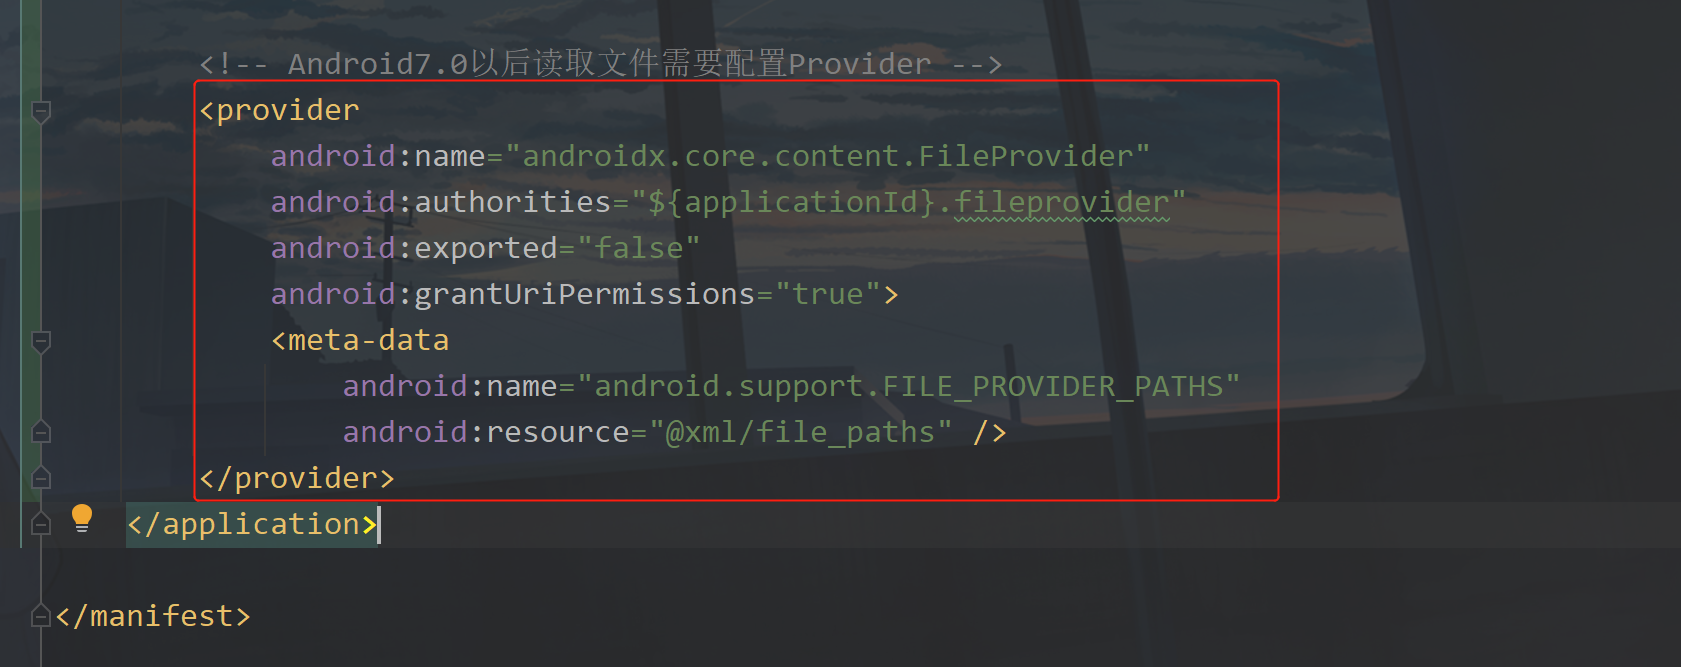
Then we went to androidmanifest Configure it in XML. The code is as follows:
		<!-- Android7.0 Configuration is required to read files later Provider -->
        <provider
            android:name="androidx.core.content.FileProvider"
            android:authorities="${applicationId}.fileprovider"
            android:exported="false"
            android:grantUriPermissions="true">
            <meta-data
                android:name="android.support.FILE_PROVIDER_PATHS"
                android:resource="@xml/file_paths" />
        </provider>
Add location as follows:
② Permission tool class
I can write a tool class myself here. Of course, I can also use a third-party framework to create a PermissionUtils class under the utils package. The code is as follows:
public class PermissionUtils {

    private static PermissionUtils mInstance;

    public static final String READ_EXTERNAL_STORAGE = Manifest.permission.READ_EXTERNAL_STORAGE;
    public static final String WRITE_EXTERNAL_STORAGE = Manifest.permission.WRITE_EXTERNAL_STORAGE;
    public static final String CAMERA = Manifest.permission.CAMERA;

    public static final int REQUEST_STORAGE_CODE = 1001;
    public static final int REQUEST_CAMERA_CODE = 1002;
    public static final int REQUEST_MANAGE_EXTERNAL_STORAGE_CODE = 1000;

    public static PermissionUtils getInstance() {
        if (mInstance == null) {
            synchronized (PermissionUtils.class) {
                if (mInstance == null) {
                    mInstance = new PermissionUtils();
                }
            }
        }
        return mInstance;
    }

    /**
     * Check whether you have certain permissions
     *
     * @param permission Permission name
     * @return true Is there false
     */
    public static boolean hasPermission(Activity activity, String permission) {
        if (Build.VERSION.SDK_INT >= Build.VERSION_CODES.M) {
            return activity.checkSelfPermission(permission) == PackageManager.PERMISSION_GRANTED;
        } else {
            return true;
        }
    }

    /**
     * Obtain the request code through the permission name
     *
     * @param permissionName Permission name
     * @return requestCode Permission request code
     */
    private static int getPermissionRequestCode(String permissionName) {
        int requestCode;
        switch (permissionName) {
            case READ_EXTERNAL_STORAGE:
            case WRITE_EXTERNAL_STORAGE:
                requestCode = REQUEST_STORAGE_CODE;
                break;
            case CAMERA:
                requestCode = REQUEST_CAMERA_CODE;
                break;
            default:
                requestCode = 1000;
                break;
        }
        return requestCode;
    }

    /**
     * Request permission
     *
     * @param permission Permission name
     */
    public static void requestPermission(Activity activity, String permission) {
        int requestCode = getPermissionRequestCode(permission);
        //Request this permission
        ActivityCompat.requestPermissions(activity, new String[]{permission}, requestCode);
    }
}
Then, because the permission request is related to Activity, we can encapsulate another layer in BaseActivity,
	/**
     * Open album request code
     */
    protected static final int SELECT_PHOTO_CODE = 2000;

    /**
     * Open camera request code
     */
    protected static final int TAKE_PHOTO_CODE = 2001;
Add two requests, because you need to jump to the system page to open the camera and album, and you also need to get the returned data. Here, I'll define it in advance, and then initialize PermissionUtils in onCreate.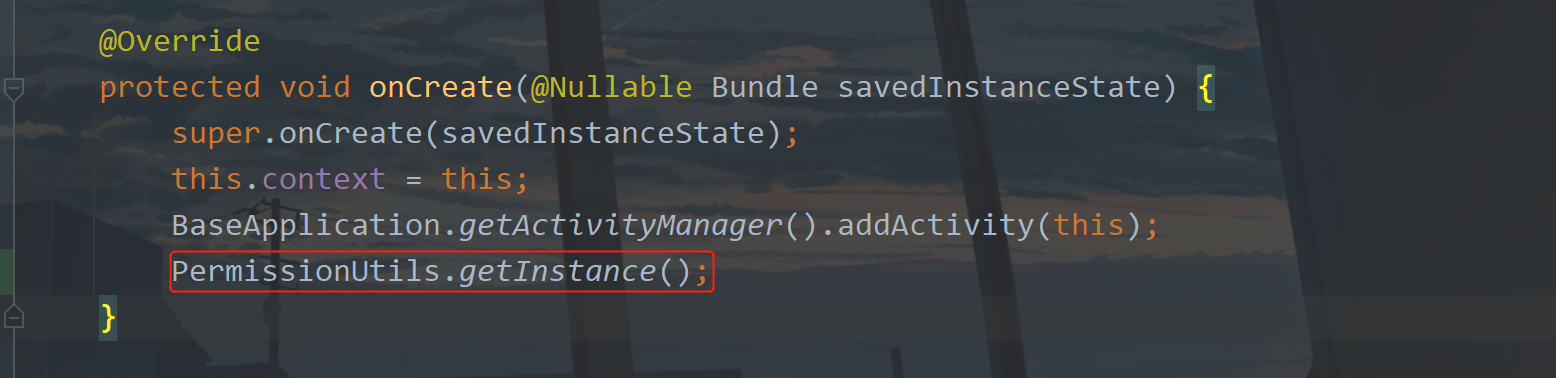
Add the following code to BaseActivity:
	/**
     * Currently on Android 11 0 and above
     */
    protected boolean isAndroid11() {
        return Build.VERSION.SDK_INT >= Build.VERSION_CODES.R;
    }

    /**
     * Currently on Android 10 0 and above
     */
    protected boolean isAndroid10() {
        return Build.VERSION.SDK_INT >= Build.VERSION_CODES.Q;
    }

    /**
     * Currently on Android 7 0 and above
     */
    protected boolean isAndroid7() {
        return Build.VERSION.SDK_INT >= Build.VERSION_CODES.N;
    }

    /**
     * Currently on Android 6 0 and above
     */
    protected boolean isAndroid6() {
        return Build.VERSION.SDK_INT >= Build.VERSION_CODES.M;
    }

    protected boolean isStorageManager() {
        return Environment.isExternalStorageManager();
    }

    protected boolean hasPermission(String permissionName) {
        return PermissionUtils.hasPermission(this, permissionName);
    }

    protected void requestPermission(String permissionName) {
        PermissionUtils.requestPermission(this, permissionName);
    }

    /**
     * Called when obtaining file read-write permission when requesting external storage management Android 11 version
     */
    protected void requestManageExternalStorage() {
        Intent intent = new Intent(Settings.ACTION_MANAGE_APP_ALL_FILES_ACCESS_PERMISSION);
        intent.setData(Uri.parse("package:" + getPackageName()));
        startActivityForResult(intent, PermissionUtils.REQUEST_MANAGE_EXTERNAL_STORAGE_CODE);
    }
Some methods are defined. Let's use DataBinding. How to get DataBinding in the pop-up window.
4, DataBinding
First, in activity_home.xml, the code is as follows:
	<data>

        <variable
            name="homeViewModel"
            type="com.llw.mvvm.viewmodels.HomeViewModel" />
    </data>
Then modify the header data DataBinding of the main page, and the code is as follows:
				<!--Circular picture-->
                <com.llw.mvvm.view.CustomImageView
                    android:id="@+id/iv_avatar"
                    localUrl="@{homeViewModel.user.avatar}"
                    android:layout_width="36dp"
                    android:layout_height="36dp"
                    android:padding="0.5dp"
                    android:scaleType="centerCrop"
                    android:src="@drawable/logo"
                    app:shapeAppearanceOverlay="@style/circleImageStyle"
                    app:strokeColor="@color/white"
                    app:strokeWidth="1dp" />
The localUrl here needs to be defined in the CustomImageView class. Add the following code in the CustomImageView:
	private static final RequestOptions OPTIONS_LOCAL = new RequestOptions()
            .placeholder(R.drawable.logo)//The picture displayed before the picture is loaded
            .fallback(R.drawable.logo) //When the url is empty, the image displayed
            .error(R.mipmap.ic_loading_failed)//The picture displayed after the picture failed to load
            .diskCacheStrategy(DiskCacheStrategy.NONE)//No disk caching
            .skipMemoryCache(true);

	@BindingAdapter(value = {"localUrl"}, requireAll = false)
    public static void setLocalUrl(ImageView imageView, String url) {
        Glide.with(BaseApplication.getContext()).load(url).apply(OPTIONS_LOCAL).into(imageView);
    }
Then there's NAV_ header. Bind DataBinding in XML. The code is as follows:
<?xml version="1.0" encoding="utf-8"?>
<layout xmlns:android="http://schemas.android.com/apk/res/android"
    xmlns:app="http://schemas.android.com/apk/res-auto">

    <data>
        <variable
            name="homeViewModel"
            type="com.llw.mvvm.viewmodels.HomeViewModel" />
    </data>

    <LinearLayout
        android:layout_width="match_parent"
        android:layout_height="wrap_content"
        android:orientation="vertical">
        <!--Header menu-->
        <RelativeLayout
            android:id="@+id/lay_user_info"
            android:layout_width="match_parent"
            android:layout_height="120dp"
            android:background="@color/purple_500">
            <!--head portrait-->
            <com.llw.mvvm.view.CustomImageView
                android:id="@+id/iv_avatar"
                localUrl="@{homeViewModel.user.avatar}"
                android:layout_width="80dp"
                android:layout_height="80dp"
                android:layout_centerVertical="true"
                android:layout_marginStart="24dp"
                android:layout_marginEnd="24dp"
                android:padding="1dp"
                android:scaleType="centerCrop"
                android:src="@drawable/logo"
                app:shapeAppearanceOverlay="@style/circleImageStyle"
                app:strokeColor="@color/white"
                app:strokeWidth="2dp" />
            <!--name-->
            <TextView
                android:id="@+id/tv_name"
                android:layout_width="wrap_content"
                android:layout_height="wrap_content"
                android:layout_alignTop="@+id/iv_avatar"
                android:layout_marginTop="16dp"
                android:layout_toEndOf="@+id/iv_avatar"
                android:text="@{homeViewModel.user.nickname ?? homeViewModel.defaultName}"
                android:textColor="#FFF"
                android:textSize="16sp" />
            <!--label-->
            <TextView
                android:id="@+id/tv_tip"
                android:layout_width="wrap_content"
                android:layout_height="wrap_content"
                android:layout_below="@+id/tv_name"
                android:layout_marginTop="8dp"
                android:layout_toEndOf="@+id/iv_avatar"
                android:text="@{homeViewModel.user.introduction ?? homeViewModel.defaultIntroduction}"
                android:textColor="#FFF"
                android:textSize="14sp" />
        </RelativeLayout>
    </LinearLayout>
</layout>
This line of code needs to be said
homeViewModel.user.nickname ?? homeViewModel.defaultName
This line of code is equivalent to
homeViewModel.user.nickname != null ? homeViewModel.user.nickname : homeViewModel.defaultName
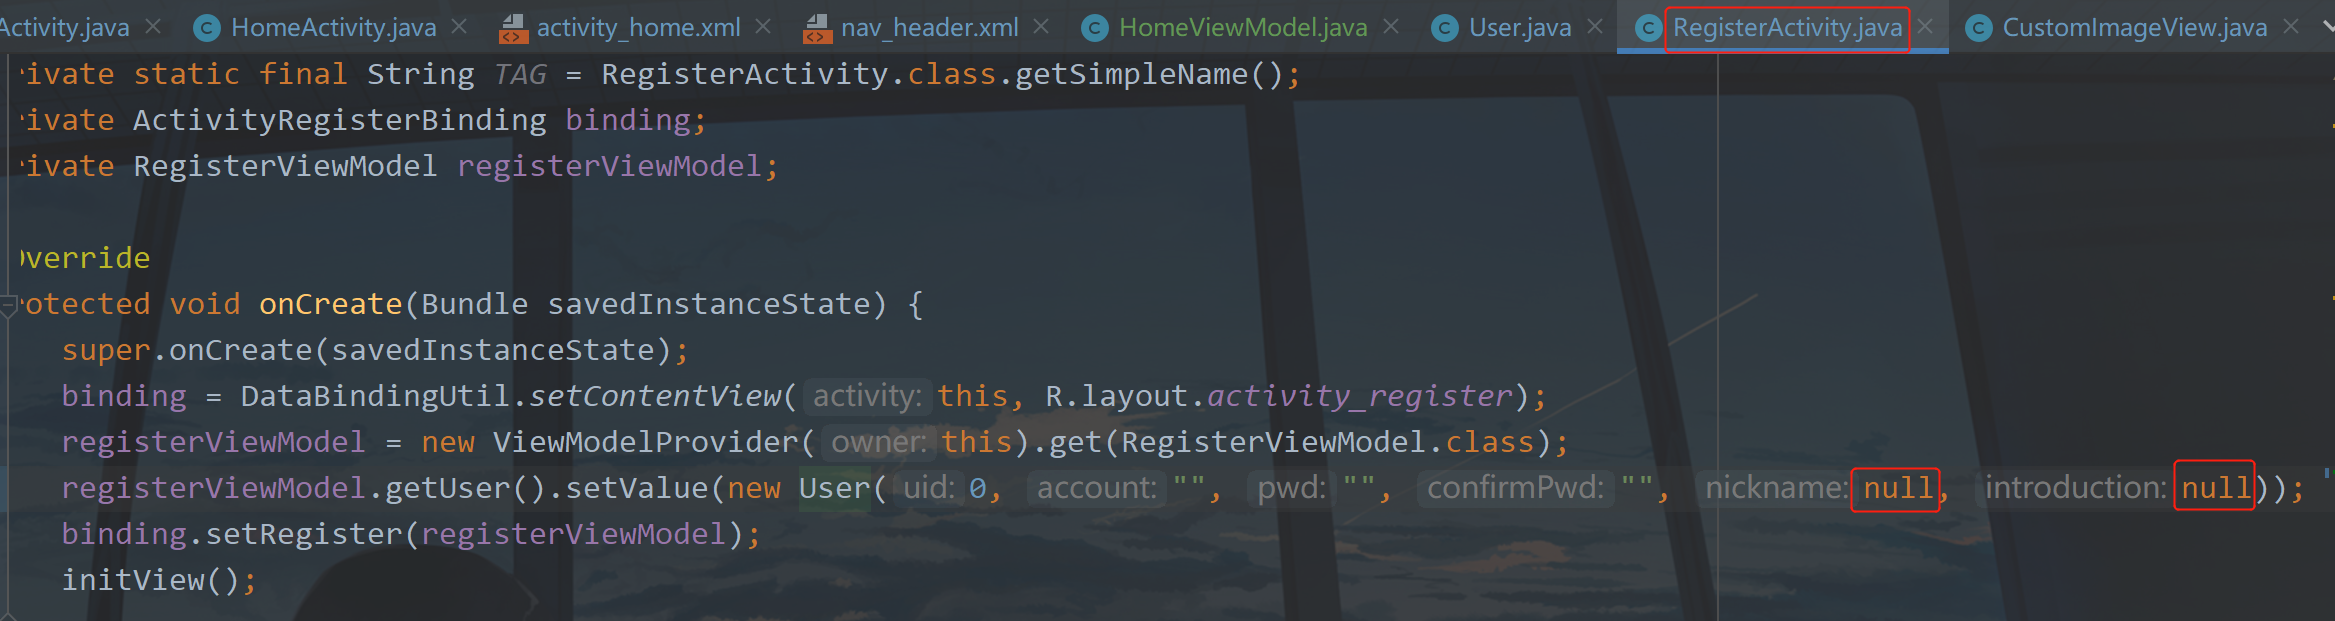
This defaultName is the default value I set earlier, because nicknames and profiles may not be filled in during registration. Here we want this default value to work when saving user information. Here, you need to modify the default value in the registration page from the previous empty string to null, so that the judgment value in xml will work. At the same time, if your value is null, there will be no error in xml. This is handled by DataBinding, which is similar to the empty security in Kotlin.
The DataBinding here mainly implements two functions. The first is that the header image of HomeActivity's title bar can change according to the user's modification of the image. If there is no modification, the default header image will be used. The second is the head in NavigationView_ The layout is also changed when the user manually modifies the nickname, profile and avatar.
5, Tool class
We will soon enter the main content. We often use some tool classes in the code, such as dp to px, time processing, Bitmp processing and camera image processing. Since I will use these tool classes later, I will post them now. The tool classes here are placed under the utils package. Create a new SizeUtils class with the following code:
public final class SizeUtils {


    private SizeUtils() {
        throw new UnsupportedOperationException("u can't instantiate me...");
    }

    /**
     * Value of dp to value of px.
     *
     * @param dpValue The value of dp.
     * @return value of px
     */
    public static int dp2px(Context context, final float dpValue) {
        final float scale = context.getApplicationContext().getResources().getDisplayMetrics().density;
        return (int) (dpValue * scale + 0.5f);
    }

    /**
     * Value of px to value of dp.
     *
     * @param pxValue The value of px.
     * @return value of dp
     */
    public static int px2dp(Context context, final float pxValue) {
        final float scale = context.getApplicationContext().getResources().getDisplayMetrics().density;
        return (int) (pxValue / scale + 0.5f);
    }

    /**
     * Value of sp to value of px.
     *
     * @param spValue The value of sp.
     * @return value of px
     */
    public static int sp2px(Context context, final float spValue) {
        final float fontScale = context.getApplicationContext().getResources().getDisplayMetrics().scaledDensity;
        return (int) (spValue * fontScale + 0.5f);
    }

    /**
     * Value of px to value of sp.
     *
     * @param pxValue The value of px.
     * @return value of sp
     */
    public static int px2sp(Context context, final float pxValue) {
        final float fontScale = context.getApplicationContext().getResources().getDisplayMetrics().scaledDensity;
        return (int) (pxValue / fontScale + 0.5f);
    }

    /**
     * Converts an unpacked complex data value holding a dimension to its final floating
     * point value. The two parameters <var>unit</var> and <var>value</var>
     * are as in {@link TypedValue#TYPE_DIMENSION}.
     *
     * @param value The value to apply the unit to.
     * @param unit  The unit to convert from.
     * @return The complex floating point value multiplied by the appropriate
     * metrics depending on its unit.
     */
    public static float applyDimension(Context context, final float value, final int unit) {
        DisplayMetrics metrics = context.getApplicationContext().getResources().getDisplayMetrics();
        switch (unit) {
            case TypedValue.COMPLEX_UNIT_PX:
                return value;
            case TypedValue.COMPLEX_UNIT_DIP:
                return value * metrics.density;
            case TypedValue.COMPLEX_UNIT_SP:
                return value * metrics.scaledDensity;
            case TypedValue.COMPLEX_UNIT_PT:
                return value * metrics.xdpi * (1.0f / 72);
            case TypedValue.COMPLEX_UNIT_IN:
                return value * metrics.xdpi;
            case TypedValue.COMPLEX_UNIT_MM:
                return value * metrics.xdpi * (1.0f / 25.4f);
        }
        return 0;
    }

    /**
     * Force get the size of view.
     * <p>e.g.</p>
     * <pre>
     * SizeUtils.forceGetViewSize(view, new SizeUtils.onGetSizeListener() {
     *     Override
     *     public void onGetSize(final View view) {
     *         view.getWidth();
     *     }
     * });
     * </pre>
     *
     * @param view     The view.
     * @param listener The get size listener.
     */
    public static void forceGetViewSize(final View view, final onGetSizeListener listener) {
        view.post(new Runnable() {
            @Override
            public void run() {
                if (listener != null) {
                    listener.onGetSize(view);
                }
            }
        });
    }

    /**
     * Return the width of view.
     *
     * @param view The view.
     * @return the width of view
     */
    public static int getMeasuredWidth(final View view) {
        return measureView(view)[0];
    }

    /**
     * Return the height of view.
     *
     * @param view The view.
     * @return the height of view
     */
    public static int getMeasuredHeight(final View view) {
        return measureView(view)[1];
    }

    /**
     * Measure the view.
     *
     * @param view The view.
     * @return arr[0]: view's width, arr[1]: view's height
     */
    public static int[] measureView(final View view) {
        ViewGroup.LayoutParams lp = view.getLayoutParams();
        if (lp == null) {
            lp = new ViewGroup.LayoutParams(
                    ViewGroup.LayoutParams.MATCH_PARENT,
                    ViewGroup.LayoutParams.WRAP_CONTENT
            );
        }
        int widthSpec = ViewGroup.getChildMeasureSpec(0, 0, lp.width);
        int lpHeight = lp.height;
        int heightSpec;
        if (lpHeight > 0) {
            heightSpec = View.MeasureSpec.makeMeasureSpec(lpHeight, View.MeasureSpec.EXACTLY);
        } else {
            heightSpec = View.MeasureSpec.makeMeasureSpec(0, View.MeasureSpec.UNSPECIFIED);
        }
        view.measure(widthSpec, heightSpec);
        return new int[]{view.getMeasuredWidth(), view.getMeasuredHeight()};
    }

    public interface onGetSizeListener {
        void onGetSize(View view);
    }

}
EasyDate class, the code is as follows:
public final class EasyDate {

    public static final String STANDARD_TIME = "yyyy-MM-dd HH:mm:ss";
    public static final String FULL_TIME = "yyyy-MM-dd HH:mm:ss.SSS";
    public static final String YEAR_MONTH_DAY = "yyyy-MM-dd";
    public static final String YEAR_MONTH_DAY_CN = "yyyy year MM month dd number";
    public static final String HOUR_MINUTE_SECOND = "HH:mm:ss";
    public static final String HOUR_MINUTE_SECOND_CN = "HH Time mm branch ss second";
    public static final String YEAR = "yyyy";
    public static final String MONTH = "MM";
    public static final String DAY = "dd";
    public static final String HOUR = "HH";
    public static final String MINUTE = "mm";
    public static final String SECOND = "ss";
    public static final String MILLISECOND = "SSS";
    public static final String YESTERDAY = "yesterday";
    public static final String TODAY = "today";
    public static final String TOMORROW = "tomorrow";
    public static final String SUNDAY = "Sunday";
    public static final String MONDAY = "Monday";
    public static final String TUESDAY = "Tuesday";
    public static final String WEDNESDAY = "Wednesday";
    public static final String THURSDAY = "Thursday";
    public static final String FRIDAY = "Friday";
    public static final String SATURDAY = "Saturday";
    public static final String[] weekDays = {SUNDAY, MONDAY, TUESDAY, WEDNESDAY, THURSDAY, FRIDAY, SATURDAY};

    /**
     * Get standard time
     *
     * @return For example, 2021-07-01 10:35:53
     */
    public static String getDateTime() {
        return new SimpleDateFormat(STANDARD_TIME, Locale.CHINESE).format(new Date());
    }

    /**
     * Get full time
     *
     * @return For example, 2021-07-01 10:37:00.748
     */
    public static String getFullDateTime() {
        return new SimpleDateFormat(FULL_TIME, Locale.CHINESE).format(new Date());
    }

    /**
     * Get date (today)
     *
     * @return For example, 2021-07-01
     */
    public static String getTheYearMonthAndDay() {
        return new SimpleDateFormat(YEAR_MONTH_DAY, Locale.CHINESE).format(new Date());
    }

    /**
     * Get date
     *
     * @return For example, July 1, 2021
     */
    public static String getTheYearMonthAndDayCn() {
        return new SimpleDateFormat(YEAR_MONTH_DAY_CN, Locale.CHINESE).format(new Date());
    }

    /**
     * Get date
     * @param delimiter Separator
     * @return For example, July 1, 2021
     */
    public static String getTheYearMonthAndDayDelimiter(CharSequence delimiter) {
        return new SimpleDateFormat(YEAR + delimiter + MONTH + delimiter + DAY, Locale.CHINESE).format(new Date());
    }

    /**
     * Get hours, minutes and seconds
     *
     * @return For example, 10:38:25
     */
    public static String getHoursMinutesAndSeconds() {
        return new SimpleDateFormat(HOUR_MINUTE_SECOND, Locale.CHINESE).format(new Date());
    }

    /**
     * Get hours, minutes and seconds
     *
     * @return For example, 10:38:50
     */
    public static String getHoursMinutesAndSecondsCn() {
        return new SimpleDateFormat(HOUR_MINUTE_SECOND_CN, Locale.CHINESE).format(new Date());
    }

    /**
     * Get hours, minutes and seconds
     * @param delimiter Separator
     * @return For example, 2021 / 07 / 01
     */
    public static String getHoursMinutesAndSecondsDelimiter(CharSequence delimiter) {
        return new SimpleDateFormat(HOUR + delimiter + MINUTE + delimiter + SECOND, Locale.CHINESE).format(new Date());
    }

    /**
     * Acquisition year
     *
     * @return For example, 2021
     */
    public static String getYear() {
        return new SimpleDateFormat(YEAR, Locale.CHINESE).format(new Date());
    }

    /**
     * Get month
     *
     * @return For example 07
     */
    public static String getMonth() {
        return new SimpleDateFormat(MONTH, Locale.CHINESE).format(new Date());
    }

    /**
     * Get days
     *
     * @return For example 01
     */
    public static String getDay() {
        return new SimpleDateFormat(DAY, Locale.CHINESE).format(new Date());
    }

    /**
     * Get hours
     *
     * @return Example 10
     */
    public static String getHour() {
        return new SimpleDateFormat(HOUR, Locale.CHINESE).format(new Date());
    }

    /**
     * Get minutes
     *
     * @return Example 40
     */
    public static String getMinute() {
        return new SimpleDateFormat(MINUTE, Locale.CHINESE).format(new Date());
    }

    /**
     * Get seconds
     *
     * @return For example 58
     */
    public static String getSecond() {
        return new SimpleDateFormat(SECOND, Locale.CHINESE).format(new Date());
    }

    /**
     * Get milliseconds
     *
     * @return E.g. 666
     */
    public static String getMilliSecond() {
        return new SimpleDateFormat(MILLISECOND, Locale.CHINESE).format(new Date());
    }

    /**
     * Get timestamp
     *
     * @return For example, 1625107306051
     */
    public static long getTimestamp() {
        return System.currentTimeMillis();
    }

    /**
     * Convert time to timestamp
     *
     * @param time For example, 2021-07-01 10:44:11
     * @return 1625107451000
     */
    public static long dateToStamp(String time) {
        SimpleDateFormat simpleDateFormat = new SimpleDateFormat(STANDARD_TIME, Locale.CHINESE);
        Date date = null;
        try {
            date = simpleDateFormat.parse(time);
        } catch (ParseException e) {
            e.printStackTrace();
        }
        return Objects.requireNonNull(date).getTime();
    }

    /**
     * Convert timestamp to time
     *
     * @param timeMillis For example, 1625107637084
     * @return For example, 2021-07-01 10:47:17
     */
    public static String stampToDate(long timeMillis) {
        return new SimpleDateFormat(STANDARD_TIME, Locale.CHINESE).format(new Date(timeMillis));
    }

    /**
     * What day is today
     *
     * @return For example, Thursday
     */
    public static String getTodayOfWeek() {
        Calendar cal = Calendar.getInstance();
        cal.setTime(new Date());
        int index = cal.get(Calendar.DAY_OF_WEEK) - 1;
        if (index < 0) {
            index = 0;
        }
        return weekDays[index];
    }

    /**
     * The day of the week is calculated according to the entered date and time
     *
     * @param dateTime For example, June 20, 2021
     * @return For example, Sunday
     */
    public static String getWeek(String dateTime) {
        Calendar cal = Calendar.getInstance();
        if ("".equals(dateTime)) {
            cal.setTime(new Date(System.currentTimeMillis()));
        } else {
            SimpleDateFormat sdf = new SimpleDateFormat(YEAR_MONTH_DAY, Locale.getDefault());
            Date date;
            try {
                date = sdf.parse(dateTime);
            } catch (ParseException e) {
                date = null;
                e.printStackTrace();
            }
            if (date != null) {
                cal.setTime(new Date(date.getTime()));
            }
        }
        return weekDays[cal.get(Calendar.DAY_OF_WEEK) - 1];
    }

    /**
     * Get yesterday of the input date
     *
     * @param date For example, 2021-07-01
     * @return For example, June 30, 2021
     */
    public static String getYesterday(Date date) {
        Calendar calendar = new GregorianCalendar();
        calendar.setTime(date);
        calendar.add(Calendar.DATE, -1);
        date = calendar.getTime();
        return new SimpleDateFormat(YEAR_MONTH_DAY, Locale.getDefault()).format(date);
    }

    /**
     * Get tomorrow of the input date
     *
     * @param date For example, 2021-07-01
     * @return For example, 2021-07-02
     */
    public static String getTomorrow(Date date) {
        Calendar calendar = new GregorianCalendar();
        calendar.setTime(date);
        calendar.add(Calendar.DATE, +1);
        date = calendar.getTime();
        return new SimpleDateFormat(YEAR_MONTH_DAY, Locale.getDefault()).format(date);
    }

    /**
     * The day of the week is calculated according to the month, year and day, and judged according to the current date. If it is not yesterday, today and tomorrow, it will be displayed in weeks
     *
     * @param dateTime For example, 2021-07-03
     * @return For example, Saturday
     */
    public static String getDayInfo(String dateTime) {
        String dayInfo;
        String yesterday = getYesterday(new Date());
        String today = getTheYearMonthAndDay();
        String tomorrow = getTomorrow(new Date());

        if (dateTime.equals(yesterday)) {
            dayInfo = YESTERDAY;
        } else if (dateTime.equals(today)) {
            dayInfo = TODAY;
        } else if (dateTime.equals(tomorrow)) {
            dayInfo = TOMORROW;
        } else {
            dayInfo = getWeek(dateTime);
        }
        return dayInfo;
    }

    /**
     * Get the number of days in this month
     *
     * @return Example 31
     */
    public static int getCurrentMonthDays() {
        Calendar calendar = Calendar.getInstance();
        //Set the date to the first day of the month
        calendar.set(Calendar.DATE, 1);
        //The date is the last day
        calendar.roll(Calendar.DATE, -1);
        return calendar.get(Calendar.DATE);
    }

    /**
     * Gets the number of days in the specified month
     *
     * @param year  For example, 2021
     * @param month Example 7
     * @return Example 31
     */
    public static int getMonthDays(int year, int month) {
        Calendar calendar = Calendar.getInstance();
        calendar.set(Calendar.YEAR, year);
        calendar.set(Calendar.MONTH, month - 1);
        //Set the date to the first day of the month
        calendar.set(Calendar.DATE, 1);
        //The date is the last day
        calendar.roll(Calendar.DATE, -1);
        return calendar.get(Calendar.DATE);
    }
}
CameraUtils class, the code is as follows:
public class CameraUtils {

    /**
     * Camera Intent
     * @param context
     * @param outputImagePath
     * @return
     */
    public static Intent getTakePhotoIntent(Context context, File outputImagePath) {
        // Activate camera
        Intent intent = new Intent(MediaStore.ACTION_IMAGE_CAPTURE);
        // Judge whether the memory card can be used for storage
        if (hasSdcard()) {
            if (Build.VERSION.SDK_INT < Build.VERSION_CODES.N) {
                // Create uri from file
                Uri uri = Uri.fromFile(outputImagePath);
                intent.putExtra(MediaStore.EXTRA_OUTPUT, uri);
            } else {
                //Compatible with Android 7 0 is in the form of a shared file
                ContentValues contentValues = new ContentValues(1);
                contentValues.put(MediaStore.Images.Media.DATA, outputImagePath.getAbsolutePath());
                Uri uri = context.getApplicationContext().getContentResolver().insert(MediaStore.Images.Media.EXTERNAL_CONTENT_URI, contentValues);
                intent.putExtra(MediaStore.EXTRA_OUTPUT, uri);
            }
        }
        return intent;
    }

    /**
     * Album Intent
     * @return
     */
    public static Intent getSelectPhotoIntent() {
        Intent intent = new Intent("android.intent.action.GET_CONTENT");
        intent.setType("image/*");
        return intent;
    }

    /**
     * Determine whether the sdcard is mounted
     */
    public static boolean hasSdcard() {
        return Environment.getExternalStorageState().equals(
                Environment.MEDIA_MOUNTED);
    }

    /**
     * 4.4 And the method of processing pictures by the above system
     */
    @TargetApi(Build.VERSION_CODES.KITKAT)
    public static String getImageOnKitKatPath(Intent data, Context context) {
        String imagePath = null;
        Uri uri = data.getData();
        Log.d("uri=intent.getData :", "" + uri);
        if (DocumentsContract.isDocumentUri(context, uri)) {
            //Rows specified in the data table
            String docId = DocumentsContract.getDocumentId(uri);
            Log.d("getDocumentId(uri) :", "" + docId);
            Log.d("uri.getAuthority() :", "" + uri.getAuthority());
            if ("com.android.providers.media.documents".equals(uri.getAuthority())) {
                String id = docId.split(":")[1];
                String selection = MediaStore.Images.Media._ID + "=" + id;
                imagePath = getImagePath(MediaStore.Images.Media.EXTERNAL_CONTENT_URI, selection, context);
            } else if ("com.android.providers.downloads.documents".equals(uri.getAuthority())) {
                Uri contentUri = ContentUris.withAppendedId(Uri.parse("content://downloads/public_downloads"), Long.valueOf(docId));
                imagePath = getImagePath(contentUri, null, context);
            }

        } else if ("content".equalsIgnoreCase(uri.getScheme())) {
            imagePath = getImagePath(uri, null, context);
        }
        return imagePath;
    }

    /**
     * Get the real picture path through uri and selection, which should be used when getting pictures from albums
     */
    public static String getImagePath(Uri uri, String selection, Context context) {
        String path = null;
        Cursor cursor = context.getContentResolver().query(uri, null, selection, null, null);
        if (cursor != null) {
            if (cursor.moveToFirst()) {
                path = cursor.getString(cursor.getColumnIndex(MediaStore.Images.Media.DATA));
            }
            cursor.close();
        }
        return path;
    }

    /**
     * Change picture display angle
     * @param filepath
     * @param orc_bitmap
     * @param iv
     */
    public static void ImgUpdateDirection(String filepath, Bitmap orc_bitmap, ImageView iv) {
        //Rotation angle of the picture
        int digree = 0;
        //Get an ExifInterface object according to the filepath of the picture
        ExifInterface exif = null;
        try {
            exif = new ExifInterface(filepath);
            if (exif != null) {

                // Read the camera direction information in the picture
                int ori = exif.getAttributeInt(ExifInterface.TAG_ORIENTATION, ExifInterface.ORIENTATION_UNDEFINED);

                // Calculate rotation angle
                switch (ori) {
                    case ExifInterface.ORIENTATION_ROTATE_90:
                        digree = 90;
                        break;
                    case ExifInterface.ORIENTATION_ROTATE_180:
                        digree = 180;
                        break;
                    case ExifInterface.ORIENTATION_ROTATE_270:
                        digree = 270;
                        break;
                    default:
                        digree = 0;
                        break;
                }

            }
            //If the picture is not 0
            if (digree != 0) {
                // Rotate picture
                Matrix m = new Matrix();
                m.postRotate(digree);
                orc_bitmap = Bitmap.createBitmap(orc_bitmap, 0, 0, orc_bitmap.getWidth(),
                        orc_bitmap.getHeight(), m, true);
            }
            if (orc_bitmap != null) {
                iv.setImageBitmap(orc_bitmap);
            }
        } catch (IOException e) {
            e.printStackTrace();
            exif = null;
        }
    }

    /**
     * 4.4 The following system processes pictures
     */
    public static String getImageBeforeKitKatPath(Intent data, Context context) {
        Uri uri = data.getData();
        String imagePath = getImagePath(uri, null, context);
        return imagePath;
    }

    /**
     * Proportional compression
     * @param image
     * @return
     */
    public static Bitmap compression(Bitmap image) {
        ByteArrayOutputStream outputStream = new ByteArrayOutputStream();
        image.compress(Bitmap.CompressFormat.JPEG, 100, outputStream);
        //Judge that if the picture is greater than 1M, compress it to avoid overflow when generating the picture (BitmapFactory.decodeStream)
        if (outputStream.toByteArray().length / 1024 > 1024) {
            //Resetting the outputStream clears the outputStream
            outputStream.reset();
            //Here, 50% is compressed and the compressed data is stored in Bao s
            image.compress(Bitmap.CompressFormat.JPEG, 50, outputStream);
        }
        ByteArrayInputStream inputStream = new ByteArrayInputStream(outputStream.toByteArray());
        BitmapFactory.Options options = new BitmapFactory.Options();
        //Start reading in the picture and put options Injustdecodebounds is set back to true
        options.inJustDecodeBounds = true;
        Bitmap bitmap = BitmapFactory.decodeStream(inputStream, null, options);
        options.inJustDecodeBounds = false;
        int outWidth = options.outWidth;
        int outHeight = options.outHeight;
        //Now most mainstream mobile phones have 800 * 480 resolution, so we set the height and width to
        float height = 800f;//Set the height here to 800f
        float width = 480f;//Set the width here to 480f

        //Zoom ratio. Because it is a fixed scale, only one of the height or width data can be calculated
        int zoomRatio = 1;//be=1 means no scaling
        if (outWidth > outHeight && outWidth > width) {//If the width is large, scale according to the fixed size of the width
            zoomRatio = (int) (options.outWidth / width);
        } else if (outWidth < outHeight && outHeight > height) {//If the height is high, scale according to the fixed size of the width
            zoomRatio = (int) (options.outHeight / height);
        }
        if (zoomRatio <= 0) {
            zoomRatio = 1;
        }
        options.inSampleSize = zoomRatio;//Set scale
        options.inPreferredConfig = Bitmap.Config.RGB_565;//Lower picture from ARGB888 to RGB565
        //Read in the picture again. Note that options. Has been set at this time Injustdecodebounds is set to false
        inputStream = new ByteArrayInputStream(outputStream.toByteArray());
        //Compress the scale before mass compression
        bitmap = BitmapFactory.decodeStream(inputStream, null, options);
        return bitmap;
    }
}
BitmapUtils class, the code is as follows (not used in this article, because I don't have a server, but if you need to upload to the server, the general practice is to convert the image into Base64 and send it to the server):
public class BitmapUtils {
    /**
     * bitmap To base64
     *
     * @param bitmap
     * @return
     */
    public static String bitmapToBase64(Bitmap bitmap) {

        String result = null;
        ByteArrayOutputStream baos = null;
        try {
            if (bitmap != null) {
                baos = new ByteArrayOutputStream();
                bitmap.compress(Bitmap.CompressFormat.JPEG, 100, baos);

                baos.flush();
                baos.close();

                byte[] bitmapBytes = baos.toByteArray();
                result = Base64.encodeToString(bitmapBytes, Base64.DEFAULT);
            }
        } catch (IOException e) {
            e.printStackTrace();
        } finally {
            try {
                if (baos != null) {
                    baos.flush();
                    baos.close();
                }
            } catch (IOException e) {
                e.printStackTrace();
            }
        }
        return result;
    }

    /**
     * base64 Convert to bitmap
     *
     * @param base64Data
     * @return
     */
    public static Bitmap base64ToBitmap(String base64Data) {
        byte[] bytes = Base64.decode(base64Data, Base64.DEFAULT);
        return BitmapFactory.decodeByteArray(bytes, 0, bytes.length);
    }

    /**
     * url To bitmap
     * @param url
     * @return
     */
    public static Bitmap urlToBitmap(final String url){
        final Bitmap[] bitmap = {null};
        new Thread(() -> {
            URL imageurl = null;
            try {
                imageurl = new URL(url);
            } catch (MalformedURLException e) {
                e.printStackTrace();
            }
            try {
                HttpURLConnection conn = (HttpURLConnection)imageurl.openConnection();
                conn.setDoInput(true);
                conn.connect();
                InputStream is = conn.getInputStream();
                bitmap[0] = BitmapFactory.decodeStream(is);
                is.close();
            } catch (IOException e) {
                e.printStackTrace();
            }
        }).start();

        return bitmap[0];
    }
}
6, Core link
The following code is written in HomeActivity. First declare some variables
	//Input pop-up window
    private AlertDialog editDialog = null;
    //Modify user information pop-up window
    private AlertDialog modifyUserInfoDialog = null;
    //Whether to display two ways to modify the Avatar
    private boolean isShow = false;
    //uri used to save photographed pictures
    private Uri mCameraUri;
    // The file path used to save pictures. Android 10 uses the following picture path to access pictures
    private String mCameraImagePath;
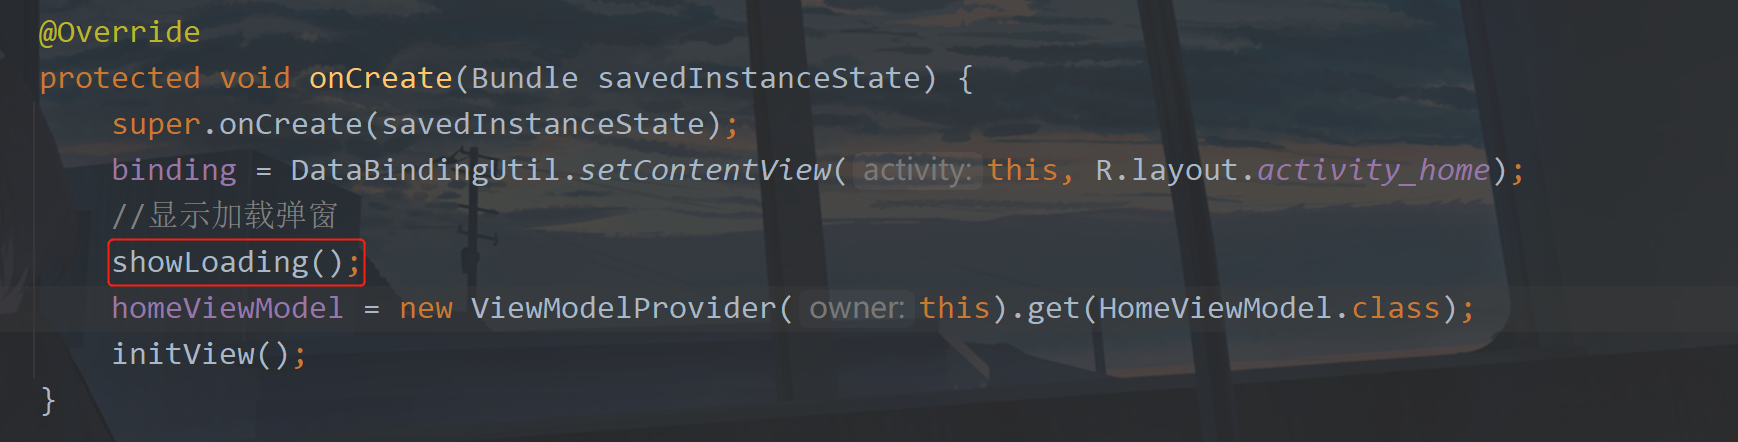
First, we add a line of code to display the loading pop-up window in the onCreate method. This method is written in BaseActivity, and the current HomeActivity is inherited from BaseActivity.
		//Show load pop-up
        showLoading();
Add location
Then add code in initView method:
		//Gets the headerLayout view of the NavigationView
        View headerView = binding.navView.getHeaderView(0);
        headerView.setOnClickListener(v -> showModifyUserInfoDialog());
        //Gets the Binding of the headerLayout view
        NavHeaderBinding headerBinding = DataBindingUtil.bind(headerView);
        //Get local user information
        homeViewModel.getUser();
        //When the user information changes, set the data source for the corresponding xml, that is, the previously written ViewModel.
        homeViewModel.user.observe(this, user -> {
            localUser = user;
            binding.setHomeViewModel(homeViewModel);
            if (headerBinding != null) {
                headerBinding.setHomeViewModel(homeViewModel);
            }
            //Hide load Popup
            dismissLoading();
        });
Add the location as shown in the figure below
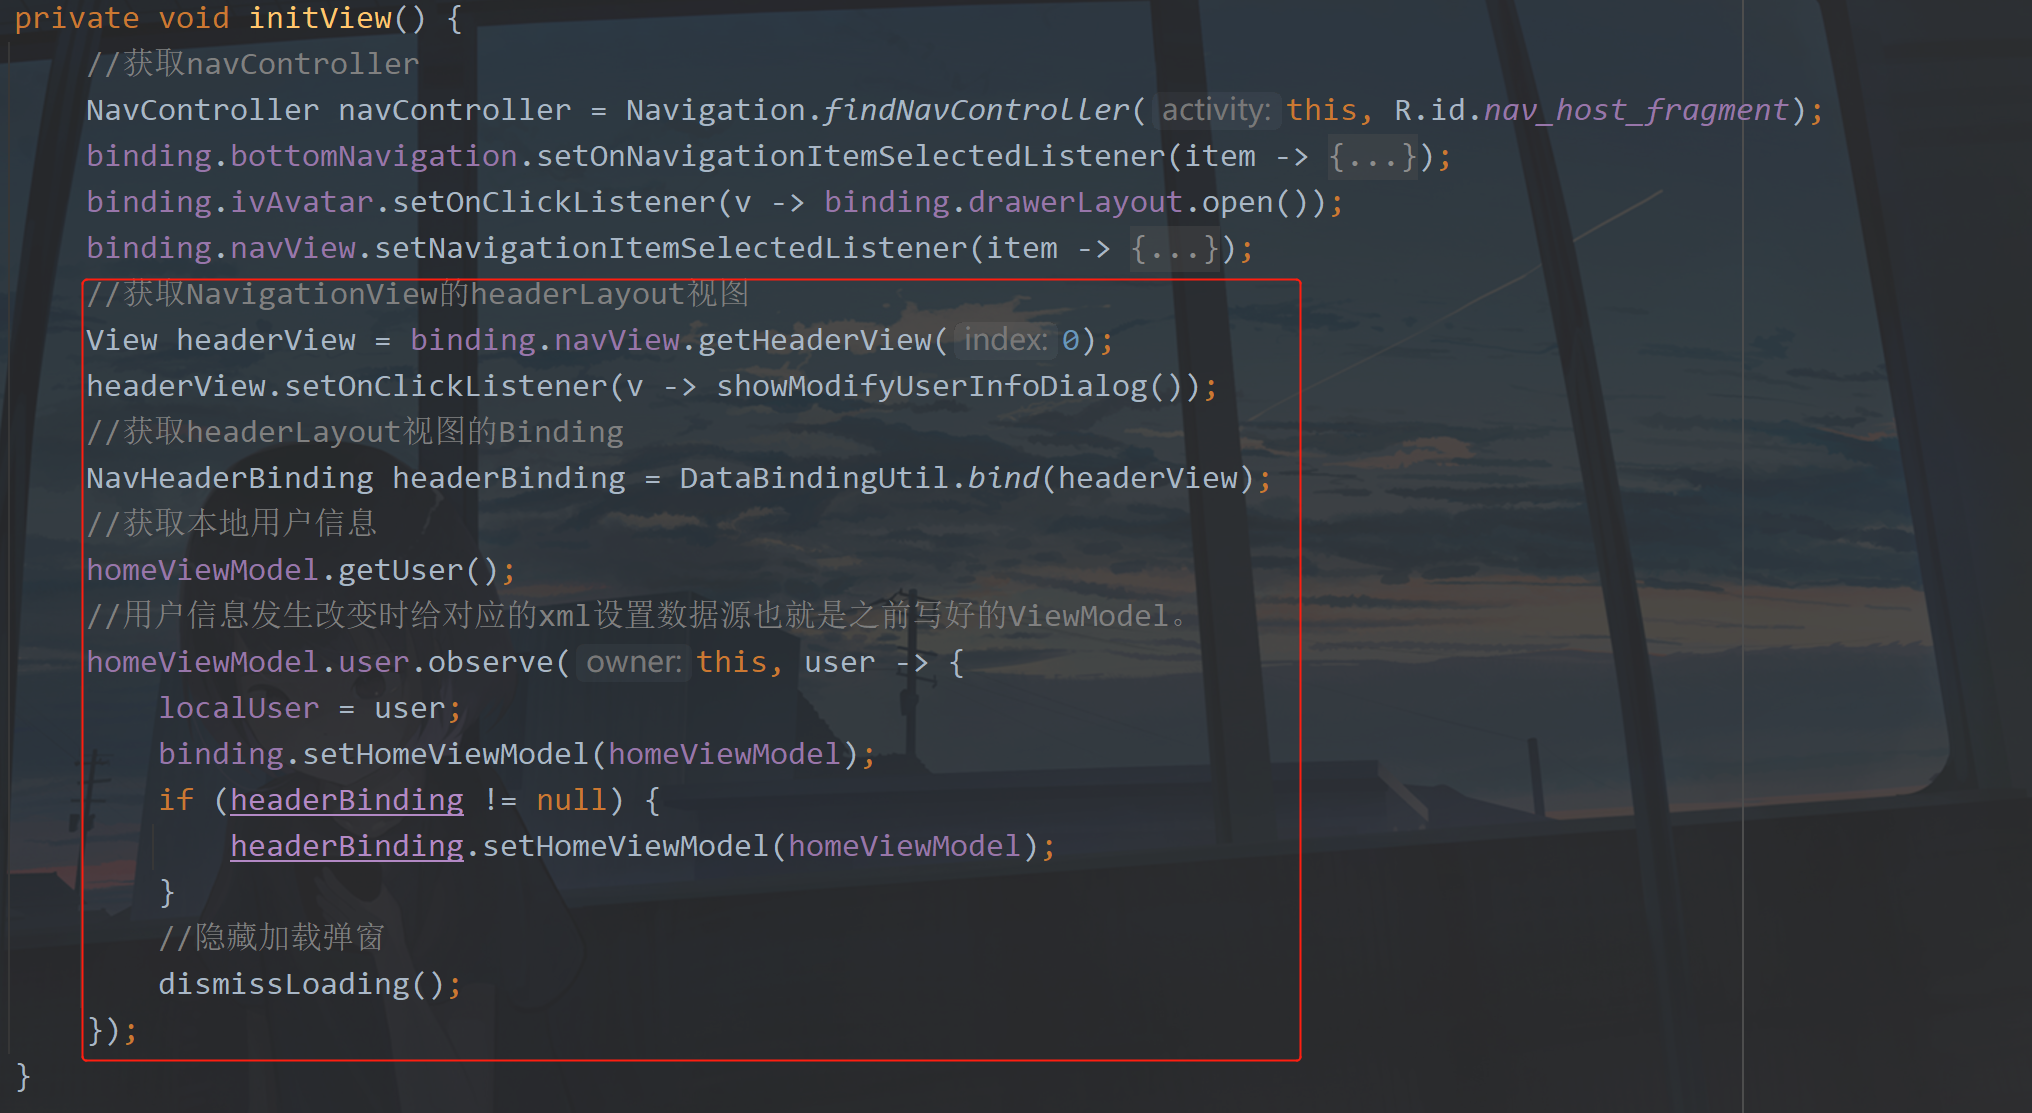
The code here is very important. First, get the local User data in the HomeActivity through the UserRepository in the HomeViewModel, and then notify the xml to load the data. This is the charm of DataBinding. After the data changes, we hide the loading pop-up window, so this step is very important.
① Display and modify user information pop-up window
If nothing unexpected happens, you have not written the showModifyUserInfoDialog method, so it must be red here. You can create the method manually or quickly by pressing Alt + Enter. The code is as follows:
	/**
     * Show modify user pop-up
     */
    private void showModifyUserInfoDialog() {
        DialogModifyUserInfoBinding binding = DataBindingUtil.inflate(LayoutInflater.from(this), R.layout.dialog_modify_user_info, null, false);
        AlertDialog.Builder builder = new AlertDialog.Builder(this)
                .addDefaultAnimation()
                .setCancelable(true)
                .setContentView(binding.getRoot())
                .setWidthAndHeight(SizeUtils.dp2px(this, 300), LinearLayout.LayoutParams.WRAP_CONTENT)
                .setOnClickListener(R.id.tv_modify_avatar, v -> {
                    //To modify the avatar, click show the method of modifying the avatar, and then click Hide the modification method again
                    binding.layModifyAvatar.setVisibility(isShow ? View.GONE : View.VISIBLE);
                    isShow = !isShow;
                }).setOnClickListener(R.id.tv_album_selection, v -> albumSelection())//Album selection
                .setOnClickListener(R.id.tv_camera_photo, v -> cameraPhoto())//Camera photography
                .setOnClickListener(R.id.tv_modify_nickname, v -> showEditDialog(0))//Modify nickname
                .setOnClickListener(R.id.tv_modify_Introduction, v -> showEditDialog(1))//Modification introduction
                .setOnClickListener(R.id.tv_close, v -> modifyUserInfoDialog.dismiss())//Close pop-up window
                .setOnDismissListener(dialog -> isShow = false);
        modifyUserInfoDialog = builder.create();
        modifyUserInfoDialog.show();
    }
The method here is to display and modify the user information pop-up window. When we click the headerLayout of NavigationView, this pop-up window will be displayed. What is done in this pop-up window?
First, get the DataBinding. This is just for convenience. You can directly use the layout without writing findViewById. Then, click TV_ modify_ During avatar, control the display and hiding of the layout of the modified avatar. If you want to optimize here, you can add an animation effect, such as expanding the display downward and shrinking and hiding upward. I won't do these fancy things here. Then there are four method calls, actually three methods, one of which is reused, but the incoming types are different.
② Album selection
Here we write these methods from top to bottom. The first is the albumSelection method. We can switch avatars in two ways. Here we select them through photo albums.
	/**
     * Album selection
     */
    private void albumSelection() {
        modifyUserInfoDialog.dismiss();
        if (isAndroid11()) {
            //Request to open external storage management
            requestManageExternalStorage();
        } else {
            if (!isAndroid6()) {
                //Open Album
                openAlbum();
                return;
            }
            if (!hasPermission(PermissionUtils.READ_EXTERNAL_STORAGE)) {
                requestPermission(PermissionUtils.READ_EXTERNAL_STORAGE);
                return;
            }
            //Open Album
            openAlbum();
        }
    }
Here, we first close the previous pop-up window, and then check whether the user is in Android 11. If so, request to turn on the external storage management switch, instead of judging whether it is Android 6 0 and above, instead of requesting dynamic permission, you can directly call openAlbum to open the album. You can check whether you have the permission to read the stored file. If you don't, you can request this permission. If you have already obtained it, open the album. Let's first look at the return of opening external storage management,
	/**
     * Page return results
     */
    @Override
    protected void onActivityResult(final int requestCode, final int resultCode, final Intent data) {
        super.onActivityResult(requestCode, resultCode, data);
        if (resultCode != RESULT_OK) {
            showMsg("Unknown reason");
            return;
        }
        switch (requestCode) {
            case PermissionUtils.REQUEST_MANAGE_EXTERNAL_STORAGE_CODE:
                //Return from the external storage management page
                if (!isStorageManager()) {
                    showMsg("The external storage management switch is not turned on. We can't open the album. Sorry");
                    return;
                }
                if (!hasPermission(PermissionUtils.READ_EXTERNAL_STORAGE)) {
                    requestPermission(PermissionUtils.READ_EXTERNAL_STORAGE);
                    return;
                }
                //Open Album
                openAlbum();
                break;
        }

    }
Here we need to process the returned results. If it is opened, check whether it has this storage permission. Please note that I didn't check whether it is Android 6 0 and above, because if I have this return, there is no doubt that it must be in Android 6 0 or above, there is no need to do more. If you don't turn on the switch, you will be prompted here.
Next, let's look at the callback of permission request,
	/**
     * Permission request result
     */
    @Override
    public void onRequestPermissionsResult(int requestCode, @NonNull @NotNull String[] permissions, @NonNull @NotNull int[] grantResults) {
        super.onRequestPermissionsResult(requestCode, permissions, grantResults);
        switch (requestCode) {
            case PermissionUtils.REQUEST_STORAGE_CODE:
                //file reservation
                if (grantResults[0] != PackageManager.PERMISSION_GRANTED) {
                    showMsg("You have denied permission to read and write files. We can't open the album. Sorry.");
                    return;
                }
                openAlbum();
                break;
            default:
                break;
        }
    }
Here, we also need to deal with whether the permission passes or not. After this step is clear, we really need to open the album and call the openAlbum method. The method code is as follows:
	/**
     * Open Album
     */
    private void openAlbum() {
        startActivityForResult(CameraUtils.getSelectPhotoIntent(), SELECT_PHOTO_CODE);
    }
It's done in one sentence, but the startActivityForResult I use here is an outdated API, but it can still be used. You can also use the new API. When we select an image, a result will be returned, which is also in the onActivityResult callback. Then we add another case to this.
			case SELECT_PHOTO_CODE:
                //Select pictures from album to return
                modifyAvatar(CameraUtils.getImageOnKitKatPath(data, this));
                break;
This should be well understood. Then we save the returned image path, and here we use another method. The method code is as follows:
	/**
     * Modify Avatar
     */
    private void modifyAvatar(String imagePath) {
        if (!TextUtils.isEmpty(imagePath)) {
            //Save to Datasheet
            modifyContent(2, imagePath);
            Log.d(TAG, "modifyAvatar: " + imagePath);
        } else {
            showMsg("Picture acquisition failed");
        }
    }
Here is the modified avatar. If the obtained image is not empty, call the modifyContent method to save it. The method code is as follows:
	/**
     * Modification content
     *
     * @param type    Type 0: nickname 1: introduction 2: Avatar
     * @param content Modification content
     */
    private void modifyContent(int type, String content) {
        if (type == 0) {
            localUser.setNickname(content);
        } else if (type == 1) {
            localUser.setIntroduction(content);
        } else if (type == 2) {
            localUser.setAvatar(content);
        }
        homeViewModel.updateUser(localUser);
        homeViewModel.failed.observe(this, failed -> {
            dismissLoading();
            if ("200".equals(failed)) {
                showMsg("Modified successfully");
            }
        });
    }
Because the three data to be modified are strings, we can write a general method to distinguish and save with a type. In this way, only one value can be modified. Although it looks like a Russian Doll from the code, the logic is like this.
So far, we have finished modifying the avatar by selecting the album. Let's take a look at modifying the avatar by taking photos with the camera. The operation effect is shown in the figure below:
③ Camera photography
Back to our previous pop-up window for modifying user information, the first method now does not report an error. The second method cameraPhoto is written below, and the code is as follows:
	/**
     * Photo album photography
     */
    private void cameraPhoto() {
        modifyUserInfoDialog.dismiss();
        if (!isAndroid6()) {
            //Turn on the camera
            openCamera();
            return;
        }
        if (!hasPermission(PermissionUtils.CAMERA)) {
            requestPermission(PermissionUtils.CAMERA);
            return;
        }
        //Turn on the camera
        openCamera();
    }
I don't want to repeat the logic here. It's clear at a glance. The following is the callback of camera permission. Add a case in onRequestPermissionsResult with the following code:
			case PermissionUtils.REQUEST_CAMERA_CODE:
                if (grantResults[0] != PackageManager.PERMISSION_GRANTED) {
                    showMsg("You have denied camera permission and cannot open the camera. Sorry.");
                    return;
                }
                openCamera();
                break;
If you open the camera with permission, it is more troublesome to open the camera than the photo album. The openCamera method code is as follows:
	/**
     * Turn up the camera to take pictures
     */
    private void openCamera() {
        Intent captureIntent = new Intent(MediaStore.ACTION_IMAGE_CAPTURE);
        // Determine whether there is a camera
        if (captureIntent.resolveActivity(getPackageManager()) != null) {
            File photoFile = null;
            Uri photoUri = null;

            if (isAndroid10()) {
                // Android 10 is adapted to create a picture address uri for saving photos taken. Android 10 will use this method in the future
                photoUri = getContentResolver().insert(Environment.getExternalStorageState().equals(Environment.MEDIA_MOUNTED) ?
                        MediaStore.Images.Media.EXTERNAL_CONTENT_URI : MediaStore.Images.Media.INTERNAL_CONTENT_URI, new ContentValues());
            } else {
                photoFile = createImageFile();
                if (photoFile != null) {
                    mCameraImagePath = photoFile.getAbsolutePath();

                    if (isAndroid7()) {
                        //Adapt Android 7.0 file permissions and create a Uri of content type through FileProvider
                        photoUri = FileProvider.getUriForFile(this, getPackageName() + ".fileprovider", photoFile);
                    } else {
                        photoUri = Uri.fromFile(photoFile);
                    }
                }
            }

            mCameraUri = photoUri;
            if (photoUri != null) {
                captureIntent.putExtra(MediaStore.EXTRA_OUTPUT, photoUri);
                captureIntent.addFlags(Intent.FLAG_GRANT_WRITE_URI_PERMISSION);
                startActivityForResult(captureIntent, TAKE_PHOTO_CODE);
            }
        }
    }
The following is the return after taking photos. Add a case in onActivityResult,
			case TAKE_PHOTO_CODE:
                //Camera return
                modifyAvatar(isAndroid10() ? mCameraUri.toString() : mCameraImagePath);
                break;
The following code is reusable, so we can run it.

The following is to modify the nickname and profile
③ Modify nicknames and profiles
Back to modifying the user pop-up window, there is only one method. The showEditDialog code is as follows:
	/**
     * Display pop-up window for inputting text
     * @param type 0 Modify nickname 1 Introduction
     */
    private void showEditDialog(int type) {
        modifyUserInfoDialog.dismiss();
        DialogEditBinding binding = DataBindingUtil.inflate(LayoutInflater.from(this), R.layout.dialog_edit, null, false);
        AlertDialog.Builder builder = new AlertDialog.Builder(this)
                .addDefaultAnimation()
                .setCancelable(true)
                .setText(R.id.tv_title, type == 0 ? "Modify nickname" : "Modification introduction")
                .setContentView(binding.getRoot())
                .setWidthAndHeight(SizeUtils.dp2px(this, 300), LinearLayout.LayoutParams.WRAP_CONTENT)
                .setOnClickListener(R.id.tv_cancel, v -> editDialog.dismiss())
                .setOnClickListener(R.id.tv_sure, v -> {
                    String content = binding.etContent.getText().toString().trim();
                    if (content.isEmpty()) {
                        showMsg(type == 0 ? "Please enter a nickname" : "Please enter a profile");
                        return;
                    }
                    if (type == 0 && content.length() > 10) {
                        showMsg("The nickname is too long. Please enter less than 8 Chinese characters or letters");
                        return;
                    }
                    editDialog.dismiss();
                    showLoading();
                    //Save the entered value
                    modifyContent(type, content);
                });
        editDialog = builder.create();
        binding.etContent.setHint(type == 0 ? "Please enter a nickname" : "Please enter a profile");
        editDialog.show();
    }
This step is over. Isn't it sudden? We have written the following code. Let's run it:
In fact, there is still room for optimization. See if you feel it. Well, that's all for this article. It's not easy to write. I'll see you later~
7, Source code
GitHub: MVVM-Demo
CSDN: MVVMDemo_7.rar