1, Environmental preparation
1. Install gcc
To install nginx, you need to compile the source code downloaded from the official website, which depends on the gcc environment. The installation instructions are as follows:
yum install gcc-c++
2. Install PCRE devel
The Rewrite module and HTTP core module of Nginx will use PCRE regular expression syntax. Here you need to install two installation packages PCRE and PCRE devel. The first installation package provides the compiled version of the library, while the second provides the header file of the development phase and the source code of the compiled project. The installation instructions are as follows:
yum install -y pcre pcre-devel
3. Install zlib
zlib library provides compression algorithms for developers. gzip compression is required in various modules of Nginx. The installation instructions are as follows:
yum install -y zlib zlib-devel
4. Install Open SSL
nginx supports not only http protocol, but also https (i.e. transmitting http over ssl Protocol). If https is used, the OpenSSL library needs to be installed. The installation instructions are as follows:
yum install -y openssl openssl-devel
2, Download and unzip the nginx package
Here you can go to nginx's official website to download - > nginx official website , you can also directly use the wget command to download. The instructions are as follows (please download according to your own needs):
wget http://nginx.org/download/nginx-1.17.6.tar.gz
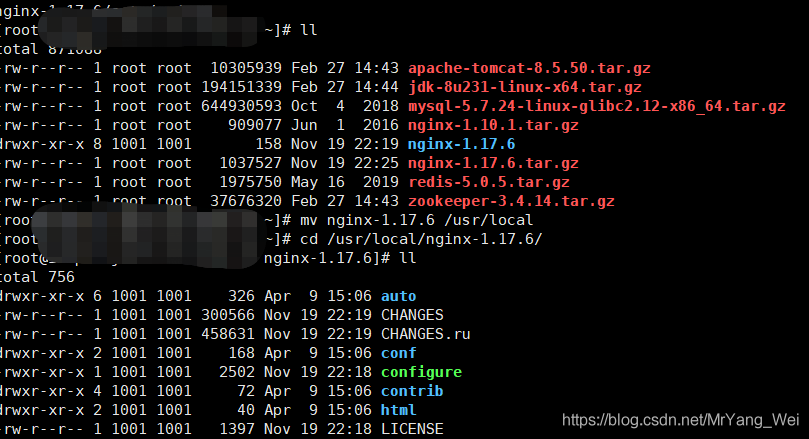
Unzip and move the downloaded compressed package (note that the unzipped file name should not be changed to nginx). The instructions are as follows (please modify according to your location):
tar -zxvf nginx-1.17.6.tar.gz
mv nginx-1.17.6 /usr/local
3, Compile and install
Since the default configuration of nginx is port 80, please ensure that port 80 is not occupied (netstat - NLP | grep: 80)
Note the current directory where I am, which is in nginx-1.17 6, execute/ configure uses the default configuration

If you are executing/ configure reports an error. Please first ensure that the previous environments have been installed. If they have been installed, you should consider whether the nginx version you installed is incompatible with your Linux version.
Execute the compile and install command
make && make install
So far, if there is no error, congratulations. Nginx has been successfully installed. If you return to the previous directory, you will find more nginx directories. Next, start nginx.
[Extension] If an error is reported when running make & & make install, I will encounter two situations here
The first error: if you execute the above, an error is reported - Werror = ******* error message
Then go to nginx-1.6 2 directory
vim objs/Makefile
Put the inside
CFLAGS = -pipe -O -W -Wall -Wpointer-arith -Wno-unused -Werror -g
-Werror Just remove it
The second error: if struct crypt occurs_ data’ has no member named ‘current_salt’
You need to enter the nginx directory for execution
[root@humanyr nginx-1.6.2]# vim src/os/unix/ngx_user.c
Find the CD in it current_ salt[0] = ~salt[0]; Just comment it out
4, Start nginx
Enter / usr/local/nginx/sbin directory and enter/ Nginx to start nginx
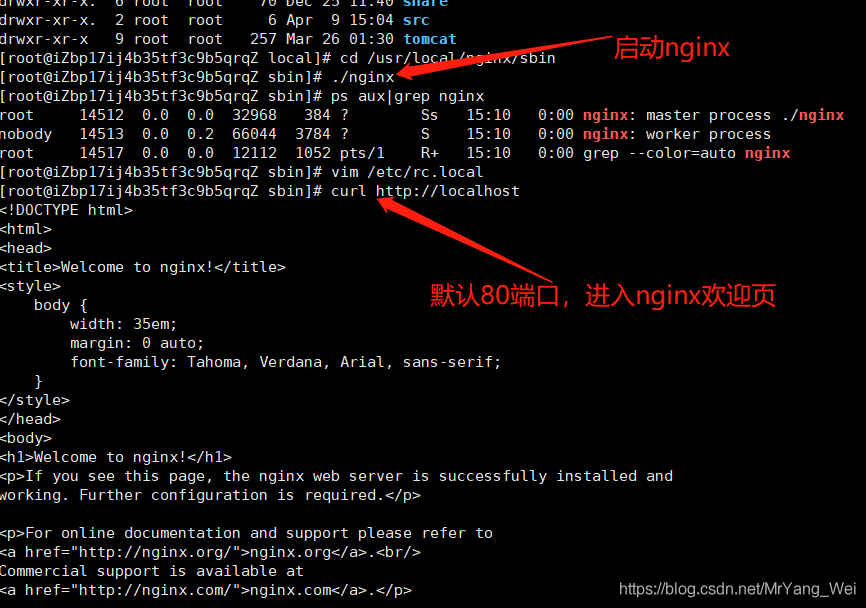
close nginx

./nginx -s quit  perhaps ./nginx -s stop

restart nginx

./nginx -s reload

set up nginx Start up, just rc.local Add the startup code.

vim /etc/rc.local

Then add at the bottom/usr/local/nginx/sbin/nginx
[Extension] configure and start SSL and report an error [emerg] the "SSL" parameter requires ngx_http_ssl_module in ****
This problem is really a little difficult for me to use the linux version of nginx for the first time. I thought it would be easy to solve it. As a result, I made one mistake after another and didn't say much to get back to business.
1: Start the SSL module for Nginx
1.1 if nginx does not enable the SSL module, an error will be prompted when configuring Https
The reason is also very simple. Nginx lacks http_ssl_module module, with - with HTTP when compiling and installing_ ssl_ Module configuration is OK, but now my nginx has been installed. How to add a module is actually very simple. Let's look below:
Make a note: my nginx installation directory is / usr/local/nginx. My source code package is / usr / local / SRC / nginx-1.6 2 catalog
nginx: [emerg] the "ssl" parameter requires ngx_http_ssl_module in /usr/local/nginx/conf/nginx.conf:37
1.2 enable SSL module by nginx
Switch to the source package: / / the source package here refers to the directory extracted after wget download or the source directory of nginx uploaded by yourself
cd /usr/local/src/nginx-1.11.3
View the original modules of nginx
/usr/local/nginx/sbin/nginx -V
The original configure parameters displayed after configure arguments: are as follows: / / of course, I don't know why my back is empty. Later, I checked and found that some of my configurations were wrong, but it doesn't affect the next operation
--prefix=/usr/local/nginx --with-http_stub_status_module
Then our new configuration information should be written as follows:
./configure --prefix=/usr/local/nginx --with-http_stub_status_module --with-http_ssl_module
Run the above command and wait until the configuration is completed
When the configuration is complete, run the command
make
Then back up the original installed nginx [here is the file of the installed nginx. I think it will not be affected if it is not backed up]
cp /usr/local/nginx/sbin/nginx /usr/local/nginx/sbin/nginx.bak
Then overwrite the original nginx with the newly compiled nginx (nginx will stop at this time)
cp ./objs/nginx /usr/local/nginx/sbin/
Then start nginx, and you can still check whether it has been successfully joined through the command
/usr/local/nginx/sbin/nginx -V
Nginx configures the coexistence of Http and Https
server {
            listen 80 default backlog=2048;
            listen 443 ssl;
            server_name wosign.com;
            root /var/www/html;

            ssl_certificate /usr/local/Tengine/sslcrt/ wosign.com.crt;
            ssl_certificate_key /usr/local/Tengine/sslcrt/ wosign.com .Key;
        }
5, Disposition
Enter the / usr/local/nginx/conf directory to modify the configuration file of nginx - > VIM nginx conf
Here are some basic configurations
#Run user
user yang;
#Start the process, usually set equal to the number of CPUs
worker_processes  1;

#Global error log and PID file
error_log  /var/log/nginx/error.log;
pid        /var/run/nginx.pid;

#Working mode and upper limit of connections
events {
    use   epoll;             #epoll is a way of multiplexing IO(I/O Multiplexing), but it is only used in Linux 2 More than 6 cores can greatly improve the performance of nginx
    worker_connections  1024;#Maximum number of concurrent links for a single background worker process process
    # multi_accept on;
}

#Set up http server and use its reverse proxy function to provide load balancing support
http {
     #Set the MIME type, which is determined by mime Type file definition
    include       /etc/nginx/mime.types;
    default_type  application/octet-stream;
    #Set log format
    access_log    /var/log/nginx/access.log;

    #The sendfile instruction specifies whether nginx calls the sendfile function (zero copy mode) to output files. For normal applications,
    #It must be set to on. If it is used for downloading and other applications, it can be set to off to balance the disk and network I/O processing speed and reduce the uptime of the system
    sendfile        on;
    #tcp_nopush     on;

    #Connection timeout
    #keepalive_timeout  0;
    keepalive_timeout  65;
    tcp_nodelay        on;

    #Turn on gzip compression
    gzip  on;
    gzip_disable "MSIE [1-6]\.(?!.*SV1)";

    #Set request buffer
    client_header_buffer_size    1k;
    large_client_header_buffers  4 4k;

    include /etc/nginx/conf.d/*.conf;
    include /etc/nginx/sites-enabled/*;

    #List of servers to set load balancing
     upstream mysvr {
    #The weigth parameter represents the weight. The higher the weight, the greater the probability of being assigned
    #Squid on this machine opens port 3128
    server 192.168.8.1:3128 weight=5;
    server 192.168.8.2:80  weight=1;
    server 192.168.8.3:80  weight=6;
    }


   server {
    #Listen on port 80
        listen       80;
        #Definition use www.xx.com COM domain name. The default is localhost
        server_name  www.xx.com;

        #Set the access log of this virtual host
        access_log  logs/www.xx.com.access.log  main;

    #Default request
    location / {
          root   /root;      #Defines the default site root location for the server
          index index.php index.html index.htm;   #Defines the name of the first page index file

          fastcgi_pass  www.xx.com;
         fastcgi_param  SCRIPT_FILENAME  $document_root/$fastcgi_script_name;
          include /etc/nginx/fastcgi_params;
        }

    # Define error prompt page
    error_page   500 502 503 504 /50x.html;
        location = /50x.html {
        root   /root;
    }

    #Static files, handled by nginx itself
    location ~ ^/(images|javascript|js|css|flash|media|static)/ {
        root /var/www/virtual/htdocs;
        #After 30 days, the static files are not updated very much. The expiration can be set larger. If they are updated frequently, they can be set smaller.
        expires 30d;
    }
    #All PHP script requests are forwarded to FastCGI for processing Use FastCGI default configuration
    location ~ \.php$ {
        root /root;
        fastcgi_pass 127.0.0.1:9000;
        fastcgi_index index.php;
        fastcgi_param SCRIPT_FILENAME /home/www/www$fastcgi_script_name;
        include fastcgi_params;
    }
    #Set the address to view Nginx status
    location /NginxStatus {
        stub_status            on;
        access_log              on;
        auth_basic              "NginxStatus";
        auth_basic_user_file  conf/htpasswd;
    }
    #No access htxxx file
    location ~ /\.ht {
        deny all;
    }

     }
}
If you want to use load balancing, you can modify the configuration of the http node as follows:
#Set up http server and use its reverse proxy function to provide load balancing support
http {
     #Set the MIME type, which is determined by mime Type file definition
    include       /etc/nginx/mime.types;
    default_type  application/octet-stream;
    #Set log format
    access_log    /var/log/nginx/access.log;

    #Omit some of the configuration nodes above

    #. . . . . . . . . .

    #List of servers to set load balancing
    upstream mysvr {
        #The weigth parameter represents the weight. The higher the weight, the greater the probability of being assigned
        server 192.168.8.1x:3128 weight=5;#Squid on this machine opens port 3128
        server 192.168.8.2x:80  weight=1;
        server 192.168.8.3x:80  weight=6;
    }

   upstream mysvr2 {
        #The weigth parameter represents the weight. The higher the weight, the greater the probability of being assigned
        server 192.168.8.x:80  weight=1;
        server 192.168.8.x:80  weight=6;
    }

   #First virtual server
   server {
    #Listening 192.168 8. X 80 port
        listen       80;
        server_name  192.168.8.x;

      #Load balancing request for aspx suffix
    location ~ .*\.aspx$ {

         root   /root;      #Defines the default site root location for the server
          index index.php index.html index.htm;   #Defines the name of the first page index file

          proxy_pass  http://mysvr ;# The request goes to the list of servers defined by mysvr

          #The following are some reverse proxy configurations that can be deleted

          proxy_redirect off;

          #The back-end Web server can obtain the user's real IP through x-forward-for
          proxy_set_header Host $host;
          proxy_set_header X-Real-IP $remote_addr;
          proxy_set_header X-Forwarded-For $proxy_add_x_forwarded_for;
          client_max_body_size 10m;    #Maximum number of single file bytes allowed for client requests
          client_body_buffer_size 128k;  #The maximum number of bytes that the buffer agent can buffer client requests,
          proxy_connect_timeout 90;  #Timeout of nginx connection to backend server (proxy connection timeout)
          proxy_send_timeout 90;        #Back end server data return time (proxy sending timeout)
          proxy_read_timeout 90;         #Response time of back-end server after successful connection (agent receiving timeout)
          proxy_buffer_size 4k;             #Set the buffer size of proxy server (nginx) to save user header information
          proxy_buffers 4 32k;               #proxy_buffers buffer. If the average web page is less than 32k, set this way
          proxy_busy_buffers_size 64k;    #Buffer size under high load (proxy_buffers*2)
          proxy_temp_file_write_size 64k;  #Set the cache folder size. If it is larger than this value, it will be transferred from the upstream server

       }

     }
}