Today's main task is to make the screen display black, hey hey.
There are many contents, including making IPL that can load programs, reading the contents of floppy disks, black screen display, and starting to run programs written in C language.
Because we have modified the same file many times, today's resources are divided into multiple folders. The contents in the brackets of the file used correspond to the folder name in the resource at the end of the document.
It's not too late, so let's start now——
Make IPL
In the previous article, we know that the first 512 bytes of the disk are the boot area. Now we want to load the next 512 bytes.
We were in the last version of IPL The following code is added to NAS. Since this part needs to be modified many times, a version is added for each modification, IPL The content of NAS (version_a) is revised as follows:
Add partial version_ Version a:
		MOV		AX,0x0820
		MOV		ES,AX
		MOV		CH,0			; Cylinder 0
		MOV		DH,0			; Head 0
		MOV		CL,2			; Sector 2

		MOV		AH,0x02			; AH=0x02 : Disk reading
		MOV		AL,1			; 1 Sectors
		MOV		BX,0
		MOV		DL,0x00			; A Driver
		INT		0x13			; Call disk BIOS
		JC		error
Old rules, look at new instructions——
JC instruction: it is the abbreviation of "jump if carry", which means to jump if the carry ID is 1. The carry ID is a register that can only store 1-bit information.
Several new registers are used here: CH = cylinder number, CL = sector number, DH = head number, DL = drive letter.
When there are multiple floppy disk drives, the drive letter is used to specify which floppy disk drive to read data from.
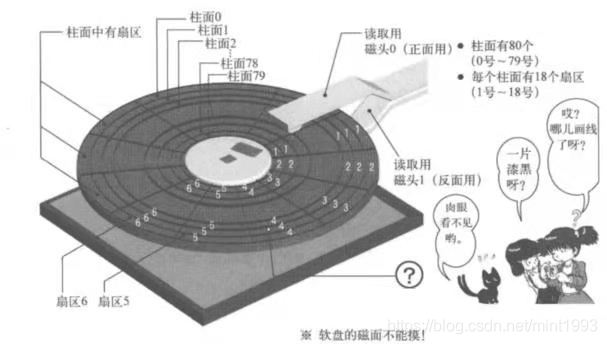
Some friends here may ask what are cylinders, sectors and heads? Don't worry, let's take apart the floppy disk and have a look at the internal structure of the floppy disk——

The cylinder is the dark black circular area in the figure above. From the outside to the inside, there are 80 cylinders: cylinder 0, cylinder 1,..., and cylinder 79.
A magnetic head is a needle shaped magnetic device that can contact the disk from both sides. Floppy disk can record data on both sides, so we have two heads, head 0 and head 1.
A sector is to divide a ring (cylinder) into several equal parts, each part is called a sector. A ring has 18 sectors, which are called sector 1, sector 2,... Sector 18 respectively.
To sum up, a floppy disk has 80 cylinders, 2 heads and 18 sectors. One sector can store 512 bytes, so the capacity of a floppy disk is:
80×2×18×512 = 1 474 560B = 1440KB.
The IPL boot area we made is located at C0-H0-S1 (cylinder 0, head 0, sector 1). The next sector is C0-H0-S1. Next, we load this sector.
Add trial and error
It is easy to make mistakes when reading the floppy disk. At this time, you may be able to read it a few more times.
So here we add a trial and error program and let it try again 5 times. If we still can't read it, we'll give up. In IPL Add trial and error program to NAS (version_b) file——
Add partial version_ Version B:
; Read disk
		MOV		AX,0x0820
		MOV		ES,AX
		MOV		CH,0			; Cylinder 0
		MOV		DH,0			; Head 0
		MOV		CL,2			; Sector 2

		MOV		SI,0			; Register that records the number of failures
retry:
		MOV		AH,0x02			; AH=0x02 : Read in disk
		MOV		AL,1			; 1 Sectors
		MOV		BX,0
		MOV		DL,0x00			; A Driver
		INT		0x13			; Call disk BIOS
		JNC		fin				; If there is no error, jump to fin
		ADD		SI,1			; to SI Plus 1
		CMP		SI,5			; compare SI And 5
		JAE		error			; SI >= 5 When, jump to error
		MOV		AH,0x00
		MOV		DL,0x00			; A Driver
		INT		0x13			; Reset drive
		JMP		retry
New instruction——
JNC instruction: it is the abbreviation of "jump if not carry". Conditional jump instruction, that is, jump if the carry flag is 0.
JAE instruction: it is the abbreviation of "jump if above or equal". Conditional jump instruction means jump when it is greater than or equal to.
AH = 0x00; DL = 0x00; The function of int 0x13 is to reset the floppy disk status and read it again.
Read floppy disk contents
Read 18 sectors
Here, let's continue reading. After reading sector 18 of a ring, it is still in IPL In the NAS (version_c) file, we add the following program——
Add partial version_ Version C:
; Read disk
		MOV		AX,0x0820
		MOV		ES,AX
		MOV		CH,0			; Cylinder 0
		MOV		DH,0			; Head 0
		MOV		CL,2			; Sector 2
readloop:
		MOV		SI,0			; Register that records the number of failures
retry:
		MOV		AH,0x02			; AH=0x02 : Read in disk
		MOV		AL,1			; 1 Sectors
		MOV		BX,0
		MOV		DL,0x00			; A Driver
		INT		0x13			; Call disk BIOS
		JNC		fin				; If there is no error, jump to fin
		ADD		SI,1			; to SI Plus 1
		CMP		SI,5			; compare SI And 5
		JAE		error			; SI >= 5 When, jump to error
		MOV		AH,0x00
		MOV		DL,0x00			; A Driver
		INT		0x13			; Reset drive
		JMP		retry
next:
		MOV		AX,ES			; Move memory address back 0 x200
		ADD		AX,0x0020
		MOV		ES,AX			; Because No ADD ES,0x20 Command, so take a slight turn here
		ADD		CL,1			; to CL Riga 1
		CMP		CL,18			; compare CL And 18
		JBE		readloop		; If CL <= 18 Jump to readloop
New instruction——
JBE instruction: it is "jump if below or equal", which means jump if less than or equal.
Here, we have 512 from C0-H0-S2 to C0-H0-S18 on disk × 17 = 8704 bytes loaded into memory 0x8200~0xa3ff.
Read in 10 cylinders
Read on and read in 10 cylinders. The next sector of C0-H0-S18 sector is C0-H1-S1 on the opposite side of the disk. Read in from 0xa400, in the order C0-H0-S18 - > C0-H1-S1... Until C9-H1-S18. ipl. The NAS (version_d) file is modified as follows——
Add partial version_ Version D
; Read disk
		MOV		AX,0x0820
		MOV		ES,AX
		MOV		CH,0			; Cylinder 0
		MOV		DH,0			; Head 0
		MOV		CL,2			; Sector 2
readloop:
		MOV		SI,0			; Register that records the number of failures
retry:
		MOV		AH,0x02			; AH=0x02 : Read in disk
		MOV		AL,1			; 1 Sectors
		MOV		BX,0
		MOV		DL,0x00			; A Driver
		INT		0x13			; Call disk BIOS
		JNC		fin				; If there is no error, jump to fin
		ADD		SI,1			; to SI Plus 1
		CMP		SI,5			; compare SI And 5
		JAE		error			; SI >= 5 When, jump to error
		MOV		AH,0x00
		MOV		DL,0x00			; A Driver
		INT		0x13			; Reset drive
		JMP		retry
next:
		MOV		AX,ES			; Move memory address back 0 x200
		ADD		AX,0x0020
		MOV		ES,AX			; Because No ADD ES,0x20 Command, so take a slight turn here
		ADD		CL,1			; to CL Riga 1
		CMP		CL,18			; compare CL And 18
		JBE		readloop		; If CL <= 18 Jump to readloop
		MOV		CL,1
		ADD		DH,1
		CMP		DH,2
		JB		readloop		; If DH < 2 Then jump to readloop
		MOV		DH,0
		ADD		CH,1
		CMP		CH,CYLS
		JB		readloop		; If CH < CYLS Then jump to readloop
New instruction——
JB instruction: it is the abbreviation of "jump if below", which means jump if less than.
EQU instruction: it is the abbreviation of "equal", which is equivalent to the #define command in C language. It is used to declare constants. "CYLS EQU 10" means "CYLS = 10".
Now our program can put the original 10 of the floppy disk × two × eighteen × 512=184320byte=180KB is loaded into the memory, that is, the program can fill the memory 0x08200~0x34fff with the data read from the floppy disk.
The simplest operating system
Make a very short program and only let it HLT (put the CPU in a suspended state).
haribote.nas(version_e) file content:
fin:
		HLT
		JMP		fin
Compile with nask to generate harinote Sys file.
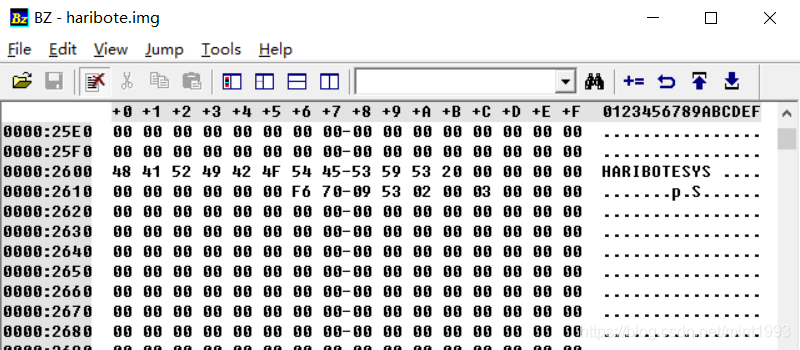
Set harinote Save the contents of sys to the image file harinote In img, use the following make command to create image files. Of course, ensure that all files mentioned in Makefile are available.

Open harinote. Com with binary editor Bz IMG, notice that the file name is saved near 0x002600.

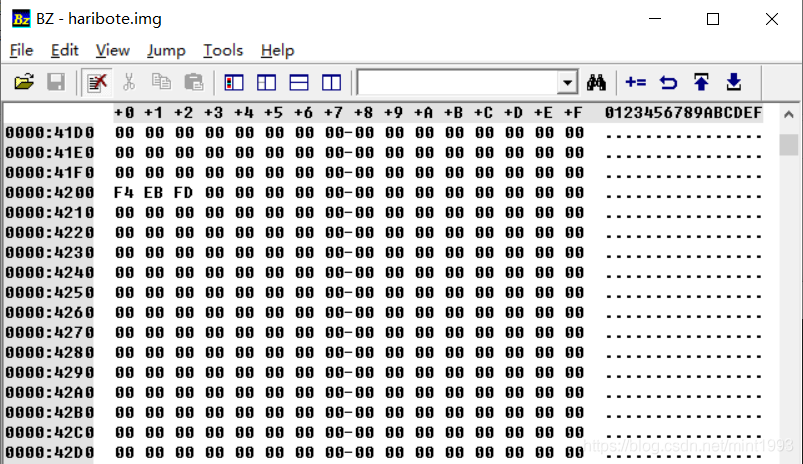
Look down again and find the position 0x004200. You can see "F4 EB FD", where the file content is written.

The screen is black
Here we will IPL NAS was renamed ipl10 NAS (version_g), using ipl10 NAS generates harinote IMG, enter the make img command on the command line:

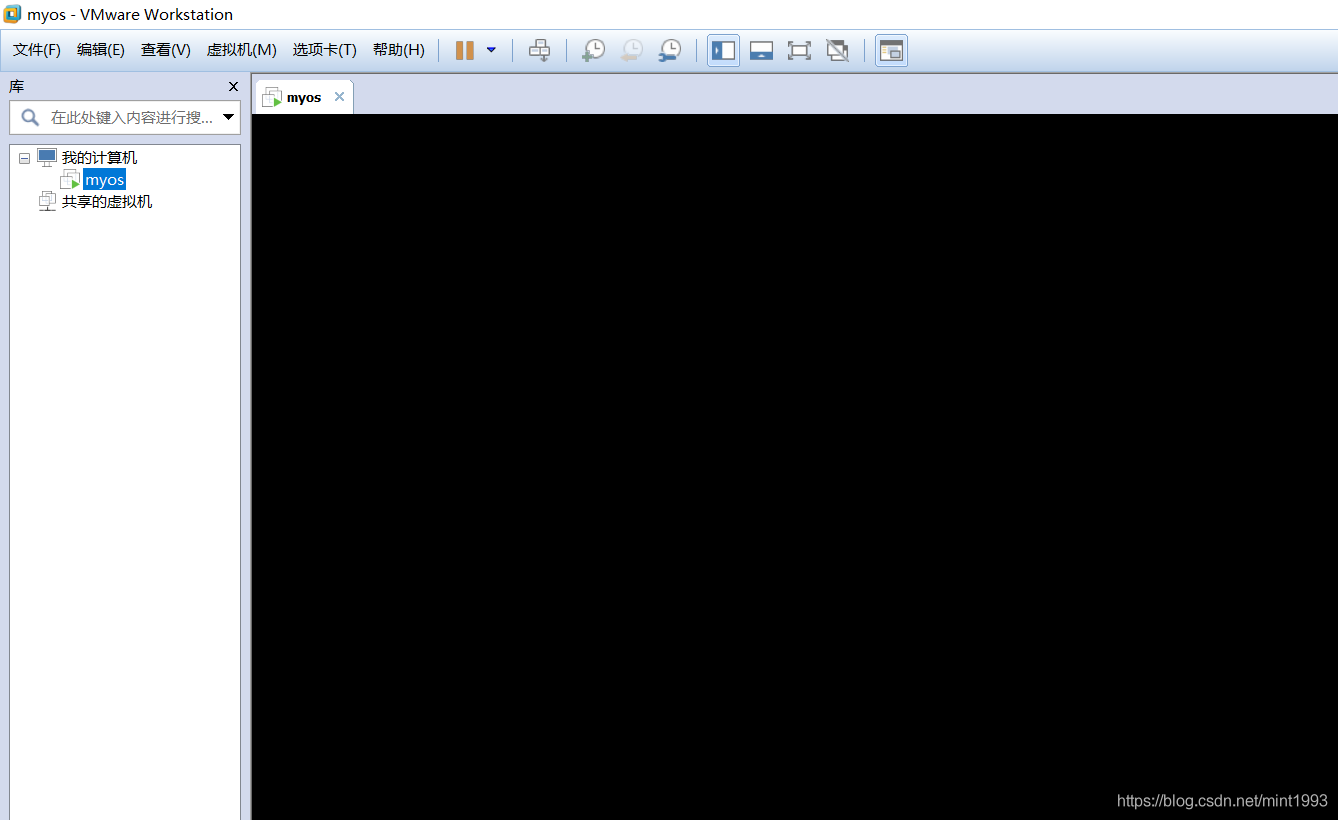
Start our harinote.com with VMware Workstation IMG, the black screen is successfully displayed~~

The development of assembly language is over. Later, we will start the development based on C language.
Start developing in C
Now we will start to develop with C language. First, we will do a preparatory work.
We need to set the picture mode and get the keyboard status from the BIOS. The keyboard status refers to whether NumLock is ON or OFF.
Add the code of keyboard status, this time harinote NAS (version_h) content:
; haribote-os
; TAB=4

; of BOOT_INFO
CYLS	EQU		0x0ff0			; Set startup area
LEDS	EQU		0x0ff1
VMODE	EQU		0x0ff2			; Information about the number of colors, the number of bits of color
SCRNX	EQU		0x0ff4			; Resolution X
SCRNY	EQU		0x0ff6			; Resolution Y
VRAM	EQU		0x0ff8			; Start address of image buffer

		ORG		0xc200			; Where will the program be loaded into memory?

		MOV		AL,0x13			; VGA Graphics card, 320 x200x8 Bit color
		MOV		AH,0x00
		INT		0x10
		MOV		BYTE [VMODE],8	; Recording screen mode
		MOV		WORD [SCRNX],320
		MOV		WORD [SCRNY],200
		MOV		DWORD [VRAM],0x000a0000

; use BIOS Get all kinds of information on the keyboard LED Indicator Status

		MOV		AH,0x02
		INT		0x16 			; keyboard BIOS
		MOV		[LEDS],AL

fin:
		HLT
		JMP		fin
This program is easy to understand. After we set the picture mode, the number of pixels and colors of the picture, as well as the keyboard information obtained from the BIOS, are saved near the memory 0x0ff0.
Now start adding the C language part. The file name is bootpack C (version_h), the content is very simple:
void HariMain(void)
{

fin:
	/* I want to write HLT here, but HLT cannot be used in C language! */
	goto fin;

}
This function will be more pleasing to the eyes of children who are familiar with C language.
The name of this function is HariMain. It is a parameterless function (void) and has no return value.
New instruction——
goto instruction: equivalent to JMP in assembly language.
So bootpack How did C become a machine language?
It goes through the following long steps——
1. Use CC1 Exe, from bootpack.exe C generate bootpack gas.
2. Use gas2nask Exe, from bootpack.exe Gas generates bootpack nas.
3. Use nask Exe, from bootpack.exe NAS generates bootpack obj.
4. Use obi2bim Exe, from bootpack.exe Obj generates bootpack bim.
5. Use bim2hrb Exe, from bootpack.exe BIM generates bootpack hrb.
6. Finally, use the copy instruction to asmhead Bin and bootpack HRB is directly combined to generate harinote sys.
Many new executable programs are used here. Let's briefly introduce them——
cc1.exe is a C compiler, which can compile c language programs into assembly language source programs.
gas2nask.exe is a program that converts gas files into nask files.
obi2bim.exe is a program that link s all the necessary target files.
bim2hrb.exe will be kept for later introduction~
Finally, HALT is implemented
It's late at night. Before going to bed, put the computer in HALT state (this state saves power).
Add naskffunc NAS (version_i) file:
; naskfunc
; TAB=4

[FORMAT "WCOFF"]				; Mode of making object file
[BITS 32]						; Mechanical language for making 32-bit mode


; Information about making target files

[FILE "naskfunc.nas"]			; Source file name information

		GLOBAL	_io_hlt			; The name of the function contained in the program


; Here are the actual functions

[SECTION .text]		; Write these in the object file before writing the program

_io_hlt:	; void io_hlt(void);
		HLT
		RET
New instruction——
RET instruction: equivalent to return in C language.
bootpack.c(version_i) file content:
/* Tell the C compiler that there is a function in another file */

void io_hlt(void);

/* Is a function declaration, but instead of {}, use;, This means: the function is in another file. Find it yourself! */

void HariMain(void)
{

fin:
	io_hlt(); /* Execute naskfun In NAS_ io_hlt */
	goto fin;

}
"make run" is still black, but the program runs normally.
Well, that's all for today~
Finally, attach the resource link:
Link: https://pan.baidu.com/s/1svWXTH0LfX2zuf5AUxXhXg
Extraction code: lhz4