ajax base call
// json object format

$.ajax({
    url:" ",
    type:"post",
    headers: {
      Accept: "application/json; charset=utf-8",
      Token: "XXXX"
    },
    data:JSON.stringify({
        adminId:adminId,
        password:password}),
    contentType: "application/json;charset=UTF-8",
    dataType:"json",
    success:function (data) {

    },
    error:function(data){

    }
});
bootstrap
Reference content
Standard html file + mobile terminal + query + bootstrap are referenced in order
		<head>
			<meta charset="utf-8" />
			<meta name="viewport" content="width=device-width, initial-scale=1, maximum-scale=1, user-scalable=no">
	    <title></title>
			<link rel="stylesheet" href="http://cdn.bootcss.com/bootstrap/3.3.0/css/bootstrap.min.css">
			<script src="https://cdn.bootcdn.net/ajax/libs/jquery/3.6.0/jquery.js"></script>
			<script src="http://maxcdn.bootstrapcdn.com/bootstrap/3.2.0/js/bootstrap.min.js"></script>
		</head>
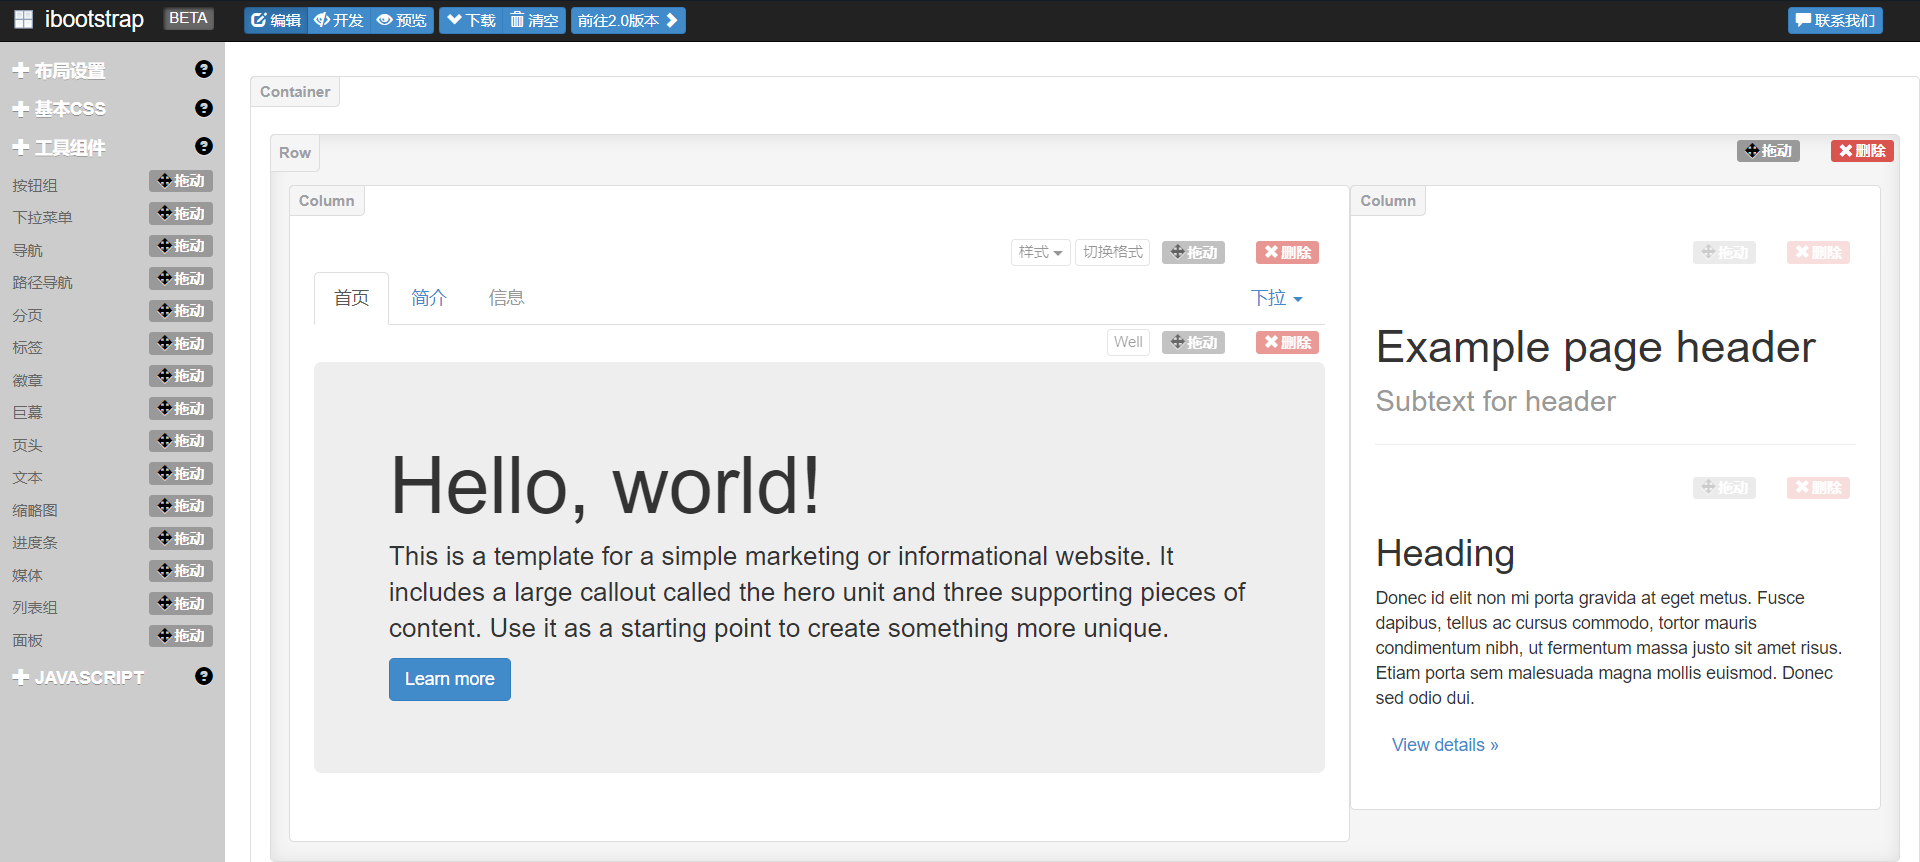
Then pass http://www.ibootstrap.cn/ Directly generate the page and copy it in
Rich styles: https://www.runoob.com/bootstrap

Semantic UI + Amis framework
Introduction content
<!DOCTYPE html>
<html>
	<head>
		<meta charset="utf-8">
		<meta
		      name="viewport"
		      content="width=device-width, initial-scale=1, maximum-scale=1"
		    />
		<meta http-equiv="X-UA-Compatible" content="IE=Edge" />
		<title></title>
		<!-- semantic Introduction of -->
		<script src="http://code.jquery.com/jquery-2.1.1.min.js"></script>
		<link rel="stylesheet" href="https://cdn.jsdelivr.net/npm/semantic-ui@2.4.2/dist/semantic.min.css">
		<script src="https://cdn.jsdelivr.net/npm/semantic-ui@2.4.2/dist/semantic.min.js"></script>

		<!-- amis Introduction of -->
		<link rel="stylesheet" href="https://cdn.jsdelivr.net/gh/404name/cdn@main/css/sdk.css" />
		<link rel="stylesheet" href="https://cdn.jsdelivr.net/gh/404name/cdn@main/css/helper.css" />
		<script src="https://cdn.jsdelivr.net/gh/404name/cdn@main/js/sdk.js"></script>
		<style>
		  html,
		  body,
		  .app-wrapper {
		    position: relative;
		    width: 100%;
		    height: 100%;
		    margin: 0;
		    padding: 0;
		  }
		</style>
	</head>
	<body>
		<div id="root" class="app-wrapper"></div>
		    <script type="text/javascript">
		      (function () {
		        let amis = amisRequire('amis/embed');
				let amisJSON = "";
		        // Generate different pages by replacing the following configuration
				$.ajax({
					type : "GET",
					url : "Request local json",
					data : {
						method : "query"
					},
					dataType : "json",//Data type returned
					success : function(data) {
						alert("Successfully loaded json");
						amisJSON = data;
						let amisScoped = amis.embed('#root', amisJSON);
					},
					error(data){
						console.log(data);
					}
				})
		      })();
		    </script>
	</body>
</html>
Construction of front page of amis
https://baidu.gitee.io/amis/zh-CN/docs/start/getting-started
Introduce three contents + page adaptation
<head>
    <meta charset="UTF-8" />
    <title>amis demo</title>
    <meta http-equiv="Content-Type" content="text/html; charset=utf-8" />
    <meta
      name="viewport"
      content="width=device-width, initial-scale=1, maximum-scale=1"
    />
    <meta http-equiv="X-UA-Compatible" content="IE=Edge" />
    <link rel="stylesheet" href="https://cdn.jsdelivr.net/gh/404name/cdn@main/css/sdk.css" />
    <link rel="stylesheet" href="https://cdn.jsdelivr.net/gh/404name/cdn@main/css/helper.css" />
    <script src="https://cdn.jsdelivr.net/gh/404name/cdn@main/js/sdk.js"></script>
    <style>
      html,
      body,
      .app-wrapper {
        position: relative;
        width: 100%;
        height: 100%;
        margin: 0;
        padding: 0;
      }
    </style>
  </head>
How to initialize the api when submitting a form
"initApi": {
  "method": "get",
  "url": "http://team.404name.top/api/users/0",
  "headers": {
    "Authorization": "${ls:token}"
  }
},
"api": {
  "method": "patch",
  "url": "http://team.404name.top/api/users",
  "data": {
    "&": "$$",
    "id": "${ls:id}"
  },
  "headers": {
    "Authorization": "${ls:token}"
  }
},
Below name One to one correspondence
Cdn mapping
Emmet syntax - write HTML/CSS fast to fly
In the process of front-end development, the most time-consuming work is to write HTML and CSS code. A pile of labels, attributes, parentheses, etc. are a headache. Here we recommend an Emmet syntax rule, which makes you fly when writing, and can greatly improve code writing. You can generate the complete HTML structure you want by typing one line of code. The following will introduce how to use it.
Emmet is a plug-in. It can be used as long as its editor can be installed. Most editors can use this syntax rule. We can use Sublime Text, Eclipse, Notepad + +, VS code, Atom, Dreamweaver and other editors we usually develop.
The installation method is the same as the usual plug-in installation. Search for the emmet plug-in installation. The installation method of each editor is different. Please try it separately
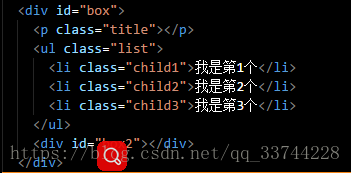
Let's start with an example:

How long do you need to type this ordinary HTML structure?
I only need a few seconds to write the following statement and press the Tab key on the keyboard to see the structure in the figure above
div#box>p.title+ul.list>li.child${I'm the third $individual}*3^div#box2
Isn't it cool? Soon ~ ~ ah ~ ah ~, a complex HTML structure is generated in just one line of code, and the id, class and content correspond to each other
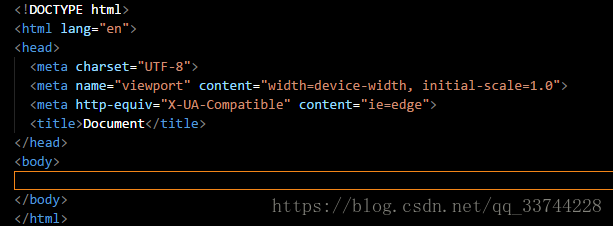
1: html initial structure
For the structure in the figure below, lazy people will directly one! = > Tab solution, which can quickly generate the basic structure and prevent forgetting a code block and entering wrong code when handwriting.

2: id(#),class(.)
id instruction: #; class Directive:
- div#test
<div id="test"></div>
- div.test
<div class="test"></div>
3: Child node (>), brother node (+), parent node (^)
Child node instruction: >; Sibling node instruction: +; Parent node:^
- div>ul>li>p
<div>
   <ul>
     <li>
       <p></p>
     </li>
   </ul>
 </div>
- div+ul+p
<div></div>
<ul></ul>
<p></p>
- Div > ul > li ^ div (the ^ here is followed by li, so at the upper level of li, they become brothers with ul. Of course, the two ^ are the upper level)
<div>
   <ul>
     <li></li>
   </ul>
   <div></div>
 </div>
4: Repeat (*)
Repeat command:*
- div*5 (* the number added after the * sign indicates the number of repeated elements)
<div></div>
   <div></div>
   <div></div>
   <div></div>
   <div></div>
5: Group ()
Group instruction: ()
- div>(ul>li>a)+div>p
(the content in the brackets is a code block, which indicates that it has nothing to do with the nesting inside and outside the brackets)
<div>
   <ul>
     <li><a href=""></a></li>
   </ul>
   <div>
     <p></p>
   </div>
 </div>
Explanation: if you don't put parentheses here, guess a+div, so div is brother to a and will be included in li. See? Ha ha
<div>
   <ul>
     <li>
       <a href=""></a>
       <div>
         <p></p>
       </div>
     </li>
   </ul
6: Attribute ([attr]) - id and class. How can we lack attributes
Attribute Directive: []
- a[href = '###' name = 'xiaoA'] (fill in the form of attribute key value pairs in brackets, separated by spaces)
<a href="###" name="xiaoA"></a>
• 1
###6: Number( ) ' Compile number finger order : )`Instruction number: )'order number:`
- ul>li.test ∗ 3 ( ∗ ∗ *3 (** * 3 (* * stands for one digit, followed by * represents the increment from 1 to the filled number * *)
<ul>
   <li class="test1"></li>
   <li class="test2"></li>
   <li class="test3"></li>
 </ul>
be careful:
- A $represents one digit, that is, two digits, and so on
(
1
)
,
Just
yes
two
position
number
Yes
,
with
this
class
PUSH
Just
can
with
shape
become
(1) , that's two digits, and so on
(1) , that is, two digits, and so on,
(01),$$$(001) - If you want to customize the increment from a few, use: @ + number word ∗ number word example as : u l > l i ∗ 3. t e s t @+Number * number, for example: UL > Li * 3 test @+Number * for example: UL > Li * 3 test@3
<ul>
   <li class="test3"></li>
   <li class="test4"></li>
   <li class="test5"></li>
 </ul>
7: Text ({})
Text instruction: {}
- ul>li. Testkatex parse error: expected '}', got 'EOF' at end of input: * 3 {test} ({fill in the content, which can be combined with $})
<ul>
  <li class="test1">Test 1</li>
  <li class="test2">Test 2</li>
  <li class="test3">Test 3</li>
</ul>
8: Implicit label
This tag has no instructions, but some tags can directly enter instructions without using the input tag to identify the parent tag.
For example: test
<div class="test"></div>
For example: UL > test$*3
<ul>
   <li class="test1"></li>
   <li class="test2"></li>
   <li class="test3"></li>
 </ul>
For example: Select > test$*5
<select name="" id="">
  <option class="test1"></option>
  <option class="test2"></option>
  <option class="test3"></option>
  <option class="test4"></option>
  <option class="test5"></option>
</select>
Wait
Privacy labels are as follows:
- li: used in ul and ol
- tr: used in table, tbody, thead, and tfoot
- td: used in tr
- option: used in select and optgroup
The last is: it's useless to see. Operate it several times. You can master these instructions in a few minutes, and then roll the code quickly