The software download link is at the bottom
thank:
CSDN Daniel: Travel through IT
bilibili Daniel: amoscloud2013
1. Preliminary preparation
Five 8G virtual machines are CDH1, cdh2, cdh3, CDH4 and cdh5 respectively. JDK is installed on all virtual machines
2. Modify IP and host name
Select CentOS 7 for cluster deployment. All three virtual machines are cloned under root permission
2.1 modify host name
# Modify the host name of the first computer
[root@localhost ~]# hostnamectl set-hostname cdh1
# Modify the host name of the second computer
[root@localhost ~]# hostnamectl set-hostname cdh2
# Modify the host name of the third machine
[root@localhost ~]# hostnamectl set-hostname cdh3
# Modify the host name of the fourth machine
[root@localhost ~]# hostnamectl set-hostname cdh4
# Modify the host name of the fifth computer
[root@localhost ~]# hostnamectl set-hostname cdh5
2.2 viewing IP addresses
# Check the ip addresses of one, two, three, four and five hosts and record them
[root@localhost ~]# cd /etc/sysconfig/network-scripts/
[root@cdh1 network-scripts]# vi ifcfg-enp0s3
3. System environment construction
3.1 modify Hosts domain name mapping
# Use the following command to perform IP mapping on all hosts
[root@cdh1 network-scripts]# vi /etc/hosts
# Insert the content, just recorded IP and corresponding host name (insert each, step 2.2)
192.168.2.131   cdh1
192.168.2.132   cdh2
192.168.2.133   cdh3
192.168.2.134   cdh4
192.168.2.135   cdh5
3.2 secret free login
# Generate key
[root@cdh1 ~]# ssh-keygen -t rsa
[root@cdh2 ~]# ssh-keygen -t rsa
[root@cdh3 ~]# ssh-keygen -t rsa
[root@cdh4 ~]# ssh-keygen -t rsa
[root@cdh5 ~]# ssh-keygen -t rsa
 Third carriage return

# Generated secret keys (public and private keys)
# At the same time, copy to other servers to be connected, including their own servers
[root@cdh1 ~]# ssh-copy-id cdh1
Are you sure you want to continue connecting (yes/no)? yes
root@cdh1's password: *********
[root@cdh2 ~]# ssh-copy-id cdh1
Are you sure you want to continue connecting (yes/no)? yes
root@cdh1's password: *********
[root@cdh3 ~]# ssh-copy-id cdh1
Are you sure you want to continue connecting (yes/no)? yes
root@cdh1's password: *********
[root@cdh4 ~]# ssh-copy-id cdh1
Are you sure you want to continue connecting (yes/no)? yes
root@cdh1's password: *********
[root@cdh5 ~]# ssh-copy-id cdh1
Are you sure you want to continue connecting (yes/no)? yes
root@cdh1's password: *********

[root@cdh1 ~]# ssh-copy-id cdh2
Are you sure you want to continue connecting (yes/no)? yes
root@cdh2's password: *********
[root@cdh2 ~]# ssh-copy-id cdh2
Are you sure you want to continue connecting (yes/no)? yes
root@cdh2's password: *********
[root@cdh3 ~]# ssh-copy-id cdh2
Are you sure you want to continue connecting (yes/no)? yes
root@cdh2's password: *********
[root@cdh4 ~]# ssh-copy-id cdh2
Are you sure you want to continue connecting (yes/no)? yes
root@cdh2's password: *********
[root@cdh5 ~]# ssh-copy-id cdh2
Are you sure you want to continue connecting (yes/no)? yes
root@cdh2's password: *********

[root@cdh1 ~]# ssh-copy-id cdh3
Are you sure you want to continue connecting (yes/no)? yes
root@cdh3's password: *********
[root@cdh2 ~]# ssh-copy-id cdh3
Are you sure you want to continue connecting (yes/no)? yes
root@cdh3's password: *********
[root@cdh3 ~]# ssh-copy-id cdh3
Are you sure you want to continue connecting (yes/no)? yes
root@cdh3's password: *********
[root@cdh4 ~]# ssh-copy-id cdh3
Are you sure you want to continue connecting (yes/no)? yes
root@cdh3's password: *********
[root@cdh5 ~]# ssh-copy-id cdh3
Are you sure you want to continue connecting (yes/no)? yes
root@cdh3's password: *********

[root@cdh1 ~]# ssh-copy-id cdh4
Are you sure you want to continue connecting (yes/no)? yes
root@cdh4's password: *********
[root@cdh2 ~]# ssh-copy-id cdh4
Are you sure you want to continue connecting (yes/no)? yes
root@cdh4's password: *********
[root@cdh3 ~]# ssh-copy-id cdh4
Are you sure you want to continue connecting (yes/no)? yes
root@cdh4's password: *********
[root@cdh4 ~]# ssh-copy-id cdh4
Are you sure you want to continue connecting (yes/no)? yes
root@cdh4's password: *********
[root@cdh5 ~]# ssh-copy-id cdh4
Are you sure you want to continue connecting (yes/no)? yes
root@cdh4's password: *********

[root@cdh1 ~]# ssh-copy-id cdh5
Are you sure you want to continue connecting (yes/no)? yes
root@cdh5's password: *********
[root@cdh2 ~]# ssh-copy-id cdh5
Are you sure you want to continue connecting (yes/no)? yes
root@cdh5's password: *********
[root@cdh3 ~]# ssh-copy-id cdh5
Are you sure you want to continue connecting (yes/no)? yes
root@cdh5's password: *********
[root@cdh4 ~]# ssh-copy-id cdh5
Are you sure you want to continue connecting (yes/no)? yes
root@cdh5's password: *********
[root@cdh5 ~]# ssh-copy-id cdh5
Are you sure you want to continue connecting (yes/no)? yes
root@cdh5's password: *********

# When it's done, test it
[root@cdh1 ~]# ssh cdh2
Last login: Tue Jul 27 19:50:00 2021 from 192.168.2.67
[root@cdh2 ~]# exit
 Logout
Connection to cdh2 closed.
3.3 firewall shutdown
# Turn off firewall
[root@cdh1 ~]# systemctl stop firewalld
# Permanently turn off the firewall
[root@cdh1 ~]# systemctl disable firewalld
[root@cdh2 ~]# systemctl stop firewalld
[root@cdh2 ~]# systemctl disable firewalld
[root@cdh3 ~]# systemctl stop firewalld
[root@cdh3 ~]# systemctl disable firewalld
[root@cdh4 ~]# systemctl stop firewalld
[root@cdh4 ~]# systemctl disable firewalld
3.4 SELINUX shutdown
# View SELINUX status
[root@cdh1 ~]# getenforce

# Change SELINUX=enforcing in the / etc/selinux/config file to SELINUX=disabled
[root@cdh1 ~]# sed -i 's/SELINUX=enforcing/SELINUX=disabled/' /etc/selinux/config
# Shut down SELINUX temporarily to avoid restarting the server
[root@cdh1 ~]# setenforce 0

[root@cdh2 ~]# sed -i 's/SELINUX=enforcing/SELINUX=disabled/' /etc/selinux/config
[root@cdh3 ~]# setenforce 0

[root@cdh3 ~]# sed -i 's/SELINUX=enforcing/SELINUX=disabled/' /etc/selinux/config
[root@cdh3 ~]# setenforce 0

[root@cdh4 ~]# sed -i 's/SELINUX=enforcing/SELINUX=disabled/' /etc/selinux/config
[root@cdh4 ~]# setenforce 0

[root@cdh5 ~]# sed -i 's/SELINUX=enforcing/SELINUX=disabled/' /etc/selinux/config
[root@cdh5 ~]# setenforce 0
3.5 disable transparent large pages
# View the settings and startup status of transparent large pages
[root@cdh1 ~]# cat /sys/kernel/mm/transparent_hugepage/defrag 	 (optional)
[root@cdh1 ~]# cat /sys/kernel/mm/transparent_hugepage/enabled 	 (optional)

# Temporarily Closed
[root@cdh1 ~]# echo never > /sys/kernel/mm/transparent_hugepage/defrag
[root@cdh1 ~]# echo never > /sys/kernel/mm/transparent_hugepage/enabled

# Permanent shutdown
[root@cdh1 ~]# echo 'echo never > /sys/kernel/mm/transparent_hugepage/defrag'  >> /etc/rc.local
[root@cdh1 ~]# echo 'echo never > /sys/kernel/mm/transparent_hugepage/enabled'  >> /etc/rc.local
[root@cdh1 ~]# chmod +x /etc/rc.local

# Every server is down
3.6 modify the Linux flexibility parameter (all nodes)
# In order to prevent the server from using the swap function and affecting the server performance, the VM Modify swappines to 0(cloudera recommends below 10)
# View parameters
[root@cdh1 ~]# cd /usr/lib/tuned
[root@cdh1 tuned]# grep "vm.swappiness" * -R

# modify parameters
[root@cdh1 tuned]# sed -i s/"vm.swappiness = 30"/"vm.swappiness = 10"/g /usr/lib/tuned/virtual-guest/tuned.conf

# Verify whether the modification is successful
[root@cdh1 tuned]# grep "vm.swappiness" * -R

# Each server is modified
3.7 JDK installation
3.7. 1 create folder
[root@cdh1 ~]# mkdir /usr/java
3.7. 2. Upload jdk files
hold jdk‐8u202‐linux‐x64.tar.gz Drag to java Under folder
3.7. 3 unzip the compressed package in the java directory
[root@cdh1 ~]# cd /usr/java
[root@cdh1 java]# tar -zxvf jdk‐8u202‐linux‐x64.tar.gz
3.7. 4 modify configuration
[root@cdh1 java]# vi /etc/profile

# Add the following two sentences to add the following configuration
export JAVA_HOME=/usr/java/jdk1.8.0_202
export PATH=$PATH:$JAVA_HOME/bin

# Refresh configuration
[root@cdh1 java]# source /etc/profile

# Check for success
[root@cdh1 java]# javac -version
3.7. 5 install for other servers
# Repeat 3.5.1 1 to 3.5 Step 4, install JDK on the other 4 machines
3.8 upload JDBC dependency package (all nodes)
3.8. 1 create directory
[root@cdh1 java]# mkdir -p /usr/share/java
[root@cdh1 java]# cd /usr/share/java
3.8. 2 upload jar package
Put MySQL connector Java Pull the jar file into the / usr/share/java folder
3.8. 3. Install each machine with 3.8 1 and 3.8 2 method upload
3.9 MySQL installation
3.9. 1. Install mysql
# Upload mysql6 files to the fifth machine / root folder
[root@cdh5 ~]# cd ~
# First, check whether mysql database is installed in your cluster
[root@cdh5 ~]# rpm -qa | grep mysql
# If yes, uninstall MySQL using Yum - y remove

# Install 6 rpm packages in turn
[root@cdh5 ~]# rpm -ivh mysql-community-common-5.7.19-1.el7.x86_64.rpm --nodeps --force
[root@cdh5 ~]# rpm -ivh mysql-community-libs-5.7.19-1.el7.x86_64.rpm --nodeps --force
[root@cdh5 ~]# rpm -ivh mysql-community-libs-compat-5.7.19-1.el7.x86_64.rpm --nodeps --force
[root@cdh5 ~]# rpm -ivh mysql-community-devel-5.7.19-1.el7.x86_64.rpm --nodeps --force
[root@cdh5 ~]# rpm -ivh mysql-community-client-5.7.19-1.el7.x86_64.rpm --nodeps --force
[root@cdh5 ~]# rpm -ivh mysql-community-server-5.7.19-1.el7.x86_64.rpm --nodeps --force
3.9. 2 start mysql
[root@cdh5 ~]# systemctl start mysqld
3.9. 3. Set startup self startup mysql
[root@cdh5 ~]# systemctl enable mysqld
3.9. 4 set the database to no password state
# Modify configuration
[root@cdh5 ~]# vi /etc/my.cnf
# Add skip grant tables on line 25
3.9. 5 restart the mysql server
[root@cdh5 ~]# systemctl restart mysqld
3.9. 6 enter the database
[root@cdh5 ~]# mysql -u root -p
# Enter directly without password
3.9. 7 select database
mysql> use mysql;
3.9. 8. Modify mysql login password
# Change the password to 123456
mysql> update user set authentication_string=password("123456") where user='root';
3.9. 9 refresh, exit
mysql> flush privileges;
mysql> quit;
3.9. 10 log in to the database again
[root@cdh5 ~]# mysql -u root -p
# Password: 123456
3.9. 11 select database
mysql> use mysql;
# An error will be reported here
# Follow the steps below
mysql> set password = PASSWORD('123456');
# If successful, continue. If unsuccessful, skip the next three steps. See below

mysql> ALTER USER 'root'@'localhost' PASSWORD EXPIRE NEVER;
mysql> flush privileges;
mysql> quit;
If you report an error, look here
If the above password setting is unsuccessful, an error is reported as follows:
mysql> set password = PASSWORD('123456');
ERROR 1819 (HY000): Your password does not satisfy the current policy requirements

Perform the following steps:

This is actually related to validate_password_policy Related to the value of.

Execute the following command to modify

mysql> set global validate_password_policy =0;
Query OK, 0 rows affected (0.04 sec)

mysql> set global validate_password_length = 6;
Query OK, 0 rows affected (0.00 sec)

Then re execute the command
mysql>SET PASSWORD = PASSWORD('your new password');

Query OK, 0 rows affected (0.00 sec)

2.ALTER USER 'root'@'localhost' PASSWORD EXPIRE NEVER
3.flush privileges;
4.quit
3.9. 12 log in to the database again
[root@cdh5 ~]# mysql -u root -p
# Password: 123456
3.9. 13 select the database again
mysql> use mysql;
3.9. 14 create 5 databases
mysql> create database cmf default character set = 'utf8';
mysql> create database amon default character set = 'utf8';
mysql> create database hue default character set = 'utf8';
mysql> create database oozie default character set = 'utf8';
mysql> create database lyz default character set = 'utf8';
3.9. 15. Empower mysql database
Any server can connect to it. Perform the following steps:
mysql> select host from user where user = 'root';
mysql> update user set host='%' where user = 'root';
mysql> flush privileges;
mysql> quit;
3.9. 16. Allow the external network to access the current mysql
Reference: centOS7 sets the mysql database to be accessible from the Internet
1. Check whether the firewall has developed port 3306 externally. The firewall has been closed before the top. You need to open the firewall first
[root@cdh5 ~]# systemctl start firewalld
[root@cdh5 ~]# systemctl status firewalld
[root@cdh5 ~]# firewall-cmd --list-all
2. Check whether the 3306 port is open
[root@cdh5 ~]# firewall-cmd --query-port=3306/tcp
# no means not open
3. Open 3306 port
[root@cdh5 ~]# firewall-cmd --permanent --add-port=3306/tcp
4. Restart the firewall
[root@cdh5 ~]# service firewalld restart
5 again Check whether the 3306 port is open
[root@cdh5 ~]# firewall-cmd --query-port=3306/tcp
6. View the current firewall
[root@cdh5 ~]# firewall-cmd --list-all
3.9 installation of NTP*
[root@cdh1 ~]# yum install -y ntp
[root@cdh1 ~]# vi /etc/ntp.conf
# First annotate the four servers, and then add the server host ip
# Configure / etc/sysconfig/ntpd
[root@cdh1 ~]# vi /etc/sysconfig/ntpd
# Append the following line
SYNC_CLOCK=yes
# Start NTP service
[root@cdh1 ~]# systemctl start ntpd.service
# Set to start automatically
[root@cdh1 ~]# systemctl enable ntpd.service
# View NTP status
[root@cdh1 ~]# service ntpd status
3.11 installation httpd
[root@cdh1 ~]# yum -y install httpd
[root@cdh1 ~]# service httpd start
[root@cdh1 ~]# systemctl enable httpd
3.12 download the third-party dependency package
[root@cdh1 ~]# yum -y install chkconfig
yum -y install bind-utils
yum -y install chkconfig
yum -y install cyrus-sasl-gssapi
yum -y install cyrus-sasl-plain
yum -y install fuse
yum -y install fuse-libs
yum -y install gcc
yum -y install libxslt
yum -y install mod_ssl
yum -y install MySQL-python
yum -y install openssl
yum -y install openssl-devel
yum -y install perl
yum -y install portmap
yum -y install postgresql-server
yum -y install psmisc
yum -y install python-devel
yum -y install python-psycopg2
yum -y install python-setuptools
yum -y install sed
yum -y install sqlite
yum -y install swig
yum -y install zlib
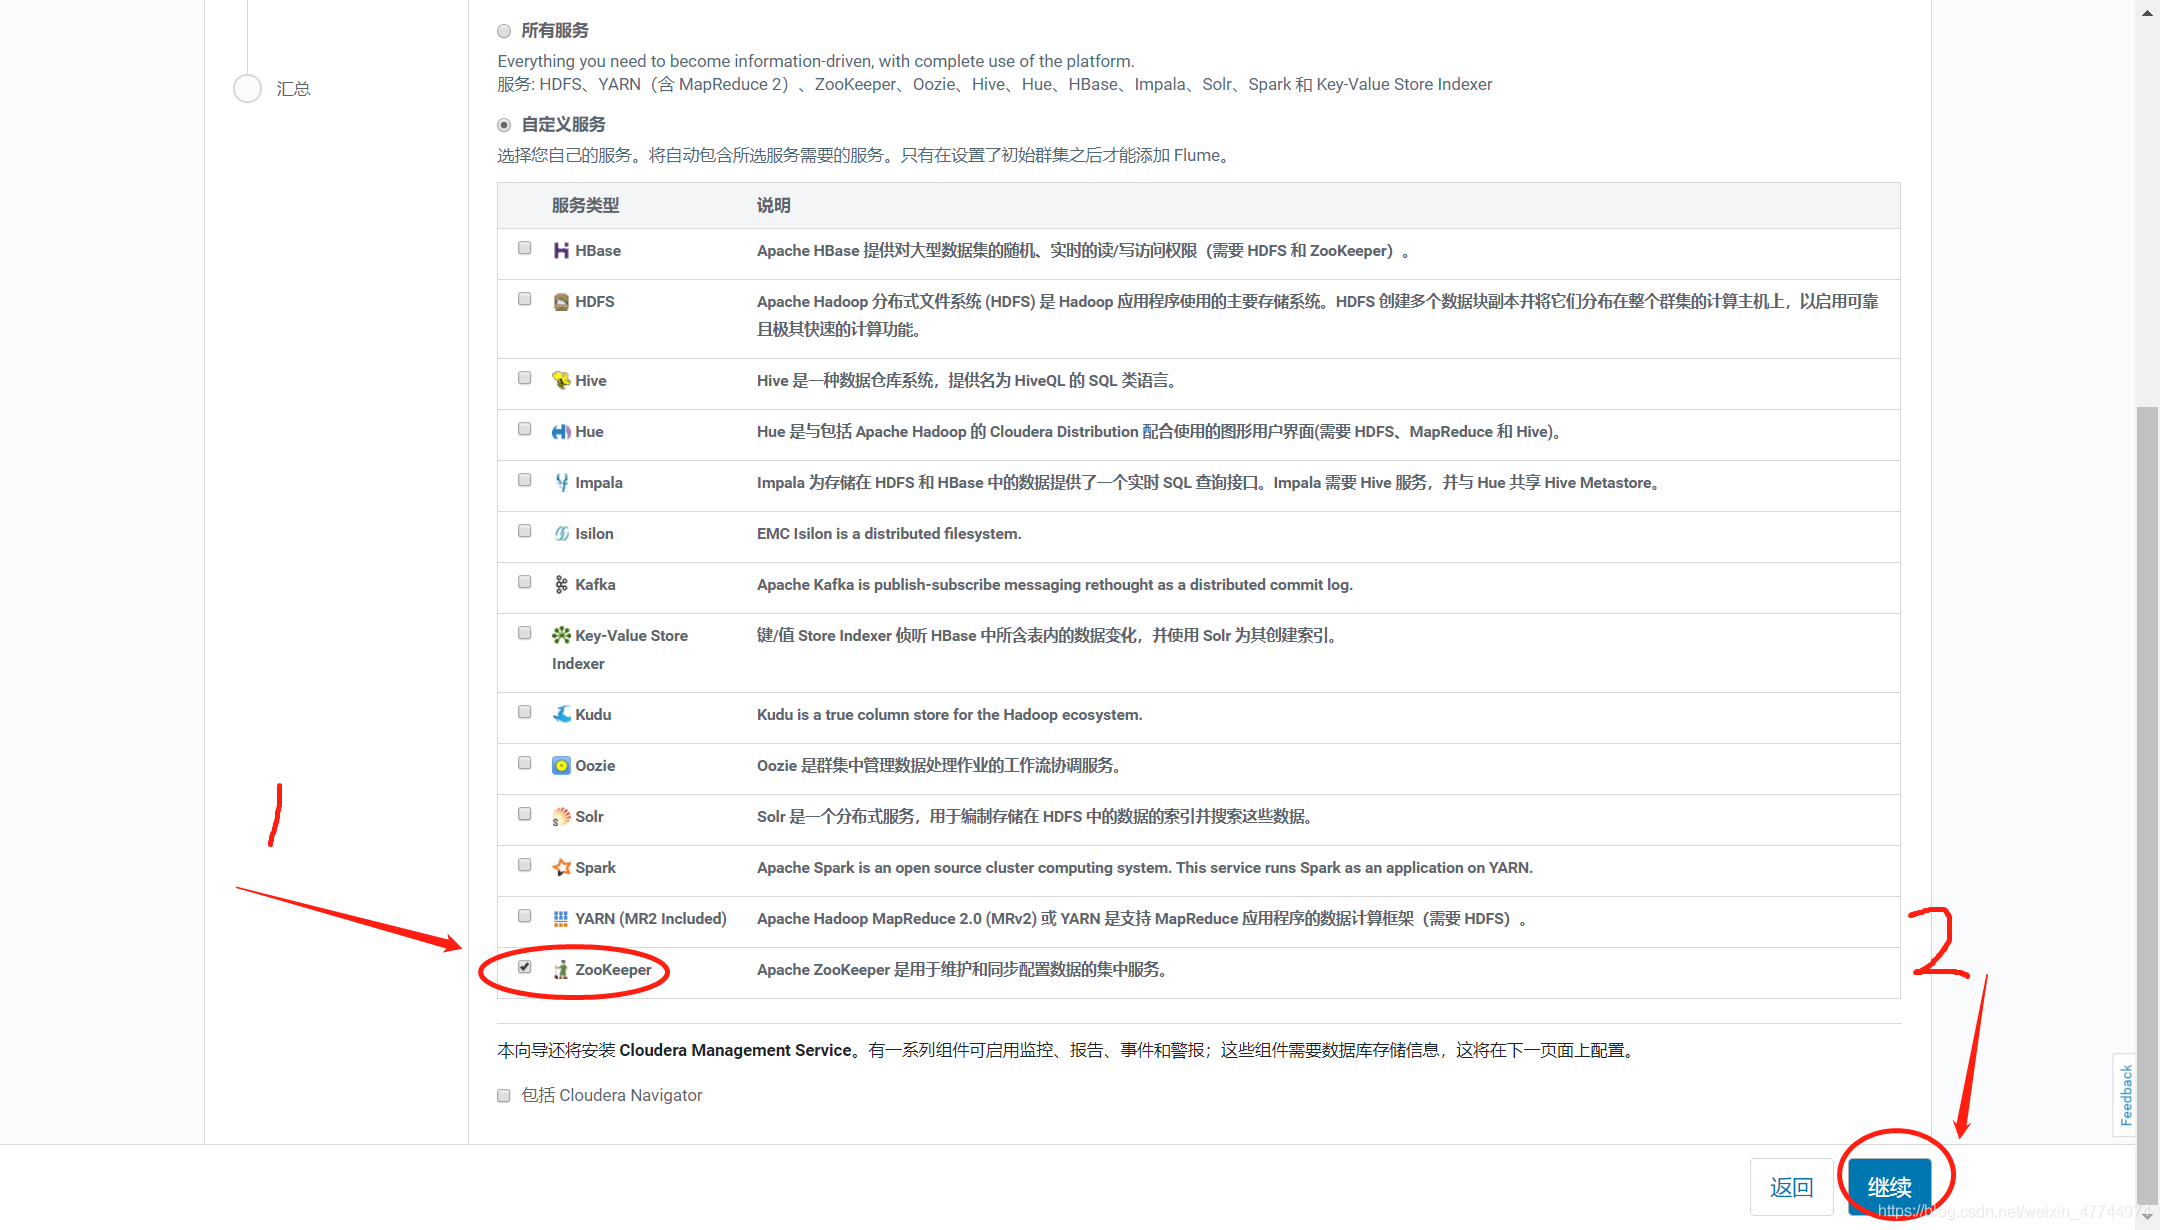
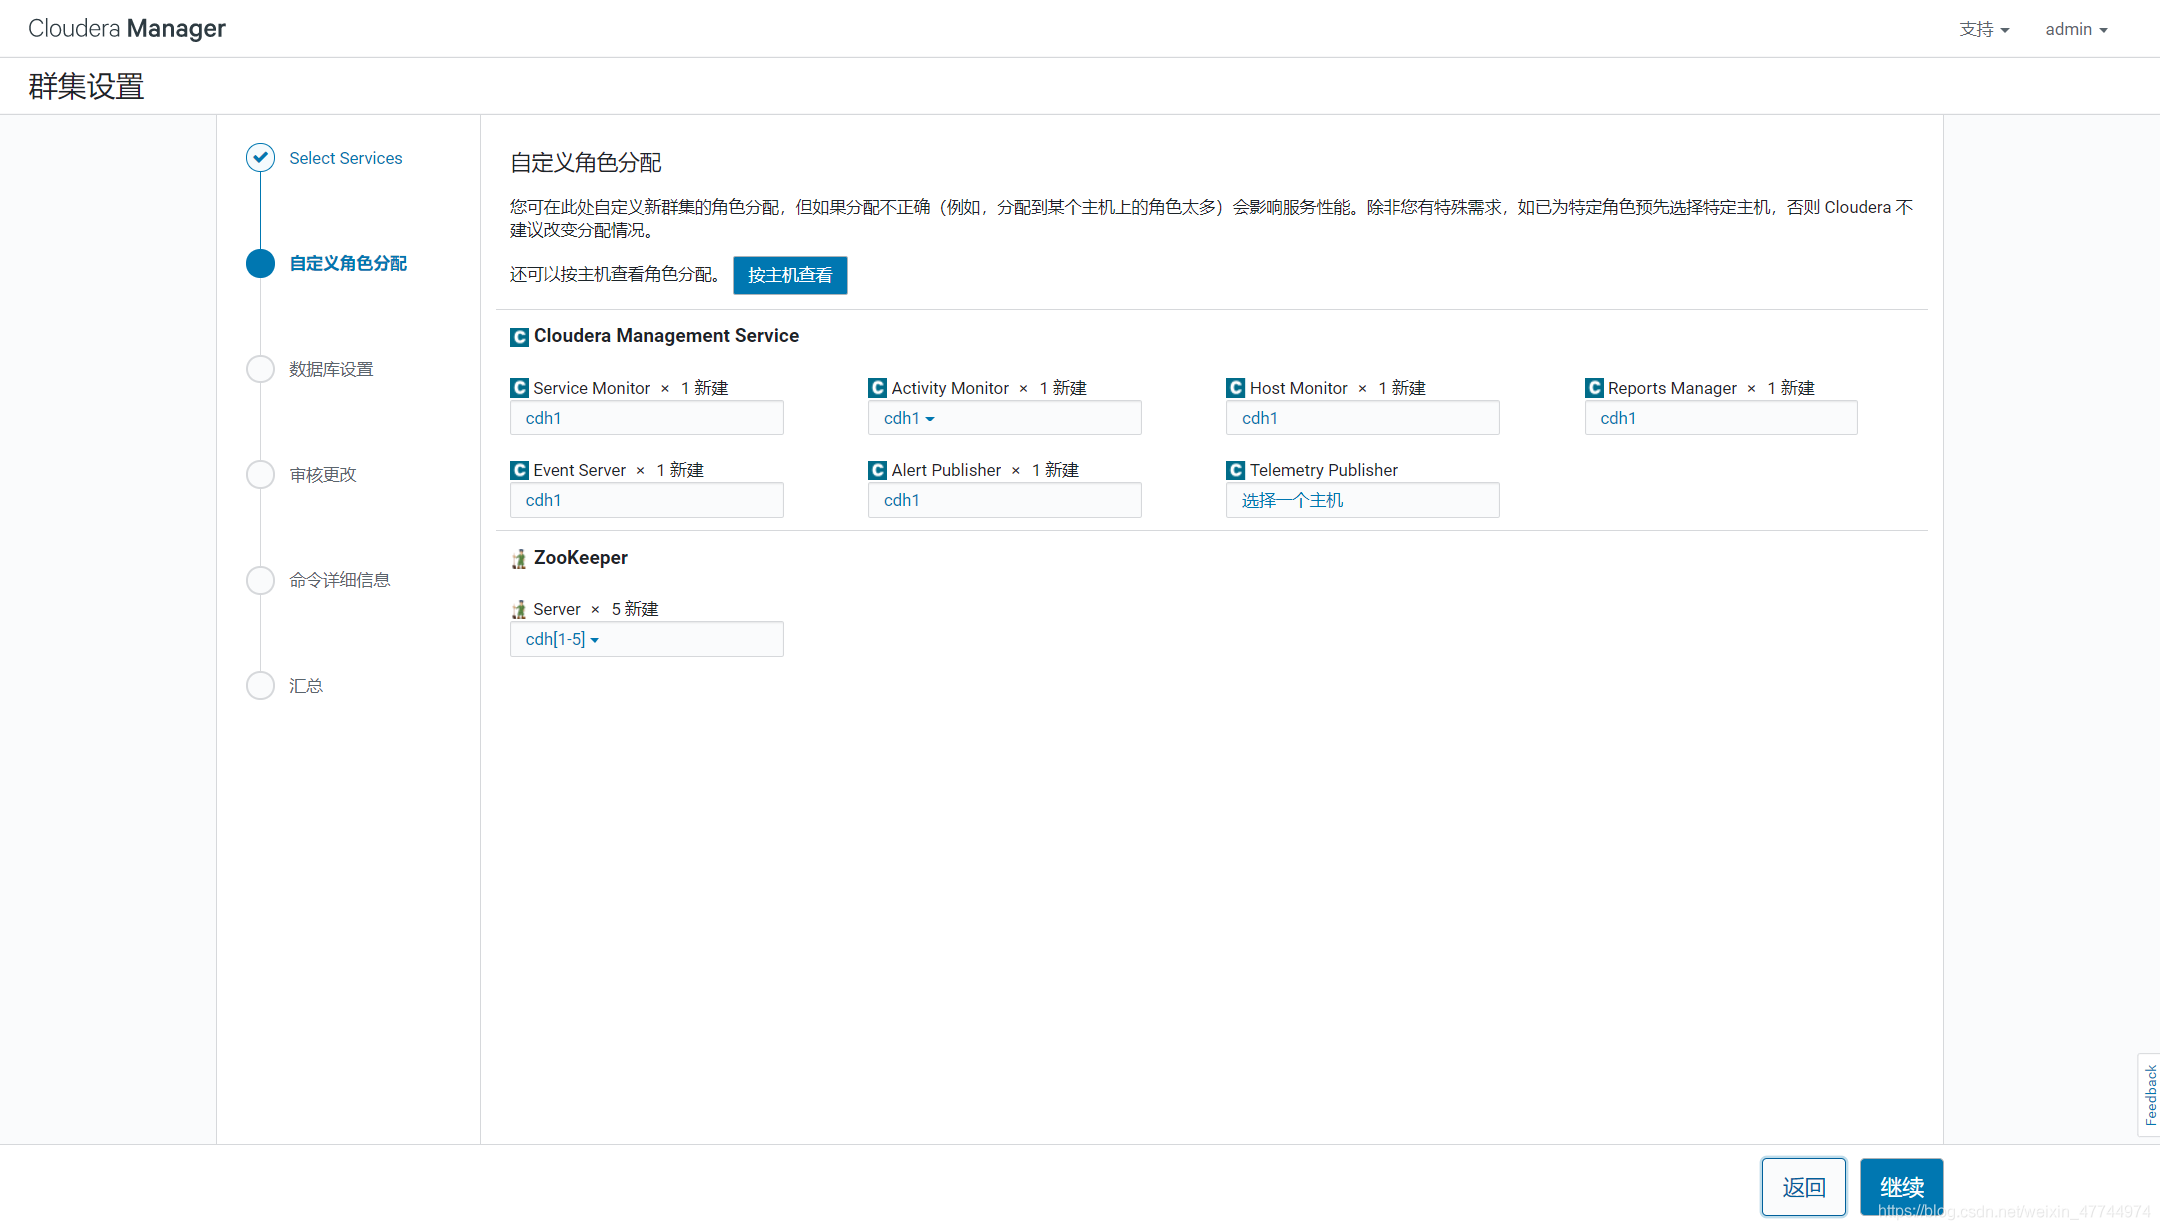
3.15 CM component and node installation
3.15. 1 upload CM components
# Upload cdh1 three CM packages
# cdh2 cdh3 cdh4 cdh5 cluster only uploads agent and daemons packages
3.15. 2. Install daemons and agent s on all nodes
[root@cdh1 ~]# yum localinstall -y cloudera-manager-daemons-6.2.0-968826.el7.x86_64.rpm
[root@cdh1 ~]# yum localinstall -y cloudera-manager-agent-6.2.0-968826.el7.x86_64.rpm
3.15.3 cdh1 node installation server
[root@cdh1 ~]# yum localinstall -y cloudera-manager-server-6.2.0-968826.el7.x86_64.rpm
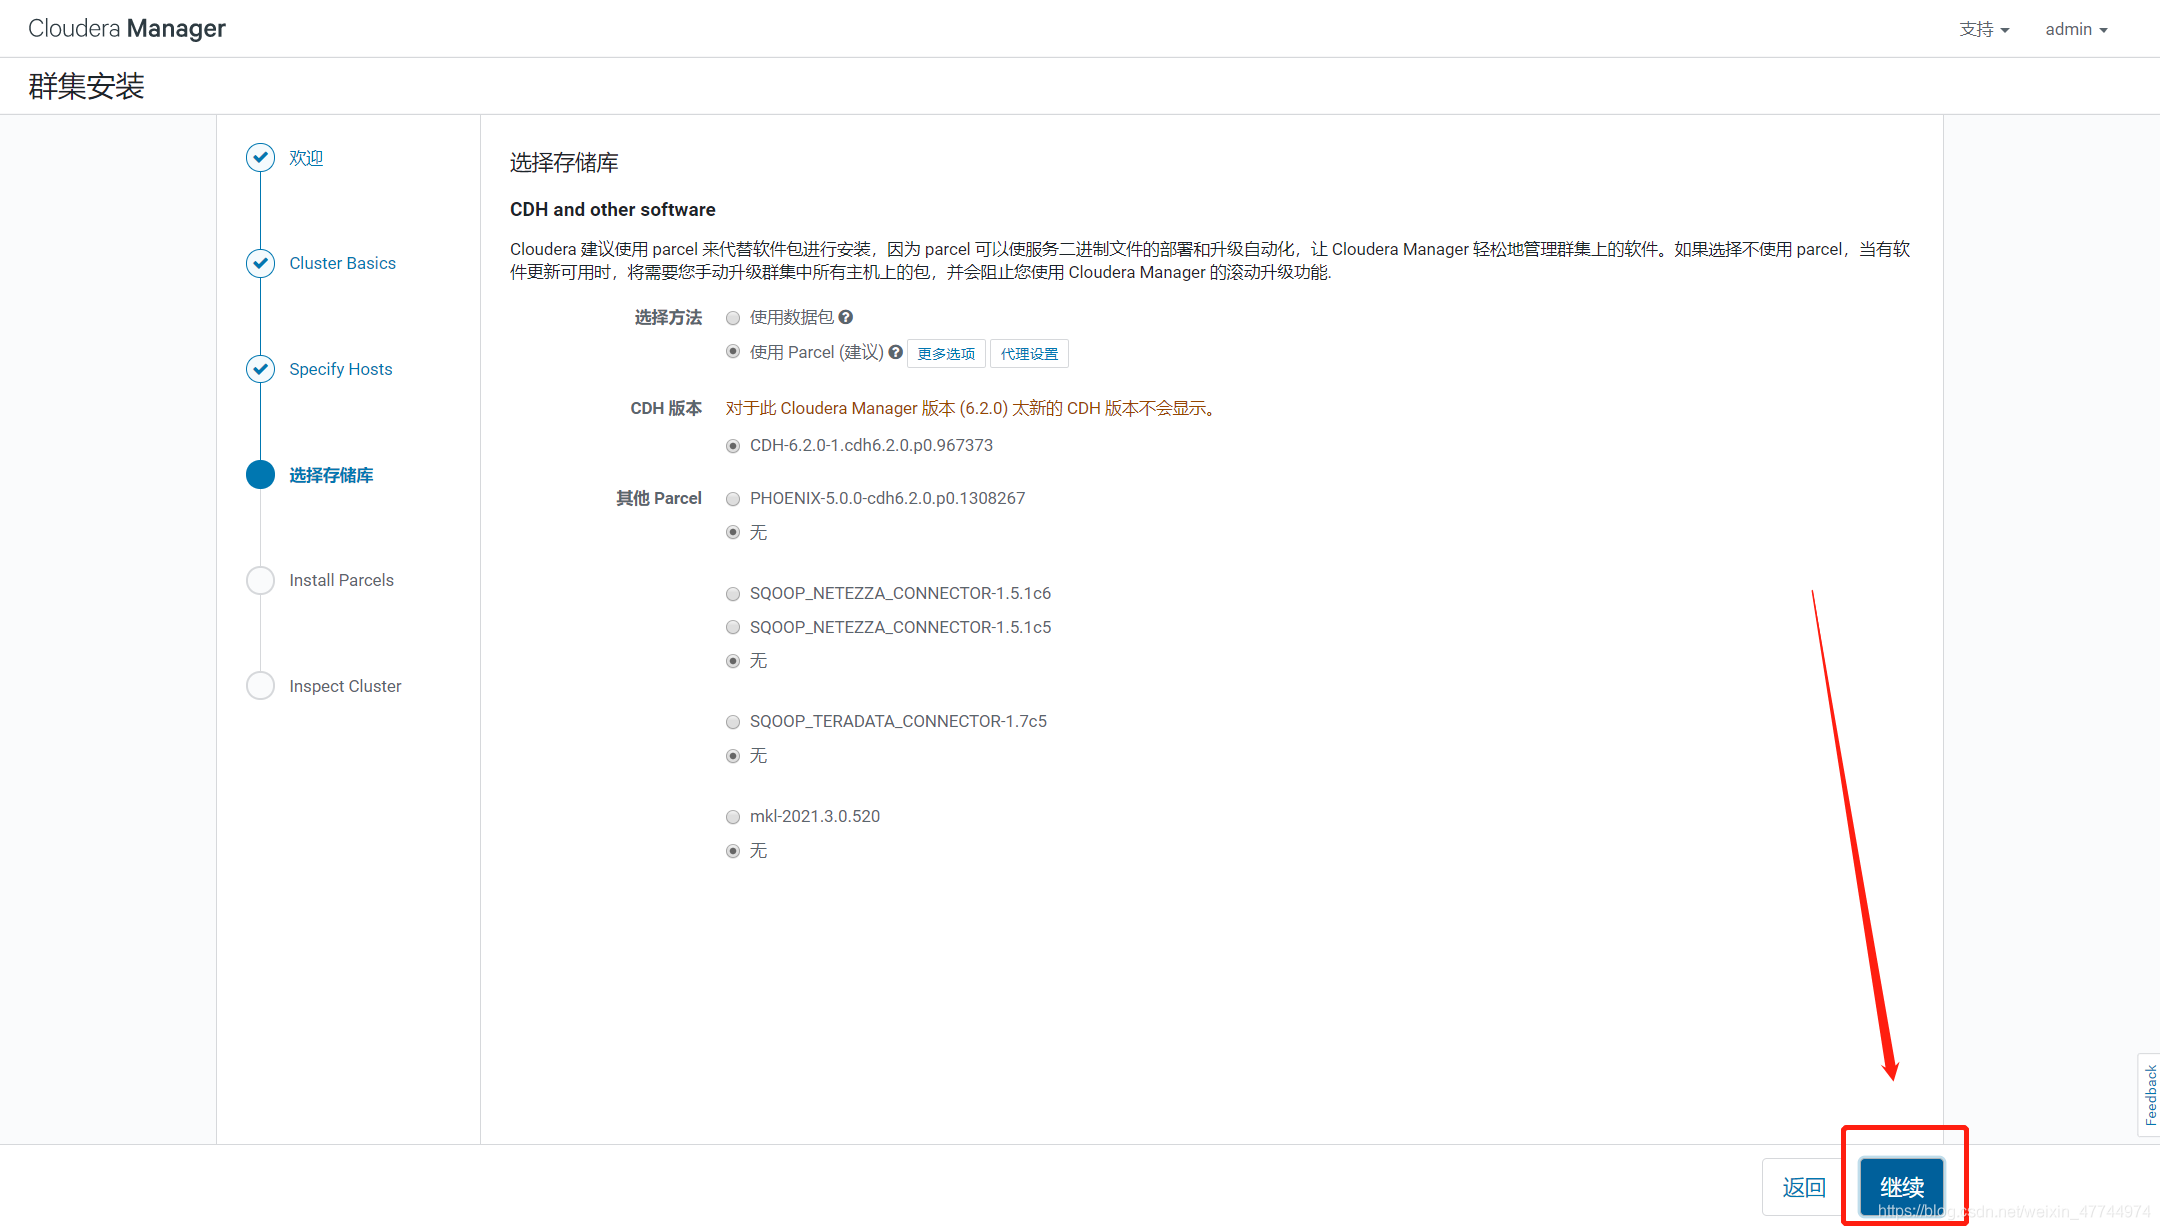
3.16 download and install cdh6 two
3.16. 1 upload CDH components
# Upload all in CDH1 node
3.16. 2. Move different resources to the corresponding directory
[root@cdh1 ~]# mv CDH-6.2.0-1.cdh6.2.0.p0.967373-el7.parcel* /opt/cloudera/parcel-repo/
[root@cdh1 ~]# mv PHOENIX-5.0.0-cdh6.2.0.p0.1308267-el7.parcel* /opt/cloudera/parcel-repo/
[root@cdh1 ~]# mv manifest.json /opt/cloudera/parcel-repo/
[root@cdh1 ~]# mv PHOENIX-1.0.jar /opt/cloudera/csd/
# Enter the parcel repo directory and verify whether the character codes in the yellow box are equal to judge whether the file is uploaded correctly
[root@cdh1 ~]# cd /opt/cloudera/parcel-repo/
[root@cdh1 parcel-repo]# sha1sum CDH-6.2.0-1.cdh6.2.0.p0.967373-el7.parcel
e9c8328d8c370517c958111a3db1a085ebace237  CDH-6.2.0-1.cdh6.2.0.p0.967373-el7.parcel
[root@cdh1 parcel-repo]# cat CDH-6.2.0-1.cdh6.2.0.p0.967373-el7.parcel.sha
e9c8328d8c370517c958111a3db1a085ebace237

[root@cdh1 parcel-repo]# sha1sum PHOENIX-5.0.0-cdh6.2.0.p0.1308267-el7.parcel
d3564f5271969a72cb000caaad336f52efc6ea4a  PHOENIX-5.0.0-cdh6.2.0.p0.1308267-el7.parcel
[root@cdh1 parcel-repo]# cat PHOENIX-5.0.0-cdh6.2.0.p0.1308267-el7.parcel.sha
d3564f5271969a72cb000caaad336f52efc6ea4a
3.16. 3. Modify the server configuration file
[root@cdh1 parcel-repo]# vi /etc/cloudera-scm-server/db.properties
    1 # Line 12 remove the comment and change localhost to cdh5
    2 # Line 15 remove the comment
    3 # Remove the comment on line 18 and change cmf to root
    4 # Remove the comment in line 21 and fill in 123456 in the password
    5 # Line 28 setupType = EXTERNAL
3.16. 4. Modify the agent configuration file of all nodes
[root@cdh1 parcel-repo]# vi /etc/cloudera-scm-agent/config.ini
[root@cdh2 ~]# vi /etc/cloudera-scm-agent/config.ini
......
15 Line handle localhost Change to cdh1
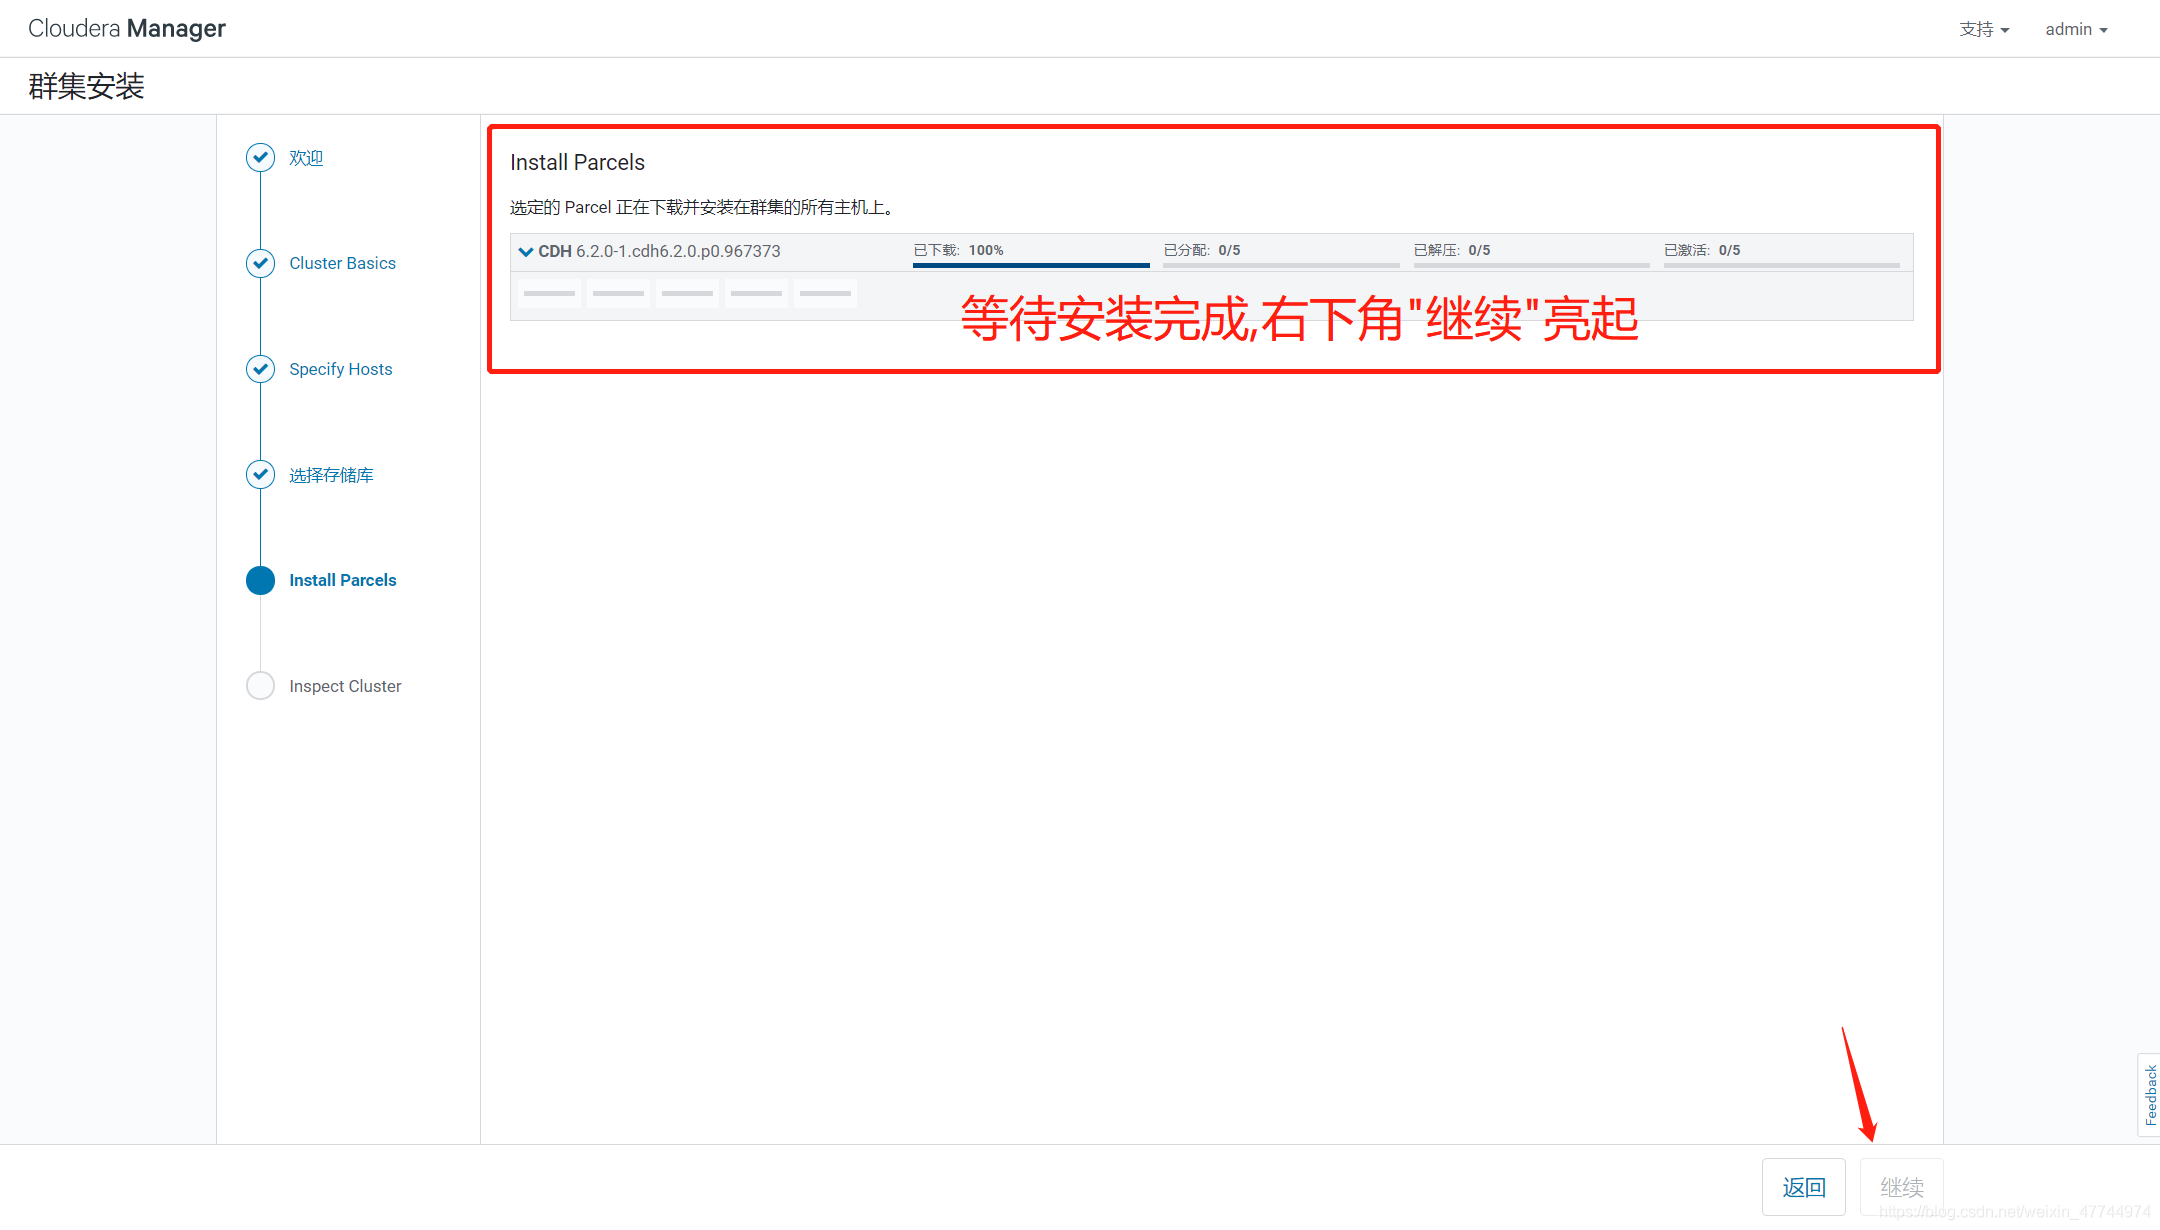
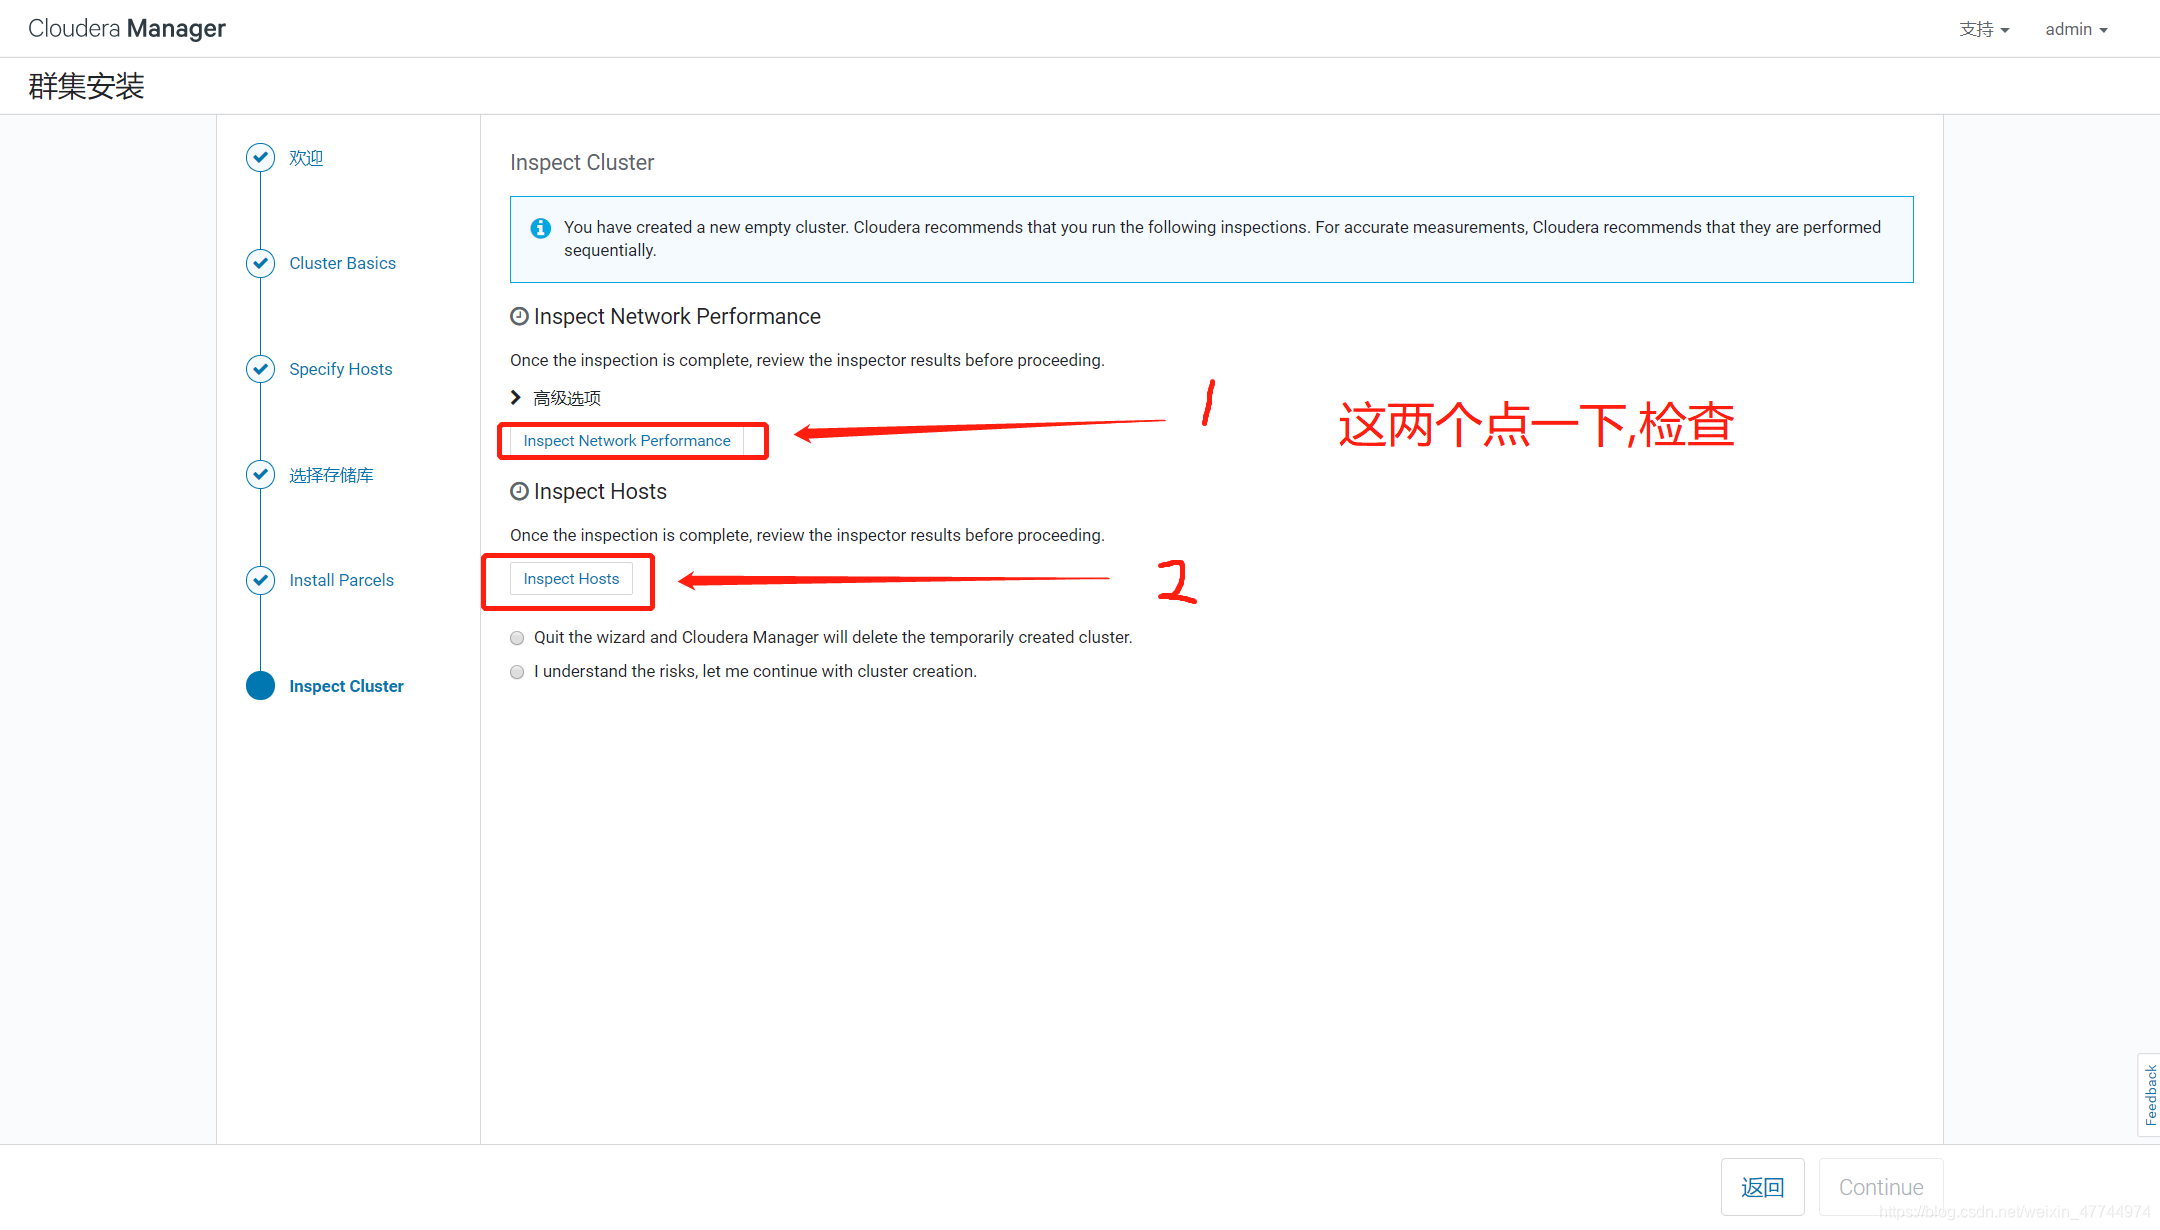
3.17 start CM and install CDH cluster
3.17. 1 turn off the firewall again for all nodes
[root@cdh1 parcel-repo]# systemctl stop firewalld
[root@cdh1 parcel-repo]# systemctl disable firewalld
......
3.17. 2 start the server and agent on cdh1
[root@cdh1 parcel-repo]# systemctl start cloudera-scm-server
[root@cdh1 parcel-repo]# systemctl start cloudera-scm-agent
3.17. 3 start the agent on other nodes
[root@cdh2 ~]# systemctl start cloudera-scm-agent
[root@cdh3 ~]# systemctl start cloudera-scm-agent
[root@cdh4 ~]# systemctl start cloudera-scm-agent
[root@cdh5 ~]# systemctl start cloudera-scm-agent
3.17. 4 view relevant logs
Open another window to view relevant logs. If there are exceptions, solve them
[root@cdh1 ~]# tail -200f /var/log/cloudera-scm-server/cloudera-scm-server.log
3.17. 5. Check whether port 7180 is effective
If it is effective, it proves that the configuration is successful. You can log in to the web page. If no information is displayed, it proves that it is not effective. Check the above log to see if there is an error
[root@cdh1 parcel-repo]# netstat ‐tunlp | grep 7180
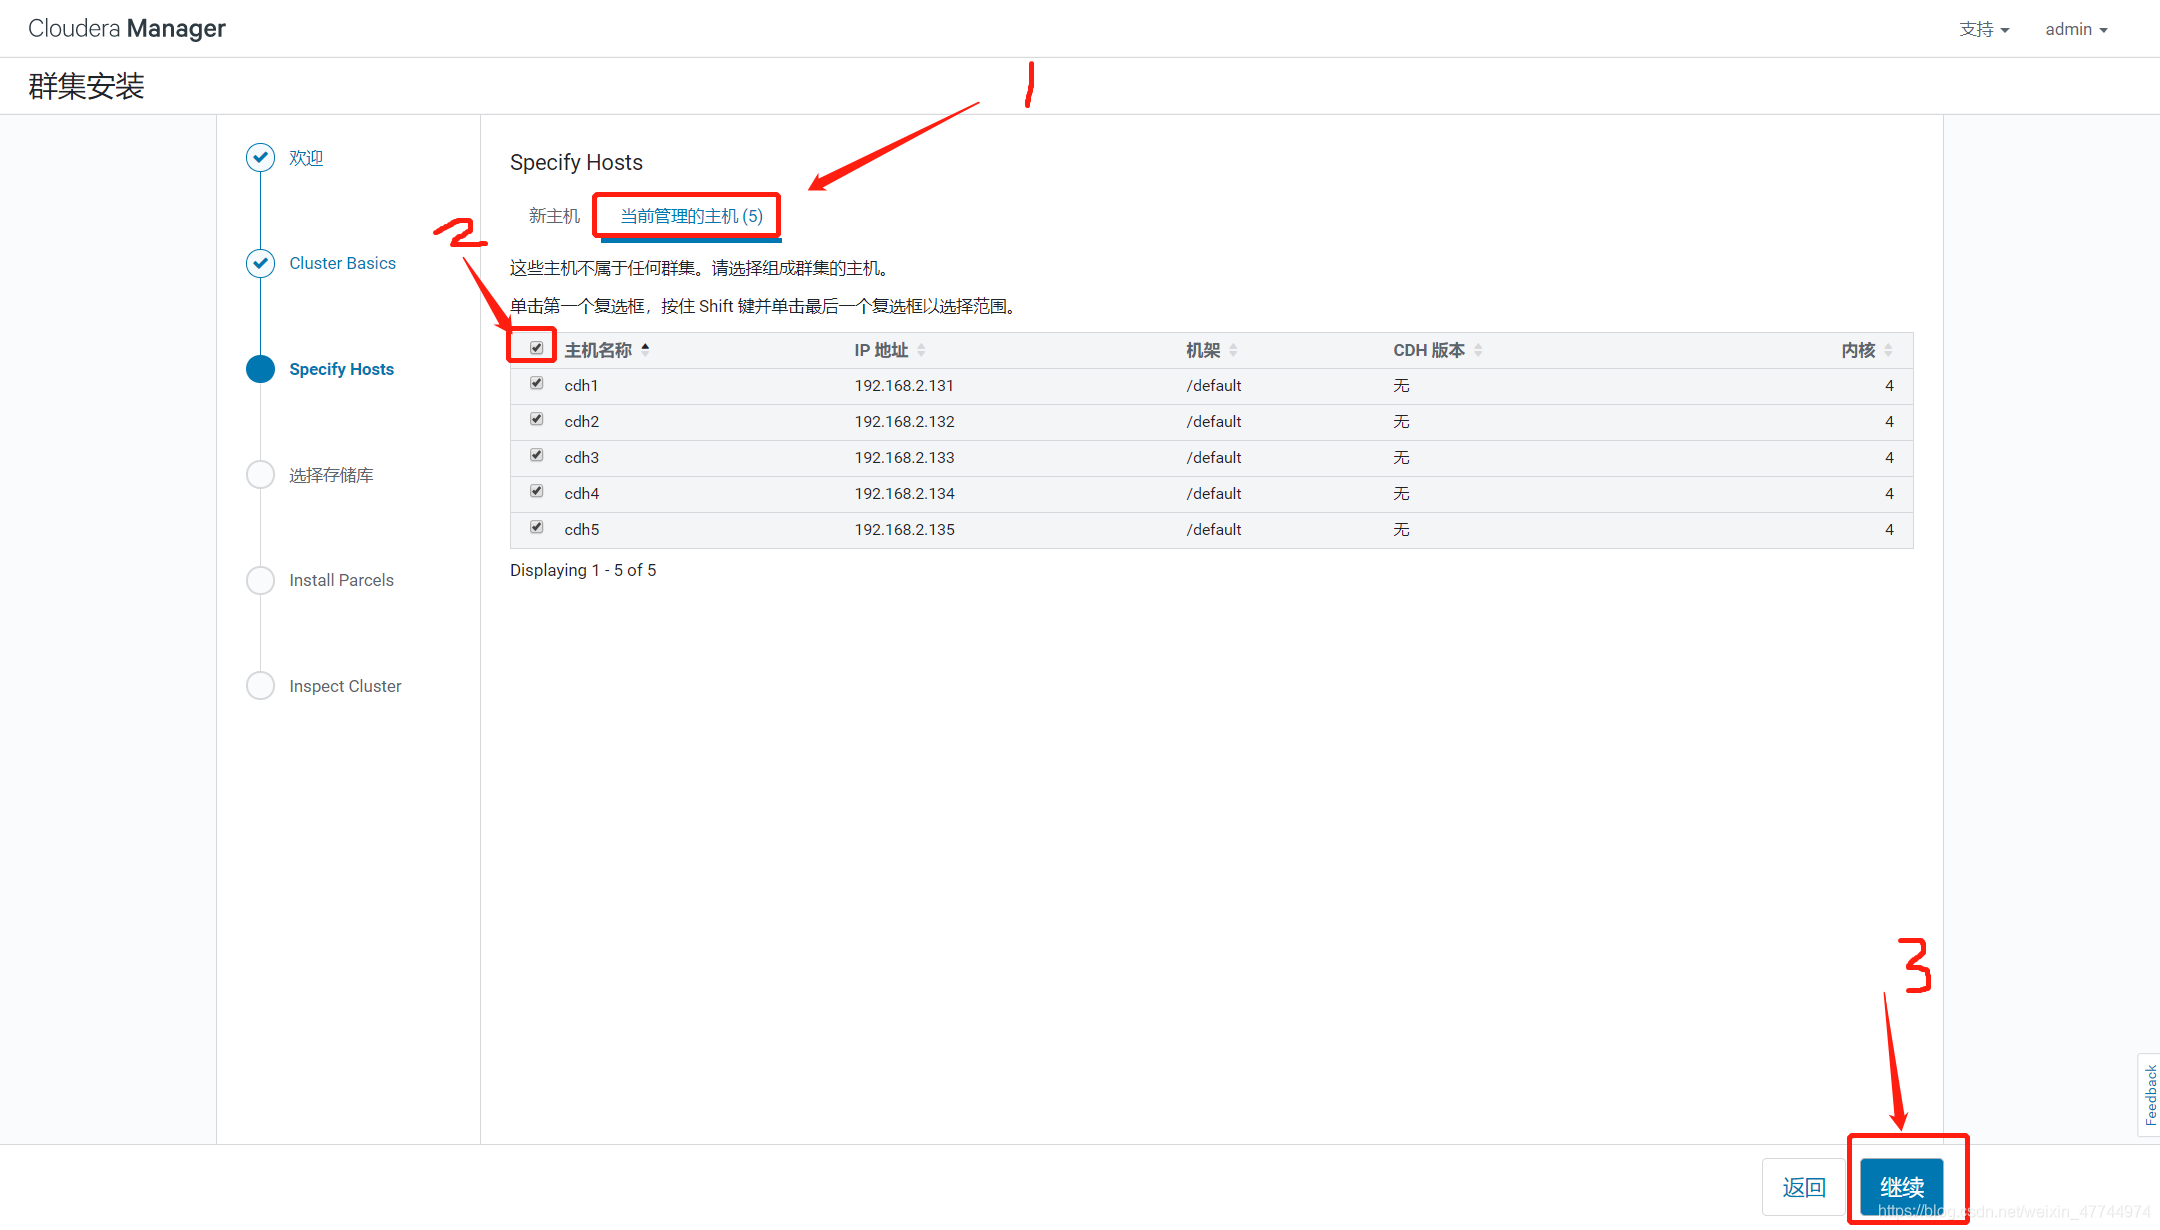
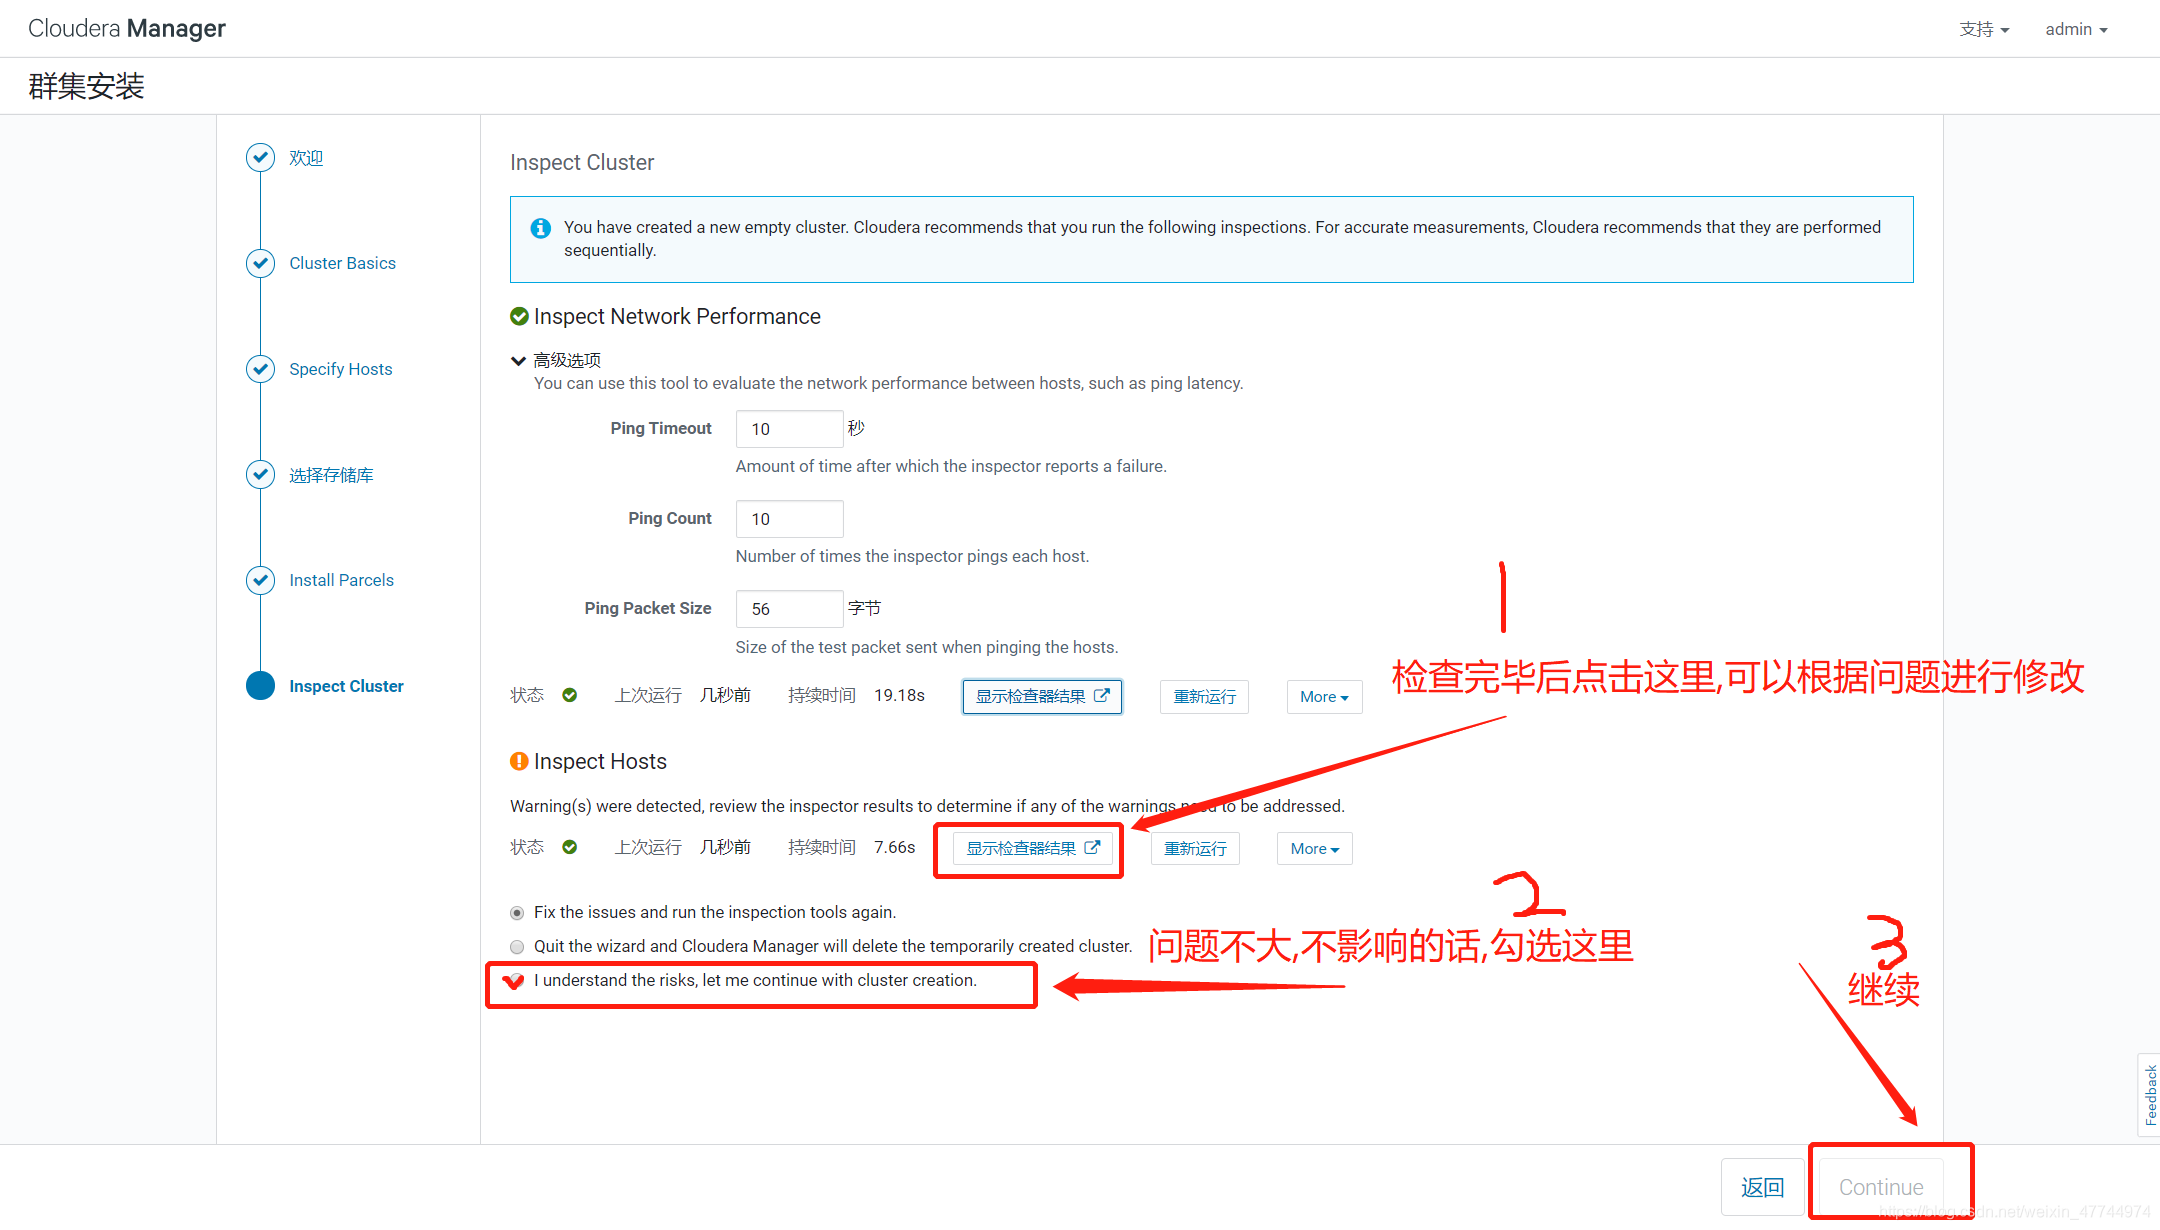
3.18 operation WEB interface
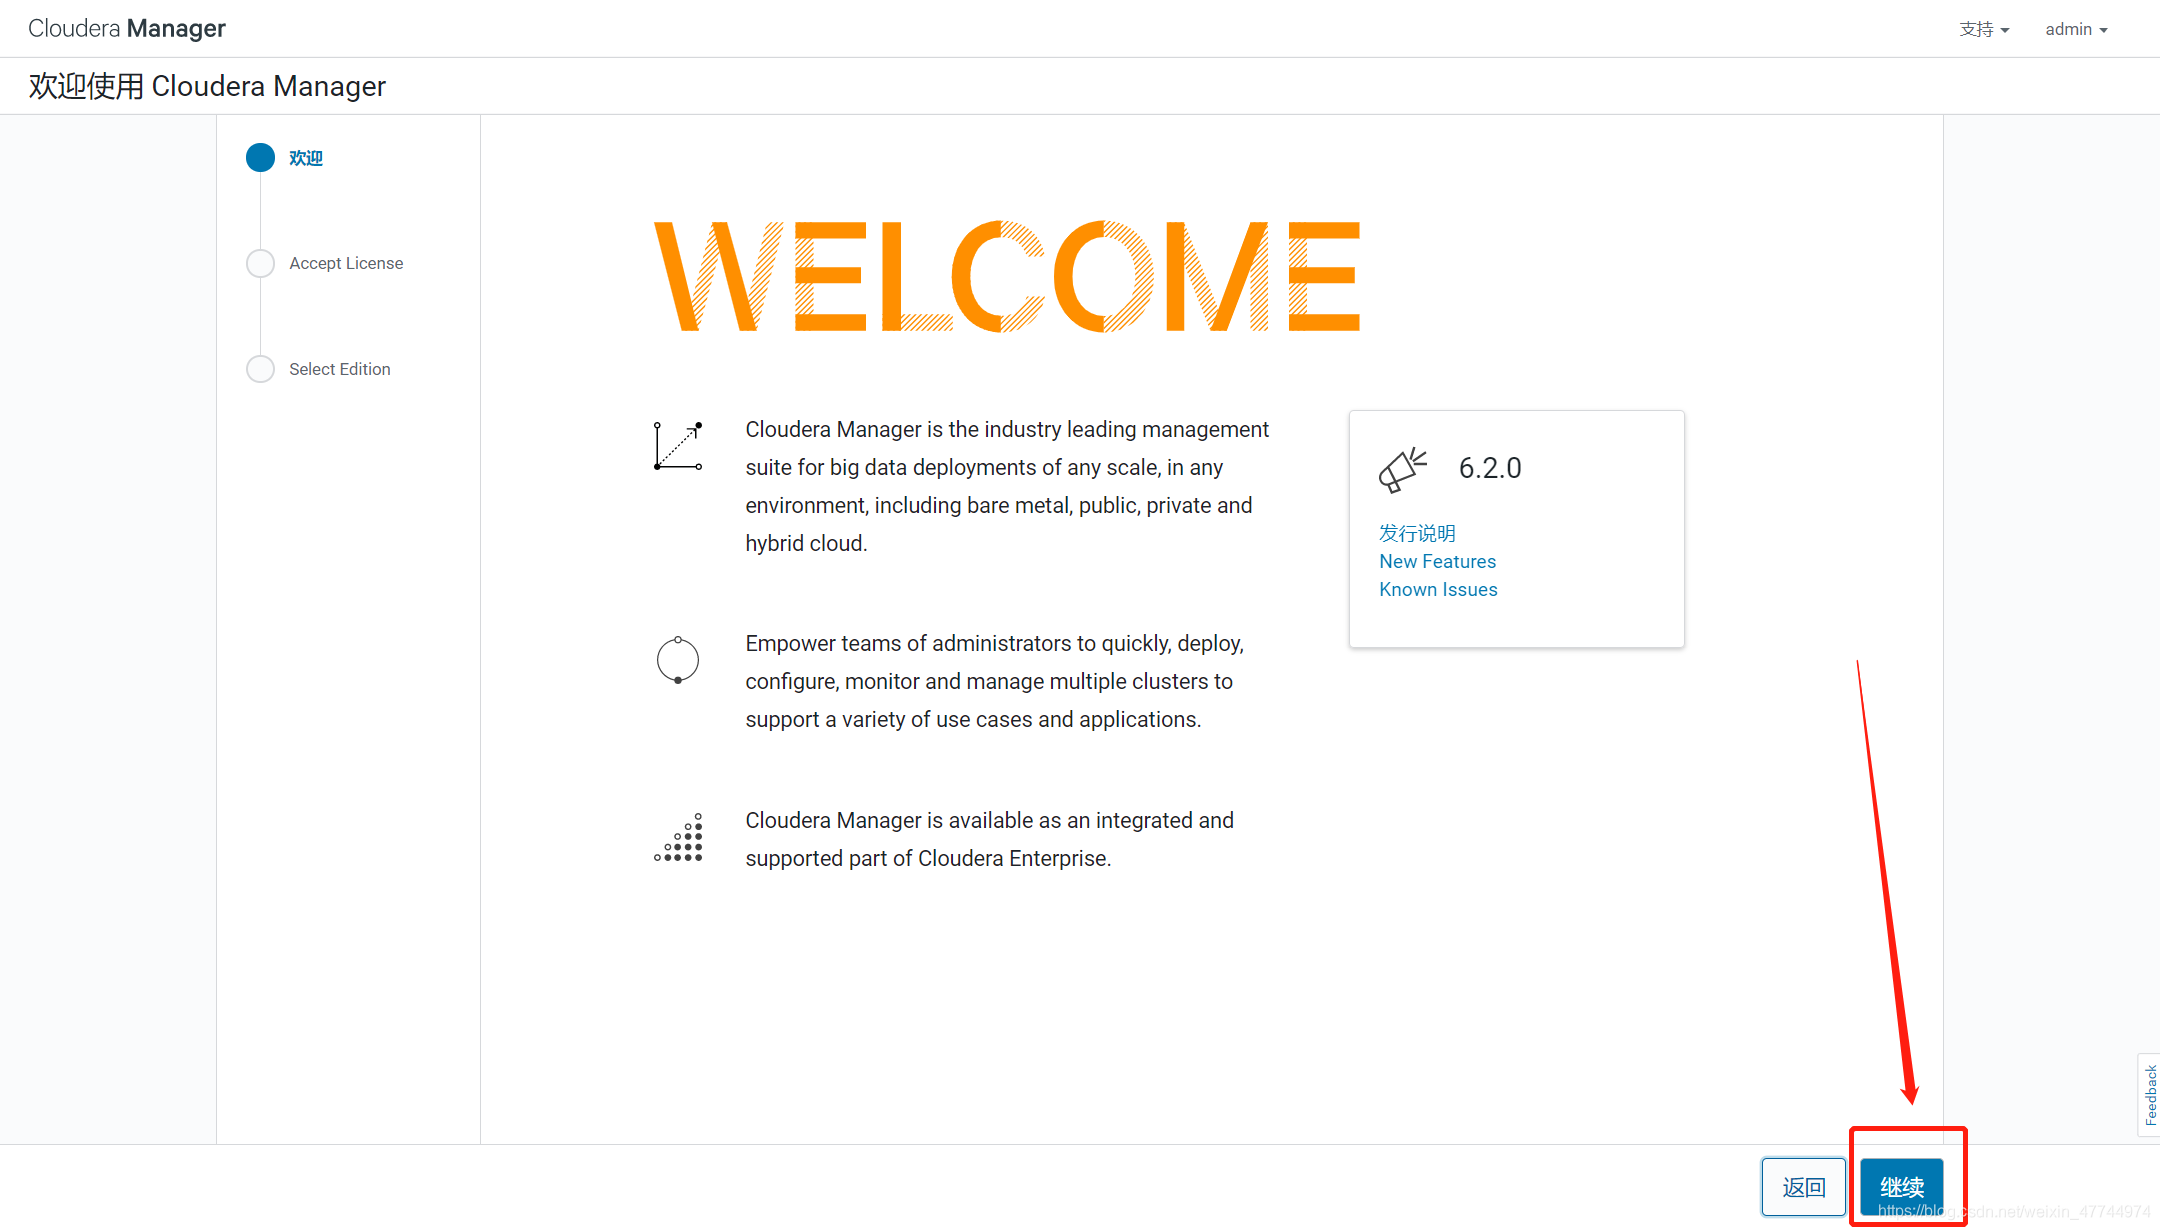
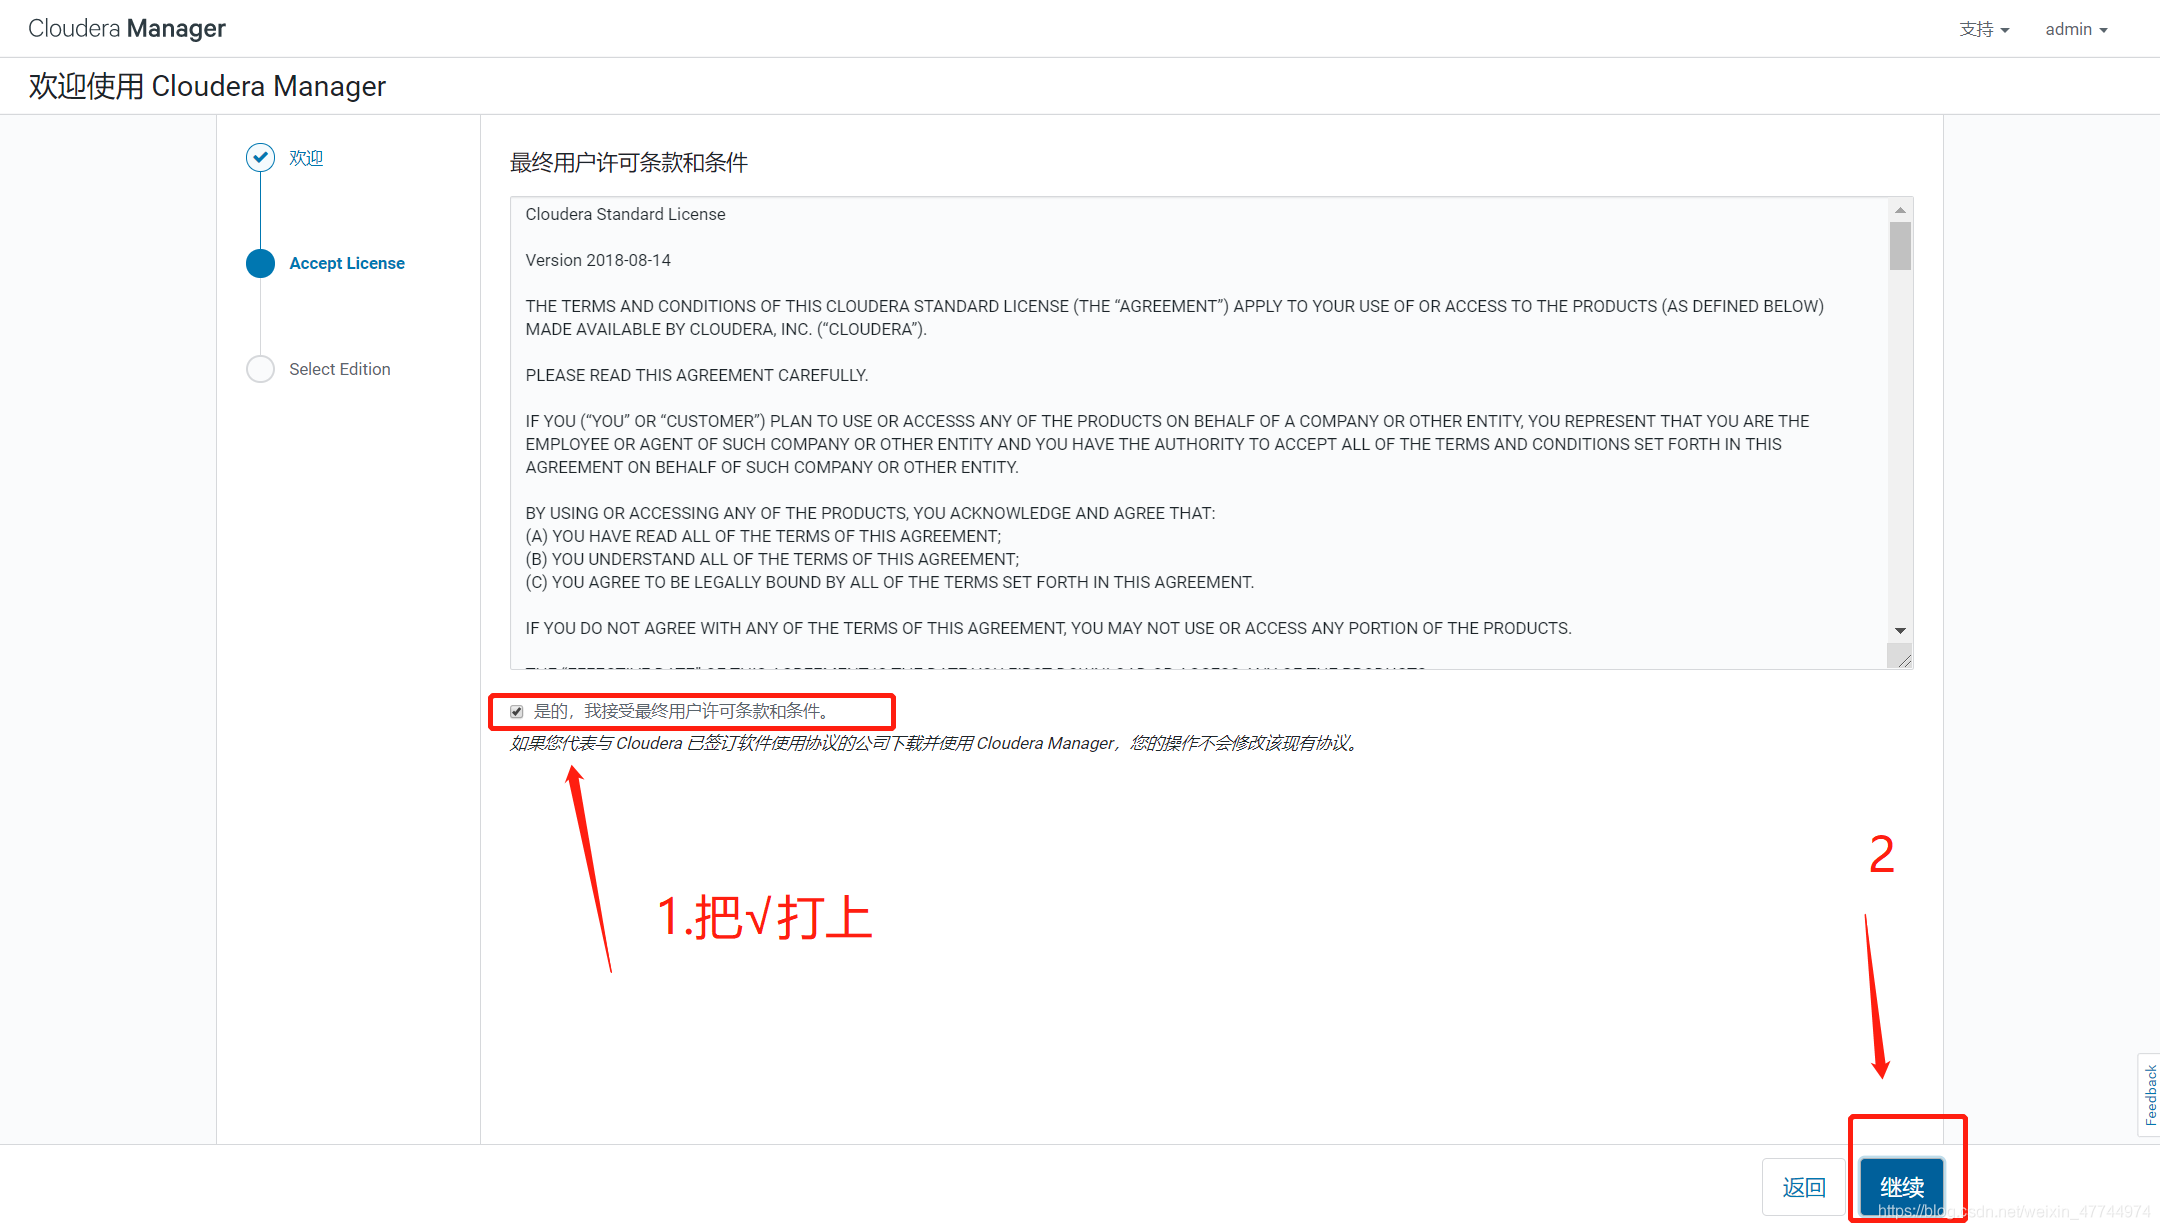
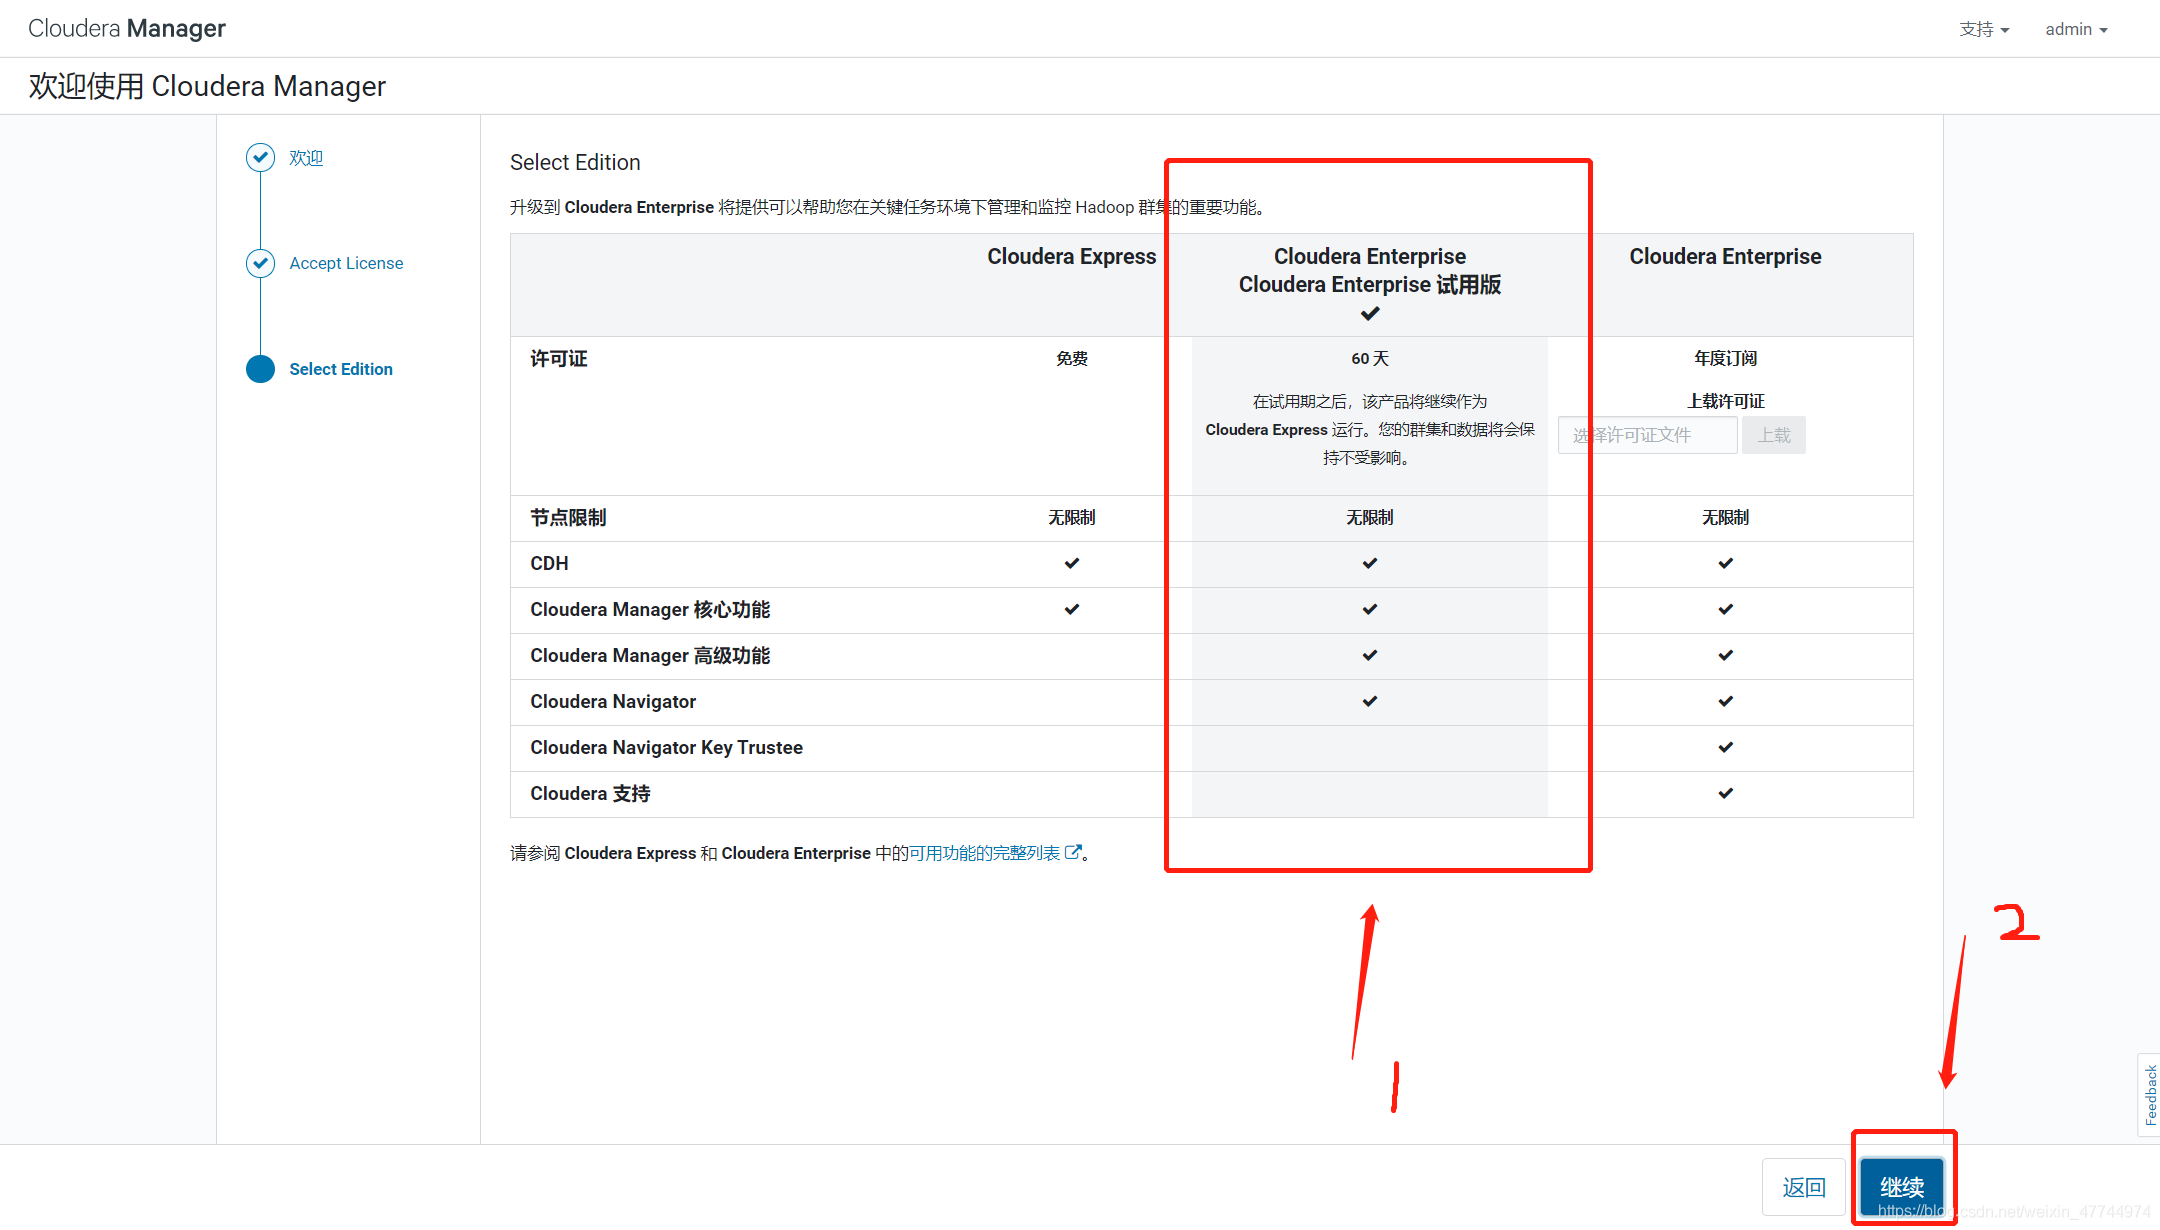
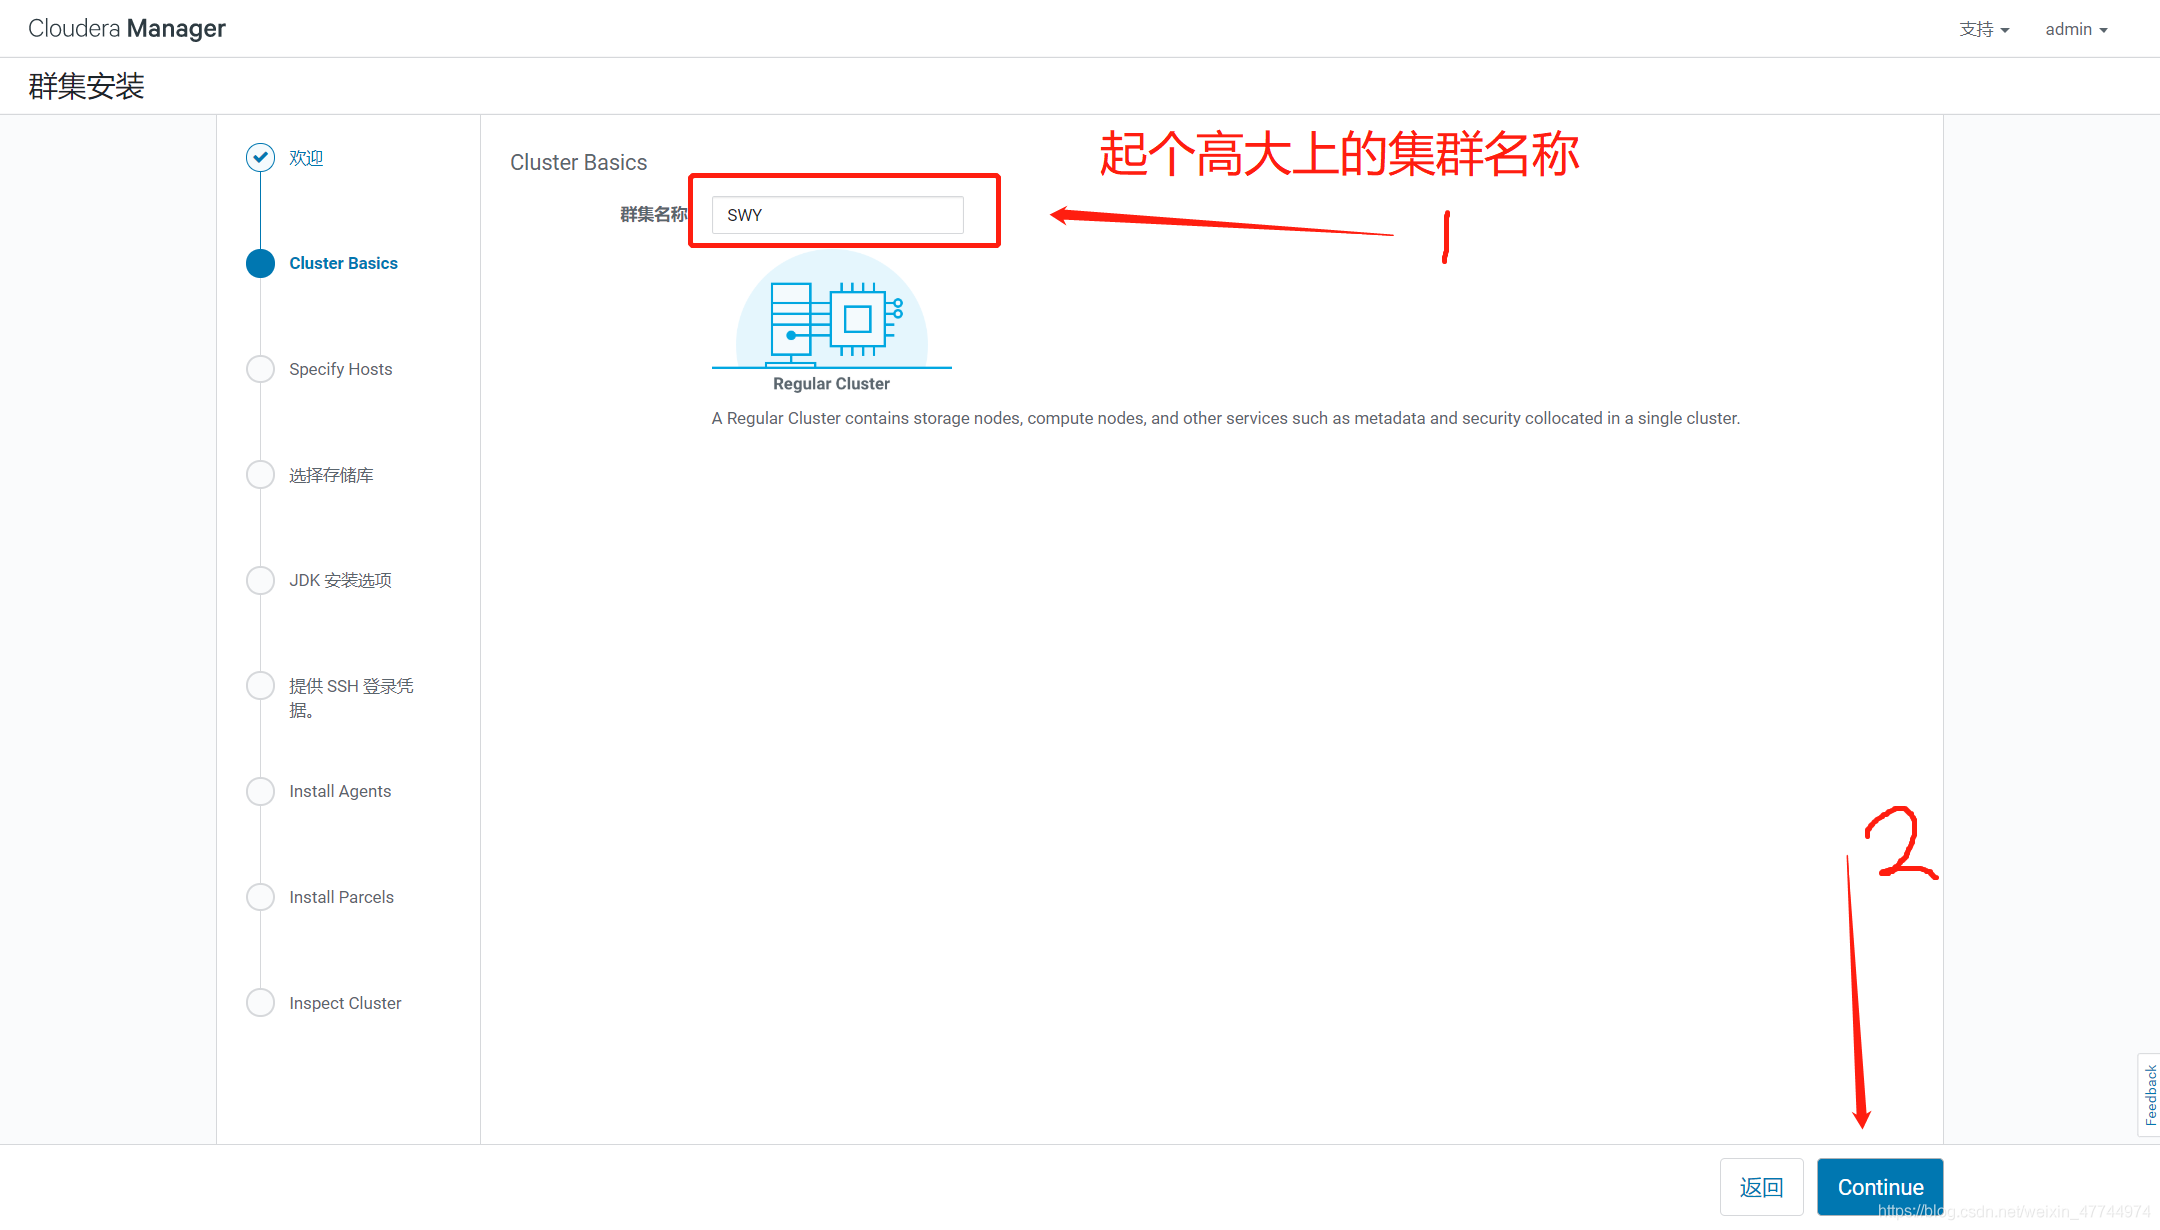
3.18. 1 browser login
Open the web page and enter the address:192.168.2.131:7180
 Login name:admin
 password:admin


All software used in the document has been stored in Baidu network disk Extraction code: in73
If you have any questions, you can send me private messages. Welcome to communicate and learn from each other!!!