Database front-end and back-end interaction from back-end to front-end tutorial II
preface
- It is divided into two blogs, taking the student management system as an example to realize the front-end and back-end interaction (it is not designed here, but focuses on the operation process!) Some software involved in the following will be introduced from installation
- For reference only, learn the basic operation, and learn the code by yourself
-
In the previous section, PowerDesign is used to design the student management database. In this section, the database in the previous section is used to establish the interaction between the front and back ends
-
Tools: eclipse(IDEA), Tomcat, MySQL driver, Bootstrap.
-
There is a website in the "preliminary preparation", and the download is slow. You can use my link to download relevant software link Extraction code: 2580
-
eclipse: Needless to explain, JAVA development software
-
Tomcat: Web application server. The code of web pages we have written should be placed in Tomcat. It is a tool and necessary for java development
-
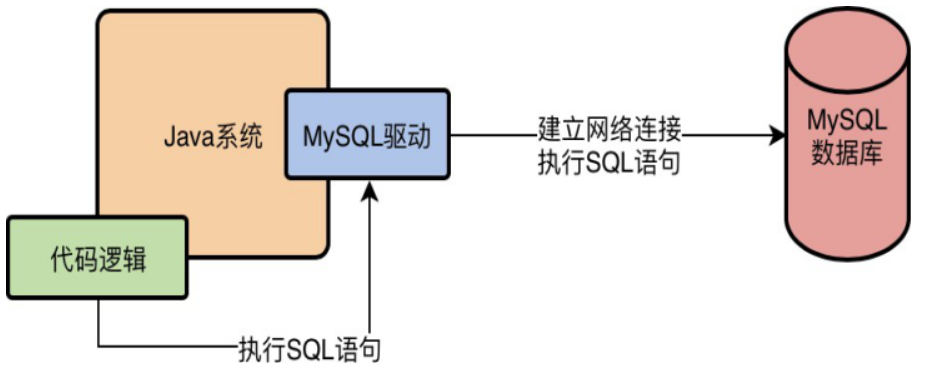
MySQL driver: as we all know, if we want to access the database, we must establish a network connection with the database. Who will establish this connection? MySQL driver. It will establish a network connection with the database at the bottom. Only after there is a network connection can it send a request to the database server!
-
Bootstrap, from Twitter, is currently the most popular front-end framework. Bootstrap is based on HTML, CSS and JAVASCRIPT. It is simple and flexible, making web development faster. At the same time, bootstrap is also the most popular HTML, CSS and JS framework for developing responsive layout and mobile device priority web projects. As a framework, it contributes to front-end development like jQuery EasyUI and WeUI. In short, using bootstrap makes front-end development simple and efficient.
-
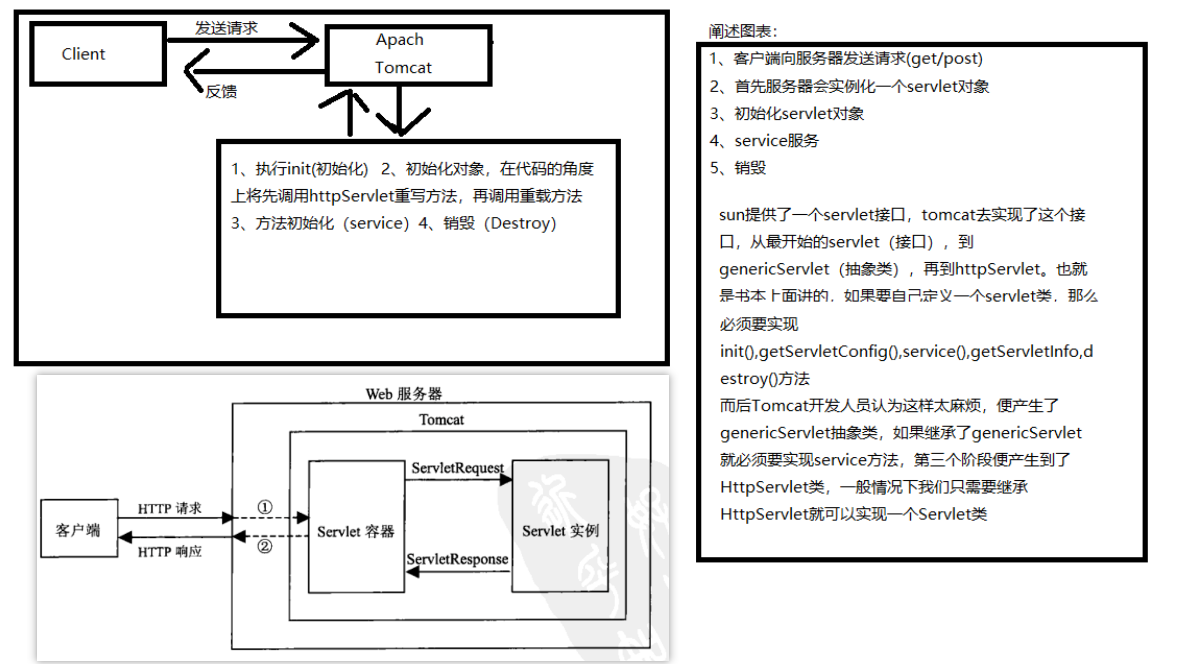
Java Servlet is a program running on the Web server or application server. It serves as an intermediate layer between requests from Web browsers or other HTTP clients and databases or applications on the HTTP server. With Servlet, you can collect user input from Web forms, render records from databases or other sources, and create Web pages dynamically.
Let's explain here that all the life cycles of servlets are carried out in the server. In fact, our series of operations in the background are carried out in the wrap wrapper class in tomcat. The context directly controls the servlet and the web container controls the servlet.
preparation in advance
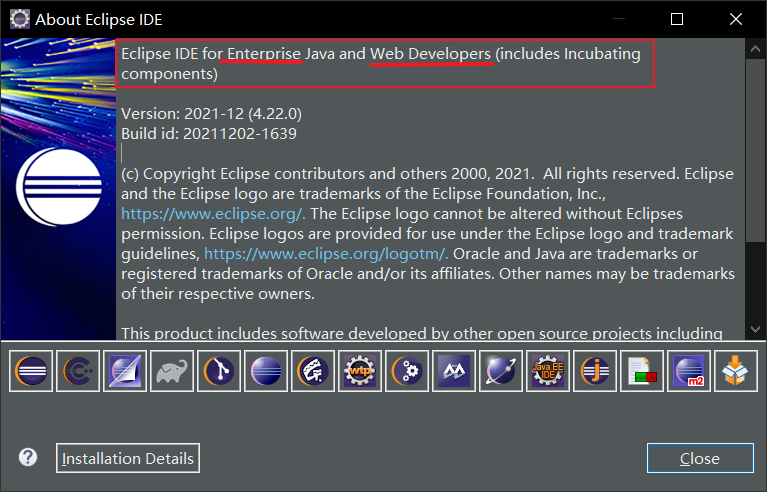
1.eclipse must be an enterprise version. Click Help about in the menu bar to display Enterprise Java and Web Developers. Because the standard edition cannot be used for web development
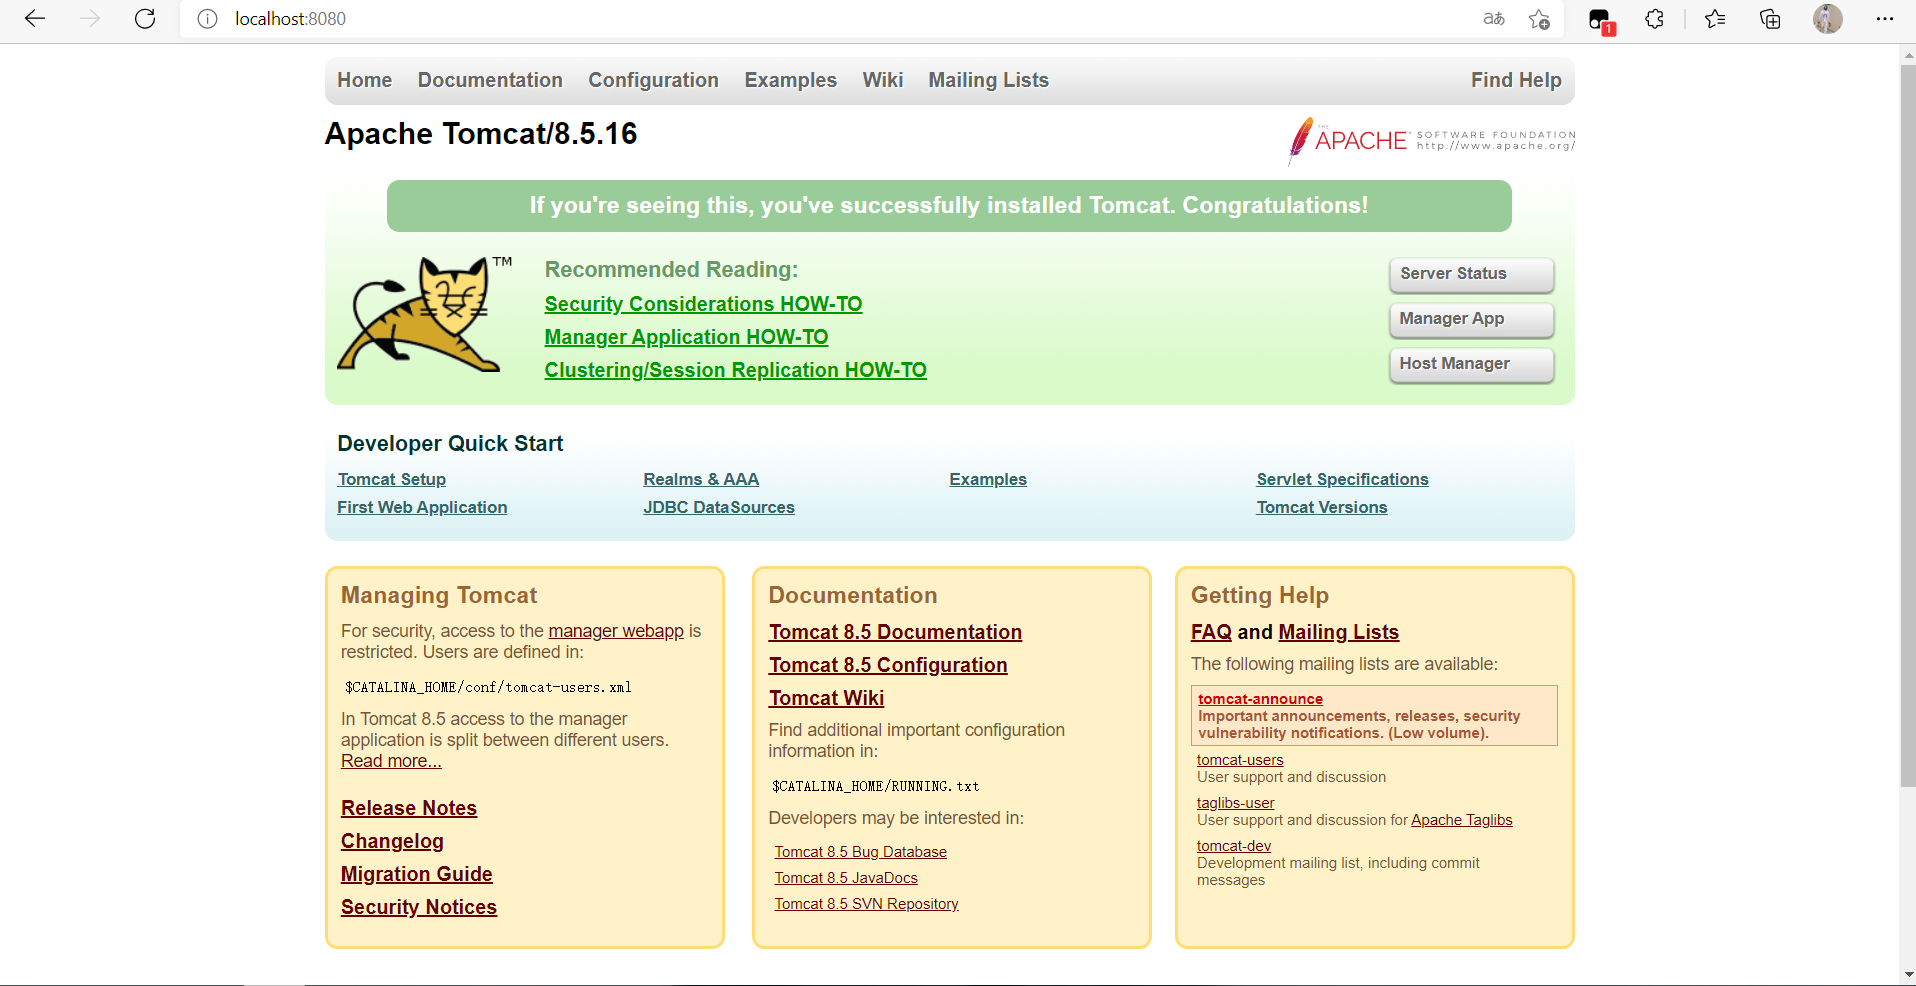
2. Configure Tomcat. Download address , select the version you need, download the 64 bit zip and unzip it. I used to install apache-tomcat-8.5 16 as an example. Open the bin file in the path (D:\Tomcat\apache-tomcat-8.5.16\bin) and run startup Bat, do not close the command window. Open browser input http://localhost:8080 , if the following figure appears, the configuration is successful. (there are on the Internet to configure the environment for Tomcat. This is not necessary. Just use the local port to display the following web page)
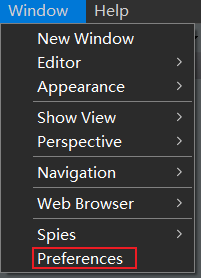
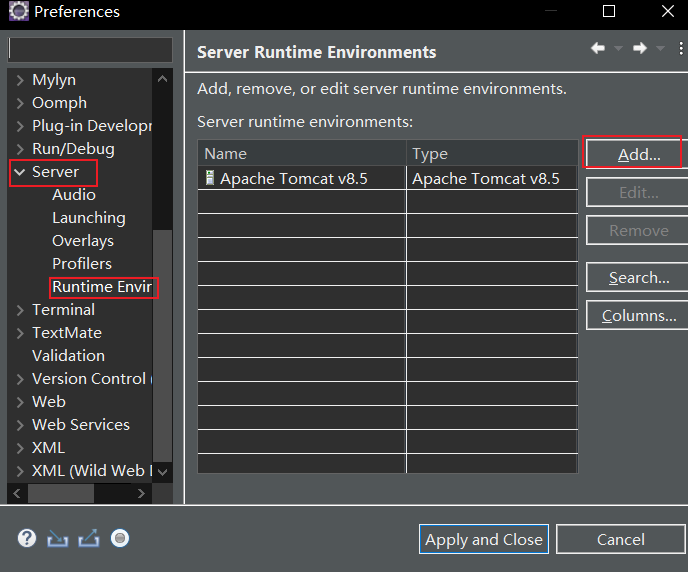
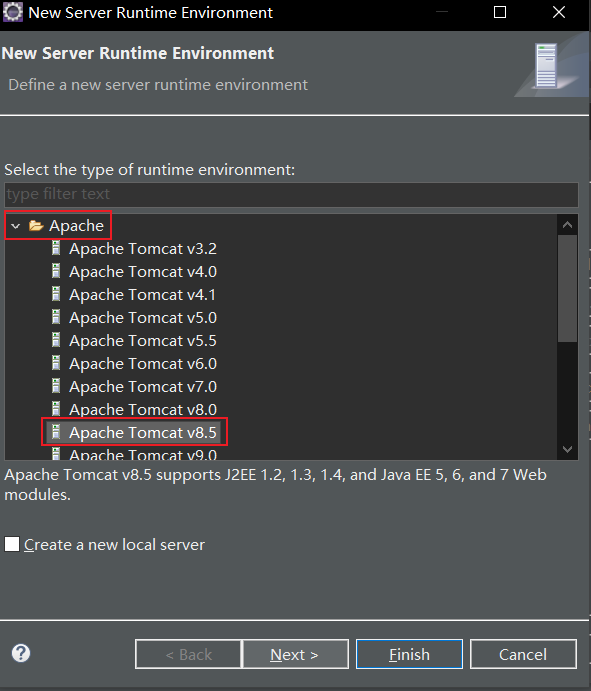
3. Set tomcat configuration for eclipse. Menu bar: window preferences server runtime environment add Apache Apache tomcat V8 5 (select your own version)
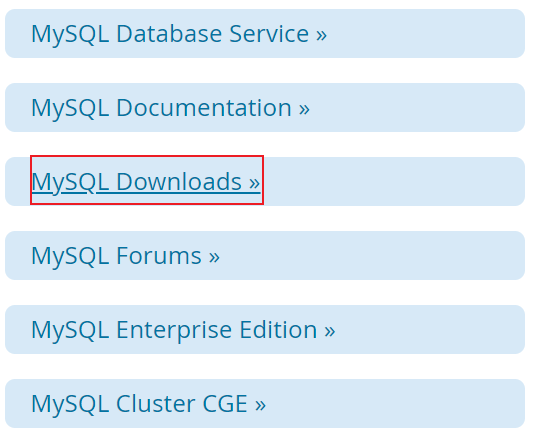
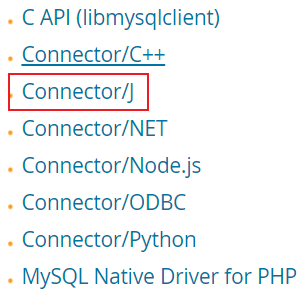
4.mysql driver download , slide down to find MySQL DownLoads. Because we are developing in JAVA, we choose connector / J
Select the appropriate operating system and download the installation free version

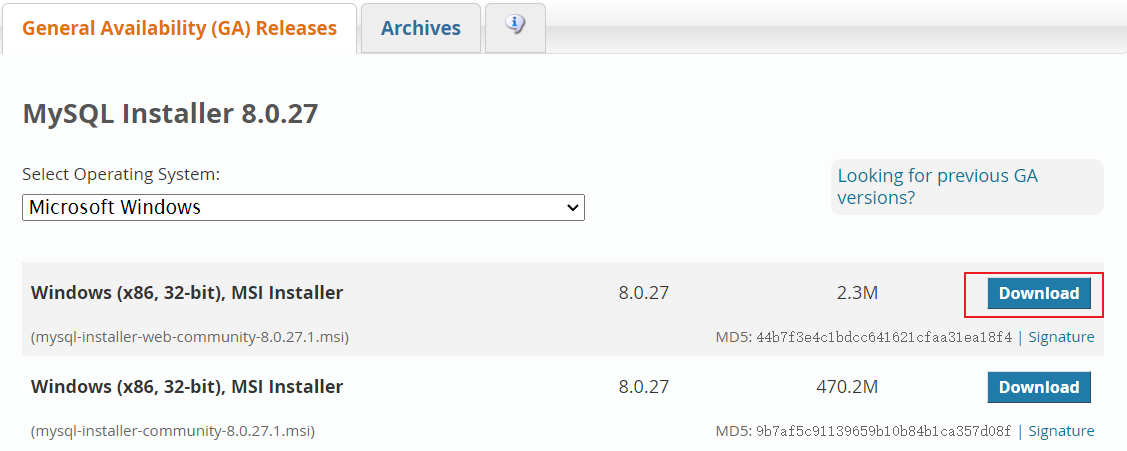
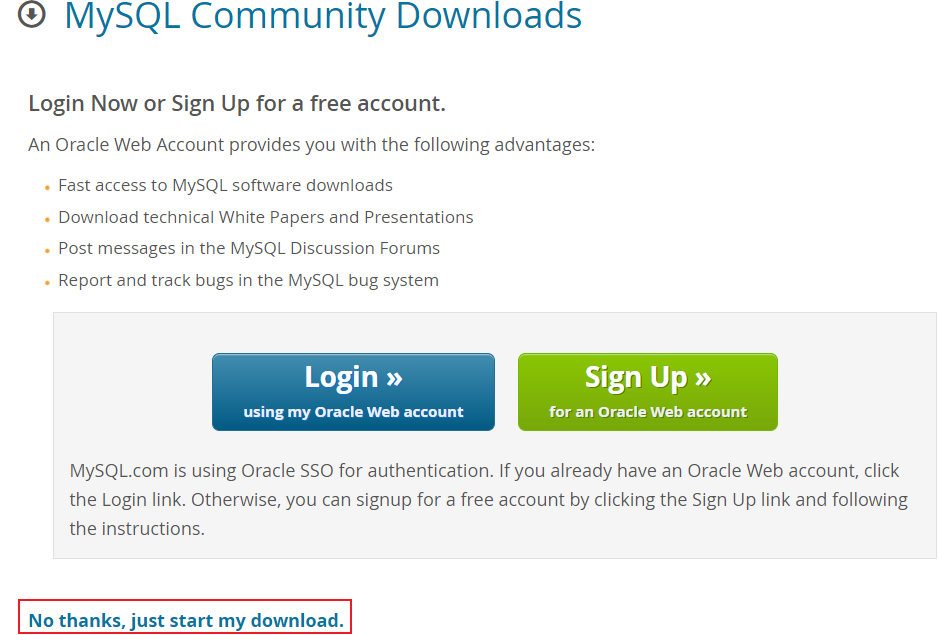
After downloading, MySQL Installer does not need to be installed Remember its path
Design Web
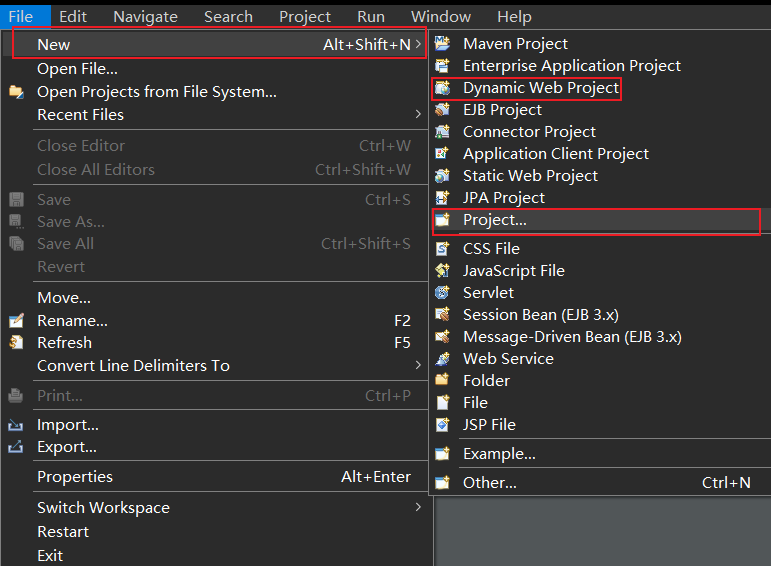
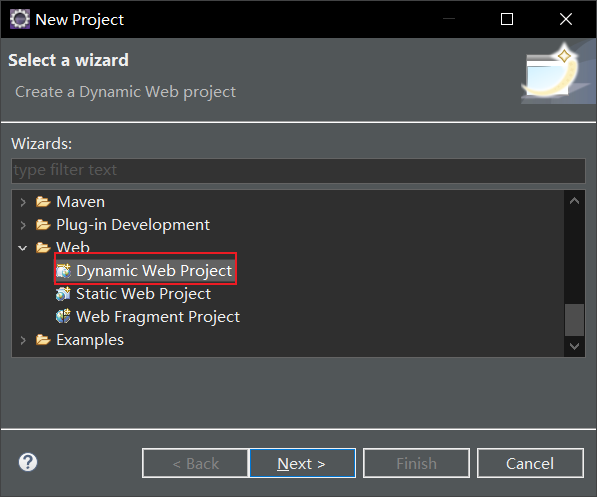
- Create a new dynamic web page project, file new dynamic web project. If this option is not available, click project web dynamic web project below.
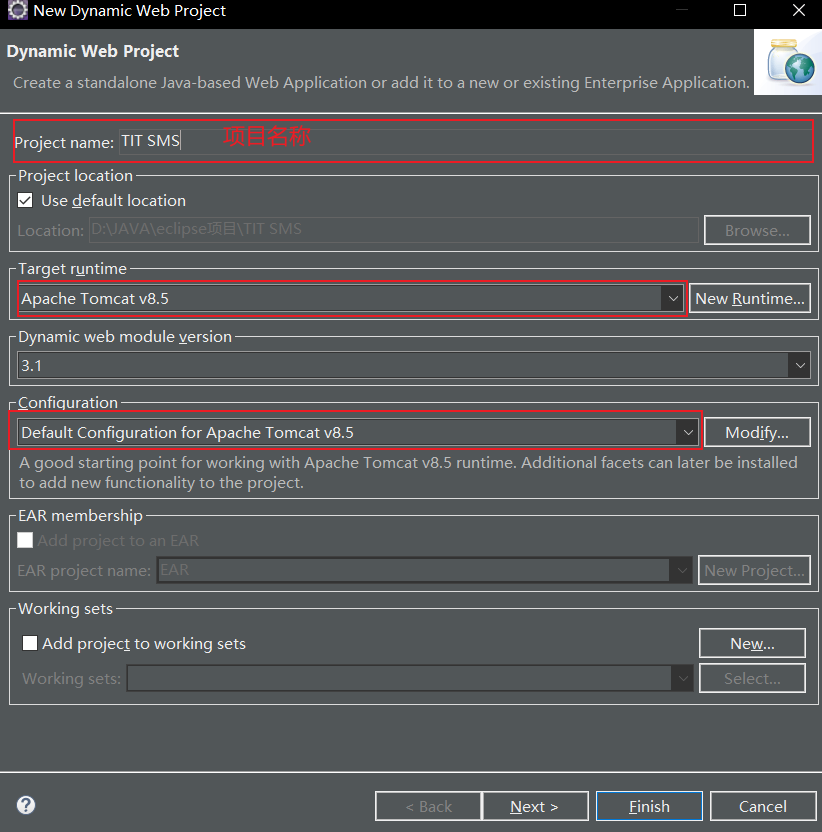
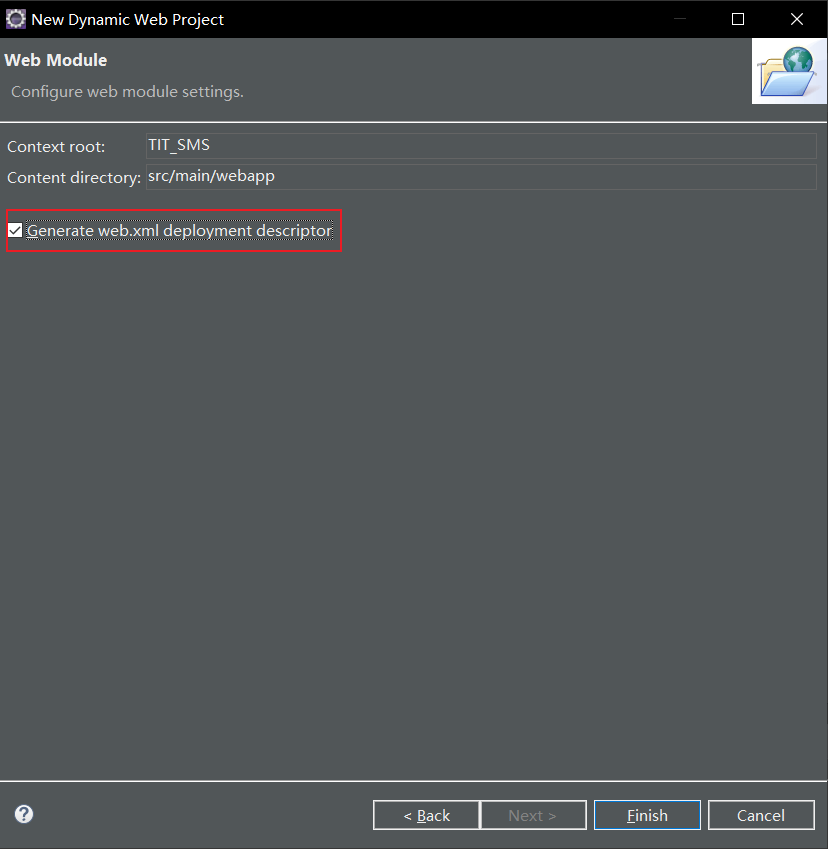
Name the project name and select the corresponding Tomcat version. Check generate web XML deployment descriptor to complete the creation
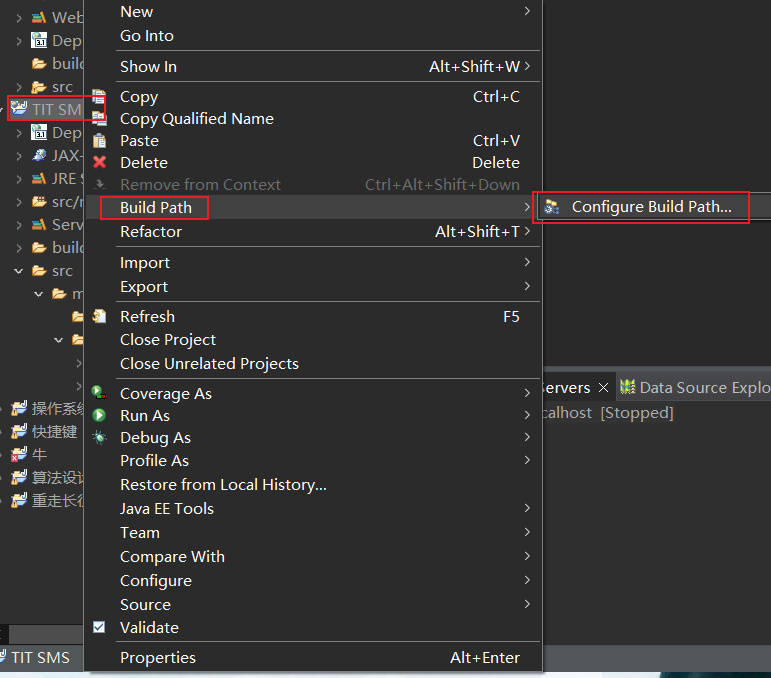
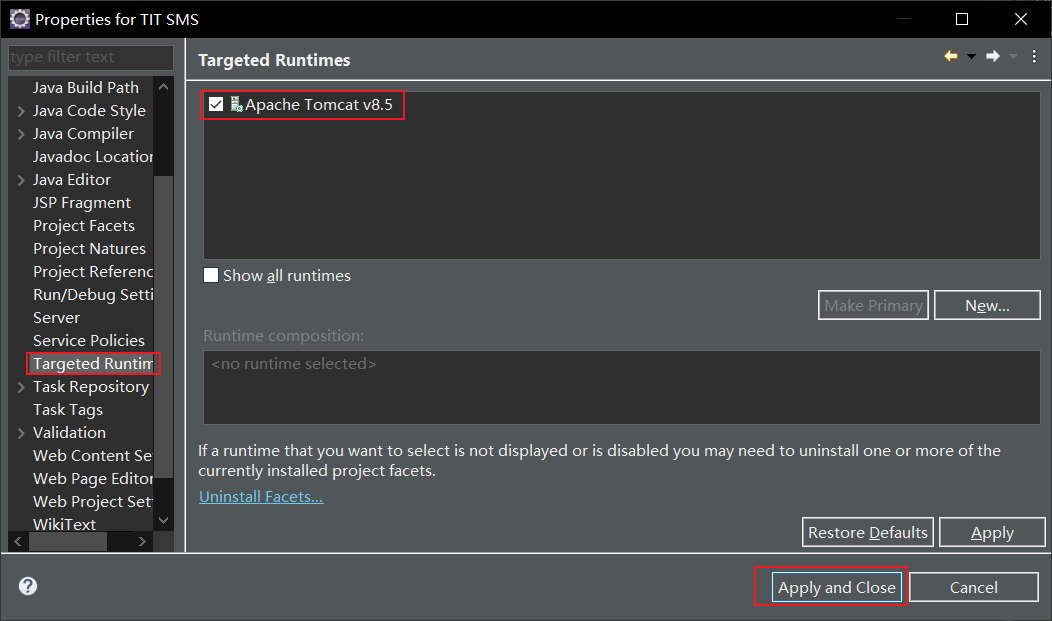
2. Import sever Library: right click the newly created project - build path configure build path targeted runtimes, and check Tomcat V8 five
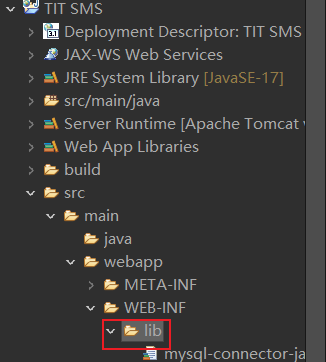
3. Import the database driver MySQL Installer. The next mysql-connector-java-5.0 4-bin. Move jar into lib path. Here, you can ctrl+c and MySQL files in the folder, select Lib in eclipse, and then press ctrl+v to import them.
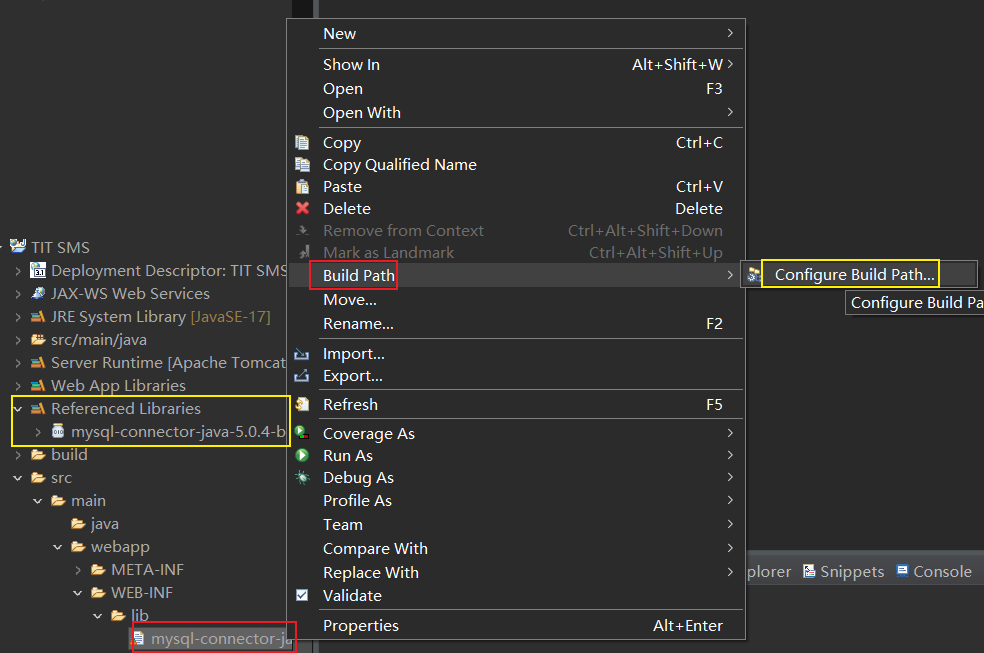
Right click myql build path add to build path, and then reference libraries will appear (I have imported it here, so add is not displayed)
4. New web page: webapp new JSP file JSP flie
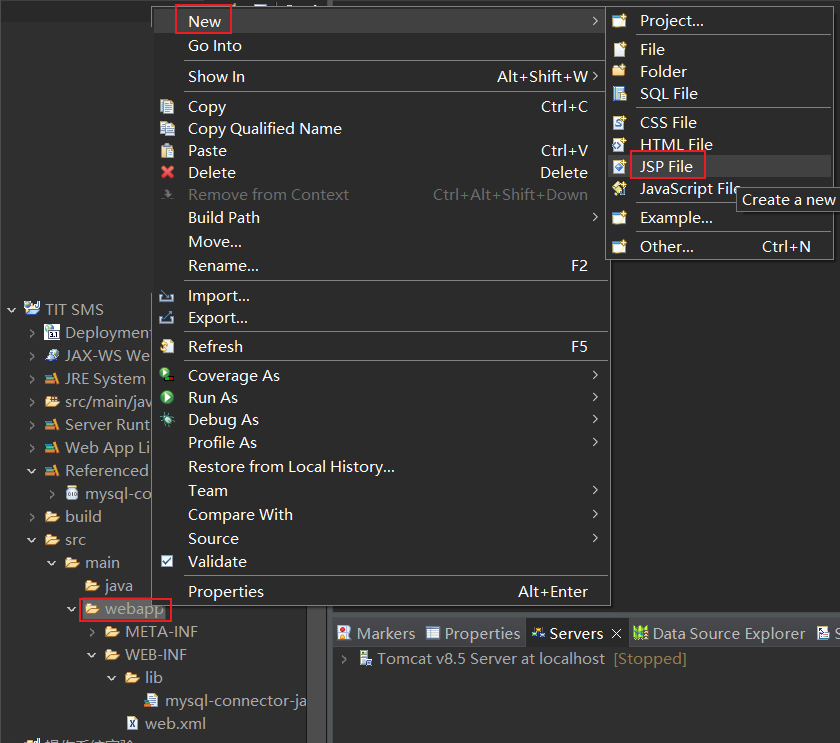
Pay attention to the encoding format

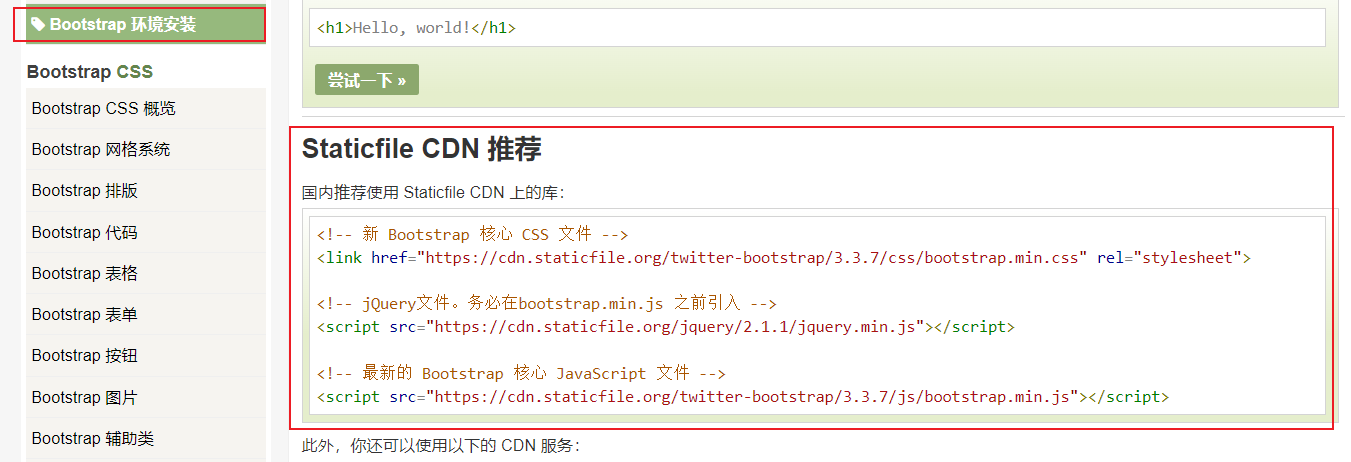
Bootstrap is not installed here. Use Rookie tutorial Import online Bootstrap Library
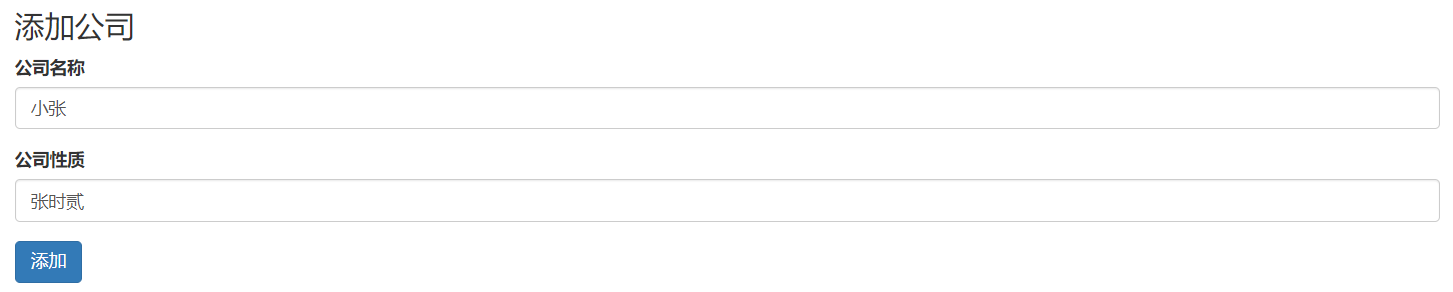
In the body tab, create a web interface for the relevant attributes of the company entity in the previous blog. The complete code is as follows:
<%@ page language="java" contentType="text/html; charset=UTF-8"
    pageEncoding="UTF-8"%>
<!DOCTYPE html>
<html>
<head>
<meta charset="ISO-8859-1">
<title>Insert title here</title>
<form action="AddCom" method="post">
	<!-- new Bootstrap core CSS file -->
<link href="https://cdn.staticfile.org/twitter-bootstrap/3.3.7/css/bootstrap.min.css" rel="stylesheet">

<!-- jQuery File. Be sure to bootstrap.min.js Previously introduced -->
<script src="https://cdn.staticfile.org/jquery/2.1.1/jquery.min.js"></script>

<!-- abreast of the times Bootstrap core JavaScript file -->
<script src="https://cdn.staticfile.org/twitter-bootstrap/3.3.7/js/bootstrap.min.js"></script>
</head>
<body>
	<div class="container">
		<h3>Add company</h3>
		<div class="form-group">
			<label>corporate name</label> <input class="form-control" placeholder="Please enter company name"
				type="text" name="cname">
		</div>

		<div class="form-group">
			<label>Nature of company</label> <input class="form-control" placeholder="Please enter company nature"
				type="text" name="ctype">
		</div>
		<button type="submit" class="btn btn-primary">add to</button>
		</form>
	</div>
</body>
</html>
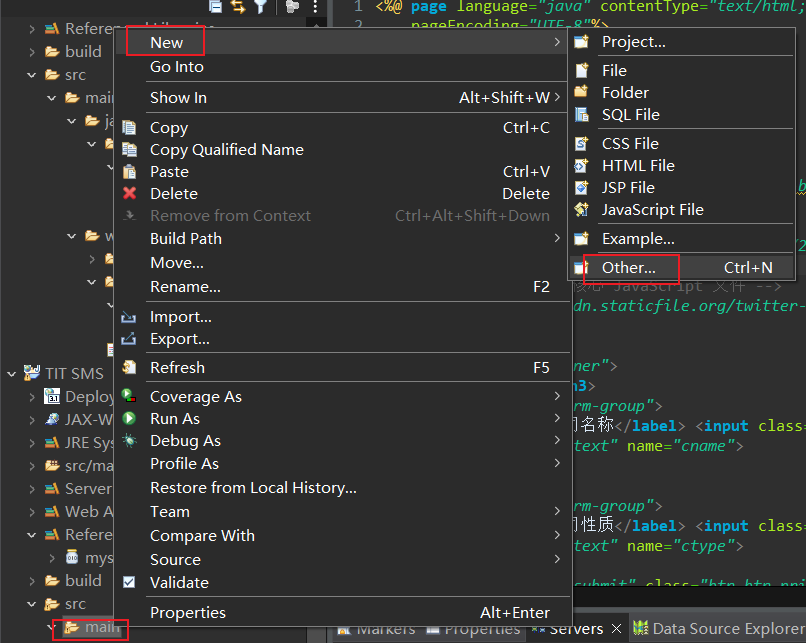
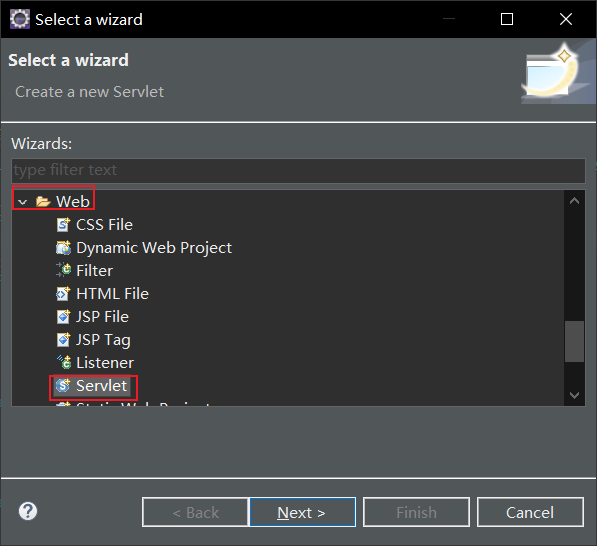
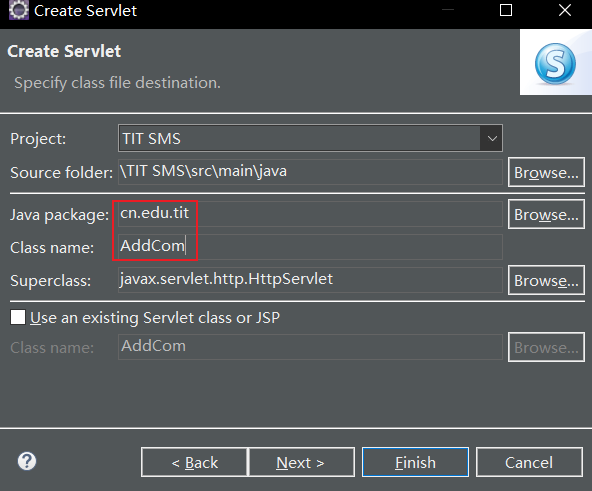
5. Create a new servlet: main new other web Servlet
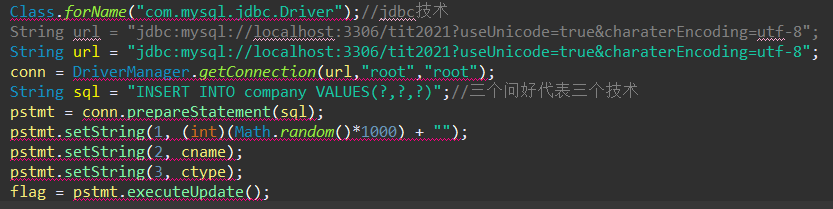
At addcom Java28 line doget fills in the code to add the form in the web page to the database
be careful:
- Lines 1 and 14 represent transcoding. If you comment it out, the data added to the database will be garbled. As shown in the figure: only numbers and letters can be recognized, but Chinese characters cannot be recognized.

-
In line 14, fill in the database name correctly. Here, my database name is tit2021
-
On line 15, fill in your MySQL account and password correctly. (all my account passwords are root)
-
Lines 16-20, pass the values in the web form to the database
-
Line 22, method executeUpdate. The return value of executeUpdate is an integer indicating the number of rows affected (i.e. update count). For statements that do not operate on rows, such as create table or drop table, the return value of executeUpdate is always zero.
request.setCharacterEncoding("utf-8");
// TODO Auto-generated method stub
//1. Accept web data: cname,ctype
String cname = request.getParameter("cname");
String ctype = request.getParameter("ctype");
//2. Connect to the database and write the data into the company table
Connection conn = null;
PreparedStatement pstmt = null;
int flag = 0; //Flag for success
//Register mysql driver

Class.forName("com.mysql.jdbc.Driver");//jdbc Technology
//String url = "jdbc:mysql://localhost:3306/tit2021";
String url = "jdbc:mysql://localhost:3306/tit2021?useUnicode=true&charaterEncoding=utf-8";
conn = DriverManager.getConnection(url,"root","root");
String sql = "INSERT INTO company VALUES(?,?,?)";//Three greetings represent three technologies
pstmt = conn.prepareStatement(sql);
pstmt.setString(1, (int)(Math.random()*1000) + "");
pstmt.setString(2, cname);
pstmt.setString(3, ctype);
flag = pstmt.executeUpdate();

if (flag == 0) {
    response.getWriter().print("fail");
} else {
    response.getWriter().print("OK");
}
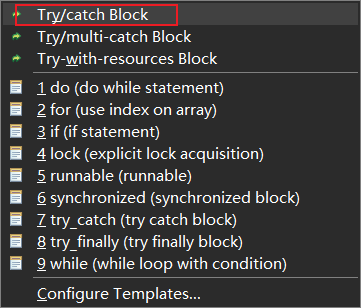
After filling in, there are many errors. Here you need to throw an exception: first select the red part, shift+alt+z, and select Try/catch Block
Complete code
package cn.edu.tit;

import java.io.IOException;
import java.sql.Connection;
import java.sql.DriverManager;
import java.sql.PreparedStatement;
import java.sql.SQLException;

import javax.servlet.ServletException;
import javax.servlet.annotation.WebServlet;
import javax.servlet.http.HttpServlet;
import javax.servlet.http.HttpServletRequest;
import javax.servlet.http.HttpServletResponse;

/**
 * Servlet implementation class AddCom
 */
@WebServlet("/AddCom")
public class AddCom extends HttpServlet {
    private static final long serialVersionUID = 1L;

    /**
     * @see HttpServlet#HttpServlet()
     */
    public AddCom() {
        super();
        // TODO Auto-generated constructor stub
    }

    /**
	 * @see HttpServlet#doGet(HttpServletRequest request, HttpServletResponse response)
	 */
    protected void doGet(HttpServletRequest request, HttpServletResponse response) throws ServletException, IOException {
        // TODO Auto-generated method stub
        request.setCharacterEncoding("utf-8");
        // TODO Auto-generated method stub
        //1. Accept web data: cname,ctype
        String cname = request.getParameter("cname");
        String ctype = request.getParameter("ctype");
        //2. Connect to the database and write the data into the company table
        Connection conn = null;
        PreparedStatement pstmt = null;
        int flag = 0; //Flag for success
        //Register mysql driver

        try {
            Class.forName("com.mysql.jdbc.Driver");//jdbc Technology
            //			String url = "jdbc:mysql://localhost:3306/tit2021?useUnicode=true&charaterEncoding=utf-8";
            String url = "jdbc:mysql://localhost:3306/tit2021?useUnicode=true&charaterEncoding=utf-8";
            conn = DriverManager.getConnection(url,"root","root");
            String sql = "INSERT INTO company VALUES(?,?,?)";//Three greetings represent three technologies
            pstmt = conn.prepareStatement(sql);
            pstmt.setString(1, (int)(Math.random()*1000) + "");
            pstmt.setString(2, cname);
            pstmt.setString(3, ctype);
            flag = pstmt.executeUpdate();
        } catch (ClassNotFoundException e) {
            // TODO Auto-generated catch block
            e.printStackTrace();
        } catch (SQLException e) {
            // TODO Auto-generated catch block
            e.printStackTrace();
        }
		if (flag == 0) {
			response.getWriter().print("fail");
		} else {
			response.getWriter().print("OK");
		}
    }

    /**
	 * @see HttpServlet#doPost(HttpServletRequest request, HttpServletResponse response)
	 */
    protected void doPost(HttpServletRequest request, HttpServletResponse response) throws ServletException, IOException {
        // TODO Auto-generated method stub
        doGet(request, response);
    }
}
test
Several methods of operation:
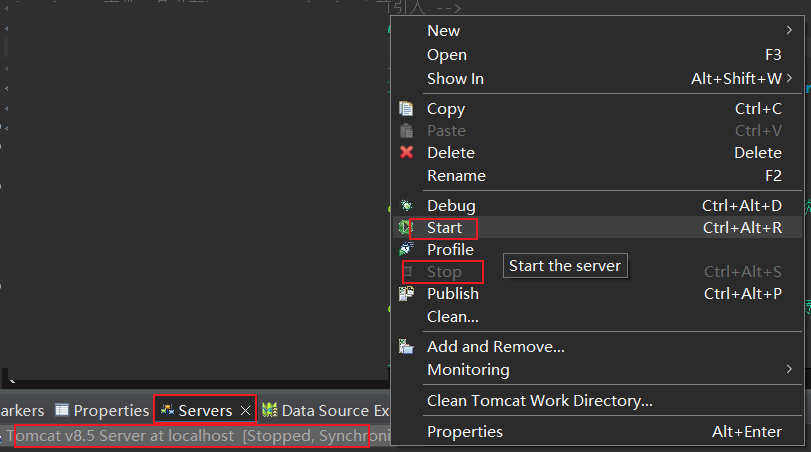
1.1 type I
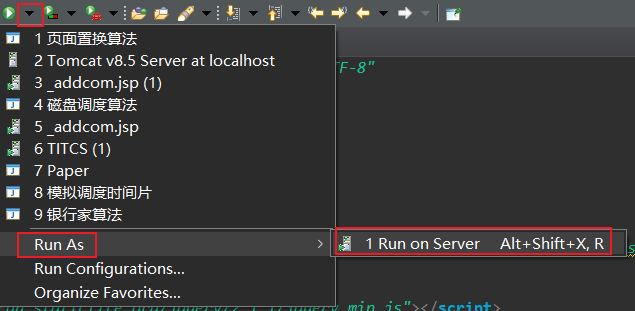
1.2 second

1.3 the third method is to click Start and enter in the browser interface http://localhost:8080/TIT_SMS/addcom.jsp (stop debugging after the mode is completed)

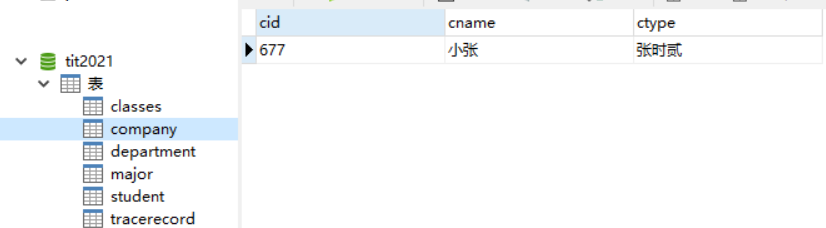
2. Input data test
After OK is displayed, open Navicat for MySQL, connect to tit2021 database, refresh and open the company form