1, Introduction to environment and hardware
Development environment: keil5
Code style: register style, no library function is used, and the underlying code is written in all registers, with high operation efficiency and clear comments.
MCU model: STM32F103ZET6
Development board: a normal STM32 development board with LCD slot and 4 independent keys.
Game simulator: NES game simulator
LCD: ALIENTEK's 3.5-inch screen. (the screen model is not important. Any one is OK. Write the bottom driver code of the screen and adapt it)
Sound output equipment: VS1053 (SPI interface, easy to operate)
Joystick: support FC joystick
The hardware required to complete this handheld game console is not complex. If you want to experience the game, you need the necessary hardware:
1. (necessary) one minimum system version of STM32F103 series
2. (necessary) one LCD screen. 2.8 inches is OK. The price is cheap.
3. (not necessary) one FC game console. The driving sequence is very simple (described in a separate chapter later). It supports combination keys and has a very good game experience.
If you don't use FC game console, you can use several independent keys on the development board, but it doesn't feel good.
4. (not necessary) a VS1053 or other series of sound card module. The game has sound. To have a perfect experience of the game, the sound card must be. It can not be played, but there is no sound. The VS1053 module supports SPI interface control. The timing is simple, the driver code is not complex, and there are many materials. It is easy to learn and understand.
5. (unnecessary) one SD card. It mainly stores NES game files and can dynamically load the games you want to play. It is convenient to switch.
If you don't have an SD card, you can also experience it. You can directly take the game into binary and store it in the array in the FLASH of STM32. STM32F103ZET6 has 512K FLASH, which is enough to store a game, and the loading speed is faster.
6. (unnecessary) SRAM external extended memory. If you don't need to load the game from SD, you don't need external memory; if you use SD card to load the game, you need to read the game data from SD card and put it in SRAM external extended memory chip. Because STM32F103ZET6 itself has only 64K memory, it can't fit.
Game experience: STM32 can overclock to 128M. It runs very smoothly. It feels the same as a normal FC game console. There is no jam and delay.
The NES simulator is transplanted to the game simulator. During the development process, the code is written in three versions:
Version 1: the compact version of handheld game console is most suitable for learning, with little code involved. Only the peripheral hardware uses only LCD, which is most suitable for learning and understanding the operation principle of the code; It does not support sound output and FC joystick, SD card and file system are not supported (that is, selecting game loading from SD card is not supported). This version of the game is directly stored in the code using array, and the operation of the game is controlled by four keys on the development board (the four buttons on the development board control the character's forward, backward, pause and jump respectively). Because there are only four buttons and do not support combined buttons, the experience is not very comfortable and the control is difficult. For the perfect experience, we still need to continue to add FC game console.
Version 2: This is also a compact handheld game console. On the basis of version 1, VS1053 module is added to support sound output. It has a better sense of experience and can hear the game sound.
Version 3: This is a complete version of the handheld game console. It adds FC joystick support, VS1053 sound card driver, SD card and FATFS file system. It can normally load and run the specified game from the SD card. The experience is very good.
Three versions of the source code and NES game collection, in the following chapter 3, there is a download address.
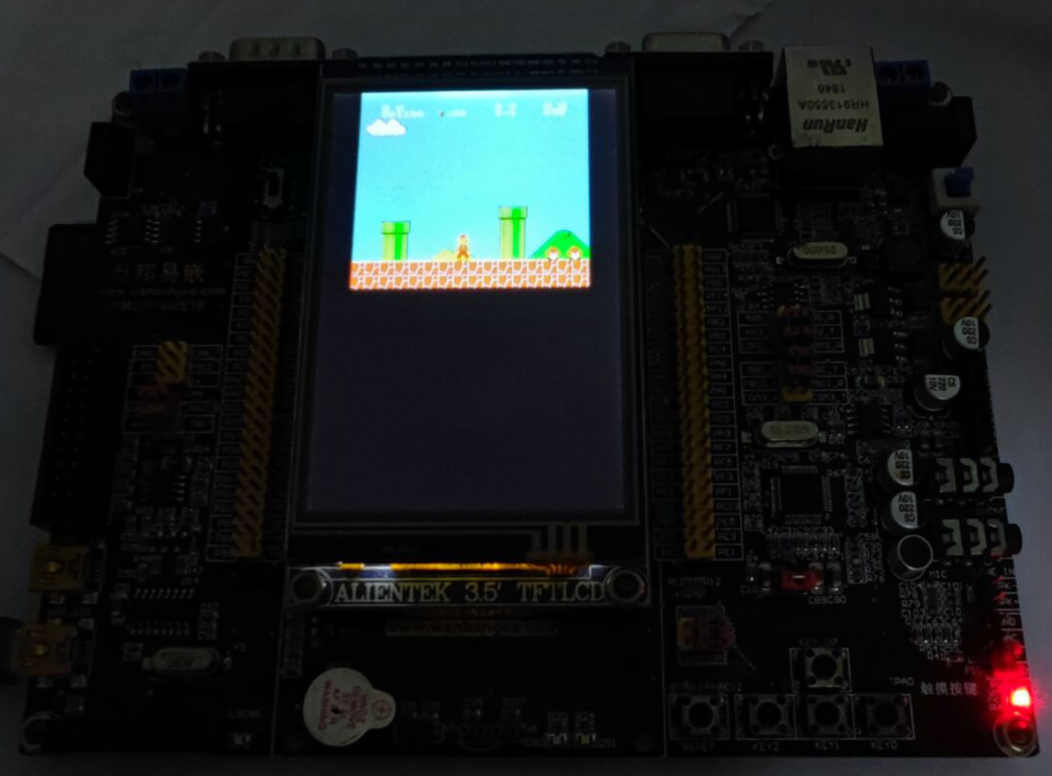
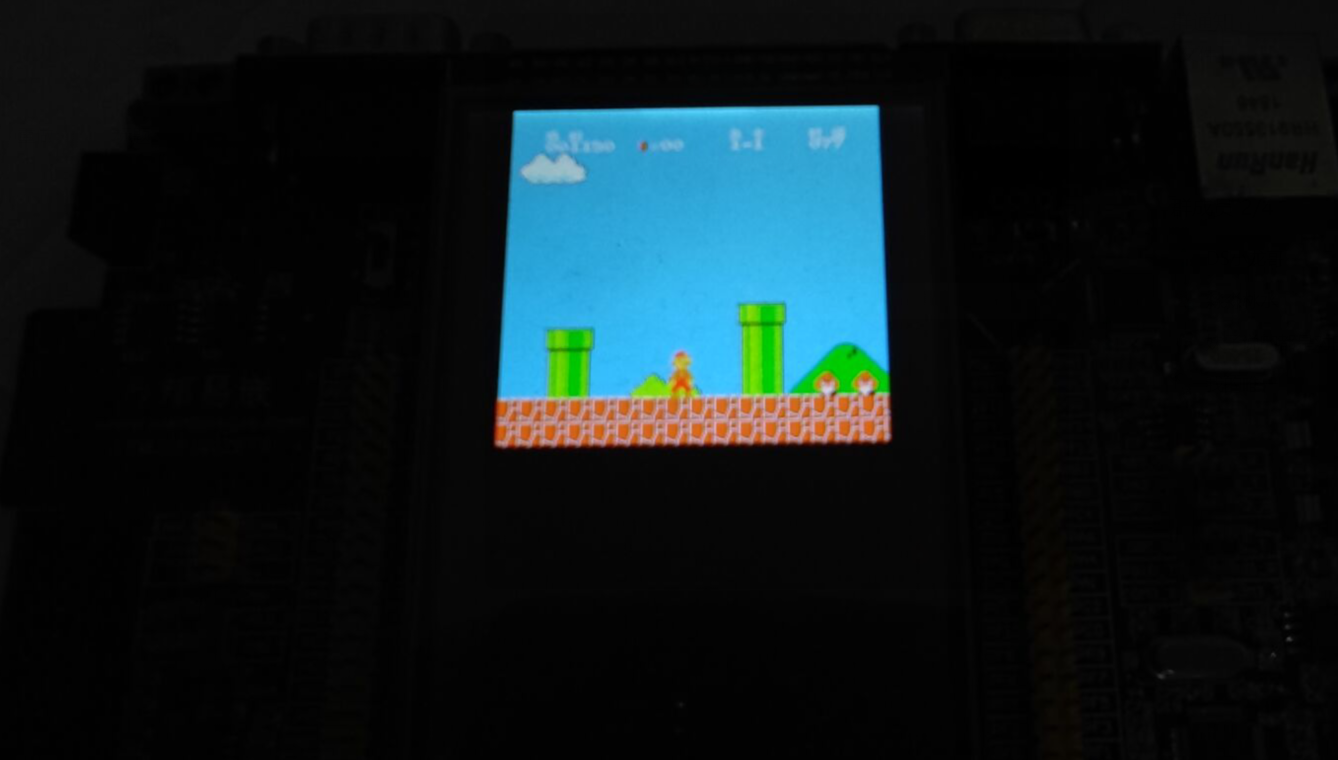
2, Game running effect (super Mary example)
2.1} super Mary operation screenshot
2.2 , only use independent keys to operate the game effect
One hand recording and one hand operation are inconvenient to operate.
Transplanting NES game framework on STM32 - running super Mary game
2.3 automatic standby operation effect of the game (no operation)
Transplanting NES game framework based on STM32 - Super Mary game (animation)
3, Data download address
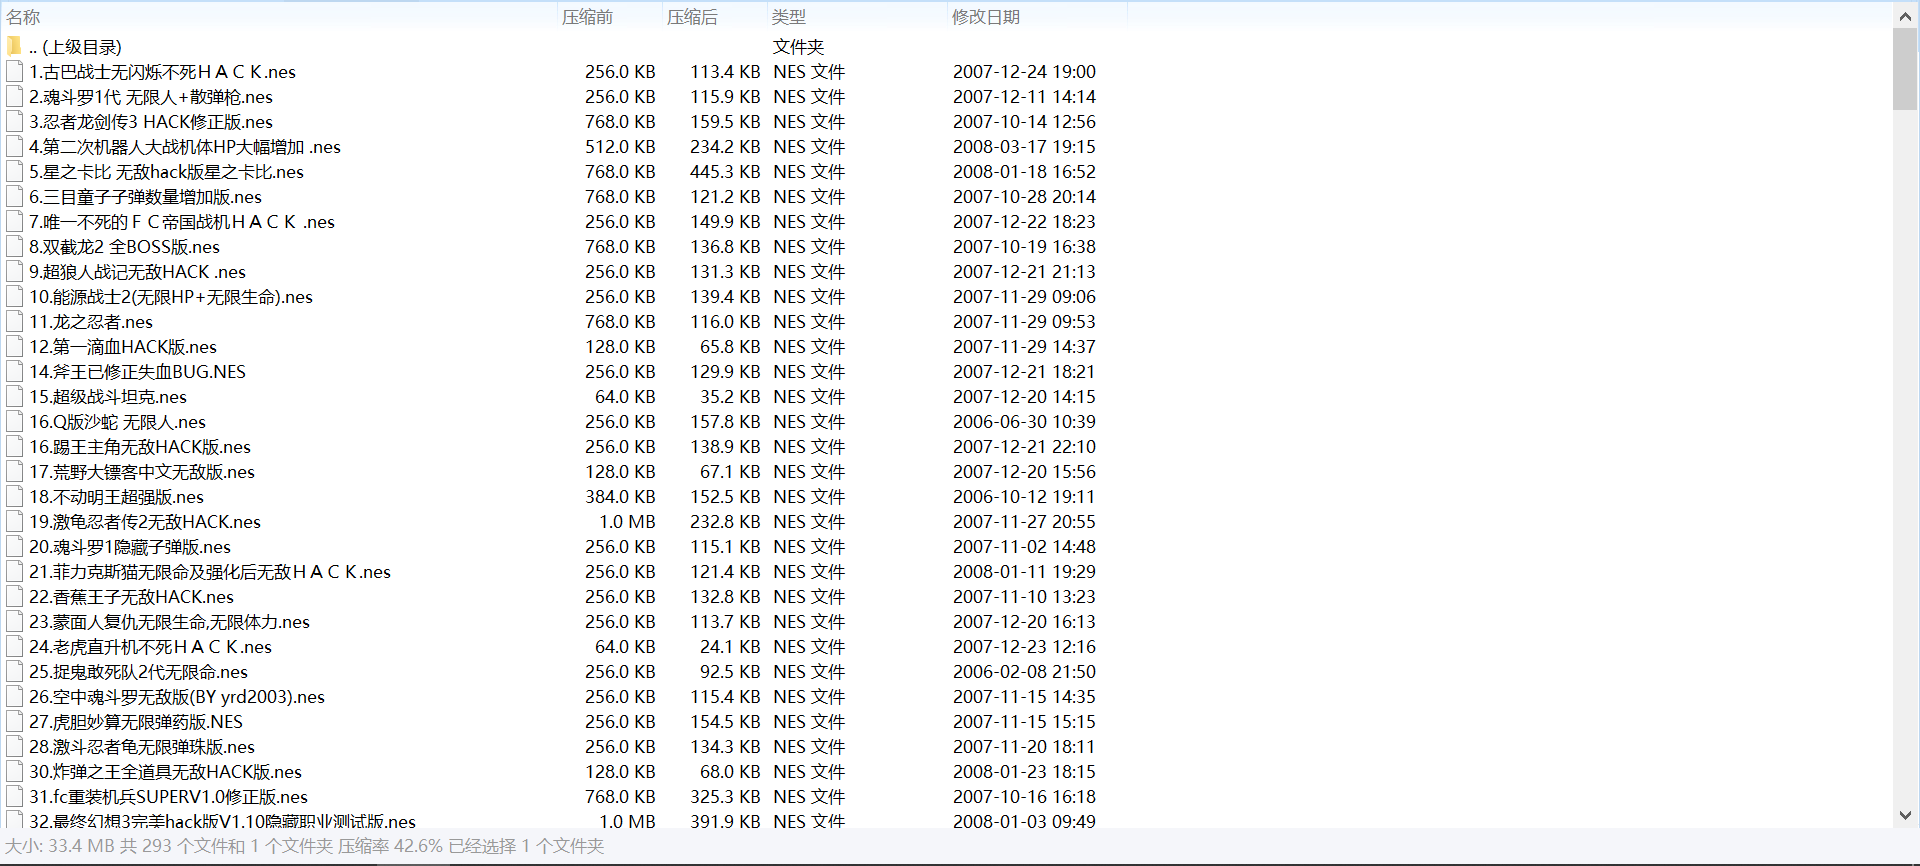
3.1 NES Game Collection Download
There are 293 games, and there is always one for you. The common super Mary, soul duel and are all included.
Address: https://download.csdn.net/download/xiaolong1126626497/20722451
3.2 download of engineering source code
Address: https://download.csdn.net/download/xiaolong1126626497/20722451

There are three versions, and the differences between them have been introduced in the first chapter.
The three are keil projects, which can be downloaded and directly compiled, downloaded and run.
4, What is NES?
NES is a game of red and white machines. The so-called NES means the European and American version of red and white machines, the American version of FC, Nintendo Entertainment System (Nintendo Entertainment System), and the Japanese red and white machines are called family computer(FC).
Development history - from Baidu Encyclopedia
On 15 July 1983, Nintendo Co., Ltd. (originally produced Japanese poker, namely "Huaza") )A third-generation home electronic game console developed under the leadership of Mr. Miyamoto: FC, full name: Family Computer, also known as Famicom; When sold outside Japan, it is called NES, full name: Nintendo Entertainment System; In Chinese mainland, Taiwan and Hongkong, because of its red and white shell, people commonly call it the "red and white machine", which has officially entered the market and has achieved great success. This has opened the prelude to the popularity of all electronic games in the world.
In 1985, nes sold 33 million units in North America, nearly double that of Japan, and accounted for half of its global market share. When NES was launched in North America, the bundled game Duck Hunt achieved a total sales of nearly 30 million sets (basically all from the North American market), [6] which ranked second in the red and white console games, second only to Super Mario
In 1986, Nintendo received US $310 million in the United States. In this year, the scale of the American game industry was US $430 million, while a year ago, the income of the American game industry deeply impacted by yadali was only US $100 million. [7] Super Mario Bros. 3, which was released in 1988, sold 7 million units in the United States, 4 million units in Japan and US $550 million.
In 1989, Nintendo's game consoles occupied 90% of the market in the United States and 95% of the market in Japan. Nintendo became a big Mac in the game industry.
In July 2003, on the 20th anniversary of FC launch, Nintendo announced that FC game console was officially discontinued. So far, FC has sold more than 60 million units worldwide. So far, Chinese mainland, Taiwan, Hongkong and Thailand, even Japan, are still manufacturing compatible FC specifications.
Nintendo has become the pioneer of the modern game industry and established the standard of modern video games in many aspects.
FC's great success has kept Nintendo's annual net profit above $500 million since 1985. Its stock has become synonymous with blue chip stocks on the Tokyo Stock Exchange, once exceeding 30000 yen, and its market value exceeds Panasonic and other enterprises. Many people praise Nintendo's success as a business myth of the new era.
Nintendo's red and white console (FC/NES) was released in 1983 and caused a great sensation in Japan. Two years later, it entered the North American market and laid Nintendo's dominant position in home game consoles. When people are in need of a high-quality home game console, Nintendo took out all their possessions. The first few games have won the praise of players, and Super Mario has become an eternal classic. At that time, owning a red and white machine should be children's biggest dream. According to foreign media data, in 1990, 30% of American families owned NES hosts.
5, Engineering source code analysis: Taking the simplified version (1) as an example
The project source code adopts the register code style, and basically each line has detailed comments; Although STM32 supports library function development with faster efficiency, the register method is more convenient to understand some configurations of the underlying registers of the CPU, which is very helpful for learning to use other types of microprocessors in the future.
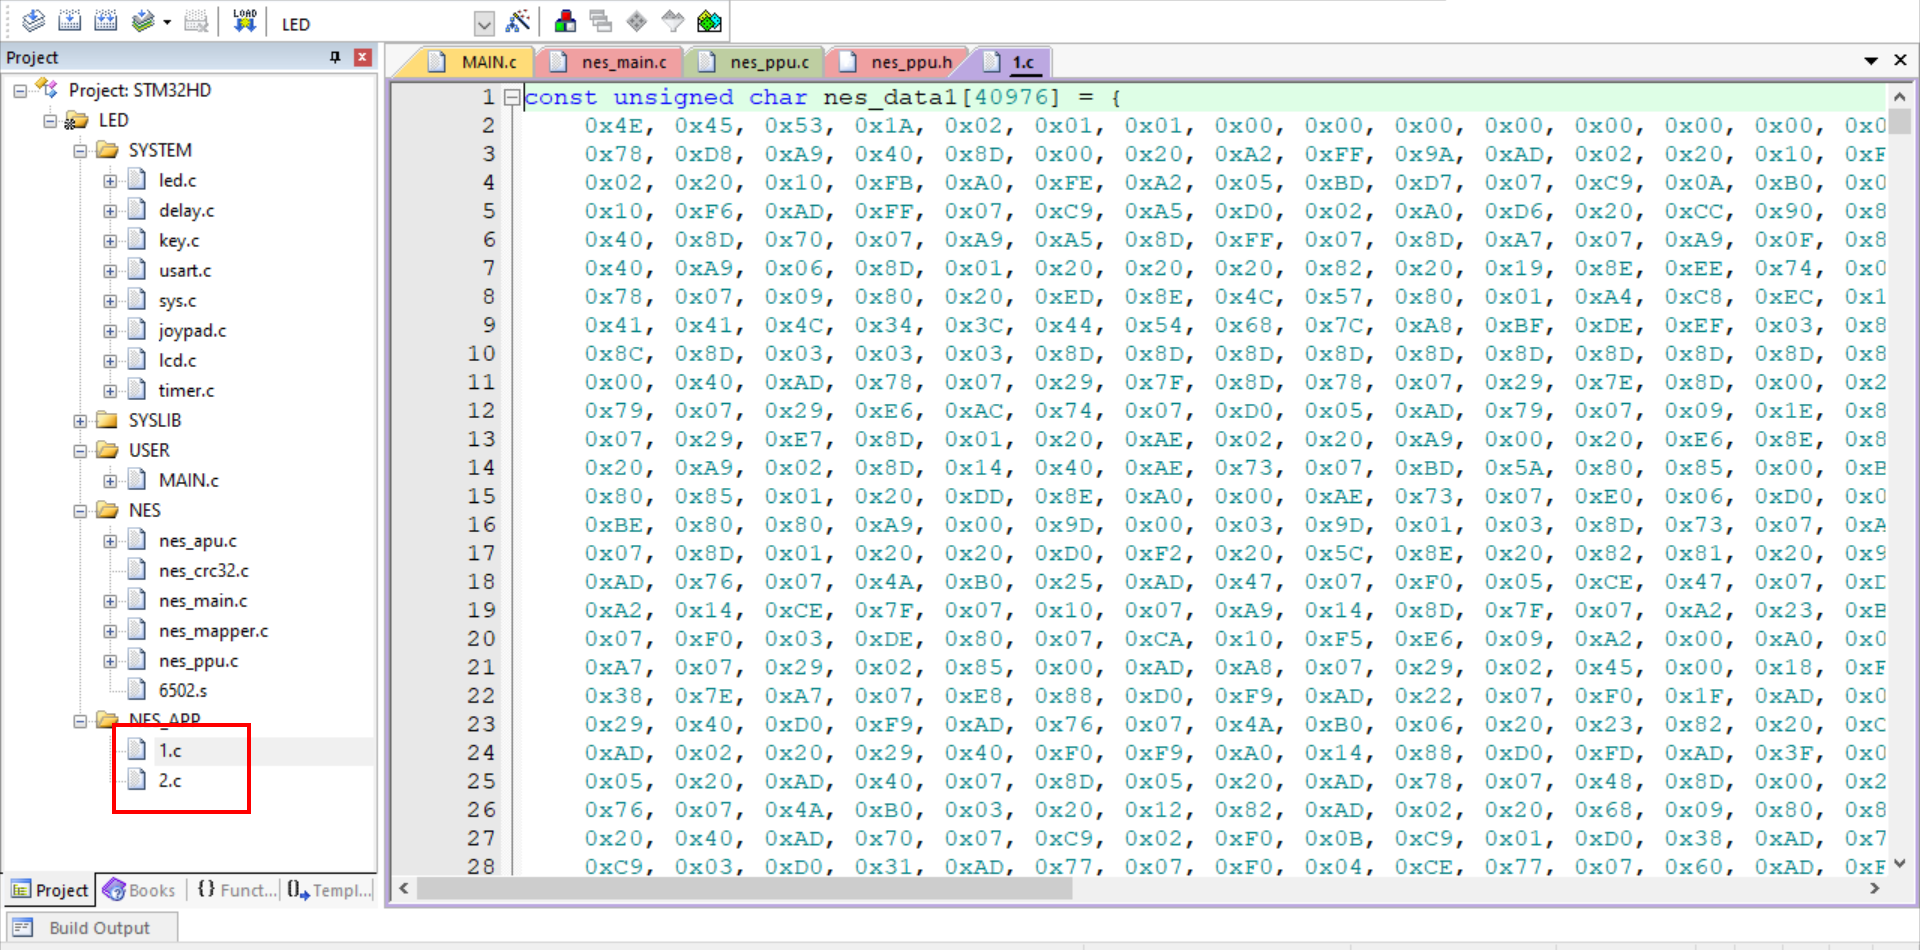
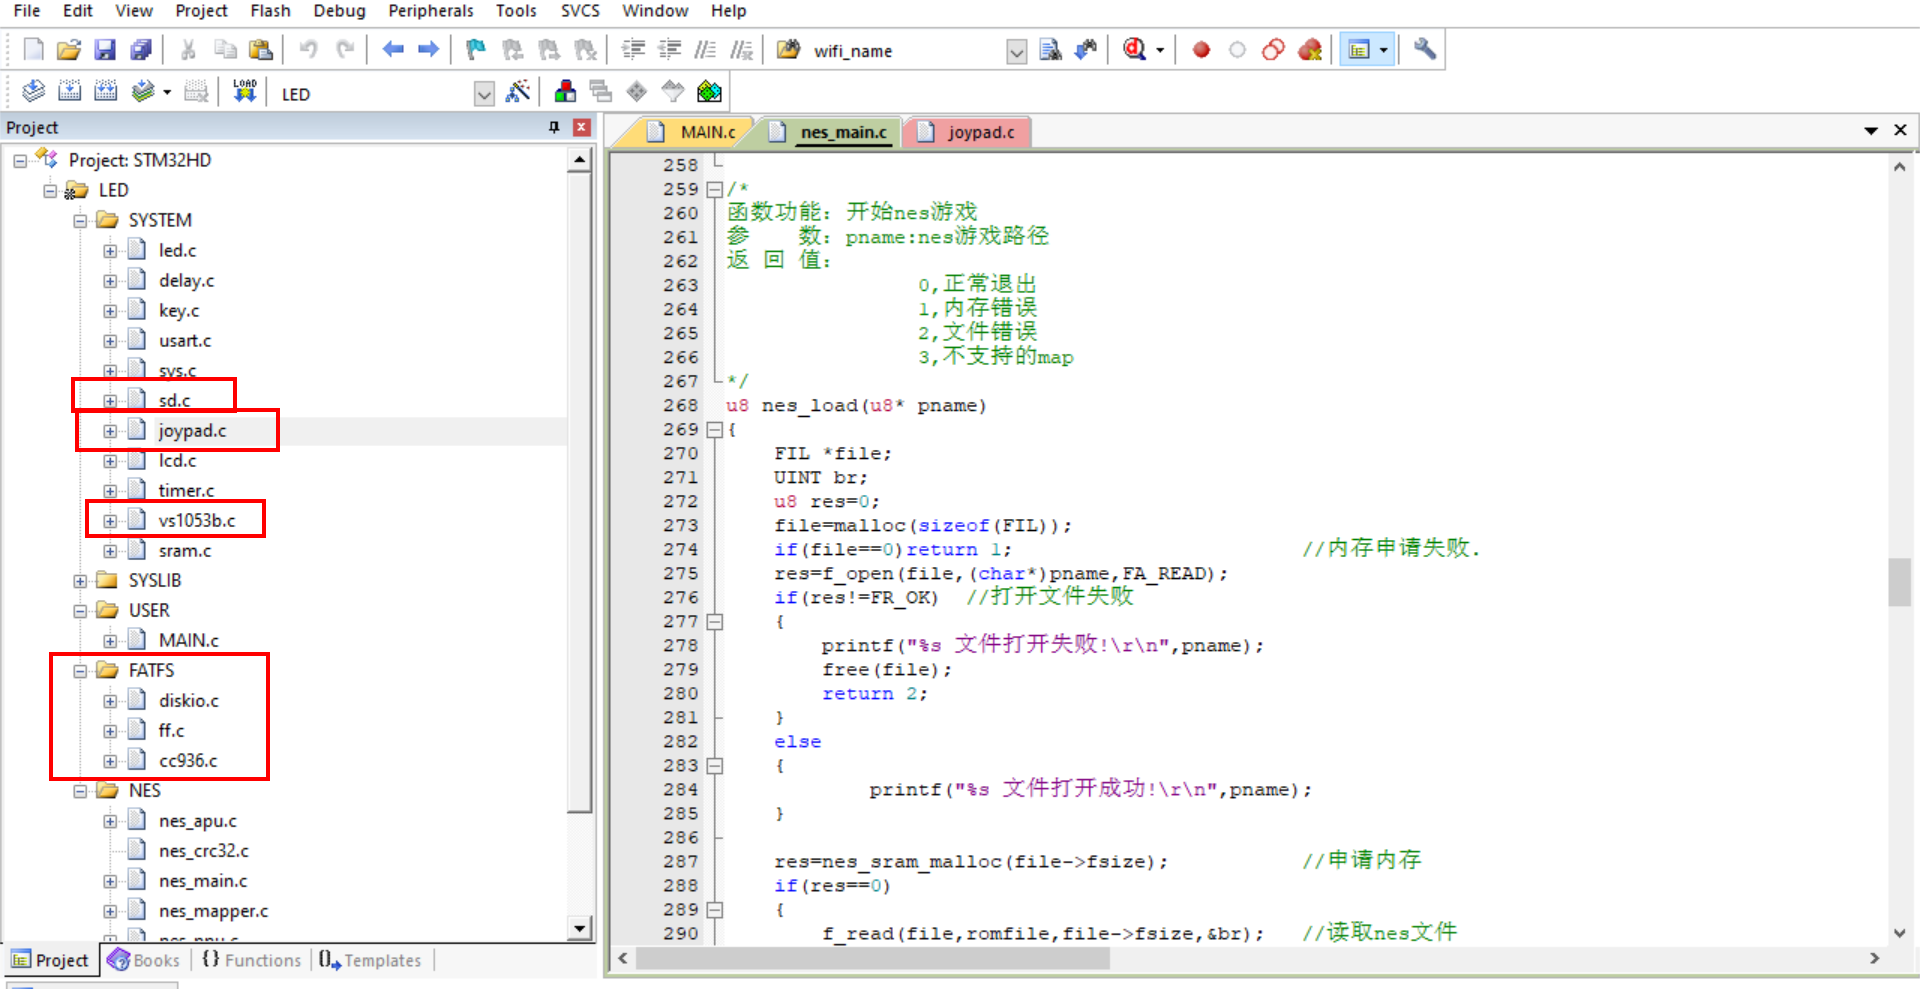
5.1 layout of engineering documents

5.2 main function code
The main function completes LCD screen initialization, key initialization, LED lamp initialization, serial port initialization and FC joystick initialization. By default, the LCD screen is cleared to black.
The LCD screen is driven by FSMC, and the FSMC timing speed is configured to be the fastest, reaching the fastest speed that STM32 can support, so as to improve the LCD screen brushing speed.
Finally, the LoadNes function is called to complete the game loading. If the loading fails, go back to the following to execute the while loop and flash the LED.
The code is as follows:
#include "stm32f10x.h"
#include "led.h"
#include "lcd.h"
#include "delay.h"
#include "key.h"
#include "usart.h"
#include <string.h>
#include <stdio.h>
#include "joypad.h"

extern u8 LoadNes(u8* pname,u32);


//Game file can generate C source code array through winhex file
extern const unsigned char nes_data1[40976];//Super Mary game files
extern const unsigned char nes_data2[262160];//Soul Douro game files


/*
Migration instructions:
1. Add joystick
2. Optimized game refresh frame rate
3. Add the development board with its own key control
*/
int main()
{
	BeepInit();		      //Buzzer initialization
	LedInit();             //LED initialization
	UsartInit(USART1,72,115200);
	KeyInit();            //Key initialization
	printf("The serial port works normally!\r\n");
	LcdInit(); 	 		    //LCD initialization
	//JoypadInit();   		// Joystick initialization
	LcdClear(0xFFFF);


/*
0000 0000: retain
0000 0001:  DATAST Hold time = 2 HCLK clock cycles
0000 0010:  DATAST Hold time = 3 HCLK clock cycles
......
1111 1111:  DATAST Hold time = 256 HCLK clock cycles (this is the default value after reset)
0,1,2,3,4,5,6,7,8,9,10,11,12,13,14
*/
	LcdClear(0);

	//Start running the game
	LoadNes((unsigned char*)nes_data1,40976);  //Super Marie
	//LoadNes((unsigned char*)nes_data2,262160);  // Contra
	while(1)
	{
		   LED1=!LED1;
		   DelayMs(400);
	}
}
5.3 loading NES games: introduction to LoadNes function
LoadNes function prototype:
u8 LoadNes(unsigned char* pname,u32 size)
This function passes in the NES game data address and the game data size.
Now this version does not use SD card and file system. The file data of the game is directly added to the code and compiled.
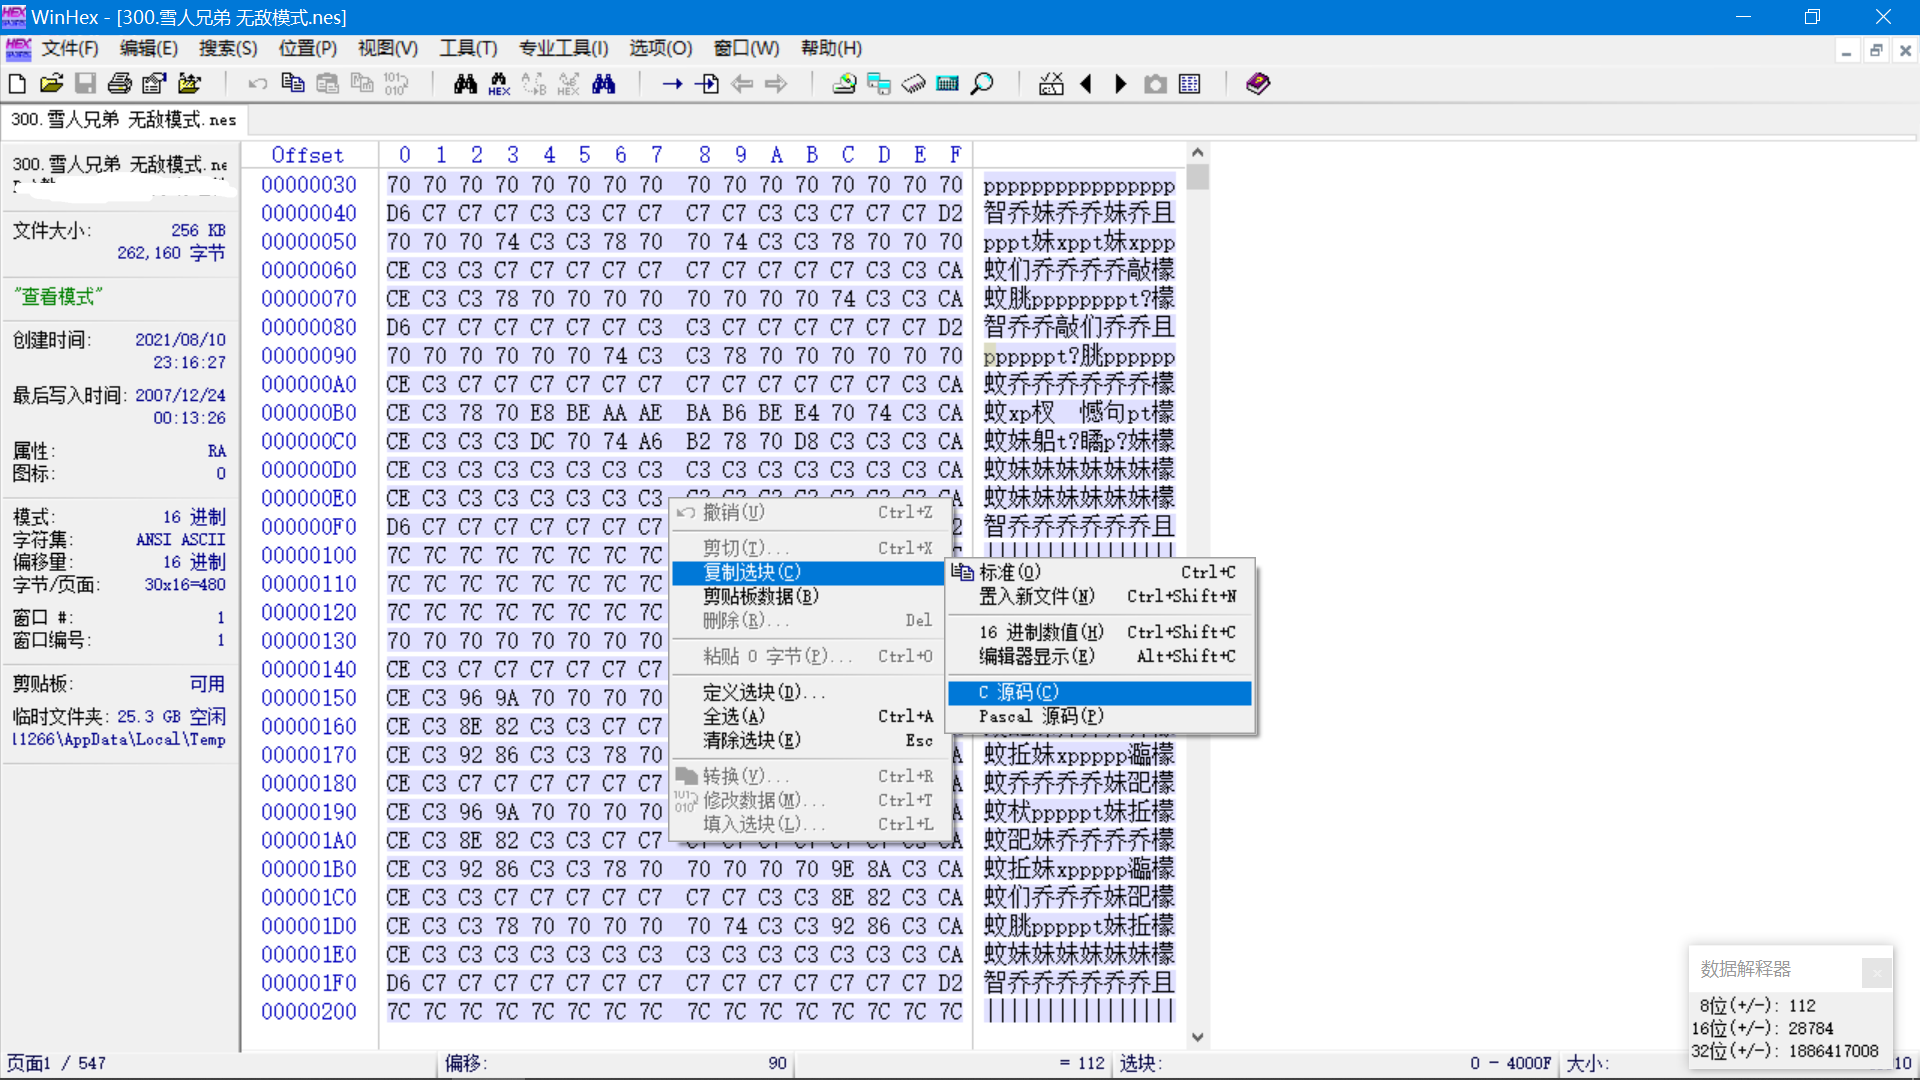
These two arrays are the data of super Mary and soul Douro. (open the file directly by using WinHEX software, select all, right-click edit, select Copy, select C source code, copy it into an array and paste it into keil)
The function mainly completes the basic initialization of NES simulator.
STM32 overclocking configuration is mainly completed. The configuration of PLL is 16 times and the overclocking is 128MHZ.
The overclocking configuration code is as follows:
/*
Function: frequency setting
 Parameter: PLL, frequency multiplier
*/
void NesClockSet(u8 PLL)
{
	u8 temp=0;
	RCC->CFGR&=0XFFFFFFFC;	//Modify the clock frequency to internal 8M
	RCC->CR&=~0x01000000;  	//PLLOFF
 	RCC->CFGR&=~(0XF<<18);	//Clear the original settings
 	PLL-=2;									//Offset 2 units
	RCC->CFGR|=PLL<<18;   	//Set PLL value 2 ~ 16
	RCC->CFGR|=1<<16;	  	  //PLLSRC ON
	FLASH->ACR|=0x12;	  	  //FLASH 2 delay cycles
 	RCC->CR|=0x01000000;  	//PLLON
	while(!(RCC->CR>>25));	//Wait for PLL lock
	RCC->CFGR|=0x02;		    //PLL as system clock
	while(temp!=0x02)    	  //Wait for the PLL to be set as the system clock successfully
	{
		temp=RCC->CFGR>>2;
		temp&=0x03;
	}
}
Next, initialize the necessary parameters of the NES game simulator. Finally, call the NesEmulateFrame function to enter the main loop code of the NES game and start running the game.
The complete code of LoadNes function is as follows:
/*
Function function: start the game
 Parameter: pname:nes game path u32 size Game Size
 Return value:
				0,Normal exit
				1,Memory error
				2,file error
				3,Unsupported map
*/
u8 LoadNes(unsigned char* pname,u32 size)
{
    u8 res=0;
    res=NesSramMalloc();			//Request memory
    romfile=(u8*)pname;       //Game source address
    NESrom_crc32=get_crc32(romfile+16,size-16);//Get the value of CRC32
    res=LoadNesRom();					//Load ROM
    printf("res=%d\r\n",res);
    NesClockSet(16);          //Set the system clock to 128MHZ 16*8
    JoypadInit();             //Joystick initialization
    cpu6502_init();						//Initialize 6502 and reset
    Mapper_Init();						//map initialization
    PPU_reset();							//ppu reset
    apu_init(); 							//apu initialization
    NesEmulateFrame();		    //Enter NES simulator main cycle
    return res;
}
5.3 NES game main cycle code
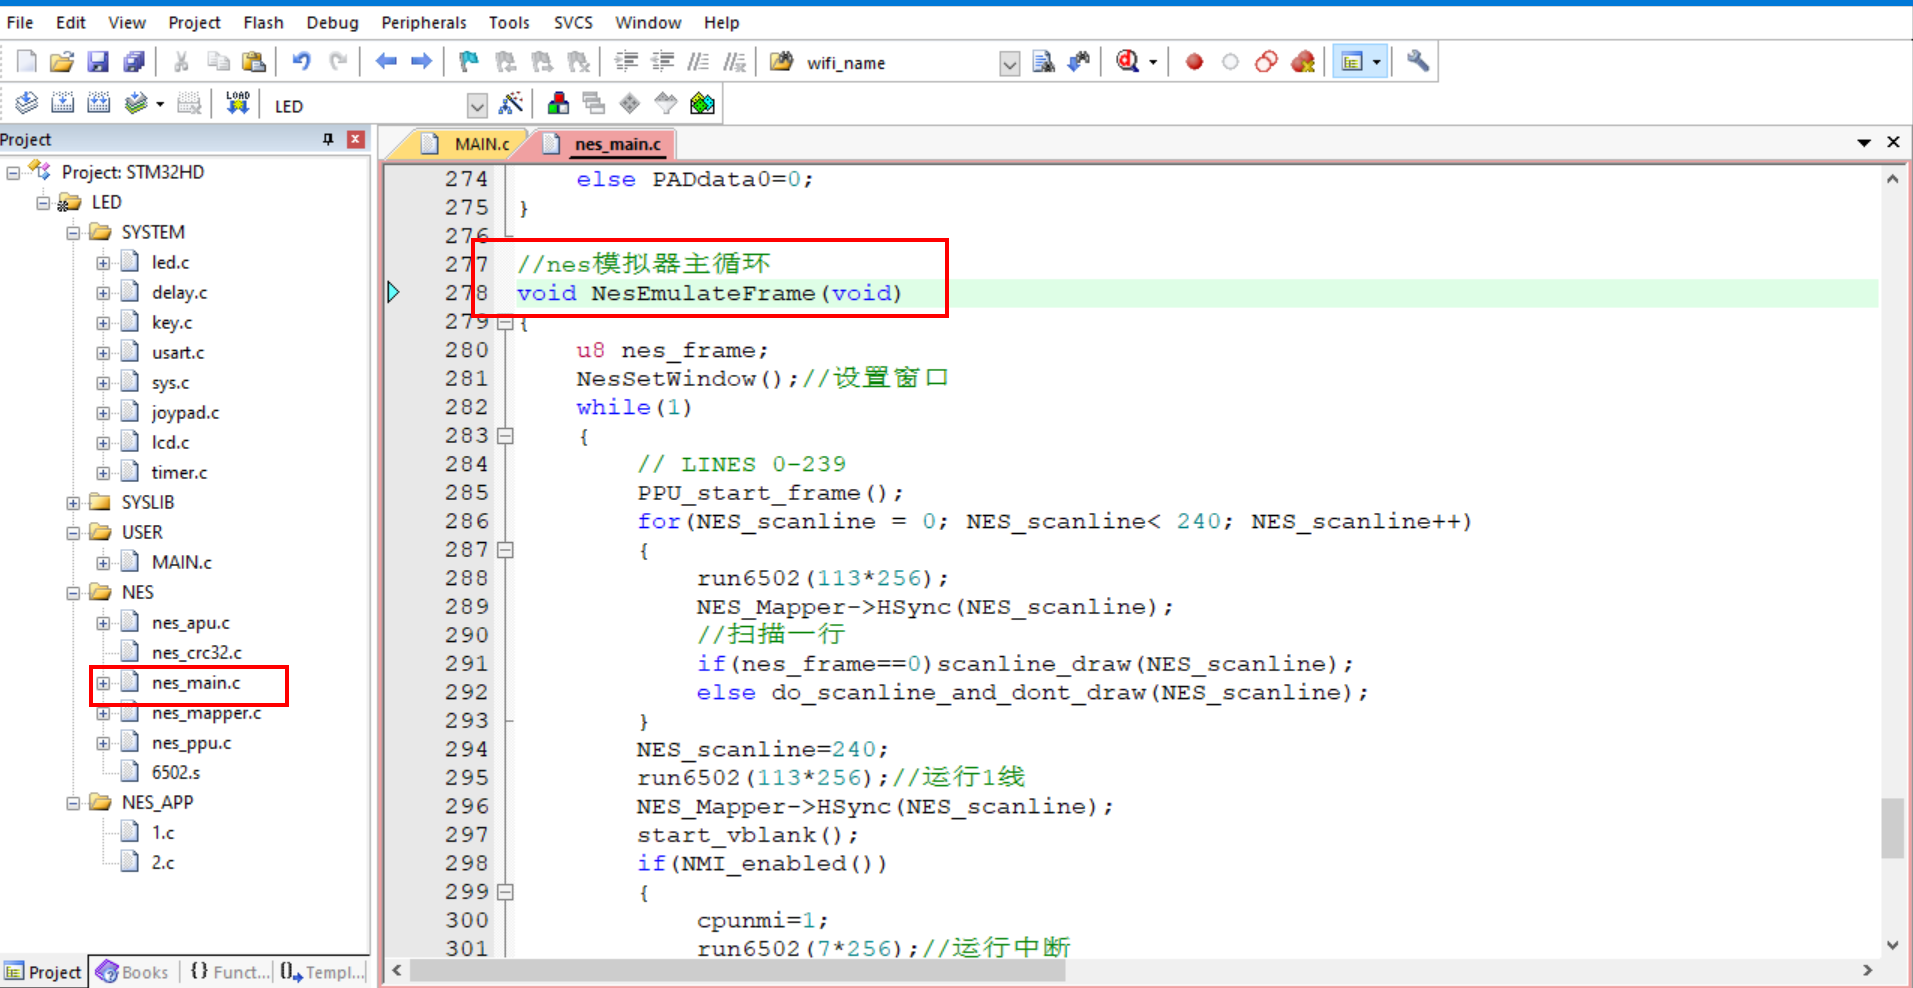
The detailed code is as follows:
//nes simulator main cycle
void NesEmulateFrame(void)
{
	u8 nes_frame;
	NesSetWindow();//Settings window
	while(1)
	{
		// LINES 0-239
		PPU_start_frame();
		for(NES_scanline = 0; NES_scanline< 240; NES_scanline++)
		{
			run6502(113*256);
			NES_Mapper->HSync(NES_scanline);
			//Scan one line
			if(nes_frame==0)scanline_draw(NES_scanline);
			else do_scanline_and_dont_draw(NES_scanline);
		}
		NES_scanline=240;
		run6502(113*256);//Operation line 1
		NES_Mapper->HSync(NES_scanline);
		start_vblank();
		if(NMI_enabled())
		{
			cpunmi=1;
			run6502(7*256);//Operation interruption
		}
		NES_Mapper->VSync();
		// LINES 242-261
		for(NES_scanline=241;NES_scanline<262;NES_scanline++)
		{
			run6502(113*256);
			NES_Mapper->HSync(NES_scanline);
		}
		end_vblank();
		NesGetGamepadval();	//Read joystick data every 3 frames
		nes_frame++;
		if(nes_frame>NES_SKIP_FRAME)
		{
			nes_frame=0;//Frame skipping
		}
	}
}
When you come in, you first call the NesSetWindow(void) function to set the window size, which calls the LCD interface. If it is other LCD screens, you only need to adapt here to use this code.
u8 nes_xoff=0;	//Display the offset in the x-axis direction (actual display width = 256-2*nes_xoff)
//Set game display window
void NesSetWindow(void)
{
	u16 lcdwidth,lcdheight;

		lcdwidth=256;
		lcdheight=240;
		nes_xoff=0;
		LcdSetWindow(32,0,lcdwidth,lcdheight);
		LcdWriteRAM_Prepare();//Preparation for writing to LCD RAM
}
Next, enter the main cycle code of NES game and start to cycle the brushed image data frame by frame to achieve the effect of the game.
After setting the window size, the following is to take out the color data from the NES game data file, and then for cycle to swipe the screen line by line.
The above code for setting the window size is not necessary, Only the currently used LCD supports coordinate self increment (generally supported by LCD). After setting the window range of LCD, continue to write data to LCD, and the coordinates of LCD will automatically increase to improve the screen brushing efficiency. If your LCD screen does not support coordinate increase, or you can't write code and want to transplant, you don't need to set the window function at all. You just need to provide a point drawing function to scan the lines in the screen brushing code in the for loop Just change it.
The for loop in the function is the code that mainly prints the image. If you want to transplant it to other LCD screens, you can change it here. The example code is as follows:
for(NES_scanline = 0; NES_scanline< 240; NES_scanline++)
{
	run6502(113*256);
	NES_Mapper->HSync(NES_scanline);
	//Scan one line
	if(nes_frame==0)scanline_draw(NES_scanline);
	else do_scanline_and_dont_draw(NES_scanline);
}
Call scanline inside_ The draw function scans by line (that is, drawing images line by line). The scanline_draw function is also a for loop, which is refined to each pixel point and drawn to the screen according to each pixel point. The LCD_RAM in the code is the address of the current LCD screen, because the current LCD screen adopts FSMC, and the LCD_RAM is the FSMC address. Write data to this address, and the FSMC generates 8080 timing to send the data to the LCD display Display the screen and refresh the display.
scanline_ The detailed screen swiping code of draw function is as follows:
extern u8 nes_xoff;	//Display the offset in the x-axis direction (actual display width = 256-2*nes_xoff)
void scanline_draw(int LineNo)
{
	uint16 i;
	u16 sx,ex;
	do_scanline_and_draw(ppu->dummy_buffer);
	sx=nes_xoff+8;
	ex=256+8-nes_xoff;
	if(lcddev.width==480)
	{
		for(i=sx;i<ex;i++)
		{
			LCD_RAM=NES_Palette[ppu->dummy_buffer[i]];//Get color value
 			LCD_RAM=NES_Palette[ppu->dummy_buffer[i]];//Get color value
			i++;
 			LCD_RAM=NES_Palette[ppu->dummy_buffer[i]];//Get color value
 			LCD_RAM=NES_Palette[ppu->dummy_buffer[i]];//Get color value
			i++;
			LCD_RAM=NES_Palette[ppu->dummy_buffer[i]];//Get color value
 			LCD_RAM=NES_Palette[ppu->dummy_buffer[i]];//Get color value
			i++;
			LCD_RAM=NES_Palette[ppu->dummy_buffer[i]];//Get color value
 			LCD_RAM=NES_Palette[ppu->dummy_buffer[i]];//Get color value
			i++;
			LCD_RAM=NES_Palette[ppu->dummy_buffer[i]];//Get color value
 			LCD_RAM=NES_Palette[ppu->dummy_buffer[i]];//Get color value
			i++;
			LCD_RAM=NES_Palette[ppu->dummy_buffer[i]];//Get color value
 			LCD_RAM=NES_Palette[ppu->dummy_buffer[i]];//Get color value
			i++;
			LCD_RAM=NES_Palette[ppu->dummy_buffer[i]];//Get color value
 			LCD_RAM=NES_Palette[ppu->dummy_buffer[i]];//Get color value
			i++;
			LCD_RAM=NES_Palette[ppu->dummy_buffer[i]];//Get color value
 			LCD_RAM=NES_Palette[ppu->dummy_buffer[i]];//Get color value
			i++;
			LCD_RAM=NES_Palette[ppu->dummy_buffer[i]];//Get color value
 			LCD_RAM=NES_Palette[ppu->dummy_buffer[i]];//Get color value
			i++;
 			LCD_RAM=NES_Palette[ppu->dummy_buffer[i]];//Get color value
 			LCD_RAM=NES_Palette[ppu->dummy_buffer[i]];//Get color value
			i++;
			LCD_RAM=NES_Palette[ppu->dummy_buffer[i]];//Get color value
 			LCD_RAM=NES_Palette[ppu->dummy_buffer[i]];//Get color value
			i++;
			LCD_RAM=NES_Palette[ppu->dummy_buffer[i]];//Get color value
 			LCD_RAM=NES_Palette[ppu->dummy_buffer[i]];//Get color value
			i++;
			LCD_RAM=NES_Palette[ppu->dummy_buffer[i]];//Get color value
 			LCD_RAM=NES_Palette[ppu->dummy_buffer[i]];//Get color value
			i++;
			LCD_RAM=NES_Palette[ppu->dummy_buffer[i]];//Get color value
 			LCD_RAM=NES_Palette[ppu->dummy_buffer[i]];//Get color value
			i++;
			LCD_RAM=NES_Palette[ppu->dummy_buffer[i]];//Get color value
 			LCD_RAM=NES_Palette[ppu->dummy_buffer[i]];//Get color value
			i++;
			LCD_RAM=NES_Palette[ppu->dummy_buffer[i]];//Get color value
 			LCD_RAM=NES_Palette[ppu->dummy_buffer[i]];//Get color value
		}
	}else
	{
		for(i=sx;i<ex;i++)
		{
			LCD_RAM=NES_Palette[ppu->dummy_buffer[i++]];
			LCD_RAM=NES_Palette[ppu->dummy_buffer[i++]];
			LCD_RAM=NES_Palette[ppu->dummy_buffer[i++]];
			LCD_RAM=NES_Palette[ppu->dummy_buffer[i++]];
			LCD_RAM=NES_Palette[ppu->dummy_buffer[i++]];
			LCD_RAM=NES_Palette[ppu->dummy_buffer[i++]];
			LCD_RAM=NES_Palette[ppu->dummy_buffer[i++]];
			LCD_RAM=NES_Palette[ppu->dummy_buffer[i++]];
			LCD_RAM=NES_Palette[ppu->dummy_buffer[i++]];
			LCD_RAM=NES_Palette[ppu->dummy_buffer[i++]];
			LCD_RAM=NES_Palette[ppu->dummy_buffer[i++]];
			LCD_RAM=NES_Palette[ppu->dummy_buffer[i++]];
			LCD_RAM=NES_Palette[ppu->dummy_buffer[i++]];
			LCD_RAM=NES_Palette[ppu->dummy_buffer[i++]];
			LCD_RAM=NES_Palette[ppu->dummy_buffer[i++]];
			LCD_RAM=NES_Palette[ppu->dummy_buffer[i]];
		}
	}
}
After running the for loop function of swiping the screen, a game image will be displayed on the LCD.
The next step is to scan the key value and complete the control of the game characters. NesGetGamepadval() function is called in the function to read the key value and refresh the key state.
NesGetGamepadval() function code is as follows:
/*
Key value Description:

Start key: 8
 Selection: 4
 Direction right: 128
 Direction left: 64
 Direction: 16
 Direction down: 32

Function key up / left: 2
 Function key down / right: 1

Key combinations: right and

Read joystick data and function keys left: 130

*/

void NesGetGamepadval(void)
{
	u8 key;
//	PADdata0=GetJoypadKey(); 	// Read the value of handle 1
	//printf("%d\r\n",PADdata0);
	key=GetKeyValue(0);
	if(key==1)PADdata0=8;
	else if(key==2)PADdata0=128;
	else if(key==3)PADdata0=64;
	else if(key==4)PADdata0=1;
	else PADdata0=0;
}
NES game simulator defines two global variables to record the data of joystick 1 and joystick 2 respectively, because NES games can be played by two people together.
u8 PADdata0;   			//Handle 1 key value [7:0] right 7 left 6 lower 5 upper 4 Start3 Select2 B1 A0
u8 PADdata1;   			//Handle 2 key value [7:0] right 7 left 6 lower 5 upper 4 Start3 Select2 B1 A0
Just give the two global variables correct values in this function, and the game characters can appear according to the normal action screen.
As for whether your physical keys use FC game console or ordinary other keys, as long as the values of these two global variables are correct, there is no problem. It doesn't matter what handles are used. The key is to understand the logic of the code. If you understand it, you will know the running logic of the program.
At this point, the main code of version 1 has been analyzed. For other detailed processes, you can see the project source code, run the program, and understand everything.
6, Analysis of engineering source code: Taking the full version (3) as an example
This version adds the functions of game console, VS1053, SD, FATFS file system and so on. Here, it is analyzed in Chapter 5. The following mainly analyzes the newly added code content.
6.1 introduction to FC joystick
FC game consoles can be roughly divided into two types: one is 11 pin and the other is 9 pin. However, there are few 11 pin handles on the market. Now almost all of them use 9-pin FC to assemble the handle. The following is the 9-pin FC handle. Another feature of the handle is that it can be directly inserted into the serial port head of DR9! In this way, the connection with the development board is simple.
The appearance of FC handle is shown in the figure:
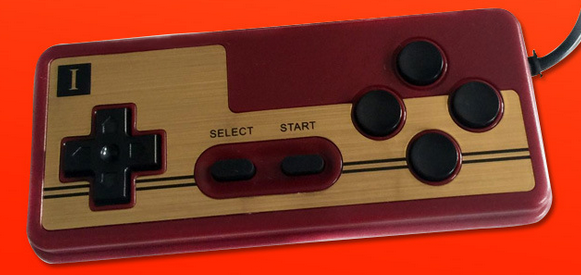
This handle usually has 10 keys (actually 8 keys): up, down, left, right, Start, Select, A, B, A and B. here, A and A are one key value, and B and B are also one key value, but when you keep pressing the key, it will keep sending (convenient for quick keys, such as firing shells).
Control circuit of FC handle, It consists of an 8-bit concatenated shift register (CD4021) and a time base integrated circuit (NE555, for continuous transmission) composition. However, in order to save cost, the current handle is directly bound on the PCB, so when you disassemble the handle, you generally can't see that there are four-way IC s in it, but only one black dot. All circuits are integrated into it, but their control and reading methods are the same.
Game handle data reading timing
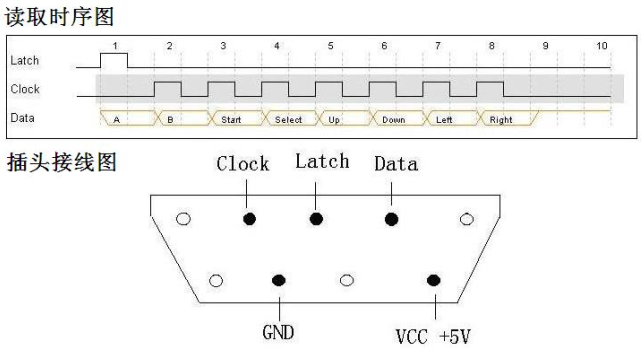
As can be seen from the above figure, the information of reading the key value of the handle is very simple: first Latch (lock key value), then get the first key value (A), and then read the key values of other keys in turn under the action of Clock, A total of 8 key values.
In the normal state, LATCH is low, CLK is high and DATA is high. This is also the state when initializing the port.
The timing of reading key value by single chip microcomputer is very simple. LATCH sends a high pulse first, and the DATA will be locked into the shift register inside the handle, and then the DATA will be continuously sent from the low bit of DATA at the falling edge of CLK clock. The key is mapped to the corresponding bit of the DATA. If a key is pressed, the corresponding bit is 0, and if no key is pressed, it is 1 That is, when no key is pressed, the read DATA is 0xFF.
Key value:
[7] : right
[6] : left
[5] : next
[4] : up
[3]:Start
[2]:Select
[1]:B
[0]:A
Driver code example:
Merit    Function: handle initialization function
 Hardware connection:
         CLK : PD3  --Clock line
				 PB10: DATA --data line
				 PB11: LAT  --Latch interface
*/
void JoypadInit(void)
{
	  /*1. Open clock*/
	  RCC->APB2ENR|=1<<5; //PD
	  RCC->APB2ENR|=1<<3; //PB

	  /*2. Configuration mode*/
	  GPIOD->CRL&=0xFFFF0FFF;
	  GPIOD->CRL|=0x00003000;

	  GPIOB->CRH&=0xFFFF00FF;
	  GPIOB->CRH|=0x00003800;

	  /*3. Pull up*/
	  GPIOD->ODR|=1<<3;
}

/*
Function: obtain the key value of the handle
 Return value: saves the state of the key for one frame
 Key value:
[7]:right
[6]:Left
[5]:lower
[4]:upper
[3]:Start
[2]:Select
[1]:B
[0]:A
*/
u8 GetJoypadKey(void)
{
	  u8 key=0,i;
	  JOYPAD_LAT=1; //Start latch
	  DelayUs(30);
	  JOYPAD_LAT=0; //Latch the current key state
	  for(i=0;i<8;i++)
	  {
			 key=key>>1;
		   if(JOYPAD_DATA==0)key|=0x80;
			 JOYPAD_CLK=1;  //Output a rising edge and tell the handle to send data
			 DelayUs(30);
			 JOYPAD_CLK=0;  //The data line remains stable
       DelayUs(30);
		}
		return key;
}
6.2 loading NES games: nes_load function
Here's nes_ The difference between the load function and Chapter 5 is that the source of game data is read from the SD card.
Pass in the game name, open the specified file on the SD card and read the data.
The external SRAM memory is used here because the read data needs to be stored in the array. The memory of STM32F103ZET6 itself is only 64K, which is certainly not enough. The space applied for here is applied for from the external SRAM module, so the development board has to bring an SRAM chip. If you don't bring it yourself, you can buy an SRAM module on Taobao (there is a store called Weixue on Taobao).
The detailed code is as follows:
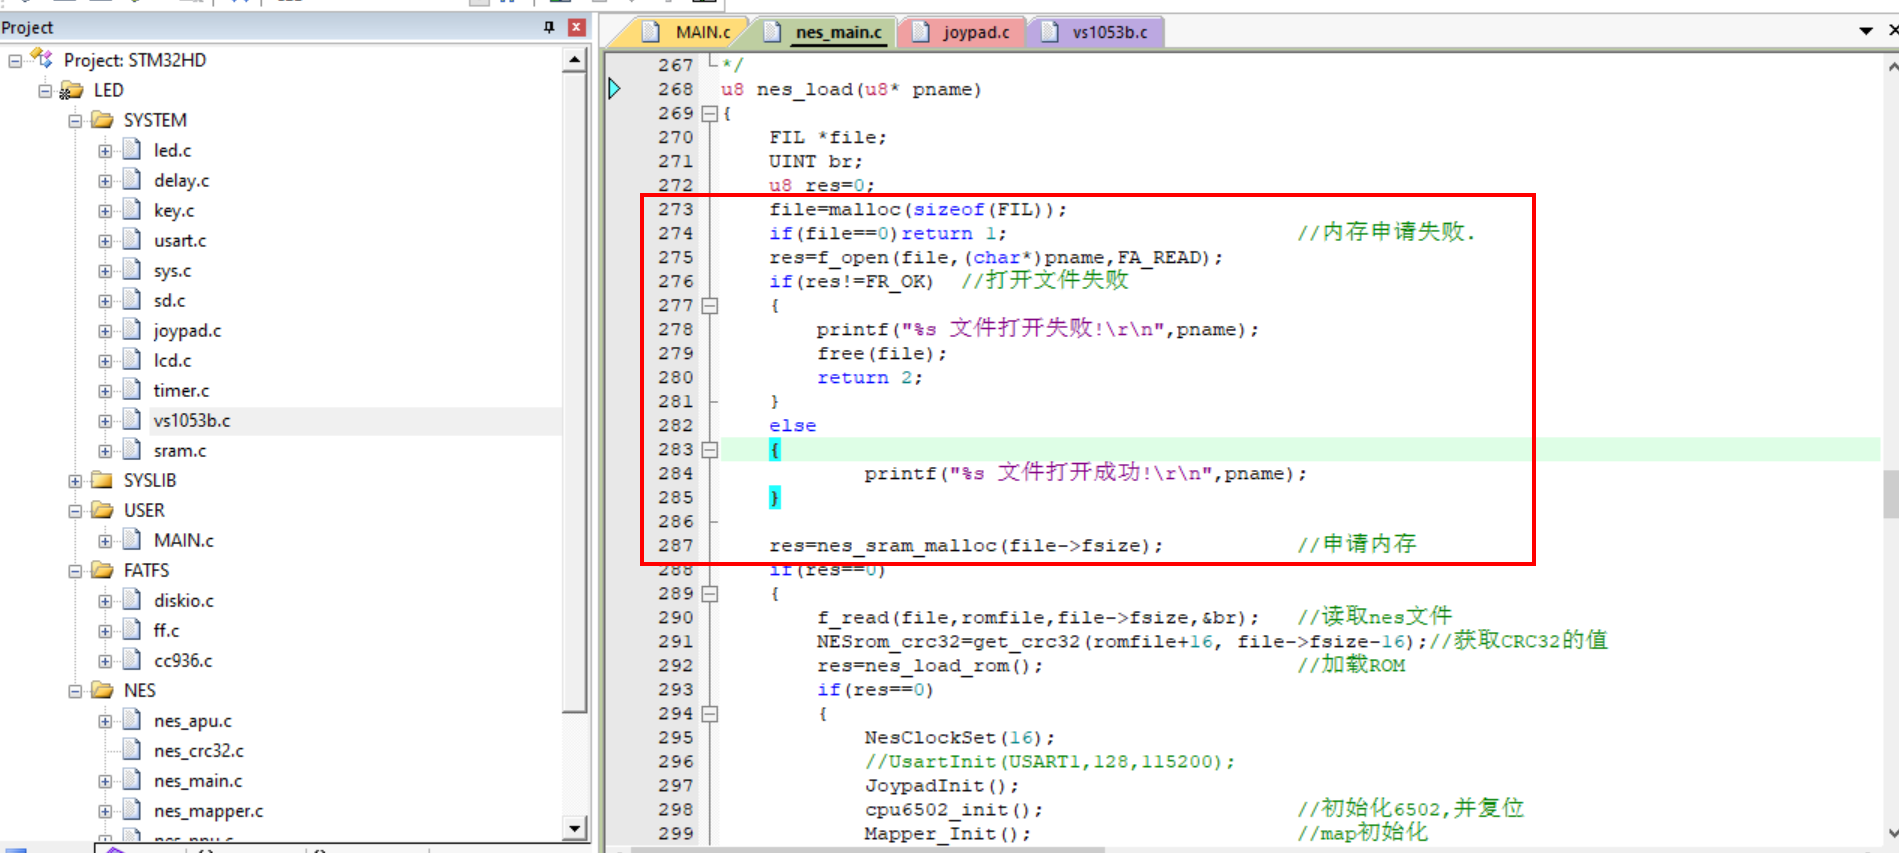
u8 nes_load(u8* pname)
{
FIL *file;
UINT br;
u8 res=0;
file=malloc(sizeof(FIL));
if(file==0)return 1; //Memory request failed
res=f_open(file,(char*)pname,FA_READ);
if(res!=FR_OK) //fail to open file
{
printf("%s File open failed!\r\n",pname);
free(file);
return 2;
}
else
{
printf("%s File opened successfully!\r\n",pname);
}
res=nes_sram_malloc(file->fsize); //Request memory
if(res==0)
{
f_read(file,romfile,file->fsize,&br); //Read nes file
NESrom_crc32=get_crc32(romfile+16, file->fsize-16);//Get the value of CRC32
res=nes_load_rom(); //Load ROM
if(res==0)
{
NesClockSet(16);
//UsartInit(USART1,128,115200);
JoypadInit();
cpu6502_init(); //Initialize 6502 and reset
Mapper_Init(); //map initialization
PPU_reset(); //ppu reset
apu_init(); //apu initialization
nes_sound_open(0,APU_SAMPLE_RATE); //Initialize playback device
nes_emulate_frame(); //Enter NES simulator main cycle
nes_sound_close(); //Turn off sound output
}
}
f_close(file);
free(file);//Free memory
nes_sram_free(); //Free memory
return res;
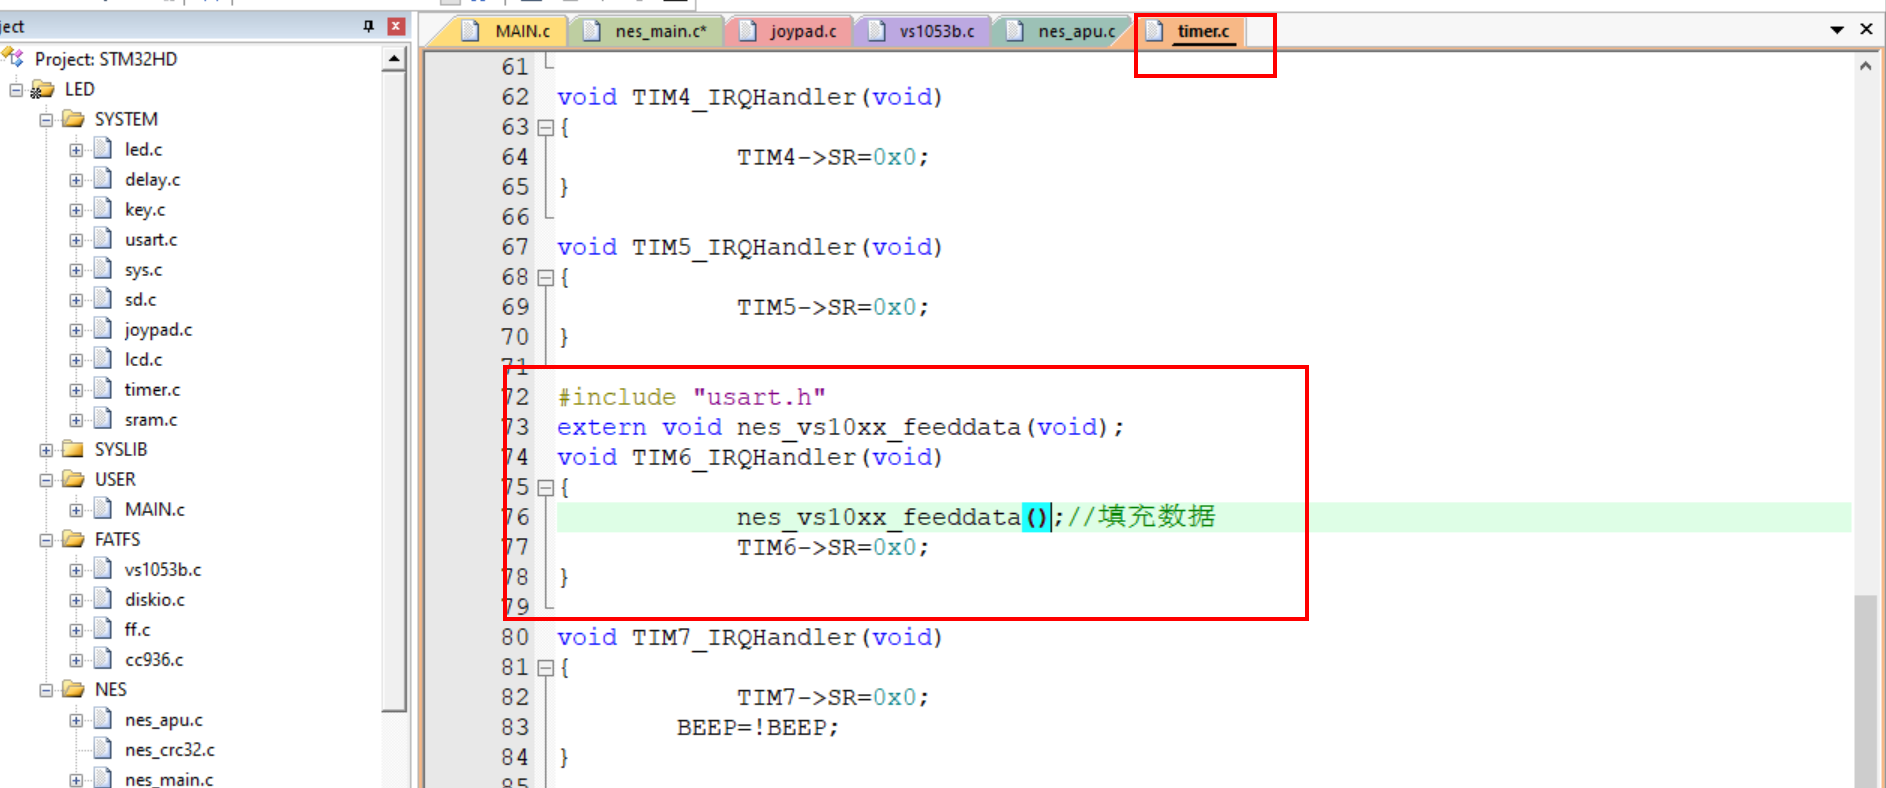
} It calls nes_ sound_ The open function initializes the audio device (VS1053). This is very important. To understand how the game sound is output, please take a closer look at the process here.
nes_ sound_ The VS1053 audio device is initialized in the open function, and then the timer interrupt is started. The timer is used to call the playback interface of VS1053, and the output of sound data is completed in the timer interrupt server function. Here, the sound is stored in a global buffer. Later, when the game runs in the main loop, data will be continuously filled into this buffer, When the timer times out and interrupts, it will query whether there is music to play. If there is, it will play. If not, it will come out.
VS1052 sound playback code example:
//Audio playback callback function
void nes_vs10xx_feeddata(void)
{
	u8 n;
	u8 nbytes;
	u8 *p;
	if(nesplaybuf==nessavebuf)return;//No new audio data has been received
	if(VS1053_DREQ!=0)//Can send data to VS10XX
	{
		p=nesapusbuf[nesplaybuf]+nesbufpos;
		nesbufpos+=32;
		if(nesbufpos>APU_PCMBUF_SIZE)
		{
			nesplaybuf++;
			if(nesplaybuf>(NES_APU_BUF_NUM-1))nesplaybuf=0;
			nbytes=APU_PCMBUF_SIZE+32-nesbufpos;
			nesbufpos=0;
		}else nbytes=32;
		for(n=0;n<nbytes;n++)
		{
			if(p[n]!=0)break;	//Judge whether all the remaining data are 0?
		}
		if(n==nbytes)return;	//If they are all 0, VS1053 will not be written directly to avoid clattering
		VS1053_XDCS=0;
		for(n=0;n<nbytes;n++)
		{
			VS1053_SPI_ReadWriteByte(p[n]);
		}
		VS1053_XDCS=1;
	}
}
nes_ sound_ The open function code is as follows:
//NES turns on audio output
int nes_sound_open(int samples_per_sync,int sample_rate)
{
	u8 *p;
	u8 i;
	p=malloc(100);	//Request 100 bytes of memory
	if(p==NULL)return 1;	//Memory application failed, exit directly
	printf("sound open:%d\r\n",sample_rate);
	for(i=0;i<sizeof(nes_wav_head);i++)//Copy nes_wav_head content
	{
		p[i]=nes_wav_head[i];
	}
	if(lcddev.width==480)	//480 * 480 screen
	{
		sample_rate=8000;	//Set 8Khz, about 0.75 times the original speed
	}
	p[24]=sample_rate&0XFF;			//Set sampling rate
	p[25]=(sample_rate>>8)&0XFF;
	p[28]=sample_rate&0XFF;			//Set byte rate (8-bit mode, equal to sample rate)
	p[29]=(sample_rate>>8)&0XFF;
	nesplaybuf=0;
	nessavebuf=0;
	VS1053_Reset();		   			//Hard reset
	VS1053_SoftReset();  			//Soft reset
	VS1053_SetVol(200);			  //Set parameters such as volume

	//Reset decoding time
    VS1053_WriteCmd(SPI_DECODE_TIME,0x0000);
	VS1053_WriteCmd(SPI_DECODE_TIME,0x0000); //Operate twice

	while(VS1053_SendMusicData(p));	//Send wav head
	while(VS1053_SendMusicData(p+32));	//Send wav head
	TimerInit(TIM6,72,1000);	//Interrupt once in 1ms
	free(p);				//Free memory
	return 1;
}
After initialization, NES is called_ emulate_ The frame function enters the main game loop.
6.3 game main cycle code
Now this code adds a sound output function to the code in Chapter 5. Call VS1053 to play the sound of the game.
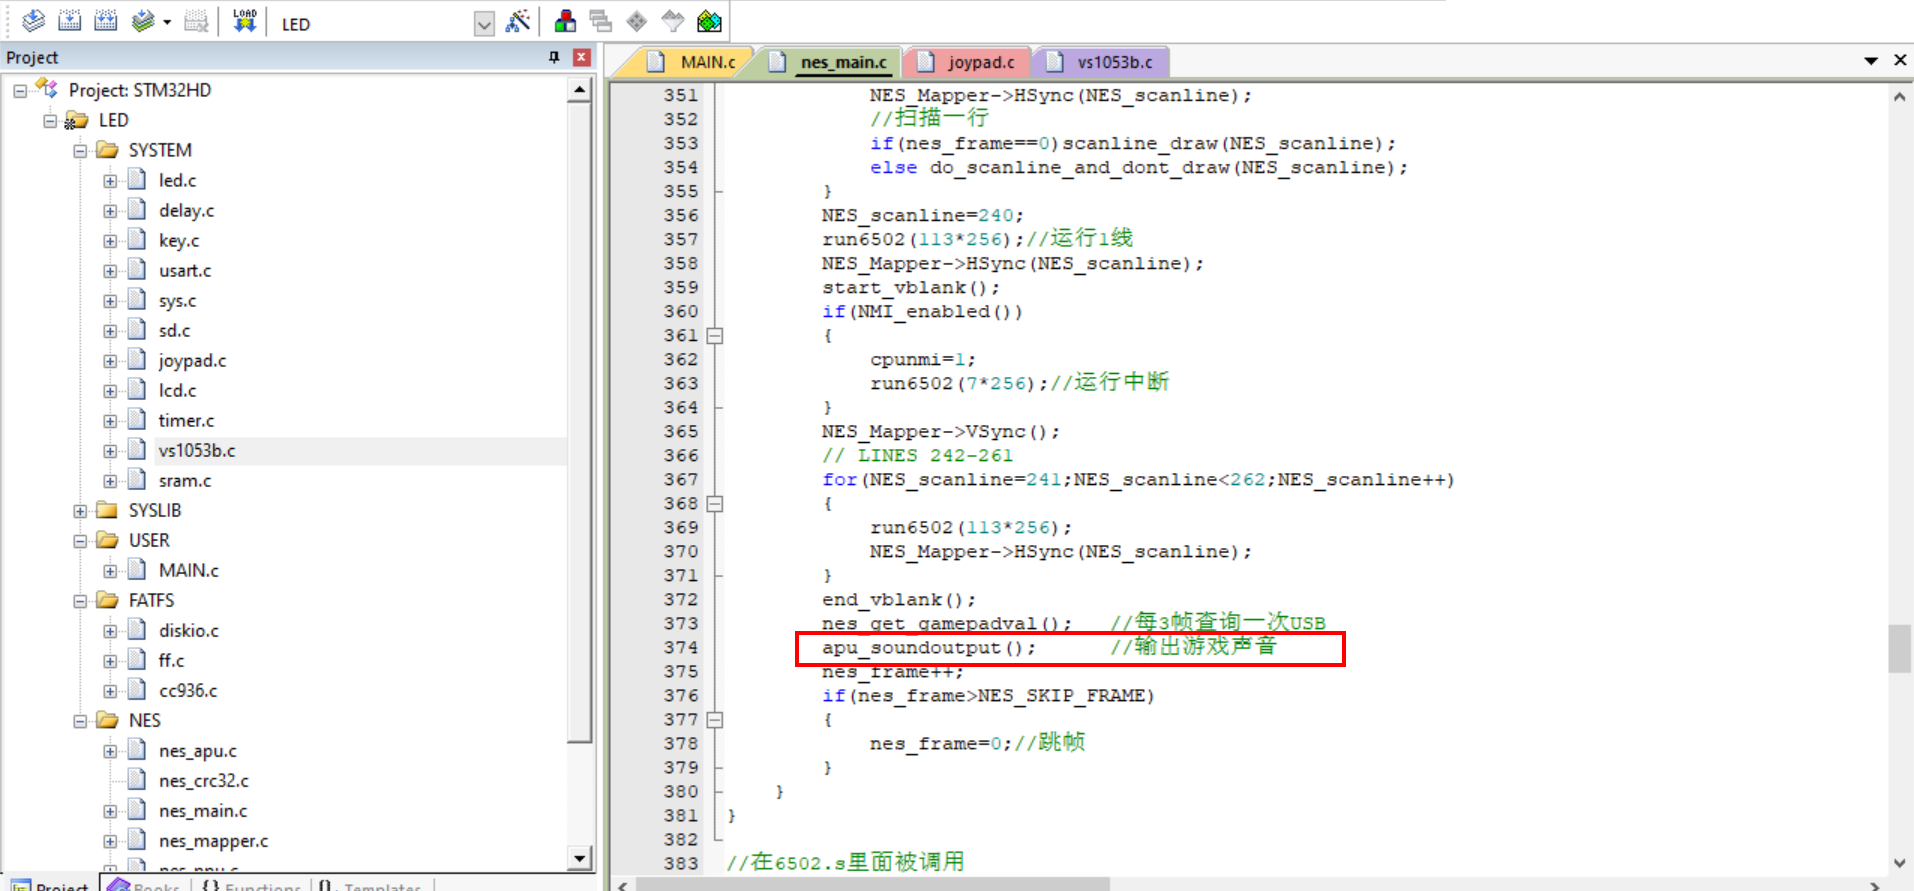
apu_ The soundoutput function code is as follows:
//apu sound output
void apu_soundoutput(void)
{
	u16 i;
	apu_process(wave_buffers,APU_PCMBUF_SIZE);
	for(i=0;i<30;i++)if(wave_buffers[i]!=wave_buffers[i+1])break;//Judge whether the first 30 data are equal?
	if(i==30&&wave_buffers[i])//Are equal and not equal to 0
	{
		for(i=0;i<APU_PCMBUF_SIZE;i++)wave_buffers[i]=0;//It is the repeated invalid data output in the suspended state, which is directly modified to 0 Thus no noise is output
	}
	clocks=0;
	nes_apu_fill_buffer(0,wave_buffers);
}
Finally called nes_. apu_ fill_ The buffer function assigns data to the VS1053 buffer for playback.
The audio initialization code has been analyzed earlier. The timer is initialized. It will constantly query whether there is music data to be played in the buffer. If there is, it will be played and not output. This function is to fill the audio buffer with data.
nes_ apu_ fill_ The buffer function code is as follows:
//NES audio output to VS1053 cache
void nes_apu_fill_buffer(int samples,u8* wavebuf)
{
 	u16	i;
	u8 tbuf;
	for(i=0;i<APU_PCMBUF_SIZE;i++)
	{
		nesapusbuf[nessavebuf][i]=wavebuf[i];
	}
	tbuf=nessavebuf;
	tbuf++;
	if(tbuf>(NES_APU_BUF_NUM-1))tbuf=0;
	while(tbuf==nesplaybuf)//The output data caught up with the audio playback position. Wait
	{
		DelayMs(5);
	}
	nessavebuf=tbuf;
}
At this point, the main audio code is analyzed. You can download the program to experience the game and cherish your childhood