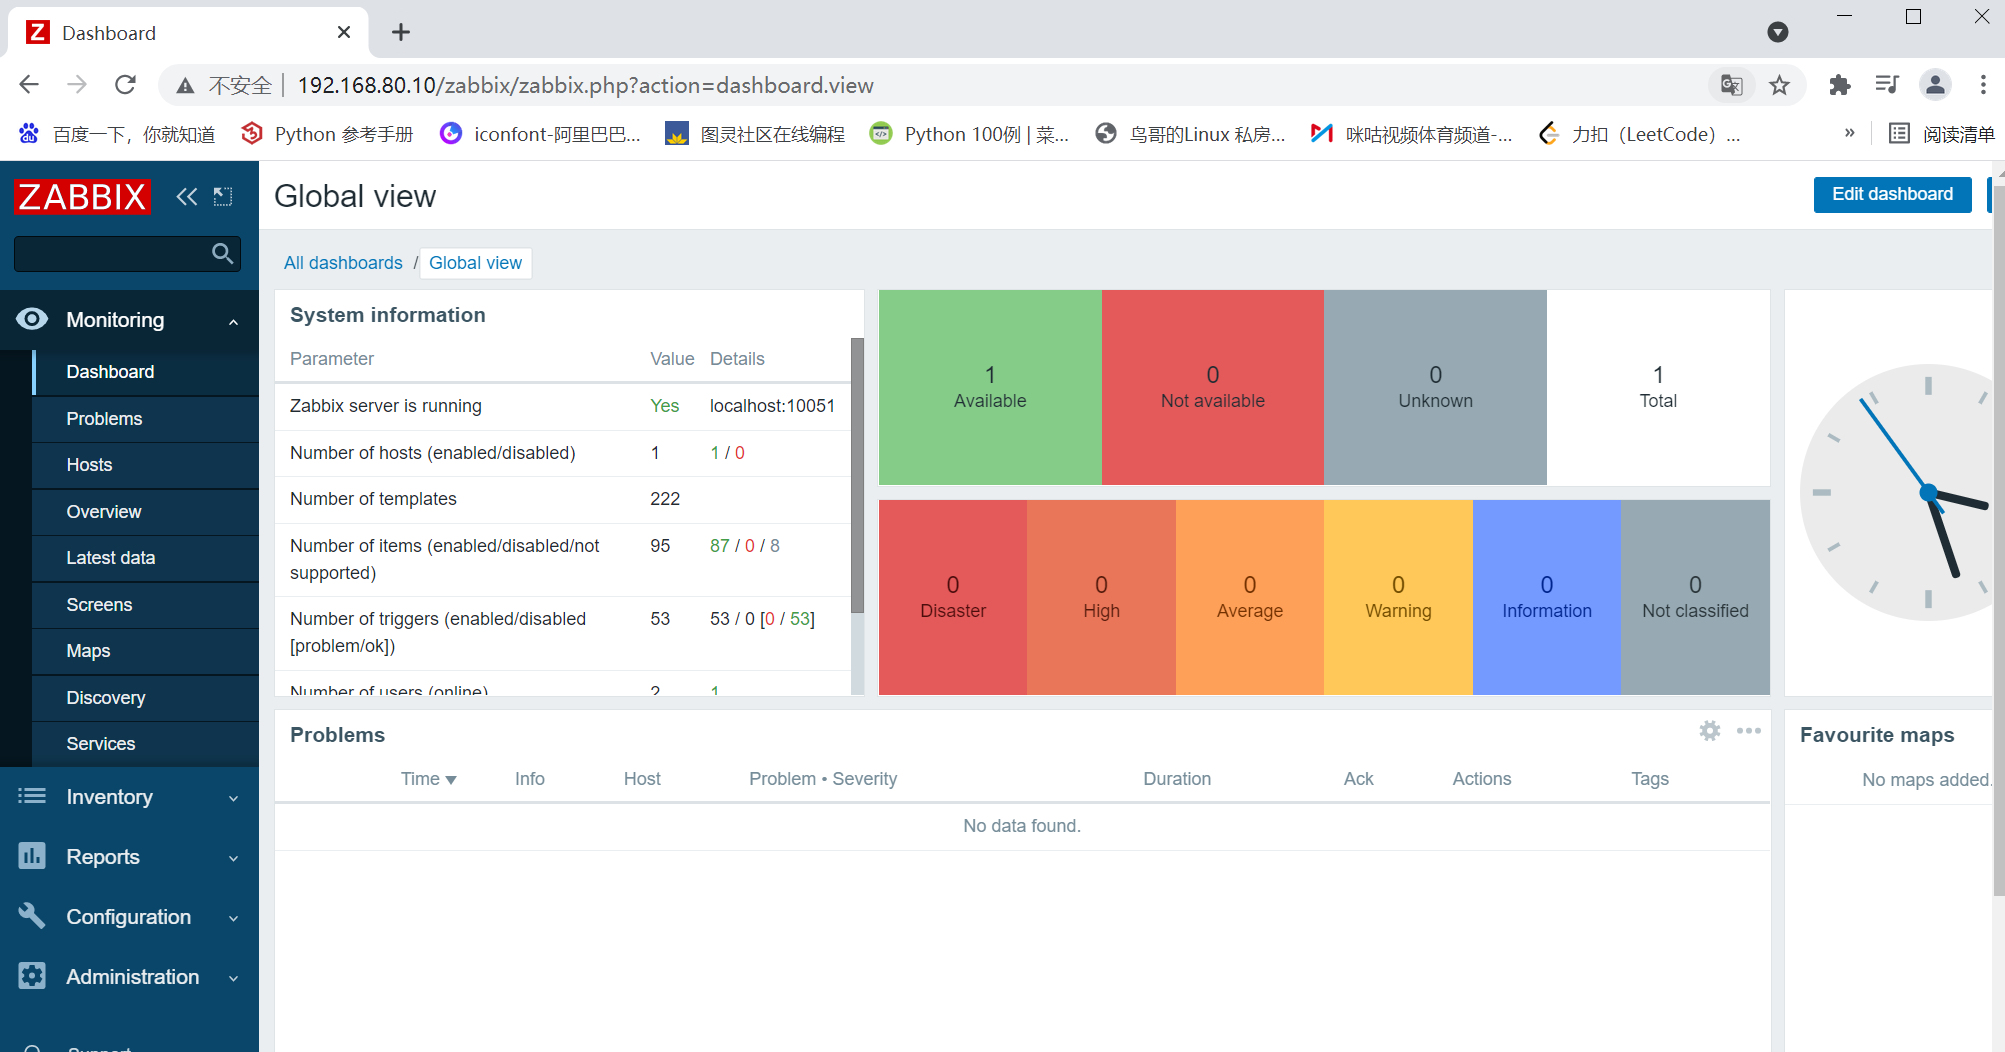
1, Introduction to Zabbix monitoring
1.1 Zabbix monitoring architecture
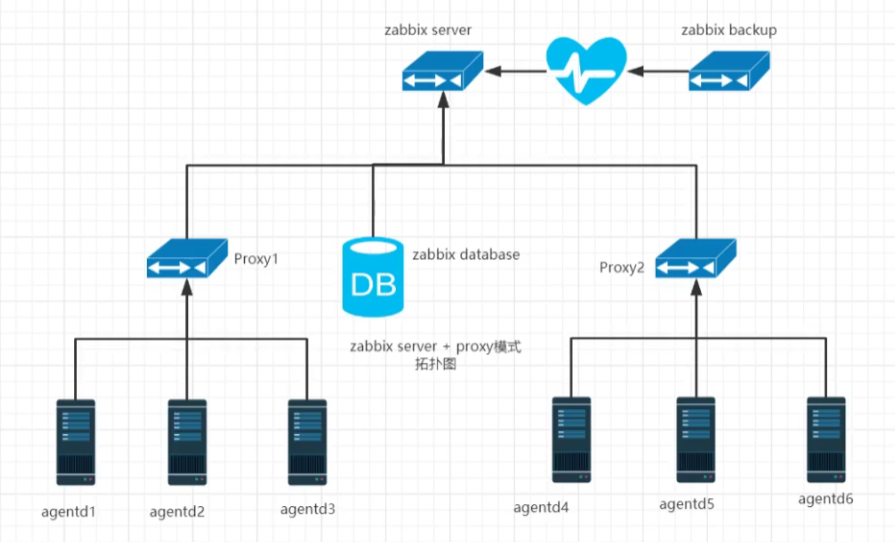
- In order to prevent Zabbix single point of failure, Zabbix high availability is made. If the company cluster is not large, a single machine can be used;
- If there are too many agents, you need a Proxy to reduce the pressure on Zabbix;
- The data is stored in the database;
1.2 advantages of ZABBIX
- Open source, no software cost investment
- Server has low requirements for equipment performance
- It supports multiple devices and comes with multiple monitoring templates
- It supports distributed centralized management, has automatic discovery function, and can realize automatic monitoring
- Open interface, strong expansibility and easy to write plug-ins
- When there are many monitored items and the server queue is large, the active state can be adopted. The monitored client actively downloads the items to be monitored from the server and then uploads the data to the server. This method has less load on the server.
- Api support, easy to combine with other systems
1.3 disadvantages of ZABBIX
- The agent needs to be installed on the monitored host. All data are stored in the database. The data generated is very large, and the bottleneck is mainly in the database.
- It is inconvenient to modify items in batches.
- Although the community is mature, there are relatively few Chinese materials and limited service support.
- It is easy to get started and realize basic monitoring, but it is difficult to be very familiar with Zabbix and carry out a large number of secondary customization development for deep-seated requirements.
- There are relatively many system level alarm settings. If you do not filter, there will be a lot of alarm messages; Moreover, the customized project alarm needs to be set by itself, and the process is cumbersome.
- Lack of data summary function. If the average value of - group servers cannot be viewed, secondary development is required;
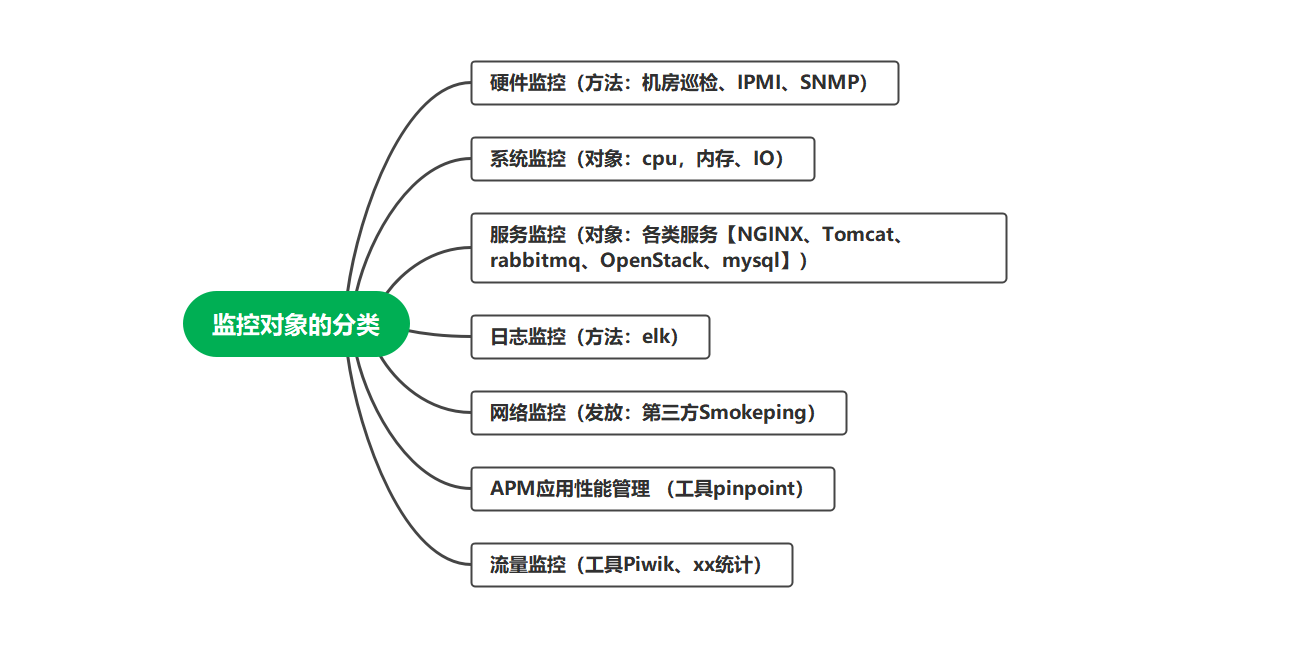
1.4 monitoring objects of ZABBIX monitoring system
| type | Typical representative services | Installed services |
|---|---|---|
| database | MySQL,MariaDB,Oracle,SQL Server | agent |
| Application software | Nginx,Apache, PHP,Tomcat | agent |
| colony | LVS,Keepalived,HAproxy,RHCS,F5 | agent |
| Virtualization | VMware,KVM,XEN ,docker ,k8s | agent |
| operating system | Linux,Unix,Windows performance parameters | agent |
| Hardware | Server, storage, network device | IPMI |
| network | Network environment (Intranet environment, extranet environment) | SNMP |
1.5 Zabbix monitoring mode
1. Active mode
- Active detection: compared with agent; Agent (active), the agent requests the server to configure its own monitoring items, and actively sends the data related to the monitoring items configured by the server to the server;
- Active monitoring can greatly save the resources of monitoring server.
2. Passive mode
- Passive detection: relative to agent; Agent, the server requests the agent to obtain the data related to each configured monitoring item, and the agent receives the request, obtains the data and responds to the server;
1.6 Zabbix program components
Zabbix_ server: server daemon
Zabbix_ agentd: agent daemon
zabbix_ proxy: proxy server
zabbix database: storage system, mysql, pgsq|
Zabbix_ web: web GUI Graphical Interface
Zabbix_ get: a command-line tool to test sending a data collection request to the agent
Zabbix_ sender: a command line tool to test sending data to the server
Zabbix_ java_ gateway: Java gateway
2, Zabbix5 0 install deployment
The requirements for the basic environment in version 5.0 have changed greatly. The biggest one is the requirements for the php version. The minimum requirement is 7.2 Version 0, php extension group
There are also requirements for the version of parts. See the documents on the official website for details: https://www.zabbix.com/documentation/5.2/manual
Environmental preparation:
| Server type | System and IP address | remarks |
|---|---|---|
| Server server | CentOS7.4(64 bit) 192.168 eighty point one zero | 4G memory |
| agentd1 server | CentOS7.4(64 bit) 192.168 eighty point two zero | |
| agentd2 server | CentOS7.4(64 bit) 192.168 eighty point three zero |
Turn off firewall and SElinux for all servers
systemctl stop firewalld
setenforce 0
1. Get the download source of Zabbix
rpm -Uvh https://mirrors.aliyun.com/zabbix/zabbix/5.0/rhel/7/x86_64/zabbix-release-5.0-1.el7.noarch.rpm
ls /etc/yum.repos.d/

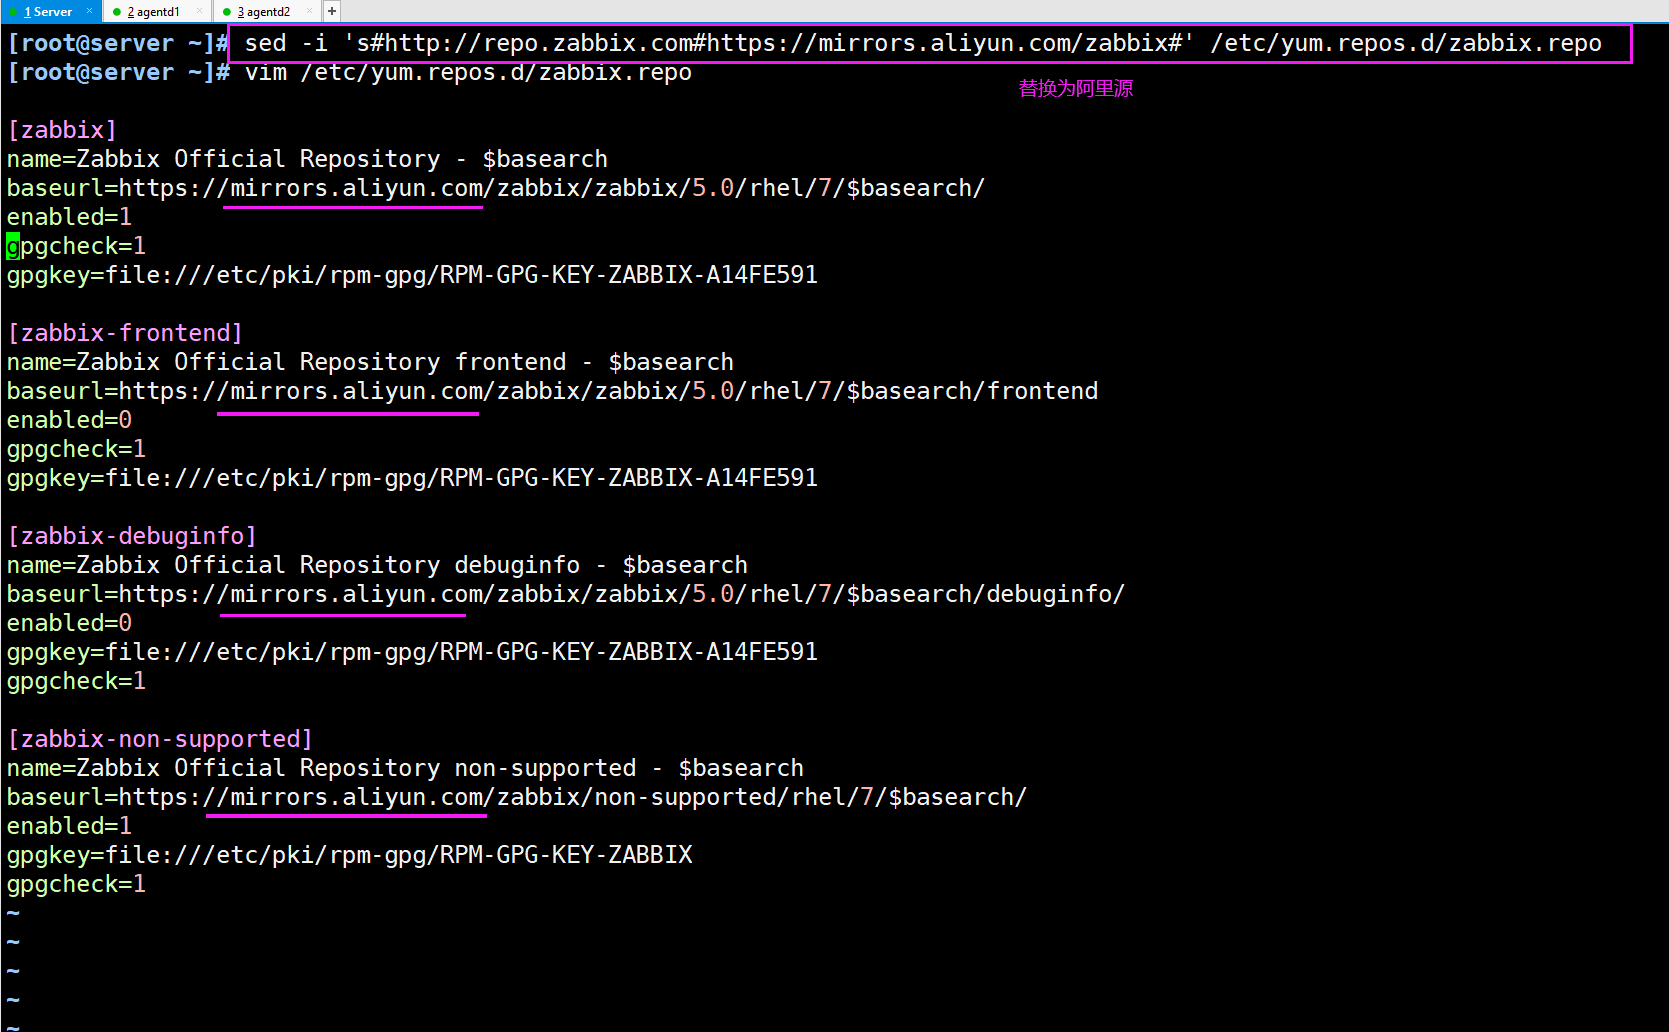
2. Replace the official source with ALI source to download faster
sed -i 's#http://repo.zabbix.com#https://mirrors.aliyun.com/zabbix#' /etc/yum.repos.d/zabbix.repo
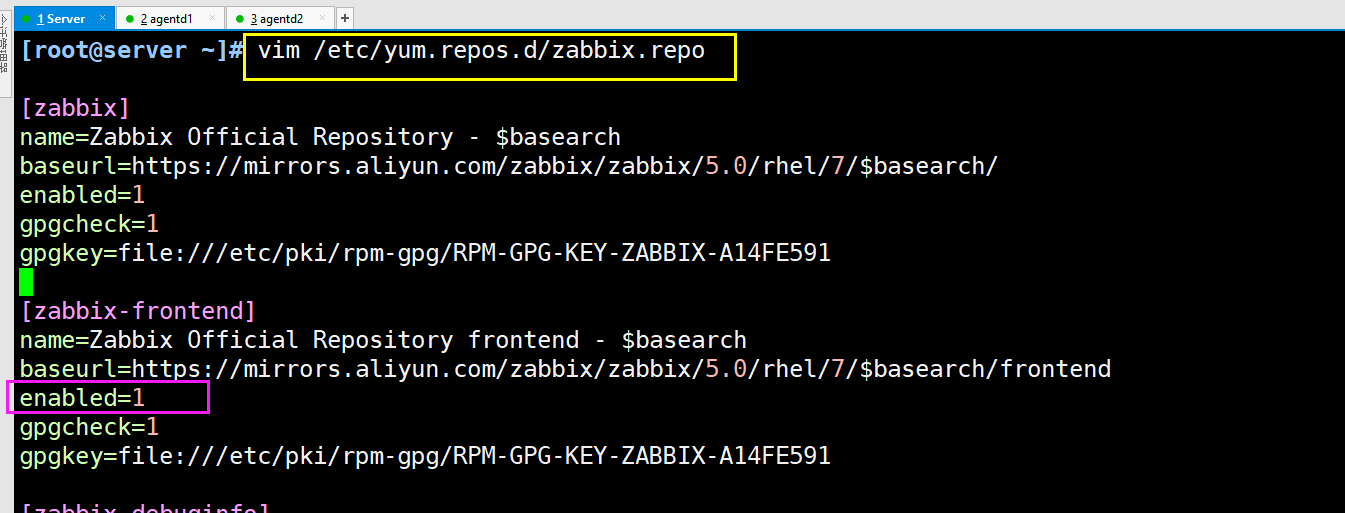
vim /etc/yum.repos.d/zabbix.repo 		##View confirmation
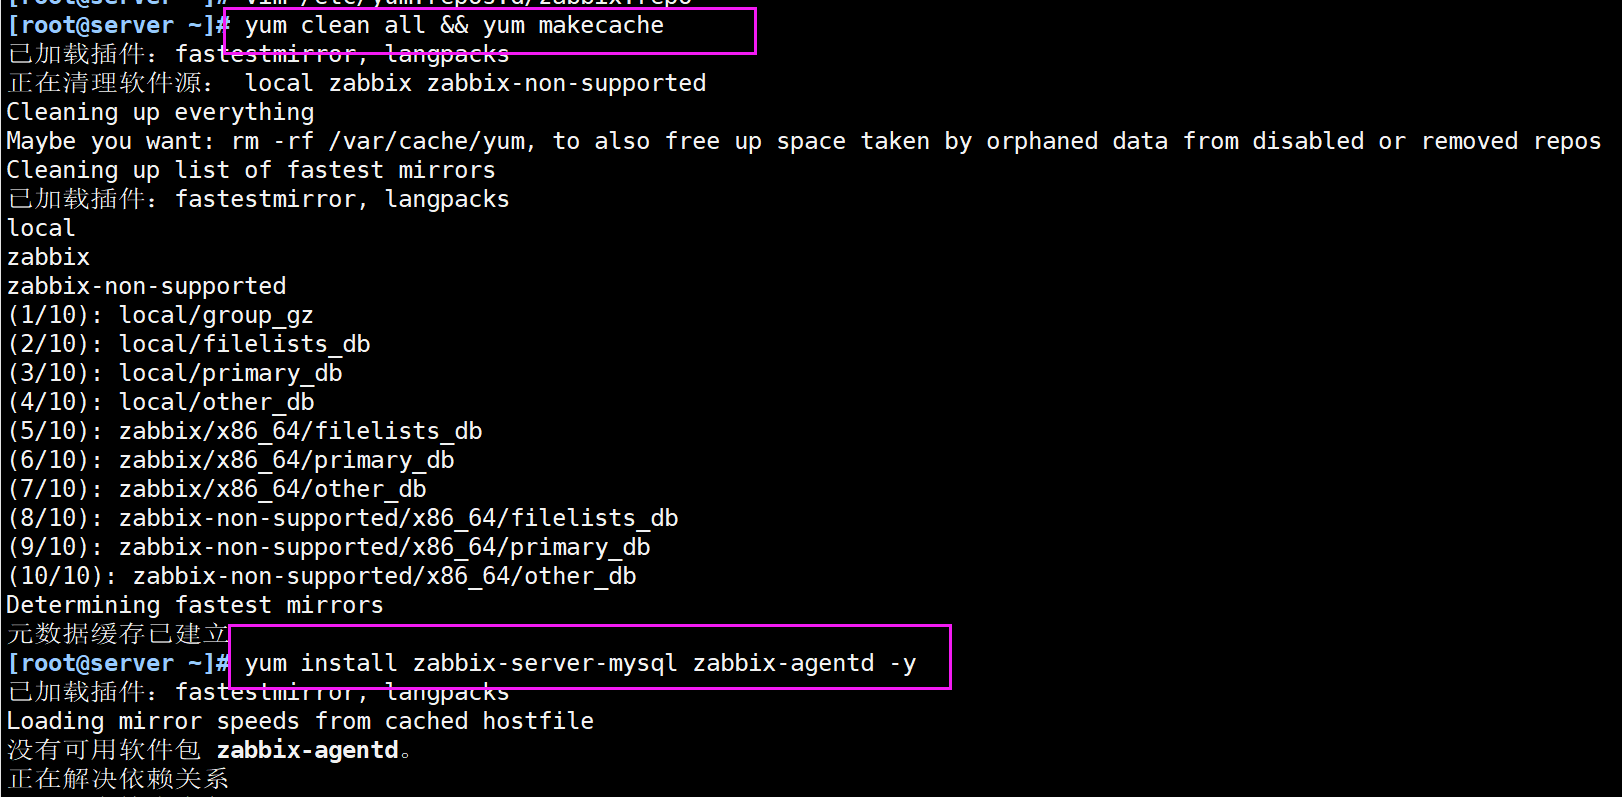
3. Empty the yum cache and download ZABBIX server and ZABBIX agentd (for monitoring the machine)
yum clean all && yum makecache
yum install zabbix-server-mysql zabbix-agent -y
4. Install Software Collections to facilitate subsequent installation of higher versions of php. By default, the php version installed by yum is 5.4.
SCL(Software Collections )It allows you to install and use multiple versions of software on the same operating system without affecting the installation package of the whole system.
The package will be installed in/opt/rh Directory
 To avoid widespread system conflicts,/opt/rh Packages are installed in directories, for example, which allows you to CentOS 7 Installed on the machine Python 3.5, Without deletion or interference Python 2.7
/etc/opt/rh/All configuration files of the software package are stored in the corresponding directory, SCL The package provides a way to define the environment variables required to use the included application shell script
yum install centos-release-scl -y #Online source is required for installation
Script reference this blog: One click of shell script to deploy yum local source and yum Ali source. You don't have to worry about downloading and installing programs anymore!
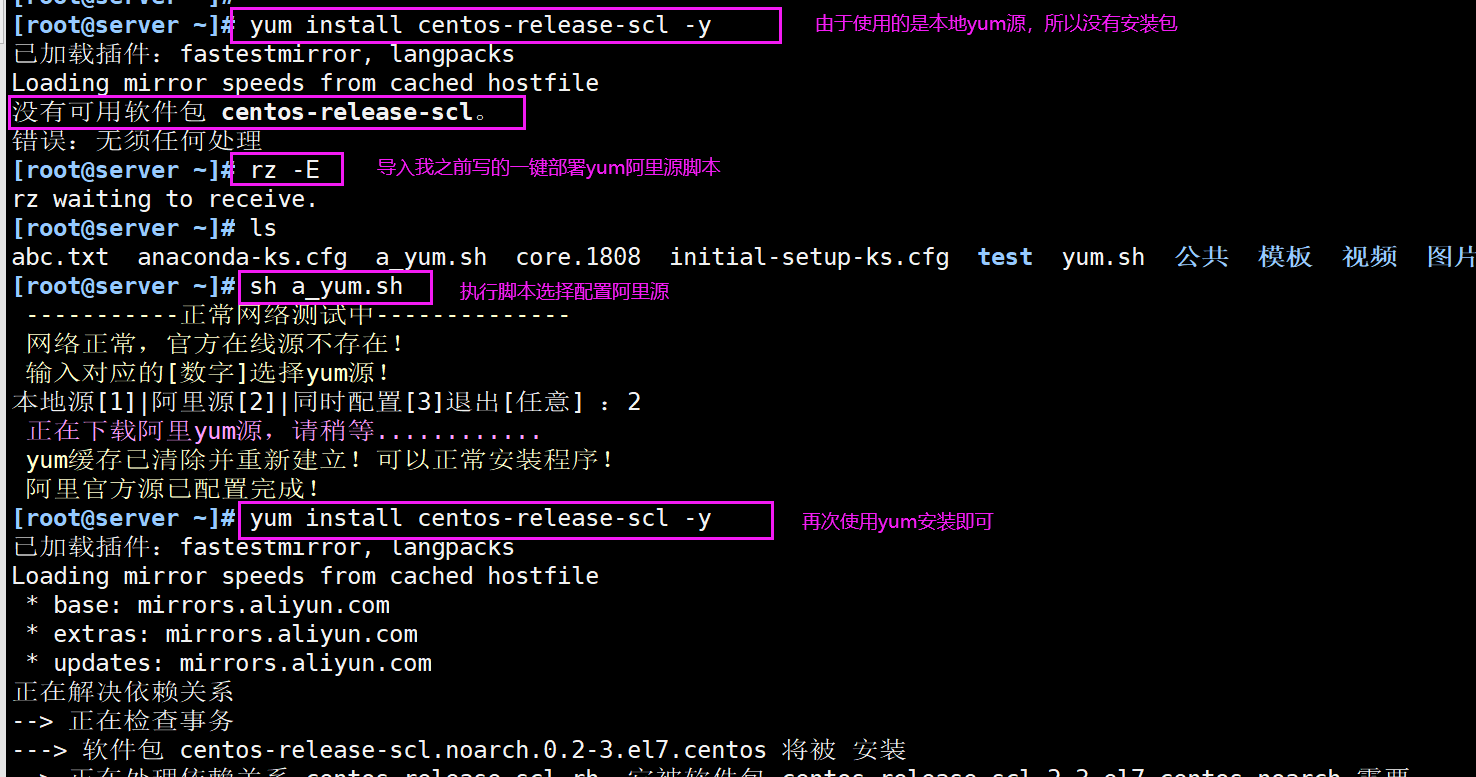

5. Modify [zabbix frontend] in the zabbix download source, and modify the parameters as follows:
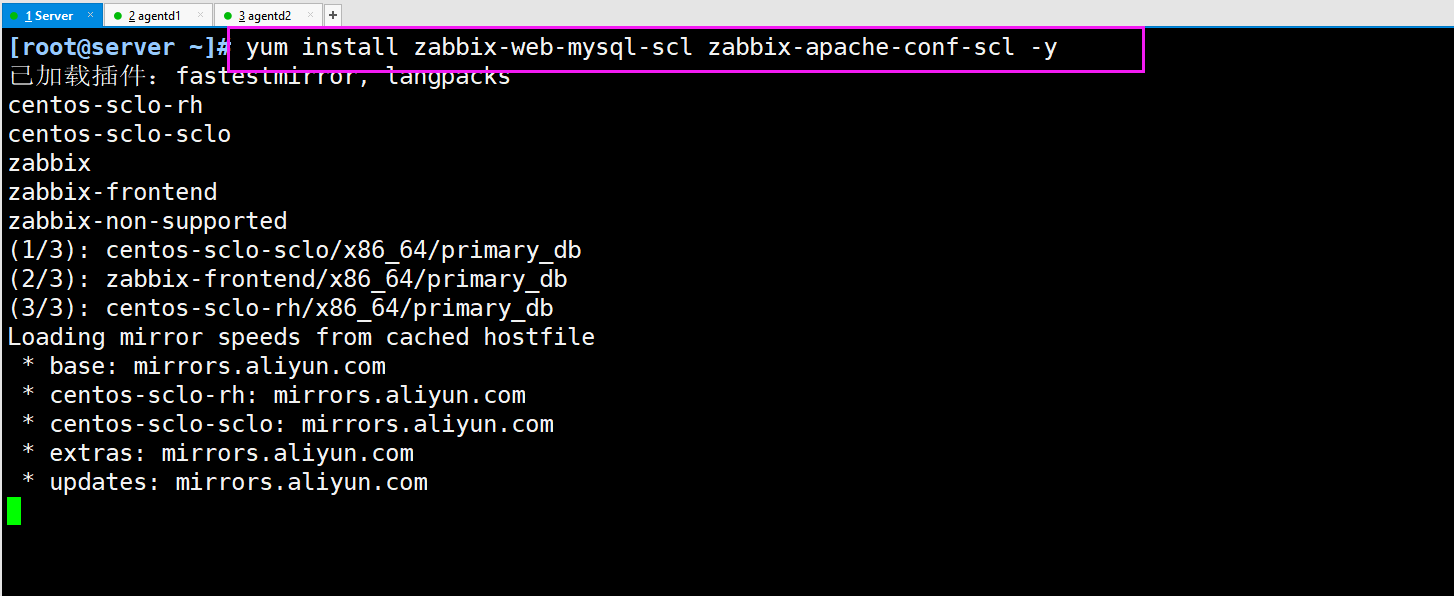
6. Install the zabbix front-end environment under the scl directory
yum install zabbix-web-mysql-scl zabbix-apache-conf-scl -y
ls /opt/rh/   		#See if there is rh-php72
rh-php72

7. Install the database required by zabbix
yum install mariadb-server -y
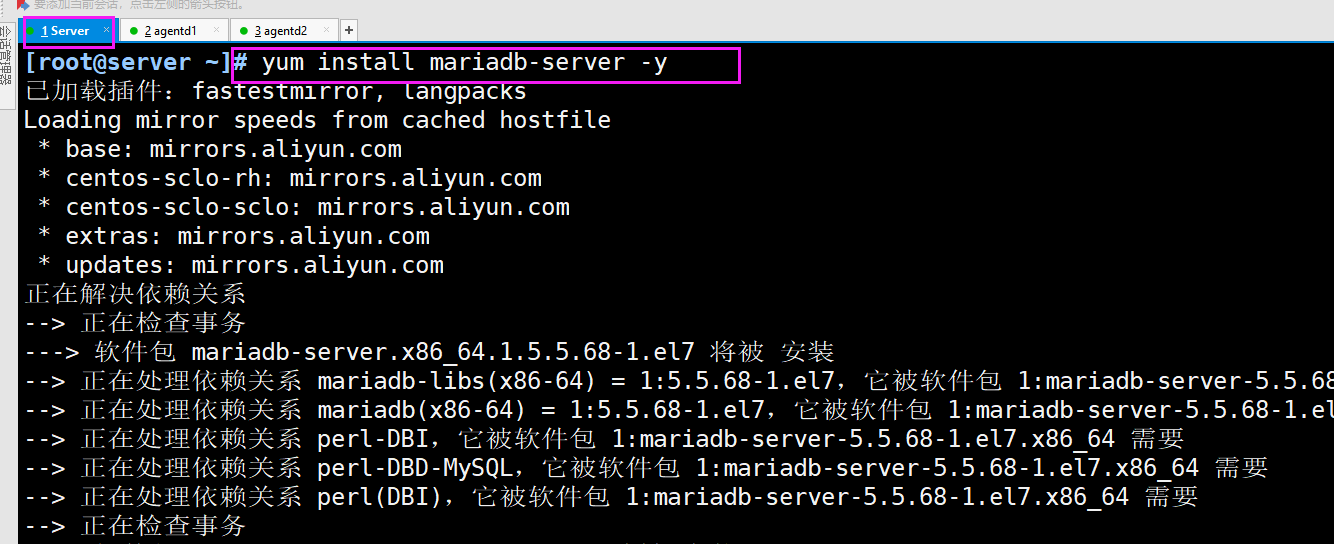
8. The configuration database starts automatically and immediately
systemctl enable --now mariadb.service
systemctl status mariadb.service
netstat -tunlp | grep :3306
tcp        0      0 0.0.0.0:3306            0.0.0.0:*               LISTEN      2692/mysqld


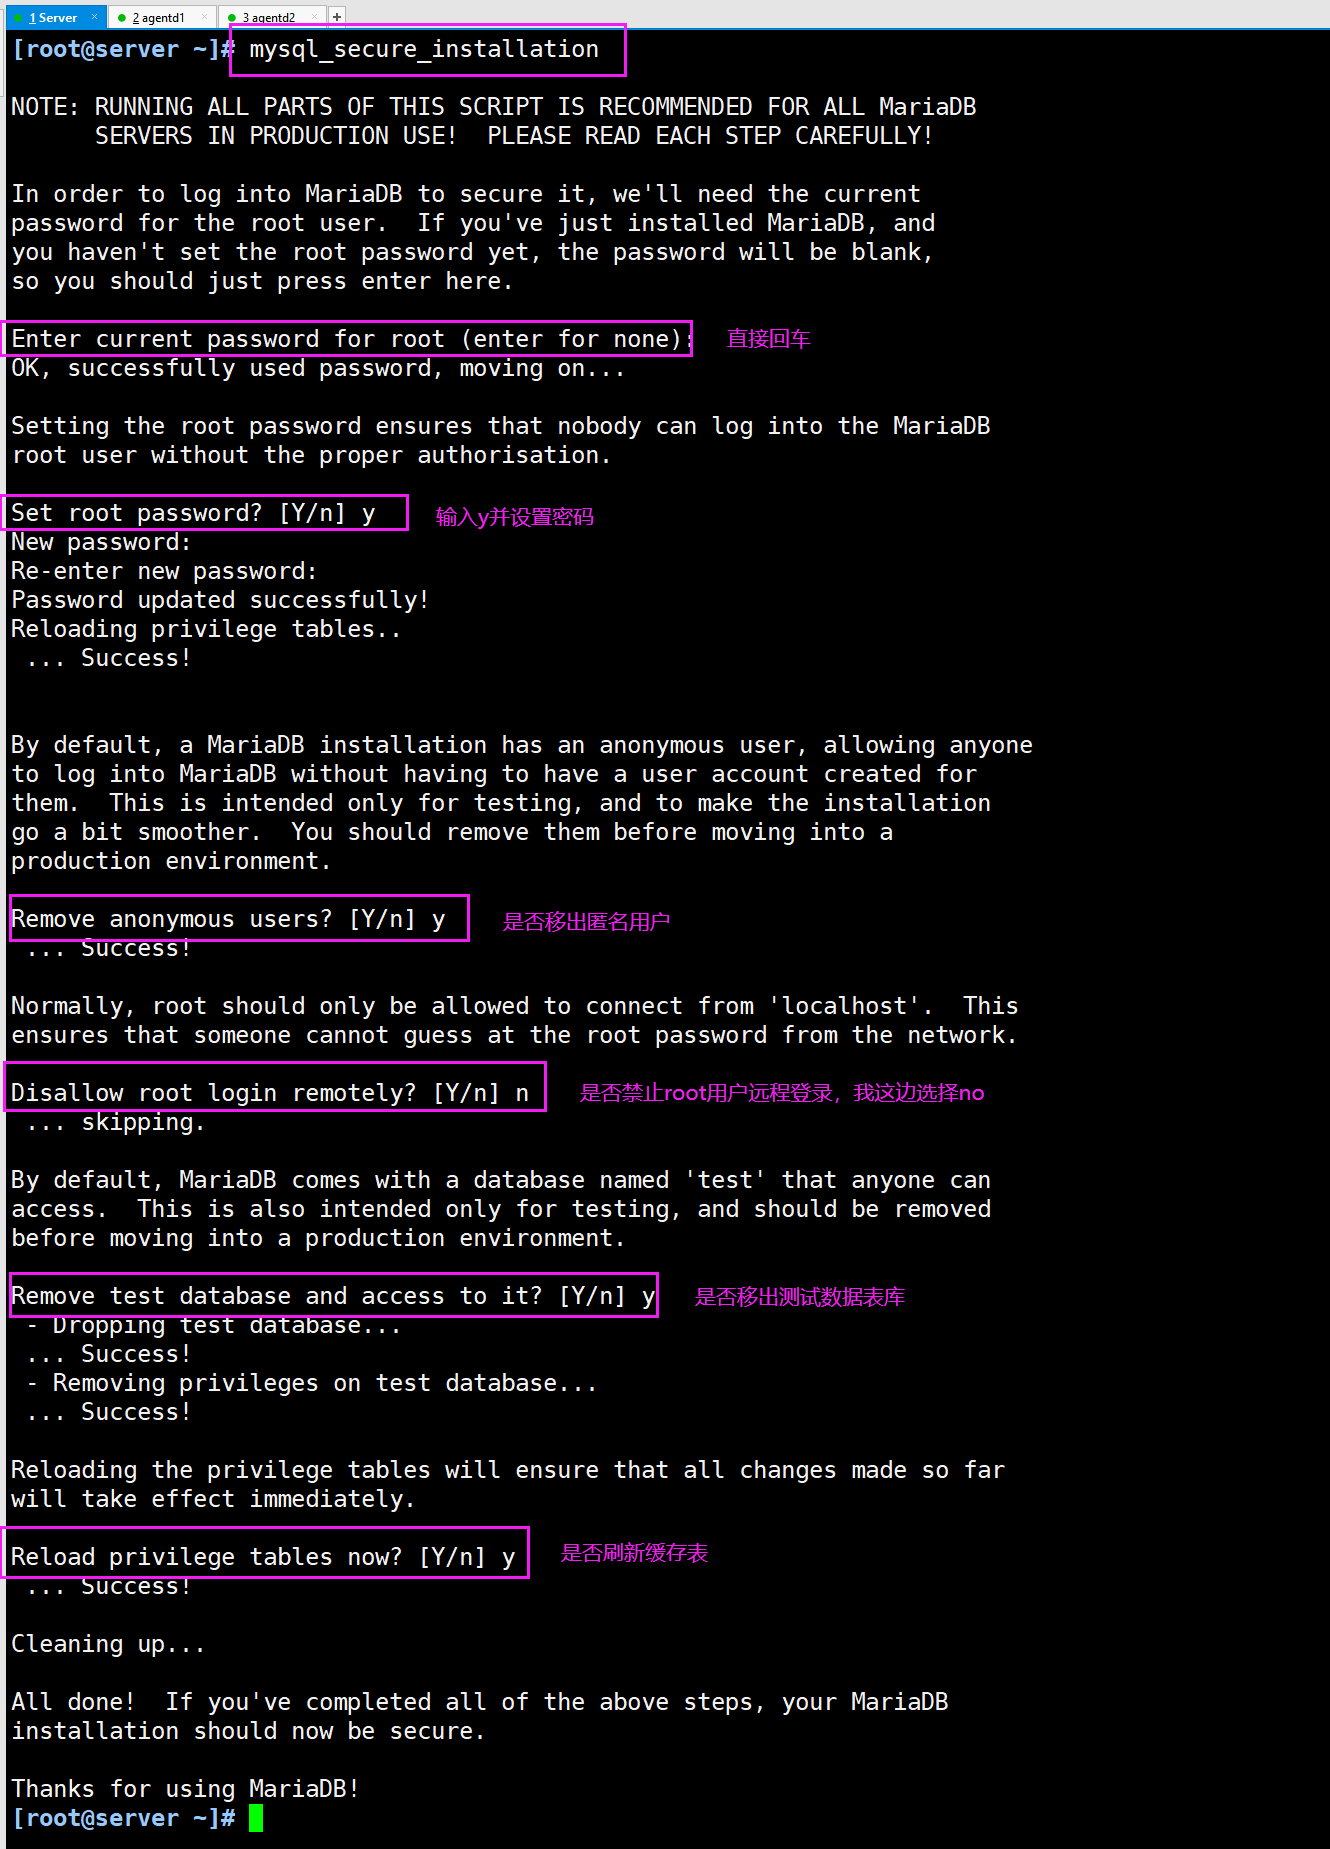
9. Initialize the database and set the password. My setting is: abc123
Then test the login database.
mysql_secure_installation
mysql -uroot -p				#Input password

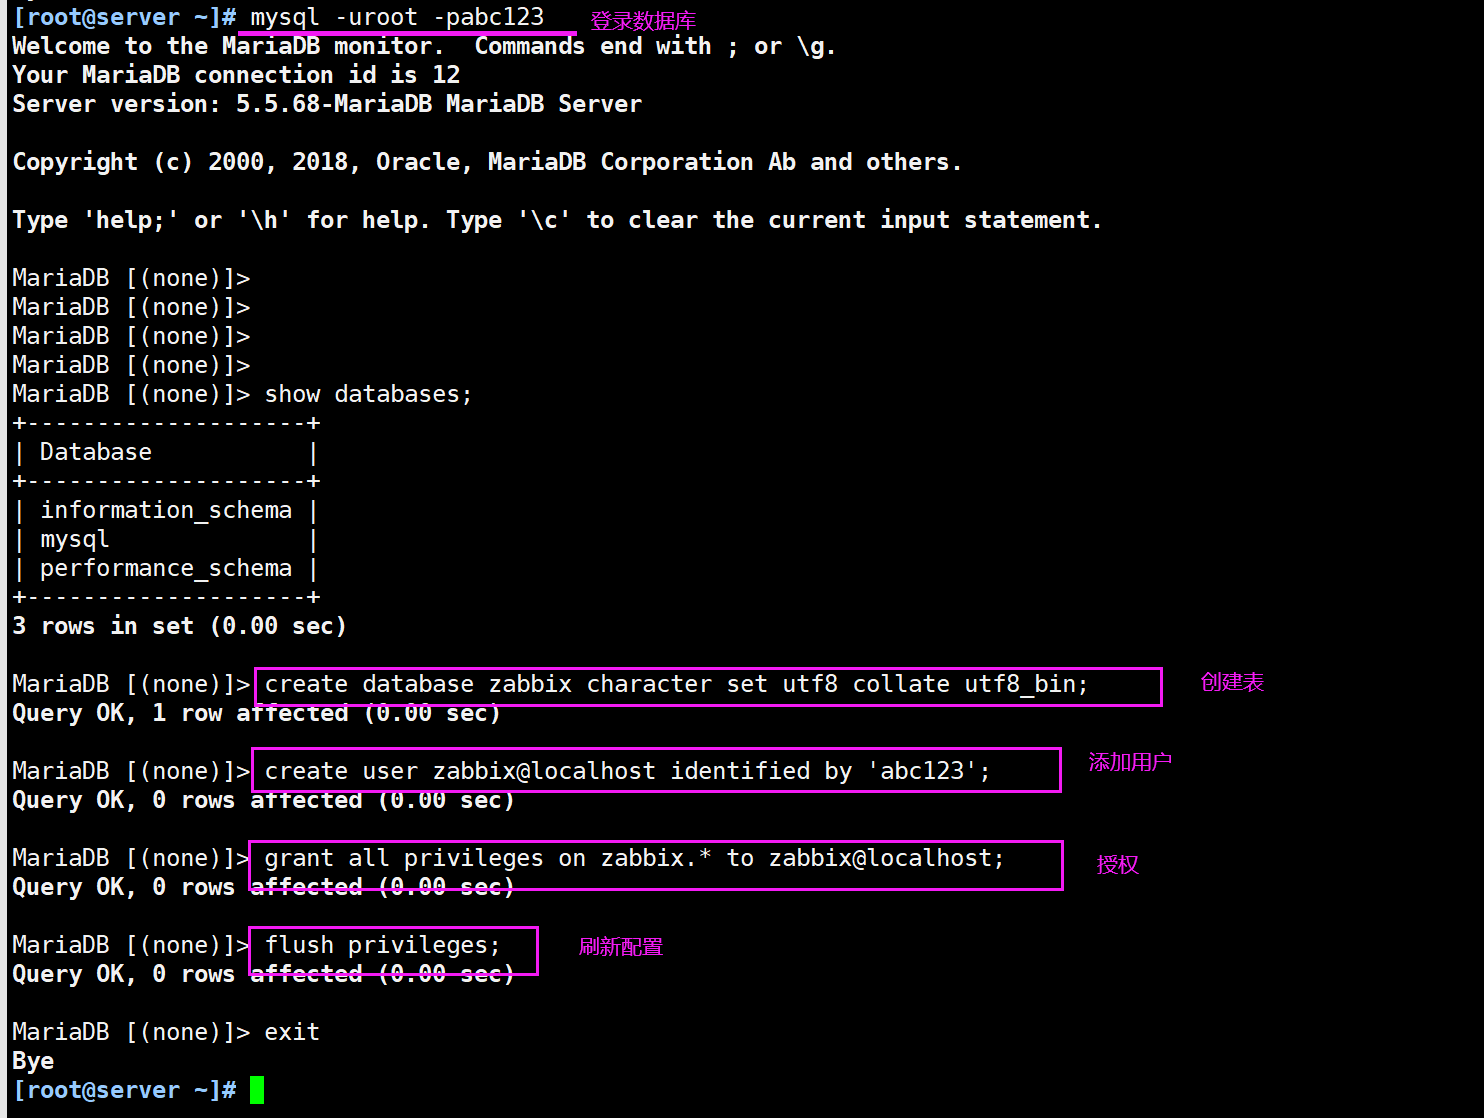
10. Add database users and database information required by zabbix
MariaDB [(none)]> create database zabbix character set utf8 collate utf8_bin;
Query OK, 1 row affected (0.00 sec)

MariaDB [(none)]> create user zabbix@localhost identified by 'abc123';
Query OK, 0 rows affected (0.00 sec)

MariaDB [(none)]> grant all privileges on zabbix.* to zabbix@localhost;
Query OK, 0 rows affected (0.00 sec)

MariaDB [(none)]> flush privileges;
Query OK, 0 rows affected (0.00 sec)
11. Use the zabbix -mysq1 command to import database information
mysql -u user name - p database name
ls /usr/share/doc/zabbix-server-mysql*/create.sql.gz
zcat /usr/share/doc/zabbix-server-mysql*/create.sql.gz | mysql -uzabbix -p zabbix

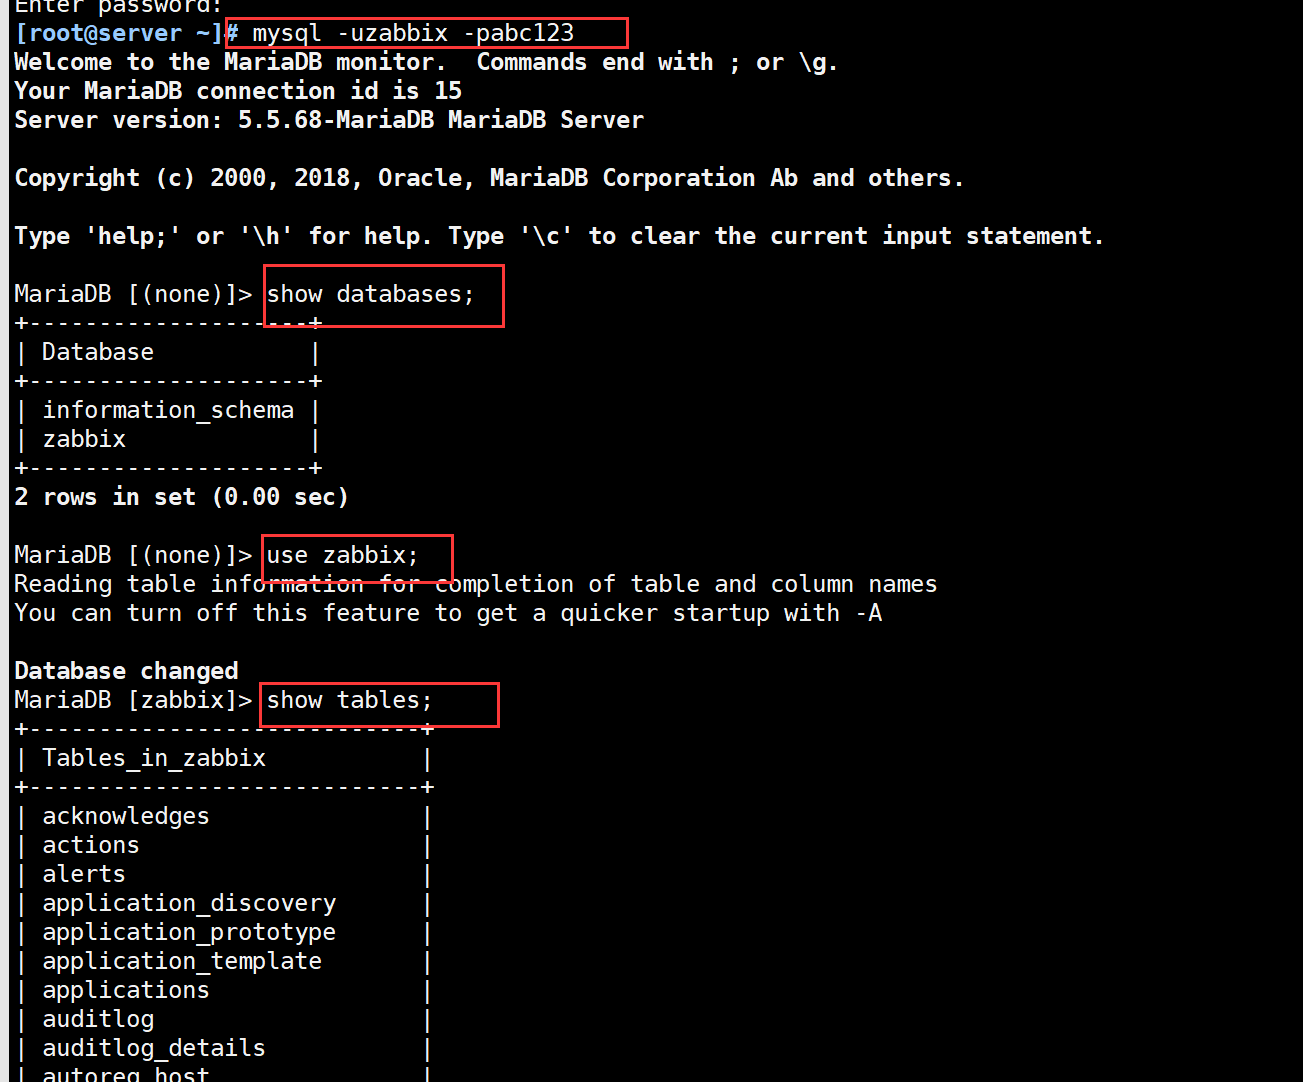
12. After data import, verify that a lot of data has been imported in the zabbix table.
mysql -uzabbix -pabc123
show databases;
+--------------------+
| Database           |
+--------------------+
| information_schema |
| zabbix             |
+--------------------+
use zabbix;
show tables;
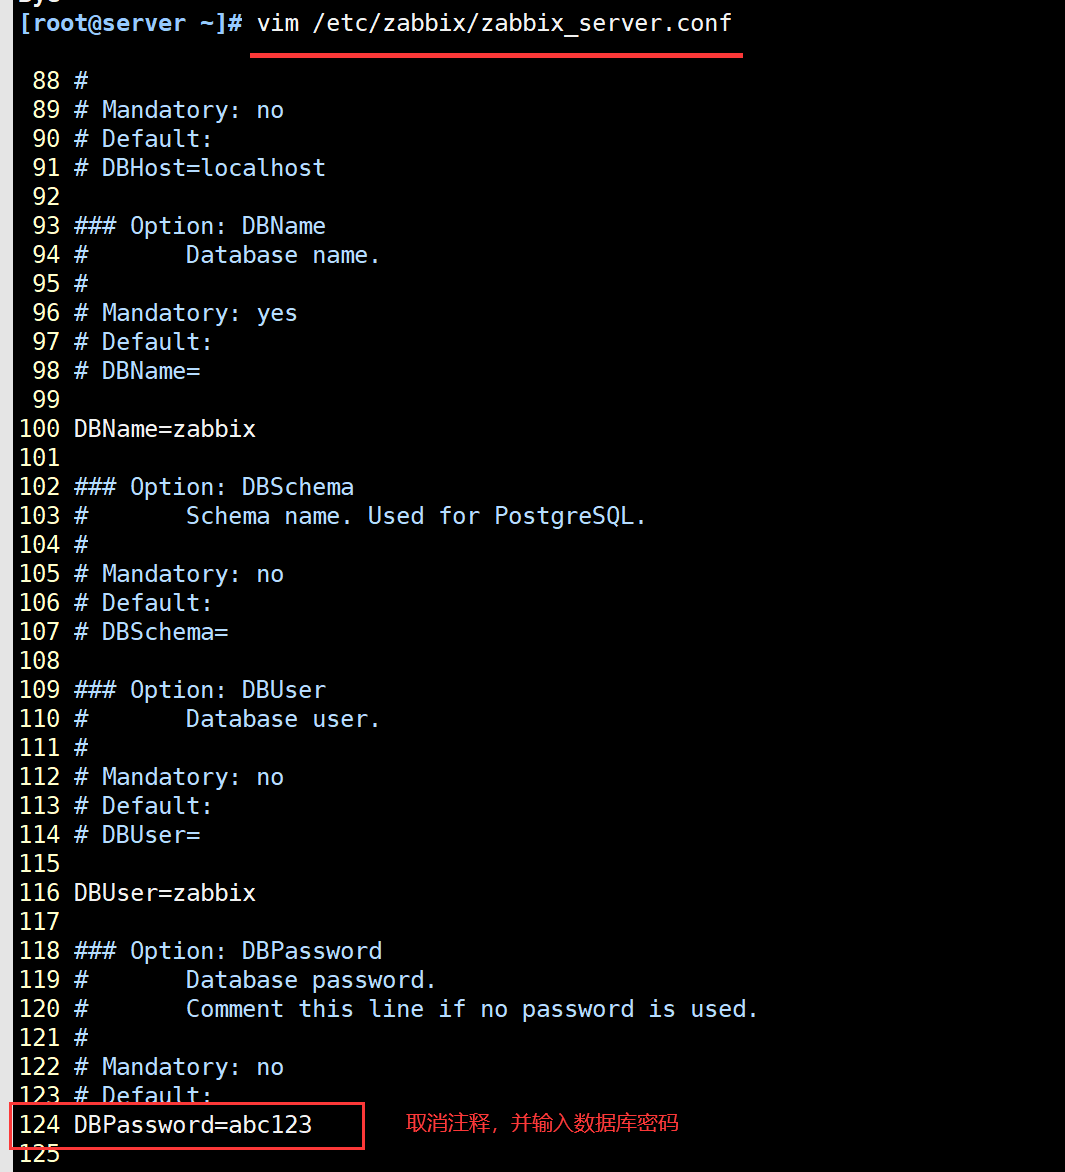
13. Modify the zabbix server configuration file and the password of the database
vim /etc/zabbix/zabbix_server.conf
grep '^DBPa' /etc/zabbix/zabbix_server.conf
DBPassword=abc123

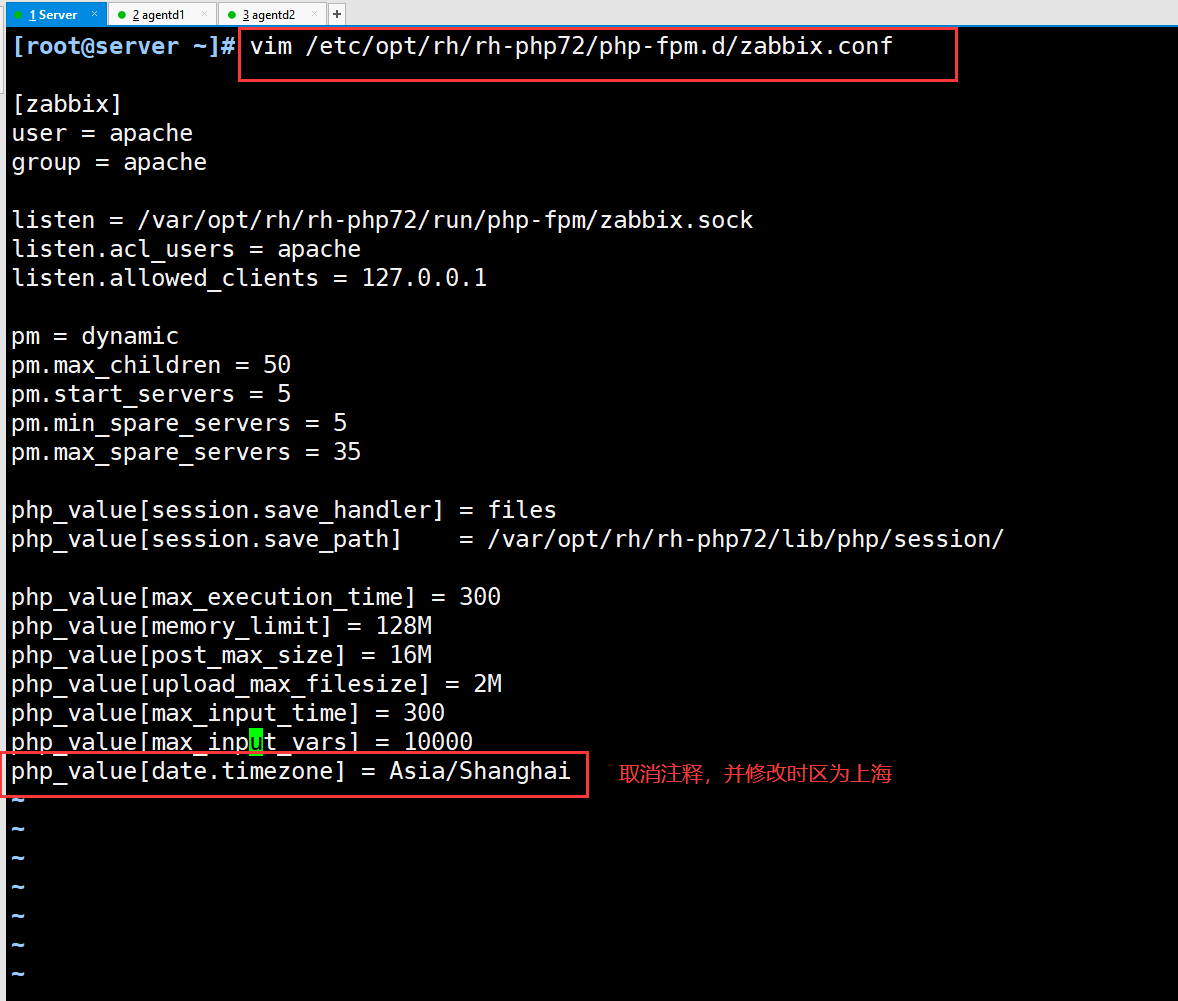
14... Modify the php configuration file of zabbi x
vim /etc/opt/rh/rh-php72/php-fpm.d/zabbix.conf
php_value[date.timezone] = Asia/Shanghai

grep 'timezone' /etc/opt/rh/rh-php72/php-fpm.d/zabbix.conf
php_value[date.timezone] = Asia/Shanghai

15. Start zabbix related services
systemctl restart zabbix-server.service zabbix-agent httpd rh-php72-php-fpm.service
systemctl enable zabbix-server.service zabbix-agent httpd rh-php72-php-fpm.service

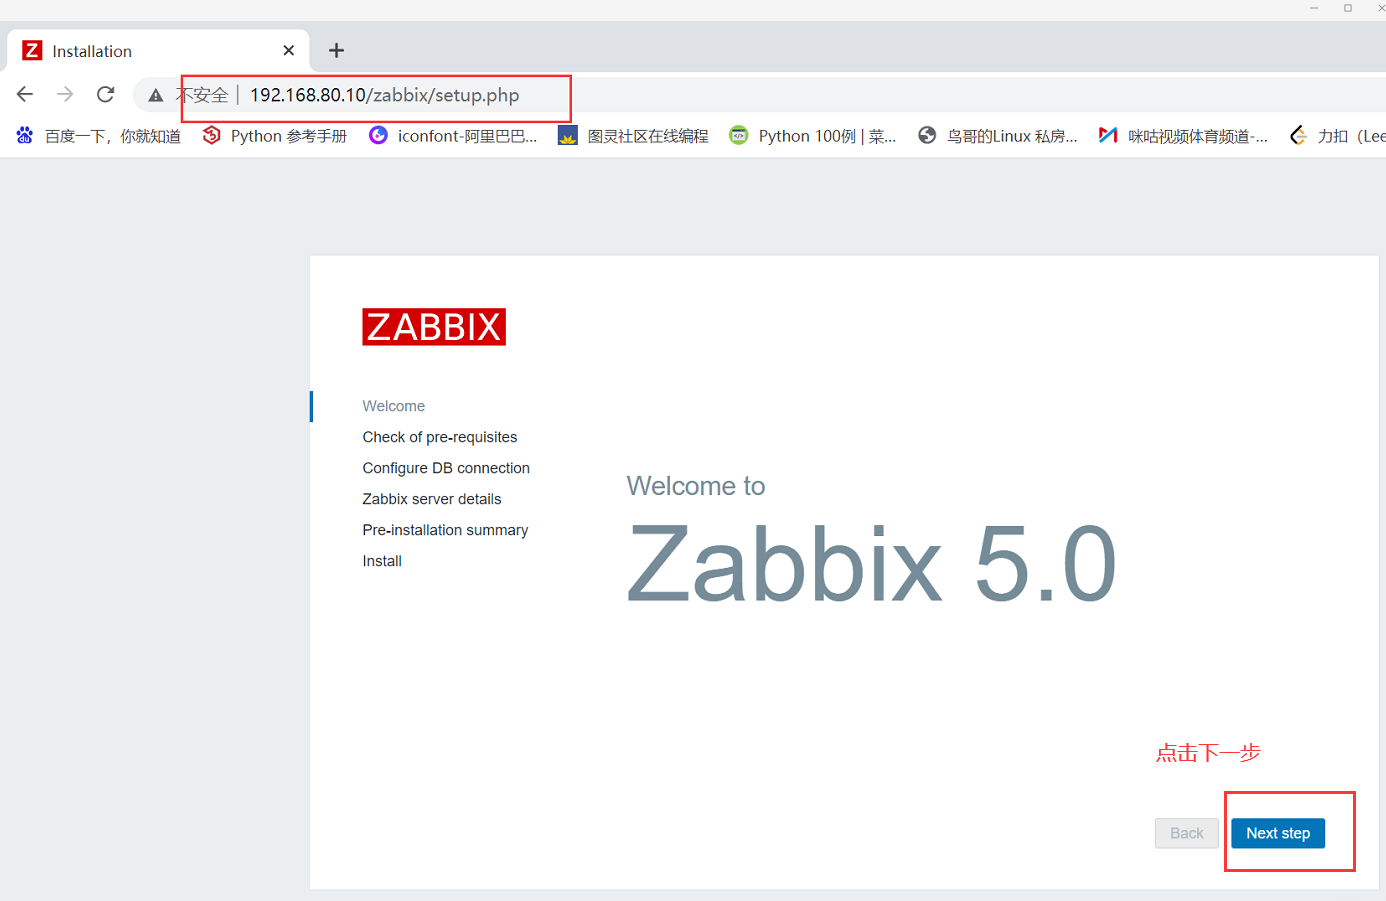
16. Enter in the browser: http://192.168.80.10/zabbix Test
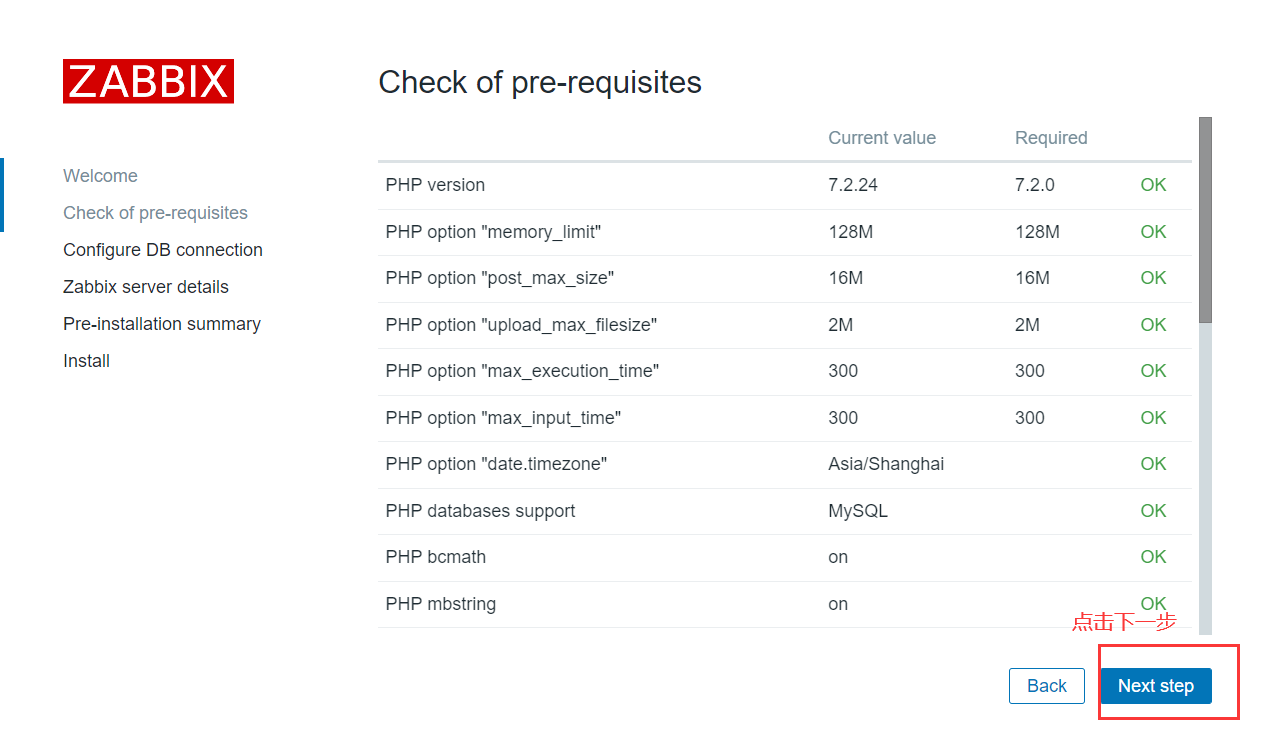
① Zabbix will check whether the basic environment is normal
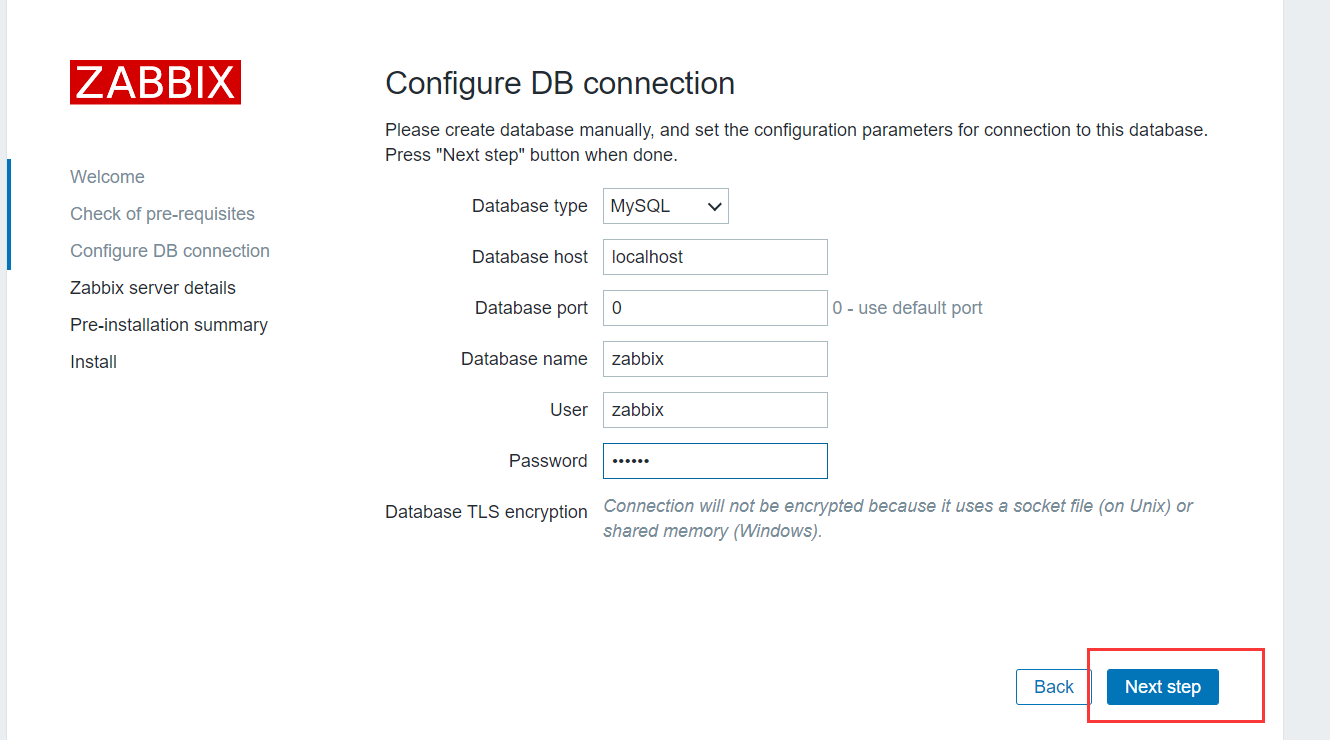
② Enter the mysql password. My side is: abc23, and then click next
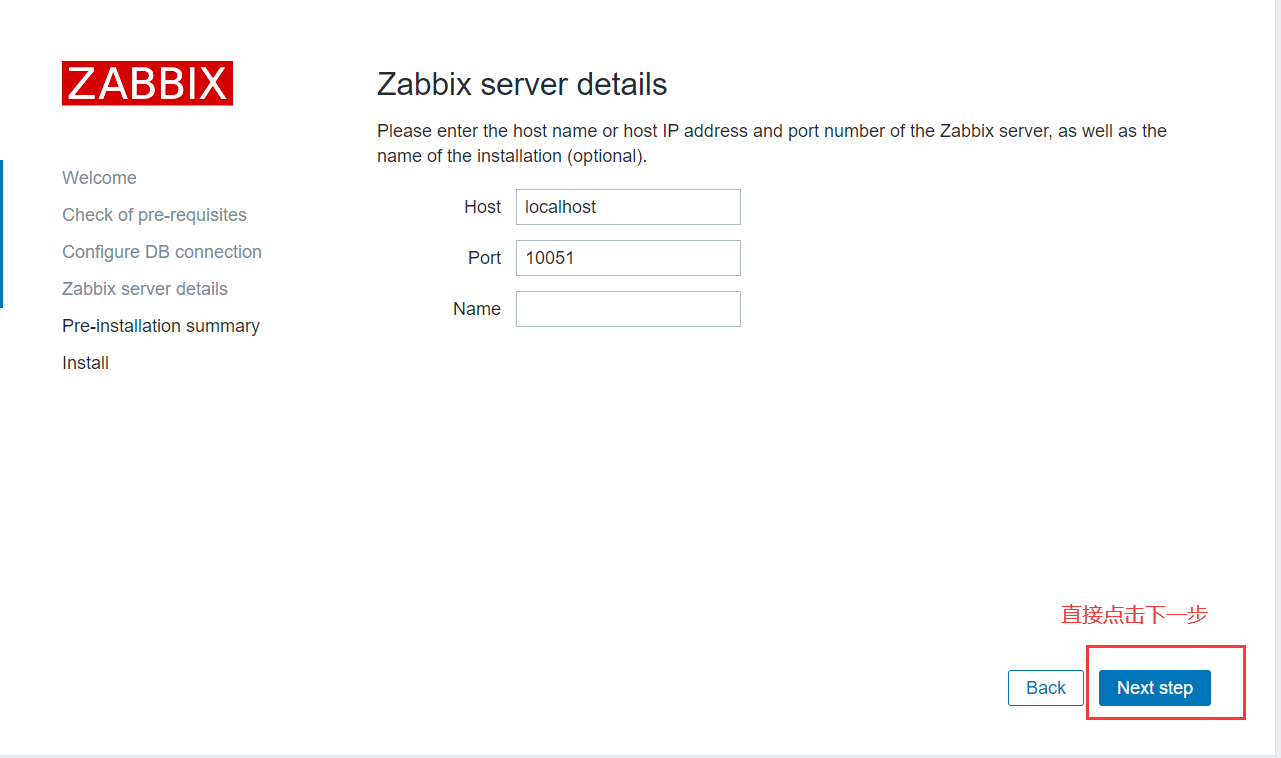
③ Zabbix server details does not require operation. Go to the next step directly
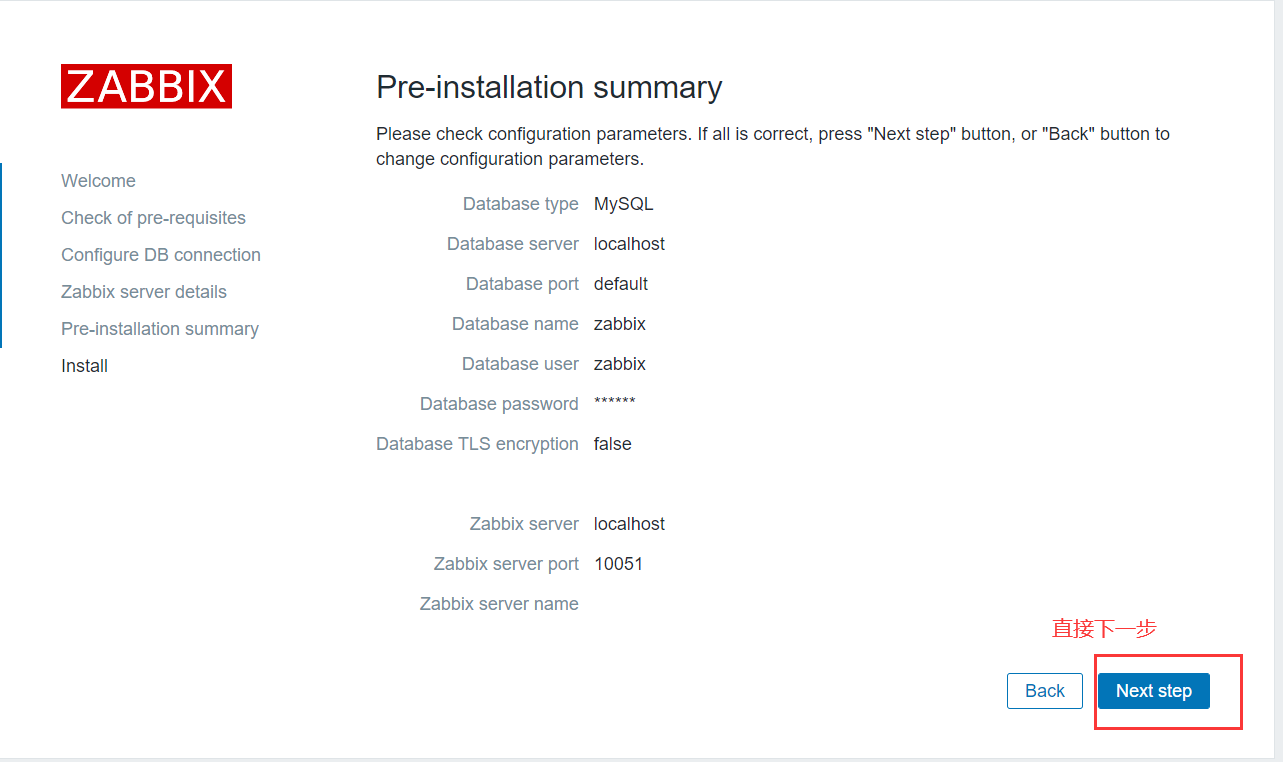
④ Display the installation details and go to the next step directly
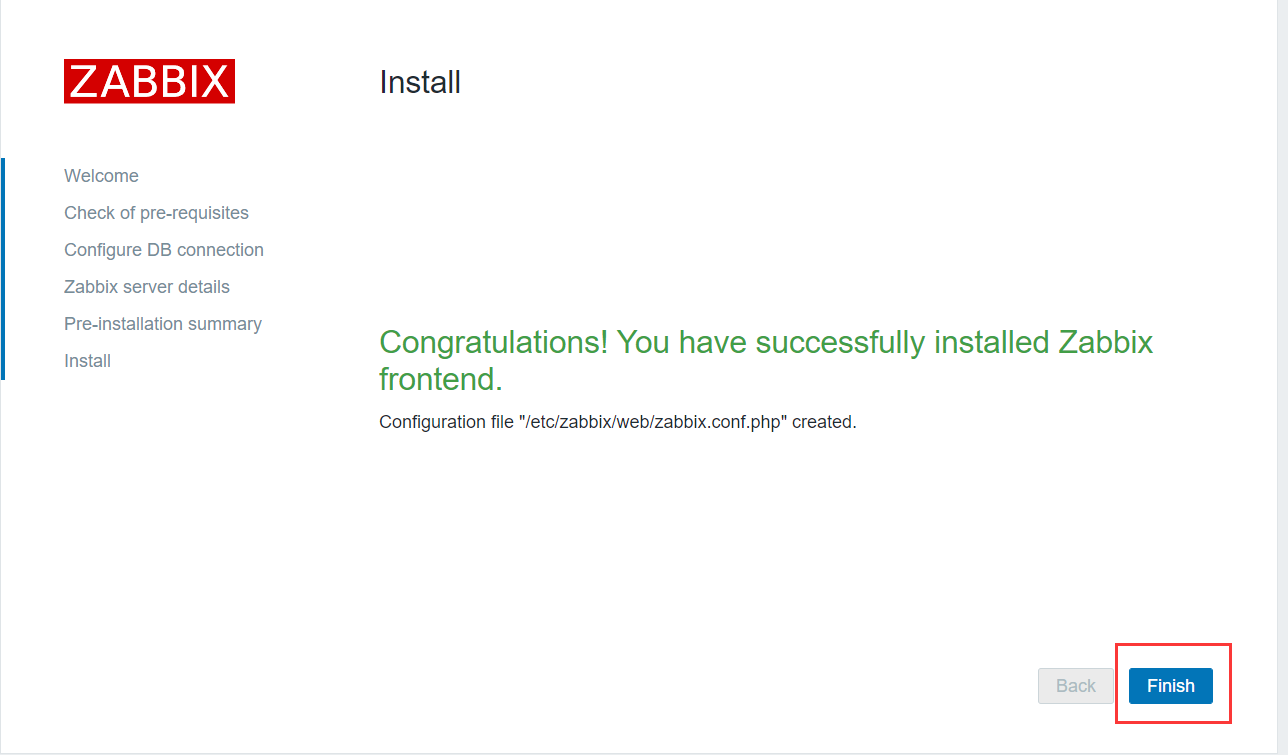
⑤ The installation is successful. Click Finish to finish
17. Visit zabbix entrance
Default account: Admin
Default password: zabbix
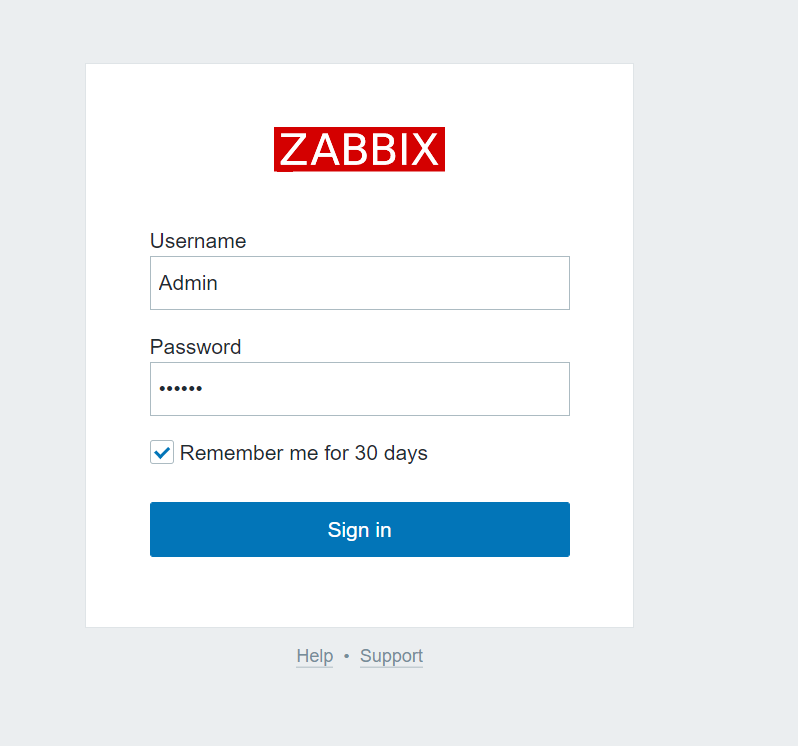
18. Successful login
