Raspberry pie quick start from scratch Lesson 8 - single bus (take DS18B20 as an example)
1, Foreword
Single bus is also called one-wire bus (one write), it has only one signal line, which transmits both clock and data, and the data transmission is bidirectional. The data interaction between the two devices is realized in the form of one question and one answer. I won't elaborate on the specific principle. Interested students can consult relevant materials by themselves. Today, I'll take DS18B20 as an example to talk about the use of raspberry single bus.
2, Hardware connection
DS18B20 pin is defined as follows. According to the pin definition, connect it to raspberry pie. I use an expansion board here. Just connect the sensor directly.
| Pin | name | explain |
|---|---|---|
| 1 | GND | Negative pole of power supply |
| 2 | DQ | Data input / output pin (connected to any IO port of MCU, note: pull-up resistance is required here) |
| 3 | VCC | Positive pole of power supply |
Note: if your sensor is packaged with a plug-in, be sure to distinguish the positive and negative, otherwise it will burn out. Judgment method (for reference only): the flat side is facing yourself. GND is on the left, VCC is on the right, and the signal line is in the middle. After connecting, you can quickly power on and power off. Touch the sensor. If it gets hot quickly and is very hot, it indicates that the connection is reversed.
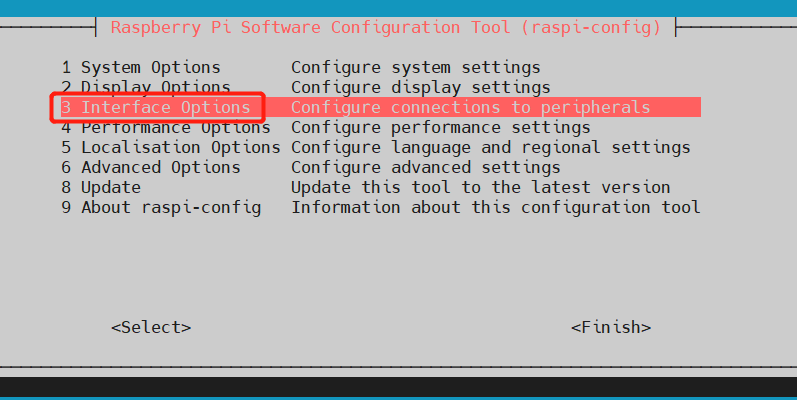
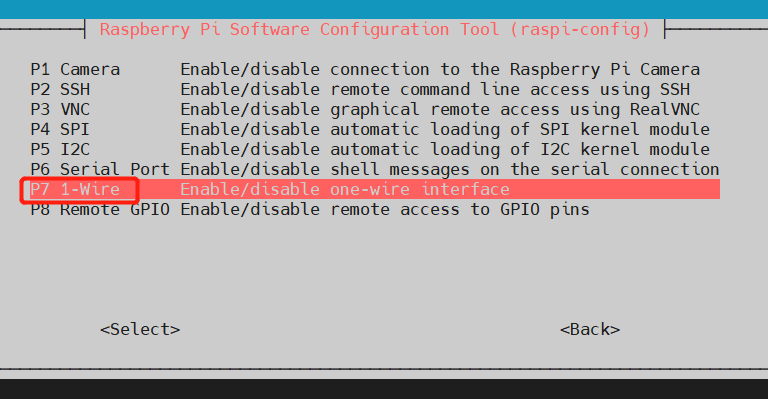
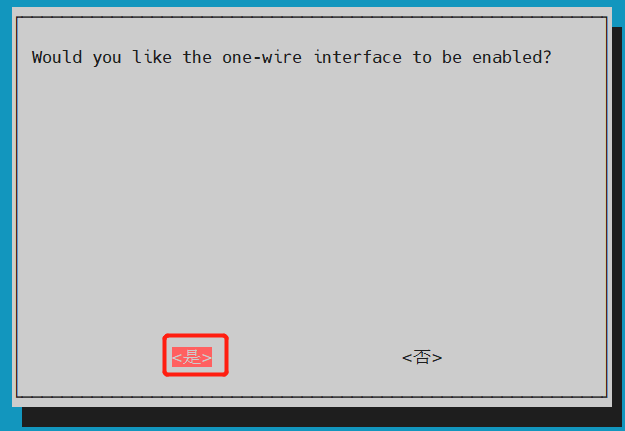
3, Enable 1-write interface
Method 1: through the configuration command
sudo raspi-config    // Open configuration
sudo reboot          // Restart. After configuration, it can take effect only after restart
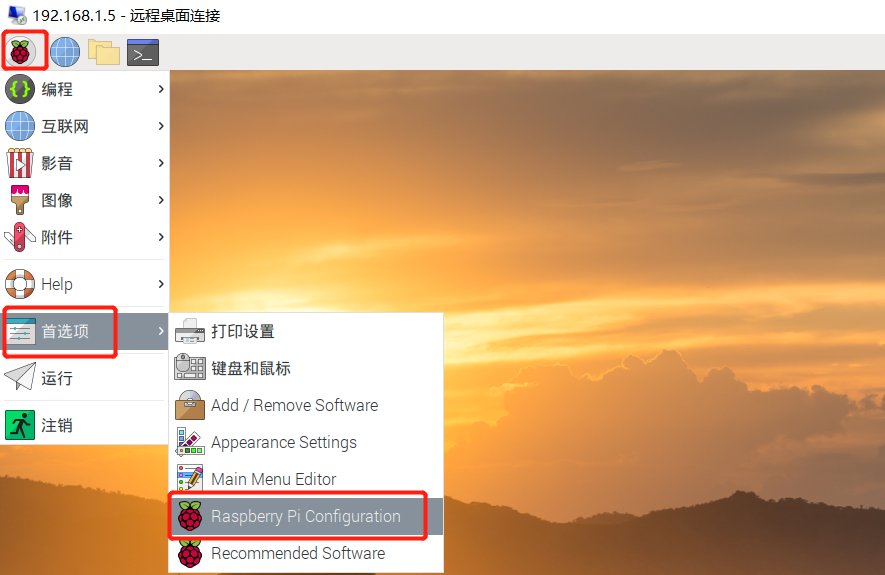
Method 2: modify in the settings of the visual interface
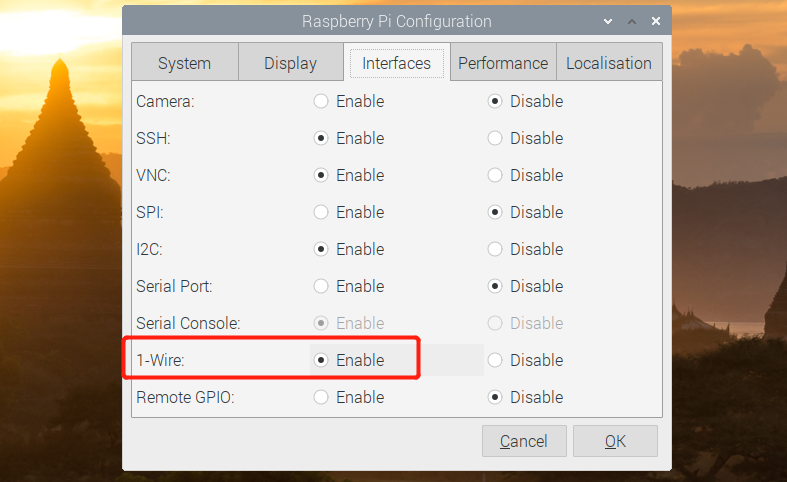
Note: if the 1-Write interface is not enabled when the device is started, it needs to be restarted to take effect after enabling.
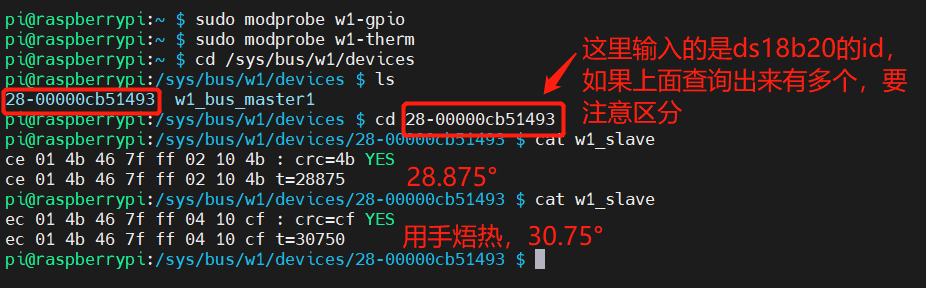
4, Communication test
sudo modprobe w1-gpio
sudo modprobe w1-therm
cd /sys/bus/w1/devices
ls                       // Query the ID of the sensor. If there is nothing, it may be that 1-Write is not enabled, or it is enabled but not restarted, or there may be a problem with the hardware connection
cd 28-xxxxxxx            // 28 XXXXXXXX: the ID of 18b20 is different for each sensor. According to your input, if the queried ID starts with 00 instead of 28, it should not be ds18b20
cat w1_slave
5, Write code and run
1. Mode 1
Based on w1thermsensor library, DS18B20 is driven. W1thermsensor library integrates the drivers of multiple sensors (DS18S20, DS1822, DS18B20, DS28EA00, DS1825/MAX31850K).
w1thermsensor Github link: https://github.com/timofurrer/w1thermsensor
Example code:
from w1thermsensor import W1ThermSensor
sensor = W1ThermSensor(W1ThermSensor.THERM_SENSOR_DS18B20, "00000cb51493")  #00000cb51493: it is the id of ds18b20. Enter it according to your own id (be careful not to copy "28 -)
temp = sensor.get_temperature()
print(temp)
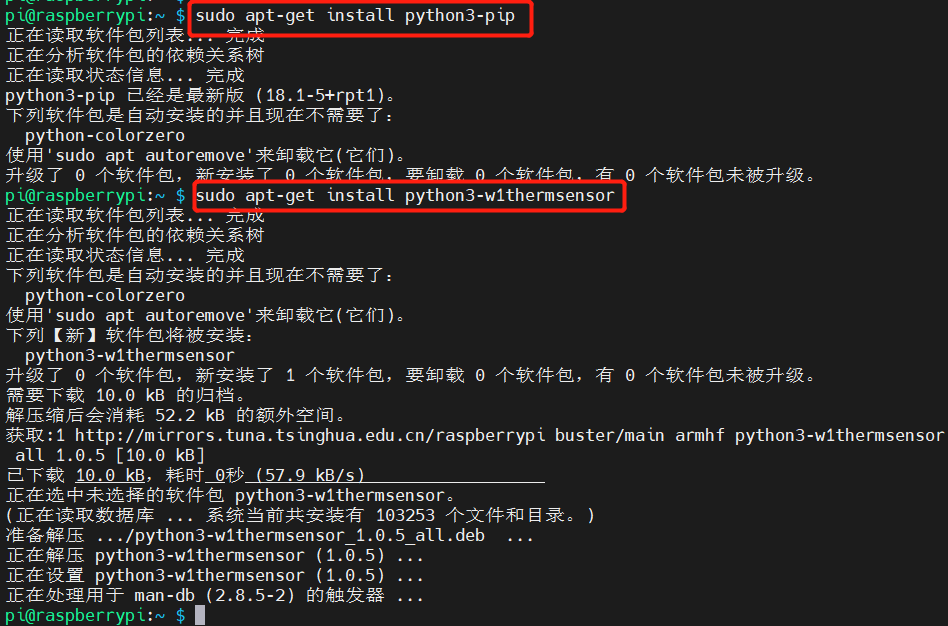
Note: the code is based on the W1 thermsensor library driver. Install the W1 thermsensor library before using it. The command is as follows:
sudo apt-get install python3-pip               // Python 3 PIP installation manager dependency package
sudo apt-get install python3-w1thermsensor     // w1thermsensor Library
Query the id of the ds18b20 to be read.
You can check through the communication test in step 4 or use the following command.
cd /etc
ls /sys/bus/w1/devices

Example code 1 run result:

2. Mode 2
This method is actually a communication test based on the fourth point, which writes and runs the manually entered commands on the script.
Example code:
#!/usr/bin/python
# -*- coding:utf-8 -*-
import os
import glob
import time

os.system('modprobe w1-gpio')
os.system('modprobe w1-therm')

base_dir = '/sys/bus/w1/devices/'
device_folder = glob.glob(base_dir + '28*')[0]
device_file = device_folder + '/w1_slave'
def read_rom():
	name_file=device_folder+'/name'
	f = open(name_file,'r')
	return f.readline()

def read_temp_raw():
	f = open(device_file, 'r')
	lines = f.readlines()
	f.close()
	return lines

def read_temp():
	lines = read_temp_raw()
	while lines[0].strip()[-3:] != 'YES':
		time.sleep(0.2)
		lines = read_temp_raw()
	equals_pos = lines[1].find('t=')
	if equals_pos != -1:
		temp_string = lines[1][equals_pos+2:]
		temp_c = float(temp_string) / 1000.0
		temp_f = temp_c * 9.0 / 5.0 + 32.0
		return temp_c, temp_f

print(' rom: '+ read_rom())
while True:
	print(' C=%3.3f  F=%3.3f'% read_temp())
	time.sleep(1)
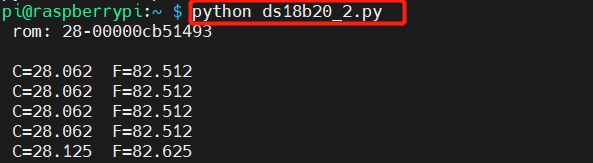
Sample code run result:
6, Conclusion
DS18B20 is a very simple single bus sensor. I think taking this as an example to learn and understand single bus is a very good choice.
Some personal opinions on raspberry pie and MCU:
The raspberry pie quick start series of tutorials has just entered the teaching of basic programming. In order to avoid everyone's misunderstanding, here I want to talk about my views on raspberry pie. Raspberry pie is a micro computer, which is stronger than single chip microcomputer in computing power. In programming, raspberry pie is more inclined to the development of application layer, which can also be understood as the development of computer software. The MCU is more about the development of the underlying peripheral driver, and the application layer is mainly based on control. It won't be said to use the MCU to do a very complex data operation or process a large amount of data. Therefore, the programming of raspberry pie is actually a little separated from the hardware, that is, we can directly call the library function to get the data regardless of how the underlying hardware realizes data collection and transmission. Of course, if we have time and energy, we can study the principle of hardware and the underlying implementation. In the development of single chip microcomputer, we often encounter some unused chips. We need to develop a driver according to the data manual of the chip, and then develop the application layer. Of course, single chip microcomputer can run the operating system, such as FreeRTos, RT thread, etc. running the operating system is somewhat similar to the programming of raspberry pie, But after all, there are still a few microcontrollers running the system.
To sum up, we can use the library if raspberry pie programming can use the library. It doesn't matter how it is implemented at the bottom. We do big things and don't spend too much time on small things. It's purely personal. Don't spray. If you have different opinions, please leave a message in the comment area. Thank you!!!
Well, that's all for this lecture. If it's helpful to you, you can give it a collection. If you want to know more about raspberry pie, you can follow me. I will continue to update more tutorials in the future.
Introduction to raspberry pie series: Raspberry pie from scratch quick start series summary