1, Configmap configuration management
Introduction:
• Configmap is used to save configuration data in the form of key value pairs.
• the configMap resource provides a way to inject configuration data into the Pod.
• it aims to decouple the image from the configuration file in order to realize the portability and reusability of the image.
Typical usage scenarios:
• populate the value of the environment variable
• set command line parameters in the container
• populate the profile of the volume
There are four ways to create ConfigMap:
• create with literal values
• create with file
• create with catalog
• write yaml file creation of configmap
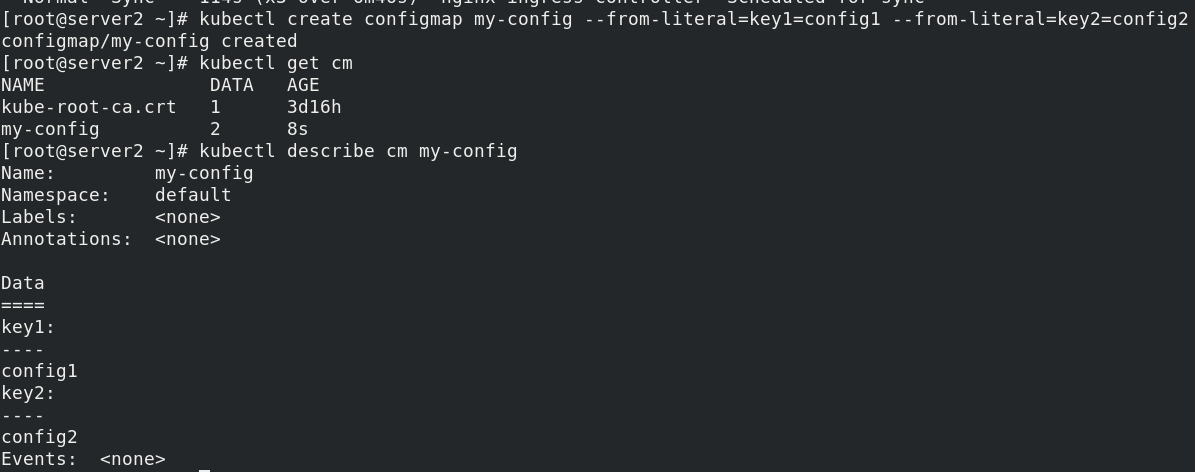
1. Use literal value to specify creation
kubectl create configmap my-config --from-literal=key1=config1 --from-literal=key2=config2
kubectl get cm
kubectl describe cm my-config
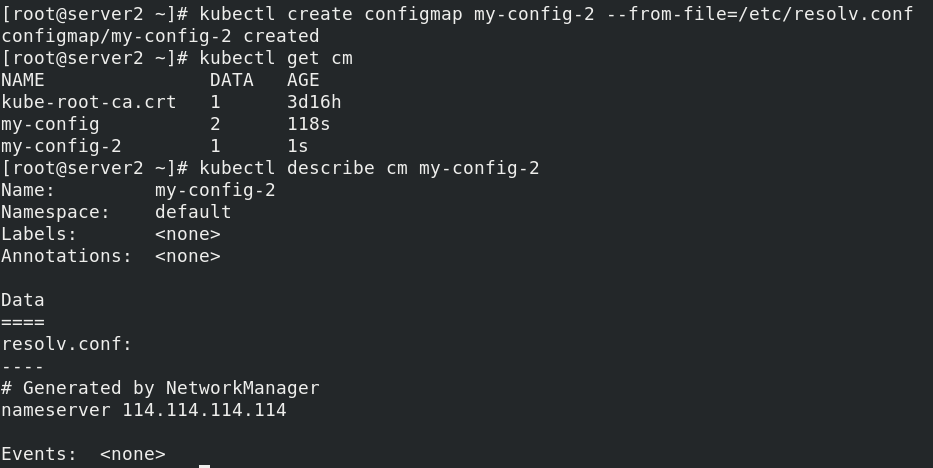
2. Create with file
kubectl create configmap my-config-2 --from-file=/etc/resolv.conf
kubectl get cm
kubectl describe cm my-config-2
3. Create with directory
mkdir configmap
cd configmap/
mkdir test
cp /etc/passwd test/
cp /etc/fstab test/
ls test/
kubectl create configmap my-config-3 --from-file=test
kubectl get cm
kubectl describe cm my-config-3

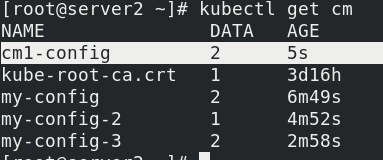
4. Write yaml file to create
vim cm1.yaml

apiVersion: v1
kind: ConfigMap
metadata:
  name: cm1-config
data:
  db_host: "172.25.0.250"
  db_port: "3306"

cat cm1.yaml
kubectl apply -f cm1.yaml
kubectl get cm
Using configmap
- It is directly passed to pod through environment variables
- By running on the command line of pod
- Mount to pod as volume
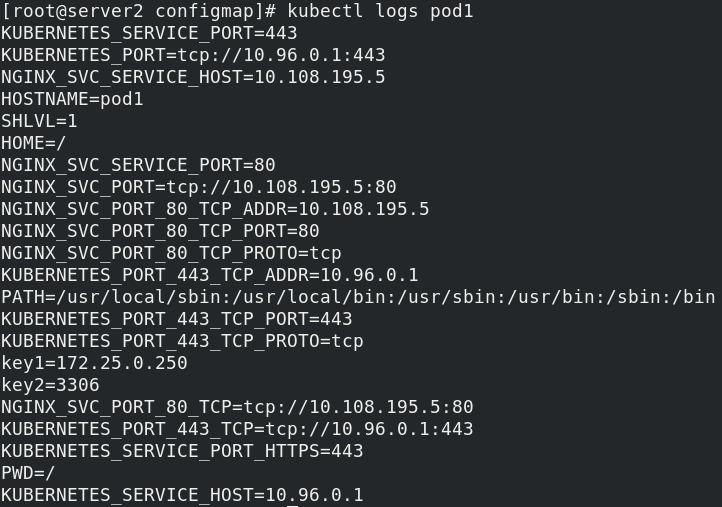
1. Directly pass to pod through environment variables:
cd configmap/
vim pod.yaml
apiVersion: v1
kind: Pod
metadata:
name: pod1
spec:
containers:
- name: pod1
image: busyboxplus
command: ["/bin/sh", "-c", "env"]
env:
- name: key1
valueFrom:
configMapKeyRef:
name: cm1-config
key: db_host
- name: key2
valueFrom:
configMapKeyRef:
name: cm1-config
key: db_port
restartPolicy: Never
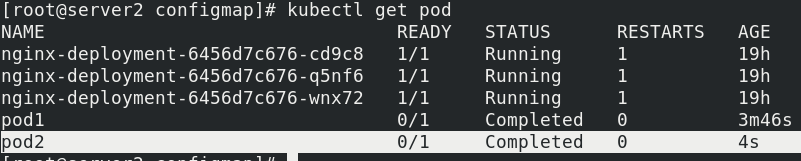
kubectl apply -f pod.yaml
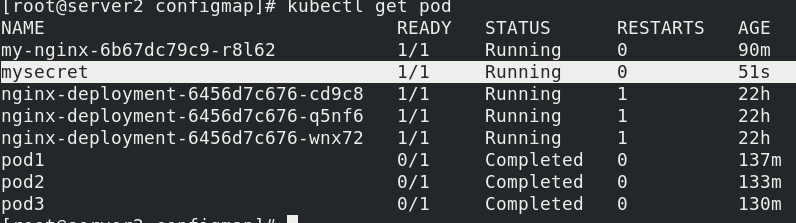
kubectl get pod

View results in pod log
kubectl logs pod1
2. By running on the command line of pod
vim pod2.yaml
apiVersion: v1
kind: Pod
metadata:
name: pod2
spec:
containers:
- name: pod2
image: busyboxplus
command: ["/bin/sh", "-c", "env"]
envFrom:
- configMapRef:
name: cm1-config
restartPolicy: Never
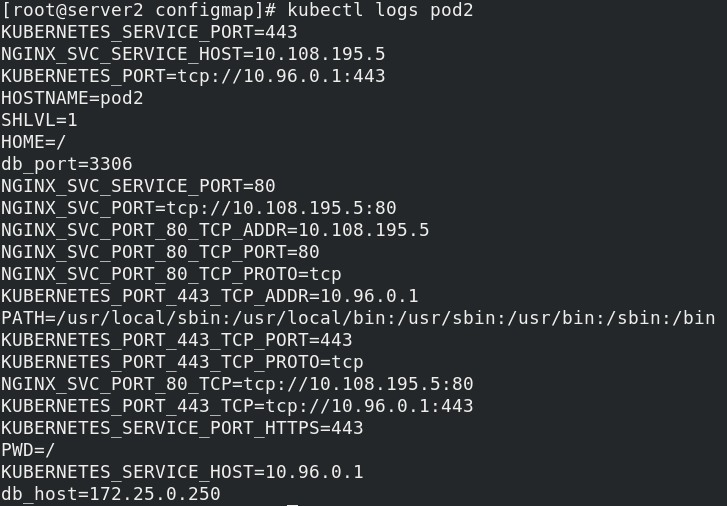
kubectl apply -f pod2.yaml
kubectl get pod
View log:
3. Mount to the pod as volume
vim pod3.yaml

apiVersion: v1
kind: Pod
metadata:
  name: pod3
spec:
  containers:
    - name: pod3
      image: busybox
      command: ["/bin/sh", "-c", "echo $(db_host) $(db_port)"]
      envFrom:
        - configMapRef:
            name: cm1-config
  restartPolicy: Never

kubectl apply -f pod3.yaml
kubectl get pod
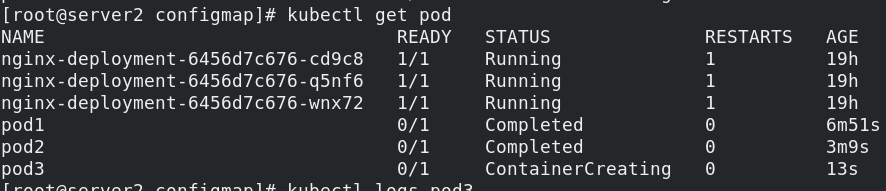
view log
kubectl logs pod3

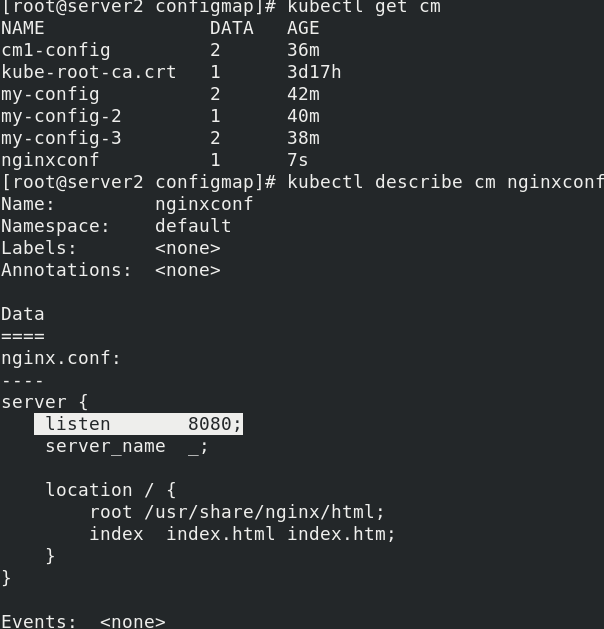
Update the configuration file of nginx and modify the port to 8080
vim nginx.conf

server {
    listen       8080;
    server_name  _;

    location / {
        root /usr/share/nginx/html;
        index  index.html index.htm;
    }
}

kubectl create configmap nginxconf --from-file=nginx.conf
kubectl get cm
Write manifest mount override nginx configuration file
 vim nginx.yaml

apiVersion: apps/v1
kind: Deployment
metadata:
  name: my-nginx
spec:
  replicas: 1
  selector:
    matchLabels:
      app: nginx
  template:
    metadata:
      labels:
        app: nginx
    spec:
      containers:
        - name: nginx
          image: nginx
          volumeMounts:
          - name: config-volume
            mountPath: /etc/nginx/conf.d
      volumes:
        - name: config-volume
          configMap:
            name: nginxconf

kubectl apply -f nginx.yaml
Check the port and test curl 10.244.1.56

Modify the port to 8000, refresh and access
kubectl edit cm nginxconf
 kubectl patch deployments.apps my-nginx --patch '{"spec": {"template": {"metadata": {"annotations": {"version/config": "20200219"}}}}}'
curl 10.244.1.56
Secret configuration management
The secret object type is used to store sensitive information, such as passwords, OAuth tokens, and SSH keys. Sensitive information in secret is more secure and flexible than in the definition of Pod or container image.
Pod can use secret in two ways:
- It is mounted in one or more containers in the pod as a file in volume
- Used when kubelet pulls the image for pod
Type of Secret:
- Service Account:Kubernetes automatically creates a secret containing access API credentials and automatically repairs it
Change pod to use this type of secret - Opera: base64 encoding is used to store information, and the original data can be obtained through base64 --decode decoding, so the security is weak.
- kubernetes.io/dockerconfigjson: used to store the authentication information of docker registry.
Create secret from file
echo -n 'admin' > ./username.txt
echo -n 'westos' > ./password.txt
kubectl create secret generic db-user-pass --from-file=./username.txt --from-file=./password.txt
kubectl get secrets

View plaintext encrypted in base64 mode
echo d2VzdG9z | base64 -d

Write a secret yaml
apiVersion: v1
kind: Secret
metadata:
  name: mysecret
type: Opaque
data:
  username: YWRtaW4=
  password: d2VzdG9z

kubectl apply -f secret.yaml
Mount Secret to Volume
apiVersion: v1
kind: Pod
metadata:
  name: mysecret
spec:
  containers:
  - name: nginx
    image: nginx
    volumeMounts:
    - name: secrets
      mountPath: "/secret"
      readOnly: true
  volumes:
  - name: secrets
    secret:
      secretName: mysecret
Run, view
kubectl apply -f secret.yaml
kubectl get pod
Enter the mysecret pod node to view
kubectl exec -it mysecret -- bash

Maps a secret key to the specified path
vim secret.yaml

apiVersion: v1
kind: Pod
metadata:
  name: mysecret
spec:
  containers:
  - name: nginx
    image: nginx
    volumeMounts:
    - name: secrets
      mountPath: "/secret"
      readOnly: true
  volumes:
  - name: secrets
    secret:
      secretName: mysecret
      items:
      - key: username
        path: my-group/my-username

kubectl apply -f secret.yaml
kubectl get pod
Enter the node terminal to view
kubectl exec -it mysecret -- bash
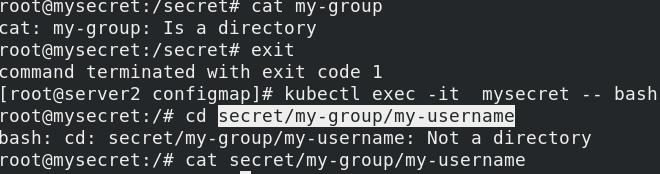
The file is mounted under the specified path my group / my username
Set Secret as the environment variable
vim secret.yaml

apiVersion: v1
kind: Pod
metadata:
  name: secret-env
spec:
  containers:
  - name: nginx
    image: nginx
    env:
      - name: SECRET_USERNAME
        valueFrom:
          secretKeyRef:
            name: mysecret
            key: username
      - name: SECRET_PASSWORD
        valueFrom:
          secretKeyRef:
            name: mysecret
            key: password

kubectl apply -f secret.yaml
kubectl get pod
Enter the pod to view
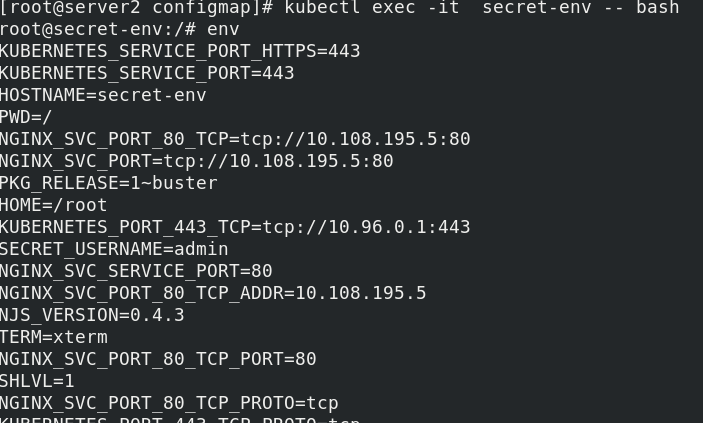
It is convenient for environment variables to read Secret, but it cannot support the dynamic update of Secret, that is, after modifying yaml file, it cannot be changed in time in the container.
kubernetes.io/dockerconfigjson is used to store the authentication information of docker registry.
The format of creating secret is docker registry
kubectl create secret docker-registry myregistrykey --docker-server=reg.westos.org --docker-username=admin --docker-password=westos --docker-email=yakexi007@westos.org

kubectl get secrets

Write a resource list and pull the image in the private warehouse
vim registry.yaml

apiVersion: v1
kind: Pod
metadata:
  name: mypod
spec:
  containers:
    - name: mario
      image: reg.westos.org/library/mario
  imagePullSecrets:
    - name: myregistrykey

kubectl apply -f registry.yaml
kubectl describe pod mypod

3, Volumes configuration management
The files in the container are temporarily stored on disk, which brings some difficulties to the special applications running in the container
Question. First, when the container crashes, kubelet will restart the container and the files in the container will be lost,
Because the container will be rebuilt in a clean state. Secondly, when multiple containers are run simultaneously in a Pod,
It is often necessary to share files between these containers. Kubernetes abstracts the Volume object to solve the problem
These two questions.
The Kubernetes volume has a clear lifecycle, the same as the Pod that wraps it. Therefore, the volume ratio Pod
Any container running in has a long lifetime and data is preserved when the container restarts. of course,
When a Pod no longer exists, the volume no longer exists. Perhaps more importantly, Kubernetes can
Many types of volumes are supported, and Pod can use any number of volumes at the same time.
A volume cannot be mounted to or hard linked to other volumes. Each container in the Pod must be independent
Specify the mount location for each volume.
Kubernetes supports the following types of volumes:
awsElasticBlockStore ,azureDisk,azureFile,cephfs,cinder,configMap,csi,gcePersistentDisk,gitRepo (deprecated),glusterfs,hostPath,iscsi,local,nfs,persistentVolumeClaim,projected,portworxVolume,quobyte,rbd,scaleIO,secret,storageos,vsphereVolume
emptyDir volume:
When the Pod is assigned to a node, an emptyDir volume is created first, and as long as the Pod
When running on this node, the volume always exists. As its name indicates, the volume is initially empty.
Although the path where the container in the Pod mounts the emptyDir volume may be the same or different, these contents
Both can read and write the same files in the emptyDir volume. When Pod is deleted from the node for some reason
In addition, the data in the emptyDir volume is also permanently deleted.
emptyDir volume creation
mkdir volumes
cd volumes/
vim vol1.yaml
apiVersion: v1
kind: Pod
metadata:
name: vol1
spec:
containers:
- image: busyboxplus
name: vm1
command: ["sleep", "300"]
volumeMounts:
- mountPath: /cache
name: cache-volume
- name: vm2
image: nginx
volumeMounts:
- mountPath: /usr/share/nginx/html
name: cache-volume
volumes:
- name: cache-volume
emptyDir:
medium: Memory
sizeLimit: 100Mi
kubectl apply -f vol1.yaml
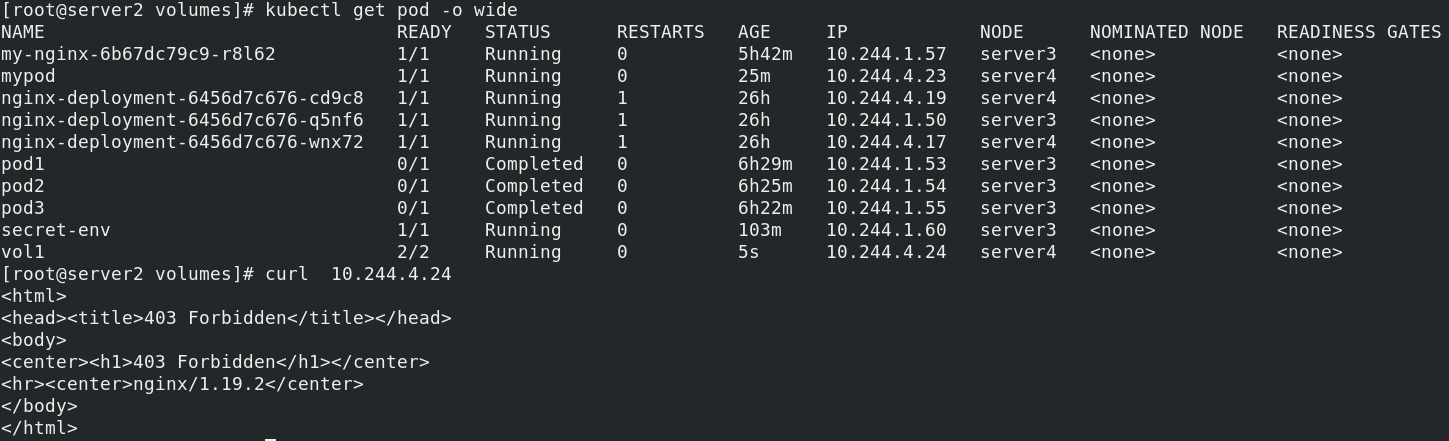
kubectl get pod -o wide
curl 10.244.4.24
Enter the container and create the default publishing file
kubectl exec -it  vol1 -- sh
cd cache/
echo www.westos.org > index.html
Visit again

(if a file larger than the set size of 100M is created, the node will be broken)
The hostPath volume can mount files or directories on the file system of the host node into your Pod. Note: the host here is the assigned node node host, not k8smaster host
vim host.yaml

apiVersion: v1
kind: Pod
metadata:
  name: test-pd
spec:
  containers:
  - image: nginx
    name: test-container
    volumeMounts:
    - mountPath: /test-pd
      name: test-volume
  volumes:
  - name: test-volume
    hostPath:
      path: /data
      type: DirectoryOrCreate
View pod
kubectl apply -f host.yaml
kubectl get pod -o wide

Enter the container and create a document for testing
kubectl exec -it  test-pd -- sh

cd test-pd
touch file1
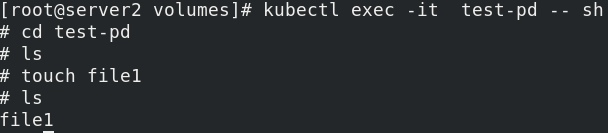
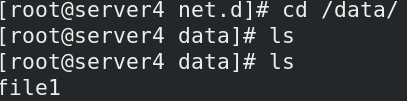
Create a file in the container mount directory, and the corresponding directory of the controlled node host will automatically generate the corresponding file.
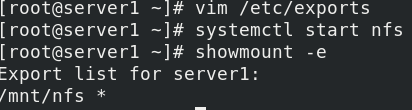
To use the shared file system nfs, first install NFS on all hosts and configure NFS on the warehouse node
server1:
yum install -y nfs-utils
vim /etc/exports
systemctl start nfs
showmount -e
server2:
vim nfs.yaml

apiVersion: v1
kind: Pod
metadata:
  name: test-pd
spec:
  containers:
  - image: nginx
    name: test-container
    volumeMounts:
    - mountPath: /usr/share/nginx/html
      name: test-volume
  volumes:
  - name: test-volume
    nfs:
      server: 172.25.13.1
      path: /mnt/nfs
Check whether the configuration is successful
showmount -e 172.25.13.1

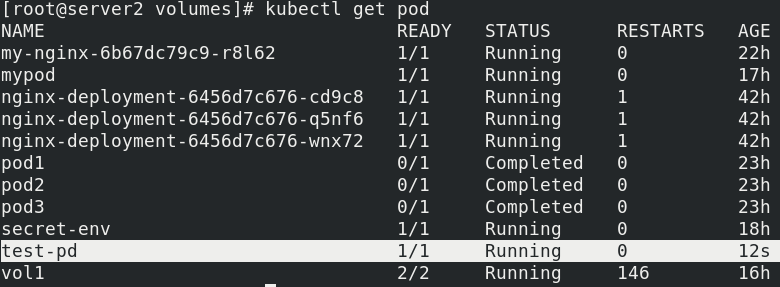
Apply and view
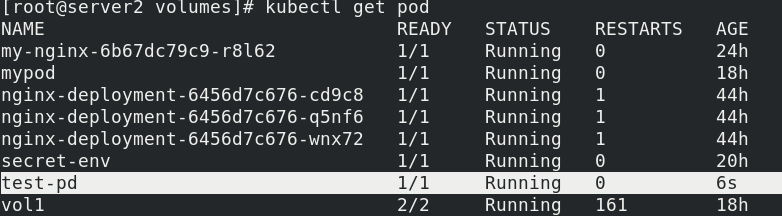
kubectl apply -f nfs.yaml
kubectl get pod -o wide
server1:
After nfs starts, test whether it is synchronized
cd /mnt/nfs
echo www.westos.org > index.html
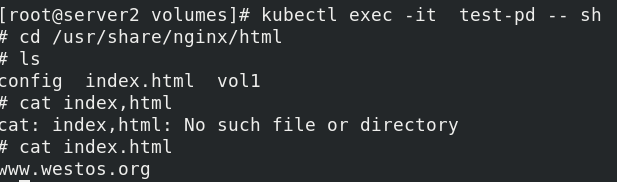
Enter server2 container and view
kubectl exec -it test-pd -- sh
Persistent volume PV -- Static
Persistent volume (PV) is a part of the network storage provided by the administrator in the cluster. Like the nodes in the cluster, PV is also a resource in the cluster. Like volume, it is a volume plug-in, but its life cycle is independent of the Pod using it. PV is an API object that captures the implementation details of NFS, ISCSI, or other cloud storage systems
Persistent volume claim (PVC) is a storage request of users. It is similar to pod. Pod consumes Node resources, while PVC consumes PV resources. Pod can request specific resources (such as CPU and memory). PVC can request the specified size and access mode (which can be mapped to one read-write or multiple read-only)
Two PV modes are provided: static and dynamic
- Static PV: the Cluster Administrator creates multiple PVS, which carry the details of real storage, which is available to cluster users. They exist in the Kubernetes API and can be used for storage and usage
- Dynamic PV: when the static PV created by the administrator does not match the user's PVC, the cluster may try to supply volume specifically to the PVC. This offering is based on StorageClass
The binding of PVC and PV is a one-to-one mapping. If no matching PV is found, the PVC will be unbound and unbound indefinitely
NFS PV example
vim pv.yaml

apiVersion: v1
kind: PersistentVolume
metadata:
  name: pv1
spec:
  capacity:
    storage: 5Gi
  volumeMode: Filesystem
  accessModes:
    - ReadWriteOnce
  persistentVolumeReclaimPolicy: Recycle
  storageClassName: nfs
  mountOptions:
    - hard
    - nfsvers=4.1
  nfs:
    path: /mnt/nfs
    server: 172.25.13.1
Pull up the container to view pv, and the status is Available
kubectl apply -f pv.yaml
kubectl get pv

Create PVC
vim pvc.yaml

apiVersion: v1
kind: PersistentVolumeClaim
metadata:
  name: pvc1
spec:
  storageClassName: nfs
  accessModes:
    - ReadWriteOnce #ReadWriteMany multipoint read write
  resources:
    requests:
      storage: 1Gi
Pull up the pvc container and check the pvc and pv related information
vim pvc.yaml

apiVersion: v1
kind: PersistentVolumeClaim
metadata:
  name: pvc1
spec:
  storageClassName: nfs
  accessModes:
    - ReadWriteOnce #ReadWriteMany multipoint read write
  resources:
    requests:
      storage: 1Gi

Pod mount PV
vim pod.yaml

apiVersion: v1
kind: Pod
metadata:
  name: test-pd
spec:
  containers:
  - image: nginx
    name: nginx
    volumeMounts:
    - mountPath: /usr/share/nginx/html
      name: pv1
  volumes:
  - name: pv1
    persistentVolumeClaim:
      claimName: pvc1
Pull up and view
kubectl apply -f pod.yaml
kubectl get pod
Enter the container terminal to test whether the mount is successful
kubectl exec -it test-pd -- bash

Test access
kubectl get pod -o wide
curl 10.244.4.27

Delete pod,pvc,pv