
Background introduction
Using the JITR function, you can quickly register the device certificate and launch the device. However, the way to configure the relevant Amazon Lambda functions is relatively complex. Use the instant deployment described in this article (JITP) function can simplify the steps of Amazon IoT rules and Amazon Lambda functions, and directly attach a customized template while registering the device CA certificate. When the device connects to Amazon IoT platform for the first time, JITP will refer to the definition of the template to complete the registration of the device certificate and the creation of the device in the cloud.
It should be noted that JITP, as a relatively new function, has not been deployed in Amazon cloud technology China. If the device needs to be connected to Amazon cloud technology China, you still need to use JITR to complete certificate registration and device online. However, for some users who need to use Amazon cloud technology overseas, this function can be used to control the device registration.
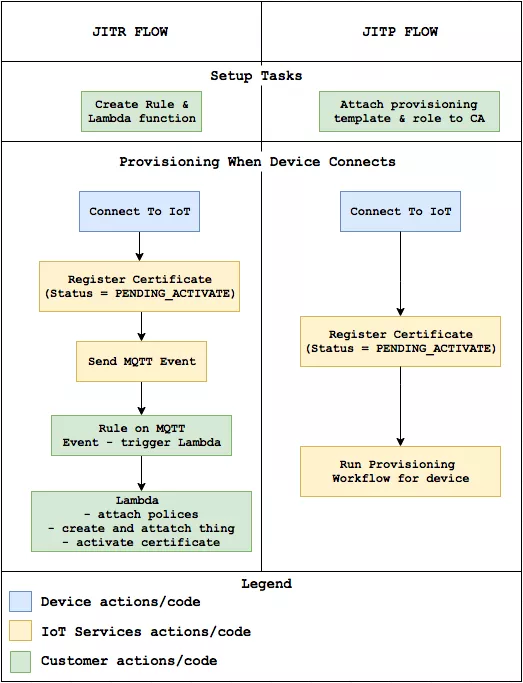
From the comparison between JITR and JITP in the figure above, it can be seen that JITP simplifies some processes.
The implementation steps of JITP are as follows:
1. Create CA certificate, template and corresponding Amazon IAM permissions.
2. Register and activate CA certificate on Amazon IoT platform and attach template.
3. Use the CA certificate to issue the equipment certificate and install it on Amazon # IoT equipment.
4. The first connection between Amazon IoT device and Amazon IoT platform.
The Amazon IoT device in this article will be simulated using an Amazon Linux EC2 instance, and the MQTT Mosquitto Client tool will be used to simulate the MQTT terminal. The configuration of Amazon IoT device will be carried out on this Amazon EC2 instance.
Create CA certificate, template and corresponding Amazon IAM permissions
Log in to Amazon EC2 instance and execute the following command to create private key and corresponding CA certificate:
$ mkdir cert
$ cd cert
$ openssl genrsa -out CA_Private.key 2048
$ openssl req -x509 -new -nodes -key CA_Private.key -sha256 -days 365 -out CA_Certificate.pem
*Slide left to see more
When creating a CA certificate in the last step, you will be required to fill in Amazon CSR related information. Please fill in the following information according to the actual situation:
Country Name (2 letter code) [XX]:
State or Province Name (full name) []:
Locality Name (eg, city) [Default City]:
Organization Name (eg, company) [Default Company Ltd]:
Organizational Unit Name (eg, section) []:
Common Name (eg, your name or your server's hostname) []:
Email Address []:
Because JITP registers device certificates and creates devices through template definitions, the corresponding permissions in the template are essential. Let's create a role in Amazon IAM and grant corresponding permissions.
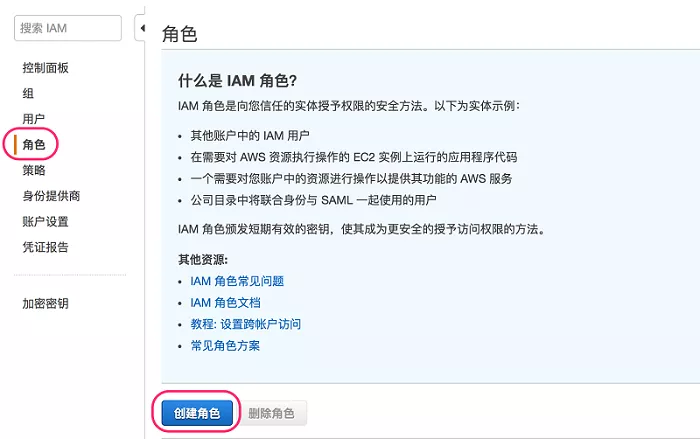
1. Log in to Amazon Console and enter Amazon IAM page.
2. Click the role on the left side of the page and click the create role button.
3. On the create role page, select Amazon IoT in "Amazon cloud technology products", and then click "next: permissions".
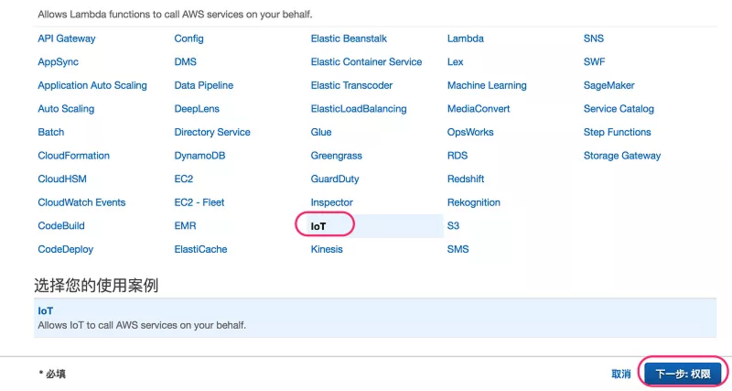
4. There is no need to make any changes on this page. Click "next: Review"
5. After filling in the role name "JITP", click create role.
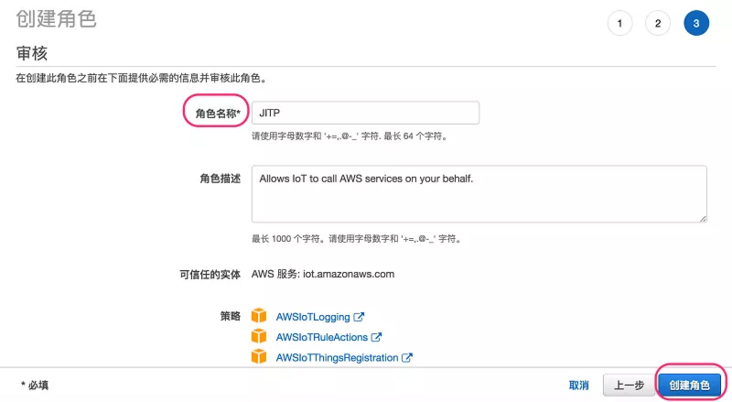
6. After the role is created, click the role name JITP and record the role ARN(arn:aws:iam::12345678910:role/JITP).
You don't need to make any changes on this page. Click "next: Review"
After filling in the role name "JITP", click create role.
After the role is created, click the role name JITP and record the role ARN(arn:aws:iam::12345678910:role/JITP).
After the roles and permissions are ready, we start to create a template, which will be submitted to Amazon IoT Core when registering the CA certificate later.
The template here is actually a JSON document, which contains two parts. One part is Parameters and the other part is resources
In the Parameters section, you can define the following contents:
- AWS::IoT::Certificate::Country
- AWS::IoT::Certificate::Organization
- AWS::IoT::Certificate::OrganizationalUnit
- AWS::IoT::Certificate::DistinguishedNameQualifier
- AWS::IoT::Certificate::StateName
- AWS::IoT::Certificate::CommonName
- AWS::IoT::Certificate::SerialNumber
- AWS::IoT::Certificate::Id
In the following template, we define two Parameters, one is AWS::IoT::Certificate::Country, and the other is AWS::IoT::Certificate::Id. In this way, when the device connects to Amazon IoT platform for the first time, the corresponding two fields in the device certificate will be extracted for the creation of things in Resources. The role ARN in the second line is the ARN (Amazon Resource Names) of the role JITP created earlier. If you follow the steps, it should have been recorded.
{
 "templateBody":"{ \"Parameters\" : { \"AWS::IoT::Certificate::Country\" : { \"Type\" : \"String\" }, \"AWS::IoT::Certificate::Id\" : { \"Type\" : \"String\" } }, \"Resources\" : { \"thing\" : { \"Type\" : \"AWS::IoT::Thing\", \"Properties\" : { \"ThingName\" : {\"Ref\" : \"AWS::IoT::Certificate::Id\"}, \"AttributePayload\" : { \"version\" : \"v1\", \"country\" : {\"Ref\" : \"AWS::IoT::Certificate::Country\"}} } }, \"certificate\" : { \"Type\" : \"AWS::IoT::Certificate\", \"Properties\" : { \"CertificateId\": {\"Ref\" : \"AWS::IoT::Certificate::Id\"}, \"Status\" : \"ACTIVE\" } }, \"policy\" : {\"Type\" : \"AWS::IoT::Policy\", \"Properties\" : { \"PolicyDocument\" : \"{\\\"Version\\\": \\\"2012-10-17\\\",\\\"Statement\\\": [{\\\"Effect\\\":\\\"Allow\\\",\\\"Action\\\": [\\\"iot:*\\\"],\\\"Resource\\\" : [\\\"*\\\"]}]}\" } } } }",
 "roleArn":"arn:aws:iam::1234567890:role/JITP"
}
*Slide left to see more
We save this JSON code to a file named provisioning template in the ~ / cert folder of Amazon EC2 instance json.
This template actually stipulates that when devices are connected, Amazon # IoT Core will create two things, one is Thing (device mapping on the cloud) and the other is Policy (operation permission). You can see from Resources in the template, and JITP will automatically do three things next:
- Assign Policy to certificate
- Mount the certificate on Thing
- Update certificate status to Active
Register and activate CA certificate and attach template on Amazon # IoT platform
With the previous preparations, we can start registering CA certificates and templates to Amazon IOT Core. For security, Amazon OT Core provides a corresponding audit process to ensure that you hold both CA certificate and corresponding private key. Therefore, before finally registering the CA certificate, we also need to use the CA certificate to generate an intermediate certificate for verifying the identity of the CA certificate and the private key holder. The following Amazon CLI command will return a randomly generated authentication code, which will be bound to your account. Record this authentication code and we'll use it soon.
$ aws iot get-registration-code
Generate a private key and certificate request file for authentication using OpenSSL (Amazon CSR – Certificate Signing Request):
$ openssl genrsa -out Verification_Private.key 2048

$ openssl req -new -key Verification_Private.key -out Verification.csr
*Slide left to see more
In the process of creating Amazon CSR, you will be prompted to enter the following contents and fill the authentication code recorded in the previous step into Common Name:
...
 Organization Name (eg, company) []:
 Organizational Unit Name (eg, section)
 Common Name (e.g. server FQDN or YOUR name) []: XXXXXREGISTRATIONCODEXXXXX
 ...
*Slide left to see more
Next, use the CA certificate, private key, and Amazon CSR created above to generate a certificate for authentication:
$ openssl x509 -req -in Verification.csr -CA CA_Certificate.pem -CAkey CA_Private.key -CAcreateserial -out Verification.crt -days 365 -sha256
*Slide left to see more
Finally, import CA certificate and intermediate certificate through the following command to complete the registration and activation of CA certificate. At the same time, enable the automatic registration of the device certificate when the device is connected to the Amazon IoT Core by setting – allow auto registration, and bind the template to the CA certificate through – registration config. The output of this command will return the certificate ARN (certificatern) and certificate ID (cacerticateid) of the corresponding CA certificate on Amazon # IoT Core
$ aws iot register-ca-certificate --ca-certificate file://CA_Certificate.pem --verification-certificate file://Verification.crt --set-as-active --allow-auto-registration --registration-config file://provisioning-template.json
*Slide left to see more
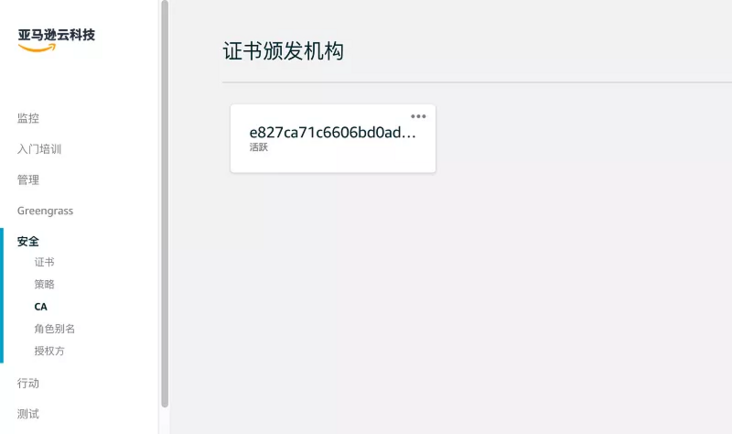
At this time, if you enter the # Amazon # IoT Core service and click Security - > Ca on the left, you will see that our CA has been registered on the # Amazon # IoT platform.
Use CA certificate to issue equipment certificate
After we have created and registered the CA certificate, we can start issuing the equipment certificate with this CA certificate. The steps are as follows:
1. Create a private key of the device certificate Key and the corresponding certificate request file Device_Certificate.csr:
$ openssl genrsa -out Device.key 2048
$ openssl req -new -key Device.key -out Device_Certificate.csr
- Use CA certificate, CA certificate private key and certificate request file to issue device certificate Device_Certificate.crt:
$ openssl x509 -req -in Device_Certificate.csr -CA CA_Certificate.pem -CAkey CA_Private.key -CAcreateserial -out Device_Certificate.crt -days 365 -sha256
*Slide left to see more
First connection between Amazon IoT device and Amazon IoT
You can install Amazon IoT SDK on your Amazon IOT device and call the SDK through your own code to realize all functions. Here, in order to simplify the steps and save time, we choose to use the MQTT Mosquitto Client tool installed on Amazon EC2 to simulate the MQTT terminal.
1. Log in to Amazon EC2 instance and execute the following command:
$ sudo wget http://download.opensuse.org/repositories/home:/oojah:/mqtt/CentOS_CentOS-7/home:oojah:mqtt.repo -O /etc/yum.repos.d/mqtt.repo
 $ sudo yum install mosquitto mosquitto-clients -y
*Slide left to see more
- If the execution of the above command depends on the missing error, you can add - skip broken and execute it again
$ sudo yum install mosquitto mosquitto-clients -y --skip-broken
*Slide left to see more
- Go to the cert directory you created earlier
$ cd cert
- Merge CA certificate and device certificate into a new certificate to form a valid certificate chain:
$ cat Device_Certificate.crt CA_Certificate.pem > Device_CA_Certificate.crt
- Execute mosquitto_ The pub command publishes a message to the corresponding topic, which is also the first connection between the device and Amazon IoT Core. If you recall the previous steps, so far our device certificate only exists on the device and is not registered on Amazon # IoT Core, then let's try to send a message.
$ mosquitto_pub --cafile root-CA.crt --cert Device_CA_Certificate.crt --key Device.key -h xxxxxxxxxxxxxx.iot.us-east-1.amazonaws.com -p 8883 -q 1 -t JITP/test -i anyclientID --tls-version tlsv1.2 -m "Hello" -d
*Slide left to see more
- The – cafile in the command is the CA certificate of Amazon # IoT platform, which is used to verify the identity of Amazon # IoT platform. This file can be obtained through this link.
- The – cert in the command is the certificate chain after merging CA certificate and device certificate.
- The – key in the command is the private key of the device.
- - h in the command is the access point of Amazon # IoT platform, which can be obtained by clicking "Settings" in the lower left corner of Amazon # IoT interface.
- - t in the command is the topic you want to publish the message to. Here I publish it to JITP/test. You can choose what you want
- Published topic
- The - i in the command can be named as you want
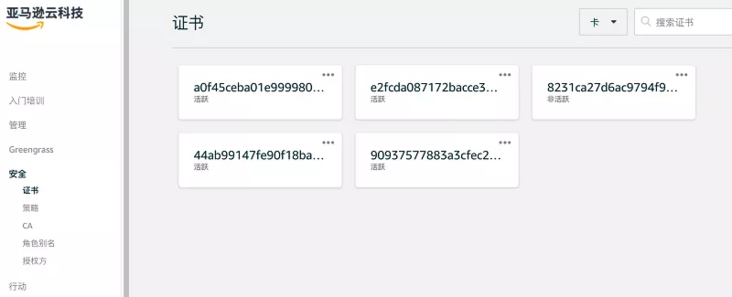
- After successfully connecting and publishing the message, the following output will appear. If you log in to the Amazon IoT interface and click Security - > certificate on the left, you can see that the device certificate has been registered and activated.
Client anyclientID sending CONNECT
Client anyclientID received CONNACK
Client anyclientID sending PUBLISH (d0, q1, r0, m1, 'JITP/test', ... (5 bytes))
Client anyclientID received PUBACK (Mid: 1)
Client anyclientID sending DISCONNECT
*Slide left to see more
Author of this article

Guo song
Amazon cloud technology solution architect
Responsible for architecture consulting and design optimization of enterprise customers, and committed to the application and promotion of Amazon IoT and storage services in domestic and global enterprise customers. Before joining Amazon cloud, he worked as a system engineer in EMC R & D center and had in-depth research on high availability architecture, scheme and performance tuning of enterprise storage applications.