1, zabbix overview
Zabbix is an enterprise class distributed open source monitoring solution.
Zabbix software can monitor the health and integrity of many network parameters and servers. Zabbix uses a flexible alarm mechanism that allows users to configure email based alarms for almost any event. This allows users to respond quickly to server problems. Zabbix provides excellent reporting and data visualization based on stored data. These features make Zabbix an ideal choice for capacity planning.
Zabbix supports active polling and passive capture (trapping). All Zabbix reports, statistics and configuration parameters can be accessed through the Web-based front-end page. The Web-based front-end page ensures that you can access the network status and server health you monitor anywhere. After proper configuration, Zabbix can play an important role in monitoring the IT infrastructure. Whether for a small number of users The same applies to small organizations with servers or large enterprises with a large number of servers.
2, zabbix function
zabbix distributed system monitoring
Zabbix is a highly mature and perfect network monitoring solution. A software package contains a variety of functions.
data acquisition
Availability and performance inspection;
Support SNMP (including active polling and passive capture), IPMI, JMX and VMware monitoring;
Custom check;
Collect the required data according to the user-defined time interval;
Perform data collection through Server/Proxy and Agents.
Flexible threshold definition
You can refer to the backend database to define a very flexible alarm threshold, that is, trigger
Highly configurable alarms
You can send alarm notification according to the increment plan, receiver and media type;
Using macro variables can make alarm notification more efficient and useful;
Automatic operations include remote execution commands.
Real time graphics
Using the built-in graphics function, the monitoring items can be drawn into graphics in real time.
Web monitoring function
Zabbix can track the click operation of the simulated mouse on the Web site to check the function and response time of the Web site.
3, zabbix build
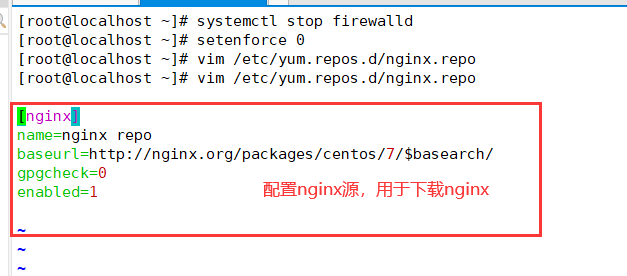
1. Installing nginx
systemctl stop firewalld
setenforce 0

vim /etc/yum.repos.d/nginx.repo
[nginx]
name=nginx repo
baseurl=http://nginx.org/packages/centos/7/$basearch/
gpgcheck=0
enabled=1

yum clean all
yum list
yum -y install nginx
systemctl start nginx
systemctl enable nginx

netstat -natp | grep nginx
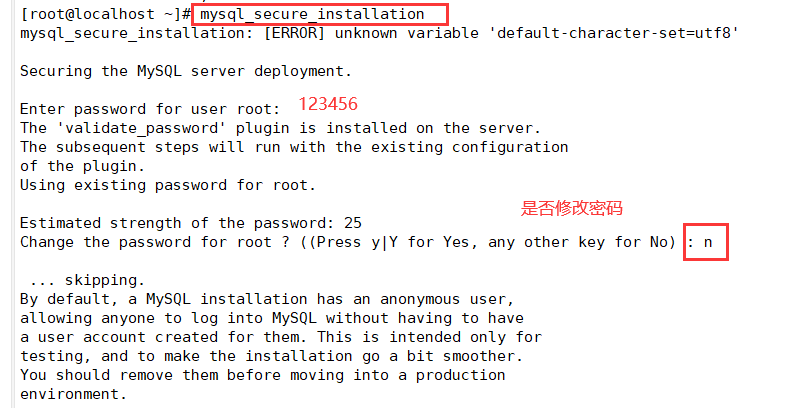
2. Deploy mariadb
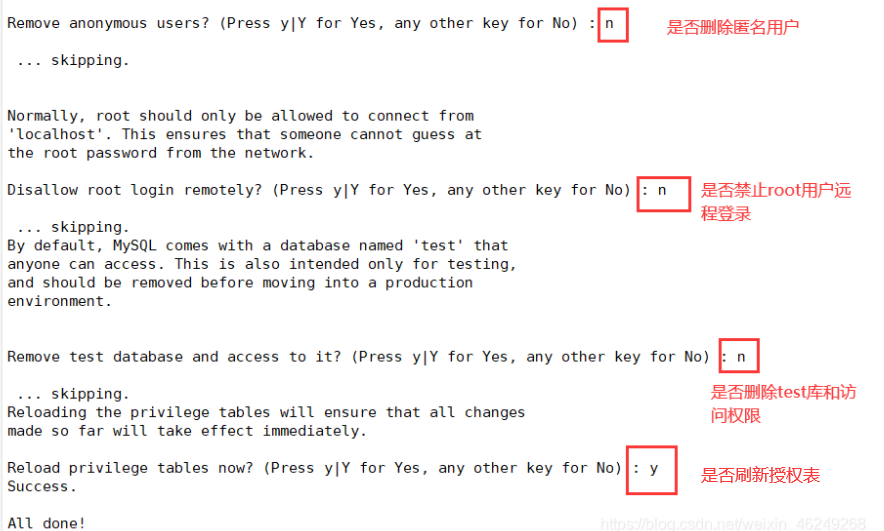
yum -y install mariadb*
systemctl start mariadb.service
systemctl enable mariadb.service
netstat -natp | grep 3306

#mysql Security Configuration Wizard
mysql_secure_installation

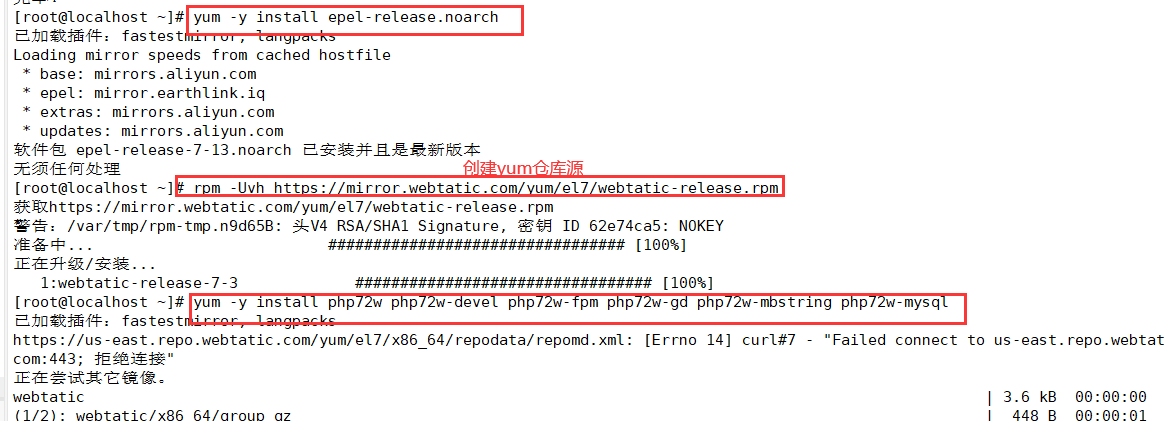
3. Deploy PHP
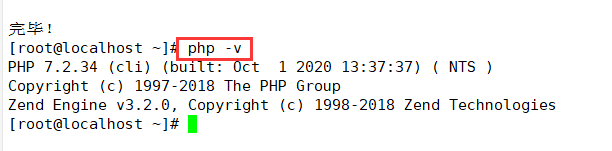
yum -y install epel-release.noarch Multiple installations

rpm -Uvh https://mirror.webtatic.com/yum/el7/webtatic-release.rpm
yum -y install php72w php72w-devel php72w-fpm php72w-gd php72w-mbstring php72w-mysql //Install PHP, language and language development packages, process dynamic requests, support image processing, and can process multi text strings
php -v //View PHP version
//Modify PHP FPM D configuration file
vim /etc/php-fpm.d/www.conf

==8 Modify user==
user = nginx

==10 Modify group==
group = nginx

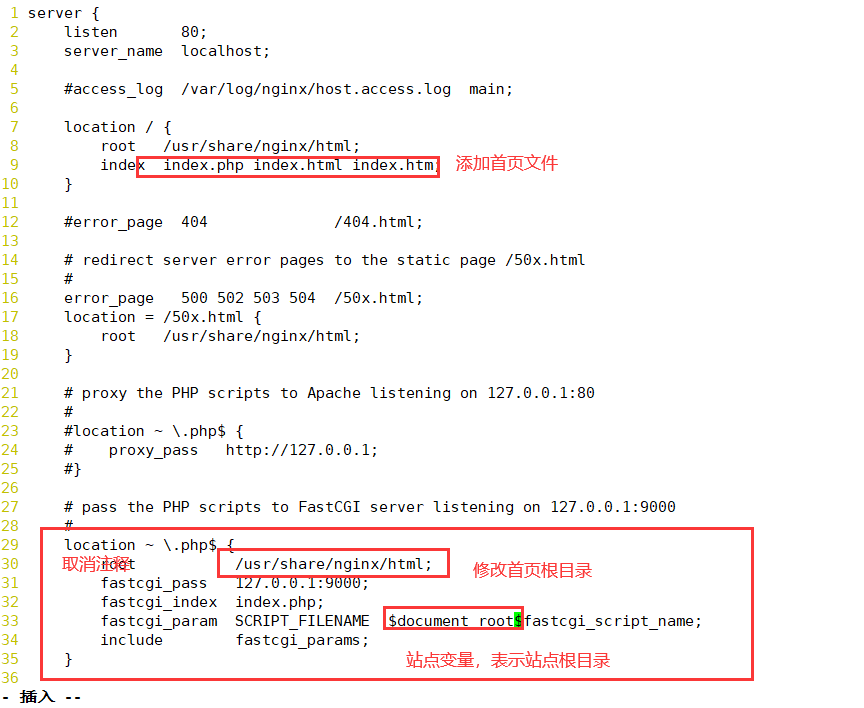
//Modify nginx master configuration file
vim /etc/nginx/conf.d/default.conf
//10 index.php
//30-36 uncomment
fastcgi_param  SCRIPT_FILENAME  $document_root$fastcgi_script_name;
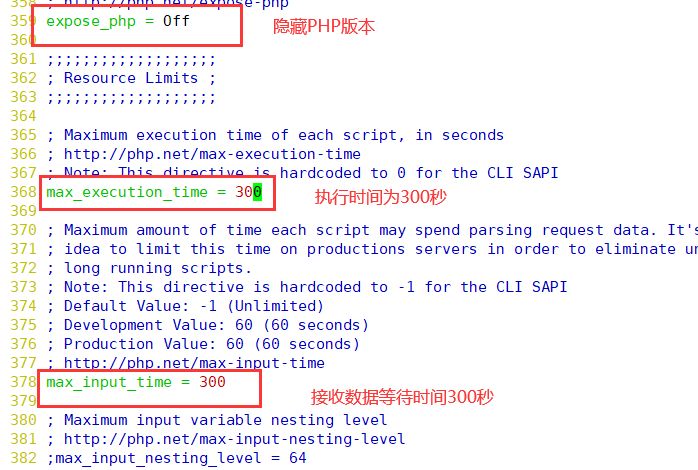
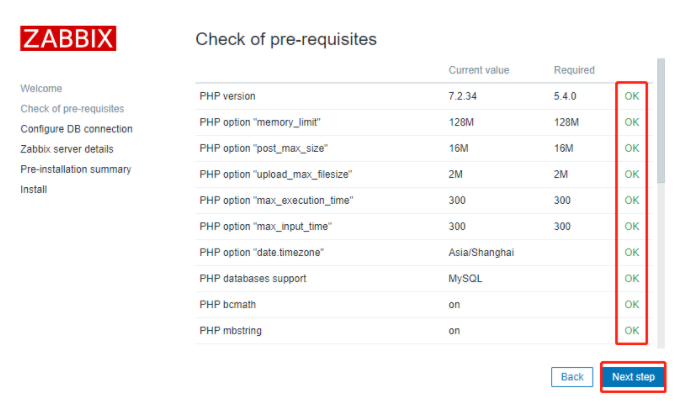
vim /etc/php.ini
//202 short_open_tag = On
//359 expose_php = Off
//368 max_execution_time = 300
//378 max_input_time = 300
//656 post_max_size = 16M
//799 upload_max_filesize = 2M
//800 always_populate_raw_post_data = -1
//877 date.timezone = Asia/Shanghai


systemctl start php-fpm
systemctl enable php-fpm
netstat -natp | grep 9000

4. Test connection database
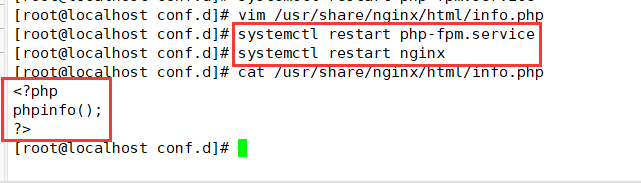
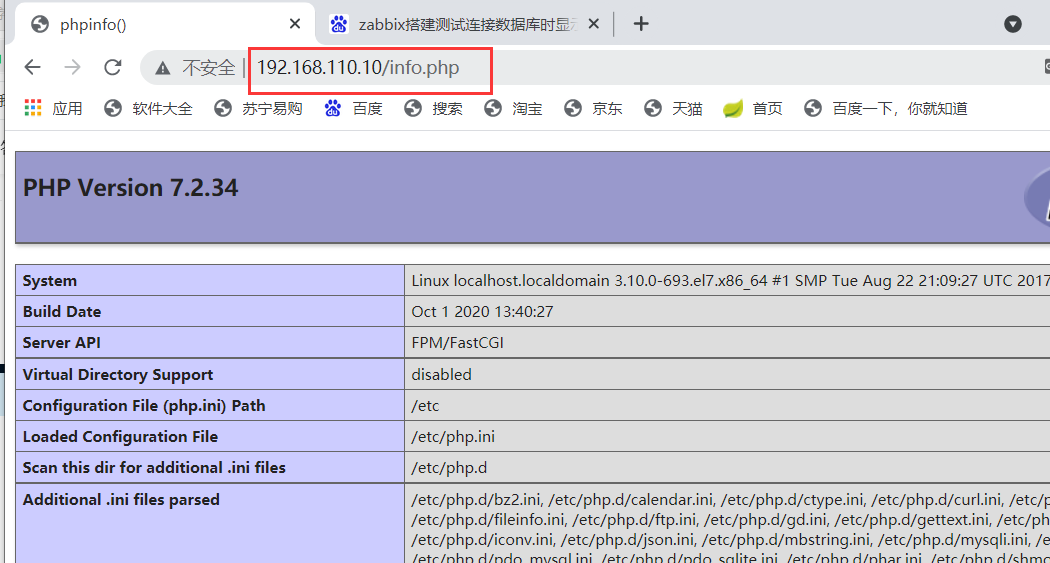
vim /usr/share/nginx/html/info.php

<?php
phpinfo();
?>

systemctl restart php-fpm.service
systemctl restart nginx

Real machine access http://192.168.110.10/info.php
vim /usr/share/nginx/html/info.php
<?php
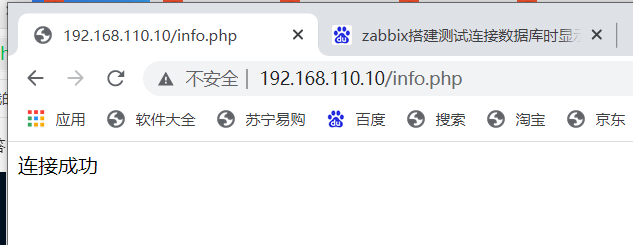
$link=mysqli_connect('127.0.0.1','root','123456');
if ($link) echo 'Connection succeeded';
else echo 'connection failed';
?>
==Real machine access==
http://192.168.110.10/info.php
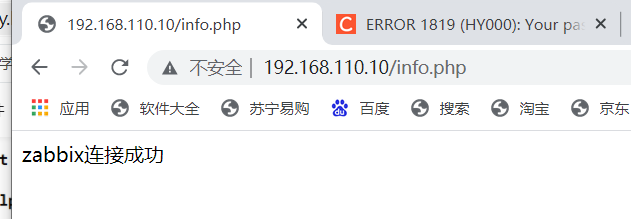
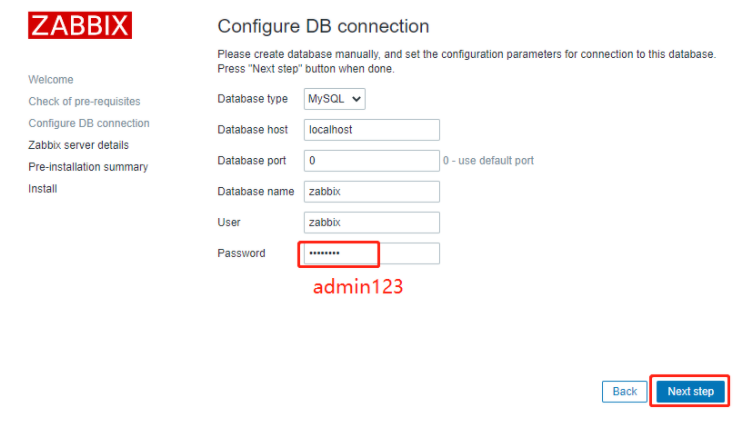
mysql -uroot -p123456
create database zabbix character set utf8 collate utf8_bin;
grant all privileges on *.* to 'zabbix'@'%' identified by '123456';
flush privileges;
exit
vim /usr/share/nginx/html/info.php
<?php
$link=mysqli_connect('127.0.0.1','zabbix','123456');
if ($link) echo 'zabbix success';
else echo 'zabbix fail';
?>

==Real machine access==
http://192.168.110.10/info.php
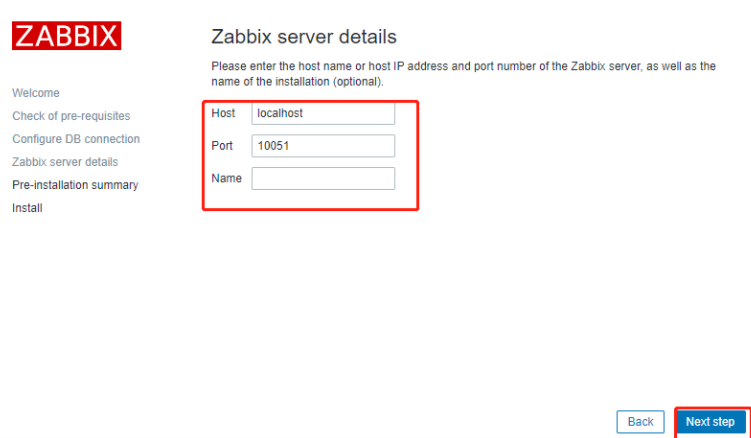
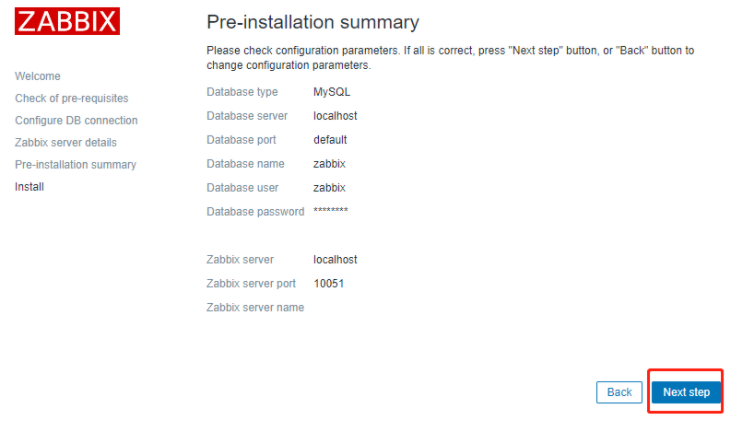
5. Deploy zabbix server
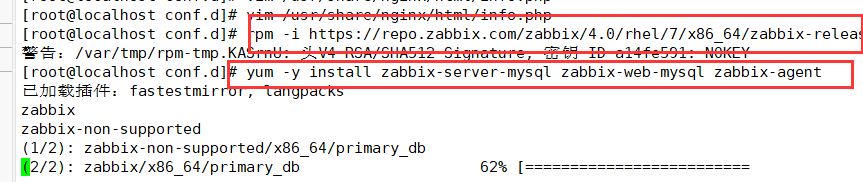
rpm -i https://repo.zabbix.com/zabbix/4.0/rhel/7/x86_64/zabbix-release-4.0-1.el7.noarch.rpm

#Multiple installations
yum -y install zabbix-server-mysql zabbix-web-mysql zabbix-agent
cd /usr/share/doc/zabbix-server-mysql-4.0.32/
zcat create.sql.gz | mysql -uzabbix -p zabbix
mysql -u zabbix -p 123456
use zabbix;
show tables;


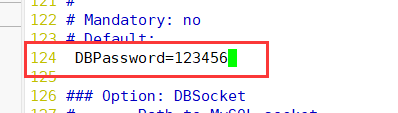
#Edit zabbix server configuration file
vim /etc/zabbix/zabbix_server.conf

#Define log file location and name
//38 LogFile=/var/log/zabbix/zabbix_server.log

#Define the log file size. 0 means unlimited size
//49 LogFileSize=0

#Process file location
//72 PidFile=/var/run/zabbix/zabbix_server.pid

#Communication sock file
//82 SocketDir=/var/run/zabbix

#Database server, local
//91 DBHost=localhost

#Database name
//100 DBName=zabbix

#Database user
//116 DBUser=zabbix

#Database password
//124 DBPassword=123456

#snmp protocol log location
//356 SNMPTrapperFile=/var/log/snmptrap/snmptrap.log

#Define timeout
//473 Timeout=4

#Script storage location of alarm
//516 AlertScriptsPath=/usr/lib/zabbix/alertscripts

#Extensibility script storage location
//527 ExternalScripts=/usr/lib/zabbix/externalscripts

#Define slow query time
//563 LogSlowQueries=3000

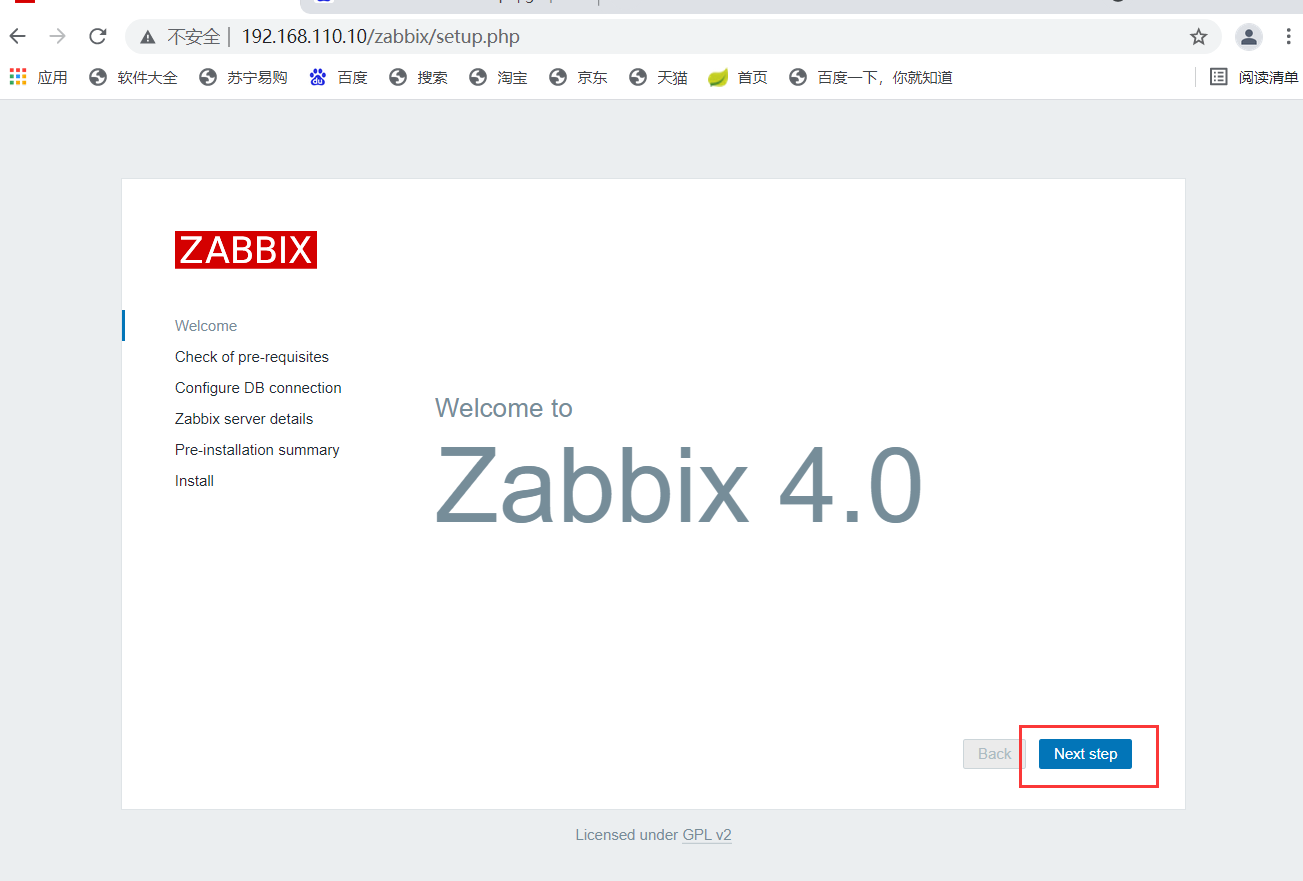
cp -r /usr/share/zabbix/ /usr/share/nginx/html
chown -R zabbix.zabbix /etc/zabbix
chown -R zabbix.zabbix /usr/share/nginx
chown -R zabbix.zabbix /usr/lib/zabbix
chmod -R 755 /etc/zabbix/web
chmod -R 777 /var/lib/php/session

systemctl start zabbix-server.service
systemctl enable zabbix-server.service

netstat -napl | grep 10051
systemctl restart php

==Real machine access==
http://192.168.110.10/zabbix
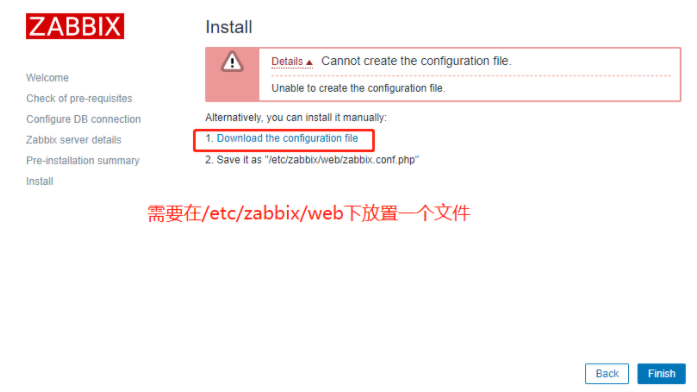
Link: ZABBIX conf.php
Extraction code: yipx
cd /etc/zabbix/web
ls
 Compressed package
chmod +x zabbix.conf.php
systemctl restart php-fpm.service
systemctl start zabbix-service.service
 Restart login
http://192.168.110.10/zabbix
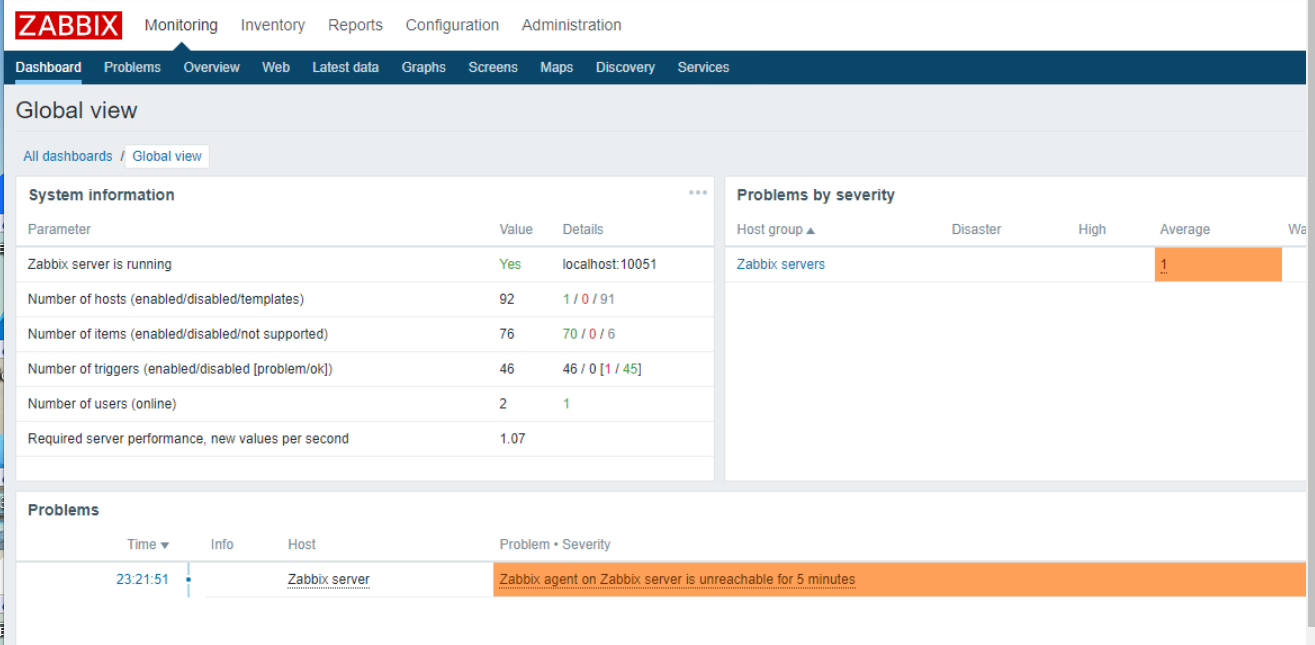
6. Configure proxy zabbix (192.168.110.20)
systemctl stop firewalld.service
setenforce 0

rpm -i https://repo.zabbix.com/zabbix/4.0/rhel/7/x86_64/zabbix-release-4.0-1.el7.noarch.rpm

yum -y install zabbix-agent
vim /etc/zabbix/zabbix_agentd.conf
//98 Server=192.168.110.10 address to monitoring end
//139  ServerActive=192.168.110.10 pointing to the monitoring server
//150 Hostname=test modify hostname

systemctl start zabbix-agent.service
systemctl enable zabbix-agent.service
netstat -natp | grep 10050
7. Configure automatic email Publishing
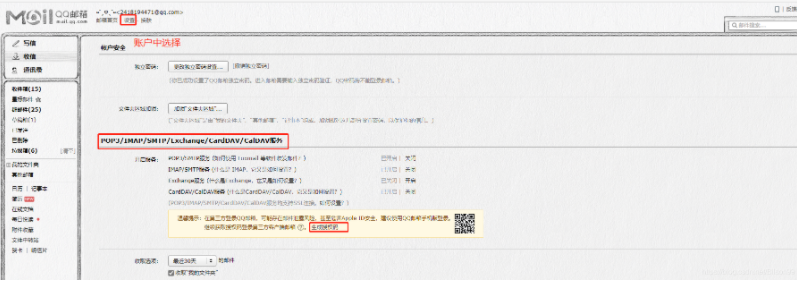
First, select the mailbox and start the pop3 and smtp services
QQ mailbox opening mode
Configure on server
server(192.168.110.10)
yum -y install mailx

vim /etc/mail.rc

#Last line add
set from=QQ number@qq.com
set smtp=smtp.qq.com
set smtp-auth-user=QQ number@qq.com
set smtp-auth-password=Authorization code
set smtp-auth=login


#Test whether it can be sent normally
echo 'hello wbw' | mail -s 'test' QQ number@qq.com
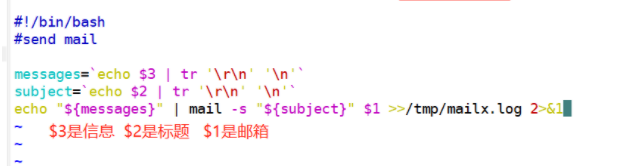
#Write the shell script for sending mail. Be sure to write it in this directory
cd /usr/lib/zabbix/alertscripts/

vim mailx.sh
#!/bin/bash
#send mail

messages=`echo $3 | tr '\r\n' '\n'`
subject=`echo $2 | tr '\r\n' '\n'`
echo "${messages}" | mail -s "${subject}" $1 >>/tmp/mailx.log 2>&1
#Create log file
touch /tmp/mailx.log

#Empowerment
chown -R zabbix.zabbix  /tmp/mailx.log
chmod +x /usr/lib/zabbix/alertscripts/mailx.sh
chown -R zabbix.zabbix /usr/lib/zabbix/

#Test script
. /usr/lib/zabbix/alertscripts/mailx.sh QQ number@qq.com "zabbix" "hello world"
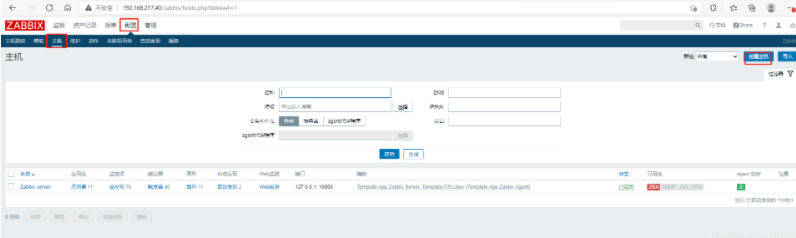
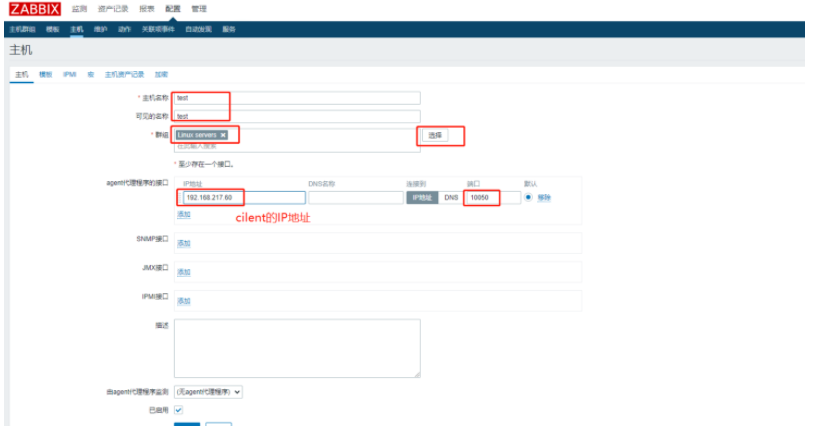
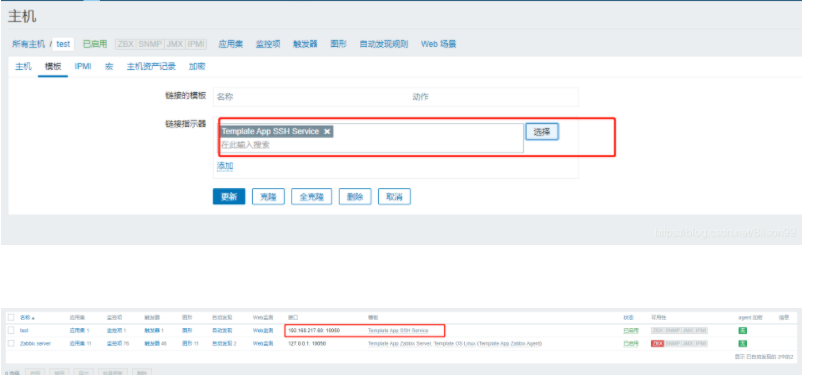
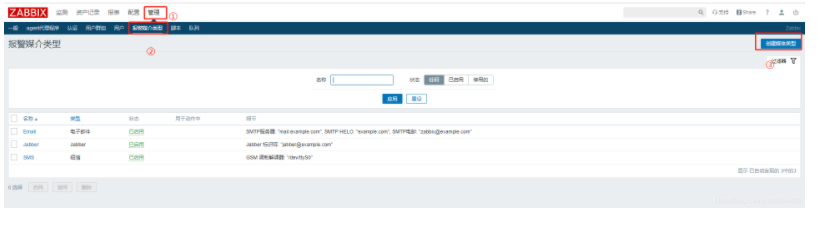
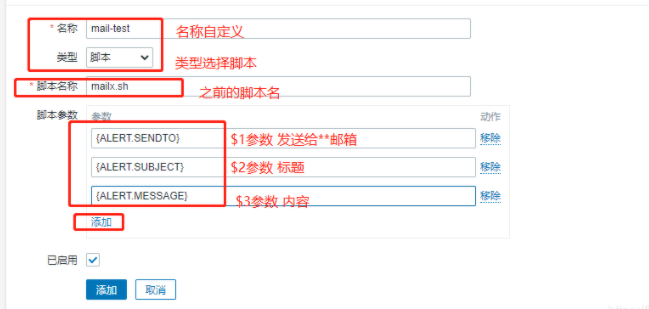
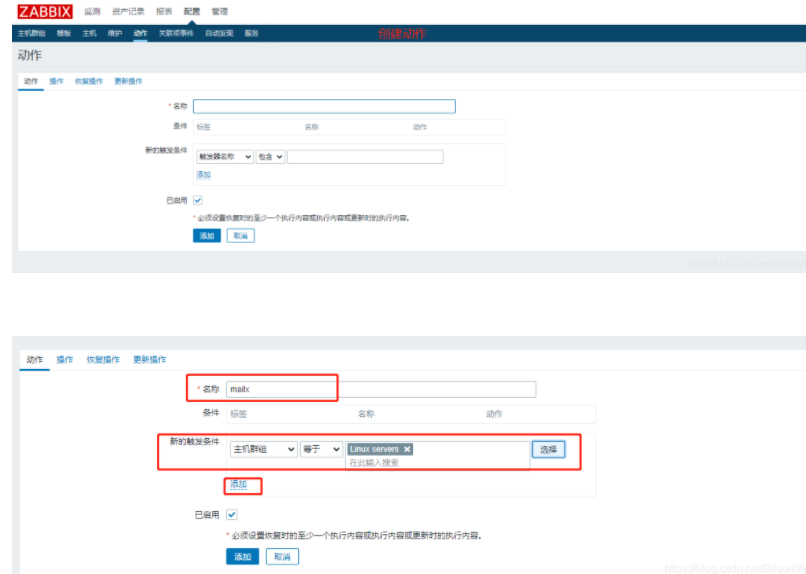
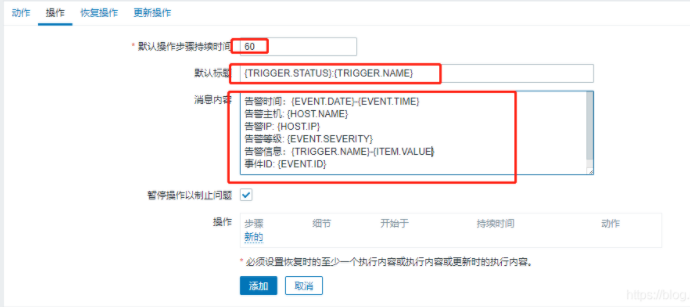
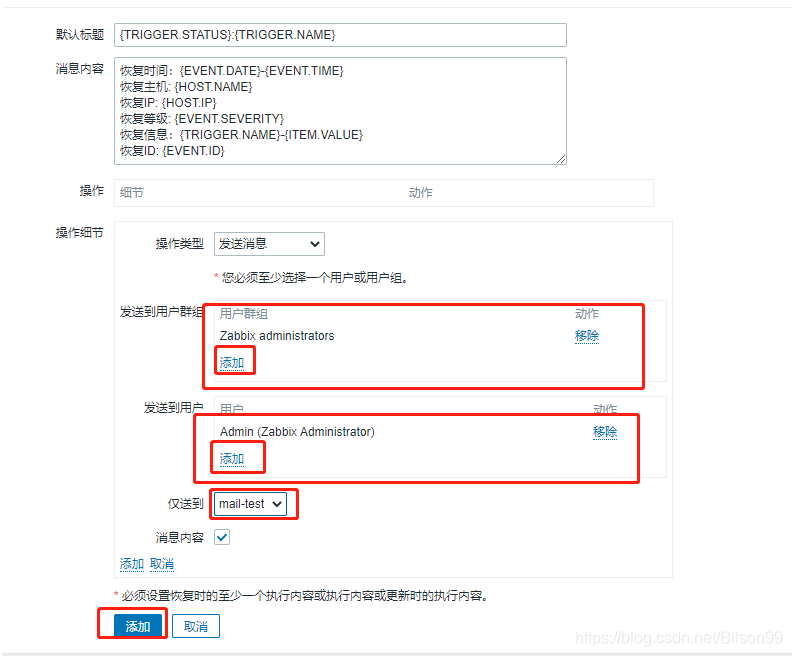
8. Web page configuration monitoring mechanism
{ALERT.SENDTO}
{ALERT.SUBJECT}
{ALERT.MESSAGE}
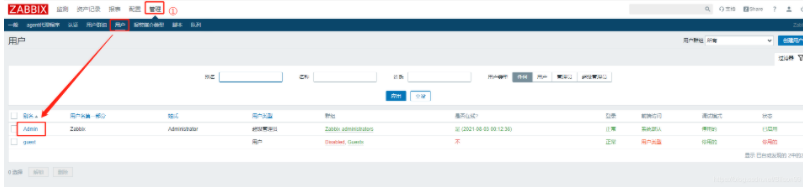
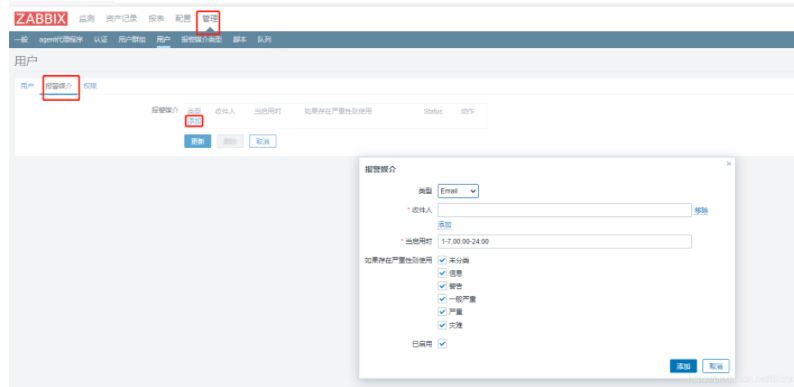
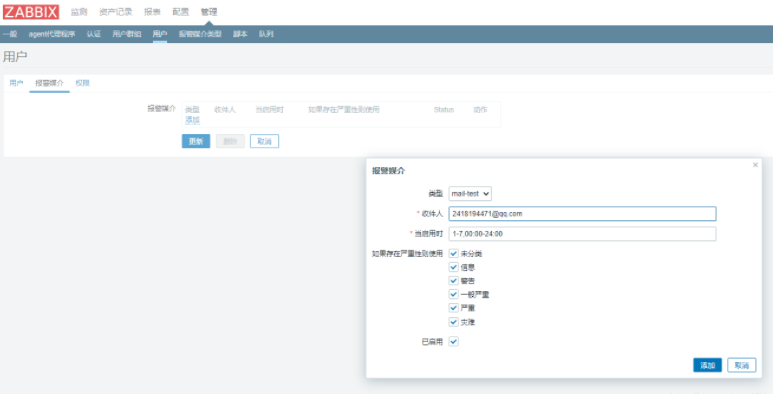
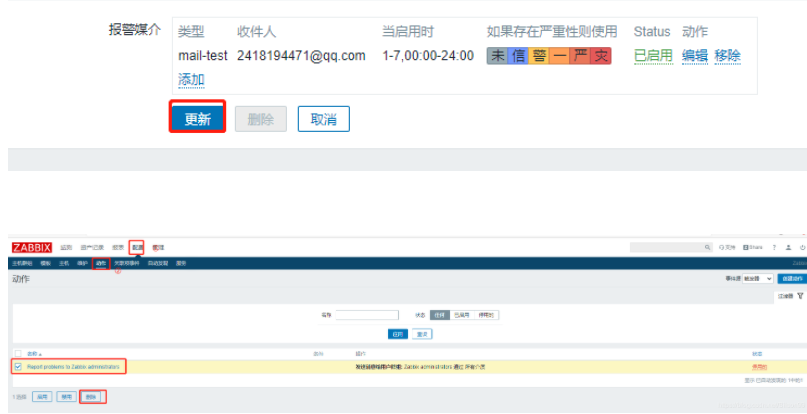
By default
Server restart zabbix service
server(192.168.110.10)
systemctl restart zabbix-*
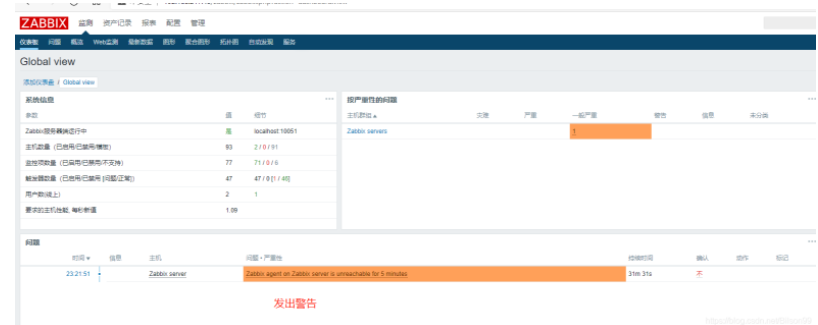
The proxy restarts the ssh service to see if the mail can be received
cilent(192.168.110.20)
systemctl restart sshd