1: The difference between four layer load balancing and seven layer load balancing
1. Layer 7 load balancing
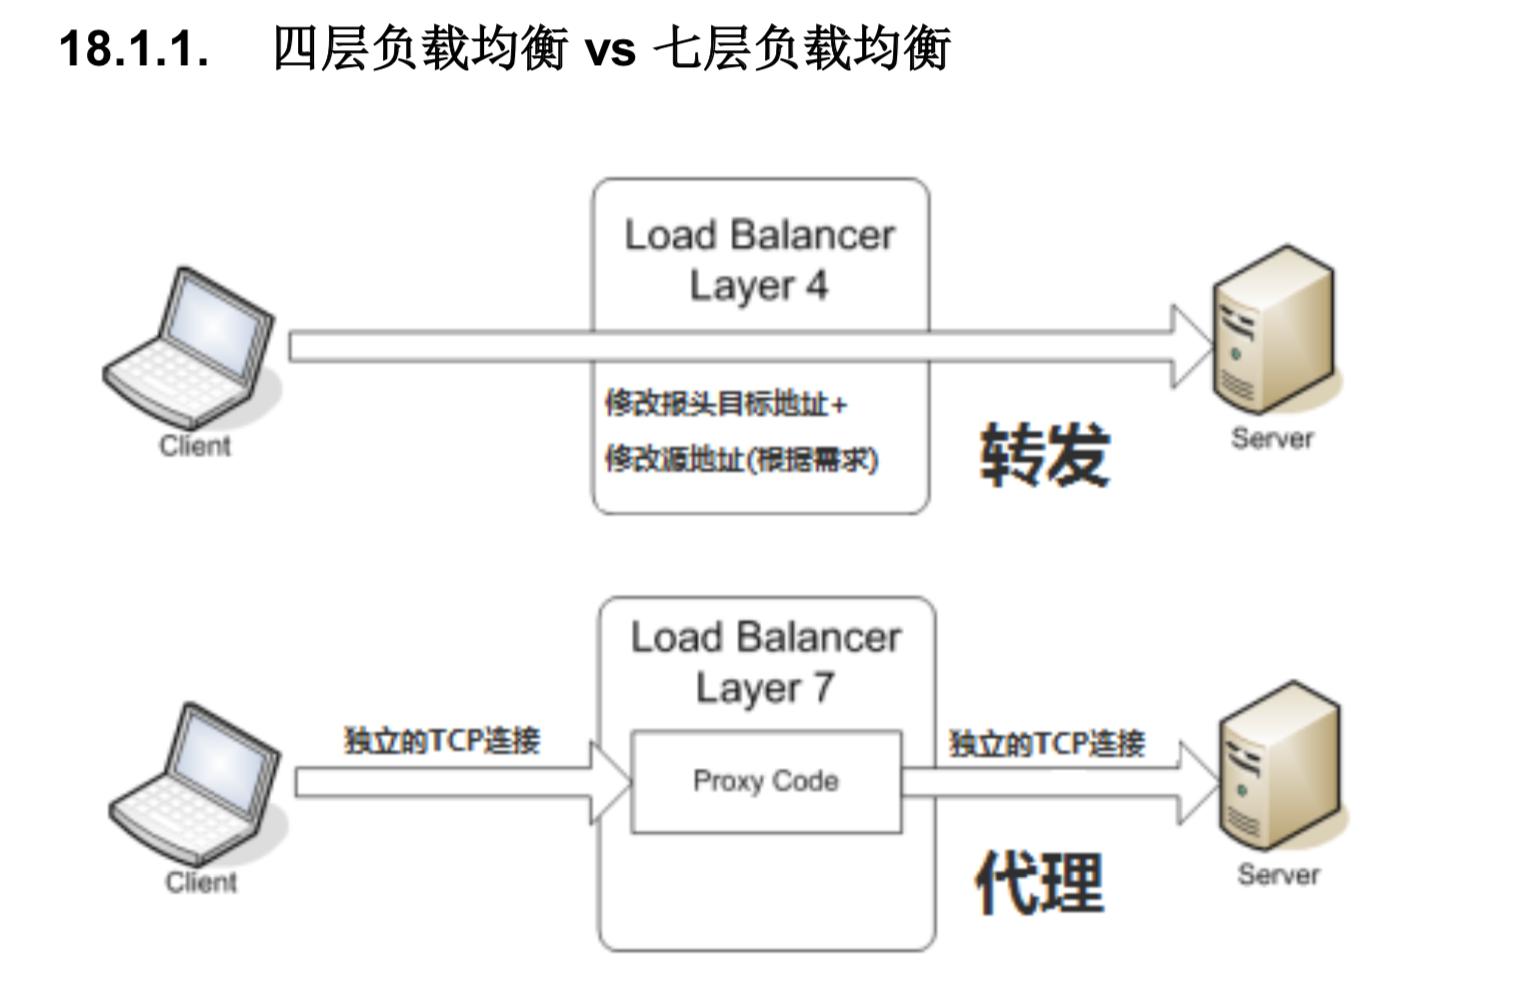
Commonly used nginx Load balancing technology is at the of application layer (layer 7) in network layering, nginx Establish with client TCP Connect (handshake), and then flexibly distribute the requests to different services according to the request information and local configuration information. nginx The advantages and disadvantages of this kind of 7-layer load balancing are obvious.
- advantage
The request can be distributed to different services, and the proxy forwarding can be carried out flexibly according to the request information; Since the request will pass through the load balancing server, the load balancing server will filter some requests (for example: DOS Attack) avoid all request information from hitting the server, and ensure the stable operation of the server.
- shortcoming
It is at the top layer of the network hierarchy. It needs to analyze the data and establish a connection with the client, which is inefficient.
2. Four layer load balancing
except nginx This 7-layer load balancing strategy, as well as the load balancing strategy based on the transport layer (4 layers). By analyzing the requested IP Address and port number for load balancing of requests. According to different request processing modes, the 4-layer load balancing algorithm can be divided into: NAT,D-NAT,DR as well as TUN Tunnel technology, etc. The implementation methods of layer 4 load balancing are: LVS.
- advantage
The data is not fully parsed and the connection (handshake) is not established with the client, which makes the request distribution efficient.
- shortcoming
The forwarding cannot be carried out flexibly. The loaded servers must be deployed on the same server, otherwise the results obtained by the same request information may be different.
3. Differences between layer 4 and layer 7 agreements
-
Layer 7 is based on HTTP protocol
-
The fourth layer is based on TCP/IP protocol
-
Summarize the seventh and fourth floors
The performance of four layer load balancing is much higher than that of HTTP agreement

HTTP The agreement is also based on TCP/IP agreement
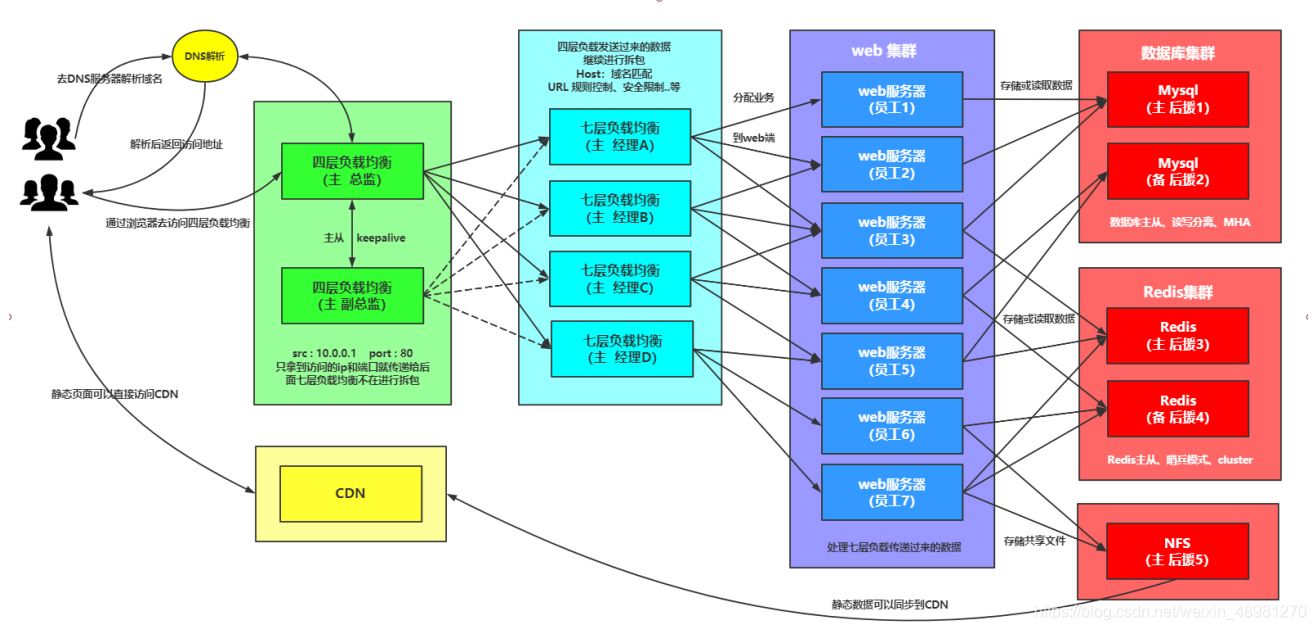
4. Four layer load balancing application scenario
1.four layers+Seven layers are used for load balancing, and four layers can ensure the high availability of seven layer load balancing;
2.SSH Proxy port,Load balancing can be used for port forwarding
3.MySQL service,Database read / write separation
5. Role of four layer load balancing
1.When there is a lot of traffic on the website, the seven layer load balancing can't resist so much traffic
2.The performance of four layer load balancing is much higher than that of seven layer load balancing
3.Four layer load balancing is the load balancing agent
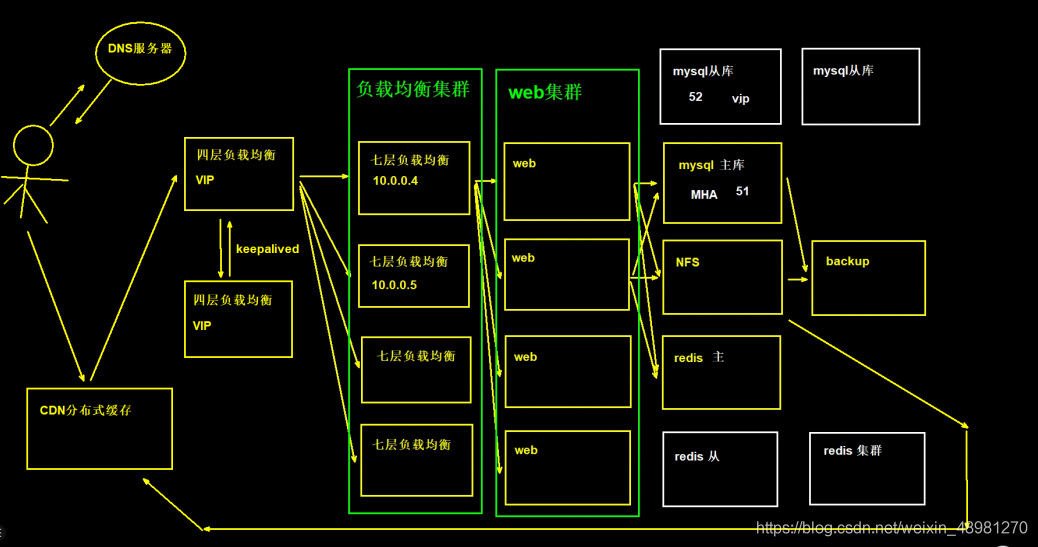
6. Cooperation between layers 4 and 7
1.Four layer load balancing cannot distinguish domain names
2.Layer 7 load traffic forwarding and security authentication
7. Implementation of four layer load balancing
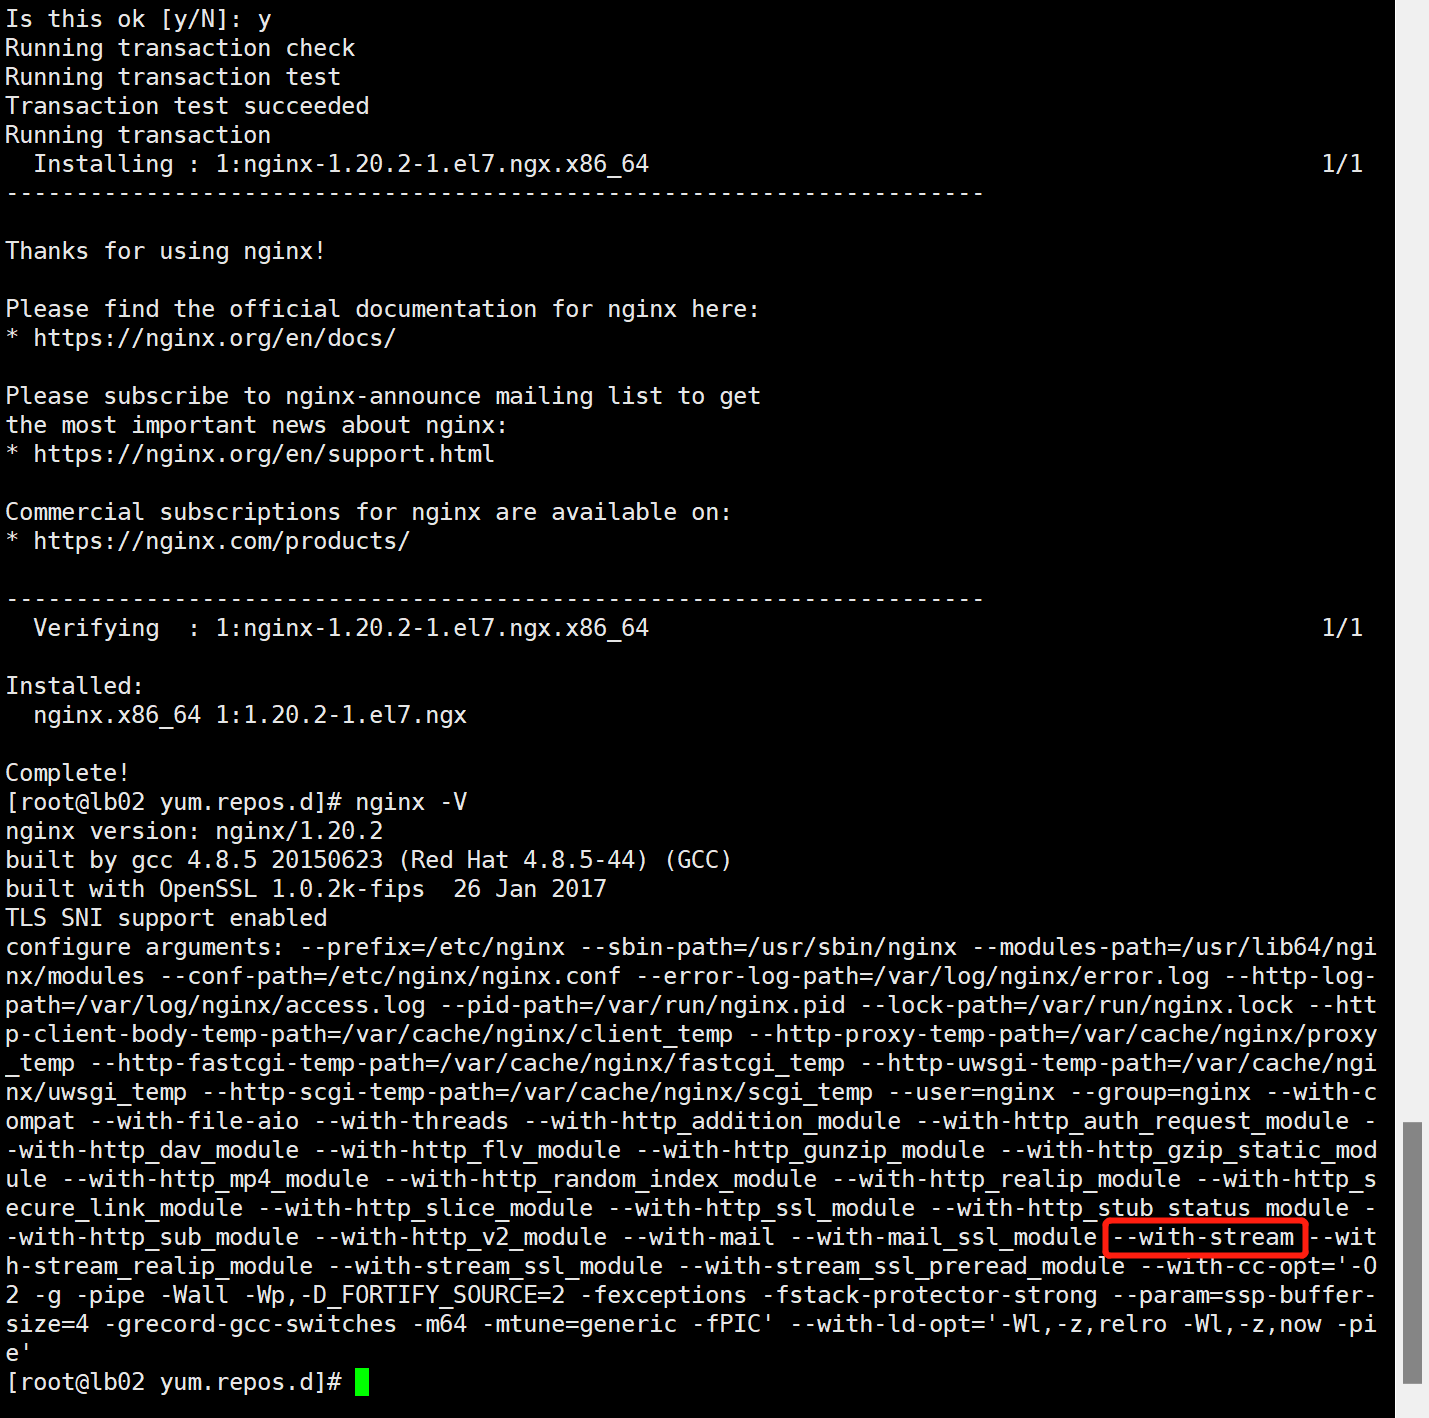
Layer 4 load balancing must have the following parameters
--with-srearm
- Note: Nginx installed in epel source cannot use four layer load balancing
2: Preparation for deployment of layer 4 load balancing (compilation and installation)
1. Use compile to install nginx (not yum)
be careful:yum No installation--with-stream parameter
 Layer 4 load balancing must be--with-stream parameter
- Official website: https://nginx.org/en/linux_packages.html#RHEL-CentOS
3. Installation Preparation
yum install net-tools vim wget -y
4. Add source
vim /etc/yum.repos.d/nginx.repo
[nginx-stable]
name=nginx stable repo
baseurl=http://nginx.org/packages/centos/$releasever/$basearch/
gpgcheck=1
enabled=1
gpgkey=https://nginx.org/keys/nginx_signing.key
module_hotfixes=true

[nginx-mainline]
name=nginx mainline repo
baseurl=http://nginx.org/packages/mainline/centos/$releasever/$basearch/
gpgcheck=1
enabled=0
gpgkey=https://nginx.org/keys/nginx_signing.key
module_hotfixes=true
5. Implementation
[root@lb02 ~]# yum clean all
6. Compilation
[root@lb02 ~]# yum makecache
7. Install nginx
[root@lb02 ~]# yum install nginx
8. Compress the epel source (cannot be installed with epel)
Switch path
[root@lb02 ~]# cd /etc/yum.repos.d
 take epel Source compression(out of commission epel install)
[root@lb02 yum.repos.d]# gzip epel.repo
total 52
-rw-r--r--. 1 root root 2523 Dec 24 18:31 CentOS-Base.repo
-rw-r--r--. 1 root root 1664 Oct 23  2020 CentOS-Base.repo.backup
-rw-r--r--. 1 root root 1309 Nov 23  2020 CentOS-CR.repo
-rw-r--r--. 1 root root  649 Nov 23  2020 CentOS-Debuginfo.repo
-rw-r--r--. 1 root root  314 Nov 23  2020 CentOS-fasttrack.repo
-rw-r--r--. 1 root root  630 Nov 23  2020 CentOS-Media.repo
-rw-r--r--. 1 root root 1331 Nov 23  2020 CentOS-Sources.repo
-rw-r--r--. 1 root root 8515 Nov 23  2020 CentOS-Vault.repo
-rw-r--r--. 1 root root  616 Nov 23  2020 CentOS-x86_64-kernel.repo
-rw-r--r--  1 root root  254 Dec 24 18:31 epel.repo.gz
-rw-r--r--  1 root root  398 Jan  8 21:34 nginx.repo
9. Reinstall nginx
yum install nginx
10. Display -- with stream parameter

11. Execute nginx -V
Show this parameter --with-stream Success(Enable layer 4 load balancing)
3: Deploy and build four layers of load balancing
1. Construction preparation
1.Can't put nginx Configuration on http within
 namely /etc/nginx/conf.d
2.Four layer load balancing
 Put it in stream within
2. Modify nginx global configuration file
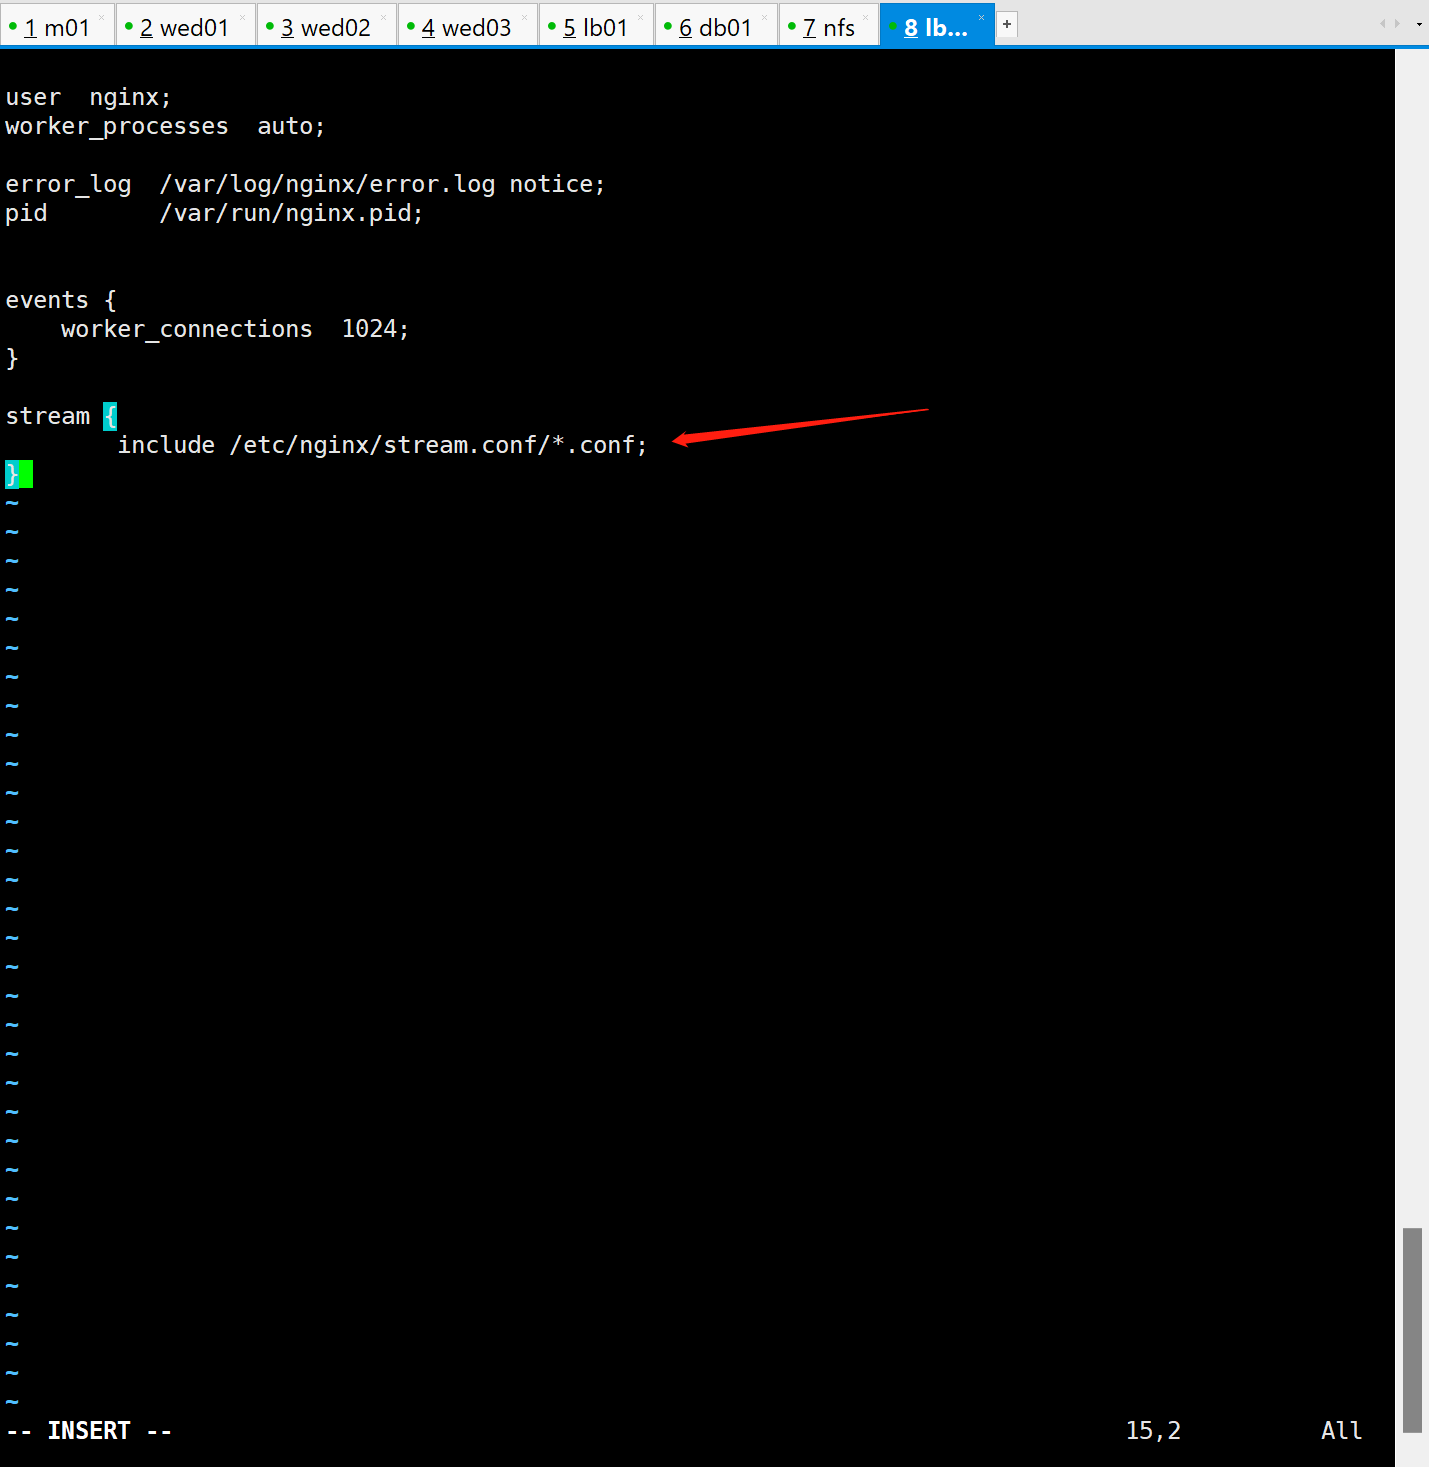
Switch path
[root@lb02 ~]# cd /etc/nginx
 Write global configuration file
[root@lb02 nginx]# vim /etc/nginx/nginx.conf
user  nginx;
worker_processes  auto;
error_log  /var/log/nginx/error.log notice;
pid        /var/run/nginx.pid;

events {
    worker_connections  1024;
}

stream {
        include /etc/nginx/stream.conf/*.conf;
}
3. Create web address profile
[root@lb02 nginx]# mkdir /etc/nginx/stream.conf
4. Switch directories
[root@lb02 nginx]# cd stream.conf
5. Write configuration web site
[root@lb02 stream.conf]# vim nginx.conf
# Connection pool
upstream nginx {
	server 172.16.1.5:80;
}
server {
	# Layer 4 load balancing cannot write domain names
	listen 80;
		# Connection pool connection
		proxy_pass nginx;

}
6. Close selinux and firewalld
close selinux
setenforce 0

close firewalld
systecmtl stop firewalld
7. Test
nginx -t
8. Restart
systemctl restart nginx
9. Website test (layer 4 agent succeeded)

4: Layer 4 load balancing practice (SSH proxy port)
- Equipment requirements
|Server name | server ip address | server|
| ---------- | ------------ | ------------ |
|LB01 | 192.168.15.5 | seven layer load balancing|
|Lb02 | 192.168.15.6 | four layer load balancing|
1. Usage scenario (SSH proxy port)
- Case 1: it is required to use port 1234 of 192.168.15.6 to link port 22 of 192.168.15.5
- ssh service is not http protocol, but tcp protocol to implement nginx proxy ssh service
- (hide the original IP address through address translation)
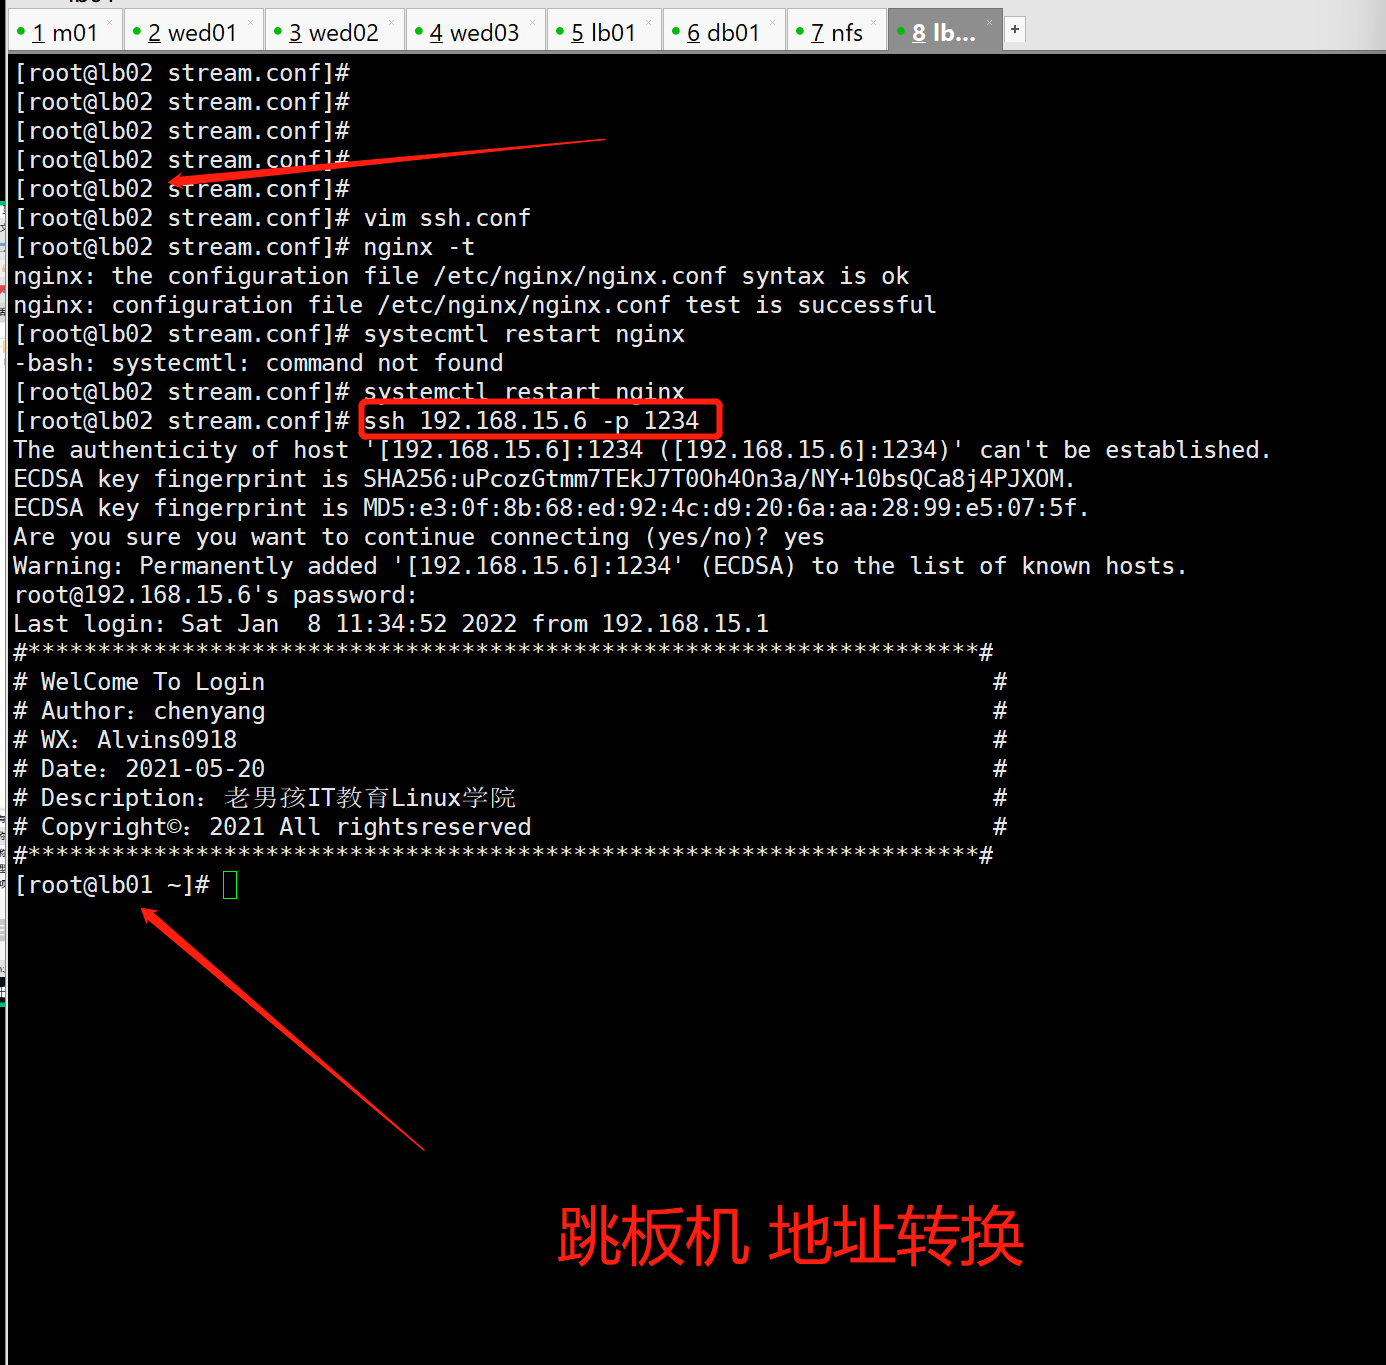
2. Create ssh file
Switch path
[root@lb02 ~]# cd /etc/nginx

establish ssh file
[root@lb02 stream.conf]# vim ssh.conf
upstream ssh {
server 172.16.1.5:22;
}
server {
listen 1234;
proxy_pass ssh;
}
3. Test
nginx -t
4. Restart
[root@lb02 stream.conf]# systemctl restart nginx
5. Connect your own ip port to realize springboard machine and address conversion
[root@lb02 stream.conf]# ssh 192.168.15.6 -p 1234
5: nginx proxy mysql service
1. Four layer load balancing agent mysql
- Case 2: it is required to use the 33060 port of 192.168.15.6 to proxy the 3306 port of 192.168.15.61
2. Prepare configuration file
[root@lb02 stream.conf]# vim mysql.conf
upstream mysql {
server 172.16.1.61:3306;
}

server {
listen 33060;
proxy_pass mysql;
}
3. Four layer load balancing 33060 port proxy database 3306 port
Four layer load balancing 33060 port proxy database 3306 port
[root@db01 ~]# mysql -uroot -p123456 -h192.168.15.6 -P33060
