Android simple dynamic loading - batch replacement of resource packages to achieve skin change
Dynamic loading technology:
The core is to dynamically call external dex files. In extreme cases, the dex file with Android APK is only a program entry (or an empty shell). All functions are completed by downloading the latest dex file from the server
When the application is running, it is suitable to load some local executable files to realize some specific functions
Dynamically load those files:
Dynamically loading so Library
Dynamically load DEX, jar and APK files
Simple implementation:
1. Get the package manager, get the resource package information class, and find the resource object
2. Obtain the AssetManager object and addAssetPath method through reflection to add the passed in skin package path
3. Create a Resources object to get the resource object in the resource package
4. The resource id obtained through Resources is compared with the resource id passed in externally to load Resources
5. When the page Activity starts, implement layoutinflator Factory2, collect controls that need to be skinned
6. In layoutinflator In the Factory2 implementation class, call onCreateView to instantiate the control, and collect the controls that need to be skinned.
7. Traverse the properties of all controls, get the control, control resource id, resource id type, resource id name, and then compare it with the resource id obtained through Resources to load the Resources in the resource package
Project link: https://github.com/renbin1990/DynamicLoad
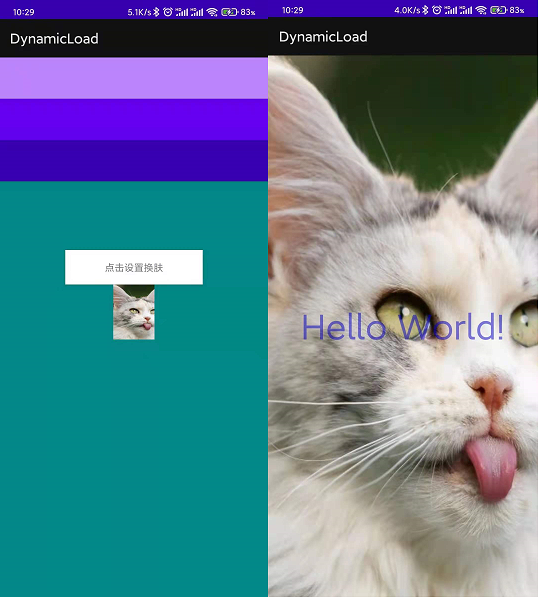
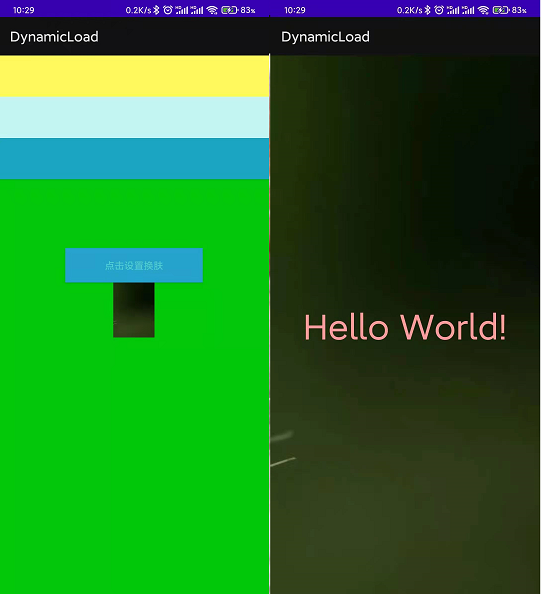
effect
It's a little ugly. It's good to achieve the effect
Before skin change:
After skin change:
1. Get the package manager, get the resource package information class, and find the resource object
Create a method to load apk, pass in the apk path, and create an initialization context class
public class SkinManager {

    private static  SkinManager sSkinManager;
    //shangxiawen
    private Context mContext;
    //Resource package name
    private String packageName;
    //Resource objects in resource packages
    private Resources mResources;

    public static  SkinManager getInstance(){
        if (sSkinManager ==null){
            sSkinManager = new SkinManager();
        }
        return sSkinManager;
    }

    public void setContext(Context context){
        this.mContext = context;
    }

    /**
     * Load skin package according to path
     * @param path
     */
    public void loadSkinApk(String path){
        //Get package manager
        PackageManager packageManager = mContext.getPackageManager();
        //Get resource package information class
        PackageInfo packageArchiveInfo = packageManager.getPackageArchiveInfo(path, PackageManager.GET_ACTIVITIES);
        //Get resource object
        packageName = packageArchiveInfo.packageName;
        }
 }
2. Create a Resources object to get the resource object in the resource package
Generally, Resources objects are obtained through getResources, but this is to obtain Resources in this package. To obtain Resources in other packages, you need to go to new Resources (), which requires three parameters. AssetManager needs to obtain them through reflection. This manager is required for all loaded Resources in the project, The remaining two parameters, DisplayMetrics, can be obtained through the initialized context.
          try{
            //Get the assetManager object through reflection
            AssetManager assetManager = AssetManager.class.newInstance();
            //Get addAssetPath direction through reflection
            Method addAssetPath = assetManager.getClass().getDeclaredMethod("addAssetPath", String.class);
            addAssetPath.invoke(assetManager,path);
            //Get the resource object in the resource package
            mResources = new Resources(assetManager,mContext.getResources().getDisplayMetrics(),mContext.getResources().getConfiguration());
        }catch (Exception e){
            e.printStackTrace();
        }
3. Compare the resource id obtained through Resources with the resource id passed in externally to load Resources
First, judge whether the obtained resource package resource is empty
    /**
     * Judge whether the resource object of the resource package is empty
     * @return
     */
    public boolean resourceIsNull(){
        if (mResources == null){
            return  true;
        }
        return false;
    }
Get color resource from resource package
(1) First, judge whether the obtained resource package resource is empty. If it is empty, the incoming resource id will be returned
    public int getColor(int resid){
        if (resourceIsNull()){
            return resid;
        }
      }
(2) Obtain the type and name of the resource id according to the passed in resource id and context
     //Gets the type of the resource id
        String resourceTypeName = mContext.getResources().getResourceTypeName(resid);
        //Gets the name of the resource id
        String resourceEntryName = mContext.getResources().getResourceEntryName(resid);
(3) Match the created mResources with the resource id passed in from the outside. If they match, the resource id corresponding to mResources will be returned
Get the complete code of color resource:
    /**
     * Get color resources
     * @param resid     The resource id of the current app replacement resource
     * @return The resource id of the matched resource object
     */
    public int getColor(int resid){
        if (resourceIsNull()){
            return resid;
        }
        //Gets the type of the resource id
        String resourceTypeName = mContext.getResources().getResourceTypeName(resid);
        //Gets the name of the resource id
        String resourceEntryName = mContext.getResources().getResourceEntryName(resid);
        //To match, obtain the id of the external pak resource to match
        int identifier = mResources.getIdentifier(resourceEntryName, resourceTypeName, packageName);
        if (identifier == 0){
            return  resid;
        }
        return mResources.getColor(identifier);
    }
Obtain the resource (picture resource) corresponding to the resource id from the resource package
    /**
     * Obtain the resource corresponding to the resource id from the resource package
     * @param id
     * @return
     */
    public Drawable getDrawable(int id){
        if (resourceIsNull()){
            return ContextCompat.getDrawable(mContext,id);
        }
        //Gets the type of the resource id
        String resourceTypeName = mContext.getResources().getResourceTypeName(id);
        //Gets the name of the resource id
        String resourceEntryName = mContext.getResources().getResourceEntryName(id);
        //To match, obtain the id of the external pak resource to match
        int identifier = mResources.getIdentifier(resourceEntryName, resourceTypeName, packageName);
        if (identifier ==0){
            return ContextCompat.getDrawable(mContext,id);
        }
        return mResources.getDrawable(identifier);
    }

/**
     * Obtain the resource corresponding to the resource id from the resource package
     * @param id
     * @return
     */
    public int getDrawableID(int id){
        if (resourceIsNull()){
            return id;
        }
        //Gets the type of the resource id
        String resourceTypeName = mContext.getResources().getResourceTypeName(id);
        //Gets the name of the resource id
        String resourceEntryName = mContext.getResources().getResourceEntryName(id);
        //To match, obtain the id of the external pak resource to match
        int identifier = mResources.getIdentifier(resourceEntryName, resourceTypeName, packageName);
        if (identifier ==0){
            return id;
        }
        return identifier;
    }
If you need to add other resources, you can add them yourself according to this method
2, Batch collection of controls that need skin change in the project
By implementing layoutinflator Factory2, get the control loaded by the current project, and then get the properties that the control needs to load, such as textcolor, background or src, and then get the loaded resource id to replace the Chinese resource files of the resource package in batch.
1. Create BaseActivity
Create BaseActivity, inherit AppCompatActivity, and create layoutinflator Factory2 implementation class,
There is a problem here. When the API < = 28, you need to reflect, obtain the mFactorySet property, and set relevant parameters, otherwise an exception will be reported, and if it is greater than 28, an exception will be reported. At present, there is no solution, so to run this project, you need to change the targetSdkVersion to 28
class BaseActivity extends AppCompatActivity {

    private SkinFactory mSkinFactory;

    @Override
    protected void onCreate(Bundle savedInstanceState) {
        super.onCreate(savedInstanceState);
        try {
            //Solve the problem of creating an error by inheriting AppCompatActivity SkinFactory
            setLayoutInflaterFactory(getLayoutInflater());
            mSkinFactory = new SkinFactory();
            LayoutInflaterCompat.setFactory2(getLayoutInflater(), mSkinFactory);
        }catch (Exception e){
            e.printStackTrace();
        }
    }

    /**
     * Change the value of mFactorySet to inherit AppCompatActivity without error
     * targetSdkVersion 28 needs to be set to be valid, 29 and 30 will report an error, and additional adaptation is required
     *
     * @param origonal
     */
    public void setLayoutInflaterFactory(LayoutInflater origonal) {
        LayoutInflater layoutInflater = origonal;
        try {
            Field mFactorySet = LayoutInflater.class.getDeclaredField("mFactorySet");
            mFactorySet.setAccessible(true);
            mFactorySet.set(layoutInflater, false);
        } catch (Exception e) {
            e.printStackTrace();
        }
    }
}
2. Implement layoutinflator Factory2
class SkinFactory implements LayoutInflater.Factory2{
    @Nullable
    @Override
    public View onCreateView(@Nullable View parent, @NonNull String name, @NonNull Context context, @NonNull AttributeSet attrs) {
        Log.e("------>","11111111111111111111  "+name);
        }

    /**
     * Control instantiation
     * @param name
     * @param context
     * @param attrs
     * @return
     */
    @Nullable
    @Override
    public View onCreateView(@NonNull String name, @NonNull Context context, @NonNull AttributeSet attrs) {

	}
}
Through printing, it is found that the above method can print all the controls during the initialization of the current page control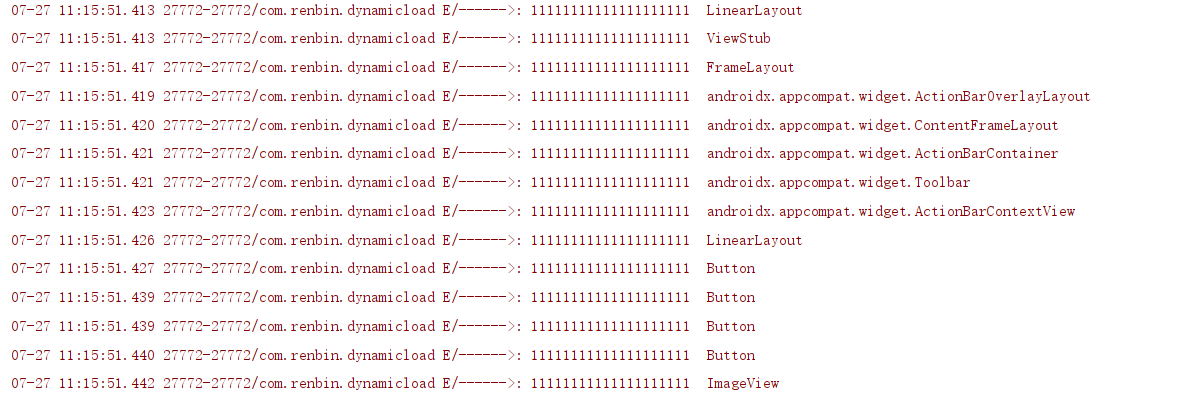
In this method, you can do the collection and processing of controls, and configure a second method to instantiate controls
3. Create an entity class that handles the control
class SkinItem{
        //Property name textcor text background
        String name;
        //The value type of the property is color mipmap
        String typeName;
        //The name of the value of the property
        String entryName;
        //Resource id of the property
        int resId;

        public SkinItem(String name, String typeName, String entryName, int resId) {
            this.name = name;
            this.typeName = typeName;
            this.entryName = entryName;
            this.resId = resId;
        }


        public String getName() {
            return name;
        }

        public void setName(String name) {
            this.name = name;
        }

        public String getTypeName() {
            return typeName;
        }

        public void setTypeName(String typeName) {
            this.typeName = typeName;
        }

        public String getEntryName() {
            return entryName;
        }

        public void setEntryName(String entryName) {
            this.entryName = entryName;
        }

        public int getResId() {
            return resId;
        }

        public void setResId(int resId) {
            this.resId = resId;
        }
    }
    /**
     * Control encapsulation object requiring skin change
     */
    class SkinView{
        View view;
        List<SkinItem> skinItems;

        public SkinView(View view, List<SkinItem> skinItems) {
            this.view = view;
            this.skinItems = skinItems;
        }

        public void apply(){
        }
      }
4. Collect controls that need to be skinned
All Android controls are in
"android.widget.",
"android.view.",
"android.webkit"
Under these three packages, some of the obtained controls have full path names, similar to: Android X constraintlayout. widget. ConstraintLayout
Some have separate names. We need to give the splice package names, similar to these controls:
Button,LinearLayout,ImageView,TextView
Therefore, there are two operations to collect the controls to be skinned, one is the full path control, and the other is the package name to be spliced
The implementation code is as follows:
   //All Android controls are under these three conditions
    private static  final  String[] prxfixList = {
      "android.widget.",
      "android.view.",
      "android.webkit"
    };
    //Collect control containers that need skinning
    private List<SkinView> mViewList = new ArrayList<>();

  @Nullable
    @Override
    public View onCreateView(@Nullable View parent, @NonNull String name, @NonNull Context context, @NonNull AttributeSet attrs) {
        Log.e("------>","11111111111111111111  "+name);
        //Collect controls that need skinning

        View view = null;
        if (name.contains(".")){
            //Controls with package names are similar to Android X constraintlayout. widget. ConstraintLayout
            view = onCreateView(name, context, attrs);
        }else {
            //Control without package name, similar to TextView LinearLayout
            for (String s : prxfixList){
                String viewName = s+name;
                view = onCreateView(viewName, context, attrs);
                if (view!=null){
                    break;
                }
            }
        }

        //Collect controls that need skinning
        if (view!= null){
            paserView(view,name,attrs);
        }
        return view;
    }
    /**
     * Collect controls that need skinning
     * @param view
     * @param name
     * @param attrs
     */
    private void paserView(View view, String name, AttributeSet attrs) {
        List<SkinItem> skinItems = new ArrayList<>();
        //Traverses all the properties of the current incoming control
        for (int i = 0; i < attrs.getAttributeCount(); i++) {
            //Get attribute name
            String attributeName = attrs.getAttributeName(i);
            if (attributeName.contains("background") || attributeName.contains("textColor")|| attributeName.contains("src")){
                //Consider the skinned control to be collected
                String attributeValue = attrs.getAttributeValue(i);
                //Get resource file id
                int resId = Integer.parseInt(attributeValue.substring(1));
                //Gets the type of the resource id
                String resourceTypeName = view.getResources().getResourceTypeName(resId);
                //Gets the name of the resource id
                String resourceEntryName = view.getResources().getResourceEntryName(resId);
                SkinItem skinItem = new SkinItem(attributeName,resourceTypeName,resourceEntryName,resId);
                skinItems.add(skinItem);
            }
        }

        /**
         * If the size of a control collection is greater than 0, it indicates that a skin change is required
         */
        if (skinItems.size() >0){
            //If it needs to be replaced, it is added to the collection
            SkinView skinView = new SkinView(view,skinItems);
            mViewList.add(skinView);
        }
    }

    /**
     * Control instantiation
     * @param name
     * @param context
     * @param attrs
     * @return
     */
    @Nullable
    @Override
    public View onCreateView(@NonNull String name, @NonNull Context context, @NonNull AttributeSet attrs) {
        View view = null;
        try {
            Class<?> aClass = context.getClassLoader().loadClass(name);
            //Get the second constructor
            Constructor<? extends View> constructor = (Constructor<? extends View>) aClass.getConstructor(Context.class, AttributeSet.class);
            view = constructor.newInstance(context, attrs);
        }catch (Exception e){
            e.printStackTrace();
        }
        return view;
    }
5. Batch replace control properties
Go through all the obtained controls, get the properties of the control setting related parameters, and then pass the resource id to SkinManager for resource matching. If it matches, it will be set directly to the control
apply method processing in SkinView
        public void apply(){
            for (SkinItem skinItem : skinItems){
                //Judge whether this attribute is background?
                if (skinItem.getName().equals("background")){
                    //For backround, there are two ways to set the background. One is to set the color by color, and the other is to set the background by drawable and mipmap
                    if (skinItem.getTypeName().equals("color")){
                        //Pass the resource id to SkinManager for resource matching. If it matches, it will be directly set to the control
                        //If there is no match, set the previous resource id to the control
                        if (SkinManager.getInstance().resourceIsNull()){
                            view.setBackgroundResource(SkinManager.getInstance().getColor(skinItem.getResId()));
                        }else {
                            view.setBackgroundColor(SkinManager.getInstance().getColor(skinItem.getResId()));
                        }
                    }else if (skinItem.getTypeName().equals("drawable")||skinItem.getTypeName().equals("mipmap")){
                        if (Build.VERSION.SDK_INT >= Build.VERSION_CODES.JELLY_BEAN){
                            view.setBackground(SkinManager.getInstance().getDrawable(skinItem.getResId()));
                        }else {
                            view.setBackgroundDrawable(SkinManager.getInstance().getDrawable(skinItem.getResId()));
                        }
                    }
                }else if (skinItem.getName().equals("src")){
                    if (skinItem.getTypeName().equals("drawable")||skinItem.getTypeName().equals("mipmap")){
                        ((ImageView)view).setImageResource(SkinManager.getInstance().getDrawableID(skinItem.getResId()));
                    }else if (skinItem.getTypeName().equals("color")){
                        ((ImageView)view).setImageResource(SkinManager.getInstance().getColor(skinItem.getResId()));
                    }
                }else if (skinItem.getName().equals("textColor")){
                    ((TextView)view).setTextColor(SkinManager.getInstance().getColor(skinItem.getResId()));
                }
            }
        }
When the external SkinFactory creates a batch skin changing method, call
    //Batch skin change
    public void apply(){
        for (SkinView skinView :mViewList){
            skinView.apply();
        }
    }
Add skin changing method in BaseActivity
    public void apply() {
        mSkinFactory.apply();
    }
    @Override
    protected void onResume() {
        super.onResume();
        //Replace resources with other hidden activities
        mSkinFactory.apply();
    }
At this point, the dynamic loading of relevant code and writing are completed. Next, test it.
3, Test related codes
1. Initialize SkinManager
public class MyApp  extends Application {
    public static MyApp appContext;

    @Override
    public void onCreate() {
        super.onCreate();
        appContext = this;
        //Initialize context in application
        SkinManager.getInstance().setContext(this);
    }
}
2. Create a resource package
Before calling the skin as like as two peas, you need to create a resource APK package and put some resource files exactly the same as the current project. The same name will do the same. The resources can be different.
Project resource file:
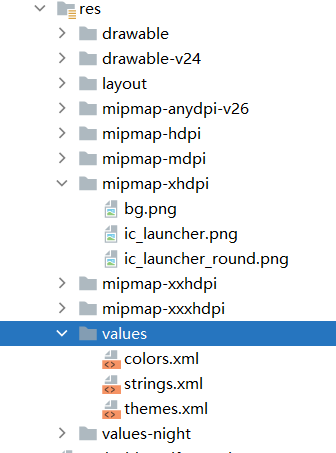
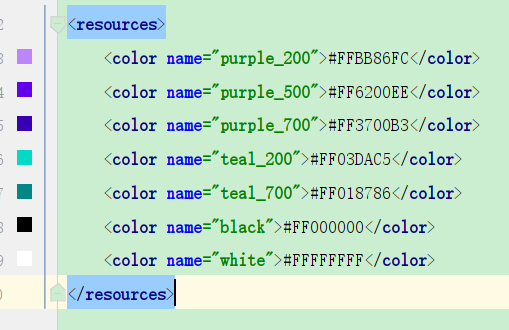
Create a project skin: create a replacement resource
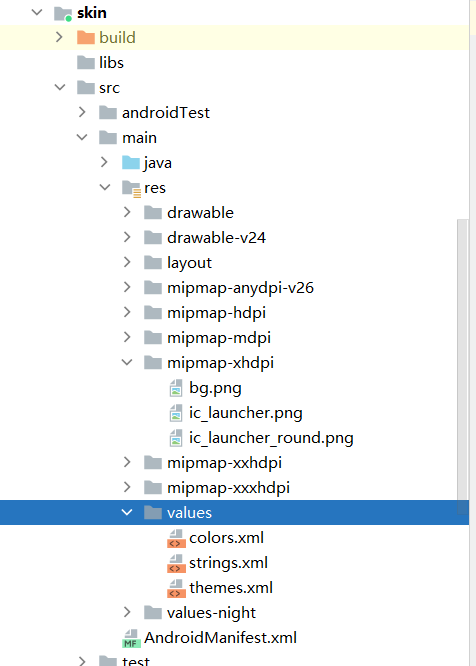
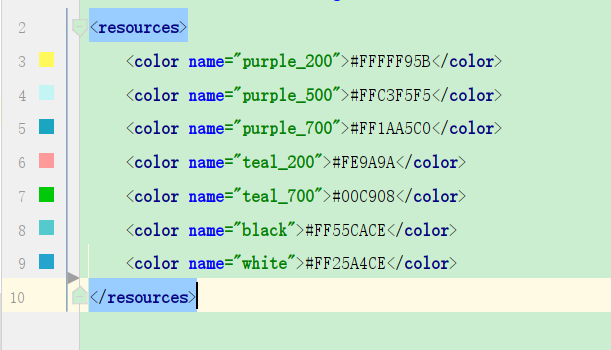
Generate apk package through this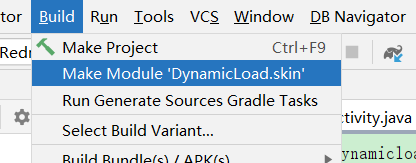
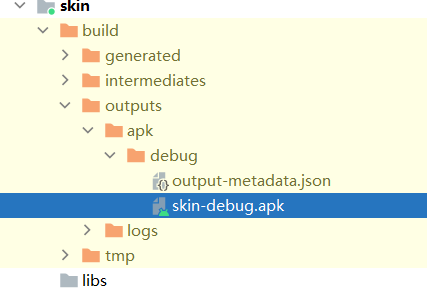
Then change the name to skin and send it to the SD card path: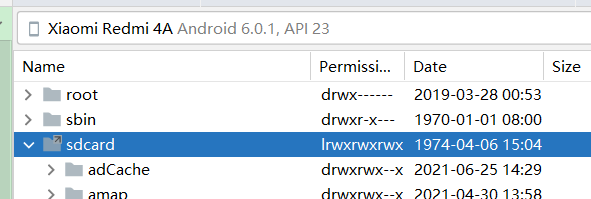

3. Call skin changing operation
     button.setOnClickListener(new View.OnClickListener() {
            @Override
            public void onClick(View v) {
                SkinManager.getInstance().loadSkinApk(Environment.getExternalStorageDirectory()+"/skin.apk");
                //skin peeler
                apply();
            }
        });
Since then, the bulk replacement skin function has been realized
summary
Project code: https://github.com/renbin1990/DynamicLoad
Before I came into contact with this technology, if I were to realize the dynamic skin change of a project, I might be to obtain the project controls, and then judge and deal with them one by one. I set the background separately. Android technology is very deep and needs to learn well.