Harmony OS device development learning record (12) -- light the oled to display Chinese characters and pictures through I2C.
Based on hispark wifi suite, harmony os 2.0 full code is adopted
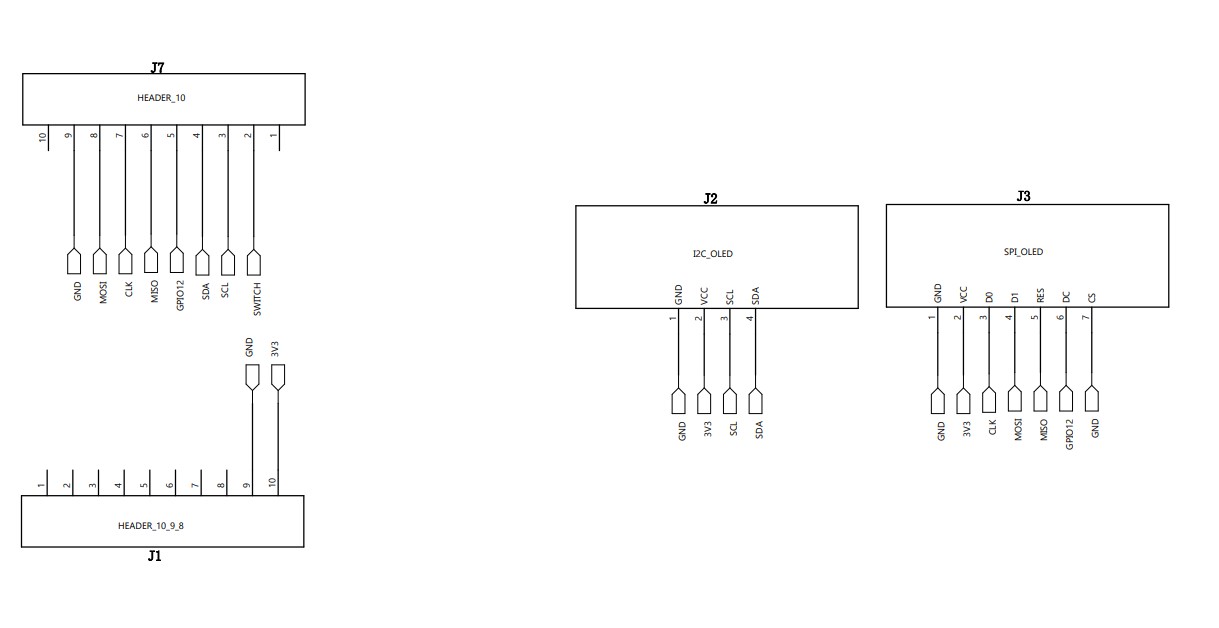
1, See the schematic diagram to determine the hardware circuit
Schematic diagram of oled
2, Create a demo file in the source code
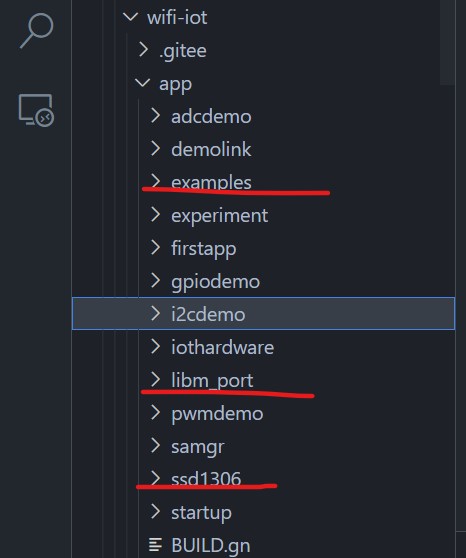
First, clone the driver transplanted by the great God in hihopeorg on gitee and move it to the project directory
git clone https://gitee.com/hihopeorg/harmonyos-ssd1306.git
cd harmonyos-ssd1306/
cp -r ssd1306/ /root/harmonyos/code-2.0-canary/applications/sample/wifi-iot/app/
cp -r examples/ /root/harmonyos/code-2.0-canary/applications/sample/wifi-iot/app/
cp -r libm_port/ /root/harmonyos/code-2.0-canary/applications/sample/wifi-iot/app/
The following folders will appear in the directory
3, Modify code
Because the sdk used in Hongmeng 1.0 is in openharmony 2 0 has been deprecated and some codes need to be modified
At ssd1306 / ssd1306 Modify the header in C
#include "ssd1306.h"
#include <math.h>
#include <stdlib.h>
#include <string.h>  // For memcpy

#include <stdio.h>
#include <unistd.h>
#include "cmsis_os2.h"
// #Include "WiFi ot_i2c. H" / / comment out these two header files
// #include "wifiiot_errno.h"

#include "hi_errno.h"
#include "hi_i2c.h"
At ssd1306 / ssd1306 Modify ssd1306 in C_ SendData function
static uint32_t ssd1306_SendData(uint8_t* data, size_t size)
{
    hi_i2c_idx id = SSD1306_I2C_IDX;
    hi_i2c_data i2cData = {0};
    i2cData.send_buf = data;
    i2cData.send_len = size;

    return hi_i2c_write(id, SSD1306_I2C_ADDR, &i2cData);
}
In examples / ssd1306_ demo. Modify the header in C
#include <ctype.h>
#include <stdio.h>
#include <unistd.h>

#include "ohos_init.h"
#include "cmsis_os2.h"
#include "hi_io.h"
#include "hi_gpio.h"
#include "hi_pwm.h"
#include "hi_adc.h"
#include "hi_i2c.h"
#include "hi_errno.h"
#include "hi_watchdog.h"

#include "ssd1306.h"
#include "ssd1306_tests.h"
In examples / ssd1306_ demo. Modify the Ssd1306TestTask function in C
void Ssd1306TestTask(void* arg)
{
    (void) arg;
    hi_gpio_init();
    hi_io_set_func(HI_IO_NAME_GPIO_13, HI_IO_FUNC_GPIO_13_I2C0_SDA);
    hi_io_set_func(HI_IO_NAME_GPIO_14, HI_IO_FUNC_GPIO_14_I2C0_SCL);
    hi_i2c_init(HI_I2C_IDX_0, OLED_I2C_BAUDRATE);

    hi_watchdog_disable();

    usleep(20*1000);
    ssd1306_Init();
    ssd1306_Fill(Black);
    ssd1306_SetCursor(0, 0);
    ssd1306_DrawString("Hello HarmonyOS!", Font_7x10, White);

    uint32_t start = HAL_GetTick();
    ssd1306_UpdateScreen();
    uint32_t end = HAL_GetTick();
    printf("ssd1306_UpdateScreen time cost: %d ms.\r\n", end - start);

    while (1) {
        TestDrawChinese1();
        osDelay(500);

        TestDrawChinese2();
        osDelay(500);

        TestShowChars(Font_6x8, 6, 8);
        osDelay(500);

        TestShowChars(Font_7x10, 7, 10);
        osDelay(500);

        ssd1306_TestAll();
    }
}
And all WiFi in the above documents_ IOT_ Change success to HI_ERR_SUCCESS
Modify build. Under the three folders respectively GN, include_ Replace dirs with the following
    include_dirs = [
        "//utils/native/lite/include",
        "//kernel/liteos_m/components/cmsis/2.0",
        "//base/iot_hardware/peripheral/interfaces/kits",
        "//device/hisilicon/hispark_pegasus/sdk_liteos/include"
    ]
In APP / build. In the parent directory Write in GN
import("//build/lite/config/component/lite_component.gni")

lite_component("app") {
    features = [
        "ssd1306:oled_ssd1306",
        "examples:oled_test",
        "libm_port:libm_port"
    ]
}
4, Compiling with hb tool under Linux
root@DESKTOP-QAO2AOK:~/harmonyos/code-2.0-canary# hb set
[OHOS INFO] Input code path: .
OHOS Which product do you need?  wifiiot_hispark_pegasus
root@DESKTOP-QAO2AOK:~/harmonyos/code-2.0-canary# hb build
If hb set has been set, you don't need to set it again. Just do it
root@DESKTOP-QAO2AOK:~/harmonyos/code-2.0-canary# hb build
If you see the word success, the compilation is successful
5, Burn the compiled firmware to the development board
Copy out from the source folder in linux to Windows to replace the original out folder, but delete the original out folder first
Open vscode and open the source folder using DevEco Device Tool
Select the corresponding development board model
hi3861 is selected here
Then, in the project settings, the following settings are made according to the actual port conditions

Save the project and open it
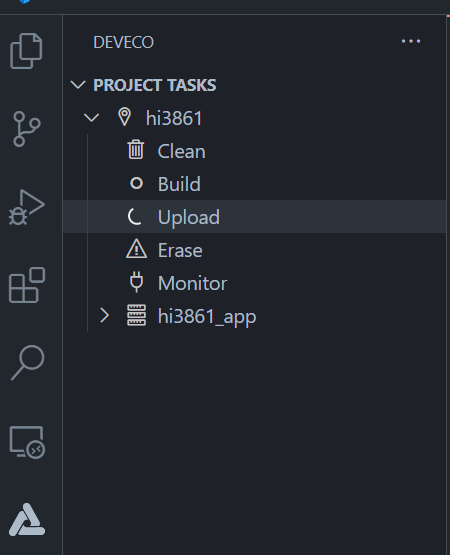
Click upload to burn. When burning, you need to press the rst key on the development board according to the prompt. Wait a moment and see that success represents the success of burning.
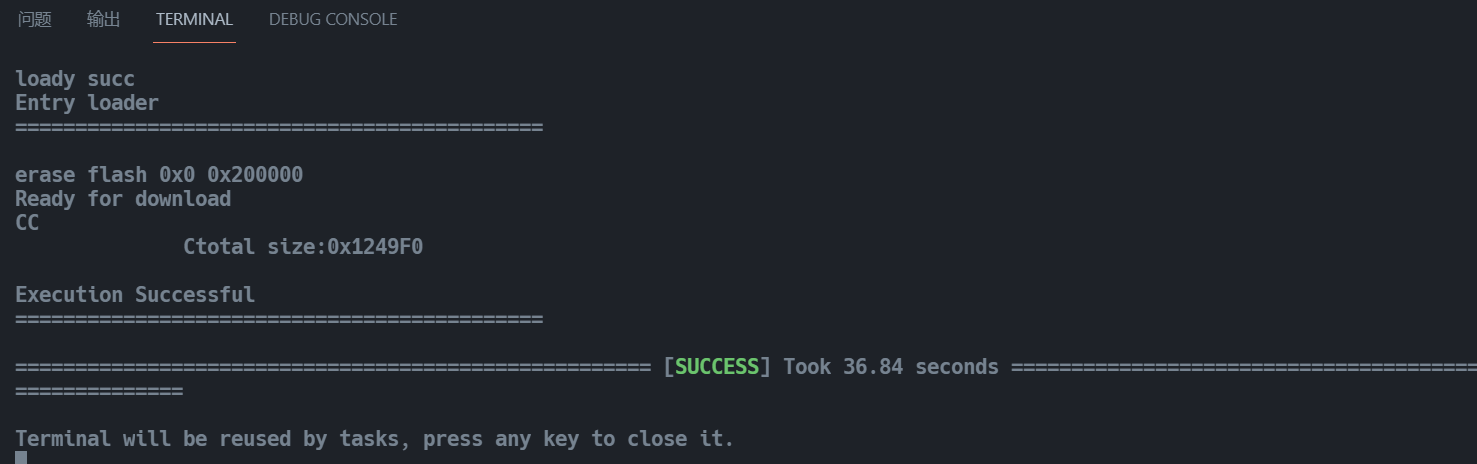
Press rst to restart the development board. At this time, you can see that the oled module on the development board starts to display different contents in turn, that is, the operation is successful.