catalogue
1, Download kit, installation module
2. Get the information of the blog in the page source code
2.1 visit the website and get the page source code.
2.2 convert the blog content in the page source code into string format
3. Convert to pdf and ipg format
5. Complete code and execution screenshot
preface
When we browse the learning content on CSDN, an excellent blog, such as watching hq's crawler blog, we may not be able to understand it at once or suddenly we can't finish reading it. Then we want to save it and read it later, but it's very uncomfortable to log in to the website every time we read it again. So I wondered if I could climb down the blog on CSDN and enjoy it in private. It was found that the power of nine cattle and two tigers can be realized. Let's take hq's blog as an example. Let's climb down his blog and save it in pdf and jpg formats.
If you only want this program, go directly to the last Baidu network disk link.
Tip: the following is the main content of this article. The following cases can be used for reference
1, Download kit, installation module
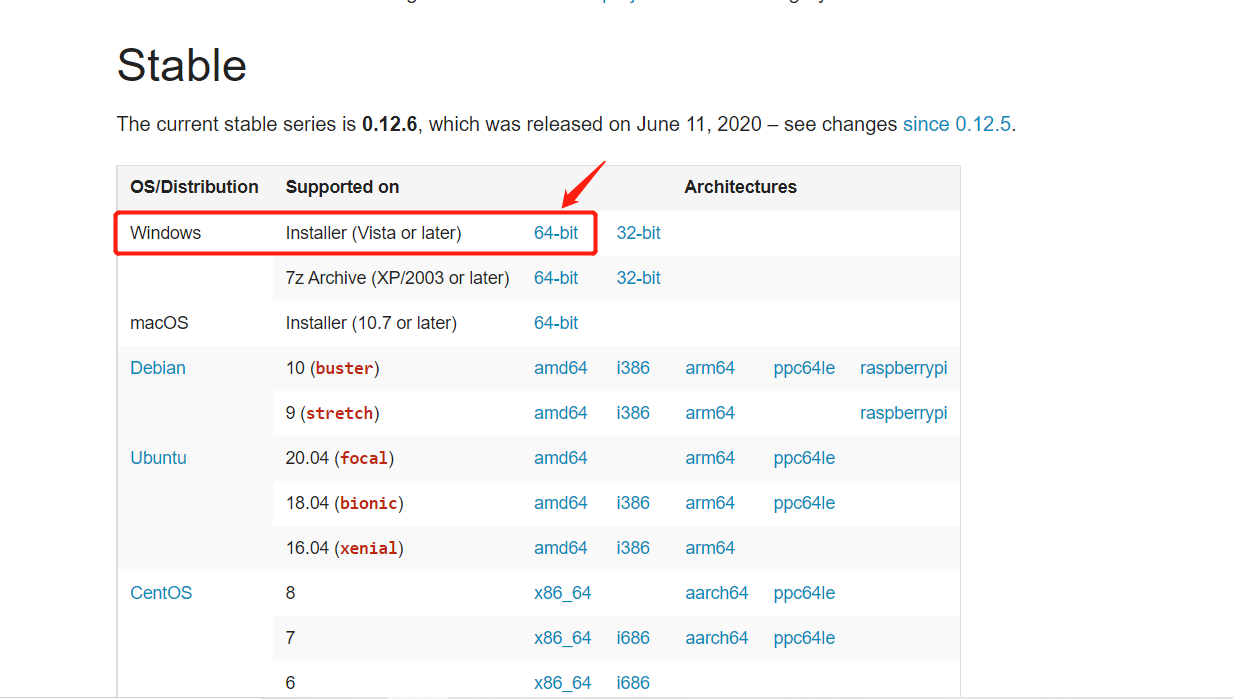
1. Need to download wkhtmltopdf toolkit, address: https://wkhtmltopdf.org/downloads.html , download the corresponding version according to your needs. For example, if I am a Windows 10-64 bit operating system, I will download the part in my circle in the figure below.
Click the downloaded toolkit and install it. You can specify the installation path as a disk other than disk C. After installation, these two exe files will be available in the bin folder of this folder. For example, my is installed on disk D, as shown in the figure below.
So far, our toolkit has been downloaded.
2. Install python imgkit module, pdfkit module, requests module, re module and lxml module. It's simple! You only need to enter the following five commands in the terminal command in pycharm, and it will be installed automatically. If you have installed it, there is no need to repeat the installation. (if you repeat the installation, it will prompt you that you already have it, so you won't install it.) If the installation is successful, you will be prompted, as shown in the figure below.
pip install imgkit
pip install pdfkit
pip install requests
pip install re
pip install lxml

You may report a warning like me. It doesn't matter. It means that an updated version can be updated. We don't need a new version. This version is stable. Of course, you can also update it. Very easy to use.
So far, we have completed the installation of five modules and a bug library.
2, Write bug
1. Import and storage module
import requests            #Visit the website and get the page source code
import pdfkit              #Convert to pdf
import imgkit              #Convert to jpg
from lxml import etree     #Extract the main content of the web page
import re                  #Get the title of the article as the name of the file
There's nothing to say about this. It's similar to writing C or C + + programs to include the "header file" and "include" to be used.
2. Get the information of the blog in the page source code
2.1 visit the website and get the page source code.
headers={
'user-agent': 'Mozilla/5.0 (Windows NT 10.0; Win64; x64) AppleWebKit/537.36 (KHTML, like Gecko) Chrome/97.0.4692.71 Safari/537.36 Edg/97.0.1072.55'
}
url = input("Please enter a CSDN website\n")
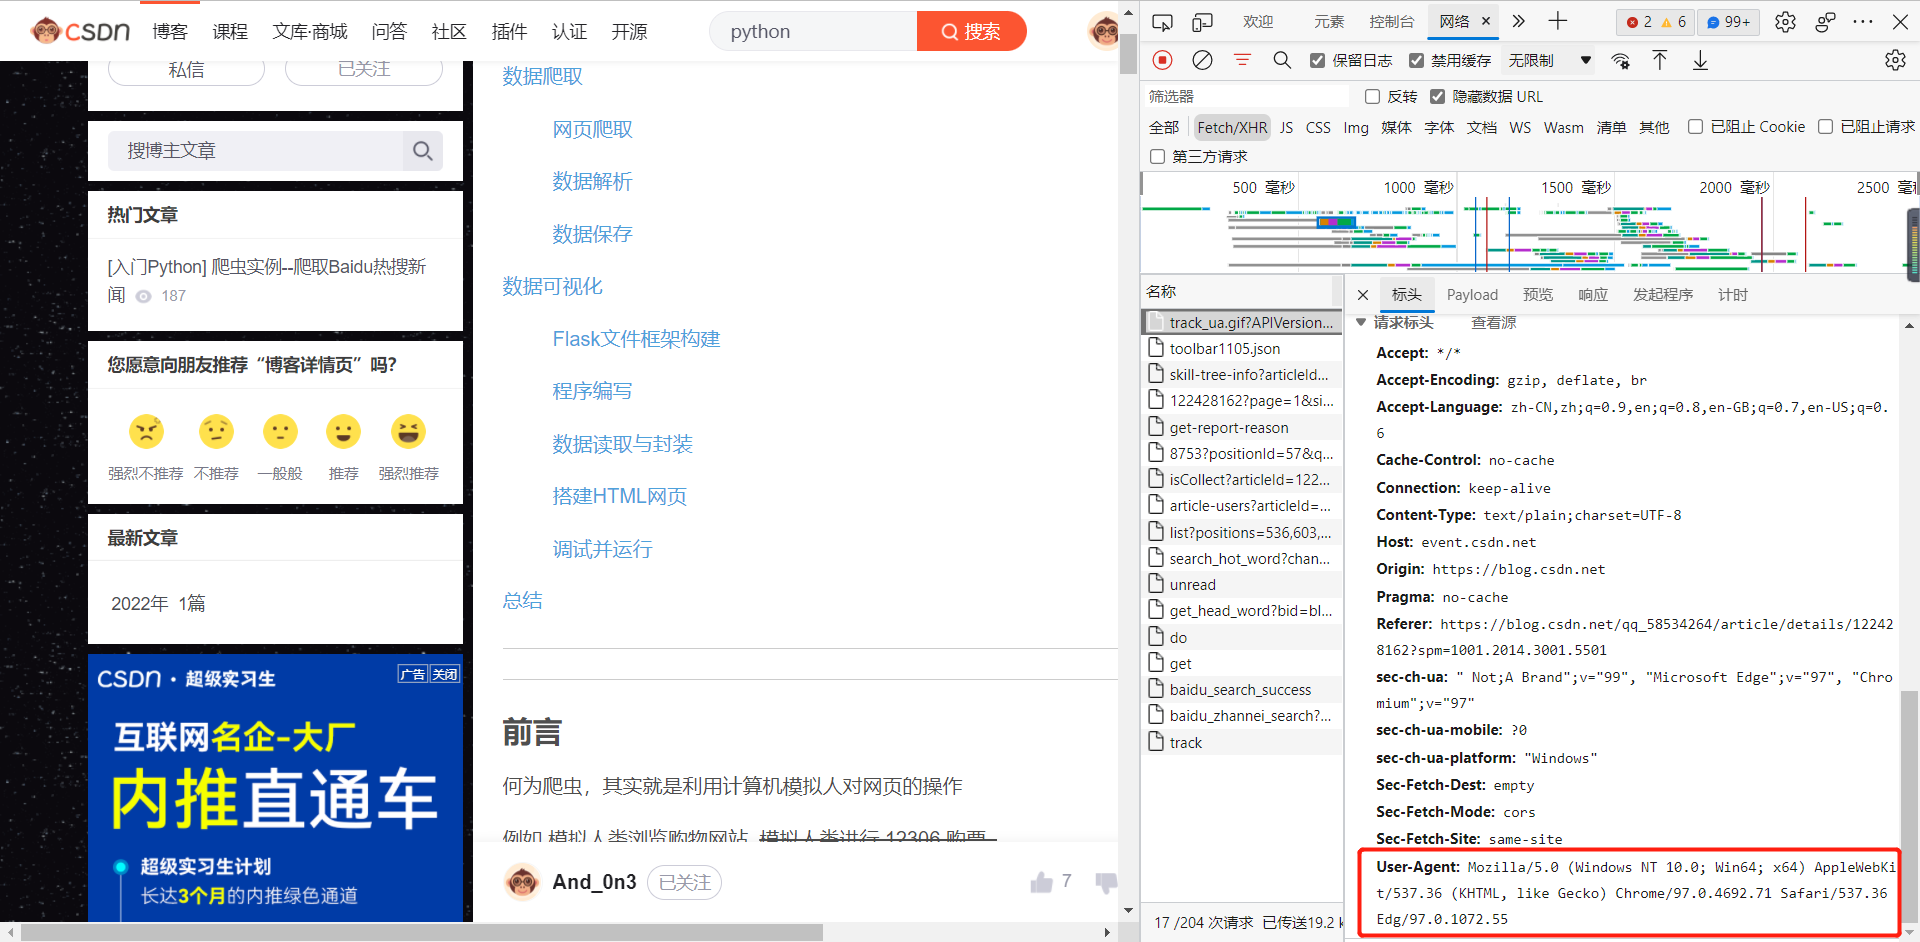
resp = requests.get(url, headers=headers)headers is a small anti climbing means we need to do. You can right-click the blank space of the blog, click "check", enter the "network", and then refresh the web page. This information is available in any visit. This message is telling the opposite server brother that this visit is not sent by the crawler, but by the "user agent", that is, the normal user.
url is the website where we need to crawl the blog.
Resp is an "object" returned by the "requests" class calling its own "class function". You can think that what you get is an object similar to that in C + + language, which is convenient for us to understand. We can access what we want from the object. For example: resp Text is the page source code of this blog page.
2.2 convert the blog content in the page source code into string format
Why do we need to convert to string format? What format is it at the beginning? We answer one by one.
Because the two library modules imgkit and pdfkit support the conversion of string data to corresponding pdf and jpg formats, we have to convert it to string format. At the beginning, the source code format of the page we crawled was html, a language for writing front-end, and also a file format.
HeadHtml='''
<!DOCTYPE html>
<html lang="en">
<head>
    <meta charset="UTF-8">
    <title>Title</title>
</head>
<body>
{}
</body>
</html>'''

page_html = etree.HTML(resp.text)
page_content = page_html.xpath("//*[@id='mainBox']/main/div[1]")[0]
page_string = etree.tostring(page_content, encoding='utf-8').decode('utf-8')
page_good = HeadHtml.format(page_string)
Let's look at the following four lines first.
The first line is to use etree in lxml for resp Textcreate a page_ The "pointer" of the html object, which points to the original page source code html.
Then the second line calls the xpath function, which parses to get the html of the blog page we want. You can right-click "check" the xpath address, select the entire blog page by clicking the upper left corner, right-click the corresponding source code, and select Copy xpath value to obtain the parameters. This value is written in parentheses. As shown in the figure below.

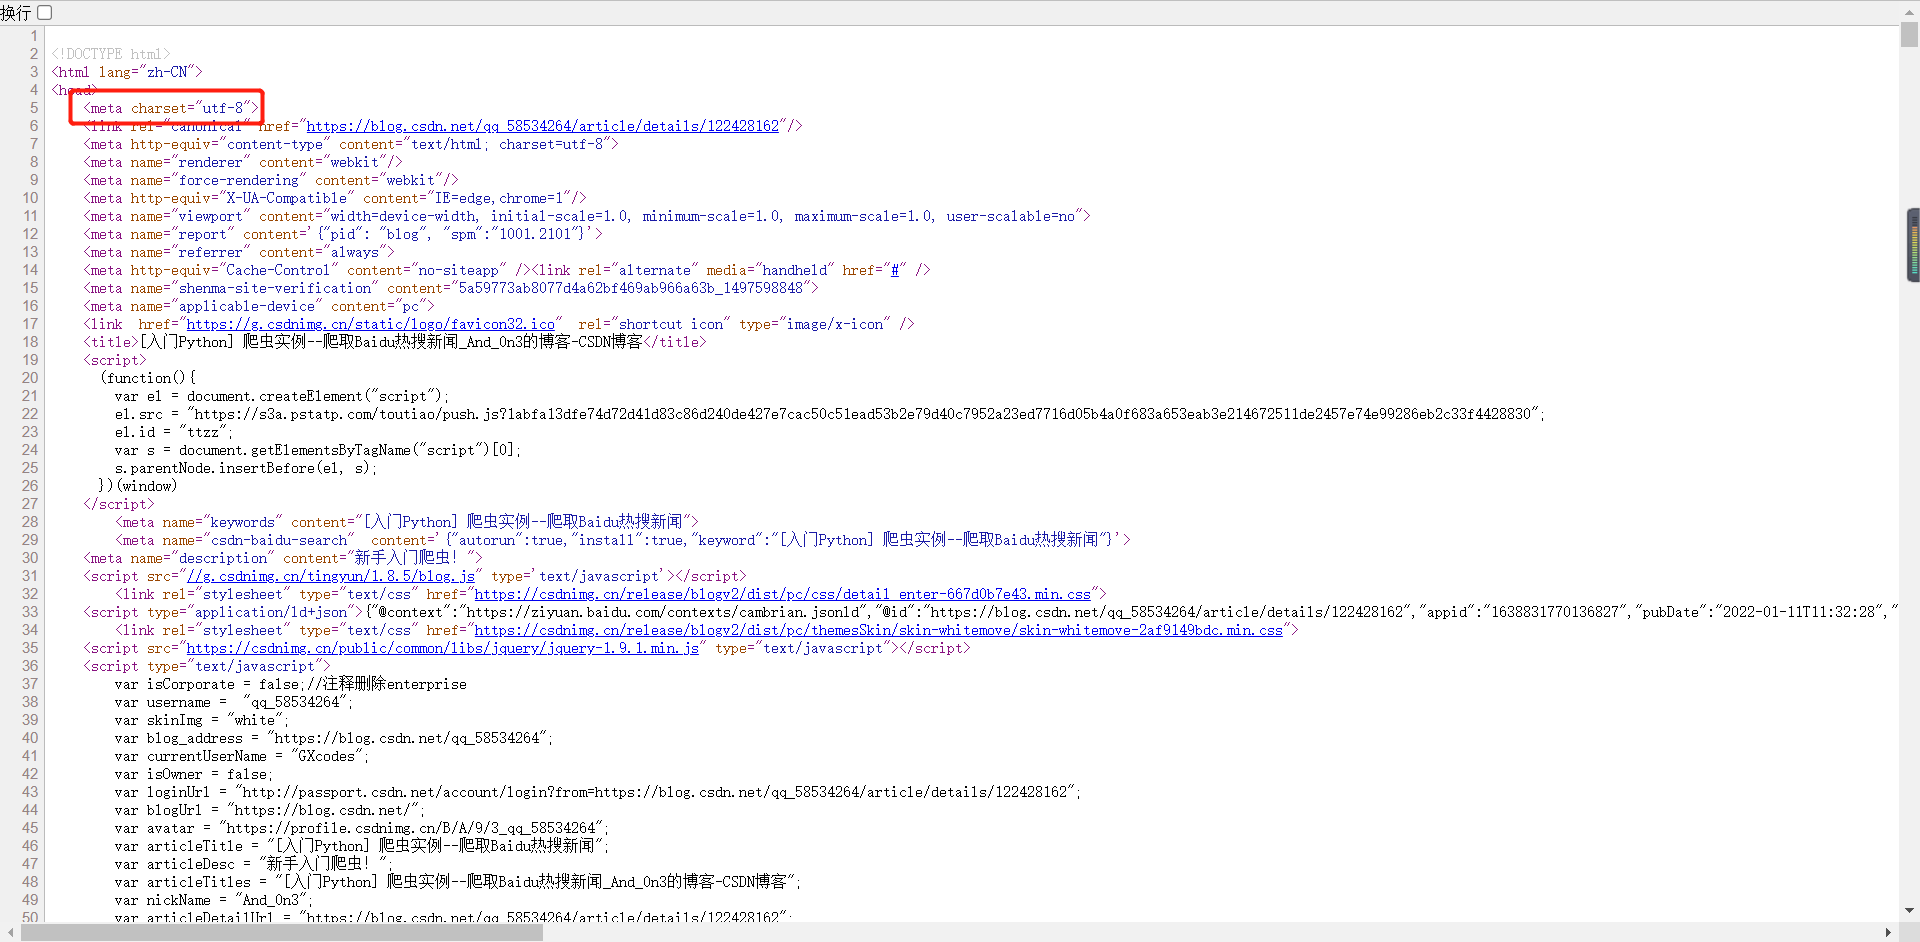
The third line is to convert the html content corresponding to the blog page into string form. Call the tosrtring function of etree to convert html information into string form. The parameter encoding can be omitted, but the external decode must be the encoding format corresponding to the page (because we want to decode, we must encode the format). Here we can find the format "utf-8" through the source code. You can right-click the blank space of the page and select "view page source code", which can be seen in it. As shown in the figure below.
The fourth line is to combine the above "HeadHtml" (in string format) and the existing blog html (in string format) into a complete html (in string format).
So far, we have finished processing the page source code of the blog and obtained the page_good: the html (string format) corresponding to the blog content.
3. Convert to pdf and ipg format
path1 = r'D:\pythonthird\python-pdf-png\wkhtmltopdf\bin\wkhtmltopdf.exe'
path2 = r'D:\pythonthird\python-pdf-png\wkhtmltopdf\bin\wkhtmltoimage.exe'

file_name1 = '{}/{}.pdf'.format(address, title)
config1 = pdfkit.configuration(wkhtmltopdf=path1)
pdfkit.from_string(page_good, file_name1, configuration=config1)

file_name2 = '{}/{}.jpg'.format(address, title)
config2=imgkit.config(wkhtmltoimage=path2)
imgkit.from_string(page_good,file_name2,config=config2)
path1 and path2 are where we install the toolkit. Giving it a location is equivalent to linking python with the toolkit.
format can place address and title in two braces respectively, so that we can have the location of the output file and the name of the output file. We'll talk about obtaining address and title later.
The following two fixed lines are the fixed writing method, which is to get our page_good (that is, the source code in string format corresponding to the blog).
4. Other acquisition
address = input("Please enter a place to store\n For example, you want to exist D Empty folder on disk gx: D:\gx\n")

obj = re.compile(r'<h1 class="title-article" id="articleContentId">(.*?)</h1>', re.S)
title = obj.findall(resp.text)[0]
Of course, you need to specify the address in advance. It's easy to say.
Using regular expressions to extract the page source code and extract the title, this should not be difficult. Well, let me briefly. First call re to generate an obj object. This object will find the parameters passed in. If there is anything in the quotation marks, it will be extracted. What is returned is (. *?) What it represents.
5. Complete code and execution screenshot
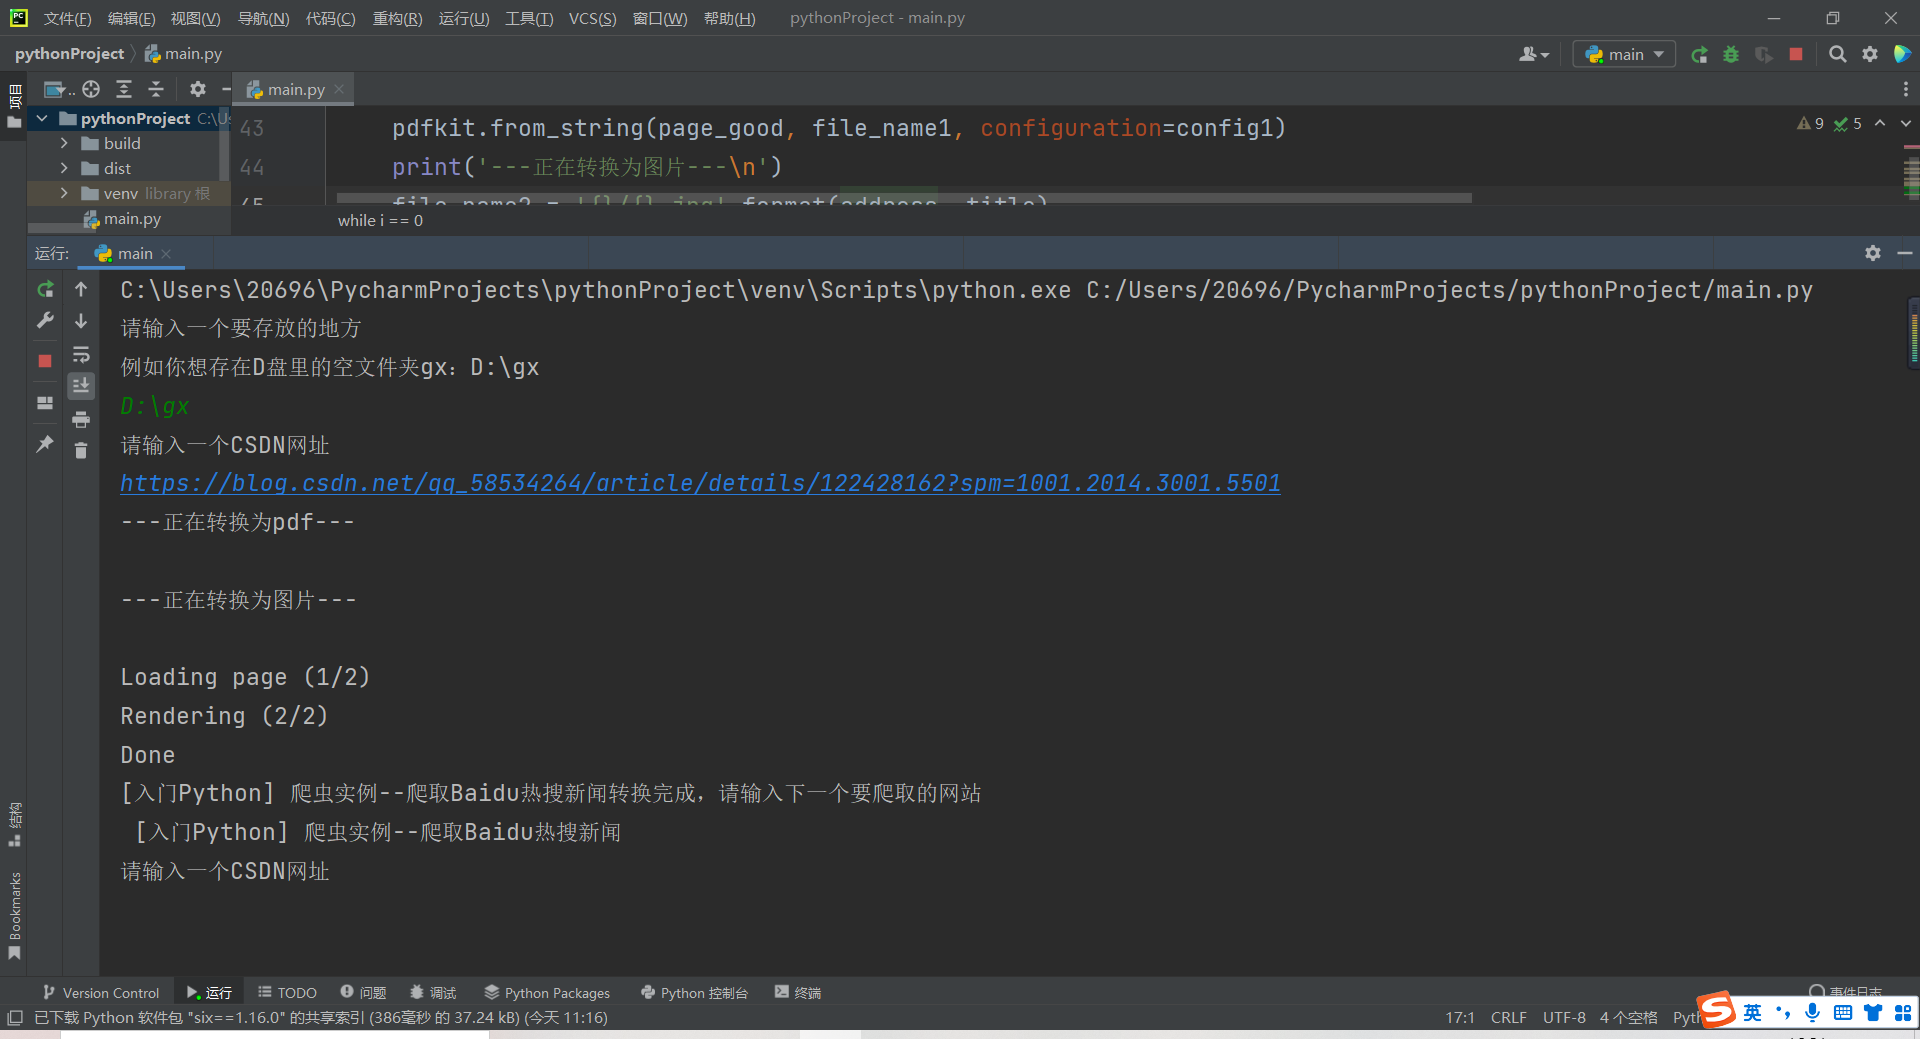
Here I put the input and subsequent processing of the website in while, so that we can enter multiple websites for crawling. It also adds some suggestive statements, which will make the program more beautiful.
import requests
import pdfkit
import imgkit
from lxml import etree
import re

address = input("Please enter a place to store\n For example, you want to exist D Empty folder on disk gx: D:\gx\n")
HeadHtml='''
<!DOCTYPE html>
<html lang="en">
<head>
    <meta charset="UTF-8">
    <title>Title</title>
</head>
<body>
{}
</body>
</html>'''
headers = {
    'user-agent': 'Mozilla/5.0 (Windows NT 10.0; Win64; x64) AppleWebKit/537.36 (KHTML, like Gecko) Chrome/97.0.4692.71 Safari/537.36 Edg/97.0.1072.55'
}

i = 0
while i == 0:
    #Get response
    url = input("Please enter a CSDN website\n")
    resp = requests.get(url, headers=headers)
    #Get the html of the blog page (string format)
    page_html = etree.HTML(resp.text)
    page_content = page_html.xpath("//*[@id='mainBox']/main/div[1]")[0]
    page_string = etree.tostring(page_content, encoding='utf-8').decode('utf-8')
    page_good = HeadHtml.format(page_string)
    #The article title is extracted by regular expression
    obj = re.compile(r'<h1 class="title-article" id="articleContentId">(.*?)</h1>', re.S)
    title = obj.findall(resp.text)[0]
    #Import two toolkit paths
    path1 = r'D:\pythonthird\python-pdf-png\wkhtmltopdf\bin\wkhtmltopdf.exe'
    path2 = r'D:\pythonthird\python-pdf-png\wkhtmltopdf\bin\wkhtmltoimage.exe'
    #pdf and jpg conversion
    print('---Converting to pdf---\n')
    file_name1 = '{}/{}.pdf'.format(address, title)
    config1 = pdfkit.configuration(wkhtmltopdf=path1)
    pdfkit.from_string(page_good, file_name1, configuration=config1)
    print('---Converting to picture---\n')
    file_name2 = '{}/{}.jpg'.format(address, title)
    config2=imgkit.config(wkhtmltoimage=path2)
    imgkit.from_string(page_good, file_name2, config=config2)
summary
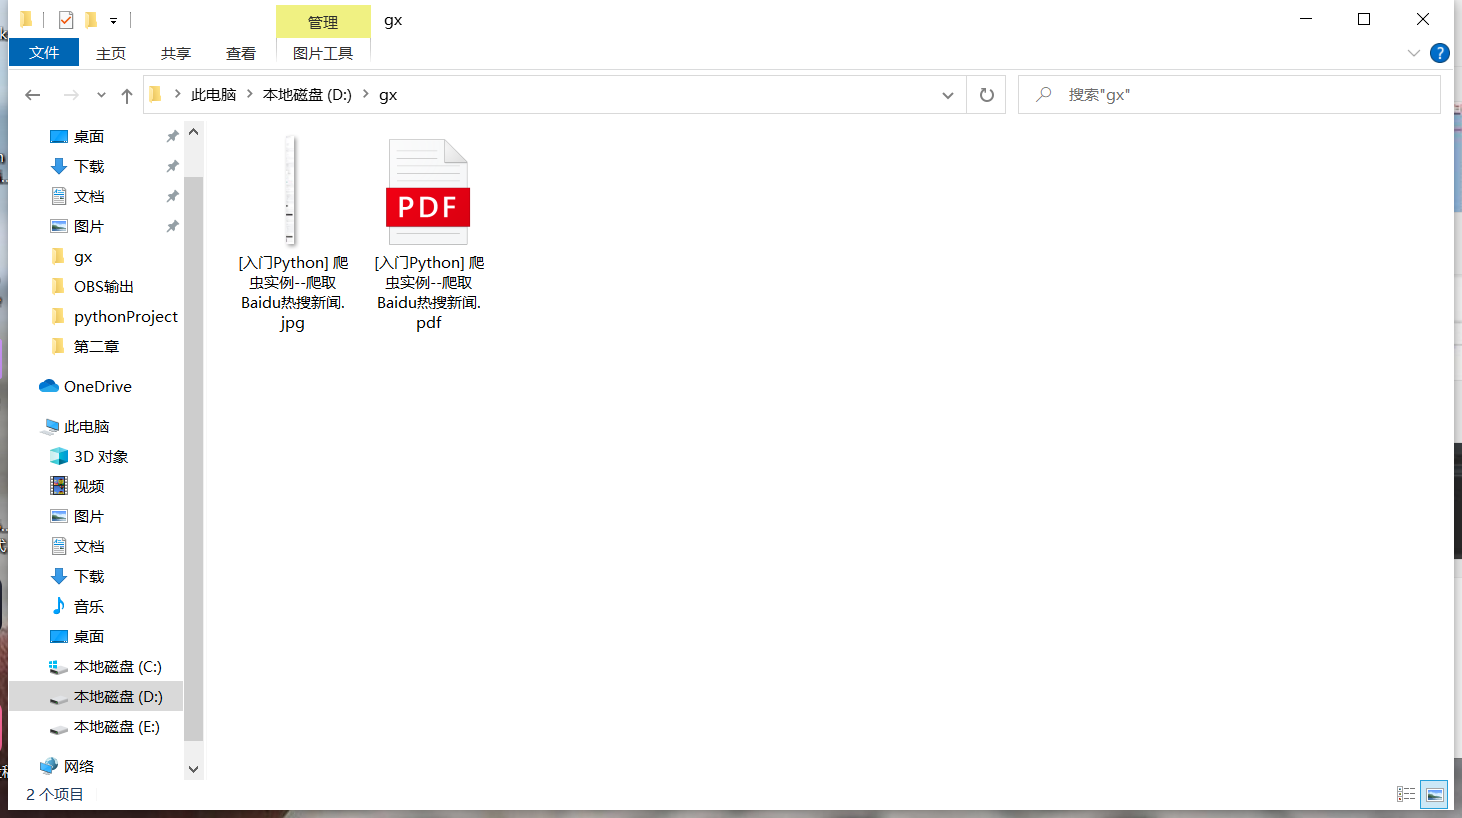
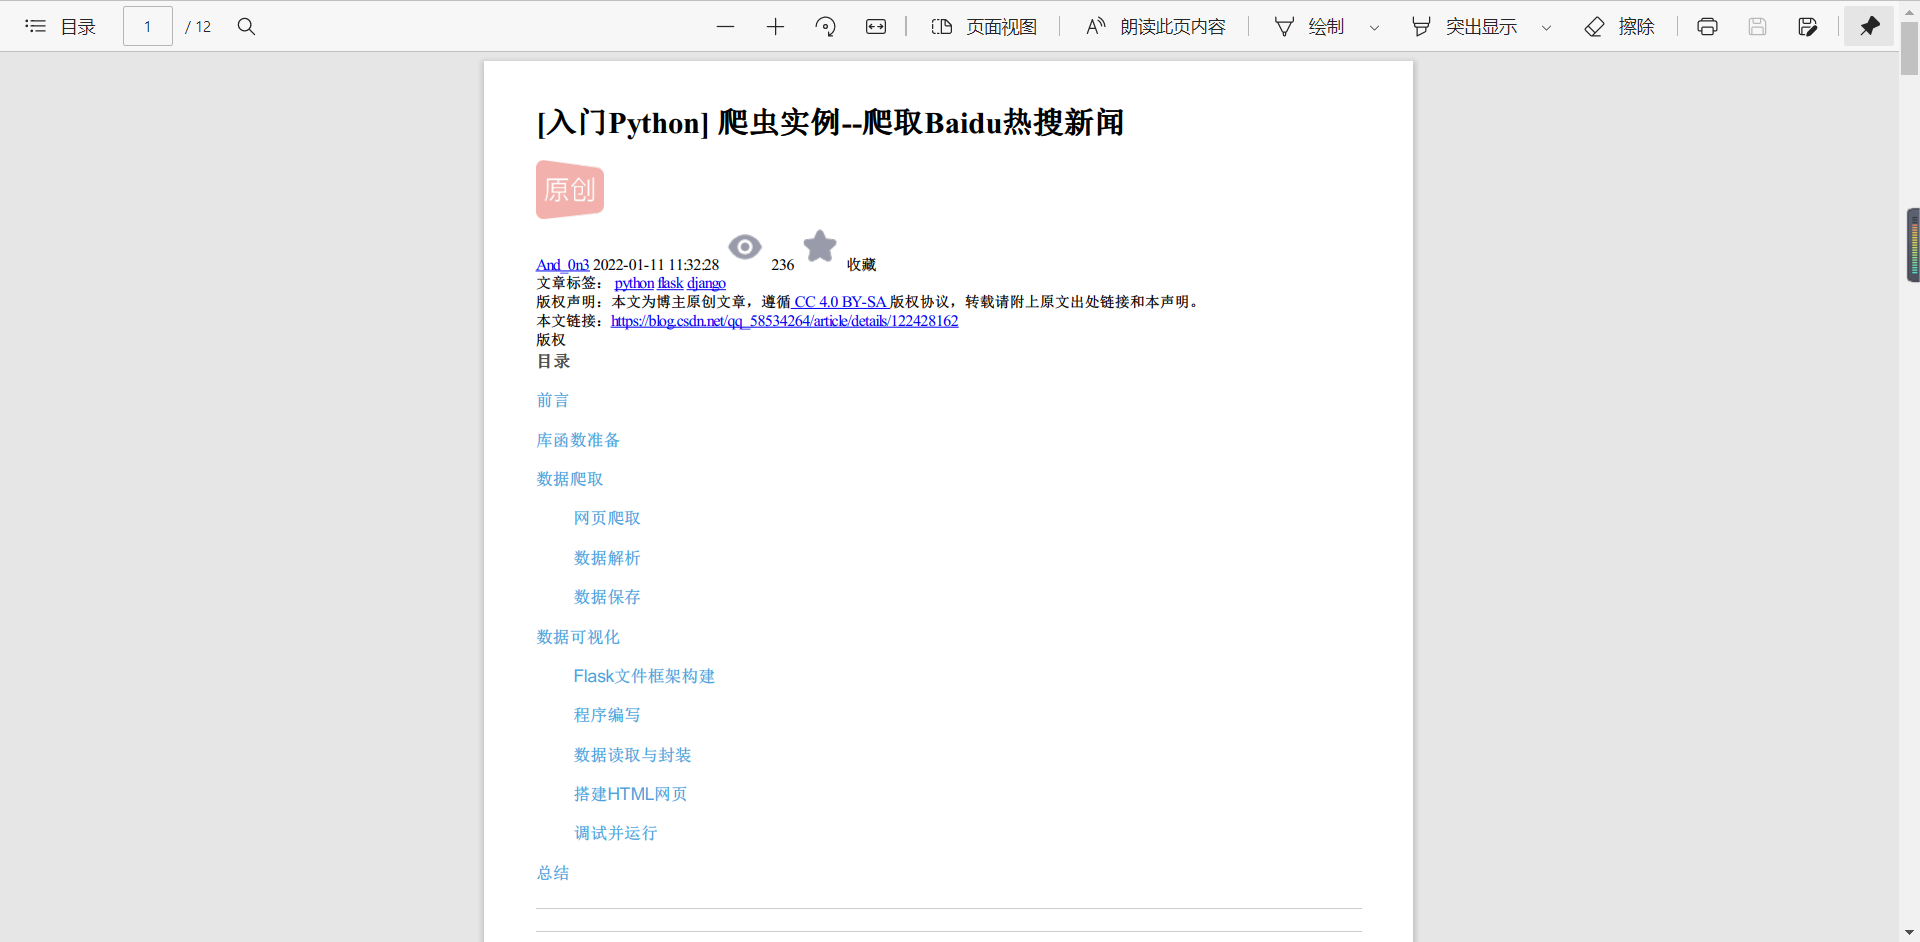
Finally, thank you for seeing here. You should also thank yourself for listening to me so much. Here we have completed the crawling of hq articles. Of course, other articles can also be used. In this way, we can enjoy CSDN blog in private without networking.
Finally, I know that everyone "doesn't install python" and can't run. It doesn't matter. I've packaged it into one under windows Exe executable program, whether there is python or not, it doesn't matter. You can crawl with this exe. I put it in this link. Welcome to download it. Thank you for your support.
Baidu online disk:
Link: https://pan.baidu.com/s/1b0seSrndfux6Hw_3oSJ5cg
Extraction code: gx66