1) Preparatory work
(1) Obtain the All in one installation package. The PCL provides the installation package under 32-bit and 64 bit configured as Visual Studio. The package contains all third-party compilation packages used in class PCL, except QT compilation package.
(2) Obtain the PDB package corresponding to the All in one package, which is used for later single step debugging.
(3) Get the PCL source package.
(4) To install the development tool Visual Studio compiler and CMake development tool, the CMake version must be greater than 2.8.3, mainly considering that some macro definitions of higher versions are used in PCL, and the lower versions are compatible.
Both the All in one installation package and the PDB installation package can be downloaded on git:
Releases · PointCloudLibrary/pcl · GitHub
The source code can also be downloaded or cloned on git:
GitHub - PointCloudLibrary/pcl: Point Cloud Library (PCL)
(ps. again make complaints about the company network!!!!!

(ps: I put relevant installation packages and some point cloud files in the network disk. If necessary, I can chat with my mailbox privately
2) Start installation
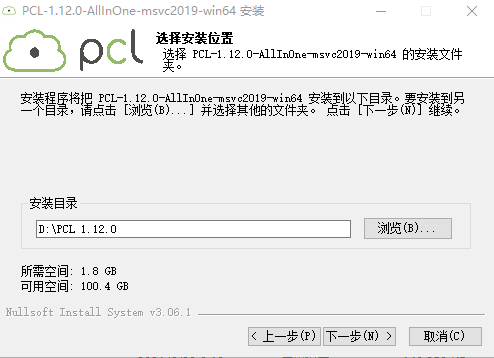
(1) after downloading the two files, install All in one first:


If the download path is selected, disk D will automatically generate a download path: D:\PCL 1.12.0
(2) after installation, you need to go to D:\PCL 1.12.0rdParty\OpenNI2 to check whether OpenNI is installed in this folder. Because the default installation path is Disk C, if only one NI installation package is found in the folder, open the installation program:

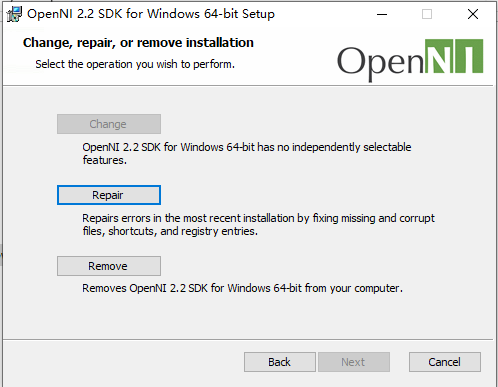
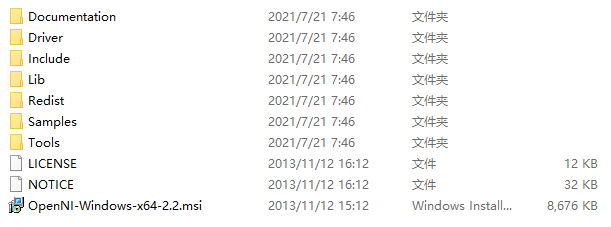
Click Remove, reinstall and select the path: D:\PCL 1.12.0rdParty\OpenNI2. After installation, these files will be in the folder:
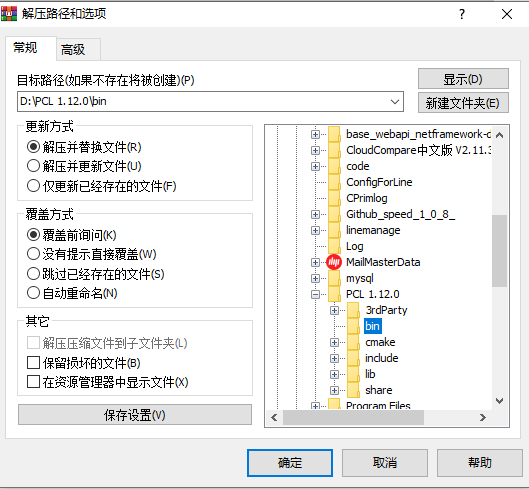
(3) unzip the downloaded PDB file to the D:\PCL 1.12.0\bin folder:
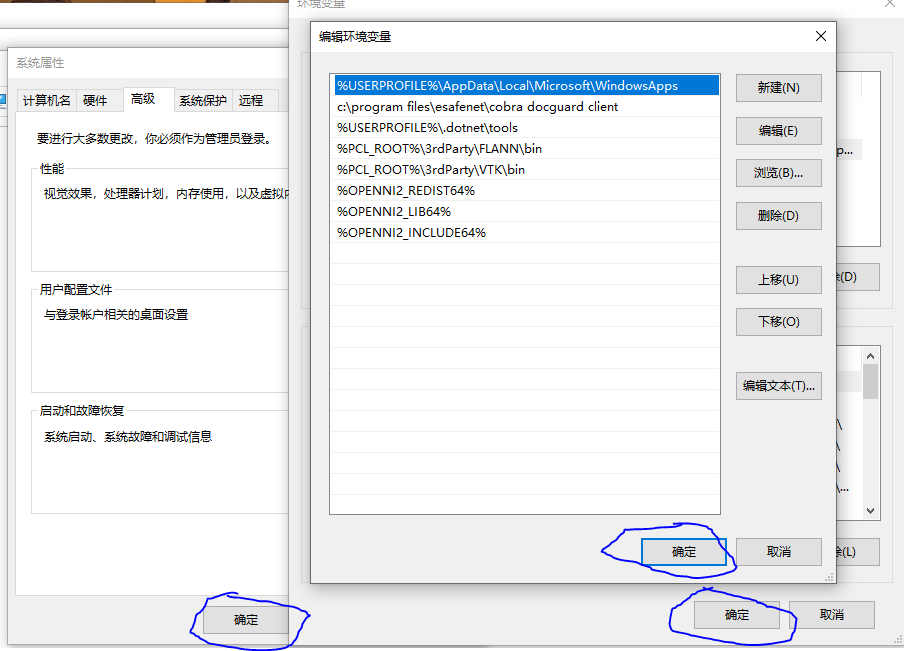
(4) setting environment variables:
Click: advanced system settings - Advanced - environment variables - user Path - New - enter the corresponding environment variables - don't forget to click OK!
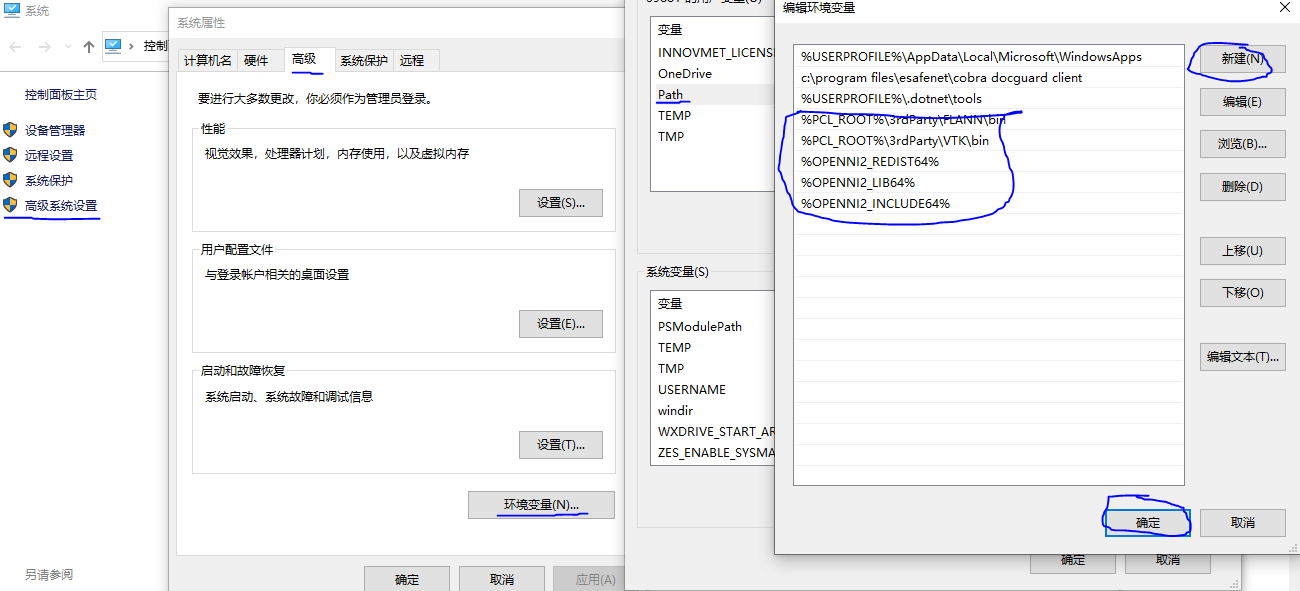
The environment variables are as follows:
%PCL_ROOT%\3rdParty\FLANN\bin
%PCL_ROOT%\3rdParty\VTK\bin
%OPENNI2_REDIST64%
%OPENNI2_LIB64%
%OPENNI2_INCLUDE64%
Note: after inputting the environment variables, you must click OK. Each confirmation points. Restart the computer after configuring the environment.
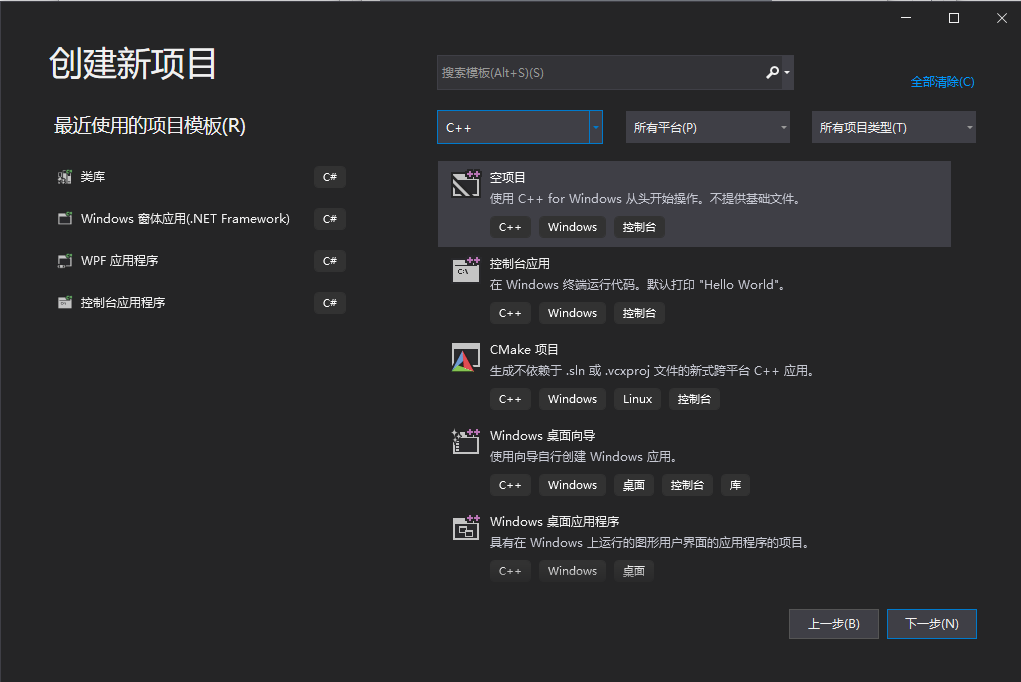
3) Visual Studio environment configuration
(1) create a new C + + empty project:
The solution is set to Debug, based on X64 platform:

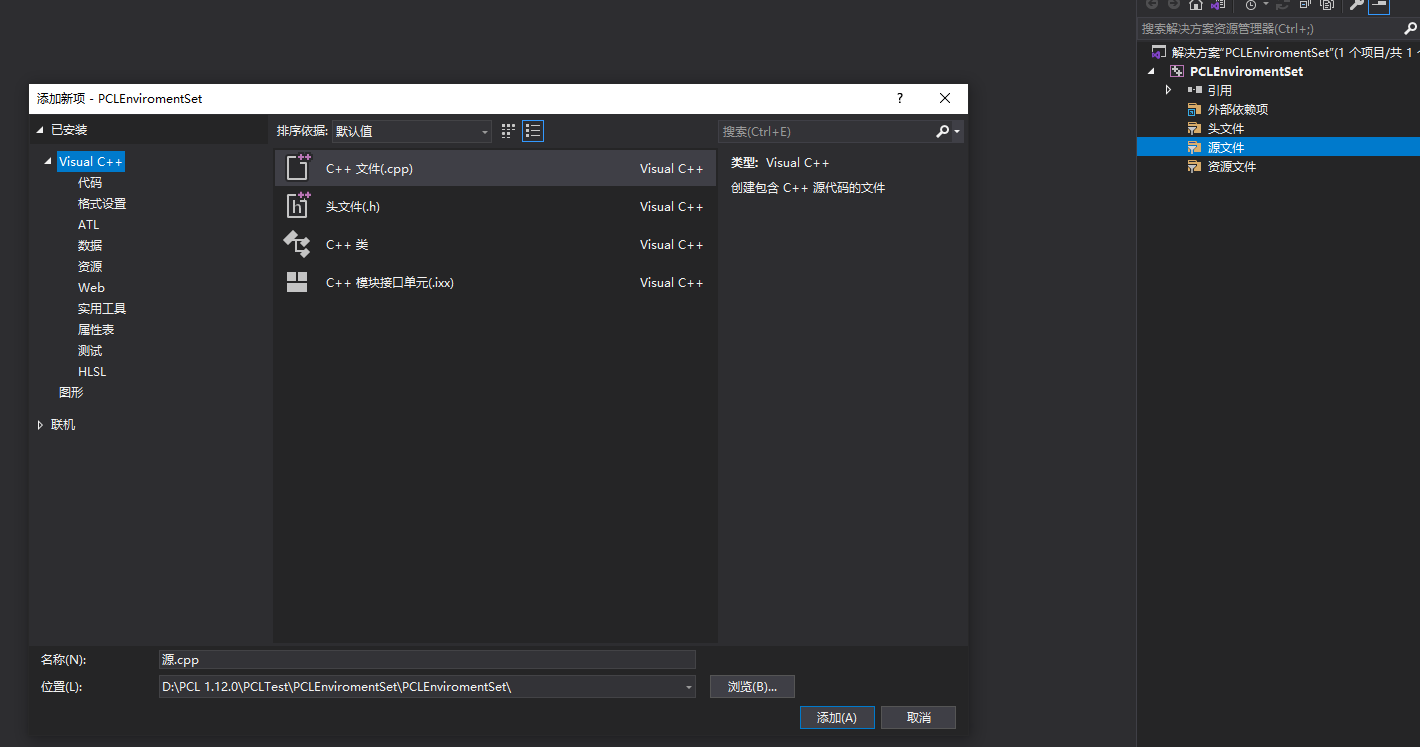
(2) create a new C + + source file in the source file:
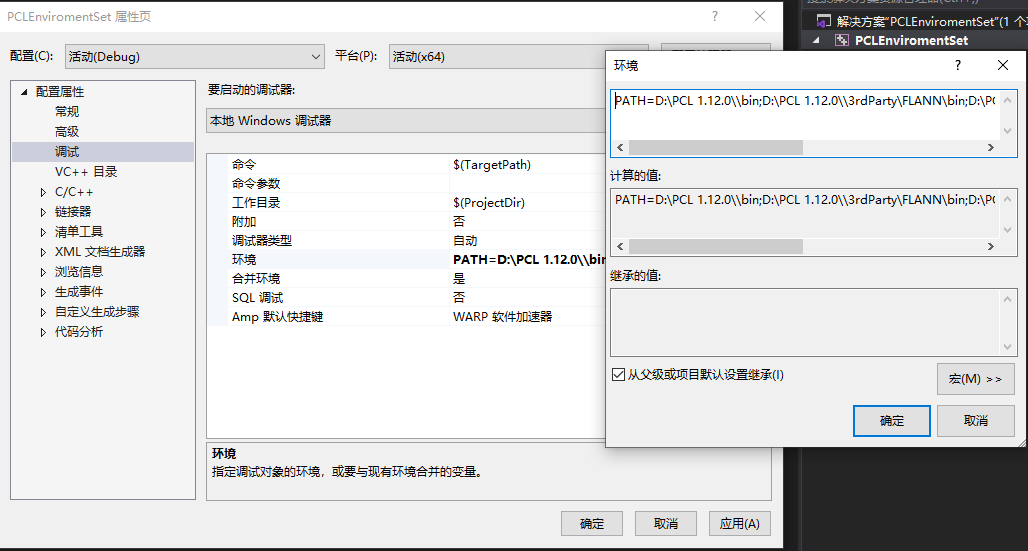
(3) right click the newly created project (note that it is not the source file), select: properties - configuration properties - Debugging - environment - edit, and add the following environment (note that these environment paths need to be adjusted according to the version you downloaded and the location of the downloaded file):
PATH=D:\PCL 1.12.0\\bin;D:\PCL 1.12.0\\3rdParty\FLANN\bin;D:\PCL 1.12.0\\3rdParty\VTK\bin;D:\PCL 1.12.0\\3rdParty\OpenNI2\Tools
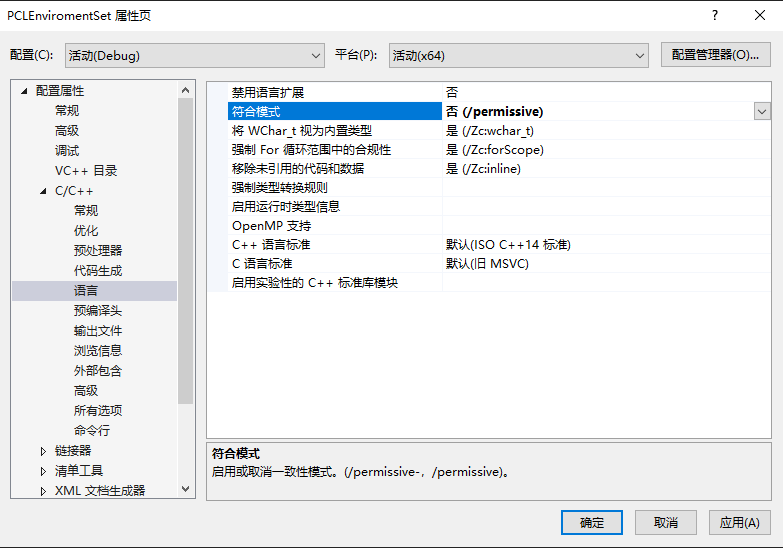
Then, select C/C + + -- language -- compliance mode -- set to No:
Finally, set: C/C + + -- all options -- SDL check -- to No:
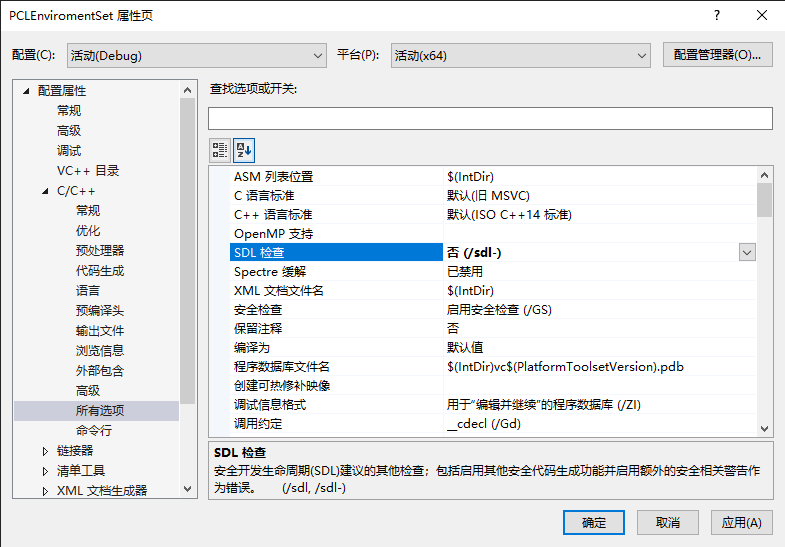
Be sure to remember some applications!!! Make sure again!!!!
4) Configure PCL 1.12.0 property sheet
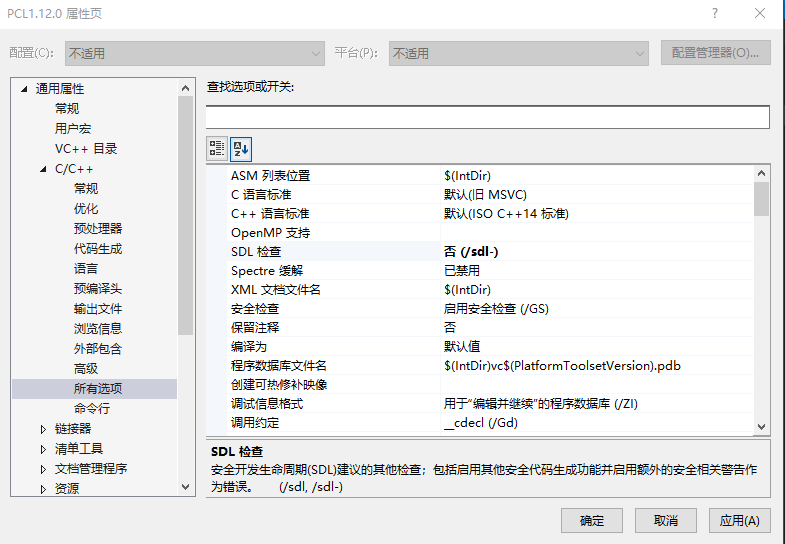
For ease of use, select the method of adding a property sheet to configure PCL 1.12.0. You need to set the SDL check of the property sheet to no, otherwise an error will appear!
(1) display attribute Manager: View -- other windows -- attribute Manager
(2) find Debug|x64 in the attribute manager, right-click to open it and select new project attribute table:

(3) setting Name: pcl1 12.0. props

(4) right click the new attribute table and open the attribute: C/C + + -- all options -- SDL check -- set to No:
(5) select VC + + Directory - include directory - Edit - add new directories as follows (these directories may change according to your installed version and path, please adjust them):
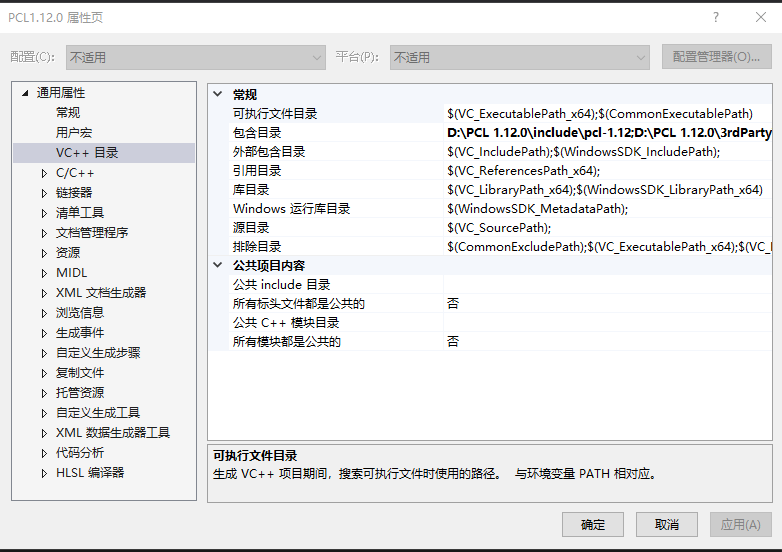
The installation directory is as follows:
D:\PCL 1.12.0\include\pcl-1.12
D:\PCL 1.12.0\3rdParty\Boost\include\boost-1_76
D:\PCL 1.12.0\3rdParty\Eigen\eigen3
D:\PCL 1.12.0\3rdParty\FLANN\include
D:\PCL 1.12.0\3rdParty\Qhull\include
D:\PCL 1.12.0\3rdParty\VTK\include\vtk-9.0
D:\PCL 1.12.0\3rdParty\OpenNI2\Include
(6) select VC + + Directory - Library Directory - Edit - add new directories as follows (these directories may change according to your installed version and path, please adjust them):

The installation library is as follows:
D:\PCL 1.12.0\lib
D:\PCL 1.12.0\3rdParty\Boost\lib
D:\PCL 1.12.0\3rdParty\FLANN\lib
D:\PCL 1.12.0\3rdParty\Qhull\lib
D:\PCL 1.12.0\3rdParty\OpenNI2\Lib
D:\PCL 1.12.0\3rdParty\VTK\lib
(7) select C/C + + -- preprocessor -- preprocessor definition -- edit -- add preprocessor definition as follows:
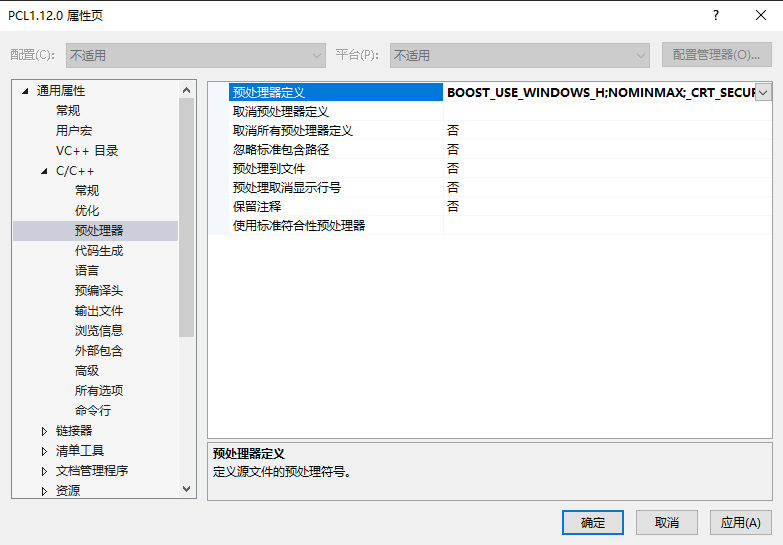
The preprocessor is defined as follows:
BOOST_USE_WINDOWS_H
NOMINMAX
_CRT_SECURE_NO_DEPRECATE
(8) here comes the important operation: batch obtain additional dependencies
First, press the shortcut key win+r to call up the operation window, enter cmd, and enter the following code in the cmd window:
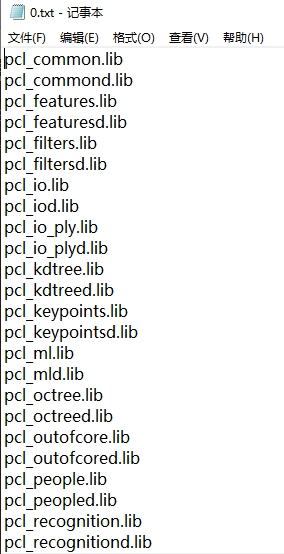
cd/d D:\PCL 1.12.0\3rdParty\VTK\lib
dir/b *.lib *>0.txt
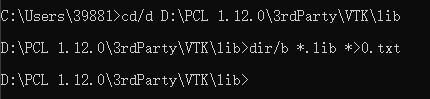
The above code can output all lib files in VTK to 0.0 in the form of txt Txt file:
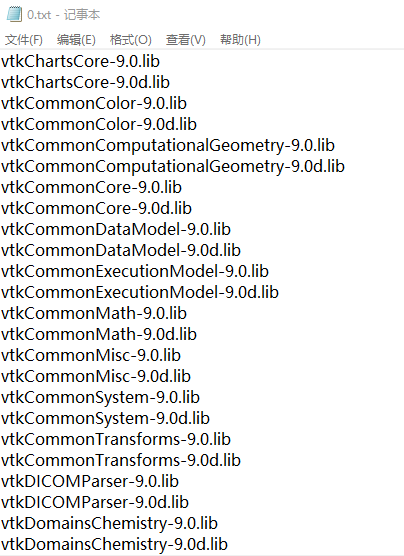
Note that both PCL and VTK libraries need to be retrieved:
Note: the read link library contains the Release version and the Debug version (with d). Here, the Debug version link library is used.
The Release version can be distinguished from the Debug version with the following code:
#include <iostream>
#include <string>
#include <fstream>
#include <iostream>
using namespace std;

int main()
{
	ifstream txtfile;//Open read file
	ofstream txt01;//Saved files
	ofstream txt02;//Saved files
	string temp;
	int index = 0;//Used to judge parity

	txtfile.open("0.txt", ios::in);

	while (!txtfile.eof())            // If the end of the file is not reached, the loop will continue
	{

		getline(txtfile, temp);//Read line by line
		if (index%2==0)//The remainder of judgment divided by 2 is the judgment of parity
		{
			txt01.open("1.txt", ios::app);
			txt01 << temp;
			txt01 << endl;
			txt01.close();
		}
		else
		{
			txt02.open("2.txt", ios::app);
			txt02 << temp;
			txt02 << endl;
			txt02.close();
		}
		index++;
	}
	txtfile.close();   //Close file
	txtfile.close();
	txt01.close();
	txt02.close();

	return 0;
}
Alternatively, you can choose to copy all to the dependencies, and then delete the link library of the Release version.
After completing the configuration of the property sheet, remember to save the property sheet. In the future, just repeat the configuration of Visual Studio, and then add the existing property sheet PCL 1.12.1 Props.

5) Code test
Enter the following code to test:
#include <iostream>
#include <vector>
#include <ctime>
#include <pcl/point_cloud.h>
#include <pcl/octree/octree.h>
#include <boost/thread/thread.hpp>
#include <pcl/visualization/pcl_visualizer.h>
using namespace std;
int
main(int argc, char** argv)
{
	srand((unsigned int)time(NULL));
	pcl::PointCloud<pcl::PointXYZ>::Ptr cloud(new pcl::PointCloud<pcl::PointXYZ>);
	// Create point cloud data
	cloud->width = 1000;
	cloud->height = 1;
	cloud->points.resize(cloud->width * cloud->height);
	for (size_t i = 0; i < cloud->points.size(); ++i)
	{
		cloud->points[i].x = 1024.0f * rand() / (RAND_MAX + 1.0f);
		cloud->points[i].y = 1024.0f * rand() / (RAND_MAX + 1.0f);
		cloud->points[i].z = 1024.0f * rand() / (RAND_MAX + 1.0f);
	}

	pcl::octree::OctreePointCloudSearch<pcl::PointXYZ> octree(0.1);
	octree.setInputCloud(cloud);
	octree.addPointsFromInputCloud();
	pcl::PointXYZ searchPoint;
	searchPoint.x = 1024.0f * rand() / (RAND_MAX + 1.0f);
	searchPoint.y = 1024.0f * rand() / (RAND_MAX + 1.0f);
	searchPoint.z = 1024.0f * rand() / (RAND_MAX + 1.0f);

	//Within radius nearest neighbor search
	vector<int>pointIdxRadiusSearch;
	vector<float>pointRadiusSquaredDistance;
	float radius = 256.0f * rand() / (RAND_MAX + 1.0f);
	cout << "Neighbors within radius search at (" << searchPoint.x
		<< " " << searchPoint.y
		<< " " << searchPoint.z
		<< ") with radius=" << radius << endl;
	if (octree.radiusSearch(searchPoint, radius, pointIdxRadiusSearch, pointRadiusSquaredDistance) > 0)
	{
		for (size_t i = 0; i < pointIdxRadiusSearch.size(); ++i)
			cout << "    " << cloud->points[pointIdxRadiusSearch[i]].x
			<< " " << cloud->points[pointIdxRadiusSearch[i]].y
			<< " " << cloud->points[pointIdxRadiusSearch[i]].z
			<< " (squared distance: " << pointRadiusSquaredDistance[i] << ")" << endl;
	}
	// Initializing a point cloud visualization object
	boost::shared_ptr<pcl::visualization::PCLVisualizer>viewer(new pcl::visualization::PCLVisualizer("Show point cloud"));
	viewer->setBackgroundColor(0, 0, 0);  //Set the background color to black
	// Point cloud shading visualization (red)
	pcl::visualization::PointCloudColorHandlerCustom<pcl::PointXYZ>target_color(cloud, 255, 0, 0);
	viewer->addPointCloud<pcl::PointXYZ>(cloud, target_color, "target cloud");
	viewer->setPointCloudRenderingProperties(pcl::visualization::PCL_VISUALIZER_POINT_SIZE, 1, "target cloud");

	// Wait until the visualization window closes
	while (!viewer->wasStopped())
	{
		viewer->spinOnce(100);
		boost::this_thread::sleep(boost::posix_time::microseconds(1000));
	}

	return (0);
}
The output results are as follows:
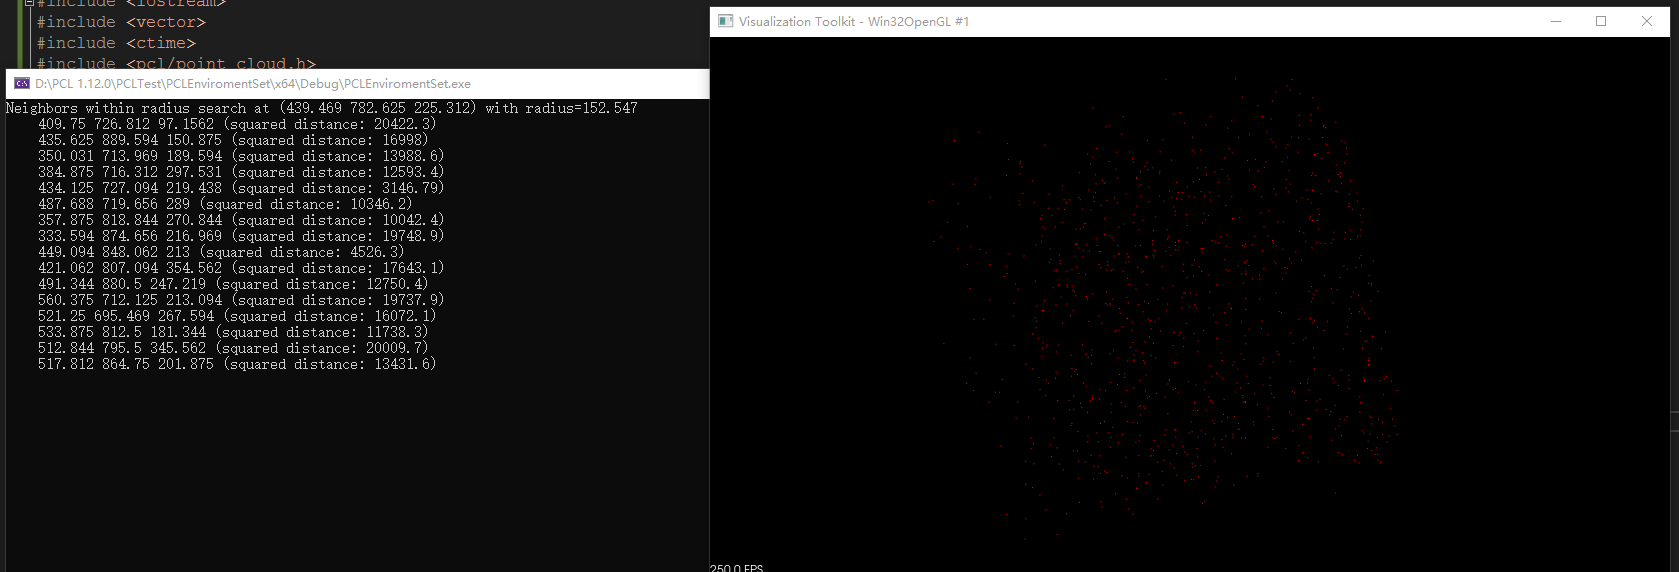
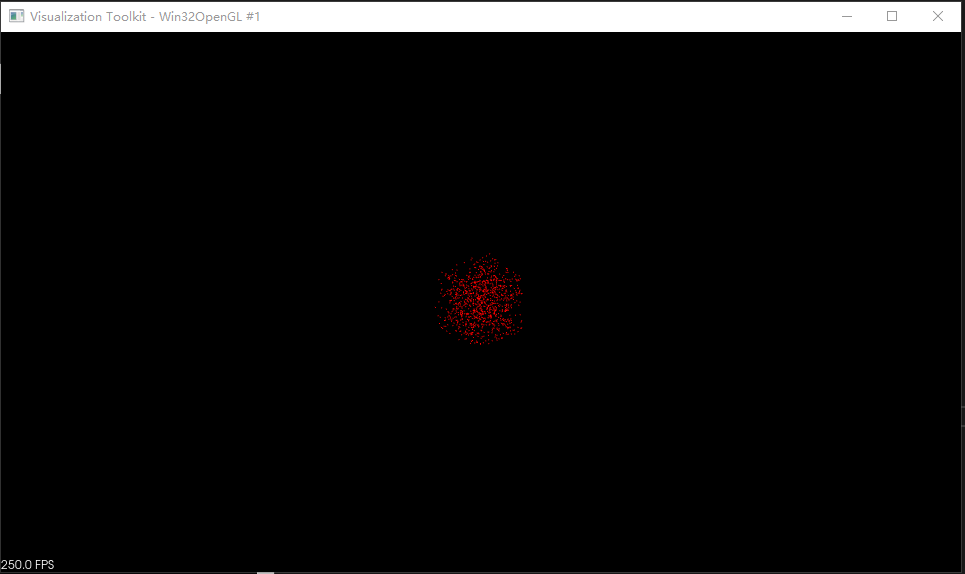
Then the PCL environment under windows is completed!