Method for verifying dimensions before uploading ElementUI pictures
I upload component usage of ElementUI
For specific attributes, you can view the official document. Here is the hook function: before upload = "beforeavatarupload". You can know from the name that this is the method executed before uploading the image. Here you can perform some verification. The official gives the verification of the image type and size. Next, you will verify the image size
<template>
  <div class="blog-main-views">
    <el-upload
      class="avatar-uploader"
      action="https://jsonplaceholder.typicode.com/posts/"
      :show-file-list="false"
      :on-success="handleAvatarSuccess"
      :before-upload="beforeAvatarUpload">
      <img v-if="imageUrl" :src="imageUrl" class="avatar">
      <i v-else class="el-icon-plus avatar-uploader-icon"></i>
        </el-upload>
  </div>
</template>
 methods: {
    beforeAvatarUpload(file) {
      const isJPG = file.type === 'image/jpeg';
      const isLt2M = file.size / 1024 / 1024 < 2;
      if (!isJPG) {
        this.$message.error('Upload avatar pictures can only be JPG format!');
      }
      if (!isLt2M) {
        this.$message.error('The size of uploaded avatar image cannot exceed 2 MB!');
      }
      return isJPG && isLt2M;
    }
  }
}
Here, let's print out the file parameter and have a look

You can see that it contains the file name, size and type, but there is no width or height of the picture
To verify the width and height of the image, I use the javascript native API FileReader
II javascript native API FileReader
Let's learn how to use this api first, and then verify it with elementUI
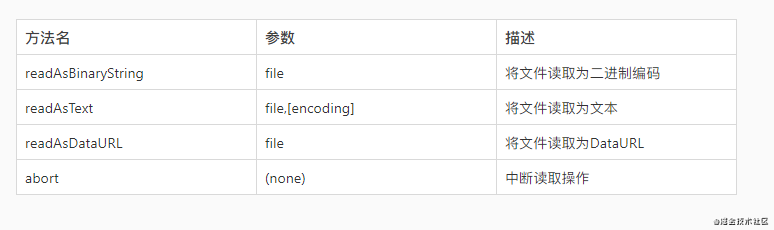
1. Method of FileReader interface
The FileReader interface has four methods, three of which are used to read files and the other is used to interrupt reading.
-
readAsText: this method has two parameters. The second parameter is the text encoding method. The default value is UTF-8. This method is very easy to understand. Read the file as text, and the reading result is the content of the text file.
-
readAsBinaryString: this method reads the file as a binary string. Usually, we transfer it to the back end, which can store the file through this string.
-
readAsDataURL: this method reads the file as a string beginning with data:, which is essentially a data URL. Data URL is a scheme to directly embed small files into the document. I use this method here
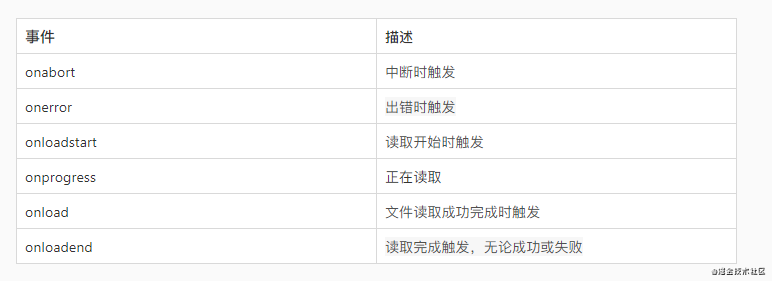
2. FileReader interface events
The FileReader interface contains a complete set of event models to capture the state when reading files.
3. FileReader properties
Whether the read succeeds or fails, the method does not return the read result, which is stored in the result attribute.
4. FileReader usage
The use of FileReader interface is very simple. You can directly create an instance without considering browser compatibility
let reader = new FileReader();
If you consider browsers, you can check them first
if(window.FileReader) {
    let reader = new FileReader();
}
else {
    alert("The browser doesn't support changing it!!");
}
III Combination of ElementUI and FileReader to realize verification
Since it is to obtain the width and height of the image, I also use the image for verification. Since it is an image, we need to use the readAsDataURL method of the FileReader interface,
beforeAvatarUpload(file) {
  let reader = new FileReader();
  reader.onload = function () {
    let txt = this.result;
    let img = document.createElement("img");
    img.src = txt;
    img.onload = function () {
      console.log(img.width);
      console.log(img.height);
    }
  };
  reader.readAsDataURL(file);
}
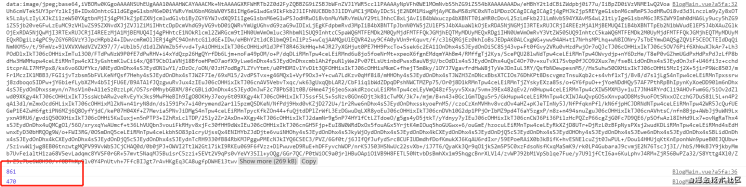
The result obtained through readAsDataURL can be just assigned to img tag as src attribute, and then we can use the simplest img Width and img Height to get the width and height, and then verify it
Look at the console print results. The code is too long. Mainly look at the part in the red box It seems that there is no problem getting the width and height
Finally, we verify that the onload method of the FileReader interface is asynchronous, so we can't get the img attribute. Therefore, we use Promise
The final verification code is as follows
beforeAvatarUpload(file) {
let _this = this;
return new Promise(resolve => {
let reader = new FileReader()
reader.readAsDataURL(file);
reader.onload = function () {
resolve(this.result)
}
}).then((result) => {
document.querySelector("#img").src = result;
let img = document.querySelector("#img")
img.onload = function () {
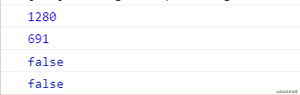
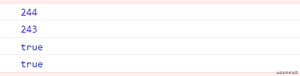
console.log(img.width)
console.log(img.height)
const isWidth = img.width < 500
const isHeight = img.height < 500
console.log(isWidth)
console.log(isHeight)
if (!isWidth) {
_this.$message.error('The width of the uploaded avatar image cannot exceed 500!');
}
if (!isHeight) {
_this.$message.error('The height of the uploaded avatar cannot exceed 500!');
}
return isWidth && isHeight;
}
})
}
Start with a picture that doesn't meet the requirements,
Change a picture that meets the requirements
It's done, so you can verify the size before uploading the picture!
After the verification is passed, it will be uploaded naturally
Upload pictures to Sina cloud based on express
Target function: image upload
Operation process: click the upload button - > upload the picture to the server - > return to the picture URL
1. Upload using elementUI in the component
<el-upload
      class="avatar-uploader"
      action="http://81.xx.xx.113:3000/blog/uploadArticleImg"
      :show-file-list="false"
      :on-success="handleAvatarSuccess"
      :before-upload="beforeAvatarUpload"
    >
      <img v-if="imageUrl" :src="imageUrl" class="avatar" />
      <i v-else class="el-icon-plus avatar-uploader-icon"></i>
</el-upload>
The interface for uploading pictures is written in action
2. Configure static resource folder
Only when the static resource folder is configured can images be accessed by URL. The open static resource folder here must be in front of dist, otherwise html will be used, so images cannot be accessed
//Open static resource file
app.use(express.static(path.join(__dirname, "public")));

// Access static resource files here is to access static resource files in all dist directories
app.use(express.static(path.resolve(__dirname, './dist')));
// Because it is a single page application, all requests go to / dist / index html
app.get('*', function(req, res) {
    const html = fs.readFileSync(path.resolve(__dirname, './dist/index.html'), 'utf-8');
    res.send(html);
})
3. Upload picture interface
The server uses the multer module to process the uploaded pictures, uses the post method, and adds upload single('file')
//blog.js

//Picture upload module
const multer = require('multer')
//Configure upload path
const upload = multer({ dest: __dirname + '../../public/uploads' })
//upload.single() indicates the upload of a single file
blog.post('/uploadArticleImg', upload.single('file'), require("./blog/uploadArticleImg"));
However, the multer module has a flaw in processing files (more likely, I don't understand the configuration), that is, it will replace the uploaded file name with random random random code, and will not retain the suffix, which leads to the direct download of the file during front-end access instead of displaying the image To do this, you need to use the path module to resolve the suffix of the original file, and then use the fs method to add a suffix to the file
//uploadArticleImg.js

//Introducing path module
const path = require("path");
//Introducing fs module
const fs = require("fs");
module.exports = async(req, res) => {
    //Receive file information
    const file = req.file;
    //Gets the suffix of the original file name
    const suffix = path.parse(req.file.originalname).ext;
    //Old file name
    const oldname = req.file.path;
    //New file name
    const newname = req.file.path + suffix;
    //Call FS The renamesync() method adds a suffix
    fs.renameSync(oldname, newname);
    //Get the URL of the picture
    file.url = `http://81.70.96.113:3000/uploads/${file.filename}` + suffix;
    //Return file information
    res.send(file);
}
Here you can upload the picture normally and return the URL of the picture
4. Upload pictures to Sina cloud
I accidentally found that sina cloud can upload pictures, and the amount of data is free within a certain range, reducing the pressure of server memory that I am not rich
/*
 * @Description: Picture upload interface
 * @Author: hanzhiwei
 * @Date: 2020-10-07 00:46:47
 * @LastEditTime: 2020-10-13 00:42:41
 * @FilePath: \blog\serve\route\blog\uploadArticleImg.js
 */
//Introducing path module
const path = require("path");
//Introducing fs module
const fs = require("fs");

//Sina sdk reference
const sinaCloud = require('scs-sdk');
//Configure the accessKey and secretKey of sina cloud. What I understand is the account password
const config = new sinaCloud.Config({
    accessKeyId: '2wesaabmtYD4N3SwxkfM',
    secretAccessKey: 'e75005531b2e364d72efb8ee729f0825629a158a',
    sslEnabled: false
});

//Instantiate Sina cloud storage
var myBucket = new sinaCloud.S3({ params: { Bucket: 'duwanyu.com' } });
//Current instance effective:
myBucket.config = config;


module.exports = async(req, res) => {
    //Receive file information
    const file = req.file;
    //Gets the suffix of the original file name
    const suffix = path.parse(req.file.originalname).ext;
    //Old file name (garbled code generated by module)
    const oldname = req.file.path;
    //New file name
    const newname = req.file.path + suffix;

    //Call FS The renamesync() method adds a suffix
    fs.renameSync(oldname, newname);
    //Get the URL of the picture
    // file.url = `http://81.70.96.113:3000/uploads/${file.filename}` + suffix;
    //Original file name (name of the file itself)
    const remoteFilename = req.file.originalname;
    //Read the file according to the new file name
    const fileBuffer = fs.readFileSync(newname);

    //Upload file
    myBucket.putObject({
        ACL: 'public-read', //jurisdiction
        Bucket: 'duwanyu.com/images', //Upload to duwanyu.com images folder in com folder
        Key: remoteFilename, //File name uploaded to Sina cloud
        Body: fileBuffer //file
    }, function(error, response) {
        if (error) {
            res.json("Failed to upload Sina cloud");
        } else {
            //Upload the picture successfully. Return the picture address to the front end
            file.sinaPath = "http://sinacloud.net/duwanyu.com/images/" + remoteFilename;
            //Get the URL of the picture
            file.url = `http://81.70.96.113:3000/uploads/${file.filename}` + suffix;
            //Return file information
            res.send(file);

        }
    });
}
It's done. At this time, Sina cloud has the pictures we uploaded!
Make an advertisement
This is my project of an open source collection website
Project address 👉👉 Click to enter , it can be directly set as the browser home page or desktop shortcut for use. I am using it and maintain it for a long time.
Completely open source, you can research and secondary development at will. Of course, you are welcome to order a Star ⭐⭐⭐
👉👉Source code link (gitee) 👉👉Source code link (github)
Link integration
🔊 Project preview address (GitHub Pages): 👉👉 https://alanhzw.github.io
🔊 Project preview alternate address (own server): 👉👉 http://warbler.duwanyu.com
🔊 Source address (gitee): 👉👉 https://gitee.com/hzw_0174/warbler-homepage
🔊 Source code address (github): 👉👉 https://github.com/alanhzw/WarblerHomepage
🔊 My blog: 👉👉 https://www.duwanyu.com