Reprint address: https://bbs.huaweicloud.com/forum/thread-108694-1-1.html
Author: Flying Penguin
Experience source code compilation and installation of mindspire GPU version on Linux
I have been exposed to the mindspire deep learning framework for nearly a year. As an AI framework amateur, I often use the mainstream framework of the open source community for some simple image recognition and natural language processing. I first came into contact with the mindspire deep learning framework in May last year and accidentally opened it Mindspire official website tutorial home page , we found that the official website provides a large number of use cases. After learning these cases step by step, we have basically mastered the use of mindspire for training and reasoning. Recently, I learned to use mindspire's custom GPU operator. I just got a host with GPU. Based on the principle of making the best use of everything, I tried to compile and install the mindspire GPU version according to the official installation guide. During this period, the author experienced several difficulties and finally compiled it. The installation description of the third-party library in the official installation guide is not detailed enough. Fortunately, the author has the good habit of writing it down by hand and records the whole compilation and installation process. I hope I can help more friends.
Confirm system environment information
First of all, it should be noted that users with sudo permission are required to compile and install the whole process.
Installing Ubuntu 18.04 is a 64 bit operating system
-
Confirm the system version number and enter the command LSB at the terminal_ release -a:
 $ lsb_release -a
 No LSB modules are available.
 Distributor ID: Ubuntu
 Description:    Ubuntu 18.04.5 LTS
 Release:        18.04
 Codename:       bionic
-
Confirm the system bits and enter the command uname -a:
 $ uname -a
 Linux ms-gpu 5.4.0-56-generic #62~18.04.1-Ubuntu SMP Tue Nov 24 10:07:50 UTC 2020 x86_64 x86_64 x86_64 GNU/Linux
You can know that my host system meets the requirements. Next, install gcc.
Install GCC version 7.3.0
First, execute the following command to install the required basic dependency packages:
sudo apt-get install -y build-essential m4 libgmp-dev libmpfr-dev libmpc-dev
-
View the native gcc version and execute the command gcc --version:
 $ gcc --version
 gcc (Ubuntu 7.5.0-3ubuntu1~18.04) 7.5.0
 Copyright (C) 2017 Free Software Foundation, Inc.
 This is free software; see the source for copying conditions.  There is NO
 warranty; not even for MERCHANTABILITY or FITNESS FOR A PARTICULAR PURPOSE.
According to the output, the installed gcc version is 7.5.0.
If gcc is not installed, execute the following command to install gcc:
sudo apt install gcc
Since gcc is version 7.5.0 on this machine and the official guide requires version 7.3.0, I need to compile and install gcc version 7.3.0.
-
Download the gcc 7.3.0 installation package and execute the following command:
wget http://ftp.gnu.org/gnu/gcc/gcc-7.3.0/gcc-7.3.0.tar.gz
-
Execute tar -xzf gcc-7.3.0 tar. GZ unzip the source package.
-
Perform compilation and installation.
View the extracted gcc source package:
 $ ls gcc-7.3.0
 ABOUT-NLS           config.log    COPYING          gcc         LAST_UPDATED  libdecnumber  libiberty      libssp           lt~obsolete.m4      Makefile.def   move-if-change
 ChangeLog           config-ml.in  COPYING3         gnattools   libada        libffi        libitm         libstdc++-v3     lto-plugin          Makefile.in    NEWS
 ChangeLog.jit       config.rpath  COPYING3.LIB     gotools     libatomic     libgcc        libmpx         libtool-ldflags  ltoptions.m4        Makefile.tpl   README
 ChangeLog.tree-ssa  config.sub    COPYING.LIB      include     libbacktrace  libgfortran   libobjc        libtool.m4       ltsugar.m4          MD5SUMS        symlink-tree
 compile             configure     COPYING.RUNTIME  INSTALL     libcc1        libgo         liboffloadmic  libvtv           ltversion.m4        missing        ylwrap
 config              configure.ac  depcomp          install-sh  libcilkrts    libgomp       libquadmath    ltgcc.m4         MAINTAINERS         mkdep          zlib
 config.guess        contrib       fixincludes      intl        libcpp        libhsail-rt   libsanitizer   ltmain.sh        maintainer-scripts  mkinstalldirs
Execute cd gcc-7.3.0 and enter the source package directory.
-
Run the following command to configure before installation.
./configure --enable-checking=release --enable-languages=c,c++ --disable-multilib
Of which:
- Enable checking = release is to add some checks
- Enable languages = C, C + + is the programming language supported by gcc
- Disable multilib cancels multi-target library compilation (cancels 32-bit library compilation)
-
Run the following command to compile and install gcc 7.3.0.
make -j 12 && sudo make install -j 12
Among them, parameter -j 12 indicates that 12 threads are started for compilation and installation. The following steps are the same. You can set appropriate values according to your cpu performance.
-
Link gcc 7.3.0 as the default gcc version by executing the following command:
sudo ln -sf /usr/local/gcc/bin/gcc /usr/bin/gcc
-
Execute gcc --version. If the output result is as follows, gcc 7.3.0 is successfully installed
 $ gcc --version
 gcc (GCC) 7.3.0
 Copyright © 2017 Free Software Foundation, Inc.
 This program is free software; Please refer to the copyright notice of the source code. There is no warranty for this software;
 Including no warranty of merchantability and fitness for a particular purpose.
-
Now that gcc 7.3.0 has been installed, continue to install gmp.
Installation gmp 6.1.2
-
Download gmp 6.1.2 source package:
wget https://gmplib.org/download/gmp/gmp-6.1.2.tar.xz
-
Run the command tar - JXF gmp-6.1.2 tar. XZ unzip the GMP source package.
- Enter the extracted directory and execute the command/ configure:
-
Execute the following command to install gmp.
make -j 12 && sudo make install -j 12
After gmp installation, continue to install NVIDA driver.
Installing NVIDIA drivers
First look at the list of graphics card drivers, execute sudo apt get install Ubuntu drivers common to install Ubuntu drivers, and then execute Ubuntu drivers devices to view the drivers supported by the graphics card:
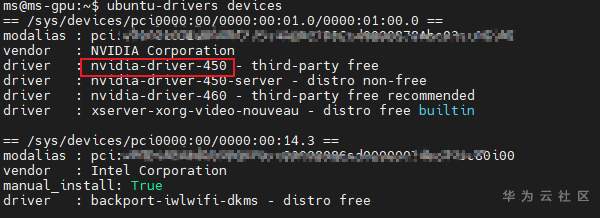
It can be seen from the output result that the driver version to be installed is nvidia-driver-450. Execute the following command to install:
sudo apt-get install -y nvidia-driver-450
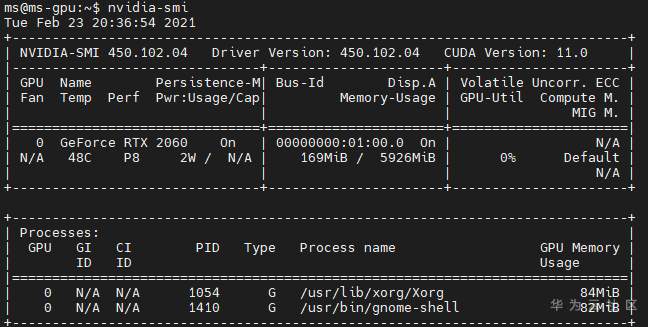
Perform nvdia SMI verification. After successful installation, the following results are displayed:
At this point, the GPU driver has been installed. Next, you need to install openssl.
Install OpenSSL 1.1.1
I chose to install OpenSSL Version 1.1.1.
-
Download the openssl 1.1.1 source package:
wget https://github.com/openssl/openssl/archive/OpenSSL_1_1_1g.tar.gz
-
Run the command tar -xzf penSSL_1_1_1g.tar.gz unzip the gmp source package.
- Enter the extracted directory and execute the command/ config --prefix=/usr/local/openssl:
-
Execute the following command to install openssl.
make -j 12 && sudo make install -j 12
-
After installation, set the environment variable export OPENSSL_ROOT_DIR=/usr/local/openssl and add to ~ / The end of the bashrc file.
After installing openssl, continue to install Python 3.7.5. Since mindspire only supports Python 3.7.5, I chose to compile and install with the source code.
Install Python version 3.7.5
Before compiling and installing Python, you need to install the necessary basic dependencies. First, execute the following command to install the required dependency packages:
sudo apt-get install -y libssl-dev zlib1g-dev libbz2-dev \
                        libreadline-dev libsqlite3-dev wget \
                        curl llvm libncurses5-dev libncursesw5-dev \
                        xz-utils tk-dev libffi-dev liblzma-dev python-openssl
The steps for compiling and installing Python are as follows:
-
Download Python 3.7.5 source package:
wget https://www.python.org/ftp/python/3.7.5/Python-3.7.5.tgz
-
Execute the command tar -xzf python-3.7.5 Tgz unzip the source package.
-
Enter the unzipped source package directory and execute the following commands to install and configure:
./configure --prefix=/usr/local/python3.7.5 --with-openssl=/usr/local/openssl --enable-shared
Of which:
-
--prefix=/usr/local/python3.7.5 installation path
The executable is placed in / usr / local / Python 3.0 7.5/bin.
The library file is placed in / usr / local / Python 3.0 7.5/lib.
The configuration file is placed in / usr / local / Python 3.0 7.1/include.
Other resource files are placed in / usr / local / Python 3.0 7.5 lower.
-
--With openssl to ensure that SSL can be found when pip installs the library, configure the openssl installation directory / usr/local/openssl in the previous step.
-
-
Execute the command make - J 12 & amp; amp; amp; amp;& amp; amp; amp; amp; Sudo make install -j 12 compile and install Python 3.7.5.
-
Add Python 3.7.5 to the environment variable:
-
Execute the command VIM ~ / bashrc edit ~ / bashrc file, append the following command to the end:
export PATH=/usr/local/python3.7.5/bin:{user_home_path}/.local/bin:$PATHWhere, {user_home_path} is replaced by the home directory of the currently logged in user.
-
Execute the following command to make python point to python 3.0 by default 7.5:
  ln -sf /usr/local/python3.7.5/bin/python3 /usr/bin/python
  ln -sf /usr/local/python3.7.5/bin/python3 /usr/bin/python3
-
-
Execute source ~ / Bashrc, refresh environment variables and execute Python 3.0 7 -- version verifies the installation and outputs the following results to successfully install python 3.7.5.
 $ python --version
 Python 3.7.5
-
Replace pip source.
New ~ / pip/pip.conf file, add the following:
 [global]
 index-url = https://pypi.tuna.tsinghua.edu.cn/simple
-
Update pip to:
python -m pip install --upgrade pip
Execute the command pip --version and output the following results to complete the installation.
 $ pip --version
 pip 21.0.1 from /usr/local/python3.7.5/site-packages/pip (python 3.7)
Since then, Python installation has been completed. Next, install cmake or select compile installation.
Installation CMake 3.18.3
-
Download the cmake 3.18.3 source package:
wget https://cmake.org/files/v3.18/cmake-3.18.3.tar.gz
-
Run the command tar -xzf cmake-3.18.3 tar. GZ extract the cmake source package.
- Enter the extracted directory and execute/ bootstrap for installation and configuration.
-
Finally, execute the following command to install cmake 3.18.3.
make -j 12 && sudo make install -j 12
The installation process is shown in the figure below:
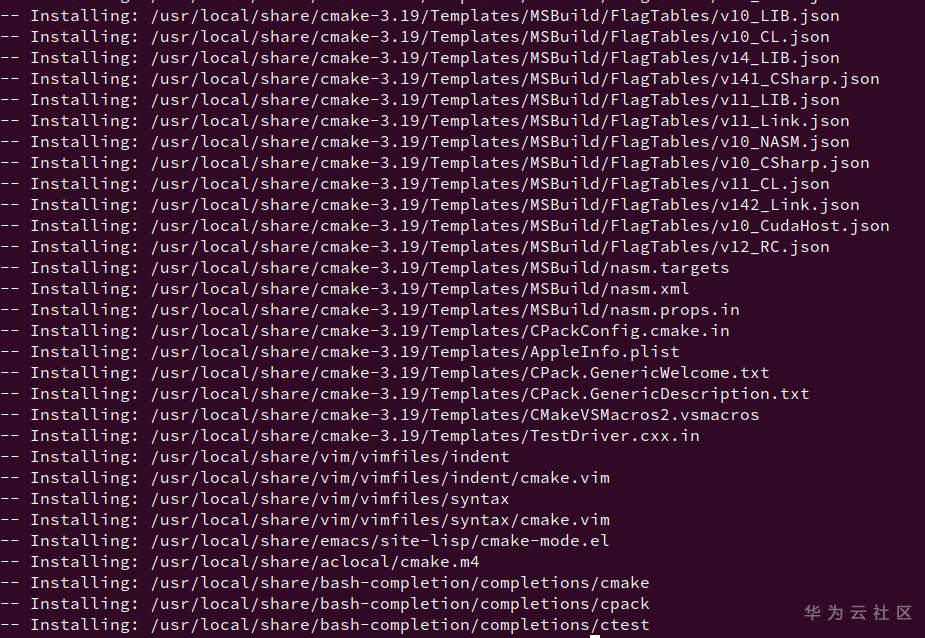
Screenshot at the end of installation:
-
Verify that the installation is successful, execute the following command to display the following results:
 $ cmake --version
 cmake version 3.18.3

 CMake suite maintained and supported by Kitware (kitware.com/cmake).
After confirming that cmake is installed, install patch.
Installing patch 2.6
-
Download patch 2.6 source package:
wget http://ftp.gnu.org/gnu/patch/patch-2.6.tar.gz
-
Run the command tar - xzf patch-2.6 tar. GZ unzip the patch source package.
- Enter the extracted directory and execute the command/ configure:
-
Execute the following command to install patch 2.6.
make -j 12 && sudo make install -j 12
-
Verify that the installation is successful, execute the following command to display the following results:
 $ patch --version
 patch 2.6
 Copyright (C) 1988 Larry Wall
 Copyright (C) 2003 Free Software Foundation, Inc.

 This program comes with NO WARRANTY, to the extent permitted by law.
 You may redistribute copies of this program
 under the terms of the GNU General Public License.
 For more information about these matters, see the file named COPYING.

 written by Larry Wall and Paul Eggert
After verifying the installation, install autoconf.
Installing Autoconf 2.70
-
Download the autoconf-2.70 source package:
wget http://ftp.gnu.org/gnu/autoconf/autoconf-2.70.tar.gz
-
Run the command tar -xzf autoconf-2.70 tar. GZ unzip the Autoconf source package.
- Enter the extracted directory and execute the command/ configure:
-
Execute the following command to install autoconf-2.70.
make -j 12 && sudo make install -j 12
-
Verify that the installation is successful, execute the following command to display the following results:
 $ autoconf --version
 autoconf (GNU Autoconf) 2.70
 Copyright (C) 2020 Free Software Foundation, Inc.
 License GPLv3+/Autoconf: GNU GPL version 3 or later
 <https://gnu.org/licenses/gpl.html>, <https://gnu.org/licenses/exceptions.html>
 This is free software: you are free to change and redistribute it.
 There is NO WARRANTY, to the extent permitted by law.

 Written by David J. MacKenzie and Akim Demaille.
Next, install libtool-2.4.6.
Installing libtool 2.4.6-29 fc30
-
Download the libtool-2.4.6 source package:
wget https://ftpmirror.gnu.org/libtool/libtool-2.4.6.tar.gz
-
Run the command tar -xzf libtool-2.4.6 tar. GZ extract the libtool source package.
- Enter the extracted directory and execute the command/ configure:
-
Execute the following command to install libtool-2.4.6.
make -j 12 && sudo make install -j 12
-
Verify that the installation is successful, execute the following command to display the following results:
 $ libtool --version
 libtool (GNU libtool) 2.4.6
 Written by Gordon Matzigkeit, 1996

 Copyright (C) 2014 Free Software Foundation, Inc.
 This is free software; see the source for copying conditions.  There is NO
 warranty; not even for MERCHANTABILITY or FITNESS FOR A PARTICULAR PURPOSE.
If no error is reported, continue to install automake.
Install Automake 1.16
-
Download the automake-1.16 source package:
wget http://ftp.gnu.org/gnu/automake/automake-1.16.tar.gz
-
Run the command tar - xzf automake-1.16 tar. GZ unzip the automake source package.
- Enter the extracted directory and execute the command/ configure:
-
Execute the following command to install automake-1.16.
make -j 12 && sudo make install -j 12
-
Verify that the installation is successful, execute the following command to display the following results:
 $ automake --version
 automake (GNU automake) 1.16
 Copyright (C) 2018 Free Software Foundation, Inc.
 License GPLv2+: GNU GPL version 2 or later <https://gnu.org/licenses/gpl-2.0.html>
 This is free software: you are free to change and redistribute it.
 There is NO WARRANTY, to the extent permitted by law.

 Written by Tom Tromey <tromey@redhat.com>
     and Alexandre Duret-Lutz <adl@gnu.org>.
Next, continue to install flex.
Installing Flex 2.6.4
-
Download the flex-2.6.4 source package:
wget https://github.com/westes/flex/releases/download/v2.6.4/flex-2.6.4.tar.gz
-
Run the command tar -xzf flex-2.6.4 tar. GZ unzip the gmp source package.
- Enter the extracted directory and execute the command/ configure:
-
Execute the following command to install flex-2.6.4.
make -j 12 && sudo make install -j 12
-
Verify that the installation is successful, execute the following command to display the following results:
 $ flex --version
 flex 2.6.4
Install wheel 0.32.0
Execute the command pip install wheel==0.32.0 to install wheel.
According to the installation guide on the official website, you need to use the cuda suite and cudnn Library in the compilation process, and then install cuda and cudnn.
Install CUDA 10.1 by default
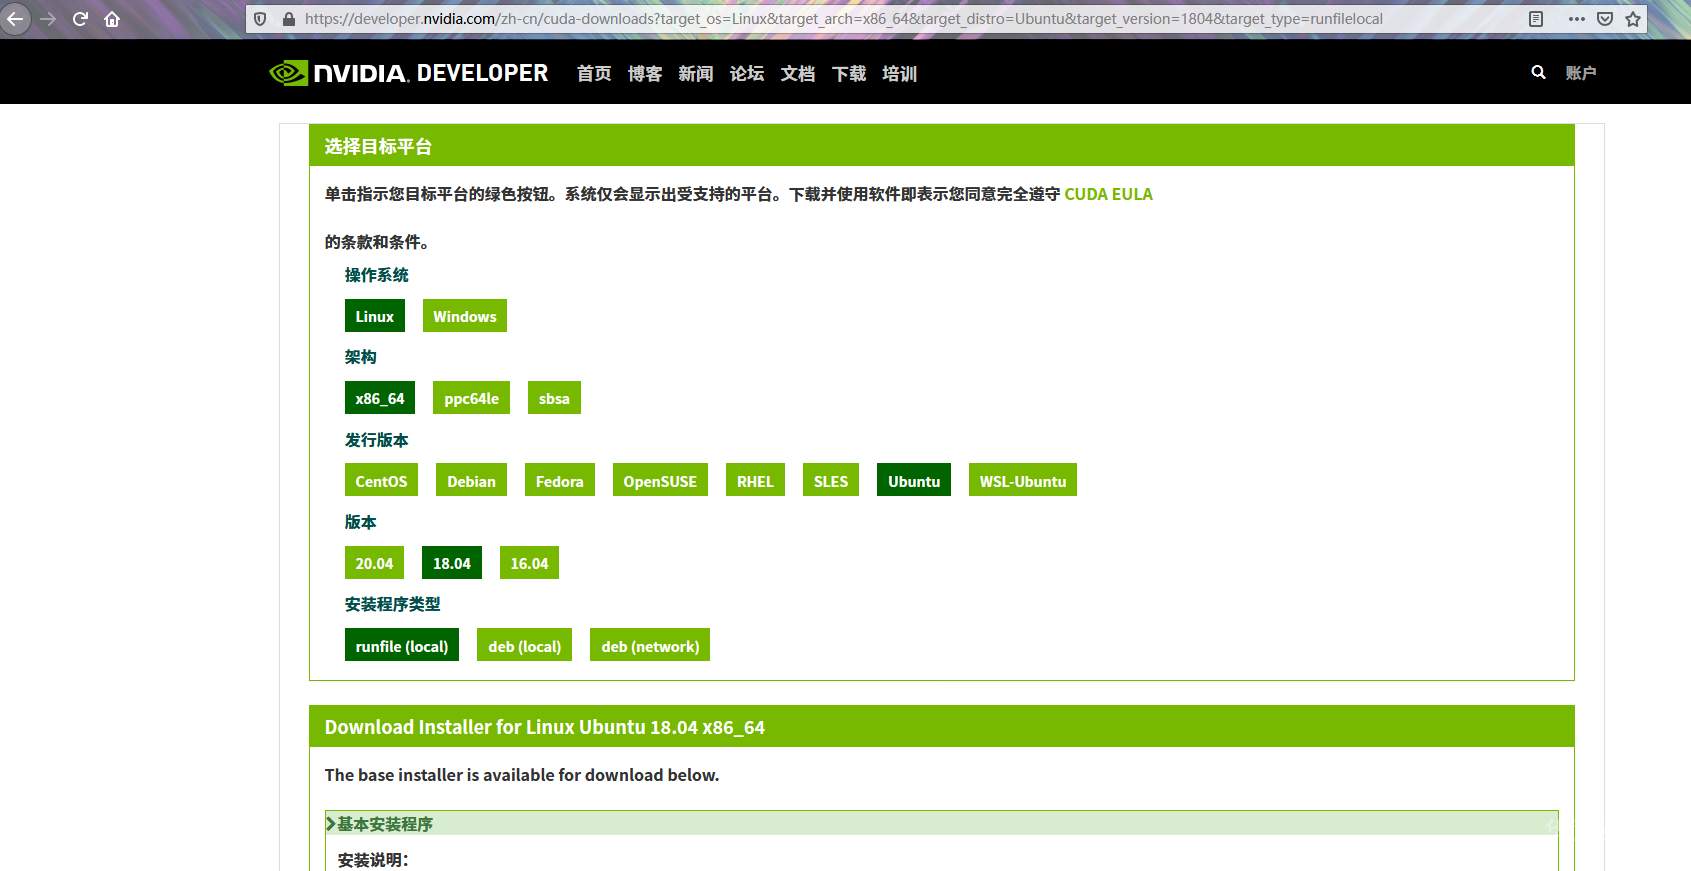
-
Open link https://developer.nvidia.com/cuda-10.1-download-archive-base? , select the version shown in the figure below and download cuda 10.1 installation package:
-
Execute sudo Chmod + X/ cuda_ 10.1.105_ 418.39_ linux. Run gives permission.
-
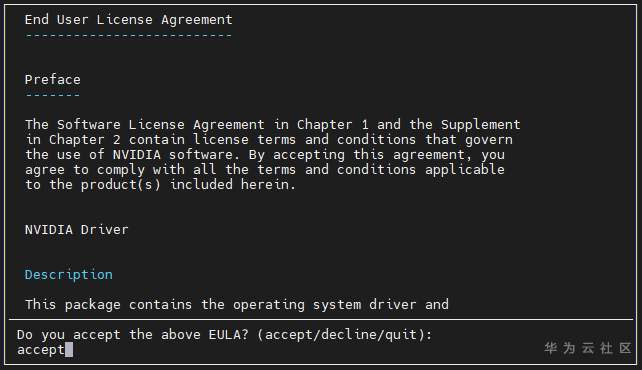
Execute sudo/ cuda_ 10.1.105_ 418.39_ linux. Run and install according to the prompts.
-
At this time, an installation prompt pops up in the window, and enter accept to confirm:
-
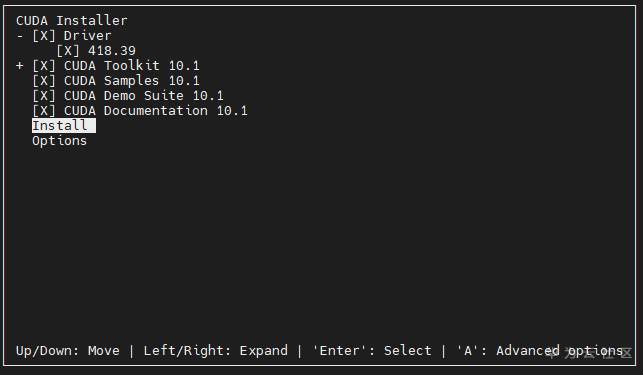
Pop up the installation option, select Install only, and press enter to confirm:
-
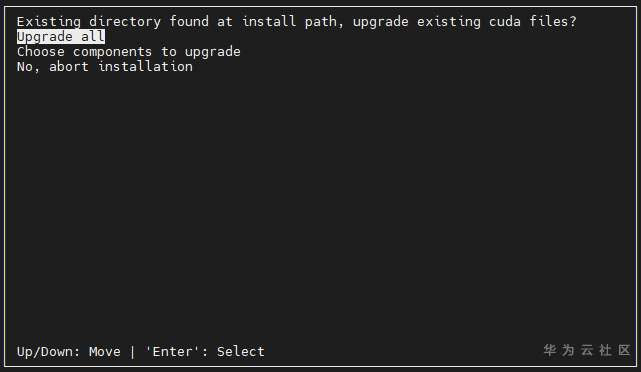
If CUDA has been installed before and not completely uninstalled, the following prompt will pop up, select Upgrade All and press enter to confirm:
-
-
Verify that the installation is complete:
 $ nvcc -V
 nvcc: NVIDIA (R) Cuda compiler driver
 Copyright (c) 2005-2019 NVIDIA Corporation
 Built on Fri_Feb__8_19:08:17_PST_2019
 Cuda compilation tools, release 10.1, V10.1.105
After cuda installation, install cudnn.
Installation cuDNN 7.6
-
Download cudnn source package:
-
Browser open link: https://developer.nvidia.com/zh-cn/cudnn , click

-
You need to log in before downloading. Click Login to log in:

-
Follow the prompts to register or log in
-
After logging in, jump to the download link:
-
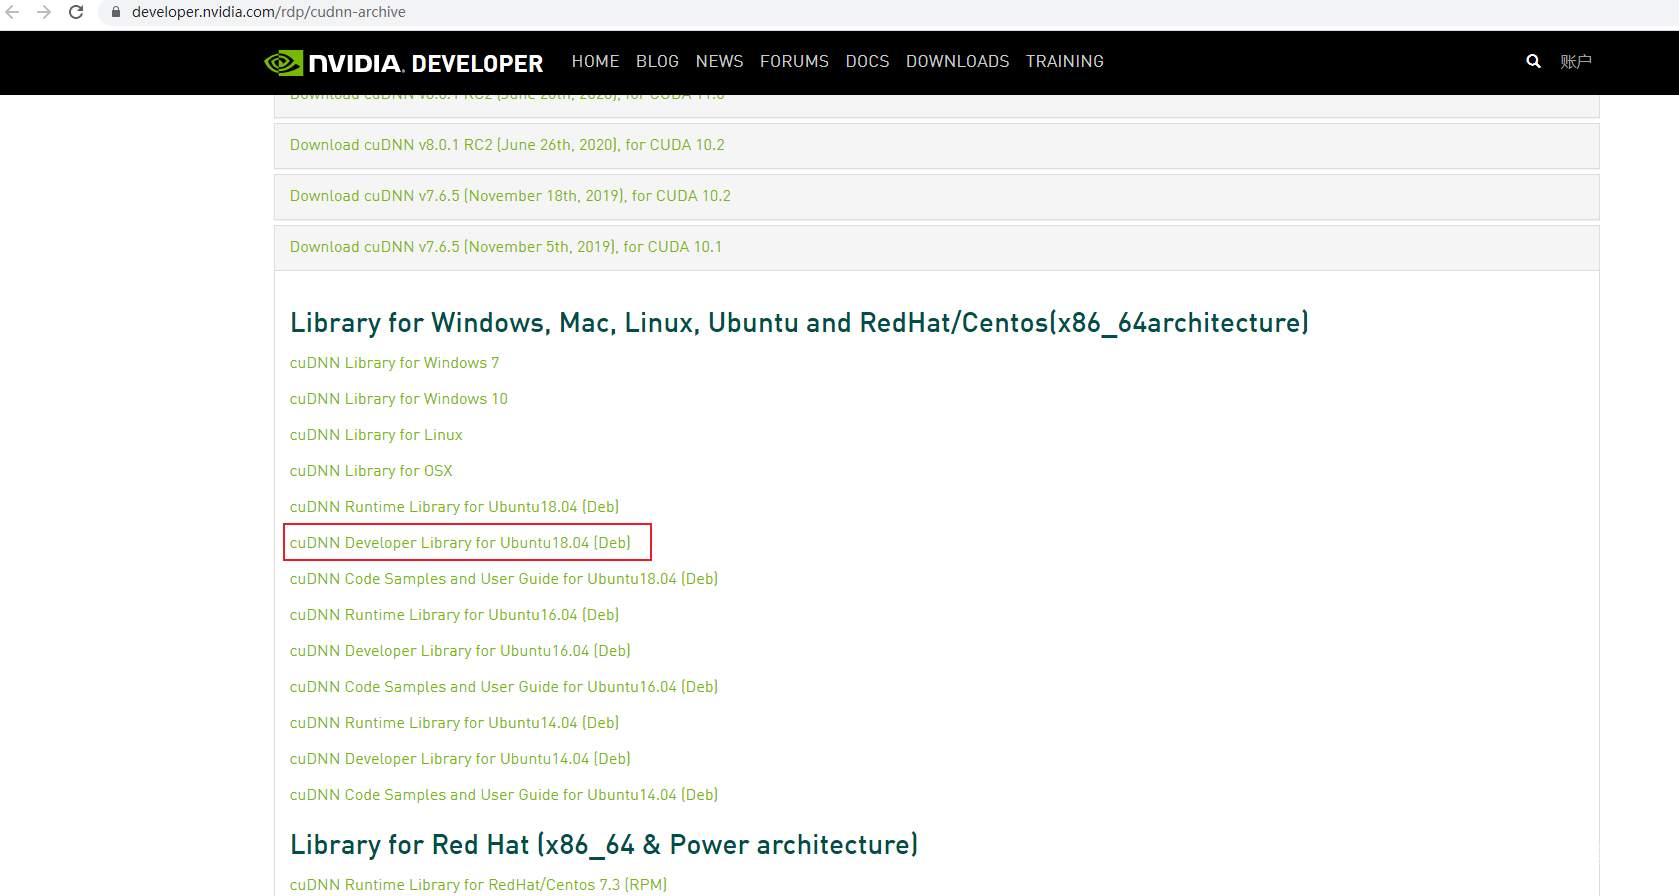
Get Linux-x86_64 platform and support cuda10 Link to version 1.
wget https://developer.nvidia.com/compute/machine-learning/cudnn/secure/7.6.5.32/Production/10.1_20191031/Ubuntu18_04-x64/libcudnn7-dev_7.6.5.32-1%2Bcuda10.1_amd64.deb
-
-
Now when you are done, run the command sudo apt get install libcudnn7 dev_ 7.6.5.32-1+cuda10. 1_ amd64. Deb for installation.
At this point, cuda and cudnn have been installed. Continue to install the remaining openmpi.
Install openmpi version 4.0.3
-
Download the openmpi-4.0.3 source package:
wget https://download.open-mpi.org/release/open-mpi/v4.0/openmpi-4.0.3.tar.gz
-
Run the command tar -xzf openmpi-4.0.3 tar. GZ unzip the gmp source package.
- Enter the extracted directory and execute the command/ configure:
-
Execute the following command to install openmpi-4.0.3.
make -j 12 && sudo make install -j 12
-
After installation, execute whereis openmpi to view the installation results:
 $ whereis openmpi
 openmpi: /usr/local/lib/openmpi
Continue to install numa and git, which are relatively simple.
Installing NUMA 2.0.11
-
Install using the following command:
sudo apt-get install libnuma-dev
-
After installation, execute whereis numa to view the installation results:
 $ whereis numa
 numa: /usr/include/numa.h /usr/share/man/man3/numa.3.gz /usr/share/man/man7/numa.7.gz
Installing git tools
-
Install using the following command:
sudo apt-get install git
-
After installation, execute whereis numa to view the installation results:
 $ git --version
 git version 2.17.1
At this point, the dependent environment for compiling mindspire is all ready. Next, we need to compile whl package. First, clone the mindspire warehouse locally.
Clone mindspire source code warehouse
Create a new mindspore repo directory in the user directory, clone the mindspot source code warehouse into the directory, and execute the following commands:
git clone https://gitee.com/mindspore/mindspore.git -b r1.1
Compile mindspire
Enter the mindspire source directory cloned in the previous step, and execute the following command under the source root directory to compile:
./build.sh -e gpu
-
Of which:
build. The default number of compilation threads in SH is 8. If the compiler performance is poor, compilation errors may occur. You can increase - j {number of threads} during execution to reduce the number of threads. For example:
./build.sh -e gpu -j4
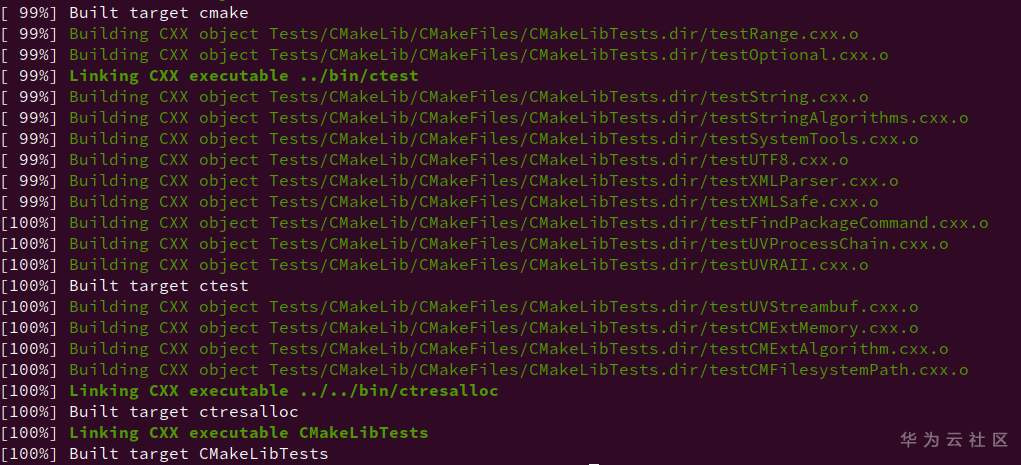
Several pictures are taken during the compilation process:
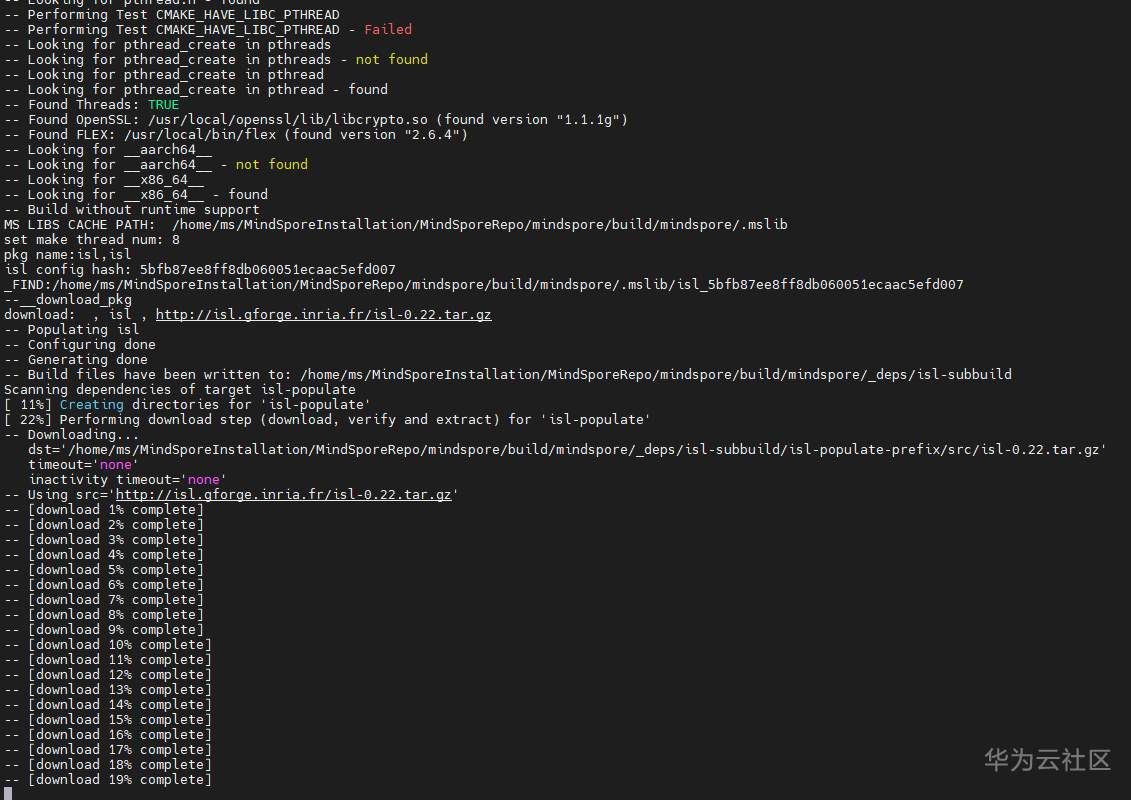
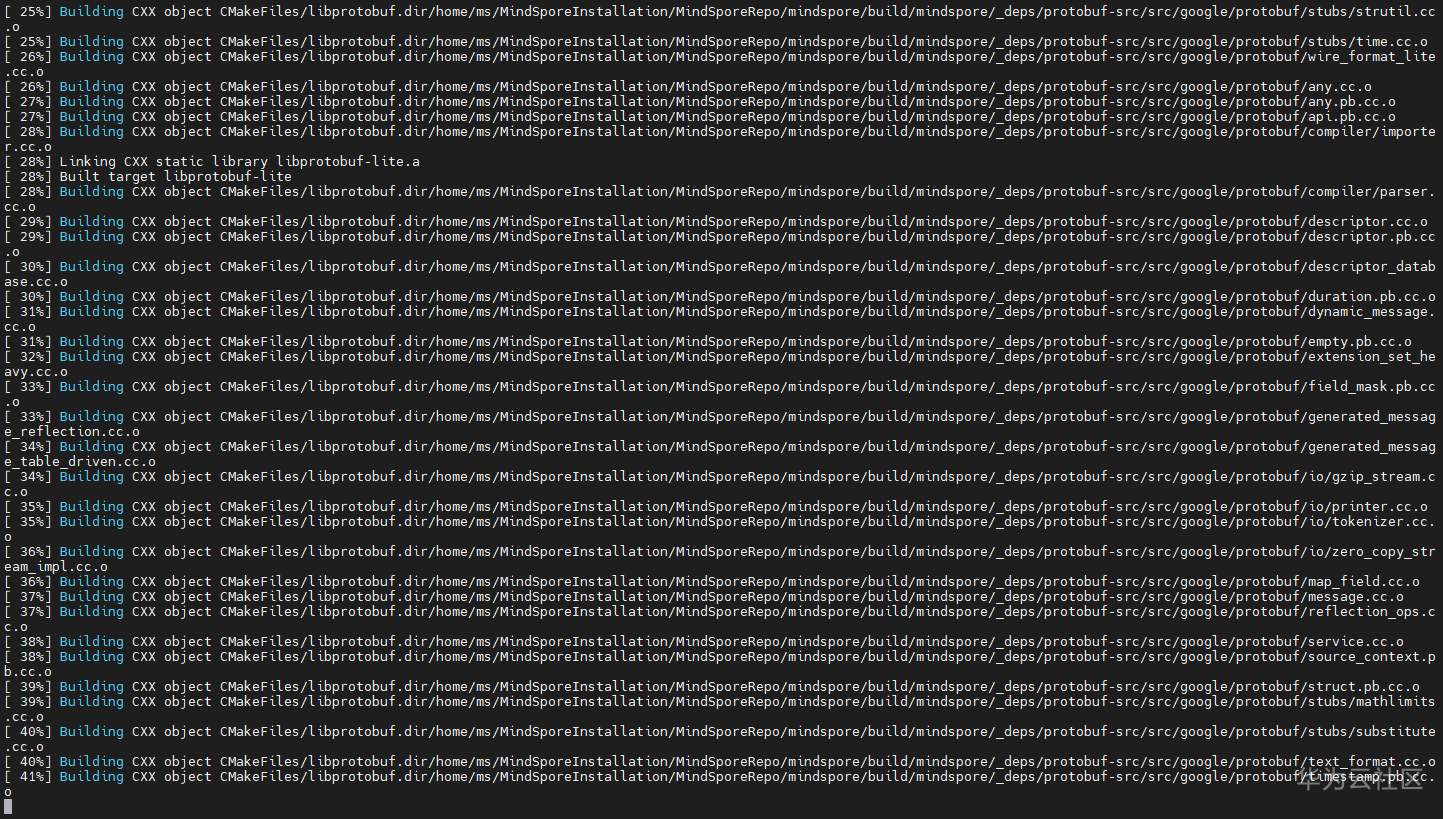
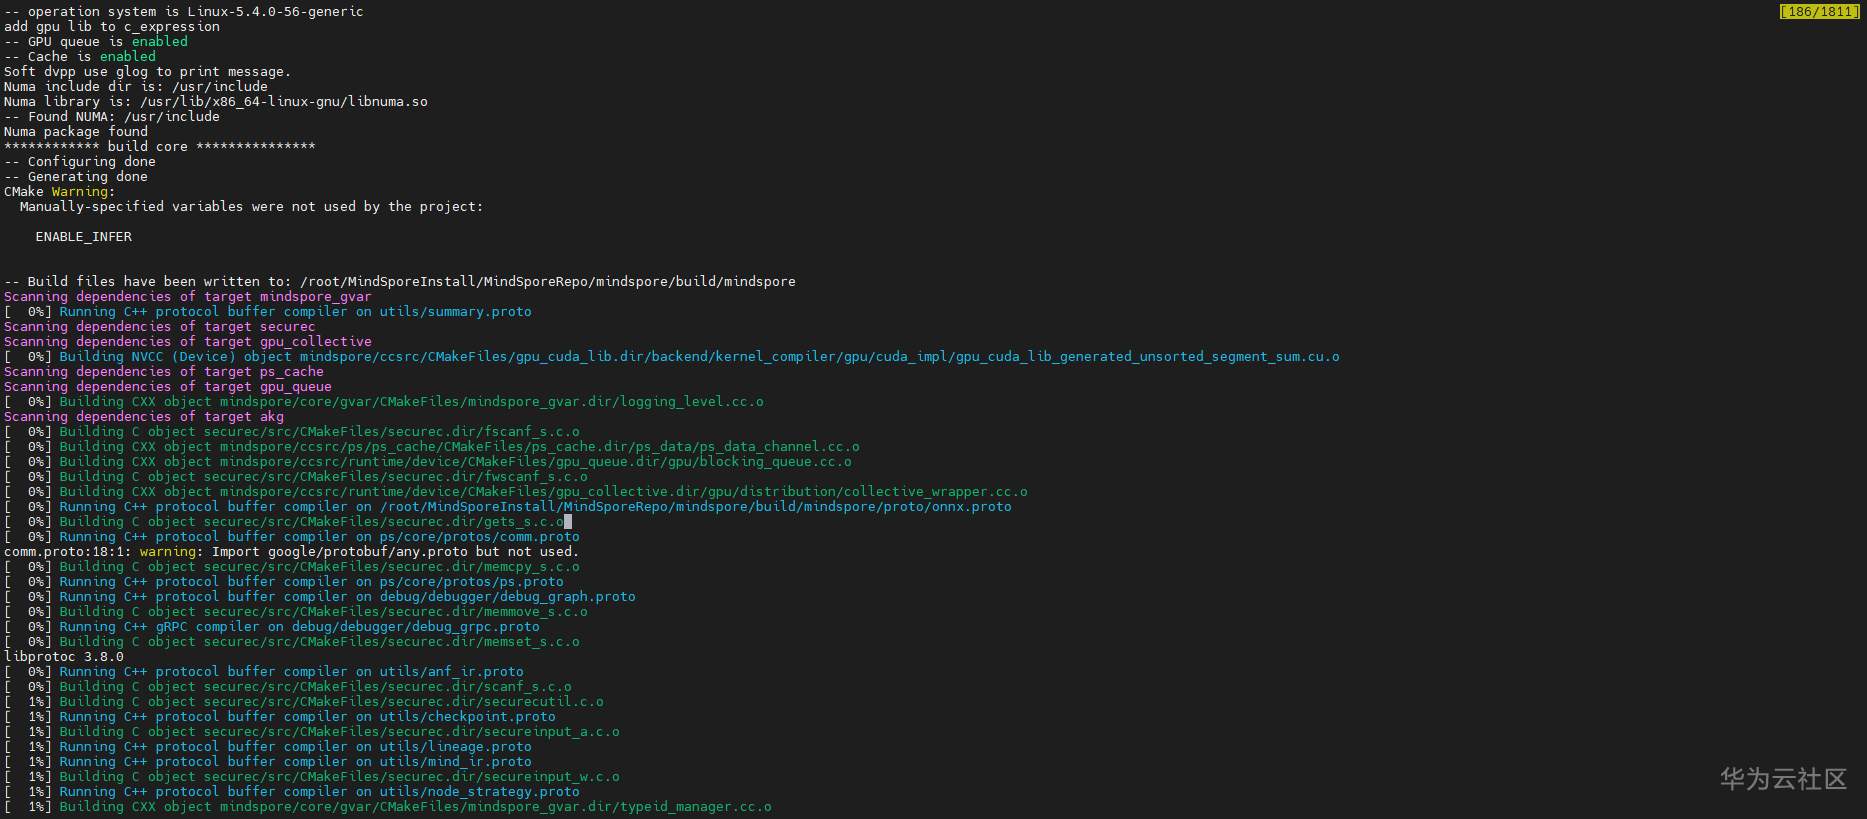
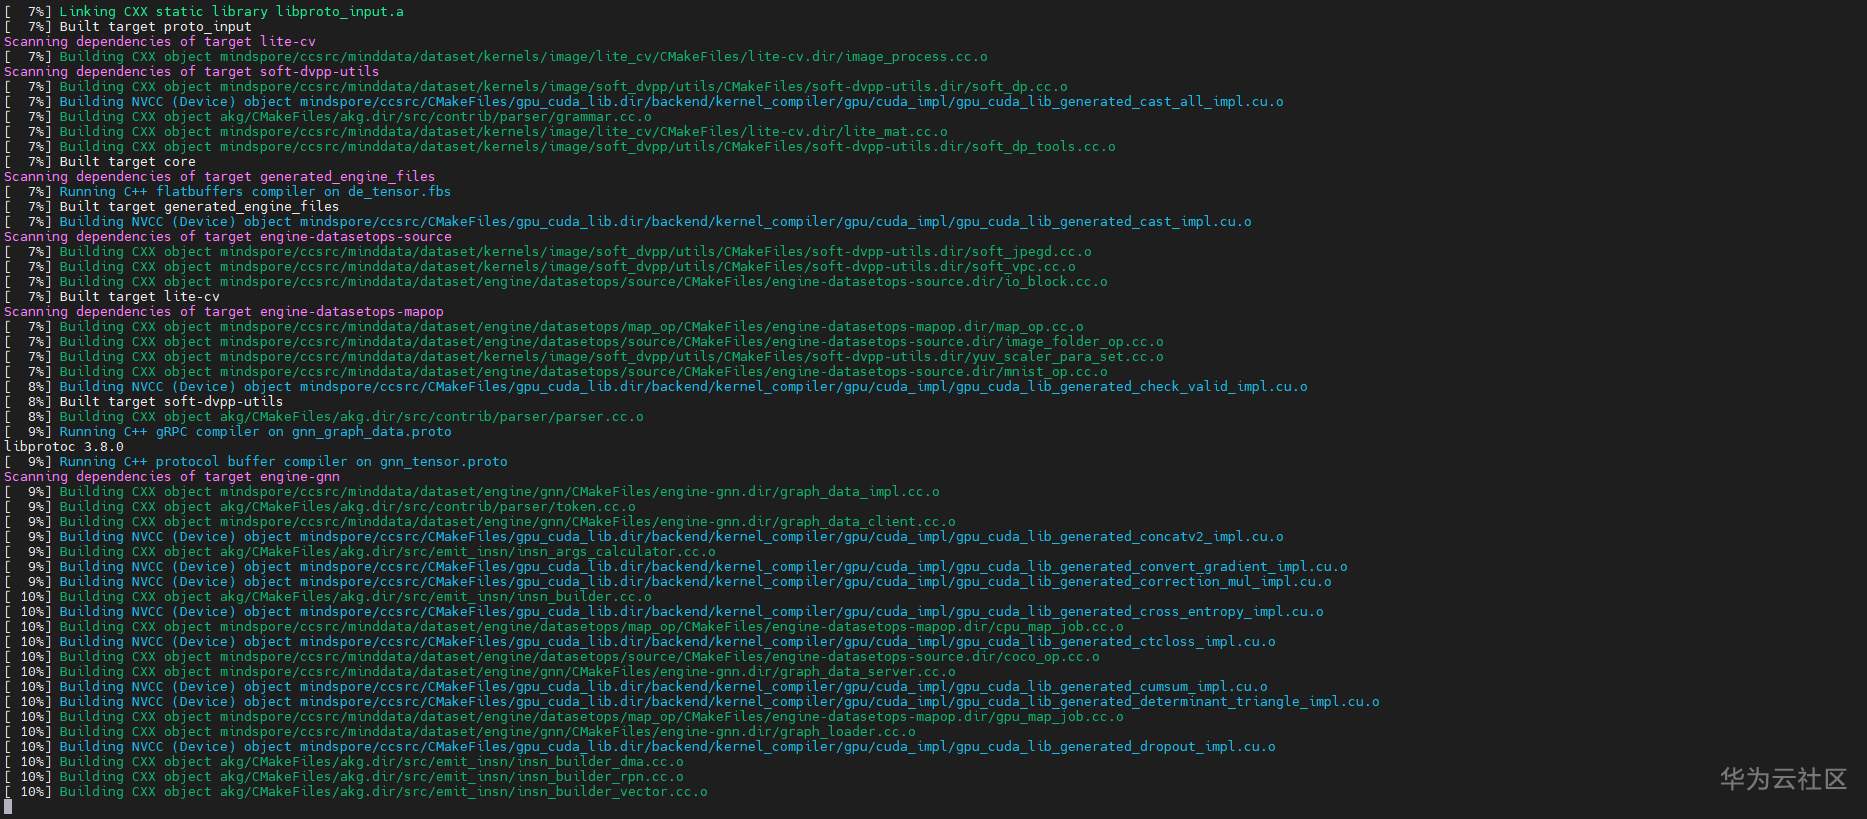
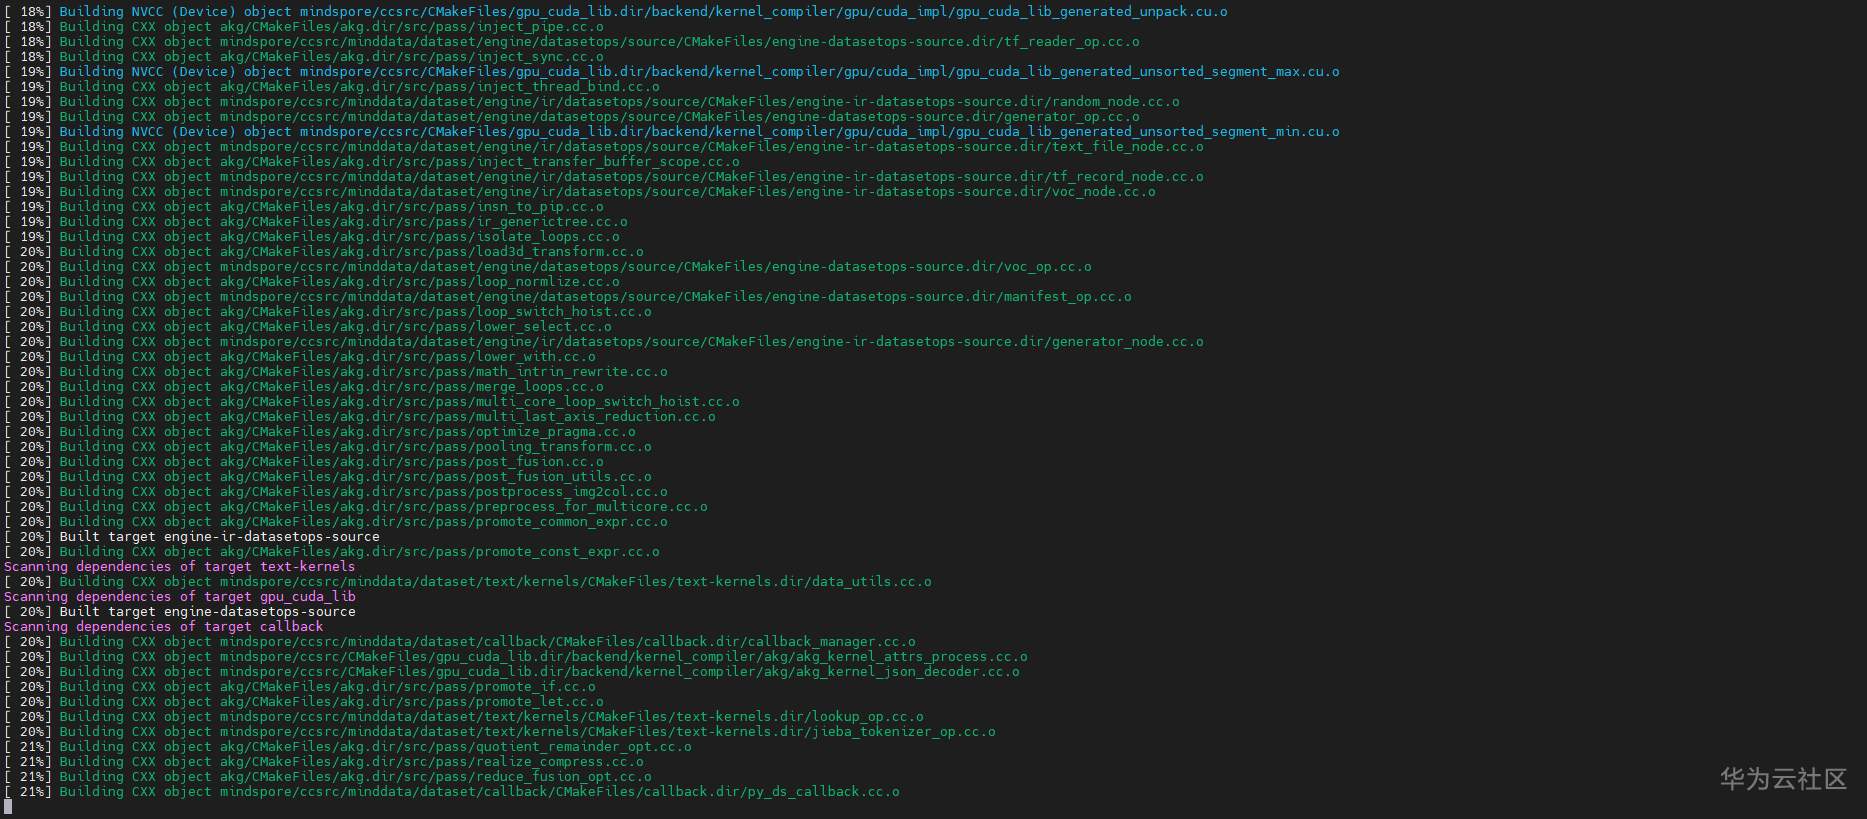
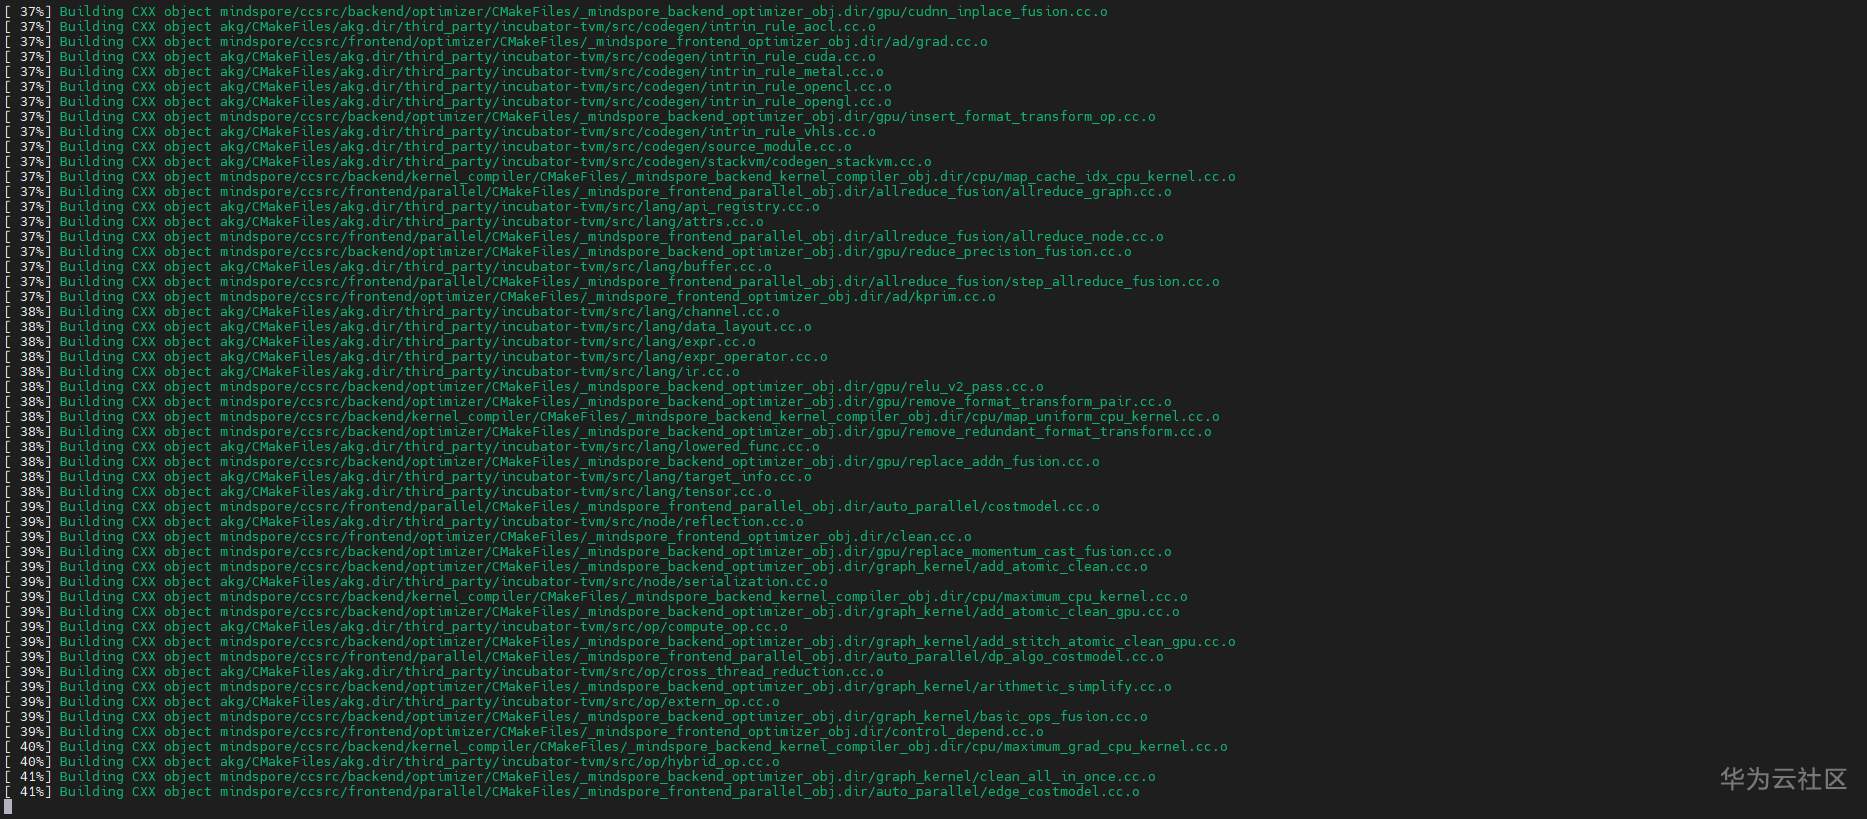
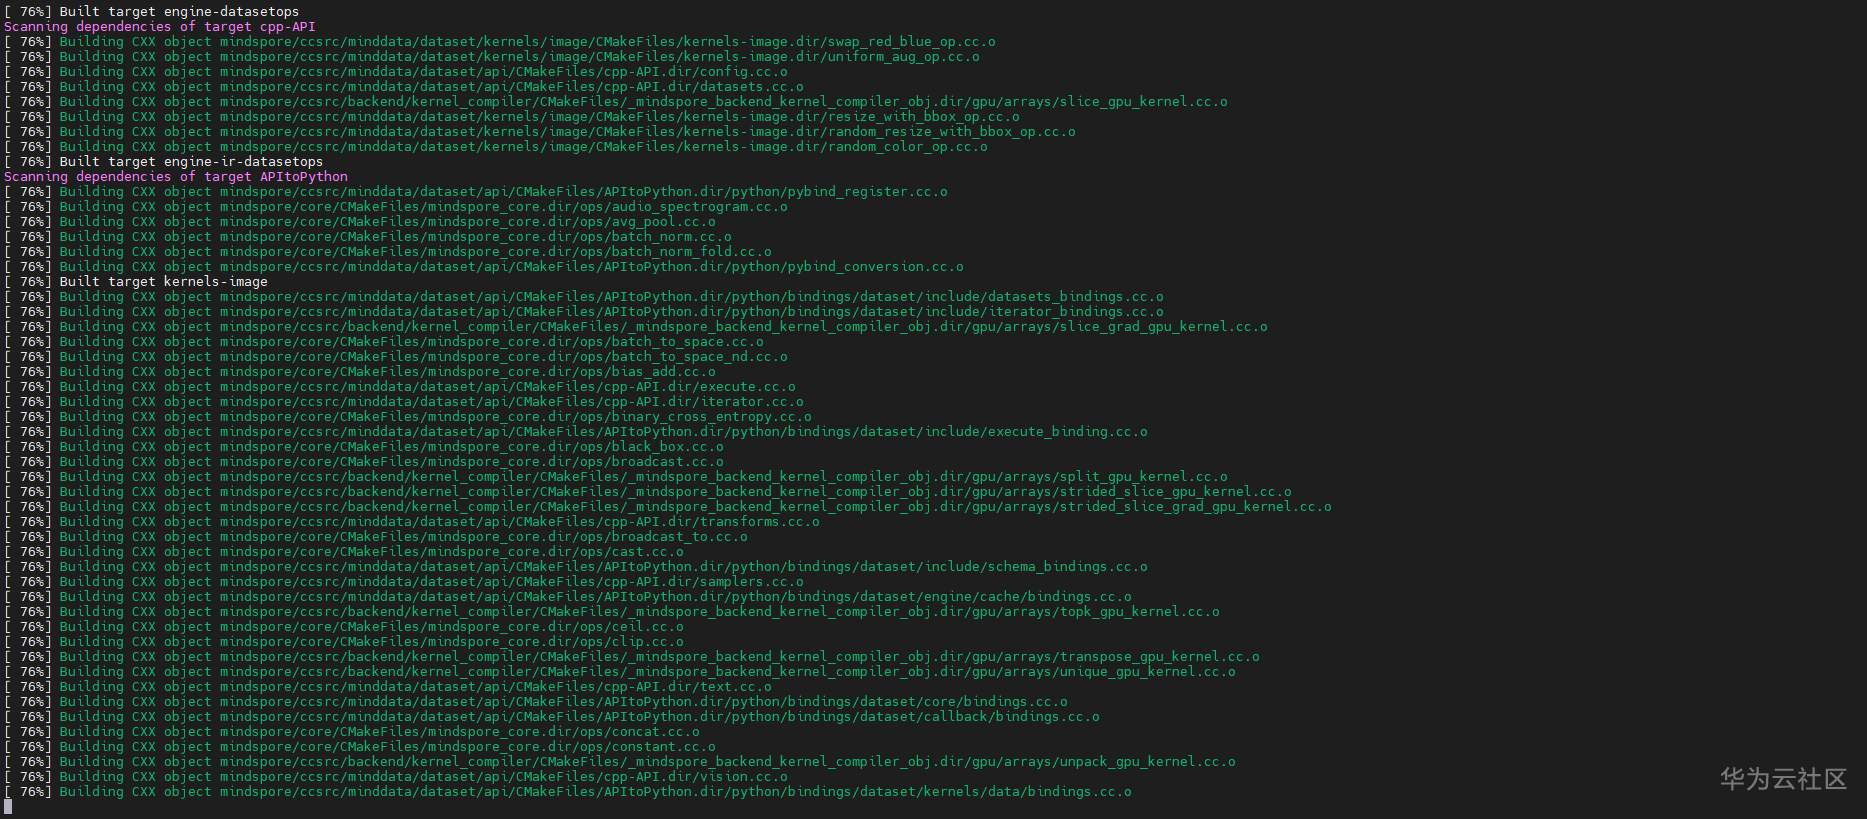
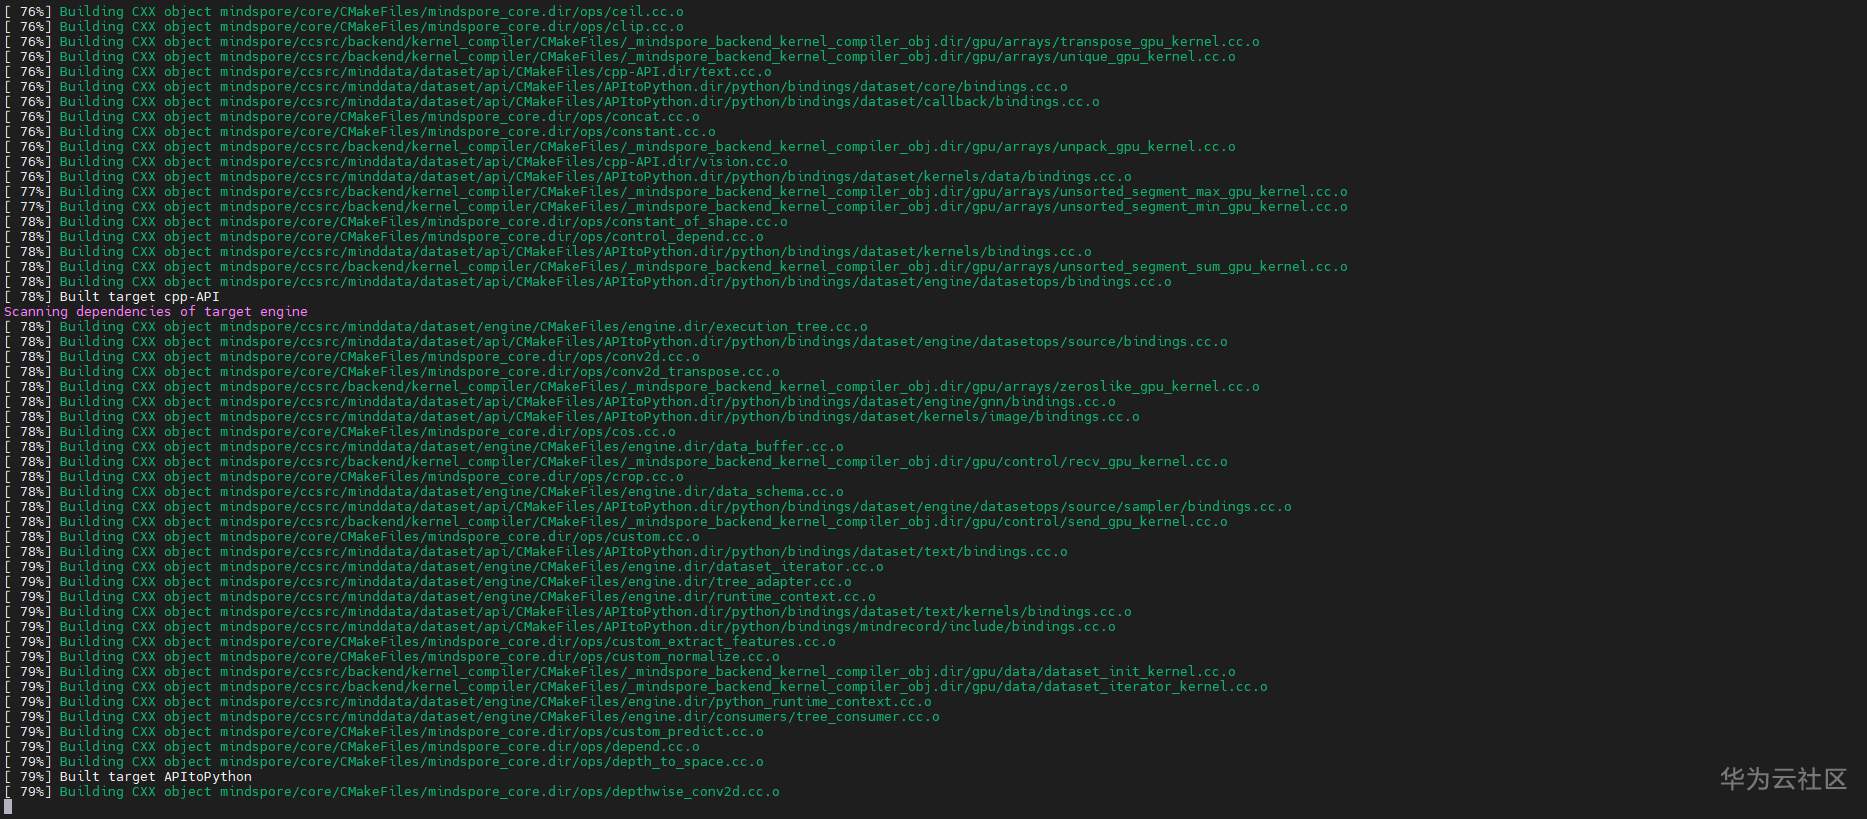
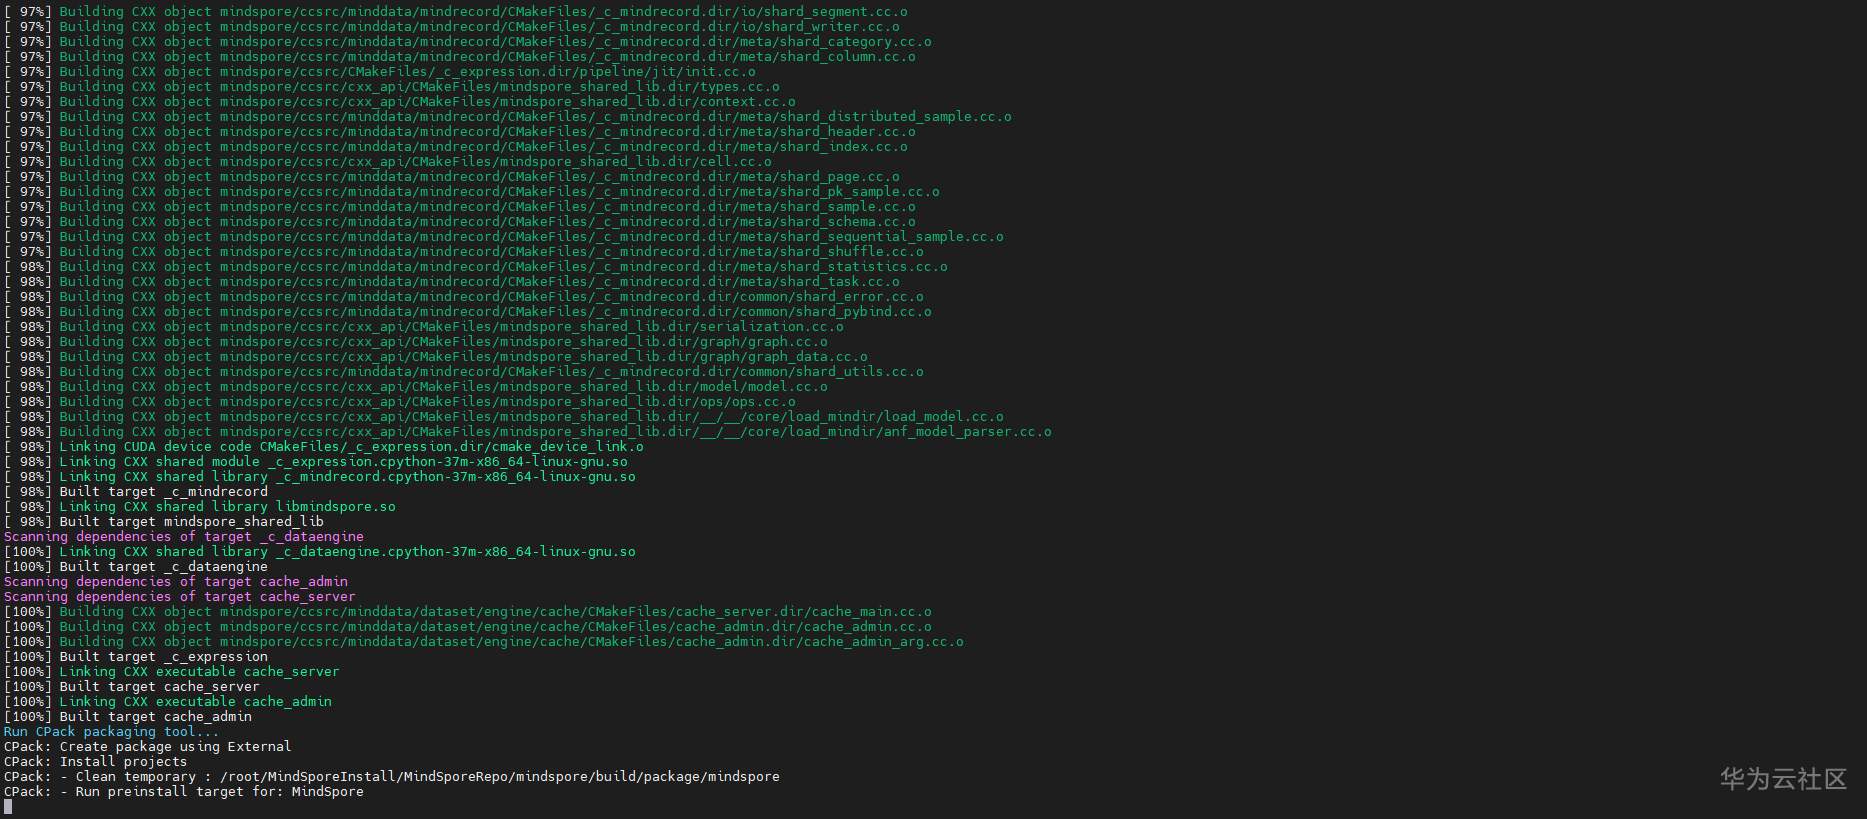
After compilation, the following is displayed:
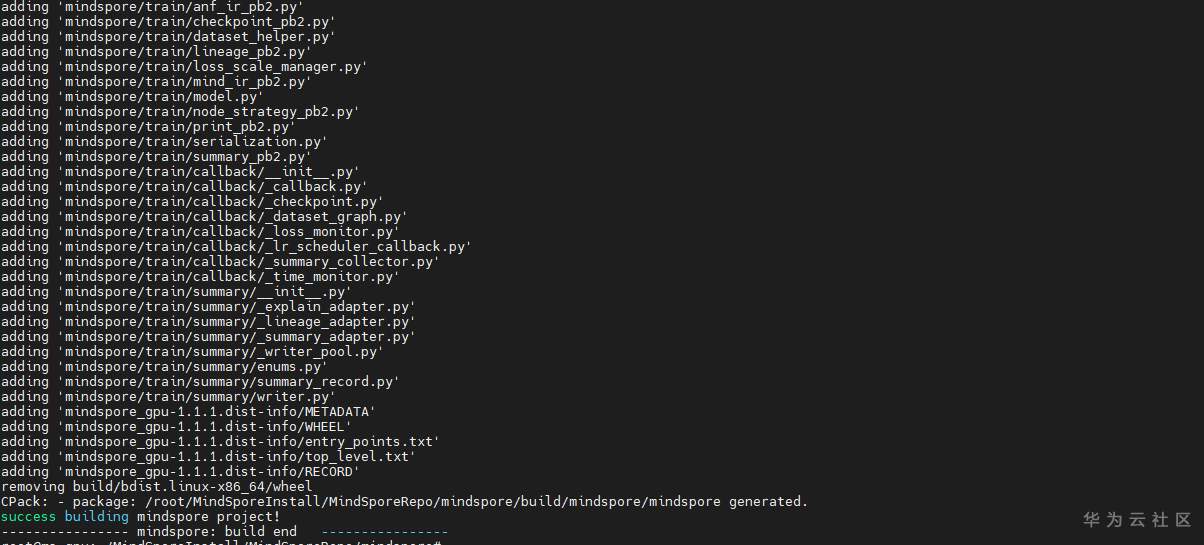
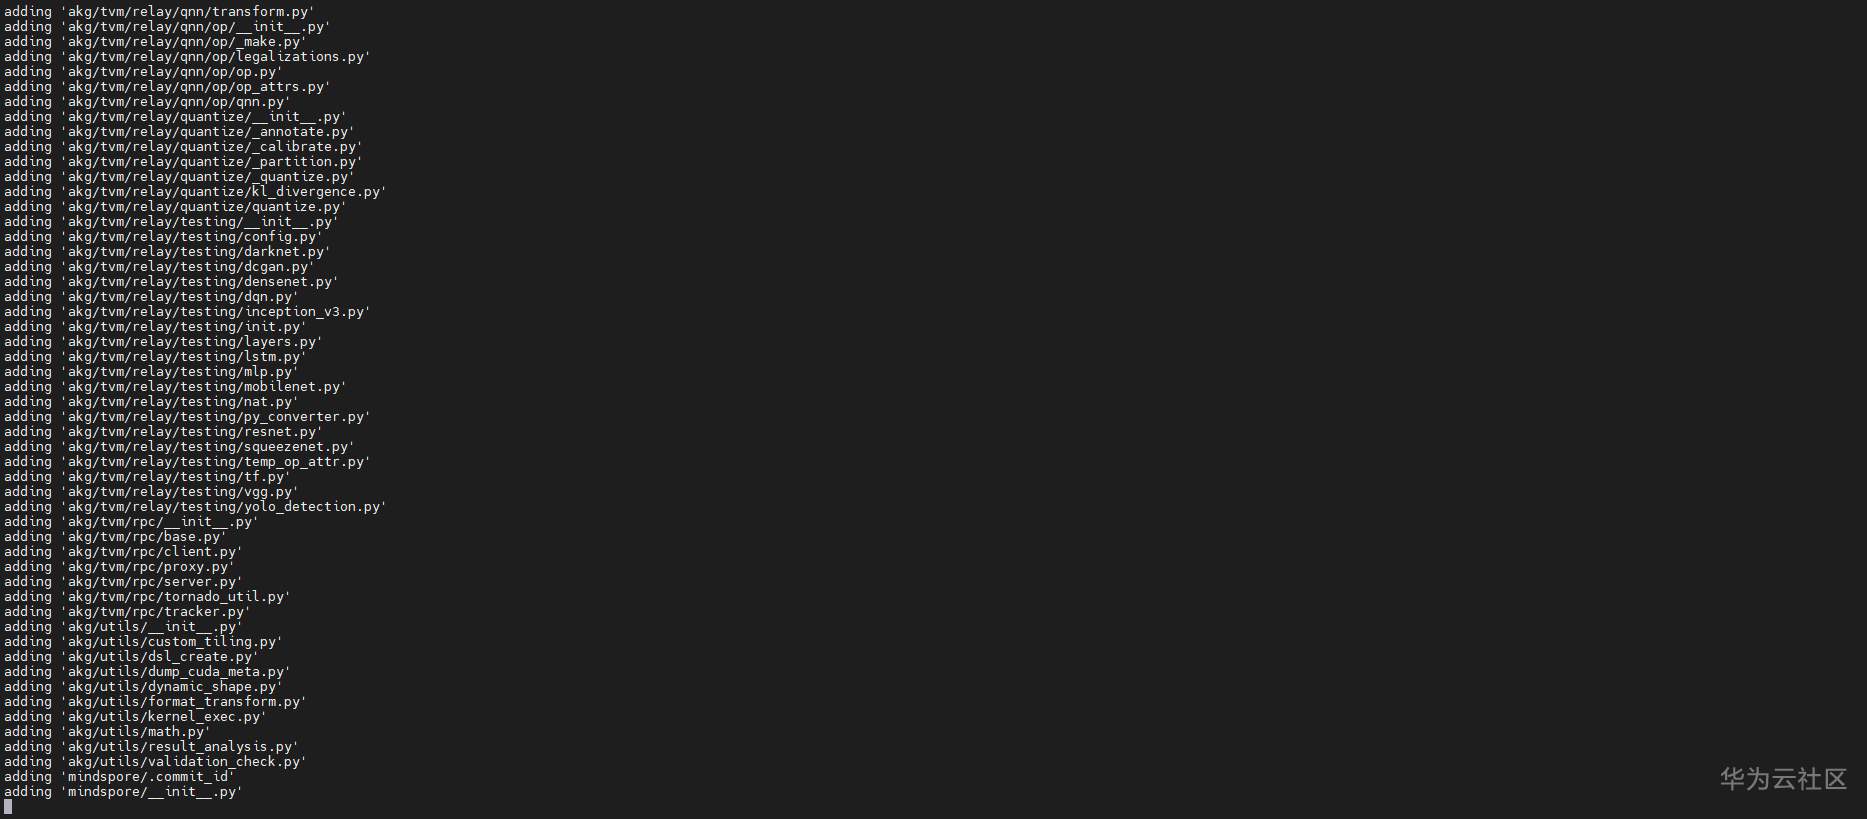
The path of the mindspire WHL installation package generated after compilation is build / package / mindspot_ gpu-1.1.1-cp37-cp37m-linux_ x86_ 64.whl:
$ ls package
akg  build  dist  mindspore  mindspore_gpu-1.1.1-cp37-cp37m-linux_x86_64.whl  mindspore_gpu.egg-info
So far, after a long wait, the long-time compilation process has finally been completed, but it is still one step away from victory. It is necessary to verify whether the compiled package is available.
Installing mindspire
Execute the following command to install the WHL package output after compilation:
chmod +x build/package/mindspore_gpu-1.1.1-cp37-cp37m-linux_x86_64.whl
pip install build/package/mindspore_gpu-1.1.1-cp37-cp37m-linux_x86_64.whl
The installation process is shown in the figure below:

After successful installation, see the following figure:

Verify successful installation
Find the following code for verification in the installation guide on the official website and execute VIM check Py, enter the following sample code and save it:
import numpy as np
from mindspore import Tensor
import mindspore.ops as ops
import mindspore.context as context

context.set_context(device_target="GPU")
x = Tensor(np.ones([1,3,3,4]).astype(np.float32))
y = Tensor(np.ones([1,3,3,4]).astype(np.float32))
print(ops.tensor_add(x, y))
Execute Python check Py, output the following:
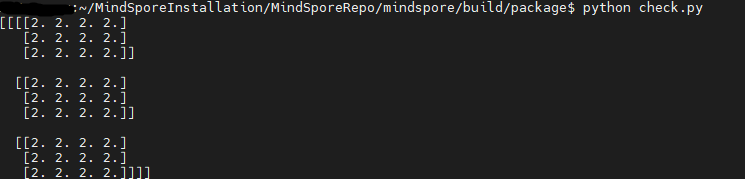
Judging from the output, the mindspire GPU version is successfully installed. It's done!
Notes and summary
There are several places in the whole compilation process that have bothered the author for a lot of time, and they are also the places that easily lead to the most errors in the compilation process. After many attempts, the following three points are summarized, which are very important in the compilation process.
-
Before compiling and installing Python, you must install basic dependencies, which has been described when compiling and installing Python.
-
If an error occurs during compilation, first confirm whether gcc, Python and cmake are installed correctly. You can try to reinstall gcc, cmake and NVIDIA drivers to solve some of the error problems.
-
It is best to install cuda using the package in runfile format, and install cudnn package in deb format by default, so as to ensure correct installation.
In the process of further learning custom operators in the future, you must execute the compilation process yourself. After this compilation and installation of mindspire, it lays a foundation for the next step of learning mindspire advanced applications.