1, Calculation properties
Computed attributes are used to declaratively describe that a value depends on other values. When you bind data to a calculated attribute in the template, Vue will update the DOM when any value it depends on causes the calculated attribute to change. This function is very powerful. It can make your code more declarative, data-driven and easy to maintain.
The above description can be summarized in one sentence: if there is a cache when calculating attributes, the cache will be called directly when the calculation result does not change. When the calculation result changes, it will be recalculated.
The characteristic of computing attribute is to cache the computing results that do not change frequently, so as to save the overhead of the system.
The logic (method) for calculating attributes is written in computed.
The methods in methods and computed should not have the same name. If the name is the same, the priority of methods is higher than that of computed
Usually, the values of data01 and data02 are obtained from the server. In this case, the example will be settled only when the values of data01 and data02 returned by the server change, otherwise it can be cached directly.
    var vm = new Vue({
        el:"#app",

        data: {
            data01:10,
            data02:20
        },
        computed: {
            example: function () {
                return this.data01+this.data02
            }
        }
    })
Format of the method in computed when calling: method name
<div id="app">
    <h3>{{example}}</h3>
</div>
Of course, we can also use cache: false to manually close the cache
        computed: {
        	cache: false,
            example: function () {
                return this.data01+this.data02
            }
        }
When a method in methods is called, the format is: method name ()
<div id="app">
    <h3>{{example()}}</h3>
</div>
    var vm = new Vue({
        el:"#app",

        data: {
            data01:10,
            data02:20
        },
        methods: {
            example: function () {
                return this.data01+this.data02
            }
        }
    })
2, Slot and content distribution slot
1. Slot
Before we touch the slot, when we use our customized component, we can find that when we write content in the label body of the customized component, it will not take effect.
    Vue.component("my-component",{
        template:`
             <ul>
                 <li>Hanjiangのjava world</li>
                 <li>Hanjiangのpython world</li>
             </ul>
            `
    })
    var vm = new Vue({
        el:"#app"
    })
<div id="app">
    <my-component>HanjiangのC++world</my-component>
</div>

If we want the content in the custom component tag to be recognized, we need to use < slot >, and the method is also very simple. We only need to insert < slot > < / slot > anywhere in our template, and the content in the component tag will be automatically bound to < slot > < / slot >,. It is worth noting that we can use multiple < slots >.
    Vue.component("my-component",{
        template:`
             <ul>
                 <li>Hanjiangのjava world</li>
                 <li>
                 	<!--Define the location of the slot-->
                    <slot></slot>
                 </li>
                 <li>Hanjiangのpython world</li>
             </ul>
            `
    })
    var vm = new Vue({
        el:"#app"
    })
<div id="app">
	<!--"HanjiangのC++World will be bound to the defined slot Middle go-->
    <my-component>HanjiangのC++world</my-component>
</div>

2. Content distribution slot
In order for components to be combined, a way is needed to mix the content of the parent component with the template of the child component itself. This process is called content distribution (or "transclusion").
We can use the "v-slot: slot name" instruction on a < template > element to specify that a specific component is inserted into a specified slot.
<div id="app">
    <my-component>
        <template v-slot:cli>
            HanjiangのC++world
        </template>
    </my-component>
</div>

Of course, the most common way to use < template V-slot > is to use it in combination with other components.
    Vue.component("my-slot",{
        template: `
            <div>
                <slot name="header">Title (default)</slot>
                <ul>
                    <slot name="list">content...</slot>
                </ul>
            </div>
            `
    })

    Vue.component("slot-title",{
        props:['title'],
        template: `
            <h3>{{title}}</h3>
        `
    })

    Vue.component("slot-list",{
        props: ['list'],
        template:`
            <li>{{list}}</li>
        `
    })

    var vm = new Vue({
        el:"#app",
        data:{
            head:"Hanjiangのvue world",
            lists:["What is? vue", "vue Use of", "vue Advantages of"]
        }
    })
: Title: is a short form of v-bind:title.
Title: is a custom attribute in the "slot title" component
List: is a custom attribute in the "slot list" component
    <div id="app">
        <my-slot>
            <!--adopt templa Fill with the name header of slot-->
            <template v-slot:header>
                <slot-title :title="head"></slot-title>
            </template>

			<!--adopt templa Fill with the name list of slot-->
            <template v-slot:list>
            	<!--take lists Traversed in item Bind to“ slot-lits"Medium list Attribute-->
                <slot-list v-for="item in lists" :list="item"></slot-list>
            </template>
        </my-slot>
    </div>

There is also an abandoned slot in the slot. I think it is necessary to talk about it.
Using slot = "" in a component can insert the component into the specified slot of its parent component.
< slot Title slot = "header" >: insert the slot Title component into the slot with the name of header.
< slot list slot = "list" >: insert the slot list component into the slot name d list.
    <div id="app">
        <my-slot>
             <!--Filling by other components slot-->
             <slot-title slot="header" :title="head"></slot-title>

             <!--take lists Traversed in item Bind to“ slot-lits"Medium list Attribute-->
             <slot-list slot="list" v-for="item in lists" :list="item"></slot-list>
        </my-slot>
    </div>

be careful:
All contents in the parent template are compiled in the parent scope; Everything in the sub template is compiled in the sub scope.
V-slots can only be added to < template > (with one exception: the abbreviation syntax of exclusive default slots), which is different from the obsolete slot attribute.
3, Custom events and the use of $emit
Before introducing custom events, let's first introduce the custom methods in components and their bindings
Methods: the properties of the methods in the vue instance are the same.
@click = "remove": equivalent to v-on:click = "remove". It is worth noting that the component can only call the methods in the methods in the group price, but cannot call the methods in the methods in the vue instance.
    Vue.component("slot-list",{
        props: ['list'],
        template:`
            <li>{{list}} <button @click="remove">delete</button></li>
        `,
        methods:{
            remove:function () {
                alert("good")
            }
        }
    })

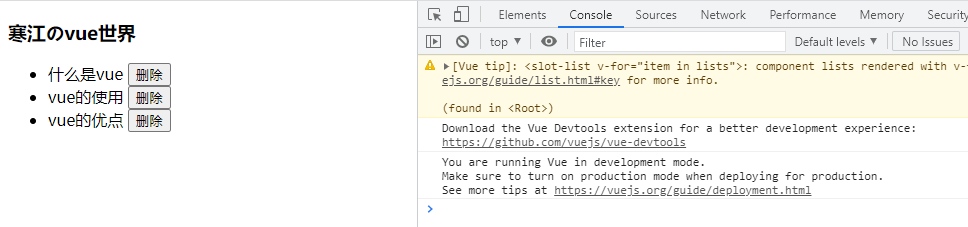
Now, we have A requirement (A): when we click the delete button, the corresponding previous text will be deleted.
Obviously, this is not easy to implement, because the text is the data in the vue instance. The data in the instance needs to be deleted through the methods in the instance, but the delete button is defined in the component and cannot be transferred to the methods in the vue instance.
In order to solve the problem that components cannot call methods in vue instances, we introduce custom events and $emit.
We can implement custom events by @ custom event name = "action / method". In the component, we can call custom events through $emit("custom event name", parameter).
<my-component @my-remove="removeItem(index)"></my-component>
this.$emit("my-remove",index)

At this point, we implemented the function of calling vue instance in component and operated the data in vue instance.
Before implementing requirement (A), we have to solve a problem: how can we flexibly operate the elements in the array in js. The answer is simple, using the splice() method.
The splice() method adds / removes items to / from the array, and then returns the deleted items. This method changes the original array.
Syntax:
| arrayObject.splice(index, howmany, item1,...,itemX) |
|---|
| parameter | describe |
|---|---|
| index | Required. Integer that specifies the position of the item to be added / deleted. Use a negative number to specify the position from the end of the array. |
| howmany | Required. Number of items to delete. If set to 0, the item is not deleted. |
| item1, ..., itemX | Optional. Adds a new item to the array. |
explain
The splice() method deletes zero or more elements starting at index and replaces those deleted elements with one or more values declared in the parameter list.
If an element is deleted from an arrayObject, an array containing the deleted element is returned.
So far, we have all the conditions for realizing requirement (A). Let's implement it.
vue instance
function (index): index needs to be passed to the caller
var vm = new Vue({
el:"#app",
data:{
head:"Hanjiangのvue world",
lists:["What is? vue", "vue Use of", "vue Advantages of"]
},
methods: {
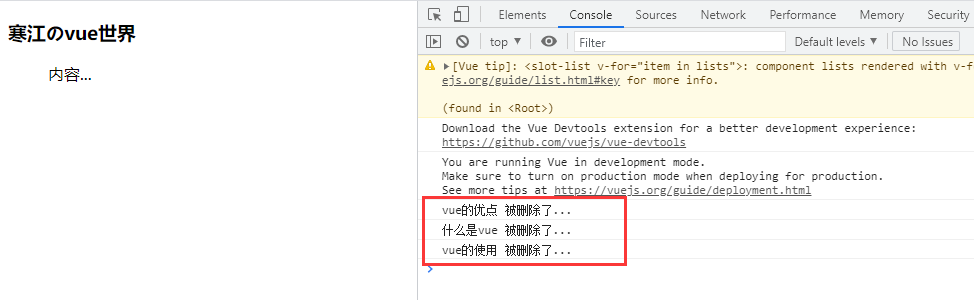
removeItem:function (index) {
let info = this.lists.splice(index,1)
console.log(info+" Deleted...")
}
}
})
Parent component
    Vue.component("my-slot",{
        template: `
            <div>
                <slot name="header">Title (default)</slot>
                <ul>
                    <slot name="list">content...</slot>
                </ul>
            </div>
            `
    })
Subcomponents
    Vue.component("slot-title",{
        props:['title'],
        template: `
            <h3>{{title}}</h3>
        `
    })
@click = "remove": call the remove method in the component
    Vue.component("slot-list",{
        props: ['list',"index"],
        template:`
            <li>{{list}} <button @click="remove">delete</button></li>
        `,
        methods:{
            remove:function (index) {
                this.$emit("my-remove",index)
            }
        }
    })
View layer
v-for="(item,index) in lists": traverse the elements in lists and their corresponding indexes.
: List = "item": bound to the list attribute in the slot list Is an abbreviation for v-bind:
: index = "index": bound to the index attribute in the slot list Is an abbreviation for v-bind:.
@My remove = "removeItem(index)": customize the event my remove, which calls the removeItem(index) method in the vue instance. Index is the index in (item,index) in lists@ It is an abbreviation for v-on:.
<div id="app">
    <my-slot>
        <!--adopt templa Fill slot-->
        <template v-slot:header>
            <slot-title :title="head"></slot-title>
        </template>

        <template v-slot:list>
            <slot-list v-for="(item,index) in lists"
                       :list="item"
                       :index="index"
                       @my-remove="removeItem(index)"

            ></slot-list>
        </template>
    </my-slot>
</div>