Series navigation and source code
demand
In the previous article use. NET 6 to develop TodoList application (5) -- domain entity creation , we left a hole that has not been filled in. When the database is saved, CreateUser and ModifiedUser were filled in Anonymous. After completing the authentication function, now we need to fill in the user name currently logged in for operation when saving the database.
target
Achieve the current login user information acquisition.
Principles and ideas
The principle is very simple. In the Token obtained during authentication, the payload contains some information about logging in to the User. As a demonstration, we need to find a way to obtain the User name information and fill in the corresponding fields when saving data. In order to obtain the User information contained in the Token, you need to use the HttpContextAccessor object. Obviously, a new interface and implementation are needed.
realization
Create current user acquisition interface
Add a new interface in Application/Common/Interfaces:
- ICurrentUserService.cs
namespace TodoList.Application.Common.Interfaces;

public interface ICurrentUserService
{
    string? UserName { get; }
}
Here we take UserName because the returned Token contains the UserName information. If you need to use UserId or other information, you need to add the following in GetClaims:
// Demonstrates the two claims of returning user name and Role
var claims = new List<Claim>
{
    // Claims contains UserName information
    new(ClaimTypes.Name, User!.UserName),
    new(JwtRegisteredClaimNames.Iss, _jwtConfiguration.ValidIssuer ?? "TodoListApi"),
    new(JwtRegisteredClaimNames.Aud, _jwtConfiguration.ValidAudience ?? "http://localhost:5050")
};
Implement interface functions
Add classes to Api/Services to implement interfaces:
- CurrentUserService.cs
using System.Security.Claims;
using TodoList.Application.Common.Interfaces;

namespace TodoList.Api.Services;

public class CurrentUserService : ICurrentUserService
{
    private readonly IHttpContextAccessor _httpContextAccessor;

    public CurrentUserService(IHttpContextAccessor httpContextAccessor)
    {
        _httpContextAccessor = httpContextAccessor;
    }

    // Get ` httpcontext. Com from the injected IHttpContextAccessor Corresponding Claims information in user (claimsprinciple) `
    public string? UserName  => _httpContextAccessor.HttpContext?.User.FindFirstValue(ClaimTypes.Name);
}
And add dependency injection in the Program:
- Program.cs
builder.Services.AddSingleton<ICurrentUserService, CurrentUserService>();
Use function
Next, to modify the DbContext, we need to inject the following into the constructor:
- TodoListDbContext.cs
private readonly ICurrentUserService _currentUserService;
public TodoListDbContext(
    DbContextOptions<TodoListDbContext> options,
    IDomainEventService domainEventService,
    ICurrentUserService currentUserService) : base(options)
{
    _domainEventService = domainEventService;
    _currentUserService = currentUserService;
}
Modify in the SaveChangesAsync method:
public override async Task<int> SaveChangesAsync(CancellationToken cancellationToken = new())
{
    foreach (var entry in ChangeTracker.Entries<AuditableEntity>())
    {
        switch (entry.State)
        {
            case EntityState.Added:
                entry.Entity.CreatedBy = _currentUserService.UserName;
                entry.Entity.Created = DateTime.UtcNow;
                break;
            case EntityState.Modified:
                entry.Entity.LastModifiedBy = _currentUserService.UserName;
                entry.Entity.LastModified = DateTime.UtcNow;
                break;
        }
    }
// Omit other
}
verification
Start the Api project, first obtain the Token, and then use the obtained Token to create a new TodoList:
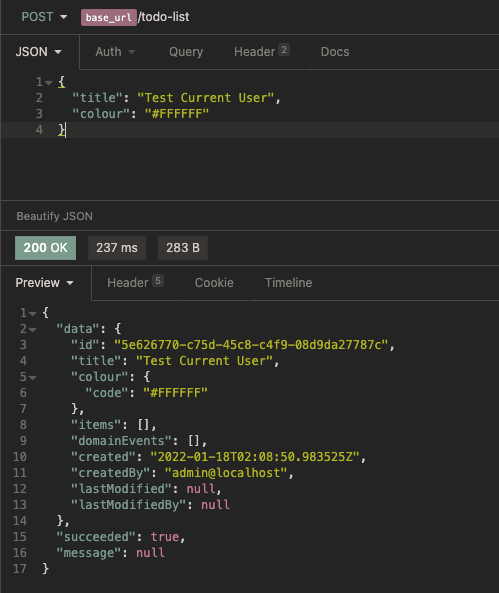
You can see that the user information of the newly created TodoList has been obtained. In order to ensure that the data is stored in the database, let's go to the database and have a look:

summary
In this paper, we realize how to obtain the current login user information from the request and save it to the database.