When installing git, you can go directly to the GIT official website, but the download is slow,
Domestic images can be used: http://npm.taobao.org/mirrors/git-for-windows/
After installation, the following message appears after the Windows key is pressed:
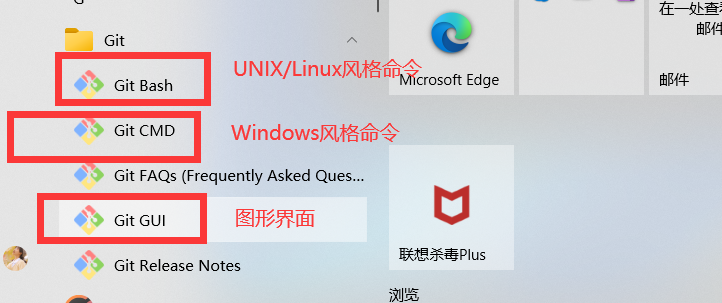
We can use Git Bash
About commands in git
cd .. 				//Used to return to the previous directory
cd Subdirectory name			//Enter the corresponding subdirectory under the current path
pwd 				//Displays the current directory path
clear				//For screen clearing
ls					//It is used to display the files in the current directory. The blue one is the directory, the green one is the program, and the white one is the file
touch file name.suffix	//Commands for creating files
rm file name.suffix		//Used to delete files
mkdir Directory name		//Used to create a directory
rm -r Directory name		//Used to delete directories
mv File directory		//Move files to directory
reset				//Reinitialize the terminal, similar to clear
history				//View all the commands you just used
exit				//Exit the command window
Configuration of global variables in git
git config --global user.name "dongmu" #Add the configuration. Quotation marks can not be written here
git config --global user.name 2645990605@qq.com #Add configuration
git config --global --list # is used to view the content of your own configuration

These two information must be configured, which is equivalent to telling git who you are. Otherwise, you don't know who submitted it. If you don't configure it, you can't submit the project,
git config -l view all configuration information
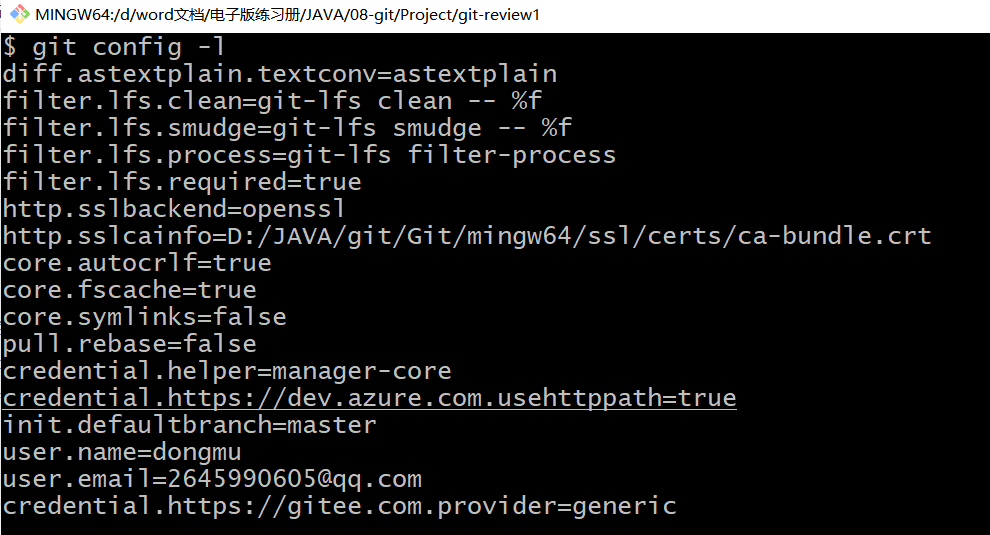
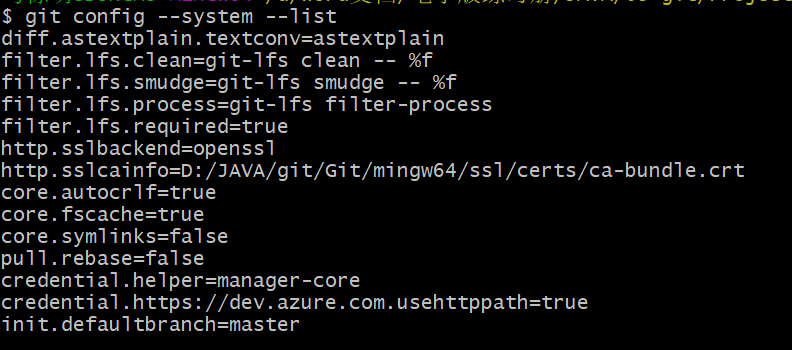
git congif --system --list this command can see what the system has configured for us
You should know that the configuration files are local, and git is the same. Its configuration information is in Git/etc/gitconfig. Open it to see:
[diff "astextplain"]
	textconv = astextplain
[filter "lfs"]
	clean = git-lfs clean -- %f
	smudge = git-lfs smudge -- %f
	process = git-lfs filter-process
	required = true
[http]
	sslBackend = openssl
	sslCAInfo = D:/JAVA/git/Git/mingw64/ssl/certs/ca-bundle.crt
[core]
	autocrlf = true
	fscache = true
	symlinks = false
[pull]
	rebase = false
[credential]
	helper = manager-core
[credential "https://dev.azure.com"]
	useHttpPath = true
[init]
	defaultBranch = master
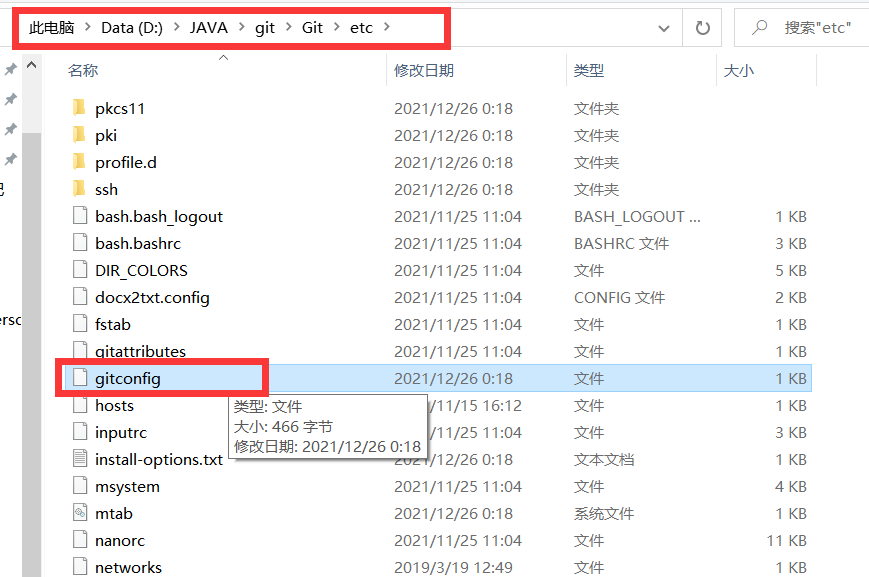
Want to view our own configuration variables in
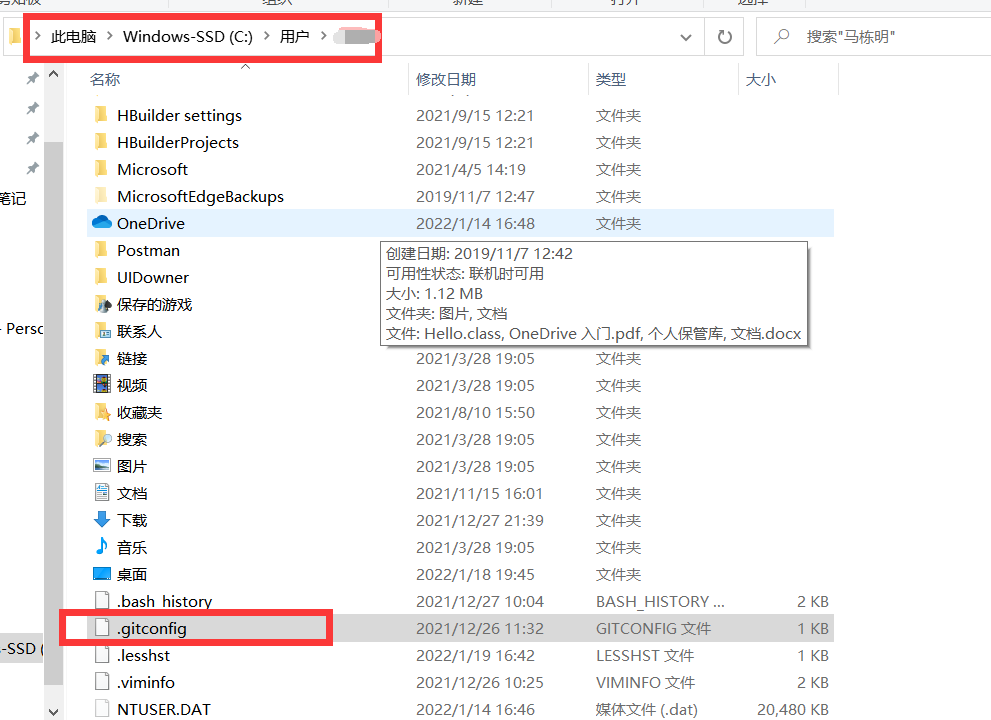
After opening, you can see the user name and password configured by ourselves.
[user]
	name = dongmu
	email = 2645990605@qq.com
[credential "https://gitee.com"]
	provider = generic
git basic theory:
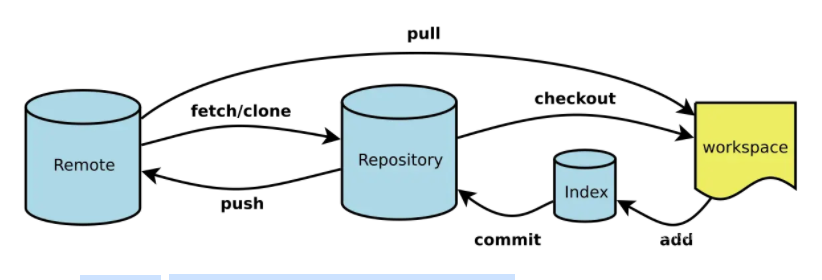
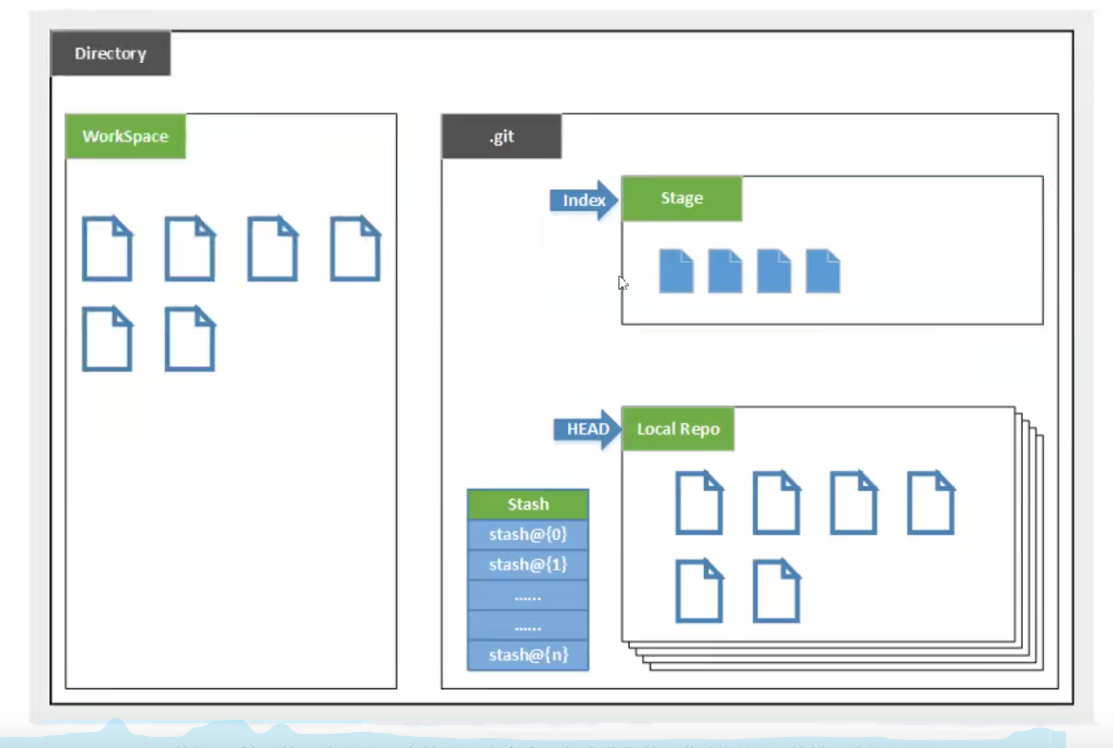
Workspace: workspace (the area modified by the current user)
Index / Stage: temporary storage area (area after add) git add
Repository: warehouse area or local warehouse (area after commit) git commit
Remote: remote warehouse (push ed area)
Basic usage commands
1: git init   #Method of initializing local warehouse
2: git status #View all file status
3: git add .  #Add all files to staging area
4:git commit -m #"Message content #Submit the contents of the staging area to the local warehouse
4:git push -m   #"Message content #Submit the contents of the local warehouse to the remote warehouse
The. Git folder is a folder that manages the GIT warehouse generated in the current directory after git init. It contains all the things needed for git operations
Yes There is a HEAD file under the git directory, which reads ref: refs/heads/master. This master is the main branch and the only one. We generally don't do things directly on this. We will establish our own branch. Now we are pointing to the main branch, so our * * code will be submitted to this branch.
There is also an index file in the. git directory. This file points to the temporary storage area, which has been mentioned in the above picture.
hooks: store some shell scripts
Info: exclude: stores some information of the warehouse
logs: save all updated reference records
ok, the above are all theoretical contents, so how to establish a git project?
First create an empty folder to store your project. Right click to open in this folder Git Bash. Execute a command git init
	At this time, you will have one more under this directory.git Folder for.

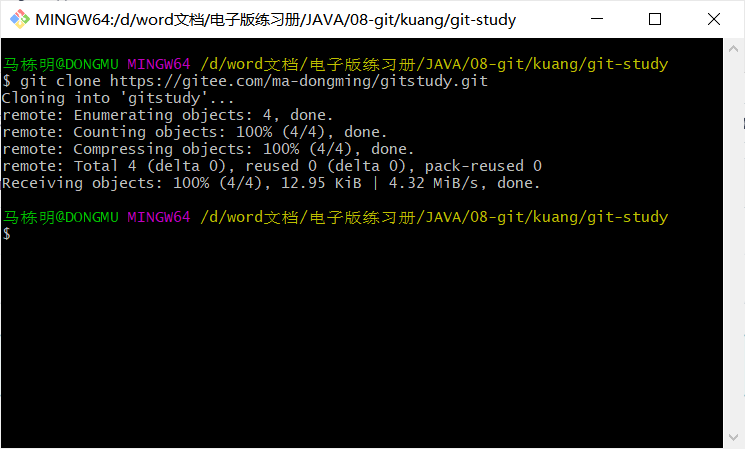
	If we don't want to create it, we can clone a remote one git Project to local. reach github perhaps gitee As shown in the figure below, we copy this link, and then create a new folder locally to place our project, and open it in this folder GitBash.
	Then execute git clone route
	That's it.

Here are four file states:
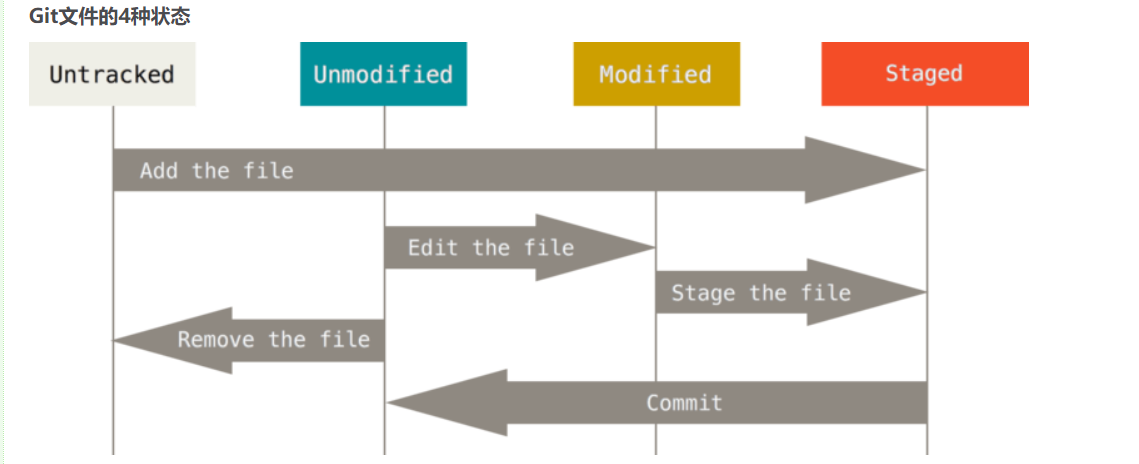
Untracked: Not tracked, This file is in a folder, But did not join git library, Do not participate in version control. adopt git add The status changes to Staged

Unmodify: The file has been put into storage, not changed, That is, the contents of the file snapshot in the version library are exactly the same as those in the folder. There are two places for this type of file, If it is modified, And become Modified. If used git rm Remove version Library, Then become Untracked file

Modified: File modified, Just modify, No other operations were performed. This document also has two destinations, adopt git add Can enter temporary storage staged state, use git checkout Discard the modified, Return to unmodify state, this git checkout That is, remove the file from the library, Overwrite current modification

Staged: Staging status. implement git commit The changes are synchronized to the library, At this time, the files in the library and local files become consistent again, File as Unmodify state. implement git reset HEAD filename Cancel staging, File status is Modified
Let's build an empty git project first
First, check the file status:

Then we write a file, say hello Txt in Under the git peer directory, and then continue to view:

Then execute git add.: Add him to the staging area. Then continue to view:

Then commit to the local warehouse and execute: git commit -m; This -m means message. It is equivalent to a comment and a notification. For example, when we submit to the remote, we tell others what changes have been made in this version
The results are as follows:

Conclusion: so we generally put our code in.git Under the peer directory, and then use git add .Add it to the staging area, and then git status Check whether it is submitted. If it is submitted, it will be deleted commit Submit to the local warehouse. If you are connected to a remote warehouse, you can push Just go to the remote.
How to connect to the remote and set it up are described below.
Some details: for example, some files in our project do not need to be submitted to the remote warehouse, such as I use IDEA When developing, there will be some other auxiliary files in the directory waiting for various information. What should I do at this time?
There is one.ignore File can be implemented. Some of its syntax are as follows:
logs/: Ignore under current path logs Directory containing logs All subdirectories and files under
/logs.txt: Ignore root logs.txt file
*.class: Ignore all suffixes.class File
!/classes/a.class: Not ignore classes Under directory a.class file
tmp/*.txt: Only those in the tmp directory are ignored txt file
**/foo: Can be ignored/foo, a/foo, a/b/foo etc.
Define global.gitignore file
 In addition to being defined in the project.gitignore In addition to files, you can also set global.gitignore File to manage all Git Project behavior.
This method is not shared among different project developers and belongs to the project Git Application level behavior.
You can create corresponding in any directory.gitignore File, and then configure it with the following command Git
git config --global core.excludesfile ~/.gitignore

.gitignore Rule does not take effect
.gitignore Can only ignore those who have not been track If some files have been included in version management, they can be modified.gitignore Is invalid. So be sure to develop the habit of creating at the beginning of the project.gitignore File habits.
The solution is to delete the local cache first(Change to not track state),Then submit:
git rm -r --cached .
git add .
git commit -m "msg"

Author: ruoxiyuan
 Link: https://www.jianshu.com/p/1c74f84e56b4
 Source: Jianshu
 The copyright belongs to the author. For commercial reprint, please contact the author for authorization. For non-commercial reprint, please indicate the source.
Universal.gitignore Configuration template for:
#java
*.class

#package file
*.war
*.ear
*.zip
*.tar.gz
*.rar
#maven ignore
target/
build/

#eclipse ignore
.settings/
.project
.classpatch

#Intellij idea
.idea/
/idea/
*.ipr
*.iml
*.iws

# temp file
*.log
*.cache
*.diff
*.patch
*.tmp

# system ignore
.DS_Store
Thumbs.db
Well, let's talk about how to configure the remote warehouse
github is foreign, so we don't need it here. It's very slow.
1: We register a gitee ourselves to improve our personal information. We must take this seriously. In fact, it's all a person's habit. We should form good habits and achieve a good future. After we take these things seriously, why can't they be our advantage in the future?
We can find an open source project on it and learn by ourselves. If we want to be commercial, we need to see whether its license agreement allows. Don't do anything illegal.
Back to the point:
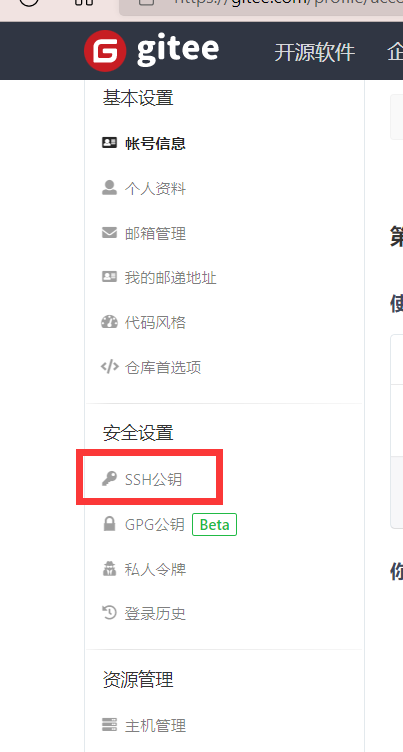
2: Bind the local SSH public key to realize secret free login. Code cloud is a remote warehouse. We work in a local warehouse.
Open our gitee public key:
Open the files in the following directory, which will be available as long as git is installed. If we haven't configured this before, it is empty. Then start gitbash in this and use the command keygen -t rsa. This rsa is an encryption algorithm. We can select others, but this is officially recommended. We'll use this.
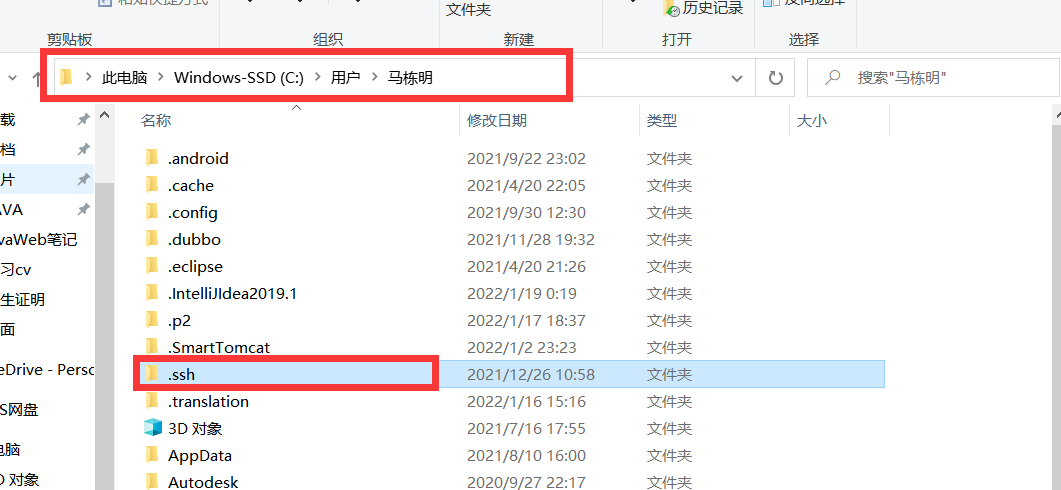
After entering, enter directly all the way, and then two files will be generated. The public key with pub and the private key without pub. We open the public key and copy the contents.

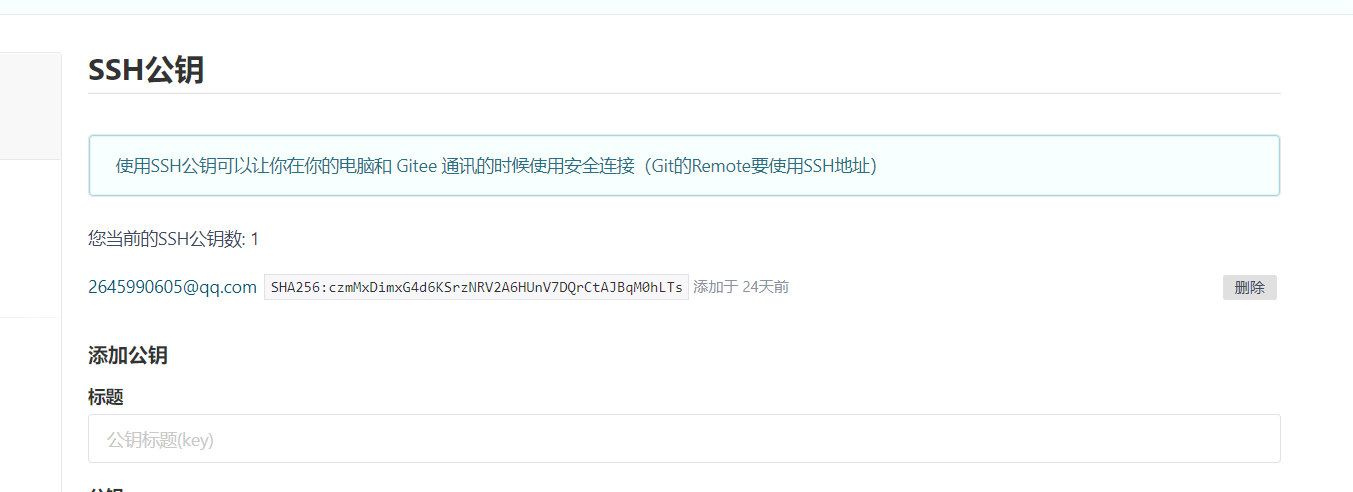
Then paste it to the location of our code cloud:

Then generate it. As follows:

The red box in front of this means that if we enter the mailbox when configuring the information, this will be the mailbox. If not, it will be the name of the machine.
After completion, it is as follows:
Create a new remote warehouse:
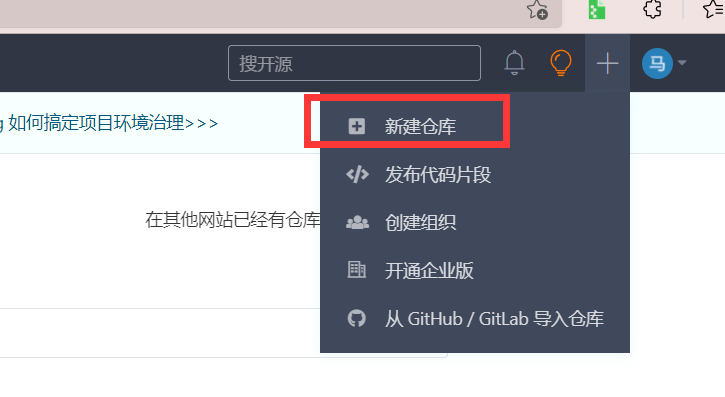
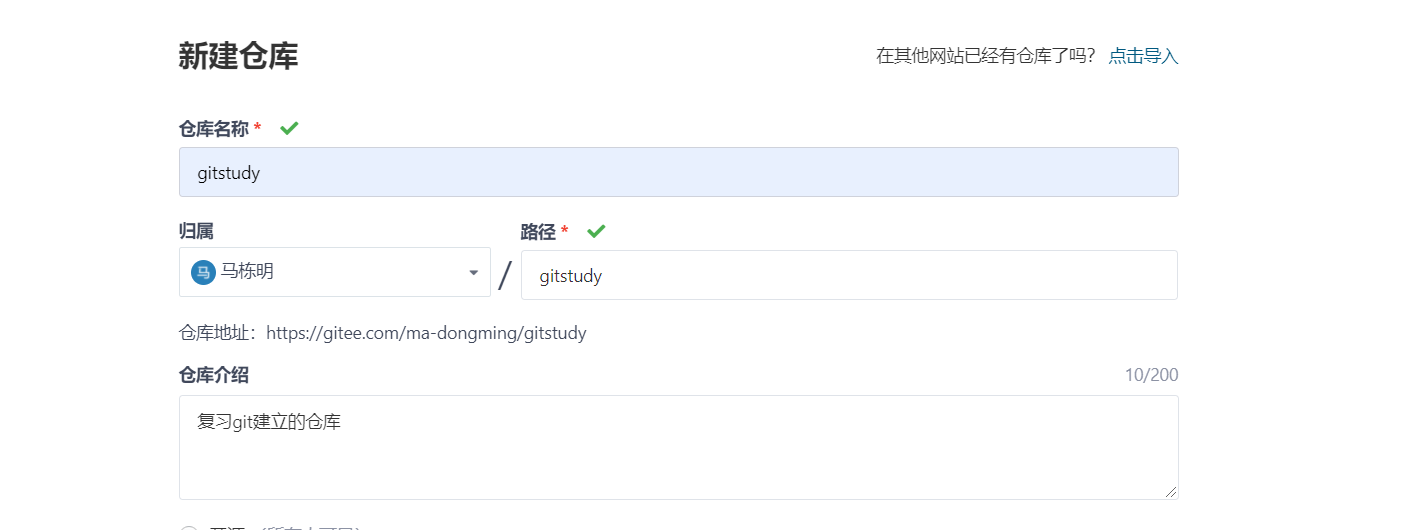

The license is to set whether open source can be used commercially.
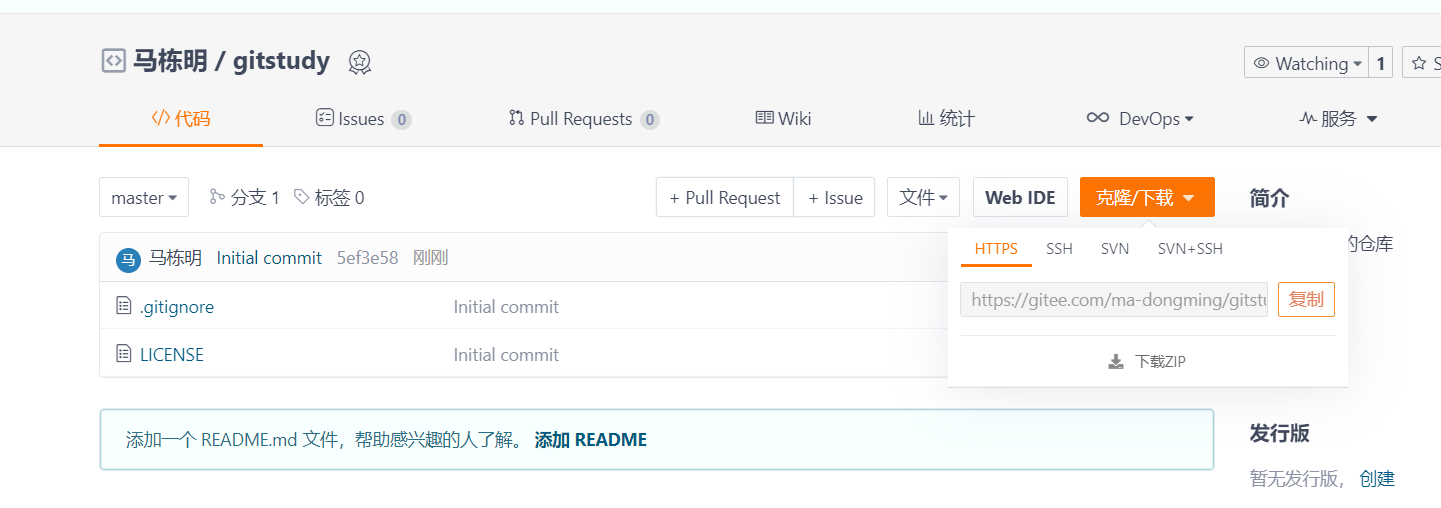
Then we download him
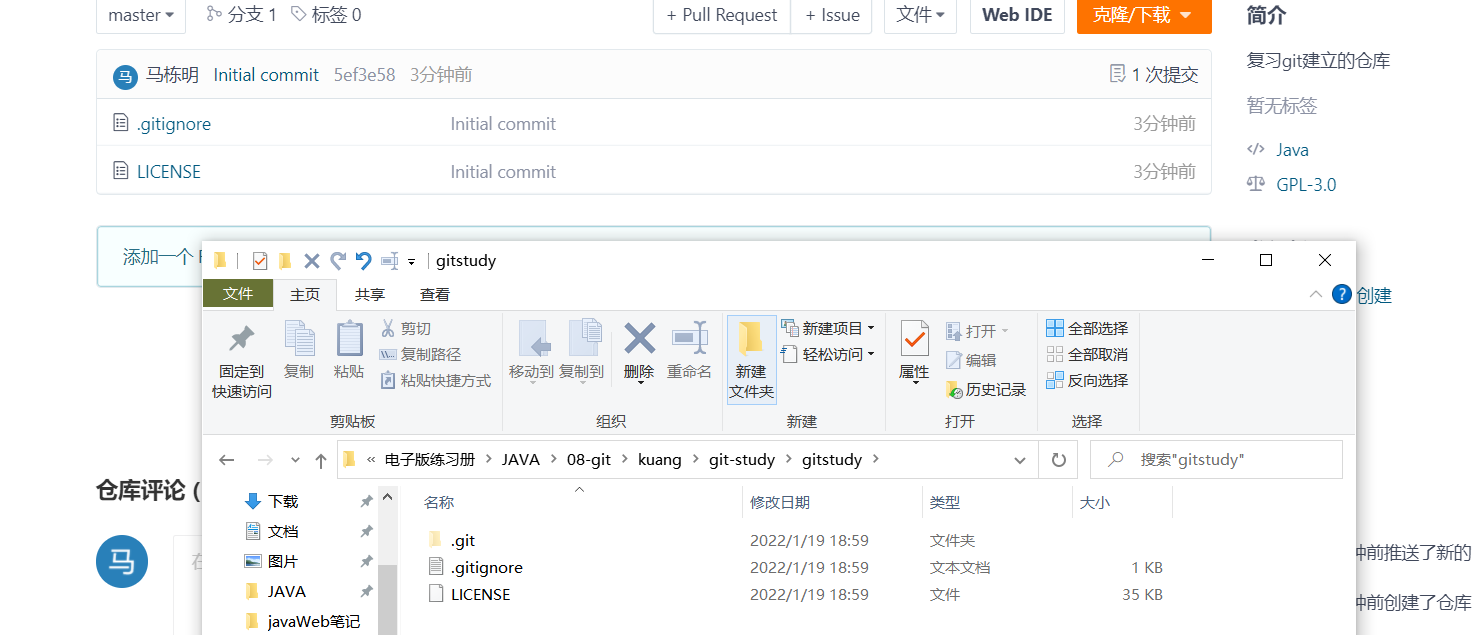
Then we can find that their directories are the same:
Integrating git with IDEA
We can just copy and paste the code pulled from gitee into our project directory
Then rebuid our project
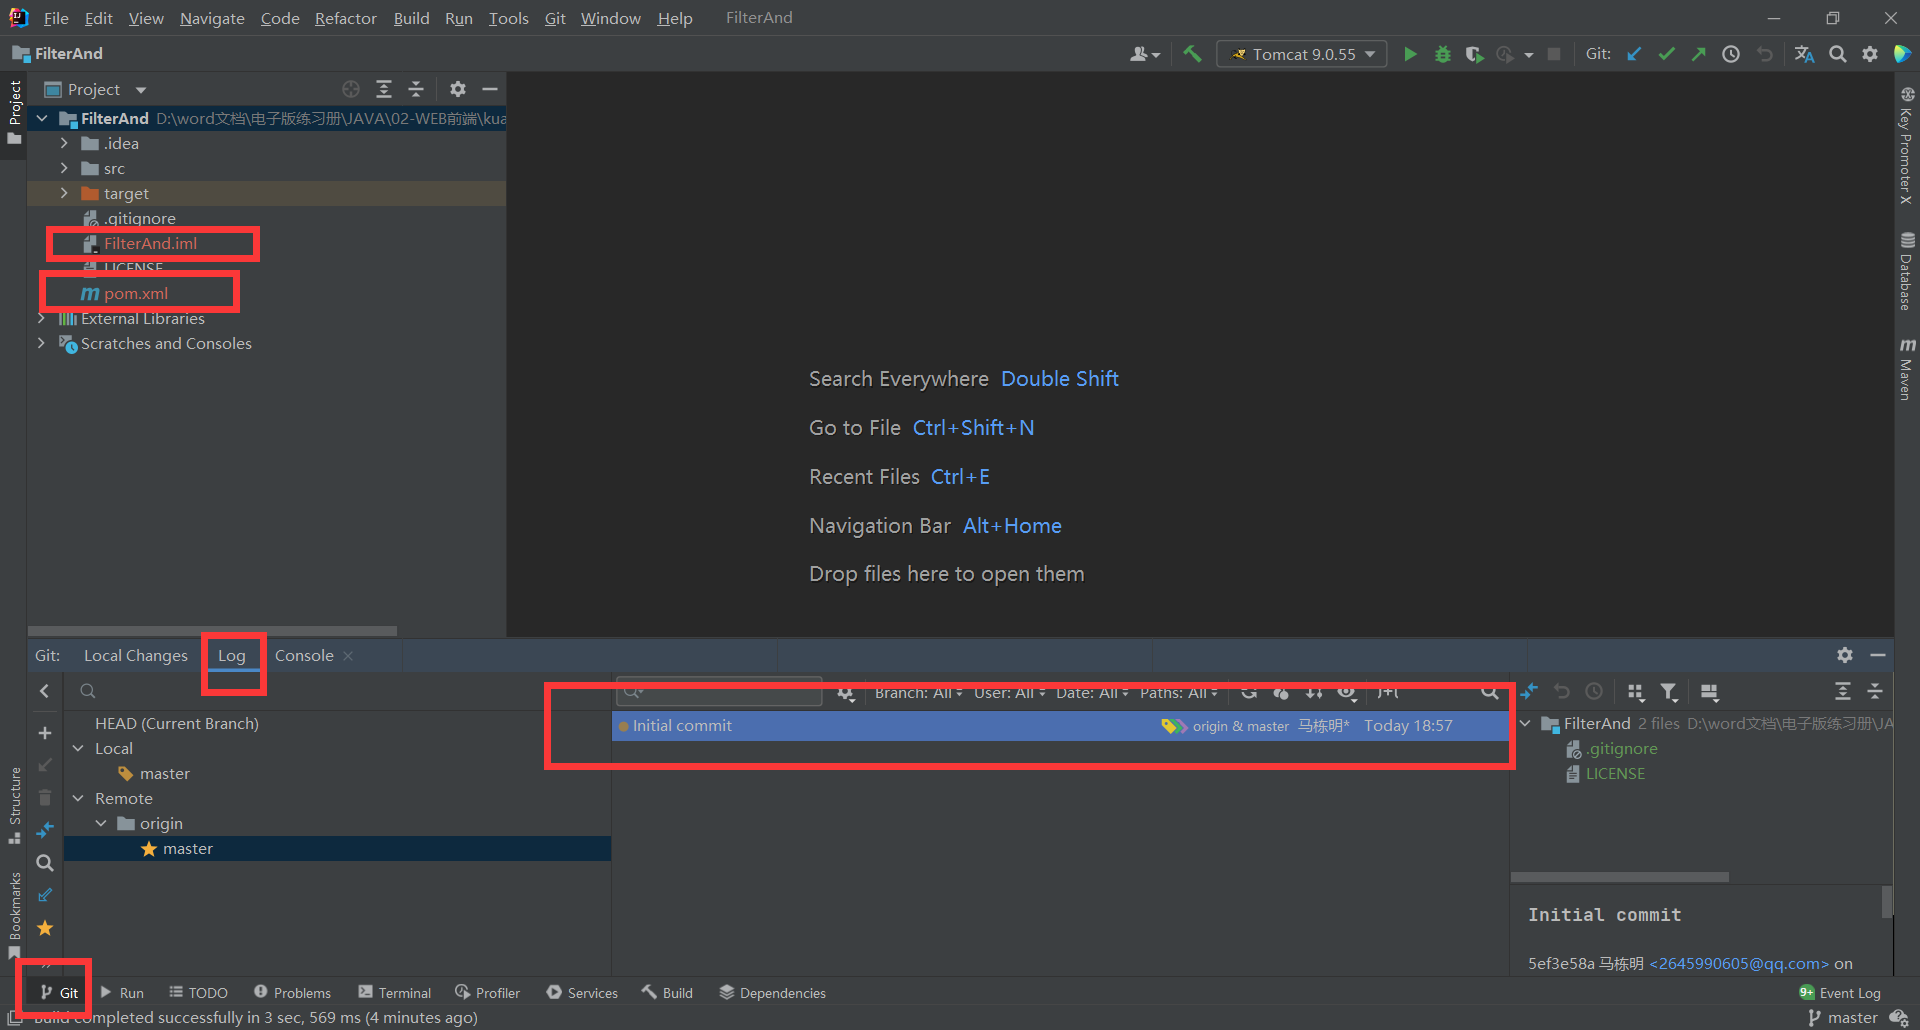
add first, and the file changes from untracked state to temporary state:

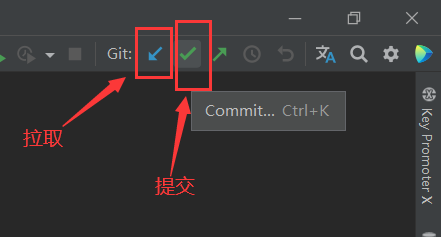
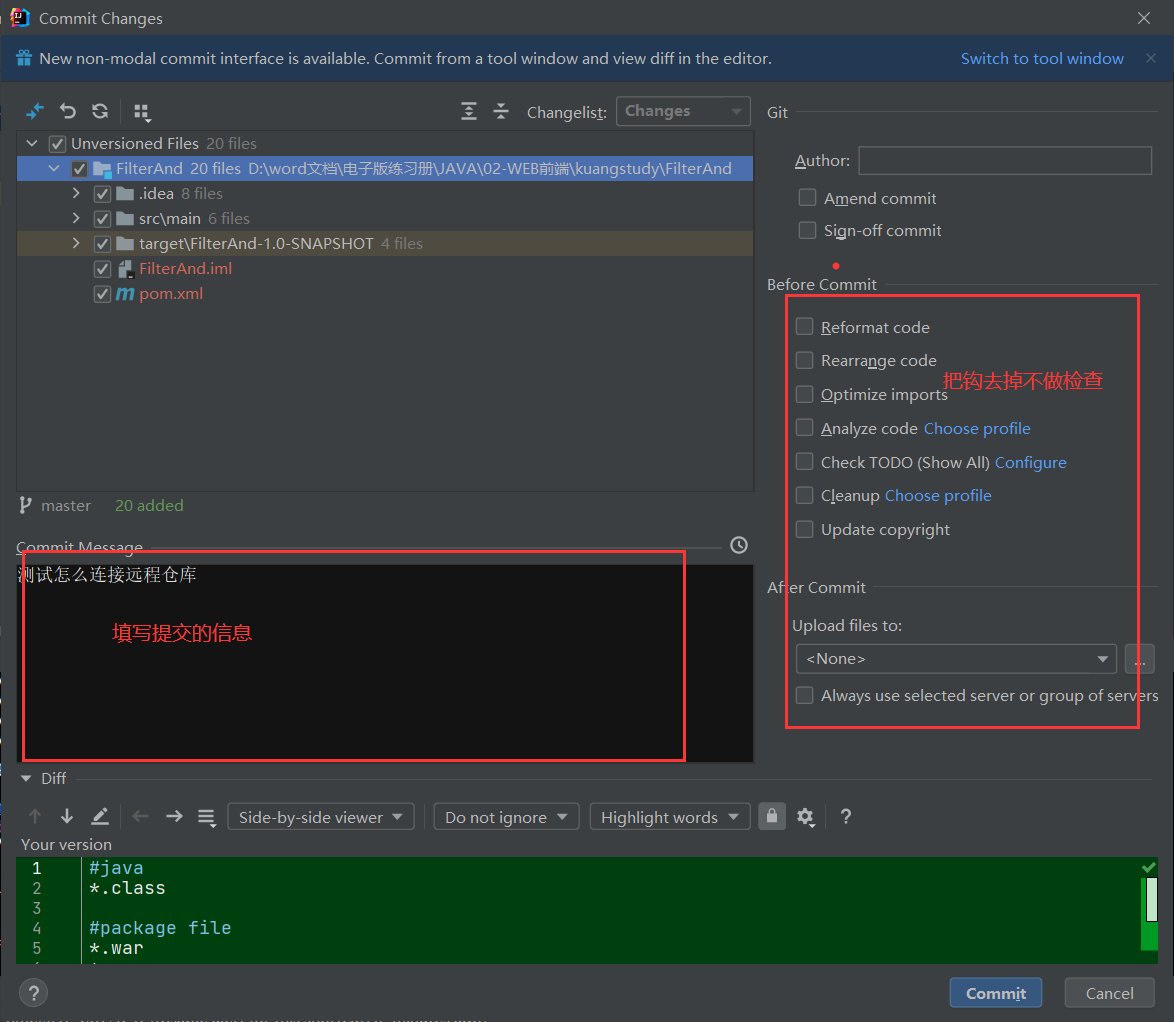
If we don't add and click Submit, the following interface will appear:
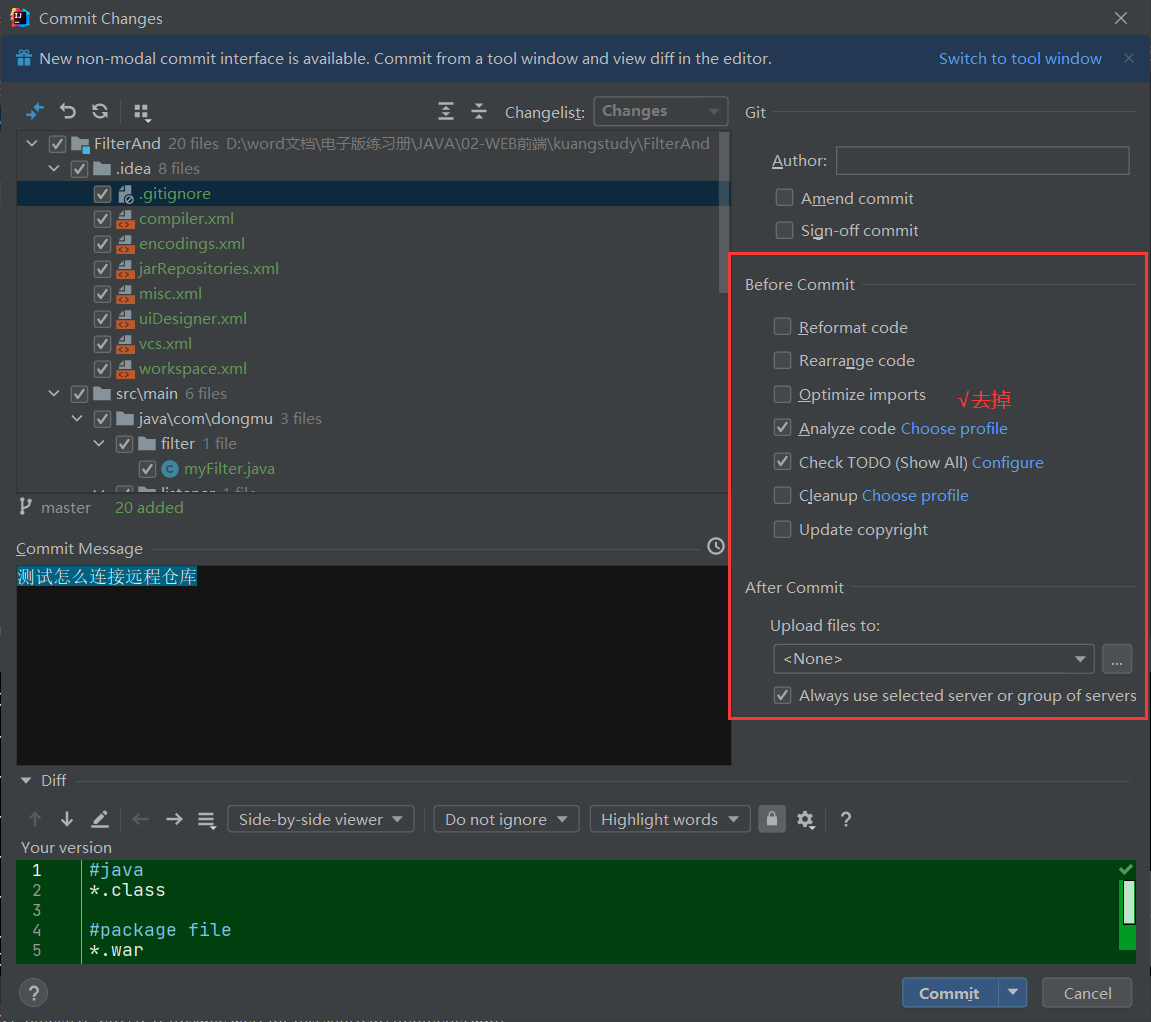
The following interface will appear after the add submission: the check mark can also not be removed
You can find that add turns green after it goes in.
Basic commands can also be right clicked on the file:
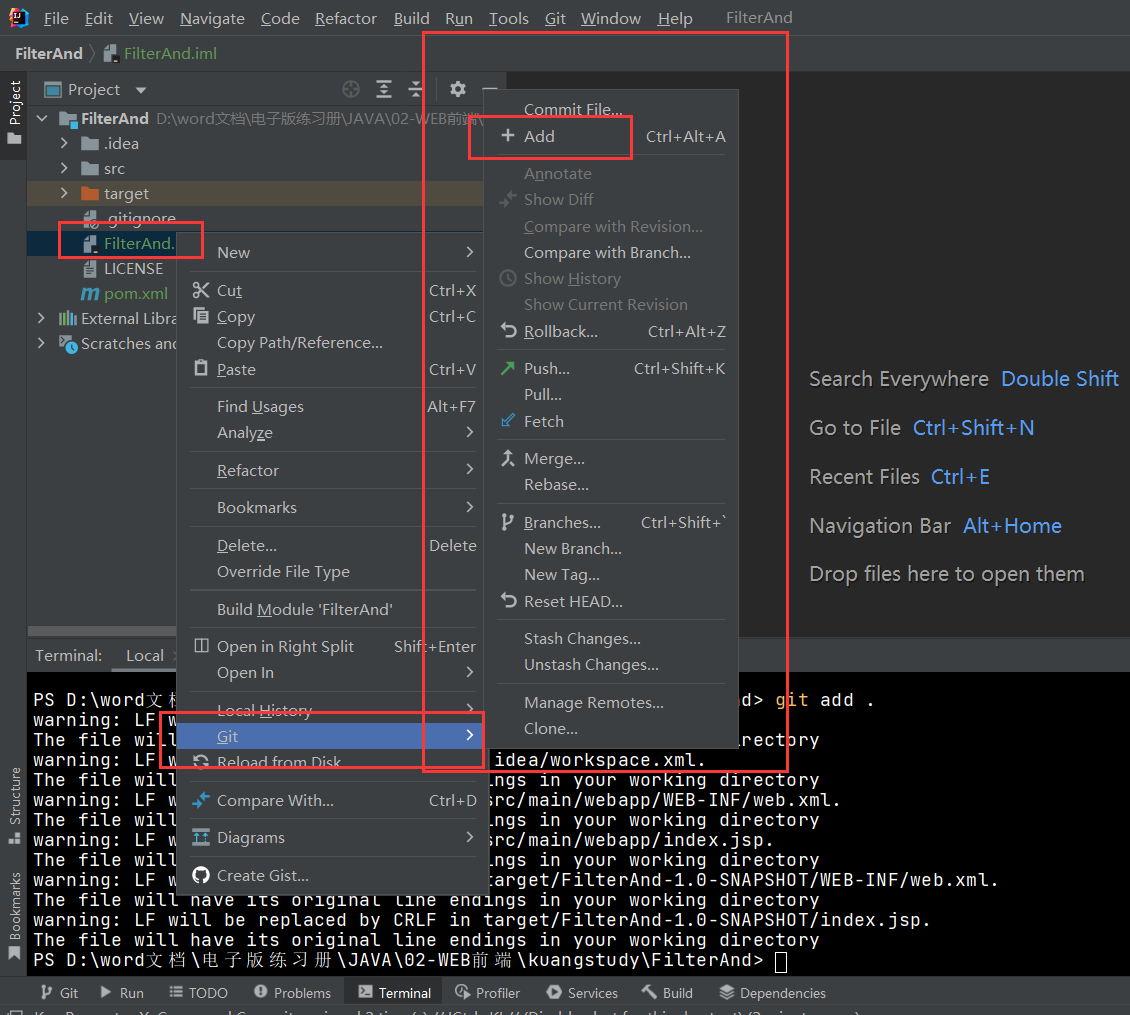
Then continue to submit
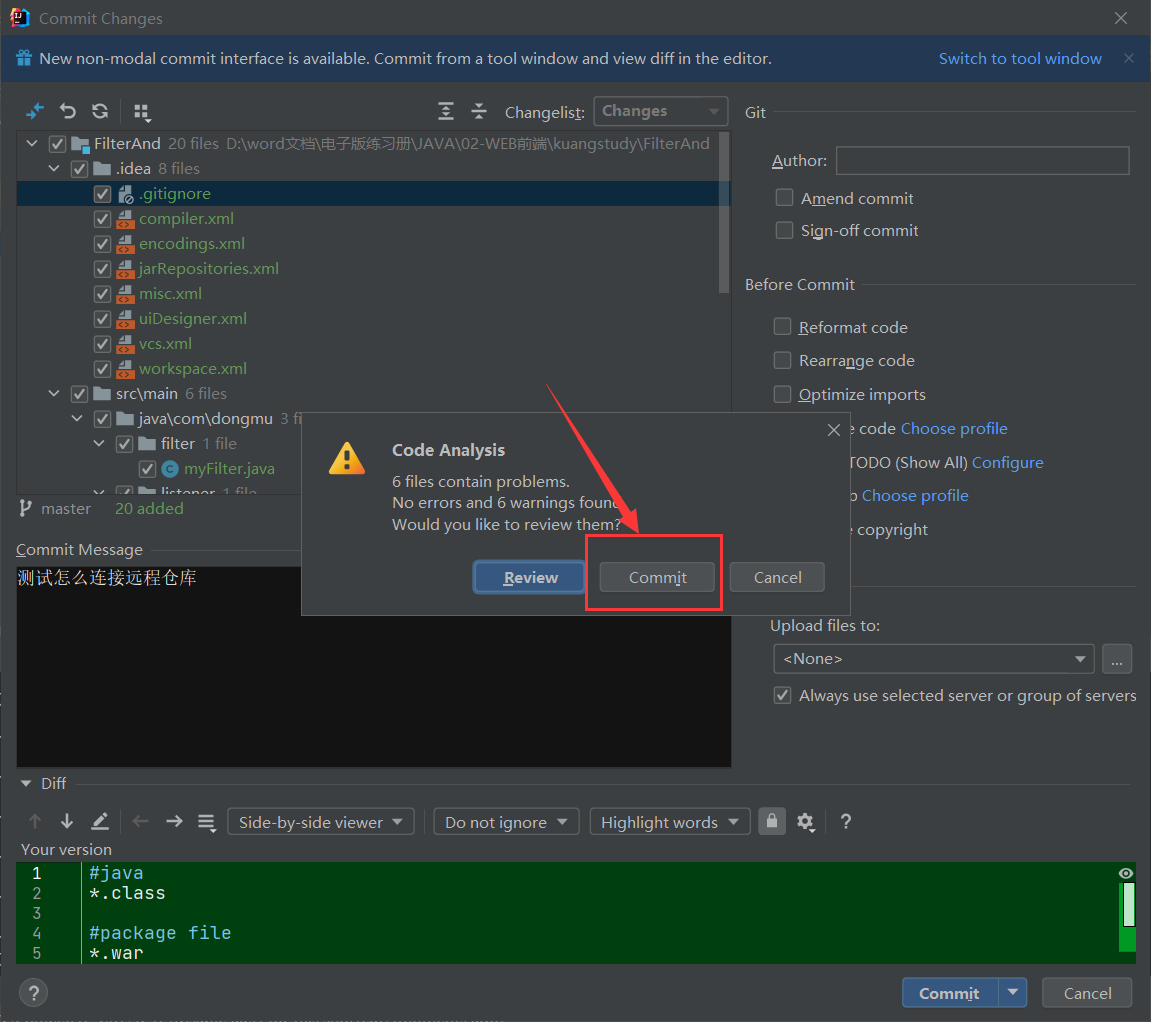
Now we submit the project to the local warehouse, but there is still no remote. We execute git push


Come back to our gitee at this time
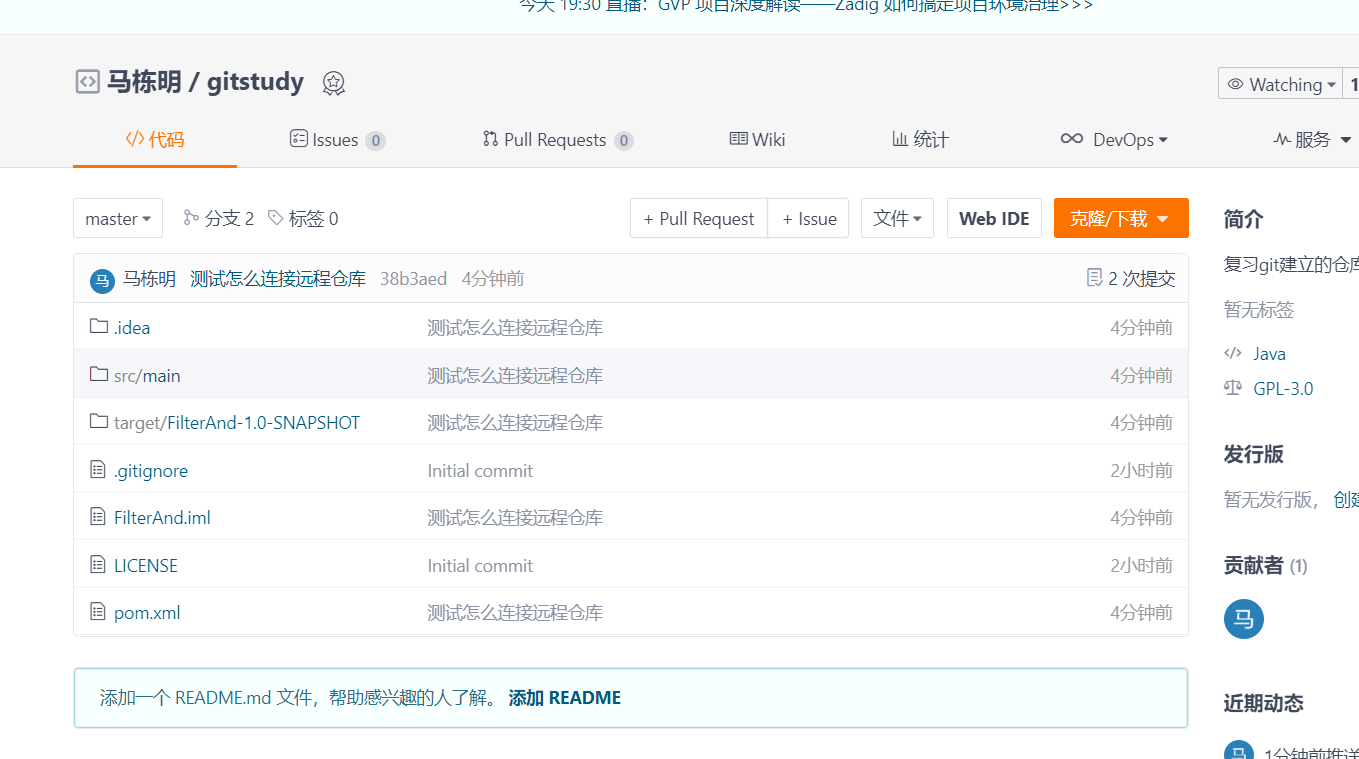
Then we add new code to the project:
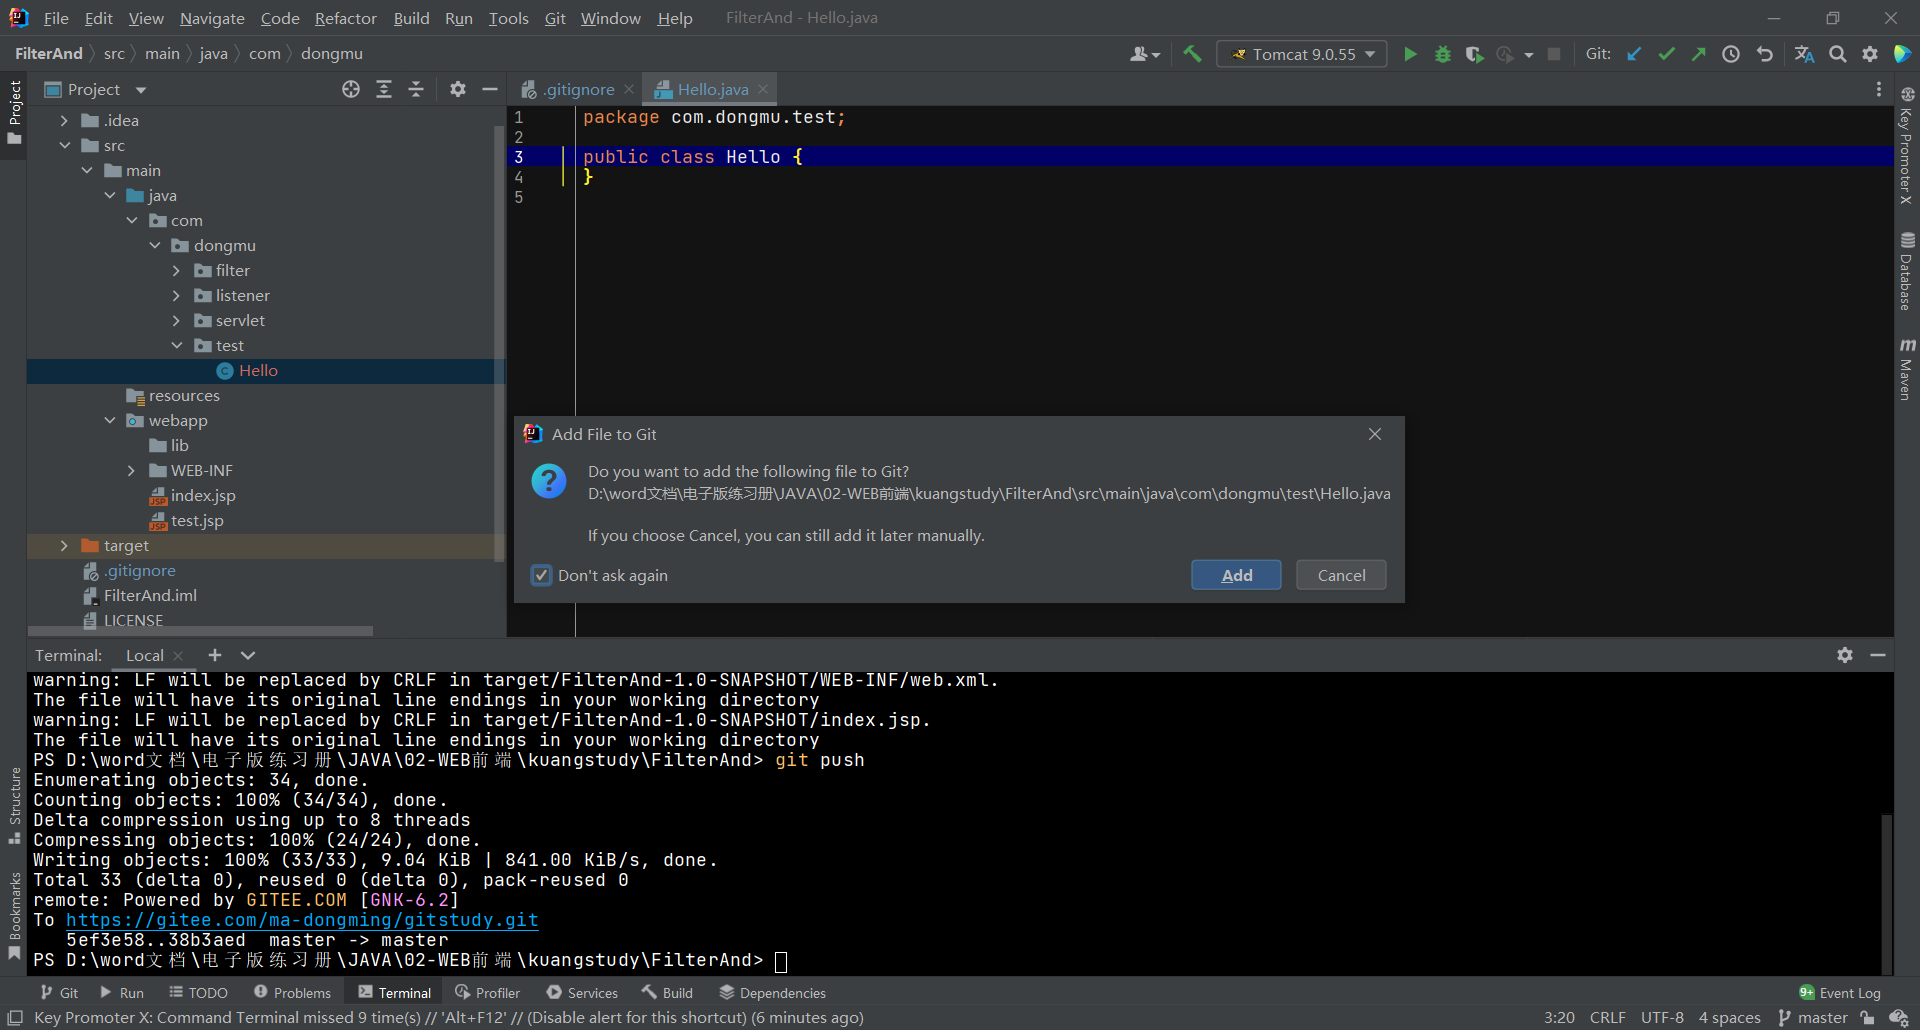
Then submit to the local warehouse, and then push to the remote warehouse

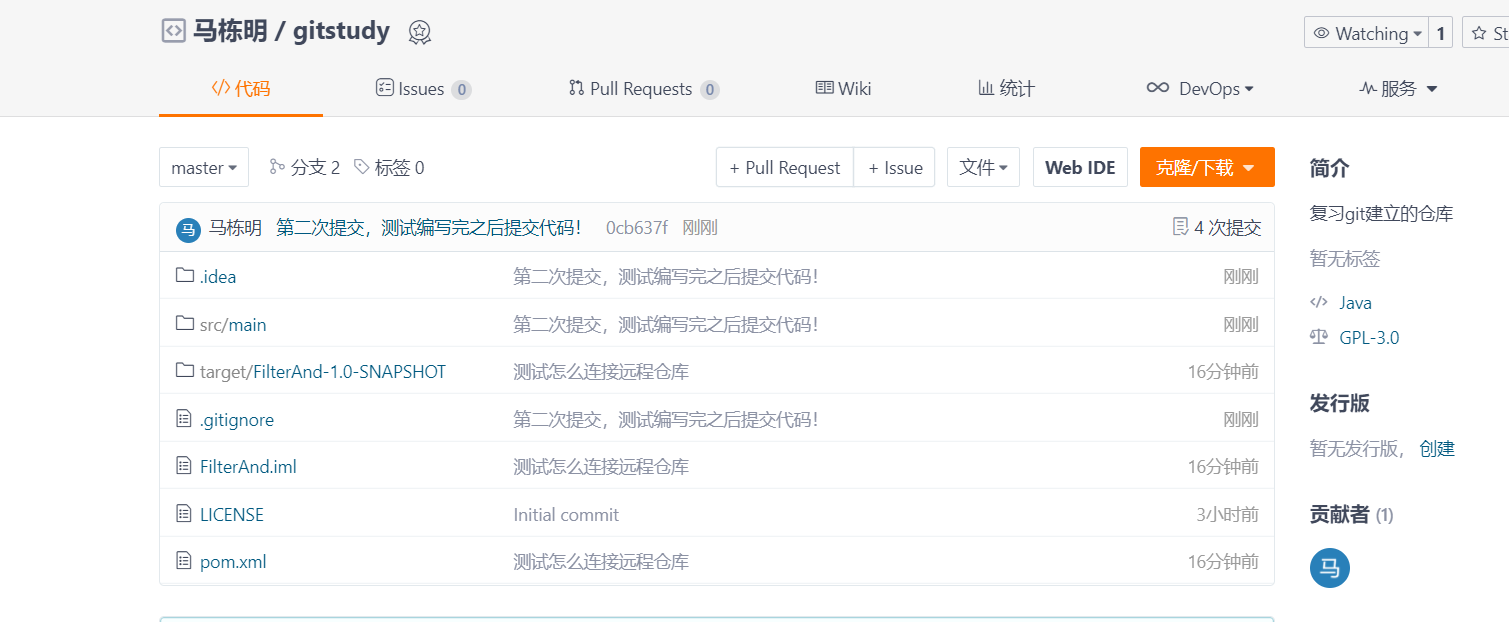
The above is the operation of one person in git, but how can multiple people cooperate in development?
git branch