SpringBoot manual build environment, Entity, Dao layer development, database model design
If the plug-in spring assistant conflicts with our computer, we will not choose this plug-in,
Build your own environment and create your own project
1. Create project
(1) Select Maven project creation
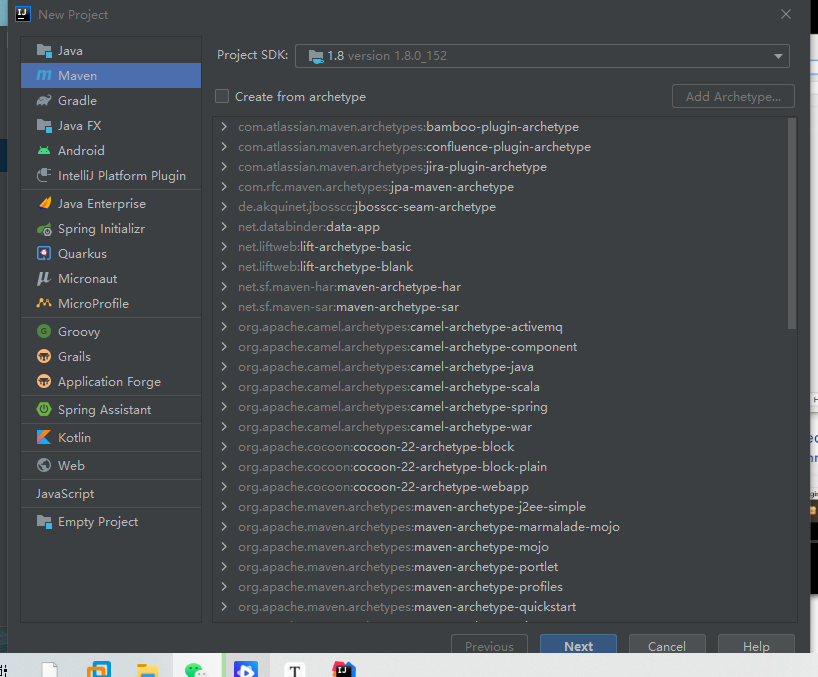
(2) Custom name
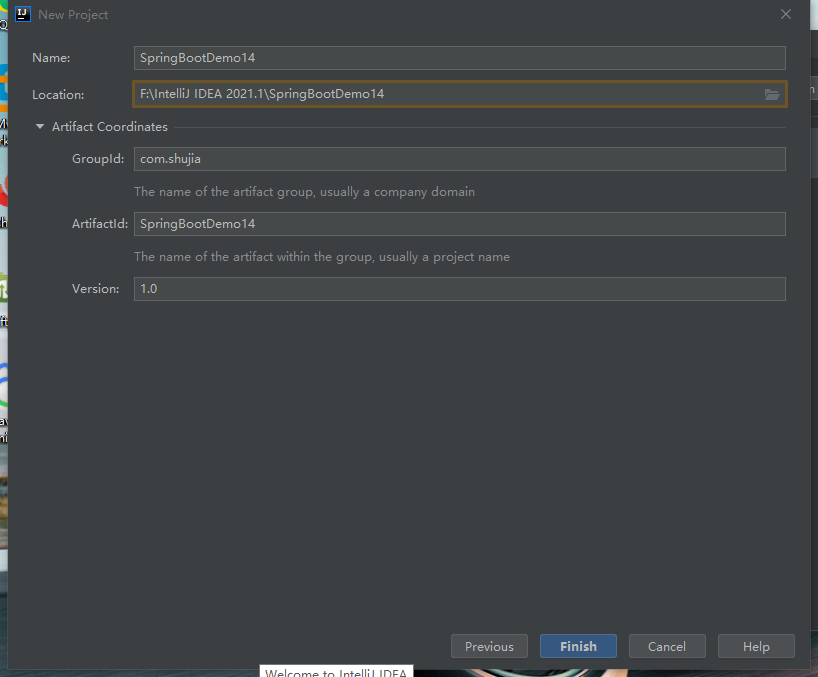
(3) Create a finished look
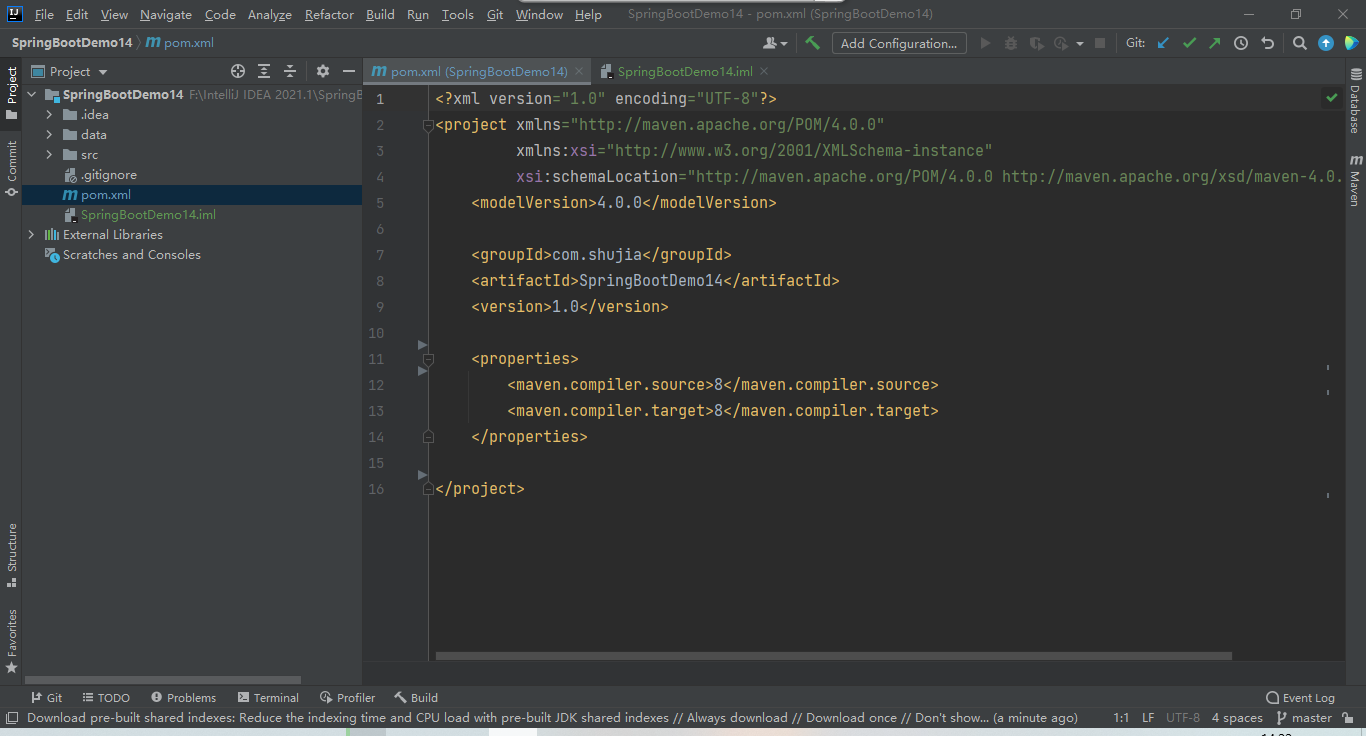
2. Manually build the SpringBoot environment
(1) Add SpringBoot dependency to POM In XML
  <parent>
        <groupId>org.springframework.boot</groupId>
        <artifactId>spring-boot-starter-parent</artifactId>
        <version>2.1.4.RELEASE</version>
  </parent>
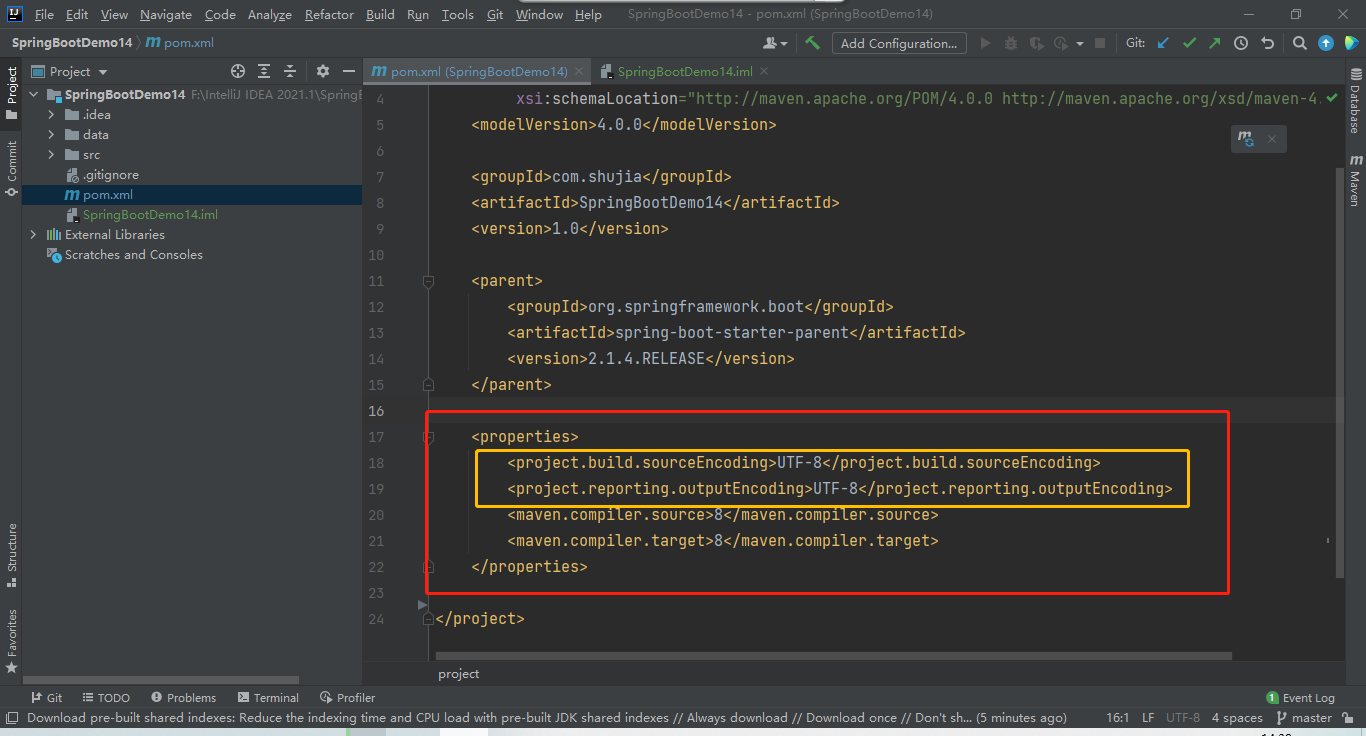
(2) Add the encoding of the project to POM In XML
<project.build.sourceEncoding>UTF-8</project.build.sourceEncoding>
<project.reporting.outputEncoding>UTF-8</project.reporting.outputEncoding>
(3) Add the dependencies required by the project to POM In XML
<dependencies>
        <!--add to Springmvc rely on-->
        <dependency>
            <groupId>org.springframework.boot</groupId>
            <artifactId>spring-boot-starter-web</artifactId>
        </dependency>

        <!-- springBoot JPA Start dependence -->
        <dependency>
            <groupId>org.springframework.boot</groupId>
            <artifactId>spring-boot-starter-data-jpa</artifactId>
        </dependency>

        <!--Because this project requires mysql Library, then add mysql rely on-->
        <dependency>
            <groupId>mysql</groupId>
            <artifactId>mysql-connector-java</artifactId>
        </dependency>
    </dependencies>
(4) The packaging method of SpringBoot is different from that of other things, and specific plug-ins are required
Add the required plug-ins to POM In XML
    <build>
        <plugins>
            <plugin>
                <groupId>org.springframework.boot</groupId>
                <artifactId>spring-boot-maven-plugin</artifactId>
                <version>2.1.4.RELEASE</version>
                <configuration>
                    <fork>true</fork>
                </configuration>
            </plugin>
        </plugins>
    </build>
(5) Refresh Maven: right click -- select Maven -- select reload project
3. Add mysql configuration file
Because the SpringBoot file will eventually be placed in a library, mysql database is used this time
Therefore, you need to configure the address of the mysql database
Create a table first
(1) Create a new database in mysql and name it spring boot demo
(2) Custom design a table in the spring boot demo library
create table  Student(
    id int primary key auto_increment,
    name varchar(255) not null,
    age int not null default 0,
    gender varchar(255),
    clazz varchar(255),
    sum_score int
);

-- yes name Index
create index stu_name_index on Student(name);
(2) Return to IDEA, right-click the project name and select new - > directory to create a new directory named data
(3) Right click the data directory and select new - > file to create a new file named student sql
(4) Paste the code of the custom table into student SQL file
Add mysql configuration file
(5) Create a new File in SCR - > main - > resources. The name is particular. It is named application properties
Paste the following code into application Properties file
(the host name master, permission root and password 123456 may be different, and can be modified according to personal conditions)
# Configure MySQL connection
spring.datasource.url=jdbc:mysql://master:3306/springbootdemo?useUnicode=true&characterEncoding=utf-8&allowMultiQueries=true&useSSL=false&serverTimezone=GMT%2b8
spring.datasource.username=root
spring.datasource.password=123456
# mysql driver
spring.datasource.driver-class-name=com.mysql.cj.jdbc.Driver
4. Create a project entry for SpringBoot
(1) Create a new package in SCR - > main - > java, for example: com shujia
(2) In the new package, create a new class file, such as SpringBootDemoApplication
(3) At the top of the class, click SpringBootApplication (indicating that this class is an application of SpringBoot)
(4) Add main method
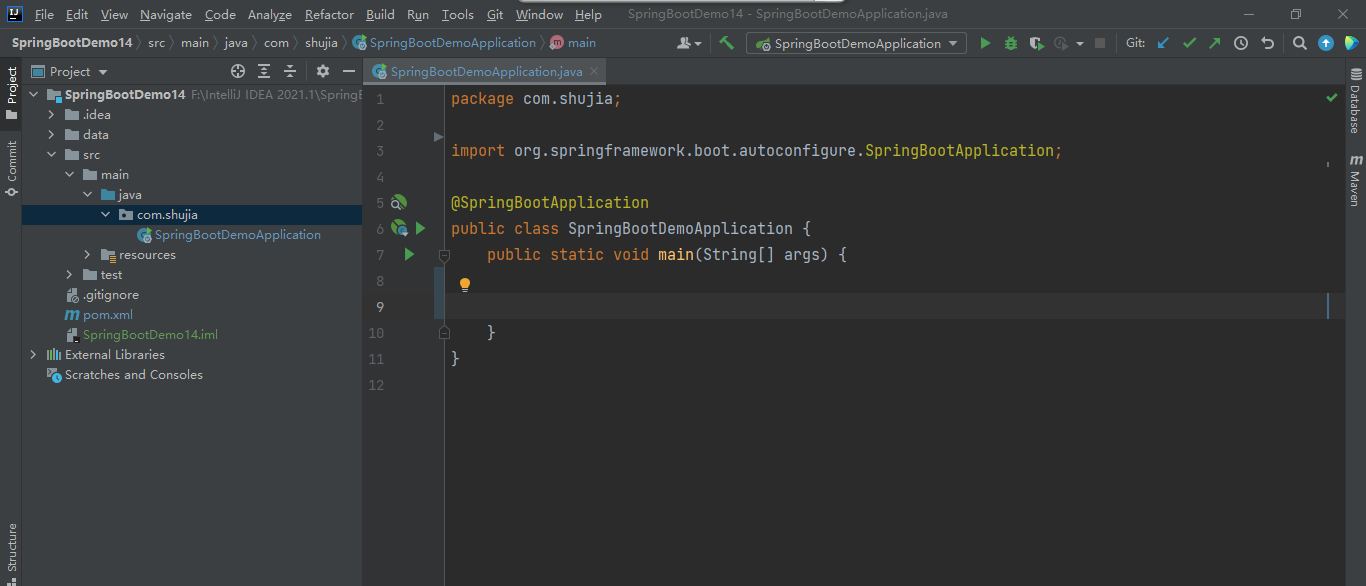
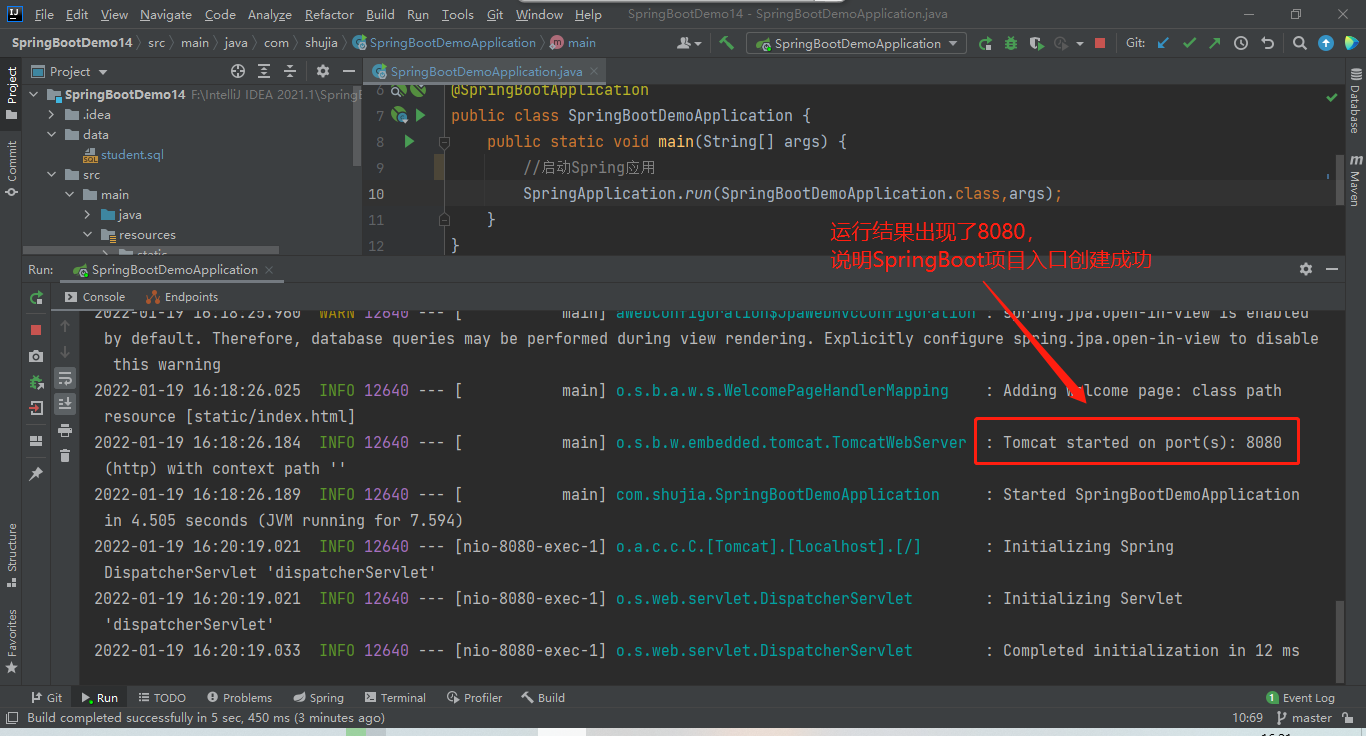
(5) Add the code to start the Spring application (in the main method): Spring application Run (class name. class,args);
//Launch Spring application
SpringApplication.run(SpringBootDemoApplication.class,args);
(6) Run program
5. Create the structural layer of the SpringBoot project
(1) First create the directory of the structure layer in SCR - > main - > java - > com Creating directories in Shujia
Catalog 1: Entity-------Database model
 Catalog 2: Dao----------Data persistence layer
 Catalog 3: Service------Data service layer
 Table of contents 4: Controller---Data control layer
 Table of contents 5: common
(2) Edit the Entity layer, create a new class file in the directory Entity, and keep the name consistent with the previously customized table name
package com.shujia.Entity;

import javax.persistence.*;

@Entity
@Table(name = "student")	//In lowercase
public class Student {
    //Define properties
    @Id //Set primary key
    @GeneratedValue(strategy = GenerationType.IDENTITY)     //Set Id auto increment
    private Integer id;
    private String name;
    private Integer age;
    private String gender;
    private String clazz;
    //The attribute name is generally consistent with the Column name of the table in the database. If it is inconsistent, the @ Column annotation can be used
    @Column(name = "sum_score")
    private Integer sumScore;

    //Add public getXxx() and setXxx() methods
    public Integer getId() {
        return id;
    }

    public void setId(Integer id) {
        this.id = id;
    }

    public String getName() {
        return name;
    }

    public void setName(String name) {
        this.name = name;
    }

    public Integer getAge() {
        return age;
    }

    public void setAge(Integer age) {
        this.age = age;
    }

    public String getGender() {
        return gender;
    }

    public void setGender(String gender) {
        this.gender = gender;
    }

    public String getClazz() {
        return clazz;
    }

    public void setClazz(String clazz) {
        this.clazz = clazz;
    }

    public Integer getSumScore() {
        return sumScore;
    }

    public void setSumScore(Integer sumScore) {
        this.sumScore = sumScore;
    }
}
(3) Edit Dao layer and create a new interface named StudentRepository
(except that Dao layer is an interface, other layers are classes)
package com.shujia.Dao;

import com.shujia.Entity.Student;
import org.springframework.data.jpa.repository.JpaRepository;
import org.springframework.stereotype.Repository;

@Repository
//This interface inherits the JpaRepository and specifies the generic type
public interface StudentRepository extends JpaRepository<Student,Integer> {
}
(4) Edit the Service layer and create a new class file named StudentService in the Service directory
In the Service layer, you can add, delete, modify, query, page, save, and so on
import com.shujia.Dao.StudentRepository;
import com.shujia.Entity.Student;
import org.springframework.stereotype.Service;

import javax.annotation.Resource;
import java.util.List;

@Service
public class StudentService {
    @Resource   //Dao layer is used as a resource, and resource annotations are added
    //Reference Dao layer resources
    private StudentRepository studentRepository;

    public List<Student> findAll(){
        return studentRepository.findAll()
    }
}
(5) Edit the Controller layer and create a new class file named StudentController in the Controller directory
@RestController //Return data in json format
@RequestMapping("/student")
public class StudentController {

    @RequestMapping("/all")
    public List<Student> findAll(){

    }

    @RequestMapping("/all2")
    public List<Student> findAll2(){

    }
}
(6) Edit the common layer and create a new class file named Result in the directory common
User ----- request (req) ----- > server
Server ------ return (RES) - > User
Generally, status codes, messages and data are returned to users
Based on status codes, messages and data, we can define a class in Java to describe them
Return an object to the user according to the class. The object contains status code, message and data
package com.shujia.common;
public class Result <T> {   //The returned object is uncertain. Add a generic type after the class
    //Define properties
    private String code;    //Define the returned status code
    private String msg;     //Define the returned message
    private T data;    //Define the returned data (uncertain type, use generic T)

    //Add the constructor and public getXxx() and setXxx()
    public Result() {

    }

    public Result(T data) {
        this.data = data;
    }

    public String getCode() {
        return code;
    }

    public void setCode(String code) {
        this.code = code;
    }

    public String getMsg() {
        return msg;
    }

    public void setMsg(String msg) {
        this.msg = msg;
    }

    public T getData() {
        return data;
    }

    public void setData(T data) {
        this.data = data;
    }

    //Define a static method that returns an object whether the request is successful or not
    //The request is successful and no data is returned
    public static <T> Result<T> sucess(){
        Result rs = new Result<>();
        rs.setCode("200");
        rs.setMsg("OK");
        return rs;
    }

    //Request succeeded, return data
    public static <T> Result<T> sucess(T data){
        Result<T> rs = new Result<T>(data);
        rs.setCode("200");
        rs.setMsg("OK");
        return rs;
    }

    //request was aborted
    public static <T> Result<T> error(String  code,String msg){
        Result rs = new Result<>();
        rs.setCode(code);
        rs.setMsg(msg);
        return rs;
    }
}
(7) Static methods are set in the common layer. At this time, you need to return to the Controller layer to modify the code
package com.shujia.Controller;

import com.shujia.Entity.Student;
import com.shujia.Service.StudentService;
import com.shujia.common.Result;
import org.springframework.web.bind.annotation.GetMapping;
import org.springframework.web.bind.annotation.RequestMapping;
import org.springframework.web.bind.annotation.RestController;

import javax.annotation.Resource;
import java.util.List;

@RestController //Return data in json format
@RequestMapping("/student")
public class StudentController {
    @Resource   //As a resource
    private StudentService studentService;//Define properties and introduce studentService

    @GetMapping("/all")
    public Result<List<Student>> findAll(){
        List<Student> list = studentService.findAll();
        return Result.success(list);
    }

    @GetMapping("/all2")
    public Result<List<Student>> findAll2(){
        List<Student> list = studentService.findAll();
        return Result.success(list);
    }
}
(9) Start running to see if there are any errors
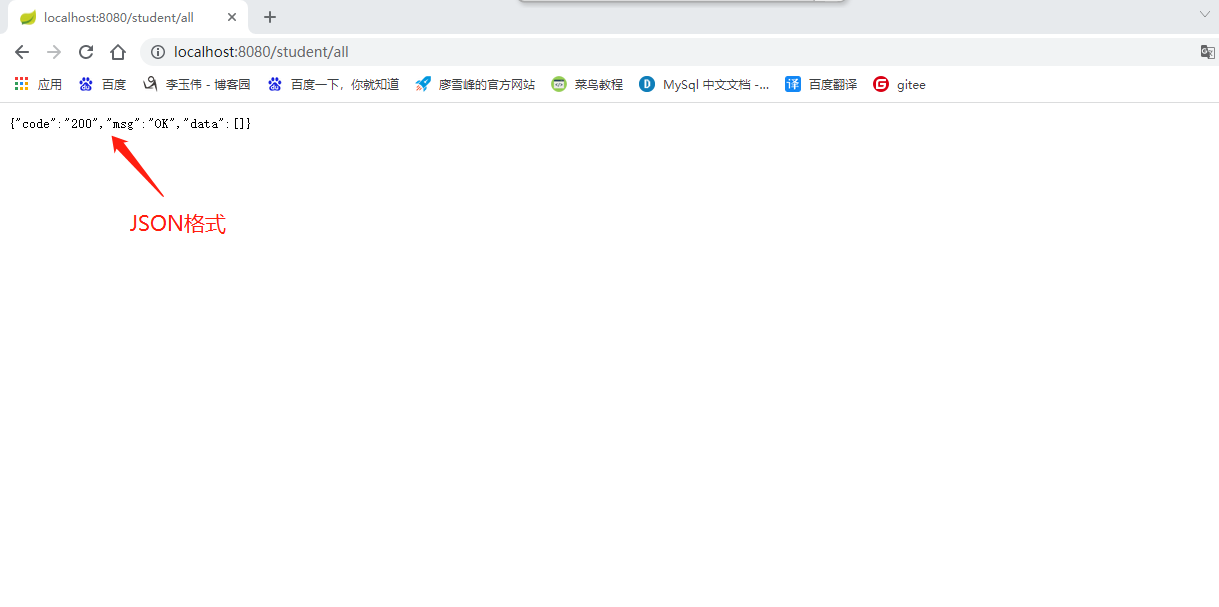
(8) If there is no error, enter in the browser http://localhost:8080/student/all , as shown below, it indicates that everything is created successfully
