In the previous article [developing the server using NodeJS+Express], we have learned the basic usage of NodeJS+Express. You may remember that the data returned by our API interface is false data and is not associated with data query. In this article, we will realize basic data interaction and simple addition, deletion, modification and query. If you haven't read the last article, please read it step by step~~~
1
preparation
First, we use Express to generate an empty Express project
- cd /Users/SPRINT/Desktop enter the desktop
- express MysqlDemo generates a MysqlDemo project
- cd MysqlDemo / enter the project root directory
- npm install installs dependent modules
- npm start starts the server
After startup, if no error occurs, access http://localhost:3000/ You will see the Welcome to Express message
2
Configure MySQL
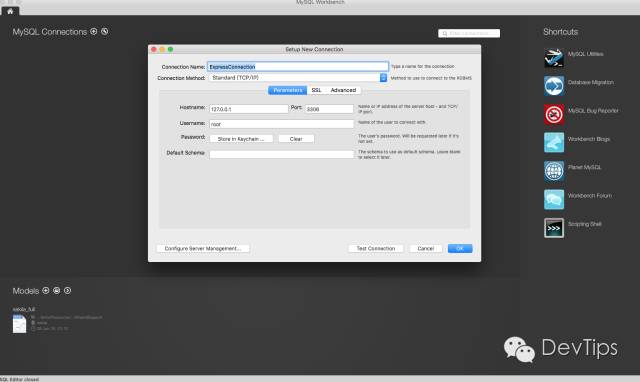
Make sure that MySQL environment is installed on your computer, and the IDE we use is MySQL workbench First, let's create a new Connection
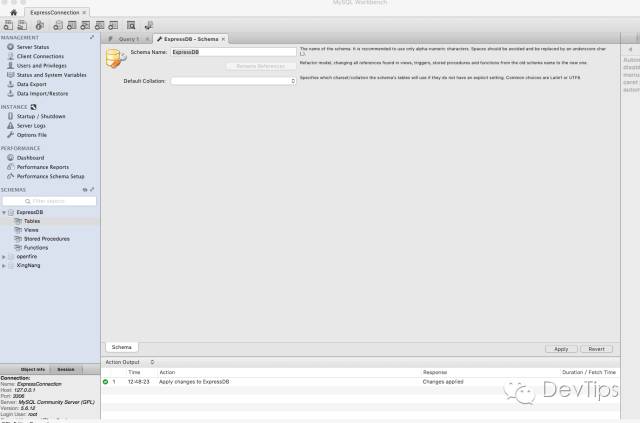
Open the newly created Connection database and name it ExpressDB
Next, we create a new Table and name it User
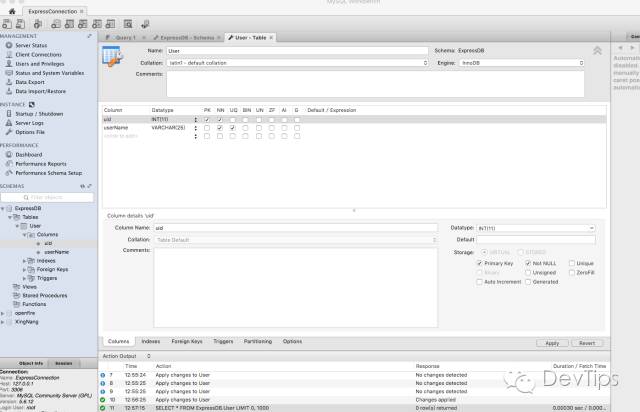
As can be seen from the figure above, we have added two columns
 uid INT(11) user id
userName VARCHAR(25) User name
This is the end of Mysql preparation. Next, we will focus on how to link Mysql using NodeJS+Express
3
Install MySQL module
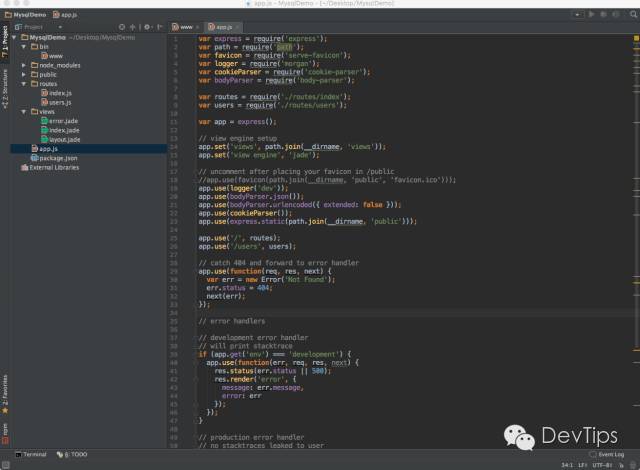
Open the MysqlDemo project we just created. Here I recommend using WebStorm or HBuilder as a demonstration. We use WebStorm to open the project
First, we open package JSON is added in the dependencies option
"mysql": "latest"
Then execute the following command
 npm install install mysql rely on
 npm start Start the server
Then we add a db directory to the project to store MySQL configuration information.
Then create a new dbconfig. In the db directory JS file and add the following
module.exports = {
    mysql: {
        host: '127.0.0.1',
        user: 'root',
        password: 'Your database Coonection password',
        database:'ExpressDB', // The user table created earlier is located in this database
        port: 3306
    }
};
After completion, the current structure of the project is as follows:

4
Add API interface to call SQL statement
Then we continue to add usersql. SQL in the db directory JS and type the following
/**
 * Created by sprint on 16/7/23.
 */
var UserSQL = {
    insert:'INSERT INTO User(uid,userName) VALUES(?,?)',
    queryAll:'SELECT * FROM User',
    getUserById:'SELECT * FROM User WHERE uid = ? ',
};

module.exports = UserSQL;
usersql.js is mainly used to add, delete, modify and query sql statements.
Next, we need to add a users in the routes directory JS exposes the API interface of our User operation.
To add test data temporarily to users JS, add an addUser interface, as follows
var express = require('express');
var router = express.Router();

// Import MySQL module
var mysql = require('mysql');

var dbConfig = require('../db/DBConfig');
var userSQL = require('../db/Usersql');

// Use dbconfig JS to create a MySQL connection pool
var pool = mysql.createPool( dbConfig.mysql );


// Respond to a JSON data
var responseJSON = function (res, ret) {

  if(typeof ret === 'undefined') {
    res.json({
      code:'-200',
      msg: 'operation failed'
    });
  } else {
    res.json(ret);
  }
};


// Add user
router.get('/addUser', function(req, res, next)

{

  // Get connection from connection pool
  pool.getConnection(function(err, connection) {
    // Get the parameters passed from the foreground page
    var param = req.query || req.params;

    // Establish a connection and add a user information
    connection.query(userSQL.insert, [param.uid,param.name], function(err, result) {

      console.log(err);

      if(result) {
        result = {
          code: 200,
          msg:'Increase success'
        };
      }

      // Return the operation result to the foreground page in the form of json
      responseJSON(res, result);

      // Release connection
      connection.release();
    });
  });


});


module.exports = router;
The key content has been annotated, and then we restart the server to access in the browser
http://localhost:3000/users/addUser?uid=4&name=helloMySQL
If the addition is successful, the page will be output
{"code":200,"msg": "increase success"}
You can experience other sql grammars by yourself. We won't repeat them one by one here. If you encounter problems during the test, you are welcome to leave a message