SpringBoot
Official download: power node official website
Video viewing address
Chapter 1 JavaConfig
Why use Spring Boot?
1. Because of Spring, Spring MVC needs to use a large number of configuration files (xml files)
You also need to configure various objects and put the used objects into the spring container to use the objects
You need to understand other framework configuration rules.
2. SpringBoot is equivalent to spring + spring MVC without configuration files. Common frameworks and third-party libraries have been configured.
You can use it.
3. SpringBoot has high development efficiency and is much more convenient to use
1.1 JavaConfig
JavaConfig: using java classes as an alternative to xml configuration files is a pure Java way to configure spring containers. In this Java class, you can create Java objects and put them into the spring container (inject them into the container),
Use two annotations:
1) @ Configuration: placed on top of a class, indicating that this class is used as a Configuration file.
2) @ Bean: declare the object and inject the object into the container.
example:
package com.bjpowernode.config;

import com.bjpowernode.vo.Student;
import org.springframework.context.annotation.Bean;
import org.springframework.context.annotation.Configuration;

/**
 * Configuration:Indicates that the current class is used as a configuration file. It is used to configure the container
 *       Location: above the class
 *
 *  SpringConfig This class is equivalent to beans xml
 */
@Configuration
public class SpringConfig {

    /**
     * Create a method whose return value is an object. Add @ Bean to the method
     * Method is injected into the container.
     *
     * @Bean: Inject the object into the spring container. The effect is equivalent to < bean >
     *
     *     Location: above the method
     *
     *     Description: @ Bean, does not specify the name of the object. The default is the method name and id
     *
     */
    @Bean
    public Student createStudent(){
        Student s1  = new Student();
        s1.setName("Zhang San");
        s1.setAge(26);
        s1.setSex("male");
        return s1;
    }


    /***
     * Specify the name of the object in the container (specify the id attribute of < bean >)
     * @Bean Specifies the name (id) of the object
     */
    @Bean(name = "lisiStudent")
    public Student makeStudent(){
        Student s2  = new Student();
        s2.setName("Li Si");
        s2.setAge(22);
        s2.setSex("male");
        return s2;
    }
}
1.2 @ImporResource
@ImportResource is used to import other xml configuration files, which is the same as in xml
<import resources="Other profiles"/>
For example:
@Configuration
@ImportResource(value ={ "classpath:applicationContext.xml","classpath:beans.xml"})
public class SpringConfig {
}
1.3 @PropertyResource
@PropertyResource: read the properties property configuration file. External configuration can be realized by using the property configuration file,
Provide data outside the program code.
Steps:
- In the resources directory, create the properties file and provide data in the format of k=v
- Specify the location of the properties file in PropertyResource
- Use @ Value (value="${key}")
@Configuration
@ImportResource(value ={ "classpath:applicationContext.xml","classpath:beans.xml"})
@PropertySource(value = "classpath:config.properties")
@ComponentScan(basePackages = "com.bjpowernode.vo")
public class SpringConfig {
}
Chapter 2 Spring Boot
2.1 introduction
SpringBoot is a member of Spring, which can simplify the use of Spring and Spring MVC. Its core is the IOC container.
characteristic:
-
Create stand-alone Spring applications
Create spring app
-
Embed Tomcat, Jetty or Undertow directly (no need to deploy WAR files)
Embedded tomcat, jetty, Undertow
-
Provide opinionated 'starter' dependencies to simplify your build configuration
starter start dependency is provided to simplify the configuration of applications.
For example, if you use the MyBatis framework, you need to configure the object SqlSessionFactory of MyBatis and the proxy object of Dao in the Spring project
In the SpringBoot project, in POM XML, add a mybatis spring boot starter dependency
-
Automatically configure Spring and 3rd party libraries whenever possible
Configure spring and third-party libraries as much as possible. It is called automatic configuration (that is, all objects in spring and third-party libraries are created and put into containers for developers to use directly)
-
Provide production-ready features such as metrics, health checks, and externalized configuration
Health check, statistics and externalized configuration are provided
-
Absolutely no code generation and no requirement for XML configuration
No code generation, no xml, configuration
2.2 create Spring Boot project
2.2.1 the first way is to use the initializer provided by Spring, that is, the wizard to create a SpringBoot application
Address used: https://start.spring.io
Structure of SpringBoot project:
2.2.1 address in China
https://start.springboot.io
2.3 use of notes
@SpringBootApplication
Compliance note: by
- @SpringBootConfiguration
- @EnableAutoConfiguration
- @ComponentScan
1. @SpringBootConfiguration
@Configuration
public @interface SpringBootConfiguration {
    @AliasFor(
        annotation = Configuration.class
    )
    boolean proxyBeanMethods() default true;
}
Note: classes annotated with @ SpringBootConfiguration annotation can be used as configuration files. Bean can be used to declare objects and inject them into containers
2.@EnableAutoConfiguration
Enable automatic configuration, configure java objects and inject them into the spring container. For example, you can create the object of mybatis and put it into the container
3.@ComponentScan
@ComponentScan scanner, find annotations, create objects according to the functions of annotations, assign values to attributes, etc. Package scanned by default: @ ComponentScan is the package and sub package of the class.
2.4 SpringBoot configuration file
Profile name: application
The extensions are: properties (k = V); yml ( k: v)
Use application properties, application. yml
Example 1: application Properties sets the port and context
#Set port number
server.port=8082
#Set access application context path, contextpath
server.servlet.context-path=/myboot
Example 2: application yml
server:
  port: 8083
  servlet:
    context-path: /myboot2
2.5 multi environment configuration
There are development environment, test environment and online environment.
Each environment has different configuration information, such as port, upper and lower files, database url, user name, password, etc
Using multi environment configuration files, you can easily switch between different configurations.
Usage: create multiple configuration files. Name rule: application - environment name properties(yml)
Create a configuration file for the development environment: application-dev.properties (application-dev.yml)
Create the configuration used by the tester: application test properties
2.6 @ConfigurationProperties
@ConfigurationProperties: map the data of the configuration file to java objects.
Attribute: the beginning of some key s in the prefix configuration file.
@Component
@ConfigurationProperties(prefix = "school")
public class SchoolInfo {

    private String name;

    private String website;

    private String address;


    public String getName() {
        return name;
    }

    public void setName(String name) {
        this.name = name;
    }

    public String getWebsite() {
        return website;
    }

    public void setWebsite(String website) {
        this.website = website;
    }

    public String getAddress() {
        return address;
    }

    public void setAddress(String address) {
        this.address = address;
    }

    @Override
    public String toString() {
        return "SchoolInfo{" +
                "name='" + name + '\'' +
                ", website='" + website + '\'' +
                ", address='" + address + '\'' +
                '}';
    }
}
application.properties
#Configure port number
server.port=8082
#context-path
server.servlet.context-path=/myboot

#Custom key=value
school.name=Dynamic node
school.website=www.bjpower.com
school.address=Daxing District of Beijing

site=www.bjpower.com
2.7 using jsp
SpringBoot does not recommend using jsp, but uses template technology instead of jsp
To use jsp, you need to configure:
1) Add a dependency to handle jsp. Responsible for compiling jsp files
<dependency>
    <groupId>org.apache.tomcat.embed</groupId>
    <artifactId>tomcat-embed-jasper</artifactId>
</dependency>
2) If you need to use the functions of servlet, jsp and jstl
<dependency>
    <groupId>javax.servlet</groupId>
    <artifactId>jstl</artifactId>
</dependency>

<dependency>
    <groupId>javax.servlet</groupId>
    <artifactId>javax.servlet-api</artifactId>
</dependency>

<dependency>
<groupId>javax.servlet.jsp</groupId>
    <artifactId>javax.servlet.jsp-api</artifactId>
    <version>2.3.1</version>
</dependency>
3) Create a directory for storing JSPS, commonly called webapp
index.jsp
4) Need to be in POM XML specifies the storage directory of the compiled jsp file.
META-INF/resources
5) Create Controller and access jsp
6) In application Configure view parser in propertis file
2.8 use of containers
You want to get objects from the container through code.
Via springapplication run(Application.class, args); Returns the value to get the container.
public static ConfigurableApplicationContext run(Class<?> primarySource, String... args) {
        return run(new Class[]{primarySource}, args);
}

ConfigurableApplicationContext : Interface, yes ApplicationContext Sub interface of
public interface ConfigurableApplicationContext extends ApplicationContext
2.9 ComnandLineRunner interface, applicationrunner interface
Both interfaces have a run method. Execution time after the container object is created, the run () method is automatically executed.
You can complete some customized operations created in the container object.
@FunctionalInterface
public interface CommandLineRunner {
    void run(String... args) throws Exception;
}

@FunctionalInterface
public interface ApplicationRunner {
    void run(ApplicationArguments args) throws Exception;
}
Chapter 3 Web components
Talk about three contents: interceptor, Servlet and Filter
3.1 interceptor
Interceptor is an object in spring MVC, which can interceptor requests to Controller.
There are system interceptors in the interceptor framework, and you can also customize interceptors. Implement pre-processing of requests.
Implement custom interceptors:
1. Create a class to implement the HandlerInterceptor interface of spring MVC framework
public interface HandlerInterceptor {
default boolean preHandle(HttpServletRequest request, HttpServletResponse response, Object handler) throws Exception {
return true;
}

default void postHandle(HttpServletRequest request, HttpServletResponse response, Object handler, @Nullable ModelAndView modelAndView) throws Exception {
}

default void afterCompletion(HttpServletRequest request, HttpServletResponse response, Object handler, @Nullable Exception ex) throws Exception {
}
}
2. Declare the interceptor in the configuration file of spring MVC
xml
<mvc:interceptors>
 <mvc:interceptor>
     <mvc:path="url" />
     <bean class="Interceptor class fully qualified name"/>
 </mvc:interceptor>
</mvc:interceptors>
Register interceptors in SpringBoot:
@Configuration
public class MyAppConfig implements WebMvcConfigurer {

    //Add interceptor objects and inject them into the container
    @Override
    public void addInterceptors(InterceptorRegistry registry) {

        //Create interceptor object
        HandlerInterceptor interceptor = new LoginInterceptor();

        //Specify blocked requests uri address
        String path []= {"/user/**"};
        //Specify an address that is not blocked
        String excludePath  [] = {"/user/login"};
        registry.addInterceptor(interceptor)
                .addPathPatterns(path)
                .excludePathPatterns(excludePath);

    }
}
3.2 Servlet
Use Servlet objects in the SpringBoot framework.
Use steps:
- Create a Servlet class. Create class inheritance HttpServlet
- Register the Servlet so that the framework can find the Servlet
example:
1. Create a custom Servlet
//establish Servlet class
public class MyServlet extends HttpServlet {
    @Override
    protected void doGet(HttpServletRequest req, HttpServletResponse resp) throws ServletException, IOException {
        doPost(req,resp);
    }

    @Override
    protected void doPost(HttpServletRequest req, HttpServletResponse resp) throws ServletException, IOException {
       //use HttpServletResponse Output data, response result
        resp.setContentType("text/html;charset=utf-8");
        PrintWriter out  = resp.getWriter();
        out.println("===The implementation is Servlet==");
        out.flush();
        out.close();

    }
}
- Register Servlet
@Configuration
public class WebApplictionConfig {

    //Defining methods, registering Servlet object
    @Bean
    public ServletRegistrationBean servletRegistrationBean(){

        //public ServletRegistrationBean(T servlet, String... urlMappings)
        //The first parameter is Servlet Object, the second is url address

        //ServletRegistrationBean bean =
                //new ServletRegistrationBean( new MyServlet(),"/myservlet");


        ServletRegistrationBean bean = new ServletRegistrationBean();
        bean.setServlet( new MyServlet());
        bean.addUrlMappings("/login","/test"); // <url-pattern>


        return bean;
    }
}
3.3 Filter
Filter is a filter in Servlet specification. It can process requests and adjust the parameters and attributes of requests. Character encoding is often handled in filters
Use filters in frames:
- Create a custom filter class
- Register Filter object
example:
// Custom filter
public class MyFilter implements Filter {
    @Override
    public void doFilter(ServletRequest servletRequest, ServletResponse servletResponse, FilterChain filterChain) throws IOException, ServletException {
        System.out.println("Yes MyFilter,doFilter ");
        filterChain.doFilter(servletRequest,servletResponse);
    }
}
Register Filter
@Configuration
public class WebApplicationConfig {

    @Bean
    public FilterRegistrationBean filterRegistrationBean(){
        FilterRegistrationBean bean  = new FilterRegistrationBean();
        bean.setFilter( new MyFilter());
        bean.addUrlPatterns("/user/*");
        return bean;
    }
}
3.4 character set filter
Characterencoding filter: solves the problem of garbled code in post requests
In the spring MVC framework, on the web XML registration filter. Configure his properties.
The first way:
Use steps:
1. Configure character set filter
@Configuration
public class WebSystemConfig {

    //register Servlet
    @Bean
    public ServletRegistrationBean servletRegistrationBean(){
        MyServlet myServlet = new MyServlet();
        ServletRegistrationBean reg = new ServletRegistrationBean(myServlet,"/myservlet");
        return reg;
    }


    //register Filter
    @Bean
    public FilterRegistrationBean filterRegistrationBean(){
        FilterRegistrationBean reg = new FilterRegistrationBean();

        //Using filter classes in the framework
        CharacterEncodingFilter filter  = new CharacterEncodingFilter();
        //Specifies the encoding used
        filter.setEncoding("utf-8");
        //appoint request , response All use encoding Value of
        filter.setForceEncoding(true);

        reg.setFilter(filter);
        //Specify filtered url address
        reg.addUrlPatterns("/*");


        return reg;
    }
}
2. Modify application Properties file to make the custom filter work
#Characterencoding filter is configured by default in SpringBoot. Code default ISO-8859-1
#Set enabled=false The function is to close the configured filter in the system and use the custom filter CharacterEncodingFilter
server.servlet.encoding.enabled=false
The second way
Modify application Properties file
server.port=9001
server.servlet.context-path=/myboot

#Make the CharacterEncdoingFilter of the system effective
server.servlet.encoding.enabled=true
#Specifies the encoding used
server.servlet.encoding.charset=utf-8
#Force request and response to use the value of charset attribute
server.servlet.encoding.force=true
Chapter 4 ORM operation MySQL
Use the MyBatis framework to manipulate data and integrate MyBatis in the SpringBoot framework
Use steps:
-
Mybatis start dependency: complete the automatic configuration of mybatis objects, and put the objects in the container
-
pom.xml specifies that the xml files in the src/main/java directory are included in the classpath
-
Create entity class Student
-
Create Dao interface StudentDao and create a method to query students
-
Create Mapper files and xml files corresponding to Dao interfaces, and write sql statements
-
Create the Service layer object, and create the StudentService interface and its implementation class. Method to dao object. Complete database operation
-
Create a Controller object and access the Service.
-
Write application Properties file
Configure the connection information for the database.
The first method: @ Mapper
@Mapper: it is placed on the dao interface. Each interface needs to use this annotation.
/**
 * @Mapper: Tell MyBatis that this is the dao interface and create a proxy object for this interface.
 *     Location: above the class
 */
@Mapper
public interface StudentDao {

    Student selectById(@Param("stuId") Integer id);
}
The second method is @ MapperScan
/**
 * @MapperScan: Find Dao interface and Mapper file
 *     basePackages: Dao Package name of the interface
 */
@SpringBootApplication
@MapperScan(basePackages = {"com.bjpowernode.dao","com.bjpowernode.mapper"})
public class Application {
}
The third way: Mapper files and Dao interfaces are managed separately
Now put the Mapper file in the resources directory
1) Create a subdirectory (custom) in the resources directory, such as mapper
2) Put the mapper file in the mapper directory
3) In application In the properties file, specify the directory of the mapper file
#Specifies the location of the mapper file
mybatis.mapper-locations=classpath:mapper/*.xml
#Specify the log for mybatis
mybatis.configuration.log-impl=org.apache.ibatis.logging.stdout.StdOutImpl
4) In POM XML specifies to compile the files in the resources directory into the target directory
<!--resources plug-in unit-->
<resources>
   <resource>
      <directory>src/main/resources</directory>
      <includes>
         <include>**/*.*</include>
      </includes>
   </resource>
</resources>
Fourth transaction
Transactions in the Spring framework:
1) Transaction management object: transaction manager (interface, which has many implementation classes)
For example: use Jdbc or mybatis to access the database, and use the transaction manager: data source transaction manager
2) declarative transaction: specify the content of transaction control in xml configuration file or annotation
Control transactions: isolation level, propagation behavior, timeout
3) Transaction processing method:
1) @ Transactional in Spring framework
2) aspectj framework can declare the content of transaction control in xml configuration file
Using transactions in SpringBoot: both of the above methods are OK.
1) Add @ Transactional to the business method. After adding annotation, the method has transaction function.
2) Explicitly add @ EnableTransactionManager to the main startup class
example:
/**
 * @Transactional: The of the presentation method is supported by transactions
 *       Default: the isolation level of the library is used, and the REQUIRED propagation behavior is used; Timeout - 1
 *       Throw a runtime exception and roll back the transaction
 */
@Transactional
@Override
public int addStudent(Student student) {
    System.out.println("Business method addStudent");
    int rows  =  studentDao.insert(student);
    System.out.println("implement sql sentence");

    //Throw a runtime exception to rollback the transaction
    //int m   = 10 / 0 ;

    return rows;
}
Chapter 5 interface architecture style - RESTful
Interface: API (Application Programming Interface) refers to some predefined interfaces (such as functions and HTTP interfaces), or software system Agreement on the connection of different components. Used to provide application program With developers based on a Software Or a set of hardware accessible routine Without having to access the source code or understand the internal Working mechanism Details.
Interface (API): it can refer to accessing the url of servlet and controller and calling the functions of other programs
Architecture style: api Organization (appearance)
Is a traditional: http://localhost:9002/mytrans/addStudent?name=lisi&age=26
The accessed resource name addStudent is provided on the address, and the parameters are passed in get mode after that.
5.1 REST
RESTful architecture style
1)REST: (English: Representational State Transfer, Chinese: presentation layer state transfer).
REST: it is an interface architecture style and design concept, not a standard.
Advantages: more concise and hierarchical
Presentation layer state transition:
- The presentation layer is the view layer, which displays the of resources, and displays the results of operating resources through view pages, JSPS, etc.
- Status: resource change
- Transfer: resources can change. The resource can be created in new status. After the resource is created, you can query the resource and see the content of the resource,
The content of this resource can be modified. The modified resource is different from the previous one.
2) Elements in REST:
Use REST to represent resources and operations on resources. In the Internet, it represents a resource or an operation.
Resources are represented by URLs. On the Internet, images, videos, texts, web pages, etc. are resources.
Resources are represented by nouns.
For resources:
- Query resources: look, find resources through URLs.
- Create resource: Add Resource
- Update resources: updating resources, editing
- Deleting resources: removing
Resources are represented by URLs, and resources are represented by nouns.
In the url, nouns are used to represent resources and information about accessing resources. In the url, "/" is used to separate information about resources
http://localhost:8080/myboot/student/1001
Use the action in http (request mode) to represent the operation on resources (CURD)
GET: query resources - sql select
Dealing with a single resource: in his singular way
http://localhost:8080/myboot/student/1001
http://localhost:8080/myboot/student/1001/1
Working with multiple resources: use the plural
http://localhost:8080/myboot/students/1001/1002
POST: create resource - sql insert
http://localhost:8080/myboot/student
Passing data in a post request
<form action="http://localhost:8080/myboot/student" method="post">
    full name:<input type="text" name="name" />
    Age:<input type="text" name="age" />
  </form>
PUT: update resources – sql update
<form action="http://localhost:8080/myboot/student/1" method="post">
 full name:<input type="text" name="name" />
 Age:<input type="text" name="age" />
      <input type="hidden" name="_method" value="PUT" />
</form>
DELETE: DELETE resource - sql delete
xml
The required paging, sorting and other parameters are still placed after the url, such as
http://localhost:8080/myboot/students?page=1&pageSize=20
3) One sentence for REST:
Use url to represent resources, and use http action to operate resources.
4) Annotation
- @PathVariable: get data from url
- @GetMapping: the supported get request method is equivalent to @ requestmapping (method = requestmethod. Get)
- @PostMapping: supports post request mode, which is equivalent to @ requestmapping (method = requestmethod. Post)
- @PutMapping: supports put request mode, which is equivalent to @ requestmapping (method = requestmethod. Put)
- @DeleteMapping: supports the delete request method, which is equivalent to @ requestmapping (method = requestmethod. Delete)
- @RestController: conforms to the annotation. It is a combination of @ Controller and @ ResponseBody.
Use @ RestController above the class to indicate that all methods of the current class have joined @ ResponseBody
5) Postman: test tool
Using Postman: you can test get, post, put, delete and other requests
5.2 in page or ajax, put and delete requests are supported
There is a filter in spring MVC that supports the conversion of post requests to put and delete
Filter: org springframework. web. filter. HiddenHttpMethodFilter
Function: turn the post request into put and delete
Implementation steps:
- application.properties(yml): enable the use of HiddenHttpMethodFilter filter
- In the request page, include_ The method parameter, whose values are put and delete, is the post method used to initiate the request
Chapter VI Redis
Redis: a NoSQL database, which is often used as a cache
Redis data types: string, hash, set, Zset, list
Redis is a middleware: an independent server.
Famous clients in java: Jedis, lettuce, Redisson
In spring, there is a RedisTemplate (string RedisTemplate) in springboot, which handles the interaction with redis
6.1 configure Windows version of redis
Redis-x64-3.2.100.rar decompress to a non Chinese directory
redis-server.exe: do not close the server after startup
redis-cli.exe: client to access data in redis
redisclient-win32. x86_ 64.2.0. Jar: redis graphical interface client
Execution method: in the directory where this file is located, execute Java - jar redisclient-win32 x86_ 64.2.0. jar
lettuce client library used by RedisTemplate
<!--redis Start dependency: used directly in the project RedisTemplate(StringRedisTemplate)-->
<dependency>
   <groupId>org.springframework.boot</groupId>
   <artifactId>spring-boot-starter-data-redis</artifactId>
</dependency>
data-redis Used   lettuce Client Library
In the program, the RedisTemplate class method is used to operate redis data, which is actually the method in the called lettuce client
6.2 comparison between StringRedisTemplate and RedisTemplate
String redistemplate: k and v are treated as strings. The serialization of strings is used, which has good readability
RedisTemplate: serialize K and v and save them to redis. k. v is serialized content and cannot be recognized directly
jdk serialization is used by default. It can be modified as a prerequisite serialization
Serialization: the process of converting an object into a transportable byte sequence is called serialization.
Deserialization: the process of restoring a byte sequence to an object is called deserialization.
Why serialization
The ultimate goal of serialization is that objects can be stored across platforms and transmitted over the network. The way of cross platform storage and network transmission is Io, and the data format supported by IO is byte array. We must formulate a rule (serialization) when converting objects into byte arrays. When we read data from the IO stream, we use this rule to restore objects back (deserialization).
When serialization is required
From the above, I think you already know that all data requiring "cross platform storage" and "network transmission" need to be serialized.
In essence, both storage and network transmission need to save an object state into a byte format recognized by cross platform, and then other platforms can restore the object information through byte information analysis.
Serialization mode
Serialization is just a rule for disassembling and assembling objects, so there may be many kinds of rules. For example, the common serialization methods are:
JDK (cross language not supported), JSON, XML, Hessian, Kryo (cross language not supported), Thrift, Protofbuff
Student( name=zs, age=20) ---- { "name":"zs", "age":20 }
java serialization: convert java objects into byte [], binary data
JSON serialization: the JSON serialization function converts objects to or from JSON format. For example, convert a Student object into JSON string {"name": "Li Si", "age": 29}), and deserialize (convert JSON string {"name": "Li Si", "age": 29} into Student object)
Set the serialization method of key or value
// use RedisTemplate ,Set serialization before accessing the value
// set up key use String Serialization of
redisTemplate.setKeySerializer( new StringRedisSerializer());

// set up value Serialization of
redisTemplate.setValueSerializer( new StringRedisSerializer());

redisTemplate.opsForValue().set(k,v);
Chapter 7 SpringBoot integration Dubbo
7.1 see the documentation of SpringBoot inheriting Dubbo
https://github.com/apache/dubbo-spring-boot-project/blob/master/README_CN.md
7.2 public projects
Independent maven project: defines interfaces and data classes
public class Student implements Serializable {
    private static final long serialVersionUID = 1901229007746699151L;

    private Integer id;
    private String name;
    private Integer age;
}

public interface StudentService {

    Student queryStudent(Integer id);
}
7.3 provider
Create a SpringBoot project
1) pom.xml
<dependencies>

   <!--To join a public project gav-->
   <dependency>
      <groupId>com.bjpowernode</groupId>
      <artifactId>022-interface-api</artifactId>
      <version>1.0.0</version>
   </dependency>

   <!--dubbo rely on-->
   <dependency>
      <groupId>org.apache.dubbo</groupId>
      <artifactId>dubbo-spring-boot-starter</artifactId>
      <version>2.7.8</version>
   </dependency>


   <!--zookeeper rely on-->
   <dependency>
      <groupId>org.apache.dubbo</groupId>
      <artifactId>dubbo-dependencies-zookeeper</artifactId>
      <version>2.7.8</version>
      <type>pom</type>
      <exclusions>
         <!-- exclude log4j rely on -->
         <exclusion>
            <artifactId>slf4j-log4j12</artifactId>
            <groupId>org.slf4j</groupId>
         </exclusion>
      </exclusions>
   </dependency>
</dependencies>
2) Implementation interface
/**
 * Expose services using annotations in dubbo
 * @Component You don't have to add it
 */
@DubboService(interfaceClass = StudentService.class,version = "1.0",timeout = 5000)
public class StudentServiceImpl implements StudentService {
    @Override
    public Student queryStudent(Integer id) {
        Student student  = new Student();
        if( 1001 == id){
            student.setId(1001);
            student.setName("------1001-Zhang San");
            student.setAge(20);
        } else if(1002  == id){
            student.setId(1002);
            student.setName("#######1002 Li Si“);
            student.setAge(22);
        }

        return student;
    }
}
3)application.properties
#Configure service name dubbo:application name = "name"
spring.application.name=studentservice-provider

#Configure scanned packages, scanned @ DubboService
dubbo.scan.base-packages=com.bjpowernode.service

#Configure dubbo protocol
#dubbo.protocol.name=dubbo
#dubbo.protocol.port=20881

#Registration Center
dubbo.registry.address=zookeeper://localhost:2181
4) Above the startup class
@SpringBootApplication
@EnableDubbo
public class ProviderApplication {

   public static void main(String[] args) {
      SpringApplication.run(ProviderApplication.class, args);
   }
}
7.4 consumers
Create a SpringBoot project
1) pom.xml
<dependencies>

   <!--To join a public project gav-->
   <dependency>
      <groupId>com.bjpowernode</groupId>
      <artifactId>022-interface-api</artifactId>
      <version>1.0.0</version>
   </dependency>

   <!--dubbo rely on-->
   <dependency>
      <groupId>org.apache.dubbo</groupId>
      <artifactId>dubbo-spring-boot-starter</artifactId>
      <version>2.7.8</version>
   </dependency>


   <!--zookeeper rely on-->
   <dependency>
      <groupId>org.apache.dubbo</groupId>
      <artifactId>dubbo-dependencies-zookeeper</artifactId>
      <version>2.7.8</version>
      <type>pom</type>
      <exclusions>
         <!-- exclude log4j rely on -->
         <exclusion>
            <artifactId>slf4j-log4j12</artifactId>
            <groupId>org.slf4j</groupId>
         </exclusion>
      </exclusions>
   </dependency>
</dependencies>
2) You can create a Controller or a Service
@RestController
public class DubboController {

    /**
     * Reference the remote service and inject the created proxy object into the studentService
     */
    //@DubboReference(interfaceClass = StudentService.class,version = "1.0")

    /**
     * interfaceClass is not used. The default is the data type of reference type
      */
    @DubboReference(version = "1.0")
    private StudentService studentService;

    @GetMapping("/query")
    public String queryStudent(Integer id){
        Student student   = studentService.queryStudent(id);
        return "Call the remote interface to get the object:"+student;
    }
}
3)application.properties
#Specify the service name
spring.application.name=consumer-application
#Designated registry
dubbo.registry.address=zookeeper://localhost:2181
7.5 practice
Technologies used: springboot, Dubbo, redis, mybatis
Student table: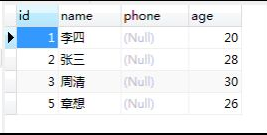
CREATE TABLE student (
id int(11) NOT NULL AUTO_INCREMENT,
name varchar(255) COLLATE utf8_bin DEFAULT NULL,
phone varchar(11) COLLATE utf8_bin DEFAULT NULL,
age int(11) DEFAULT NULL,
PRIMARY KEY (id)
) ENGINE=InnoDB AUTO_INCREMENT=6 DEFAULT CHARSET=utf8 COLLATE=utf8_bin;
Registered student
Phone must be unique. If a mobile phone number already exists, the registration fails.
int addStudent(Student student);
Return value: int
1: successful registration
2: the mobile phone number already exists
name must be at least two characters,
age must be greater than 0
2) Query the student. Query the student according to the id.
First go to redis to query students. If redis does not have this student, query from the database and put the queried students into redis.
Later, query again. The student should be able to get it from redis.
Student queryStudent(Integer id);
3) Using the Dubbo framework, addstudent and querystudent are implemented by service providers.
The consumer can be a Controller and call two methods of the provider. Realize registration and query.
4) The page uses html and ajax, jquery.
In the html page, the form is provided to register students, and the text box is provided to enter the id for query.
Both registration and query use ajax technology.
html,jquery.js are placed in the resources/static directory
Chapter VIII packaging
8.1 packaging war
1. Create a jsp Application
2. Modify POM xml
1) Specifies the packaged file name
<build>
   <!--Packaged file name-->
   <finalName>myboot</finalName>
</build>
2) Specify jsp compilation directory
<!--resources Plug in, put jsp Compile to the specified directory-->
<resources>
   <resource>
      <directory>src/main/webapp</directory>
      <targetPath>META-INF/resources</targetPath>
      <includes>
         <include>**/*.*</include>
      </includes>
   </resource>

   <!--mybatis is used, and the mapper file is placed in the src/main/java directory -- >
   <resource>
      <directory>src/main/java</directory>
      <includes>
         <include>**/*.xml</include>
      </includes>
   </resource>

   <!--hold src/main/resources All the following files are included in classes catalogue-->
   <resource>
      <directory>src/main/resources</directory>
      <includes>
         <include>**/*.*</include>
      </includes>
   </resource>
</resources>
3) Performing packaging is war
<!--Packaging type-->
<packaging>war</packaging>
4) The main boot class inherits SpringBootServletInitializer
/**
 * SpringBootServletInitializer: Inherit this class to use a stand-alone tomcat server
 */
@SpringBootApplication
public class JspApplication  extends SpringBootServletInitializer  {

   public static void main(String[] args) {
      SpringApplication.run(JspApplication.class, args);
   }

   @Override
   protected SpringApplicationBuilder configure(SpringApplicationBuilder builder) {
      return builder.sources(JspApplication.class);
   }
}
5) Deploy war
Put war in the release directory of servers such as tomcat. tomcat as an example, myboot Put war in tomcat/webapps directory.
8.2 package as jar
1. Create a project containing jsp
2. Modify POM xml
1) specify the packaged file name
<build>
   <!--Packaged file name-->
   <finalName>myboot</finalName>
</build>
2) Specify the springboot Maven plugin version
<plugins>
   <plugin>
      <groupId>org.springframework.boot</groupId>
      <artifactId>spring-boot-maven-plugin</artifactId>
      <!--pack jar, have jsp File must be specified maven-plugin The version of the plug-in is 1.4.2.RELEASE-->
      <version>1.4.2.RELEASE</version>
   </plugin>
</plugins>
3) Finally, execute maven clean package
In the target directory, generate jar files, for example, myboot jar
Execute the independent springboot project and java -jar myboot.jar in cmd jar
Chapter 9 Thymeleaf template engine
Thymeleaf: it is a template technology developed in java and runs on the server side. Send the processed data to the browser.
Templates work for view layers. Displays the of the data. Thymeleaf is based on Html language. Thymleaf syntax is applied in
html tag. The spring boot framework integrates Thymeleaf and uses Thymeleaf instead of jsp.
Thymeleaf's official website: http://www.thymeleaf.org
Thymeleaf official Manual: https://www.thymeleaf.org/doc/tutorials/3.0/usingthymeleaf.html
9.1 expression
1. Standard variable expression
Syntax: ${key}
Function: get the text data of key. Key is the key in the request scope. Use request setAttribute(), model. addAttribute()
In the html tag on the page, use th:text="${key}"
<div style="margin-left: 400px">
    <h3>Standard variable expression:  ${key}</h3>
    <p th:text="${site}">key non-existent</p>
    <br/>
    <p>obtain SysUser Object attribute value</p>
    <p th:text="${myuser.id}">id</p>
    <p th:text="${myuser.name}">full name</p>
    <p th:text="${myuser.sex}">full name: m male</p>
    <p th:text="${myuser.age}">Age</p>
    <p th:text="${myuser.getName()}">Get name usage getXXX</p>
</div>
2. Select variable expression (asterisk variable expression)
Syntax: * {key}
Function: get the data corresponding to the key, * {key} needs to be used together with the th:object attribute.
The purpose is to simply obtain the attribute value of the object.
<p>use *{} obtain SysUser Attribute value for</p>
<div th:object="${myuser}">
    <p th:text="*{id}"></p>
    <p th:text="*{name}"></p>
    <p th:text="*{sex}"></p>
    <p th:text="*{age}"></p>

</div>
<p>use*{}Completed represents the property value of the object</p>
<p th:text="*{myuser.name}" ></p>
3. Link expression
Syntax: @ {url}
Function: represents a link, which can
<script src="..."> , <link href="..."> <a href=".."> ,<form action="..."> <img src="...">
9.2 Thymeleaf properties
Attributes are placed in html elements, that is, the attributes of html elements, with the th prefix added. Property does not change. After adding th, the value of the attribute is processed by the template engine. You can use variable expressions in attributes
For example:
<form action="/loginServlet" method="post"></form>

<form th:action="/loginServlet" th:method="${methodAttr}"></form>
9.3 each
each loop can loop List and Array
Syntax:
In an html tag, use th:each
<div th:each="Collection loop member,Loop state variable:${key}">
    <p th:text="${Collection loop member}" ></p>
</div>
Collection loop member,Loop state variable:Both names are custom. The name "loop state variable" can be undefined. The default is"Collection loop member Stat"
each loop Map
In an html tag, use th:each
<div th:each="Collection loop member,Loop state variable:${key}">
    <p th:text="${Collection loop member.key}" ></p>
    <p th:text="${Collection loop member.value}" ></p>
</div>
Collection loop member,Loop state variable:Both names are custom. The name "loop state variable" can be undefined. The default is"Collection loop member Stat"
key:map In the collection key
value: map aggregate key Corresponding value value
9.4 th:if
"th:if": judgment statement. When the condition is true, the html tag body is displayed; otherwise, no else statement is displayed
Syntax:
<div th:if=" 10 > 0 "> Display text content </div>
There is also an opposite behavior of th:unless and th:if
Syntax:
<div th:unless=" 10 < 0 "> When the condition is false Display label body content </div>
Example: if
<div style="margin-left: 400px">
        <h3> if use</h3>
        <p th:if="${sex=='m'}">Gender is male</p>
        <p th:if="${isLogin}">Logged in to the system</p>
        <p th:if="${age > 20}">Older than 20</p>
        <!--""The null character is true-->
        <p th:if="${name}">name Is' '</p>
        <!--null yes false-->
        <p th:if="${isOld}"> isOld yes null</p>
 </div>
Example: unless
 <div style="margin-left: 400px">
        <h3>unless: The judgment condition is false,Display label body content</h3>
        <p th:unless="${sex=='f'}">Gender is male</p>
        <p th:unless="${isLogin}">Login system</p>
        <p th:unless="${isOld}"> isOld yes null </p>
 </div>
9.5 th:switch
th:switch is the same as switch in java
Syntax:
<div th:switch="Value to compare">
    <p th:case="Value 1">
        Result 1
    </p>
    <p th:case="Value 2">
        Result 2
    </p>
    <p th:case="*">
        Default result
    </p>
    Above case Only one statement is executed

</div>
9.6 th:inline
1. Inline text: get the value of the expression outside the html tag
Syntax:
<p>The display name is:[[${key}]]</p>

 <div style="margin-left: 400px">
        <h3>inline text, Displays the value of a variable using an inline expression</h3>
        <div th:inline="text">
            <p>I am[[${name}]],Age is[[${age}]]</p>
            I am<span th:text="${name}"></span>,Age is<span th:text="${age}"></span>
        </div>

        <div>
            <p>Use inline text</p>
            <p>I am[[${name}]],Gender is[[${sex}]]</p>
        </div>
</div>
2. Inline javascript
example:
 <script type="text/javascript" th:inline="javascript">
         var myname = [[${name}]];
         var myage = [[${age}]];

         //alert("Get the data in the template "+ myname + ","+myage)

        function fun(){
            alert("Click the event to get the data "+ myname + ","+ [[${sex}]])
        }
    </script>
9.7 literal quantity
example:
 <div style="margin-left: 400px">
       <h3>Text literal: A string enclosed in single quotes</h3>
       <p th:text="'I am'+${name}+',My city'+${city}">data display</p>

       <h3>Numeric literal</h3>
        <p th:if="${20>5}"> 20 Greater than 5</p>

        <h3>boolean Literal </h3>
        <p th:if="${isLogin == true}">The user has logged in to the system</p>

        <h3>null Literal </h3>
        <p th:if="${myuser != null}">have myuser data</p>
    </div>
9.8 string connection
There are two syntax for connection strings
1) Syntax uses single quotation marks to enclose strings, and + to connect other strings or expressions
<p th:text="'I am'+${name}+',My city'+${city}">data display</p>
2) Syntax: use double vertical bars, | strings and expressions|
<p th:text="|I am ${name},My city ${city|">
    Display data
</p>
example:
    <div style="margin-left: 400px">
       <h3>String connection method 1: a string enclosed in single quotation marks</h3>
       <p th:text="'I am'+${name}+',My city'+${city}">data display</p>
        <br/>
        <br/>
        <h3>String connection mode 2:|Strings and expressions|</h3>
        <p th:text="|I am ${name},City ${city},someone else ${myuser.name}|"></p>
    </div>
9.9 operators
-
Arithmetic operations: +, --, *, /,%
-
Relationship comparison: >, <, > =, < = (GT, lt, Ge, Le)
-
Equality judgment: = == ( eq , ne )
<div style="margin-left: 400px">
        <h3>Use operator</h3>
        <p th:text="${age > 10}">Older than 10 </p>
        <p th:text="${ 20 + 30 }">Display operation results</p>
        <p th:if="${myuser == null}">myuser yes null</p>
        <p th:if="${myuser eq null}">myuser yes null</p>
        <p th:if="${myuser ne null}">myuser no null</p>

        <p th:text="${isLogin == true ? 'The user is already logged in' : 'User needs to log in'}"></p>
        <p th:text="${isLogin == true ? ( age > 10 ? 'The user is greater than 10' : 'The user is relatively young') : 'User needs to log in'}"></p>

    </div>
Ternary operators: expressions? The result of true: the result of false. Ternary operators can be nested
9.10 built in objects
Document address: https://www.thymeleaf.org/doc/tutorials/3.0/usingthymeleaf.html#web-context-namespaces-for-requestsession-attributes-etc.
#request indicates HttpServletRequest
#session represents the HttpSession object
Session represents the Map object. It is #p a simple representation of session, which is used to obtain the value of the key specified in the session
#session.getAttribute("loginname") == session.loginname
These are built-in objects that can be used directly in the template file.
example:
 <div style="margin-left: 350px">
        <h3>Built in object#request,#Session, use of session</h3>
        <p>Get data in scope</p>
        <p th:text="${#request.getAttribute('requestData')}"></p>
        <p th:text="${#session.getAttribute('sessionData')}"></p>
        <p th:text="${session.loginname}"></p>

        <br/>
        <br/>
        <h3>Methods of using built-in objects</h3>
        getRequestURL=<span th:text="${#request.getRequestURL()}"></span><br/>
        getRequestURI=<span th:text="${#request.getRequestURI()}"></span><br/>
        getQueryString=<span th:text="${#request.getQueryString()}"></span><br/>
        getContextPath=<span th:text="${#request.getContextPath()}"></span><br/>
        getServerName=<span th:text="${#request.getServerName()}"></span><br/>
        getServerPort=<span th:text="${#request.getServerPort()}"></span><br/>
</div>
9.11 built in tools
Built in tool types: Thymeleaf's own classes provide some processing methods for string, date and collection
#dates: tool class that handles the date handler
#Numbers: process numbers
#lists: handle the list collection
<div style="margin-left: 350px">
      <h3>Date class object #dates</h3>
      <p th:text="${#dates.format(mydate )}"></p>
      <p th:text="${#dates.format(mydate,'yyyy-MM-dd')}"></p>
      <p th:text="${#dates.format(mydate,'yyyy-MM-dd HH:mm:ss')}"></p>
      <p th:text="${#dates.year(mydate)}"></p>
      <p th:text="${#dates.month(mydate)}"></p>
      <p th:text="${#dates.monthName(mydate)}"></p>
      <p th:text="${#dates.createNow()}"></p>
      <br/>

      <h3>Built in tool class#numbers, the number of operands</h3>
      <p th:text="${#numbers.formatCurrency(mynum)}"></p>
      <p th:text="${#numbers.formatDecimal(mynum,5,2)}"></p>

      <br/>
      <h3>Built in tool class#strings, operation string</h3>
      <p th:text="${#strings.toUpperCase(mystr)}"></p>
      <p th:text="${#strings.indexOf(mystr,'power')}"></p>
      <p th:text="${#strings.substring(mystr,2,5)}"></p>
      <p th:text="${#strings.substring(mystr,2)}"></p>
      <p th:text="${#strings. Concat (mystr,'--- Whampoa Military Academy developed by Java -- '} "></p>
      <p th:text="${#strings.length(mystr)}"></p>
      <p th:text="${#strings.length('hello')}"></p>
      <p th:unless="${#strings. Isempty (mystr)} "> mystring is not an empty string</p>

      <br/>
      <h3>Built in tool class#lists, operation list set</h3>
      <p th:text="${#lists.size(mylist)}"></p>
      <p th:if="${#lists. Contains (mylist, 'a')} "> member a</p>
      <p th:if="!${#lists. Isempty (mylist)} "> the list collection has multiple members</p>

      <br/>
      <h3>handle null</h3>
      <p th:text="${zoo?.dog?.name}"></p>

  </div>
9.12 custom templates
Templates are content reuse, defined once and used multiple times in other template files.
Template usage:
1. Define template
2. Use template
Template definition syntax:
th:fragment="Template custom name"

For example:
<div th:fragment="head">
    <p>
        Dynamic node-java development
    </p>
    <p>
        www.
    </p>
</div>
Reference template syntax:
1) ~{templatename :: selector}
   templatename:  File name
   selector:  Custom template name
2)templatename :: selector
   templatename:  File name
   selector:  Custom template name

For using templates: there are included templates( th:include), Insert template(th:insert)
Chapter 10 summary
10.1 notes
Spring + SpringMVC + SpringBoot
To create an object:
@Controller: put it on the top of the class, create a controller object and inject it into the container @RestController: put it on the top of the class, create a controller object and inject it into the container. Function: the composite annotation is @ controller and @ ResponseBody. The return values of controller methods in this annotation class are data @Service: put it on the implementation class of the business layer, create a service object and inject it into the container @Repository: put it on the implementation class of dao layer, create dao objects and put them into containers. This annotation is not used because the MyBatis framework is now used, and the dao object is generated by MyBatis through proxy. There is no need to use @ repository, so it is not used. @Component: put it on the top of the class, create the object of this class, and put it into the container. Assigned: @Value: assignment of a simple type. For example, @ Value("Li Si") private String name is used above the attribute You can also use @ Value to get the data (properties or yml) of the profile owner. @Value("${server.port}") private Integer port @Autowired: reference type assignment is automatically injected. Byname and byType are supported The default is byType. It can be placed on the property or on the constructor. The recommendation is to put it on the construction method @Qualifier: assign value to reference type in byName mode. @Autowird and @ qualifier are all provided by the Spring framework. @Resource: from the definition in jdk, javax annotation. Implement automatic injection of reference types, and support byname and bytype byName is the default. If byName fails, byType injection is used again. Use on properties other: @Configuration: placed on the top of the class, indicating that it is a configuration class, which is equivalent to an xml configuration file @Bean: put it on the top of the method and inject the return value object of the method into the spring container. @ImportResource: load other xml configuration files and inject the objects in the file into the spring container @PropertySource: read other properties property configuration files @ComponentScan: scanner, specify package name and scan annotation @ResponseBody: placed on the top of the method, indicating that the return value of the method is data, not view @RequestBody: read out the data in the request body and turn it into a java object. @ControllerAdvice: controller enhancement, which is placed on the top of the class, indicates that this class provides methods to enhance the functions of the controller. @ExceptionHandler: for handling exceptions, put it on the top of the method @Transitional: the method for processing transactions, which is placed on the public method of the service implementation class, indicating that this method has transactions Annotations used in SpringBoot @SpringBootApplication: placed on the startup class, including @ SpringBootConfiguration @EnableAutoConfiguration, @ComponentScan MyBatis related notes @Mapper: put it on the top of the class, let MyBatis find the interface and create his proxy object @MapperScan: put it on the top of the main class, specify the scanned package, and create proxy objects for all interfaces in the package. Object is injected into the container @Param: it is placed in front of the formal parameter of the method of dao interface and used as a named parameter. Dubbo annotation @DubboService: it is used on the provider side and exposes the service. It is placed on the implementation class of the interface @DubboReference: used on the consumer side to refer to the remote service and put it on the attribute. @EnableDubbo: placed on the main class, indicating that the current reference enables the Dubbo function.